You must be logged in to rate content!
14 minute read
348 ecu removal & chip removal
Compliments of ernie @ ferrarichat.com
1-10-2012
Before I start I would like to thank Eric (3forty8) for sending me a set of replacement chips for my car, and for posting a how-to http://ferrarichat.com/forum/showthread.php?t=306424
However, even though Eric's instructions helped I did run into some frustration getting the pin block out. So I figured I would post another thread, with some added tips, to help out the next 348 Brother to tackle this job.
Oh yeah, and I did wait over a YEAR after I got the chips to F I N A L L Y put them in. Yeah I know, I know I'm a lazybutt.
Anyhow here is the how-to.
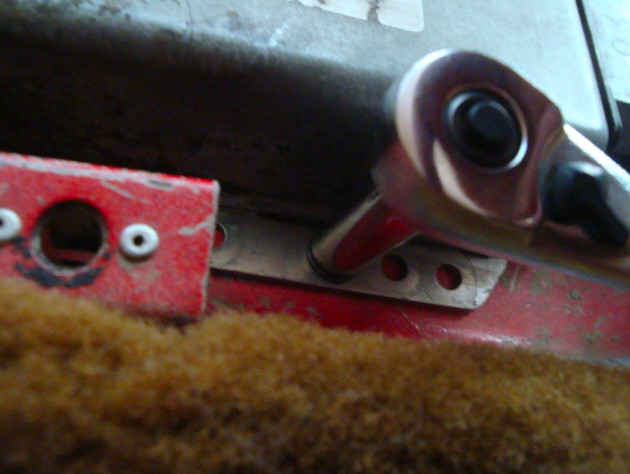
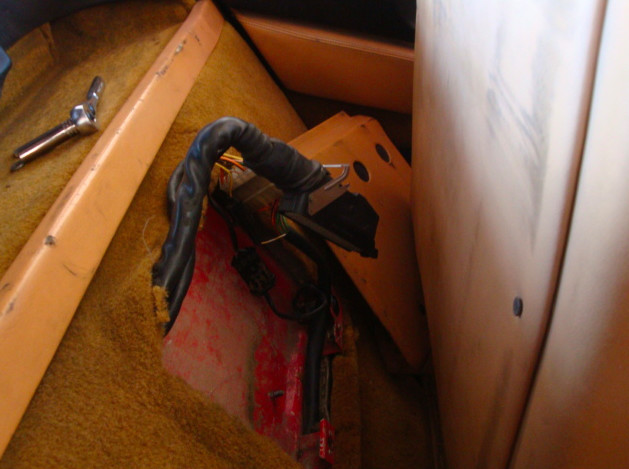
First thing you are gonna want to do is disconnect the battery. After you have disconnected the battery slide your seat all the way forward, and tip the back forward also. This will give you access to the ecu cover
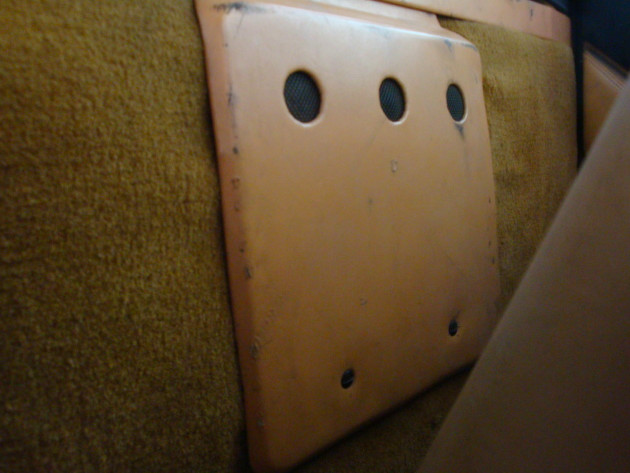
I like to use a coin to open the retaining clips. I used a dime in this instance. Room is a bit limited back there so this helps. I could use a shorty screw driver, but I find the coin easier.
Stick the coin in the slot, and then turn it a 1/4 turn, so the slot is vertical.
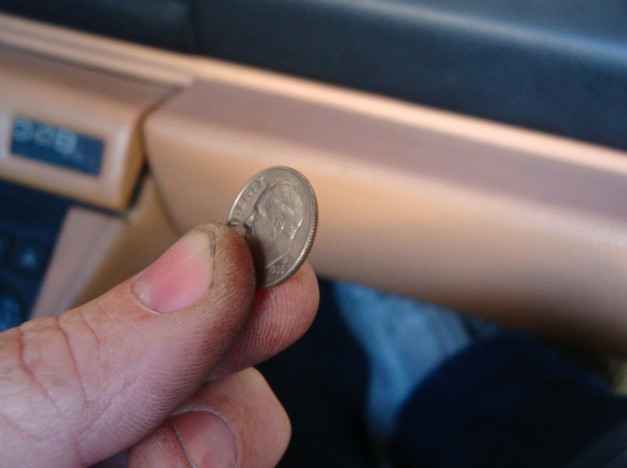
Then take the cover off and set it aside exposing the ecu.
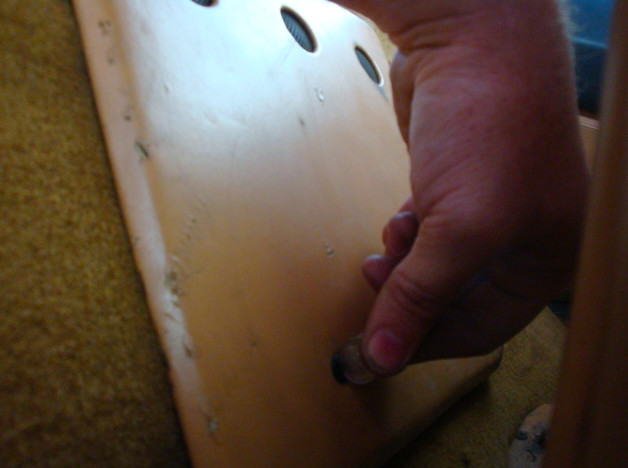
In case some of you are wondering, I pointed to the push button for pulling the check engine codes, in the second pic.
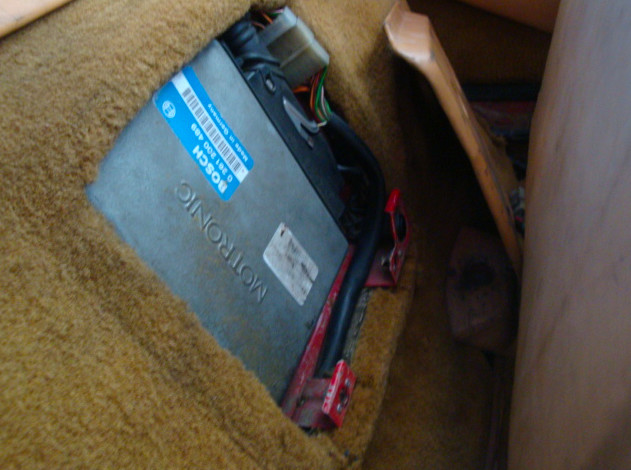
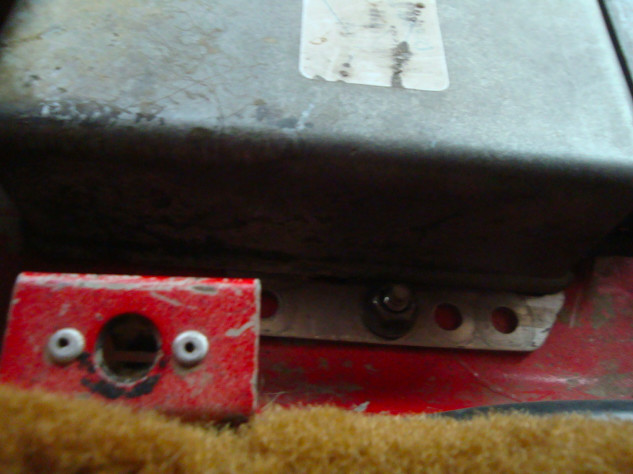
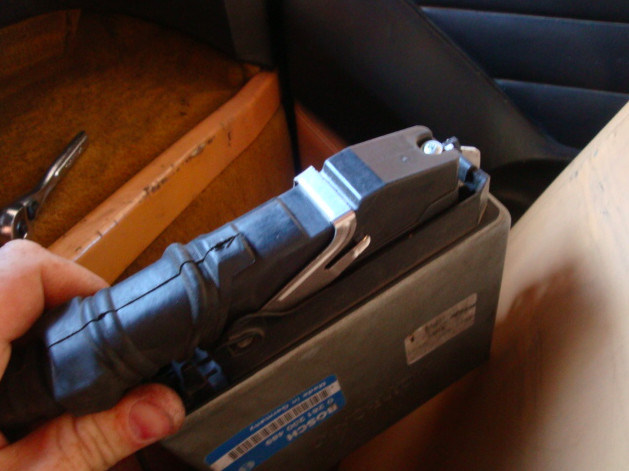
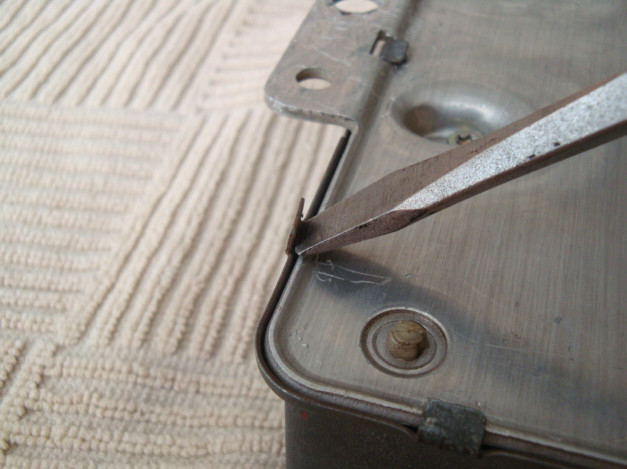
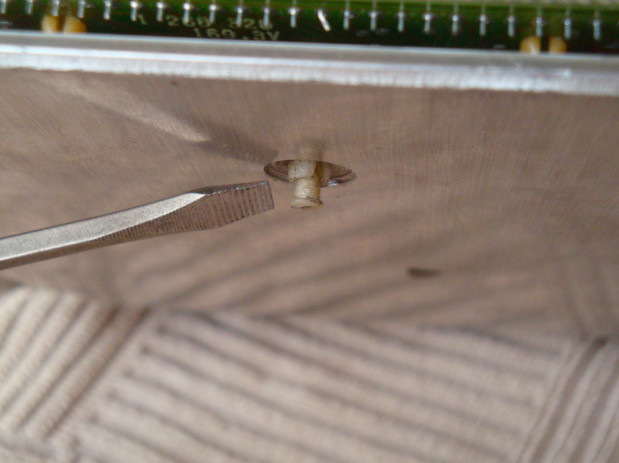
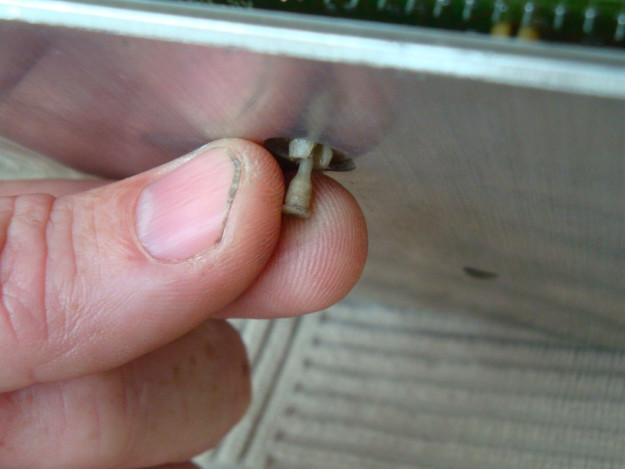
There are 2 retaining nuts holding the ecu in place. 1 on the top and 1 on the bottom. Remove both of those, and then take the ecu out of the hole.
1-11-2012
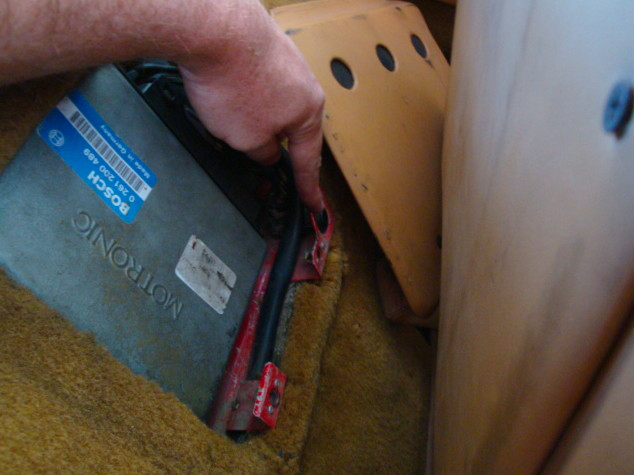
Now that you have the ecu out you will need to remove the connector. To do this get ahold of the sides of the locking arm and lift it up. As you do this the connector will lift off of the ecu. Keep the arm up and then take the connector all the way off. The ecu is now free.
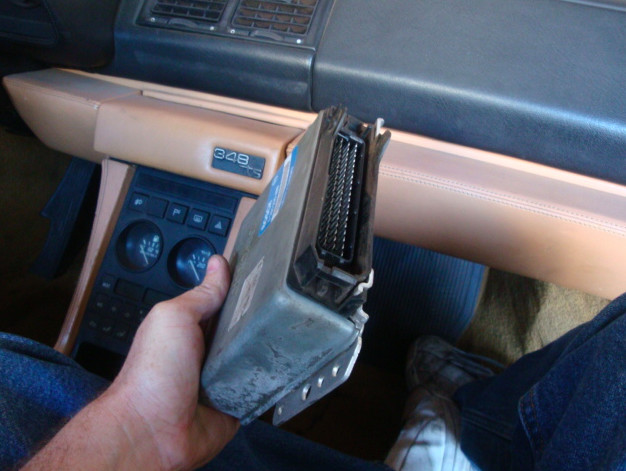
That is how you remove the ecu from a 348, Stooge style.
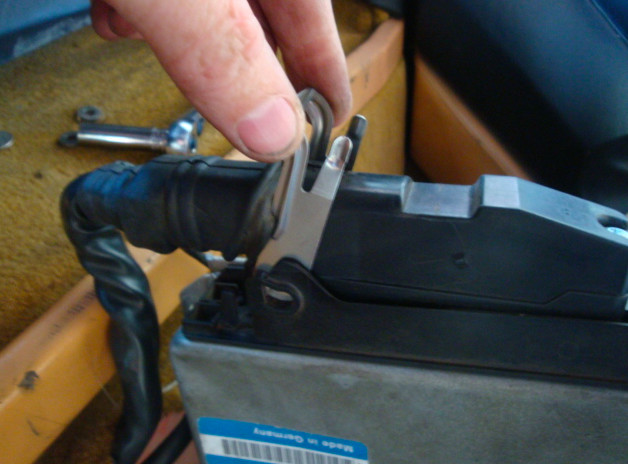
Now for the chip removal.
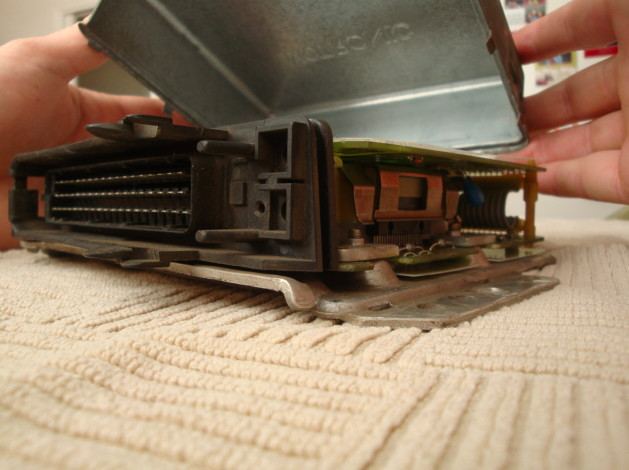
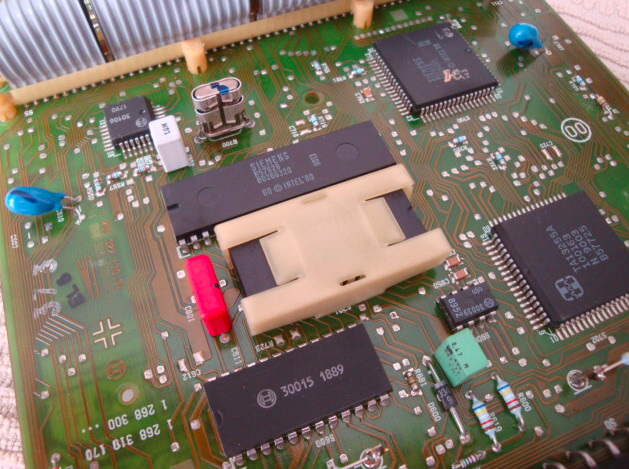
Take the ecu and place it on it's back so that the tabs are facing up.
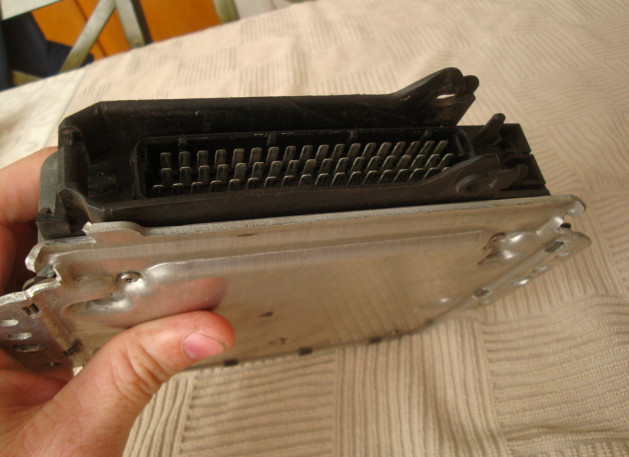
I then took a screwdriver and unbent the tabs holding the cover down.
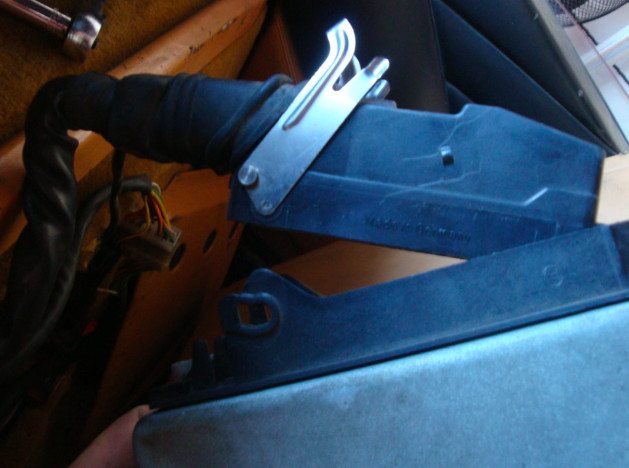
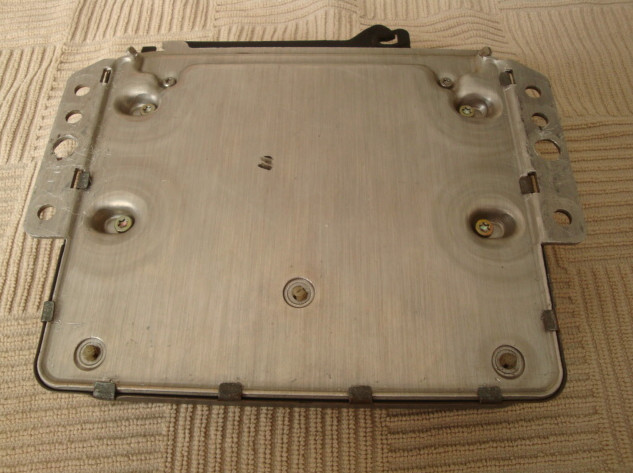
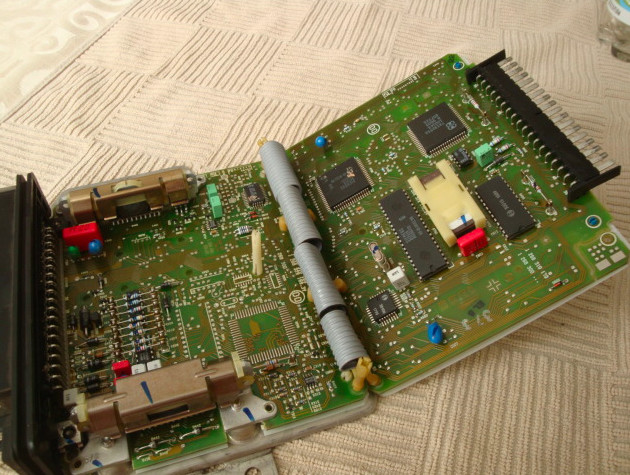
Turn the ecu over and lift off the back.
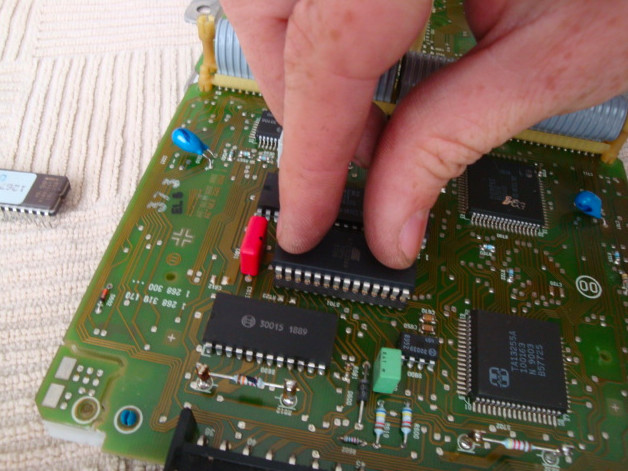
There is a plastic cover over the mother board you will need to hold up to get to the clip holding the board down.
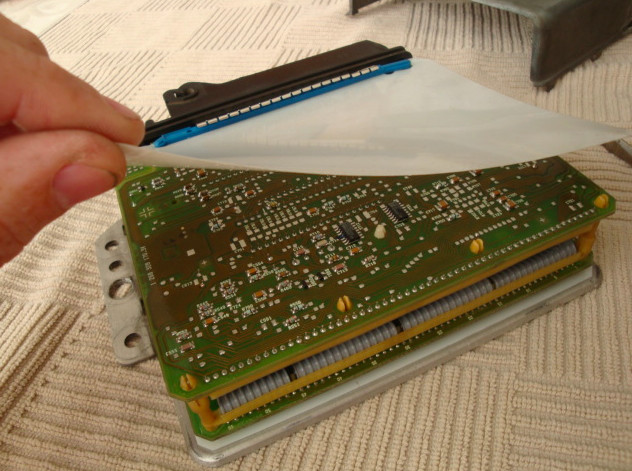
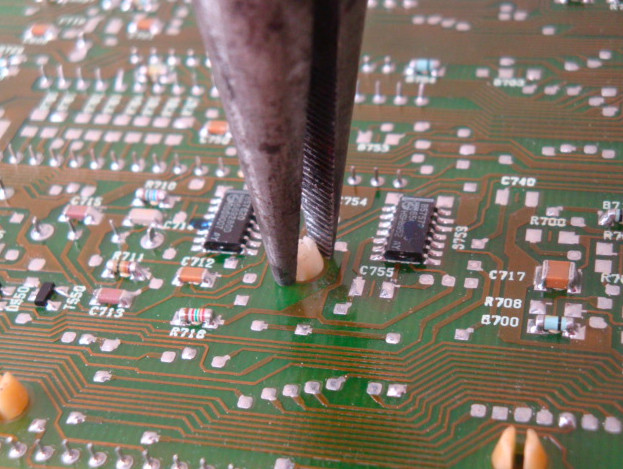
On this particular board, there was a dowel that I needed to push through before I could pinch the clip. I used a small screw driver to push it down. Then I picked up the ecu so I could grab hold of the dowel and pulled it all the way down.
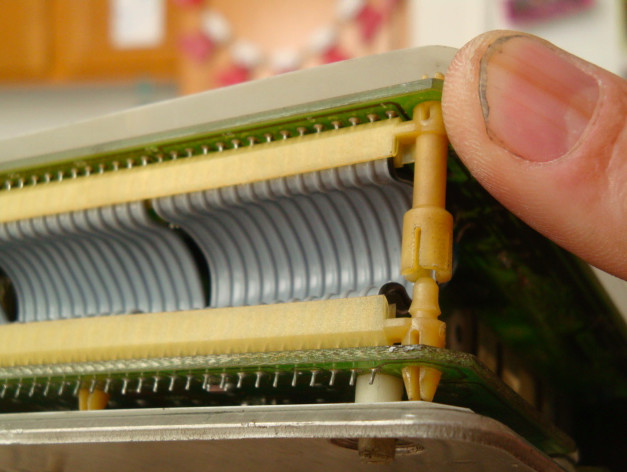
Now with the dowel no longer locking the clip, I could pinch it to release the board. BE VERY CAREFUL when you do this. You DO N O T want to scratch the board.
I placed my fingers under the board and pressed up until the posts popped out of the retainers, releasing the board on both sides.
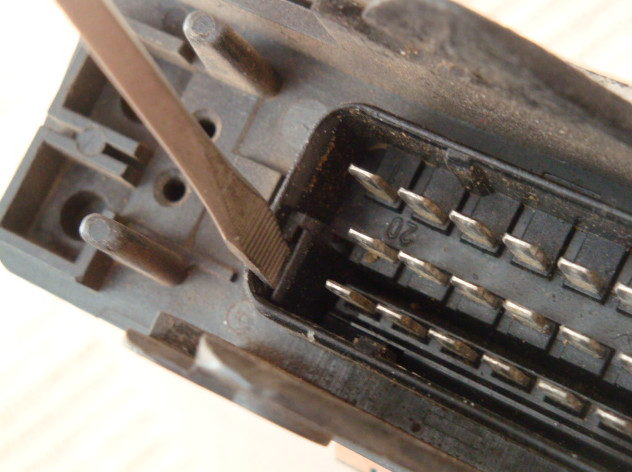
Now came the pain in the ass part.
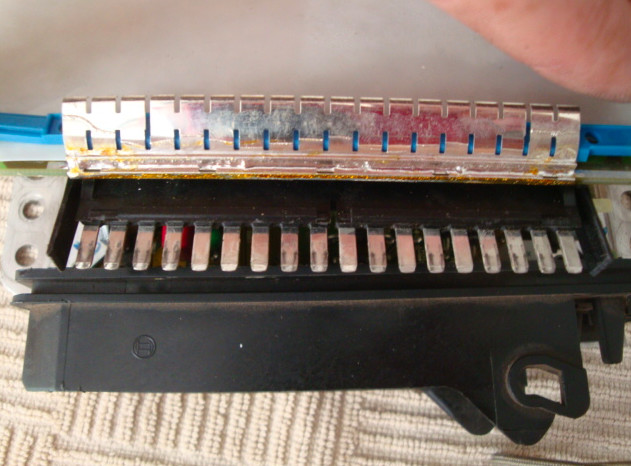
These retaining tabs, on both sides, are what hold the pin block to the connector. And there is a certain way you need to hold them in order to get the pin block to come out. This took me the better part of half an hour to figure it out. I did not want to break anything, cause if I did I would have been screwed
So here is how I got them out.
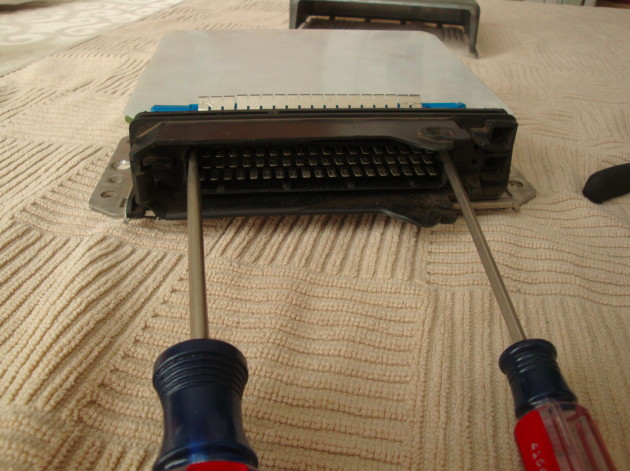
First you have to slide 2 screw drivers inside to keep the tabs held open. And yes you need to do this on both sides at the same time. I'm sure there are "proper" tools for this, but I'm a Stooge and used what I have.
With the screw drivers holding the tabs open slide another screw driver in the slot right next to it, and press down, so that the tab goes into the slot on the side keeping it held open. Make sure the top screw driver stay wedged in place, or the tab will pop back into its original groove.
Like I said, a pain in the ass if you have no clue why the pin block won't come loose.
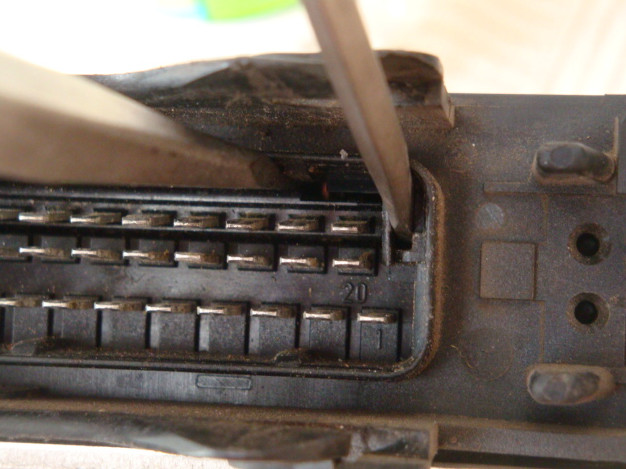
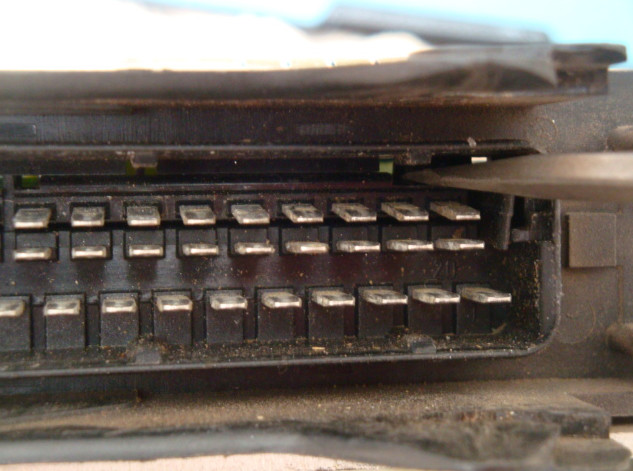
If you look closely you can see the other hooks that hold the pin block to the top of the connector. You can see a little notch an the left top side, and one on the right, next to the tip of the screwdriver. You will also notice that the top row of pins are now pressed closer to the second row of pins, and the tab is open and held down in the notch via the top pressure from the screwdriver wedged in place.
So....with the top screwdrivers wedged in place, you need them wedged in place on both sides, keeping the top pressed down on both sides, AND keeping the side tabs open and down in the notches, you can remove the side screwdrivers that were holding the tabs open, and NOW.....you can pull the pin block out.
Remember you need to have this done on both sides, at the same time, in order for the pin block to come out.
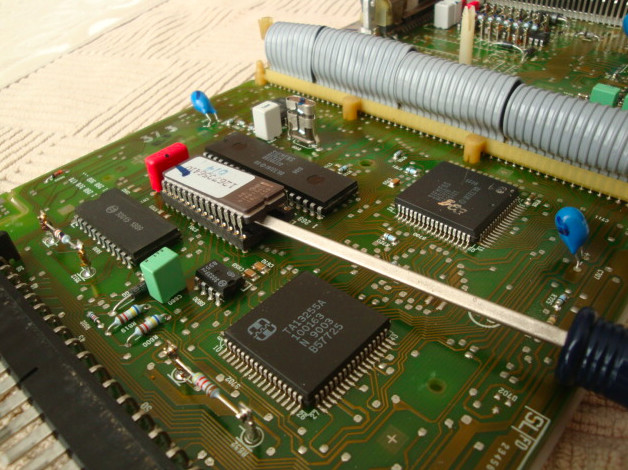
Next fold open the top motherboard, giving you access to the chip.
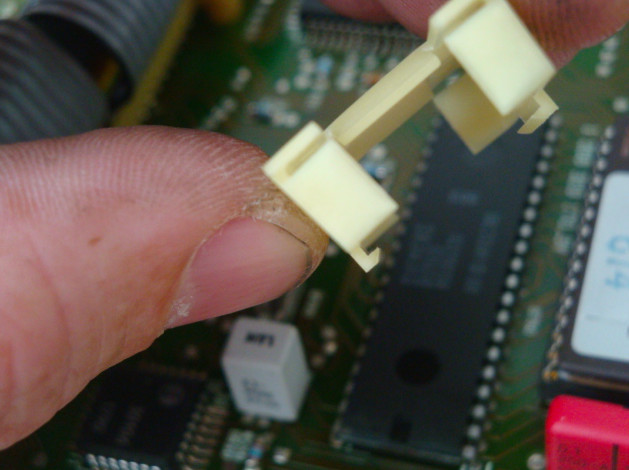
There are 2 slots in the chip retaining cover that you use to remove it. It the first picture, I inserted a small screwdriver into the slot, and then I moved the top of the screw driver to the left, so that the bottom opened to the right, to pop open the hook on the bottom of the cover. Then just do the inverse to the opposite side, and remove the cover.
In the second pic you can see the hooks that hold the cover in place.
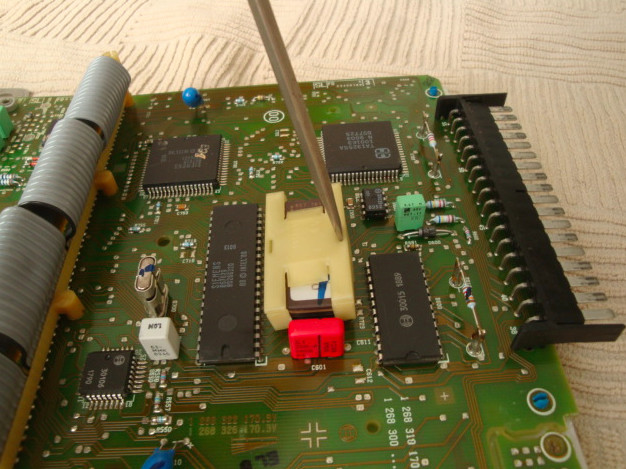
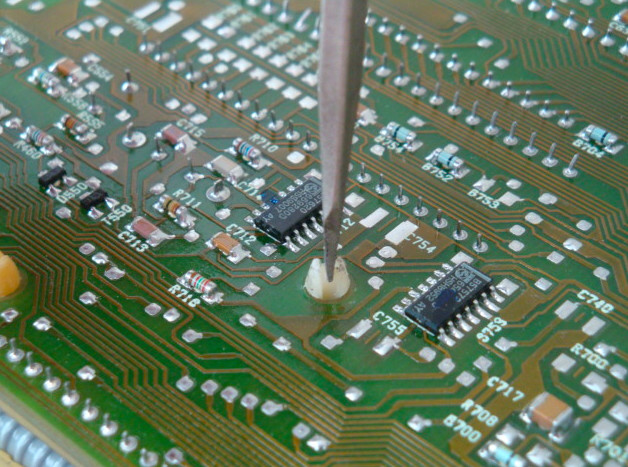
Now I know there is a proper tool for removing the chip, but I was too lazy to go and buy one, so.....I used Eric's technique of GENTLY sliding a screwdriver under the chip, and lifting the chip up. As I lifted one end a little I slid the screwdriver in further, and then GENTLY twisted it, so that the head of the screwdriver would push up on the bottom the chip. That way I was lift off the chip "evenly". I know, I know, I should have gone and bought a proper chip removal tool, but hey, what do you expect from a Stooge.
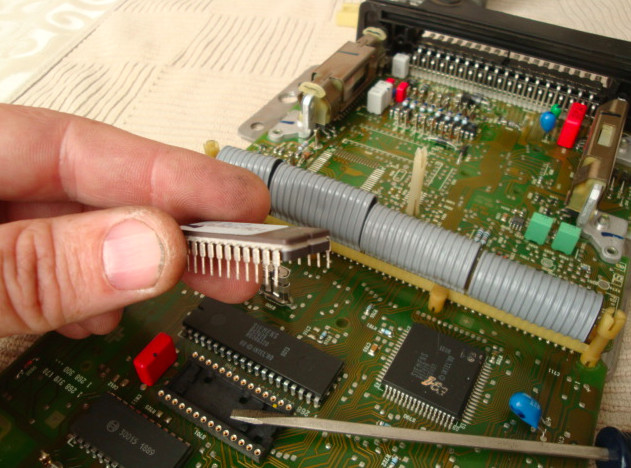
Then I CAREFULLY pressed in the new chip Eric sent me. I was careful to MAKE SURE all the pins were in the holes before I pressed in on. I did have to nudge some of the pins a little bit to get them in the holes, but once then were in I gently, and slowly pressed the new chip in place, and then reinstalled the ship retaining cover.
That is how you replace the chip in a 348 Motronic 2.7 ECU,..........Stooge Style.
Again a BIG thanks goes out to 3forty8 (Eric) for burning me a copy of the chips, and for posting the first thread on how to change the chips. Thanks a Bunch Eric!
OH SNAP!!!
VERY GOOD POINT Eric, thanks for reminding me! Good looking out.
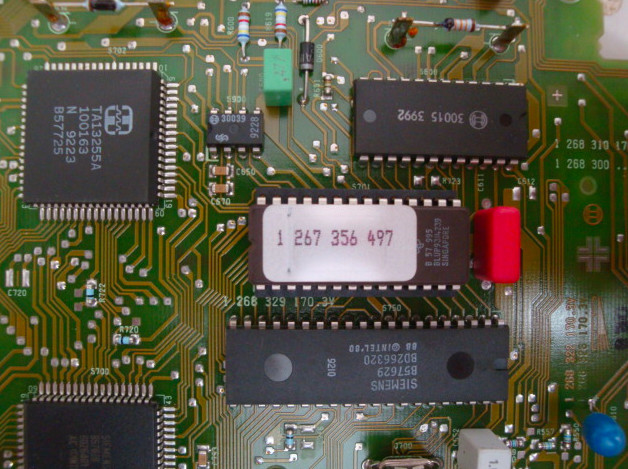
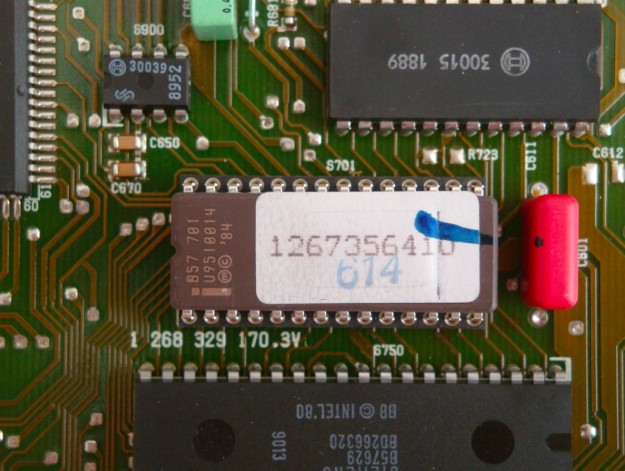
Okay as Eric pointed out you need to have the new chips oriented in the proper direction. If you look at these pictures of the old chips (with the white sticker on them) you will see a notch on the left side of the chip. When you install the new chips make sure you have the notch in the new ones installed facing the same direction as the old one. The notch faces away from the little red thingamajig. You can see the notch a bit better in the second pic.
As just for your information smartass, I did fire up the car today, let it go through the warm up parameters until the fans kicked on, and took it for a nice 36 mile drive. It ran MUCH better. I had two different chips in my ecu's. One was the 497, and the other was a 410. But now it has matching brains thanks to you. No more bipolar issues. Thanks again Eric.
How this for some humor.
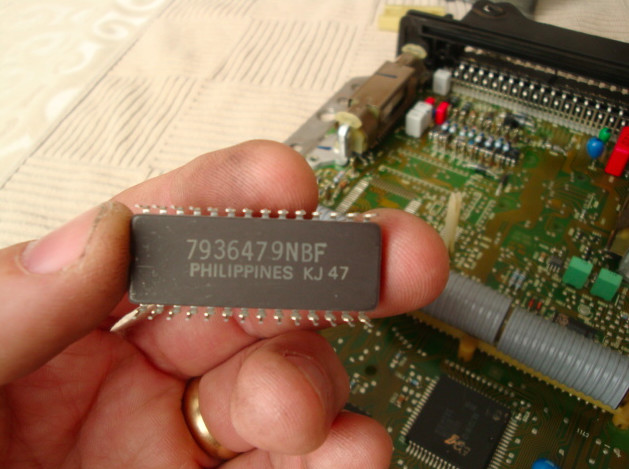
This is the back of the old 410 chip, "genuine" Ferrari parts in an Italian car, with a German ecu, running Philippino chips.
WAAAAHAHAHahahhhhhaaaaaa!
But what is interesting is, the side I had the 497 EPROM in, was what controlled the rev limiter, which was the driver side, or the 5/8 bank for our brothers that drive on the wrong side of the road. How do I know this? Well let's just say I have heard the rev limiter right around the 7800 rpm mark once....or twice.
The car does sound better and feel better so far. Oh this thing was pissing me off big time. It was giving me all sorts of random CEL and they would be different from one drive to the next. It would give me a lamba code, but the O2 sensor was brand new, then a coolant temp sensor code and the temp sensors are brand new, and then the last one was a crank sensor code and the sensors are brand new. The car would run great for a few days, and then all of a sudden it would run rough, idle high, cough spit and almost shut the bank down. Then a few days later it would run just fine. So finally yesterday I decided to stop being stubborn and changed out the chips, after having the chips, oh sorry, sorry Mitch, the eprom's , sitting in my drawer over a daggon year. And *presto* no more bipolar issues.
I hope you have a full stock of eprom's Eric because I'm sure, as you already know, we won't be the last brothers that need to replace the old ones.
I just got back from a nice 59 mile drive, what a difference. It ran so much smoother at highway cruising speed. I could really tell in the exhaust note. The engine is much happier now that both side of it's brain match and are talking properly. Hahahaaa

Nice record ?
Posted by Diggymart on 12/14/19 @ 3:47:13 AM