You must be logged in to rate content!
14 minute read

348 gas tank removal
Compliments of ernie @ ferrarichat.com
4-9-2008
Well boys it's that time again for another "how-to" post.
My gas tank decided to spring a leak on me late last year, and I finally got the gumption to removing it about a month ago. So what follows is the "how-to", and yes I took plenty of pictures for you kids.
So here it goes......
Step #1
Disconnect the battery.
then
Get the car in the air and remove the rear wheels, and wheel well splash guards. I used jack stands to keep the car in the air. I also did only using ONE floorjack.
Yes I know I didn't take pictures of this step. But you guys are pretty smart and can figure how to remove a wheel.
Step #2
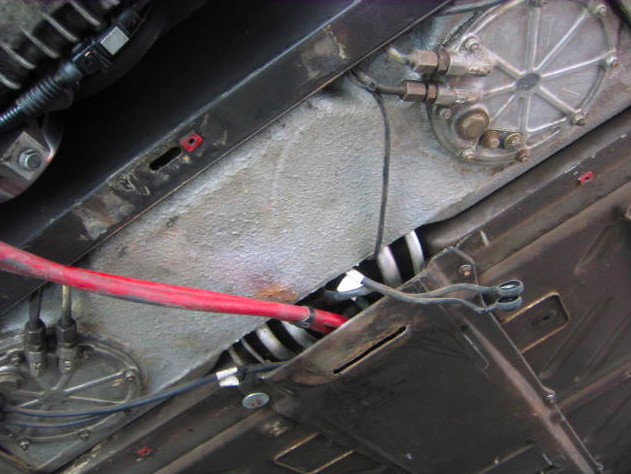
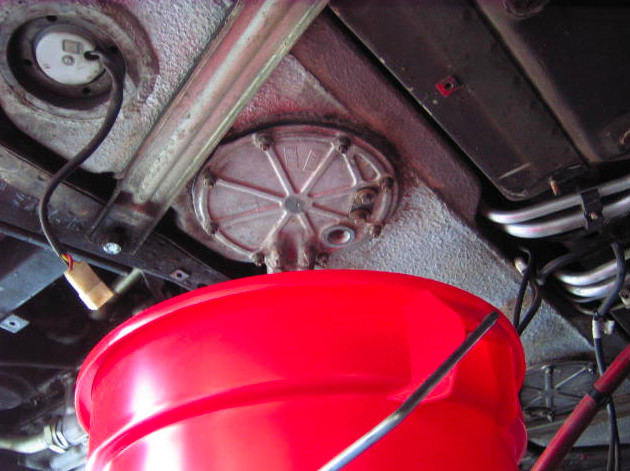
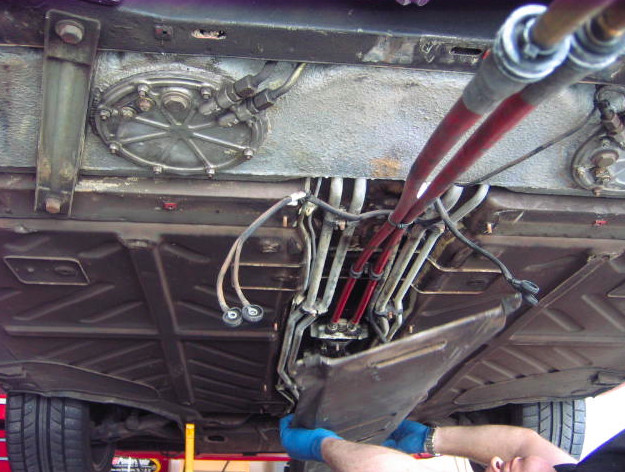
Now that you have the car in the air you will want to remove the the covers on the bottom of the car to expose the gas tank.
Step #3
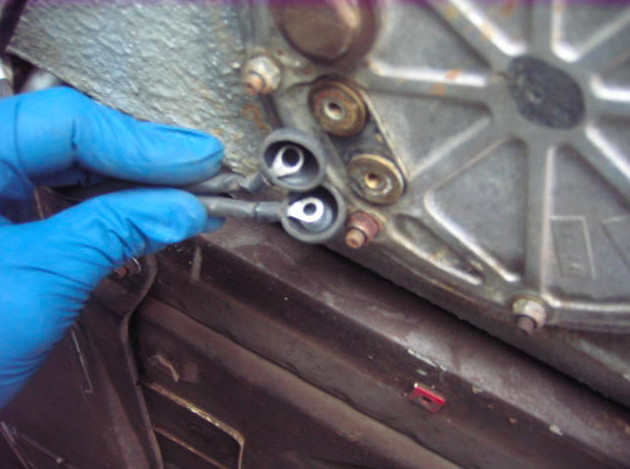
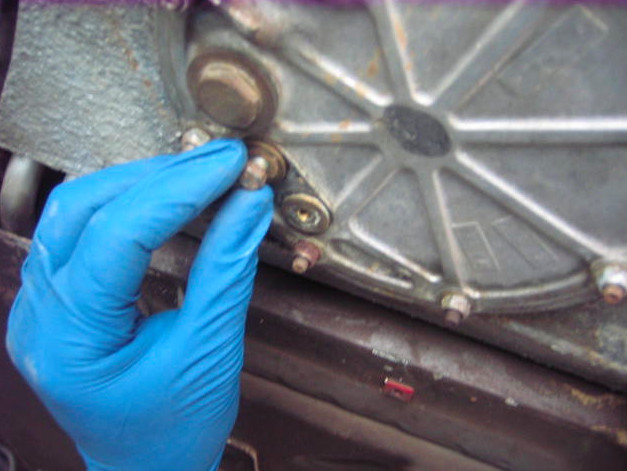
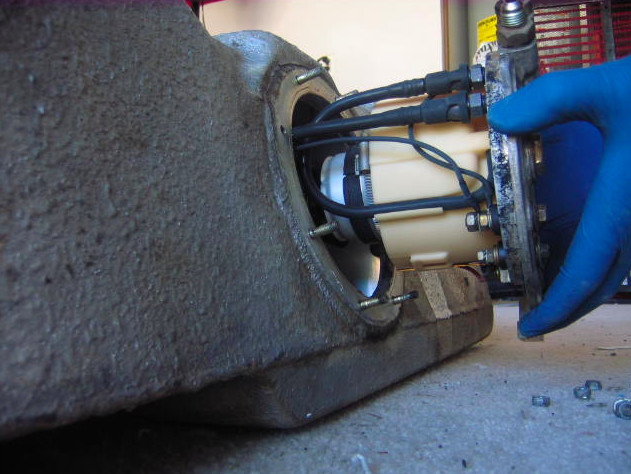
Now you will want to disconnect the wires supplying power to the fuels pumps
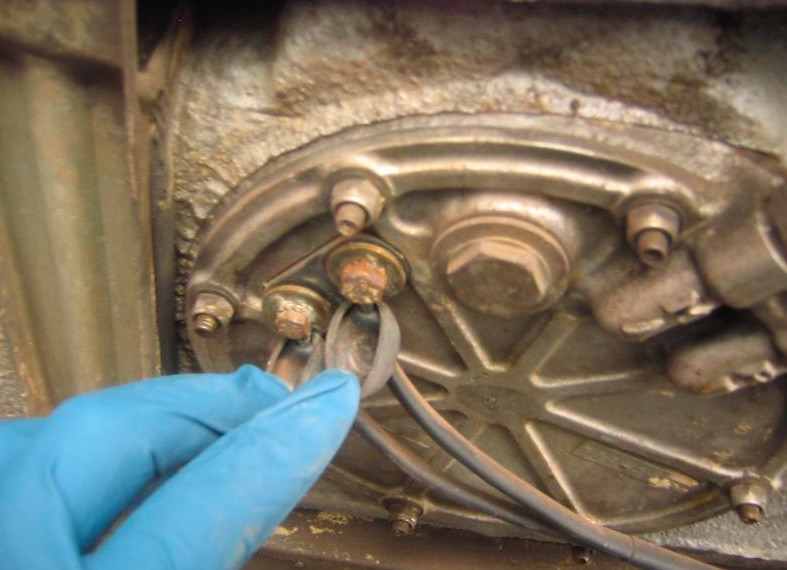
Once you have the connections off you will notice that they have different size holes. This is so that you don't screw up and put the wrong wire on the wrong place. After I remove nut's or bolts I like to put them back in the hole/stud that they came off of. This is so I don't loose them, and so I know where they go.
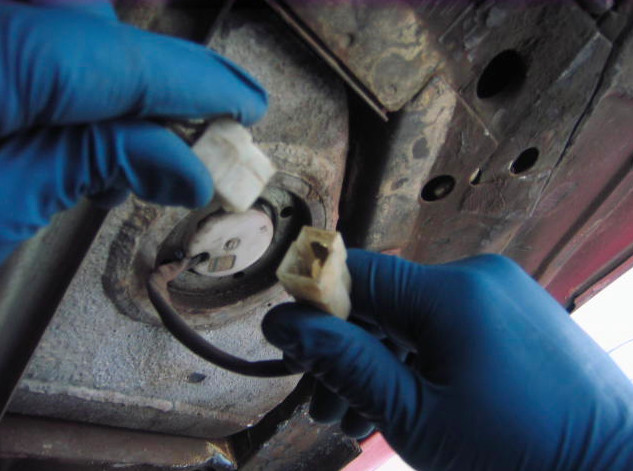
Step #4
Now disconnect the fuel gage sending unit clip.
Step #5
Drain the remaining gas from the tank via the drain plug next to the connections. Be sure to have a bucket under it to catch any gas that is left in the tank. Before I drained my tank I drove it until it was practically empty.

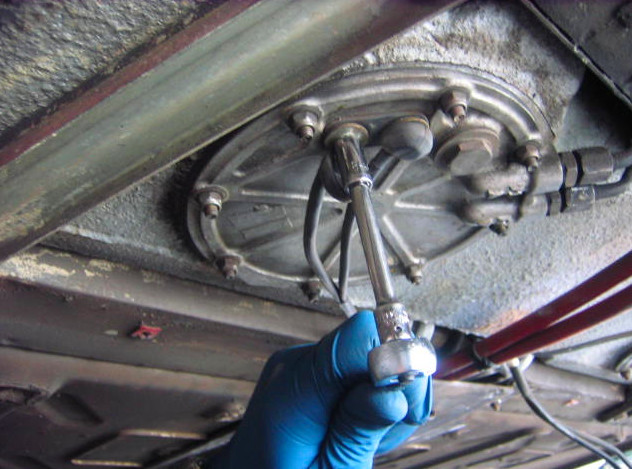
Step #6
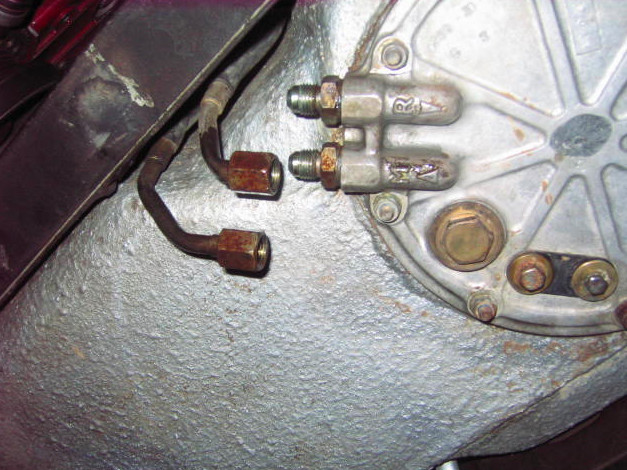
While you still have the bucket under the fuels pump, disconnect the fuel lines from the pump. When you do this don't just open them up right away. The fuel lines still hold pressure and gas in them even though you drained the tank. So you will want to just crack the lines open and let the pressure slowly bleed off. If you don't you are gonna give yourself a nice gasoline shower. So just crack the lines and let the pressure bleed off, then remove them all the way.
When your are opening the lines use two wrenches. Put one on the nuts for the fuel lines, and the other on the nipple end nut attached to the pump.
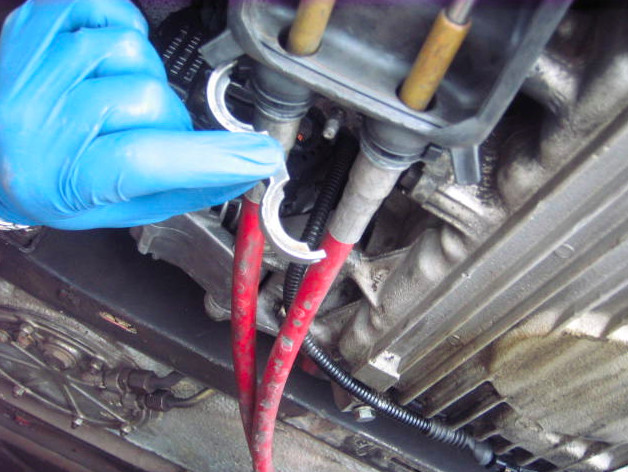
Step #7
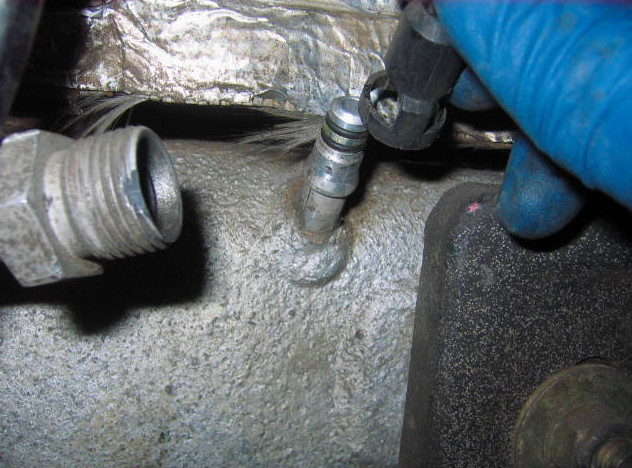
Next you will be disconnecting the fuel vapor lines on the top corners of the tank. I used a pair of pliers to pinch the sides of the quick connect lines. You will be pinching the open side of the quick connect. There are to little hooks under the closed sides that click in place when the line gets pushed on to the nipple.
When you are pinching the clip you will want to pull up on it at the same time. Be careful not to scratch the nipple. These lines are quick connect, but they aren't quick disconnect. D'oh. Mine had been on the car for 18 years, so the seals are a bit stubborn. They will come off though. That line that you see disconnected it from the a/c. I have it completely disconnected in my car. You will still be able to get to that quick connect with the a/c line connected.

Step #8
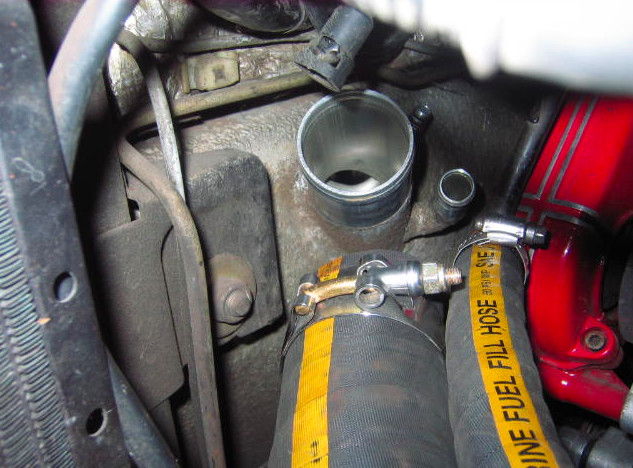
Remove the fuel filer & over flow lines from the gas tank.
Step #8
The next thing is to get the shift cables out of the way. They run right under the tank so they need to be move out of the way before the tank can be dropped down.
Remove all the nuts holding the shift cable cover to the bottom of the car, then take the cover off and put it out of the way.
Step #9
Remove the nut holding the shift cable bracket in place, and then take the bracket off.
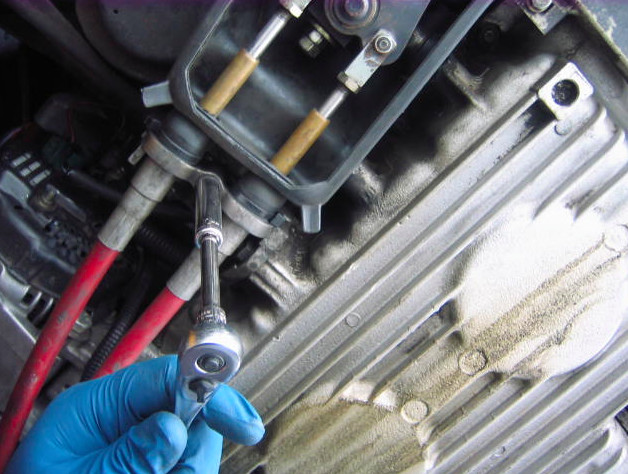
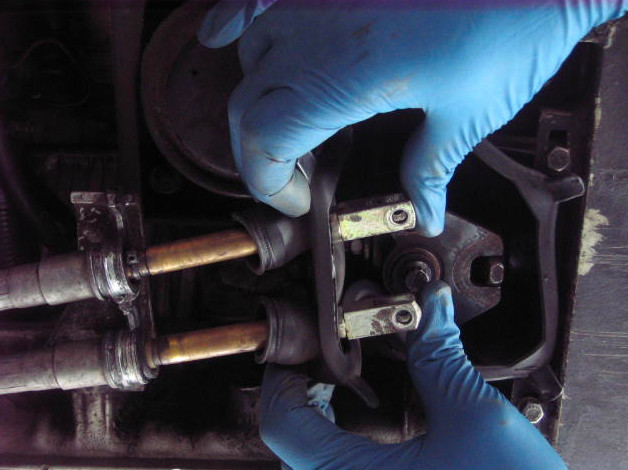
Step #10
Next you are going to disconnect the shift cables from the selector. I use a wrench on the back side to hold the bolt still, then put the socket on the other end and remove the nut using the ratchet.
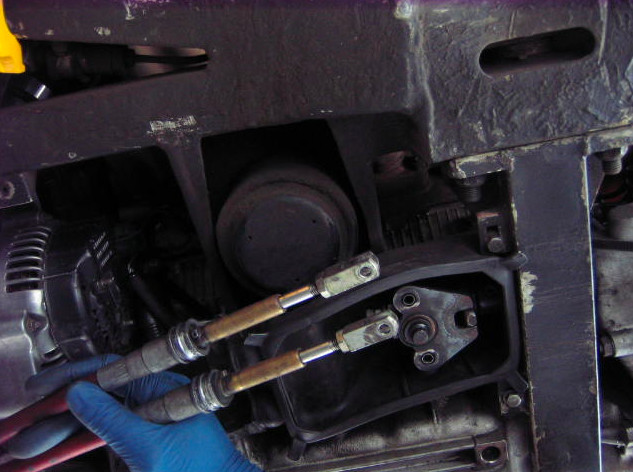
Step #11
Now that you have the cables disconnected push them out of the rubber boot.
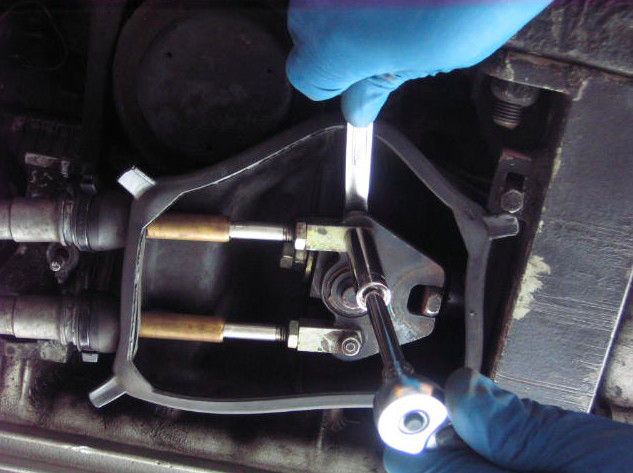
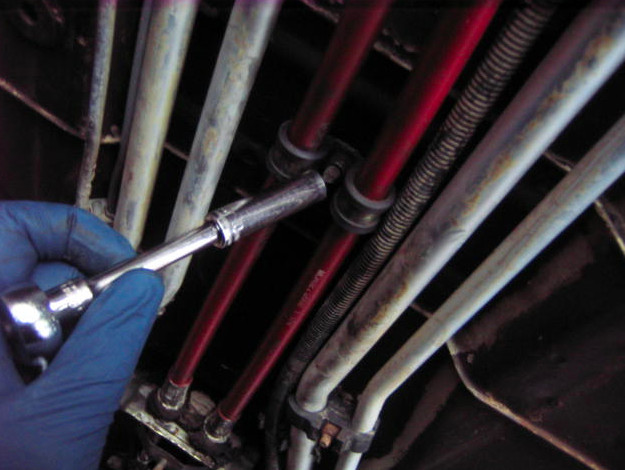
Step #12
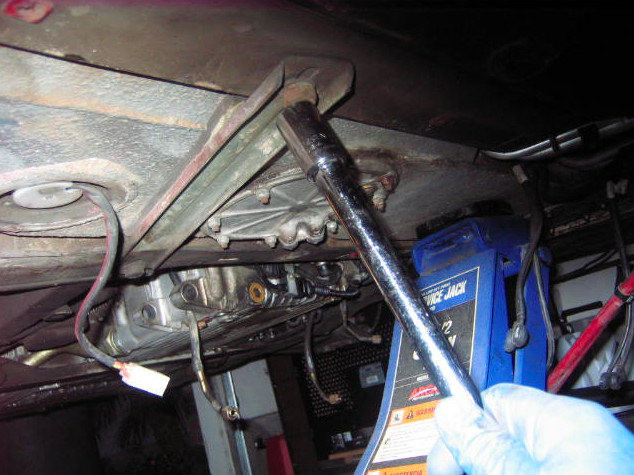
The next thing is to remove the nut in the center of the shift cables, under the car.
I left it in place to hold up the cables while I disconnected them from the gear box. That way I didn't get smacked in the face when they were off at the ends.
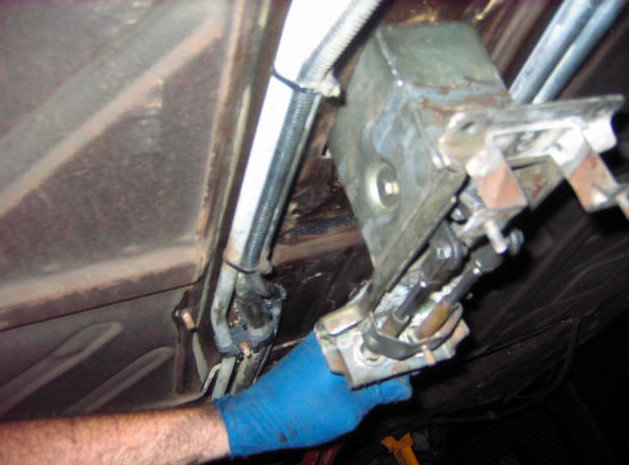
Step #12
Now go inside the cabin and remove the shift ball off of the shift stick. Then remove the screws holding the shift gate in place. Disconnect the reverse light switch and unscrew it from the shift assembly box. Go back under the car and remove the four bolts holing the shift box to the bottom of the car. Lower the box out of the car and get it out of the way.
You actually can just remove the cables from the the bottom of the stick shift. But I just wanted to get the whole thing out of the way.
Step #13
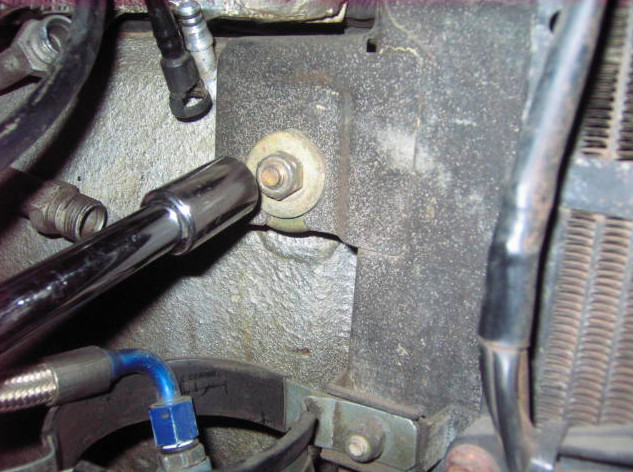
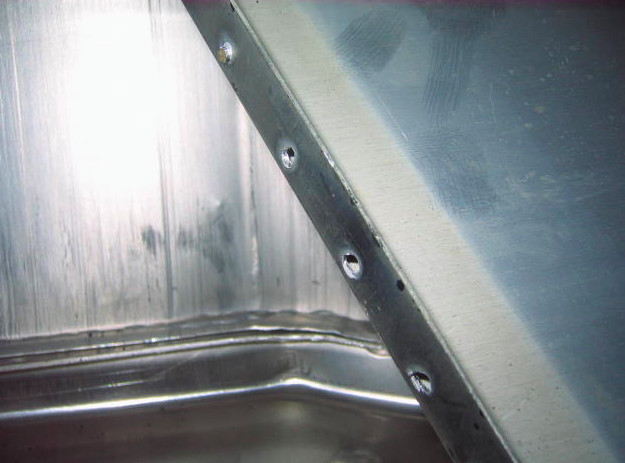
Remove the nuts holding the tanks to the guides on the frame on the left and the right.
To get easier access to the nuts, loosen the brackets holding the fuel filters in place and then side then down. You don't need to remove them. Just slide them down and out of the way. As I said earlier, I don't have my a/c lines hooked up.
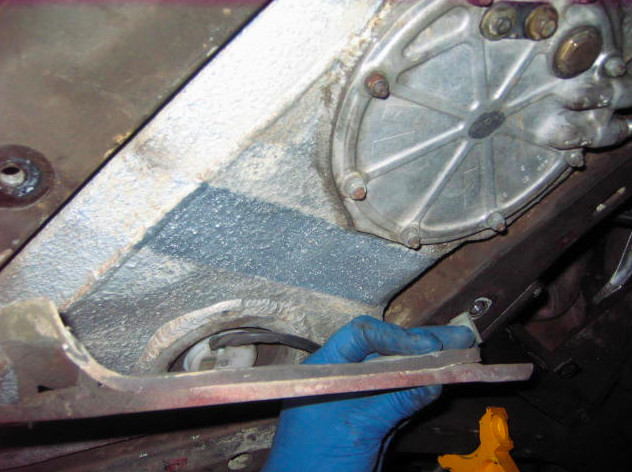
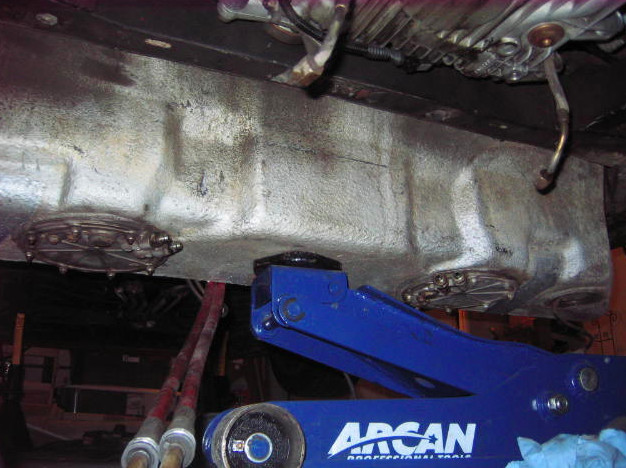
Step #14
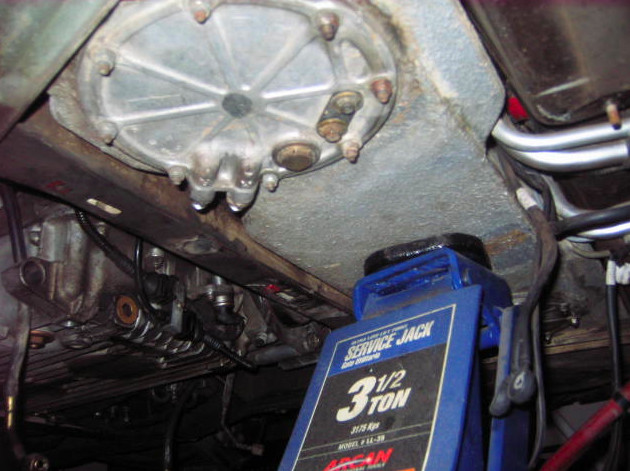
Support the gas tank by rolling the floorjack under it, and centering it in the middle of the tank.
Now you can remove the nuts holding the gas tank support brackets to the bottom of the frame, and remove the brackets. Pay attention to direction that the curved part of the bracket is facing when you remove it. The part that curves up goes back on towards the cabin of the car.
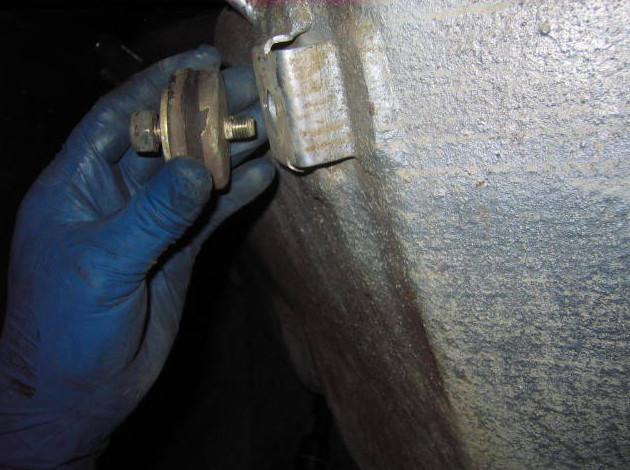
Step #15
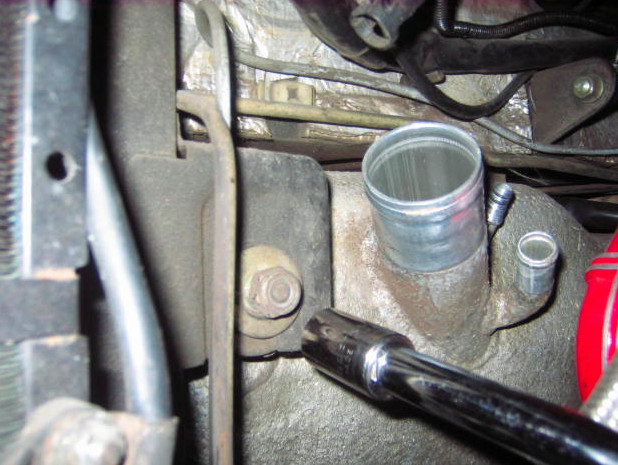
Before you can completely lower the tank out of the car you need to remove the support bushings from both sides of the tank.
Lower the tank so that the bolt slides out of the guide slot attached to the body. Then get a good grip on the bushing, unscrew it counter clockwise, and remove it. You must remove the bushing or it will get hung up on the frame, and you won't be able to lower the tank out.
Now.
Go double check that you have everything disconnect, and then remove the tank.
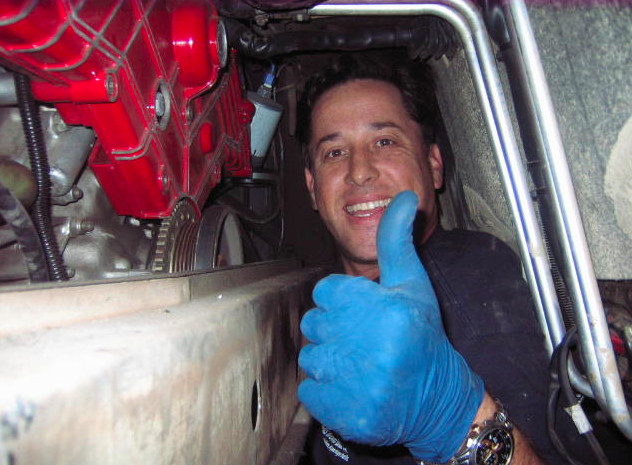
Here is a shot of the empty space where the tank was.
Hmmmmmmm???
I wonder if I could fit in there?
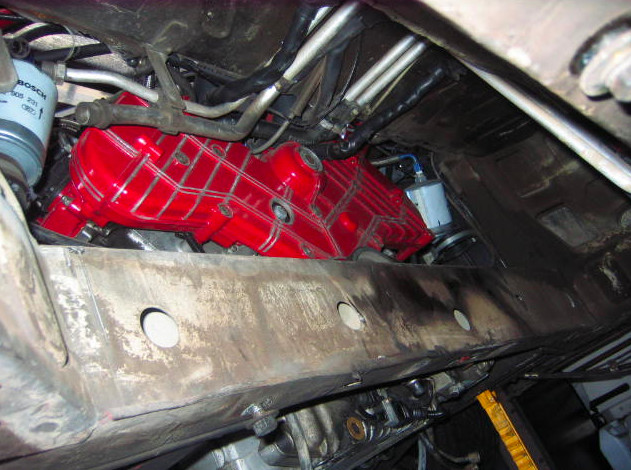
Yes I can!
Another successful do-it-yourself job!
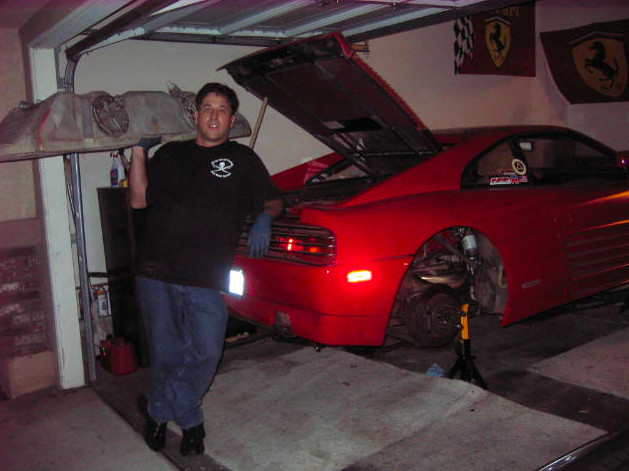
Ah yes, you are probably wondering how long it took? I took me just over 3 hours to remove it. But keep in mind a big part of that was me fooling around with the camera getting the best pictures for you guys. Had I just put my nose down and not fooled with the camera so much I could have had it out in around 2 hours.
As you can see in that last picture I'm holding the tank with one hand. It's pretty light as it's made out of aluminum. It weighs about 35 pounds dry, with both fuel pumps and the sender still inside. I remove the pumps and the sending unit, and then reweighed the tank. It came in at 23 pounds.
Well kids there you have it.
Happy wrenching.
Okay I figure I'll put up some more pics.
Here is how you remove the fuel pumps.
Step #1
Remove all the nuts holding the pump to the bottom of the tank.
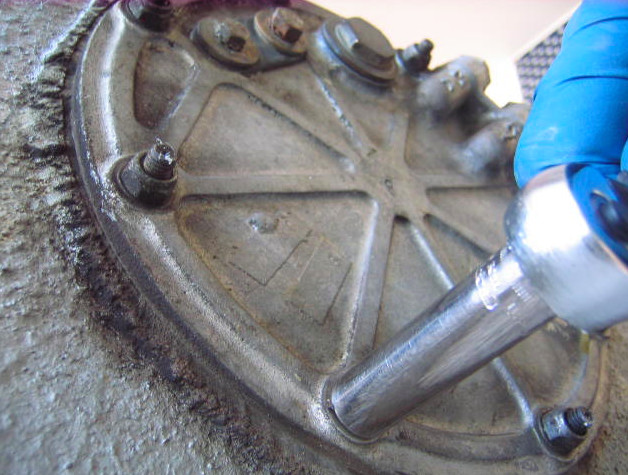
Step #2
Gently pry the pump up.
I used a plastic cat-claw that is used for removing door panels. Both the tank and the pump are aluminum so you don't want to mar them. We don't want it leaking when it goes back in.
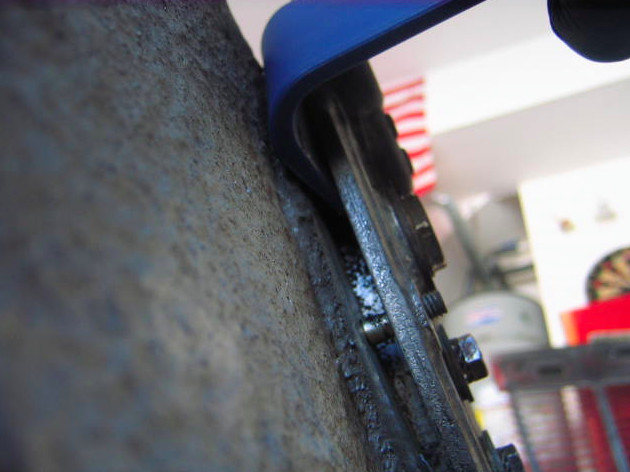
Step #3
Now carefully slide the fuel pump out of the tank.
Thats it's.
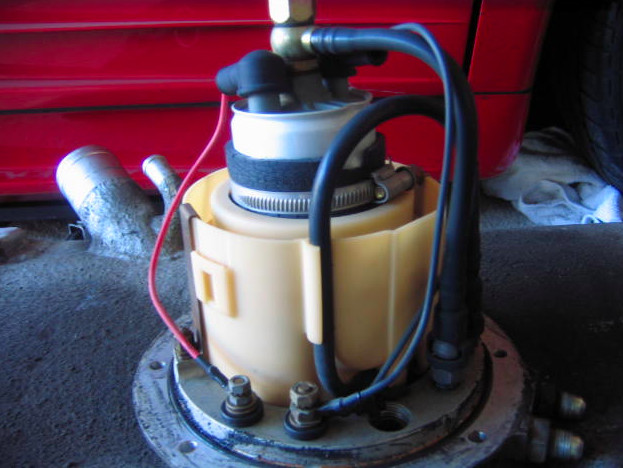
Here is a shot of the pumps out of the tank.
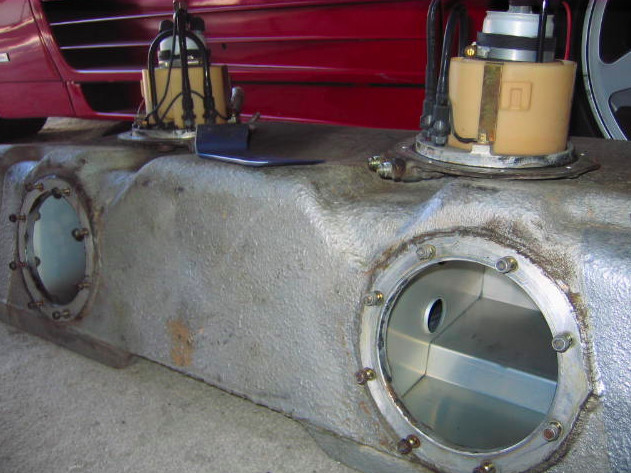
Now for a look inside the tank.
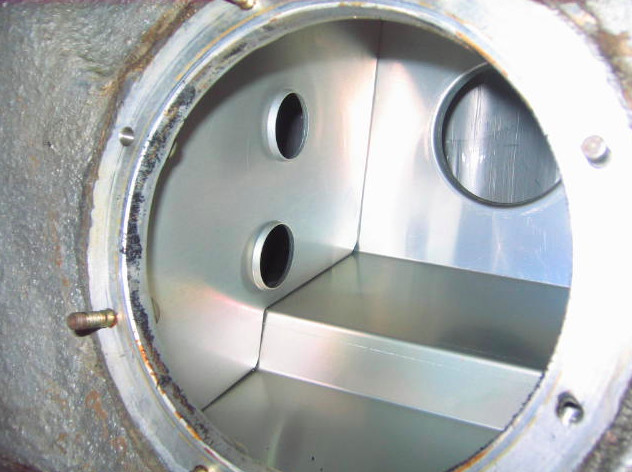
Here is the inside of the tank. I took the picture from inside the right side fuel pump hole. You are looking left towards the fuel filler neck, and the tank is laying on it's back. You'll notice that the middle baffle is missing, and can see where the spot welds are pulled out on the right side of the picture.

Here is the cause of my tank leak. The CRAPASS spot welds that pulled out. The middle baffle was COMPLETELY off. I could hear it rattle around as soon as I had the tank out of the car.
I found a guy at a marine boatyard that is willing to weld on the tank. But I have to take it out to him so he can have a good look at it. He was saying that he needs to see what gage the aluminum is. I also told hims that is was a gasoline tank, and he said that it wouldn't be a problem. He'd give it a good washing and then hit it with some sort of gas before he started to cut on it.
I forgot to mention something.
When you are disconnecting the shift cables, you will also want to disconnect the parking break cable and get it out of the way. And make sure you are in a well ventilated area. I had my garage door wide open, and was running a fan at full speed to help get the gas fumes out of the garage.
4-10-2008
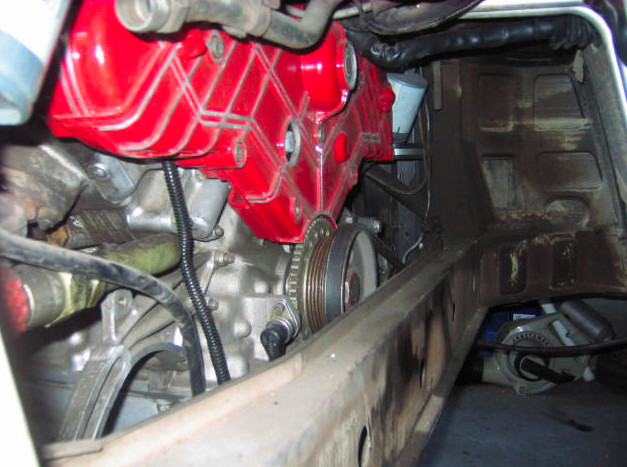
I'm with Chubbalard on this one.
First of all there really isn't that much room in there. What you don't see in that pic I took of me inside is that, I'm sitting on my hip while leaning on my other arm. Plus as soon as you turn your head your face is right in front of the engine. If you were going to change the belt this way, I think that you will only be changing just the belt, and I really wouldn't try it without the use of a lift. Just yank the engine out, it really isn't that hard, and it's SOOOOOOO much easier to work on with it out.
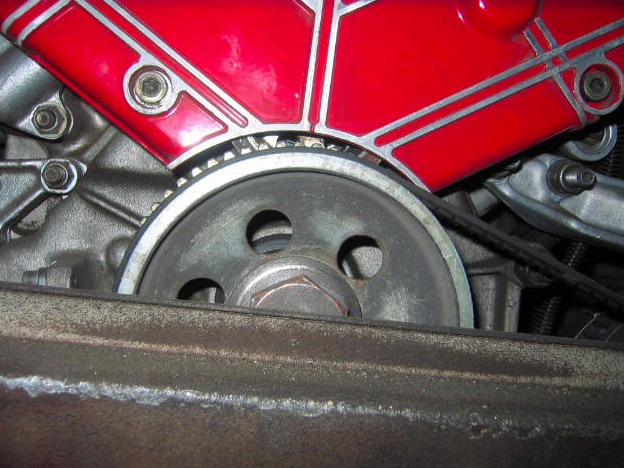
In these pictures you'll see that, just as fatboy said, the cross member is right in front of the crank pulley. It actually sits right smack in the middle of the thing. So, you are really gonna have to tilt the engine up to be able to get an impact wrench on the crank bolt, and then even further to get the pulley off. That is a lot of stress being placed on the engine mounts.