You must be logged in to rate content!
14 minute read
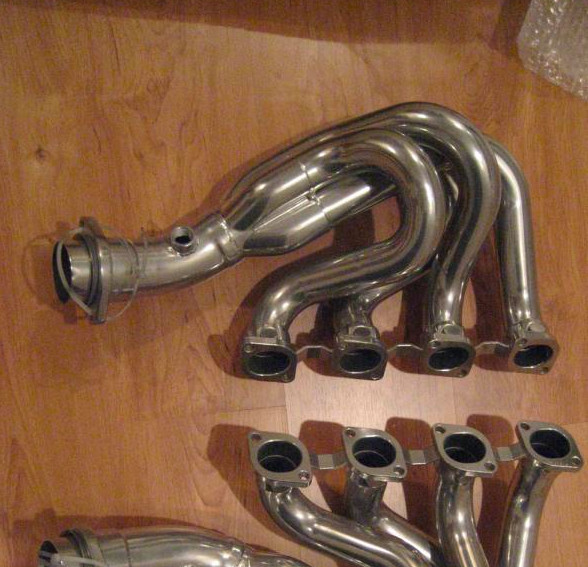
My Fabspeed 360 header install
Compliments of dwe8922 @ ferrarichat.com
4-12-2009
I've had a lot of people pm me about my experience with my Fabspeed headers, and I haven't had anything to say about them yet, since I haven't had a chance to install them. So, I thought I would give some notes on my purchase/install/drive experience, since there seems to be a lot of interest, and given Ferrari's reputation w/ headers. First off, my car is a 2000, w/ around 14k miles.
I dealt w/ Jeremy at Fabspeed, and he was helpful, and seemed to be "their guy" in dealing w/ Ferrari exhausts. He was punctual in returning calls, and everything arrived on time. I had them ceramic coated to help w/ heat, and they also added a bung in each header for the o2 sensor. My first concern was whether or not I would need to relocate the o2 sensors, but was told that the remaining cat between the two original o2 sensor locations would suffice, not upset the computer causing a cel. My second concern came later, when I realized that my car did indeed have secondary air injection rails on the factory headers. I called again, and Jeremy explained that eliminating this wouldn't upset the computer, or throw a cel. He said that it would on a 355, and that their 355 headers come w/ the secondary air injection rails for that reason.
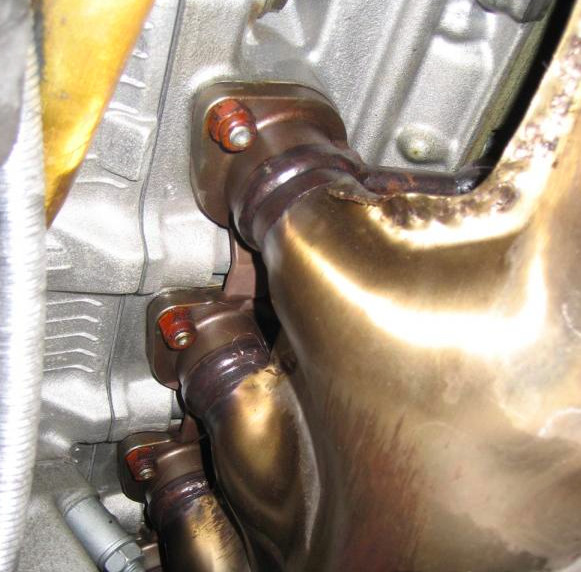
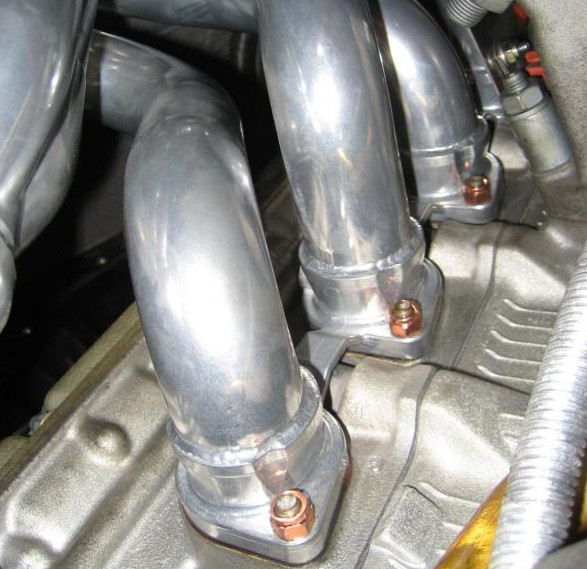
Removing the original headers was pretty tough, as the bolts are very hard to get to due to limited space. First, I disconnected the hose for the air injection, and removed it, and then the o2 sensors. Do this before trying to remove the headers. Next, I loosened the lower header bolts (13mm) using a combination of extensions, swivel sockets, and a wrench. The uppers are the most difficult, especially toward the front of the car, partly due to the air injection rails. I ended up putting a towel over the fender, and used the open end of the wrench guided by a light and mirror. I have both snap on and craftsman, and neither closed end had enough offset to work for me. The upper bolts take a lot of patience! For part of it, I put a blanket over the motor, and laid on top to reach the bolts closest to the front of the car.
The header to cat bolts are easy, but getting the header free was like delivering a baby. On both sides I questioned whether it would come out. I tried all kinds of different ways, but on both sides they came out with the cat-side end coming down first. Don't force it. Be careful not to damage the doughnut gaskets on the engine, or the collar gasket on the other end. They all seemed fragile. Also pay attention to which direction the collar gasket comes off, as it is different on each end.
The new headers were much easier to get in place w/o all of the shielding. I got all of the bolts started (the forward ones are still tough to reach), and thought I'd have it all wrapped up pretty quick, but as luck would have it, the reliefs for the bolt heads on the new headers were too small. I tried both snap on and craftsman sockets and wrenches, and all were too thick to tighten the bolts. Some had enough room, but most didn't (urrrrgggghhhh). My first thought was to pull the headers back off, and grind the reliefs out a little more, but didn't want to b/c of the ceramic coating. I'll have to call Jeremy Monday to see what he recommends, then I'll update once we get it figured out.
Sorry for the limited pictures; It's hard to take a break to snap photos when you're in the thick of it. The more I work on this car, the more respect I have for good Ferrari mechanics. Sometimes I look at the way things are laid out in this car, and wonder what were they thinking! The Porsches I've had have been easier to work on, but the driving feel, and noises of the 360 are second to none.
4-13-2009
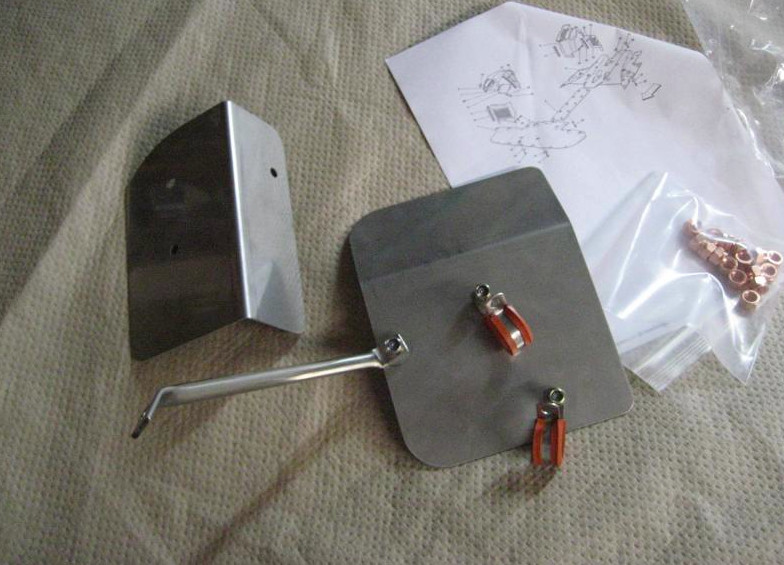
I talked to Jeremy this morning, and he said the kit was supposed to arrive with bolts. They supply a 12mm head vs the 13mm head on the factory bolt. He says this will give the clearance needed. He said he'd overnight them to me, and he would also send me heat shields they've come up with for the alternator and ac compressor to try free of charge.
For the bolt length, I'm not sure how accurate the picture is since I think I just had them finger tight at that point. We'll see once I get them on.
I thought about modifying a wrench, but I don't have a welder. I figured I'd be done way before I had a friend weld it for me, so I left it at that. However, if I planned on doing this again (hopefully not), I would definitely make a better tool! I did use hand wrenches for the top; that's the only thing that will fit between the air rail.
I believe the cs uses the same header/air injection setup, and cats.
I'll post again once I get it all together.
4-15-2009
No, not doing the headers yet. I'd like to down the road since I think it would lower the heat in the engine bay a little.
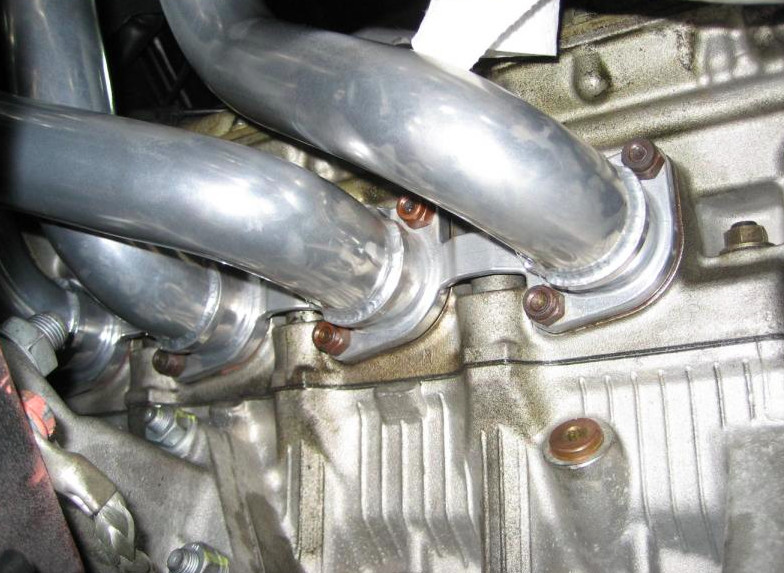
I received my bolts the next morning as promised, along with the heat shields, so I was happy with Jeremy's effort, and that I could get back on the project last night. I got the drivers side shield in and the header bolted up. The ac shield goes in pretty easy w/ the headers in place. 3 bolts hold it in place. I reached the lower header bolts with a socket. Torque is 23 ft/lb. A swivel and different length extensions help a lot. The top bolts can he fed on carefully from underneath the car, but I had to lay on top of the motor again to tighten them. The smaller 12mm bolts do the trick with the reliefs as they are. I ended up using a 3/8" breaker bar to tighten the top just b/c it has a very small head .
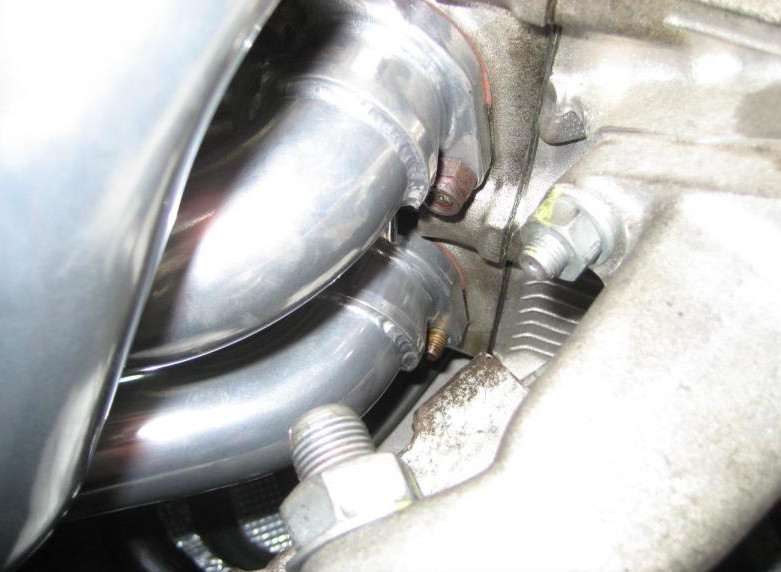
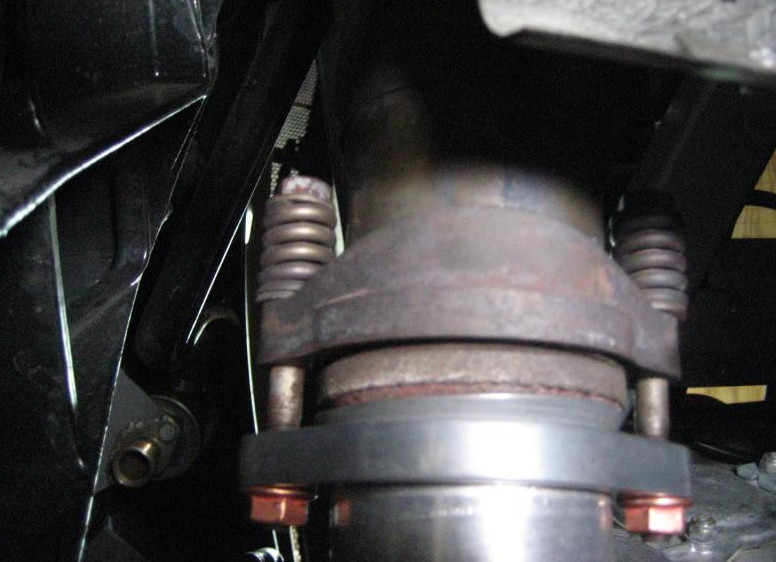
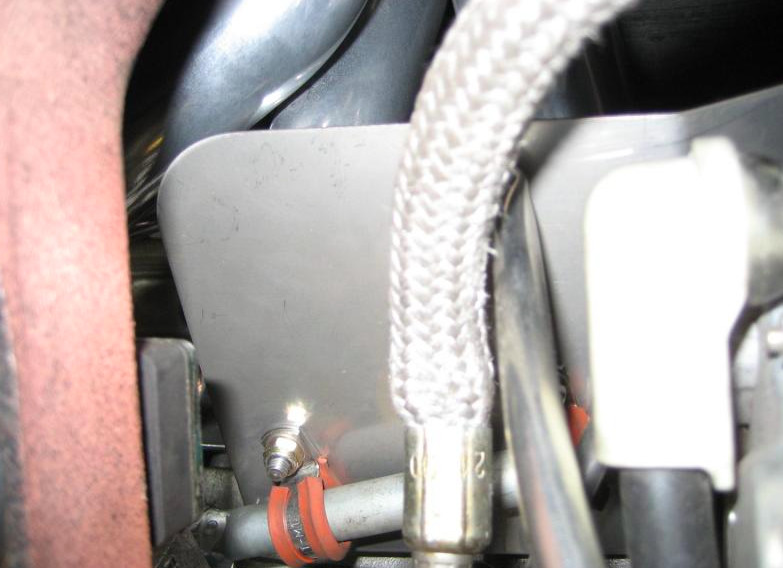
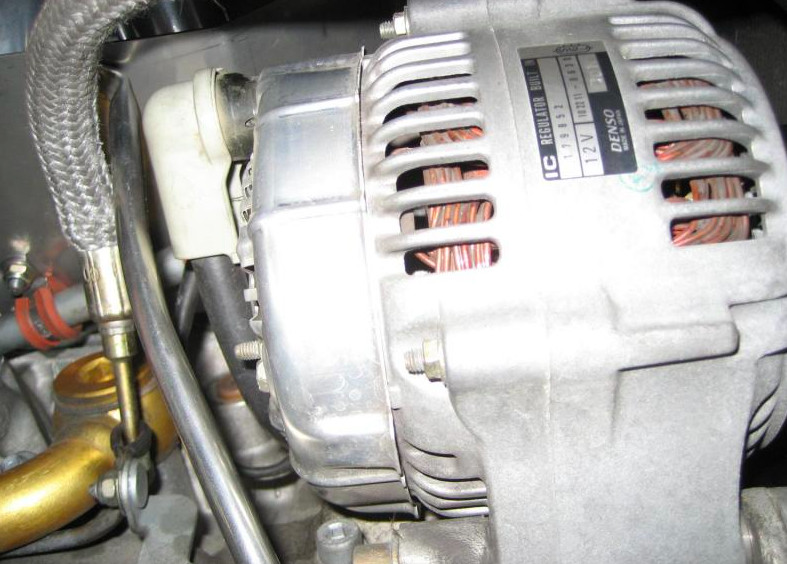
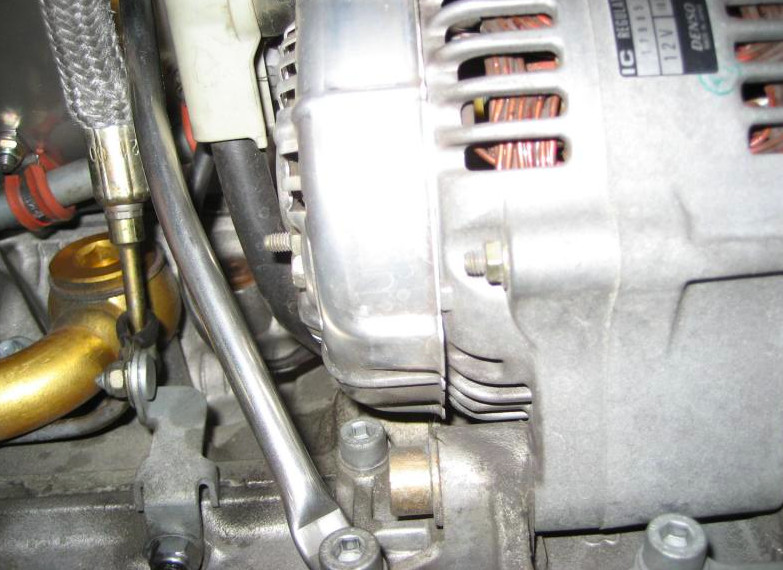
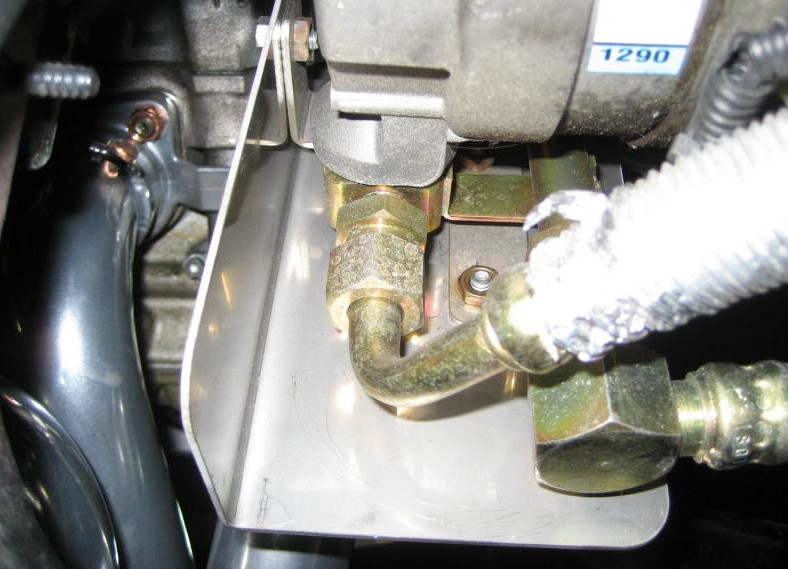
I couldn't figure out exactly how the alternator shield fit, so I stopped and called Jeremy this morning for direction. I put the passenger side header in tonight using about the same process as the other side. The shield wasn't too bad to fit, and I did it after getting the header in. You can see in the picture that I bent the down tube for better clearance between the alternator wire and the clutch hydraulic line. I didn't want them to touch. Jeremy sent me a picture of it in place, and they didn't have to bend the tube, and theirs seemed to clear fine; each fit is a little different I guess. The new headers have a lot more room to work around and are definitely easier to get on than the stock one were to get off.
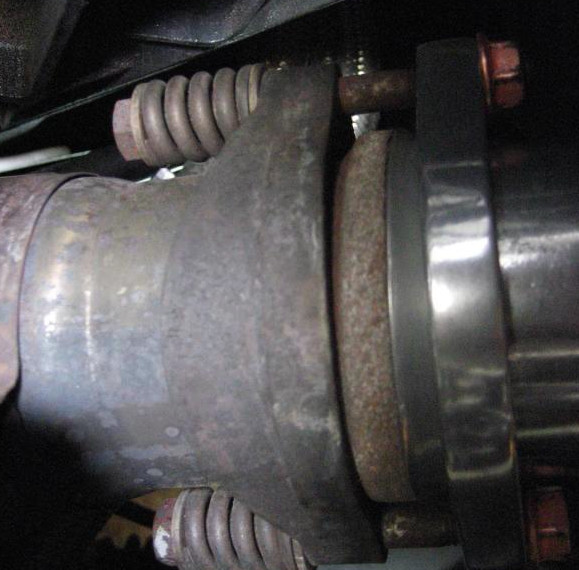
My headers didn't mate up evenly to the cats, so I tried loosening one so I could rotate it to adjust the fit, as Jeremy said would need to be done. I loosened the collar between the cat and muffler, but couldn't get the cat to budge. It was too late to take the bumper off, so I called it a night. Any suggestions on loosening the cat without having to take the bumper off?
Can't wait to fire it up!
4-16-2009
I weighed the old header on my super duper accurate bathroom scale, and it came out to 17.5 lbs.
I got everything finished up tonight. I loosened the cats from both ends, sprayed penetrant, and still couldn't really budge anything w/o removing the bumper. Jeremy thought the header to cat bolts could be a lot tighter than what I showed him in my pictures, so I tried tightening one side. Got a good, pretty much flush mating, so I did the same w/ the other side, and tightened the cat-muffler bolts. Tested this, and no leaks, so I put the floor pan back on for a test drive.
Car sounds louder, but not by a huge amount. It has a little more pitch to it, but similar to the stock sound, just more of it, whereas a Tubi seems to change the sound. Not unduly loud though, and not as big a change as a muffler. Power wise, I felt the car was quicker between 4-6k rpms. I really like the change!! No cel so far. I only did one cold start cycle, so I'll report back after I've had a chance to drive it more cycles.
Looking back, the install was challenging, but not something a good DIYer couldn't do. It requires a lot of patience more than anything to get to the bolts. Getting the old headers off was the hardest part. There is a lot more space to work around the Fabspeeds; the important part is getting the harder to reach bolts tightened close to the right spec. The shields were a nice touch as well. They both fit well, and were well made. The alternator is so close to the header, that I can't help but think there is a benefit. So thanks Jeremy for giving me a set to try!
4-18-2009
Yes, a lift would have been easier. I do have one close by that I can use, but driving back and forth to work on the car is more a pain to me than working under jackstands. I don't really know how to evaluate the effectiveness of the heatshields. The stainless steel used is fairly thick, and the alternator is not shielded from the factory.
I drove it again tonight and it does feel stronger through the upper range, and louder.
The pipes disconnect just below the side engine compartment shields, and air just gets blown into the engine bay during the first 30 sec or so at cold startup. Jeremy says that this will not cause cel issues, so I'm taking him at his word on that one. I've only done two startup cycles since getting them in, so I'll keep everyone posted.
I would like to get some heat values for comparison. Would any of you w/ a digital pyrometer (laser beam type) be willing to take some temperatures of their stock headers and also ac compressor and alternator? I'm going to take some tomorrow, and I'd like to compare them.
4-19-2009
17.5 lbs was the weight for a single header
I measured the temps today using a digital pyrometer (laserbeam type). I lost my sheet where I took temperatures before, so hopefully someone can take stock temps for me. Here's what I found:
Header tubes front to back
Driver's Passenger
450F 480F
500 470
512 514
524 440
2nd try after steady driving at 50mph
500 519
475 530
na 440
na 411
ac shield horizontal portion 280
vertical portion 380
alternator shield 330
alternator 240
Both cats 360
muffler 180
all temps in deg F
I remember my stock headers being in the range of 450degF
Thoughts?
7-25-2009
Sorry I haven't kept up with this, but I've been busy at work, and am still sorting out my car. I was hoping to give a report once I got everything sorted out. Since putting the headers in, I've gotten 2 cel's, after roughly 3-4 drive cycles before each cel. Interestingly though, it has been the P0432 code both times, indicating the bank 2 drivers side catalyst inefficiency. From searching back, those that went to test pipes, etc, usually got P0422 (bank 1) and P0432 (bank 2). It's weird that this came about after fitting the headers, but I would think both banks would show fault if the headers were the cause. These headers do not use the secondary air injection, but again I would expect to see fault in both banks. To eliminate the chance of a faulty o2 sensor, I have swapped them left to right, but haven't completed enough drive cycles to answer this.
The sound of the headers is great, especially opening up the bypass. Higher RPM power has improved, though low end torque seems slightly lower. I had mine ceramic coated, but I want to improve the heat shielding, so I'm going to add heat reflective material to the heat shields Fabspeed supplied me for the alternator and ac compressor.
My stock headers were ok, but I grew worried of the precat material breaking up and getting drawn up into the engine, especially since I have a friend to whom that happened.
7-26-2009
Yes, I realize that this cel will continue. I knew going into it that there would be a chance of getting the cel, but my concern from the outset was to get rid of the precats b/c of the chance of particulate getting drawn into the motor, like my friend had happen to him. At this point, I probably would buy the headers again; there is no other halfway reasonably priced option out there. My concern at this point is that only one of the cats is showing fault, implying that that cat may be just slightly out of spec, or failed. I am considering trying a spacer to back the o2 sensor slightly out of the stream, putting it in slightly cleaner air. Or, I may just go to test pipes and keep the stock exhaust in good shape for if I ever sell the car, and just check and reset the light as it comes on. From what I understand, there is no danger in having the fault come up and addressing it, but rather letting the cel stay on long term and it end up being for something else.
I have heard of going the smaller bolt head route. It's a Japanese bolt, and is supposed to work pretty well. Getting the Fabspeeds on wasn't too bad, but putting the stock headers back on would be a major pain!
I've heard of o2 simulators, and/or adjusting the ecu programming, but don't know much about them. I've always been leary of messing with the computer on this car. A common Porsche trick for test pipes is to hold the downstream o2 senor out into the engine bay, and surprisingly, its supposed to work.
I won't be able to work on this for the next two months w/ work, but I'll definitely keep reporting my progress. Many have emailed, and I know a lot of people are interested in this as it is a problem most of us 360 owners will face.
