You must be logged in to rate content!
12 minute read
RPM FACE COLOR CHANGES--the whole process--LOTS of pics
Compliments of brokenarrow @ ferrarichat.com
11-30-2007
First I want to thank the previous posters, primarily Craig, for providing some great instructions to guide me through this project. And I want to thank Daniel at Ricambi who is the best parts person I've ever dealt with, period. FerrariChat is fortunate to have such a great sponsor and "make-it-happen guy" like Daniel at our service.
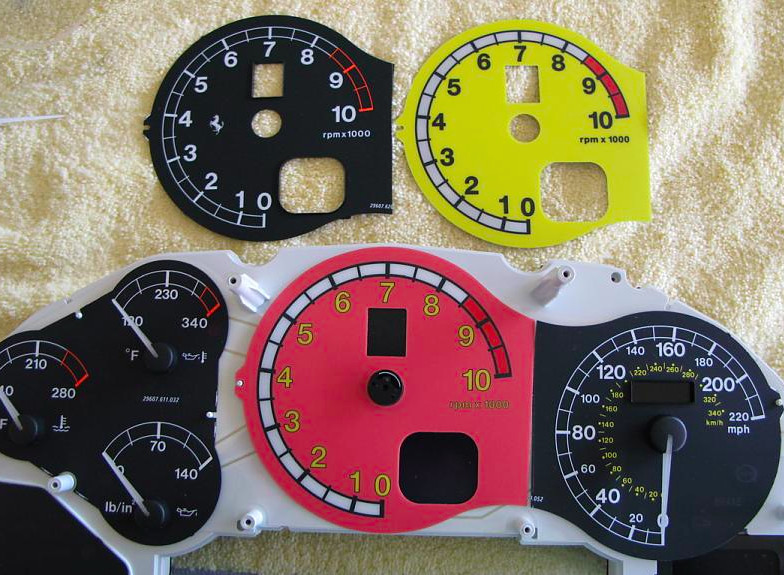
I purchased both Red and Yellow faces from Ricambi as I just could not make up my mind when it came to the two colors--they both look fantastic.
The project:
Okay, the directions Craig gave were fantastic. A few areas that I would like to add to are...
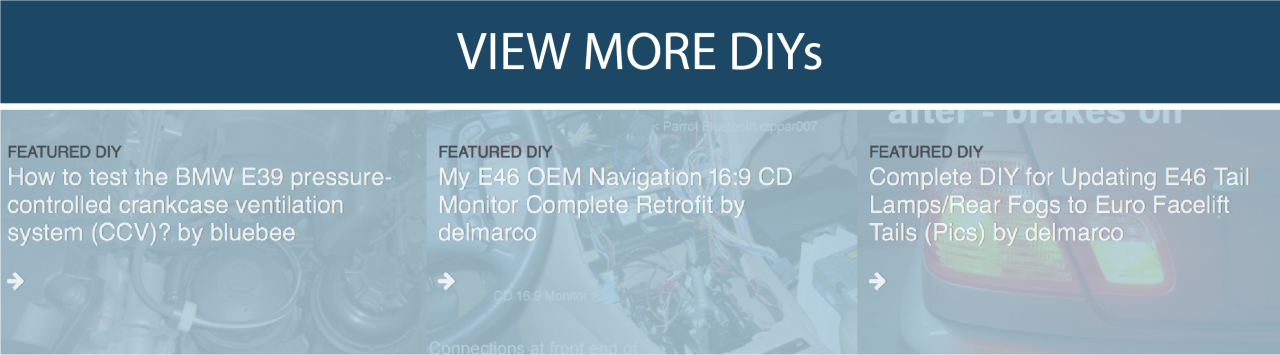
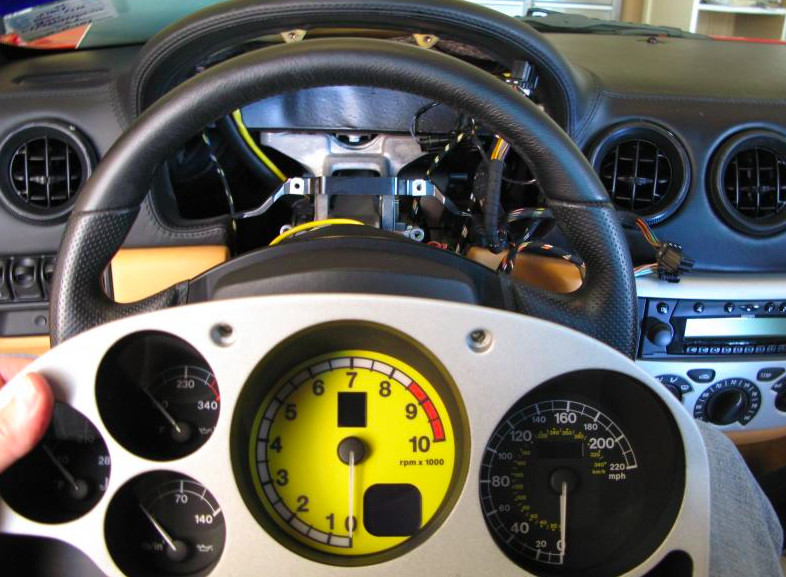
1. Remove the bottom pan of the stearing wheel column too, it makes it easier to take off the top because of those damn long female column ends (PIC 1).
2. Use long allen wrenches--much easier (PIC 2).
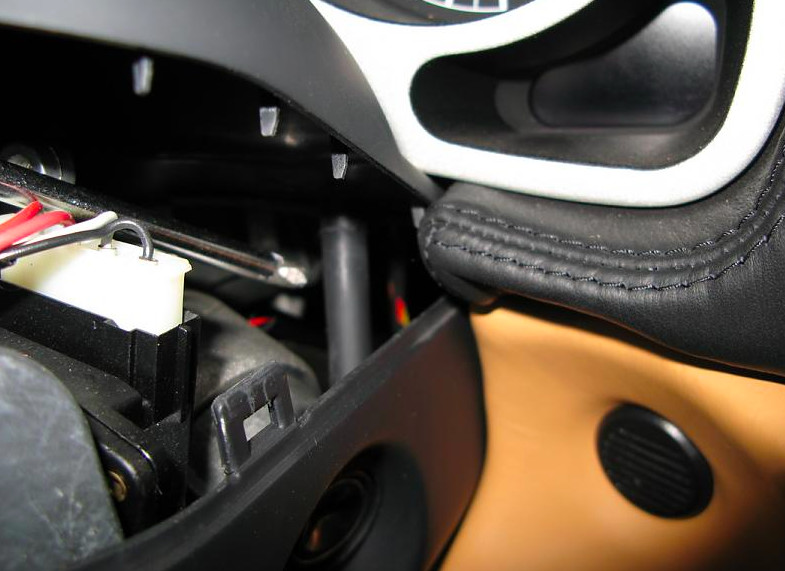
3. That nebulous retention bar, here's a picture of it, the nut with yellow paint on it. There are actually two holding the thin metal stopper in place, loosening one is all you need to do otherwise it'll be a royal pia to put back together since it's so damn hard to get to. Once I loosened the most accessible nut, closest to you, the bar fell, but since the other nut was still in place it kept the bar, nut, washer and everything in the right place. This is smart--trust me as when you go back to assemble it's a lot easier (PIC 3).
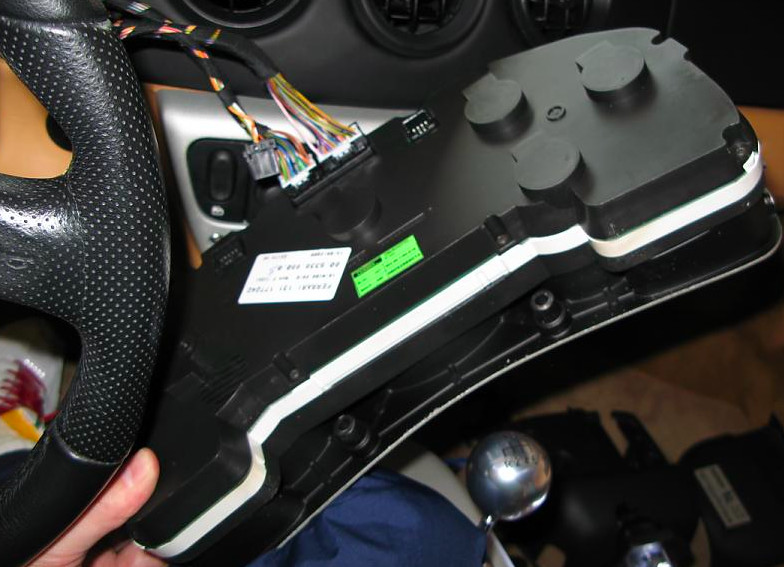
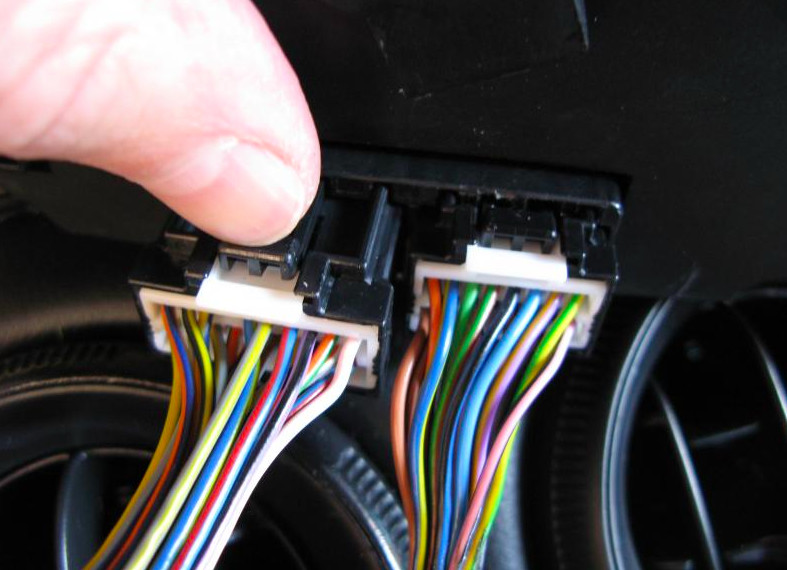
4. When you manage to wiggle the guage cluster out, take it out to the right side as there's more play in the wiring allowing you to rotate the cluster to better get at the rear wiring. The connections on the rear are very difficult to remove from the guages and it doesn't help that the tape gunk is all over them--be sure to clean it off your hands before proceeding to the next step (PIC 4 & 5).
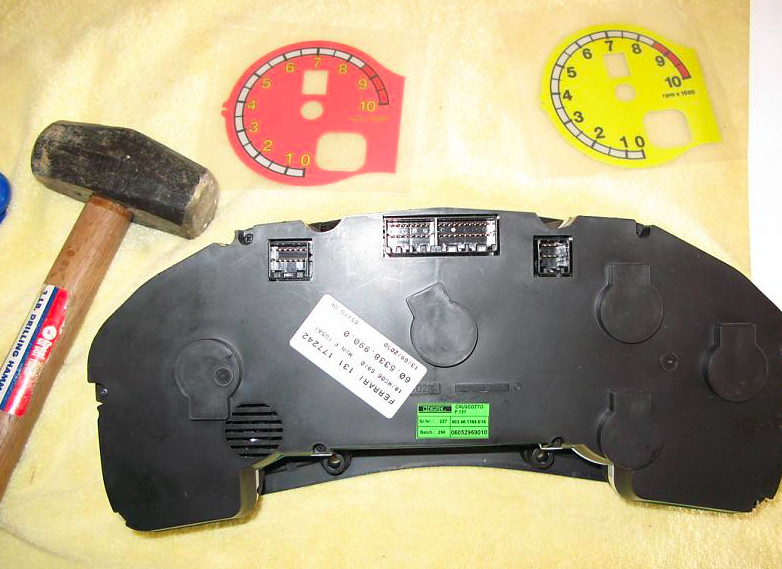
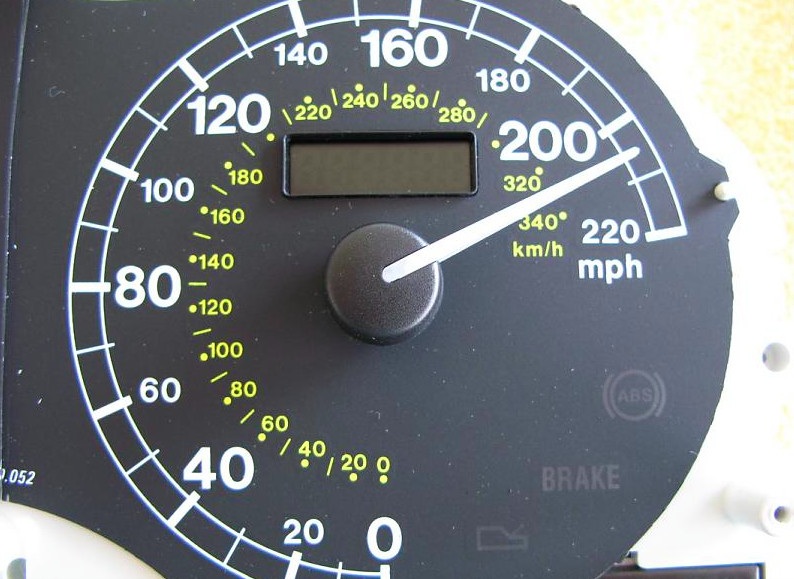
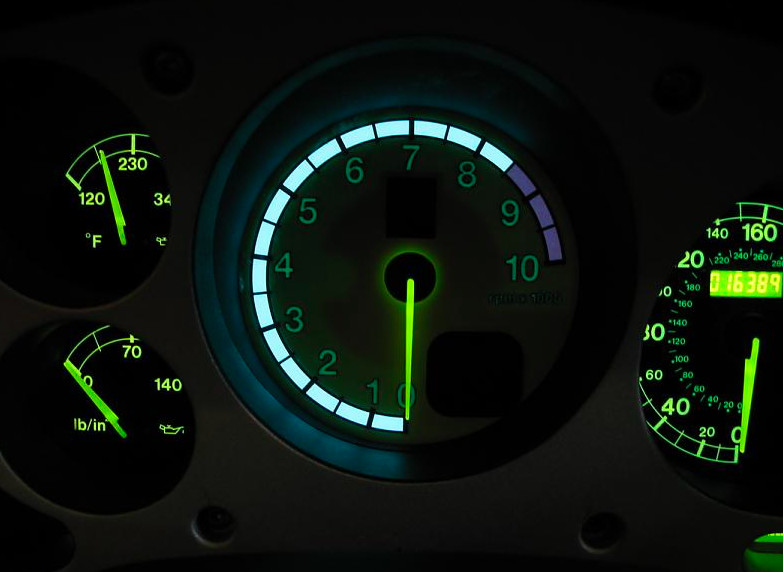
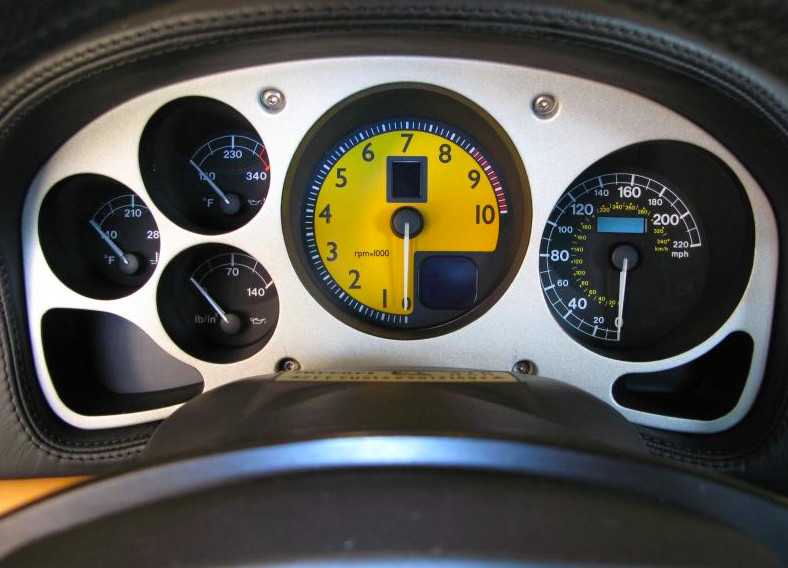
5. Now that you've got it out and removed the face plate screws (the hammer's there just in case) you can remove the lenses, then the black guage caves..(PIC 1,2), I had to peg it above 200mph for grins. Lord knows I'll never see that speed.
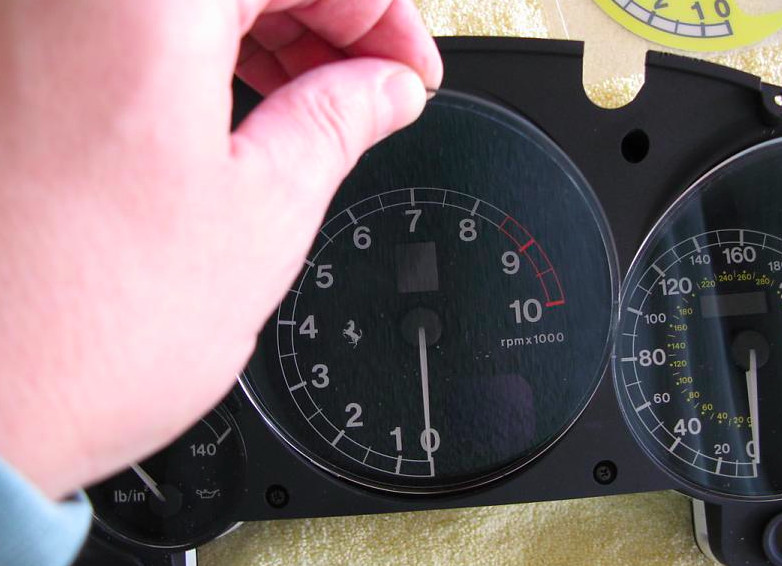
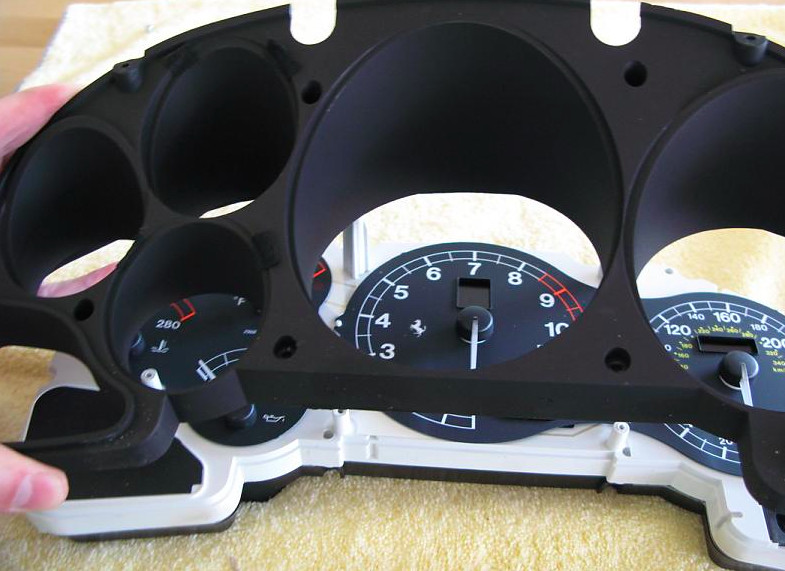
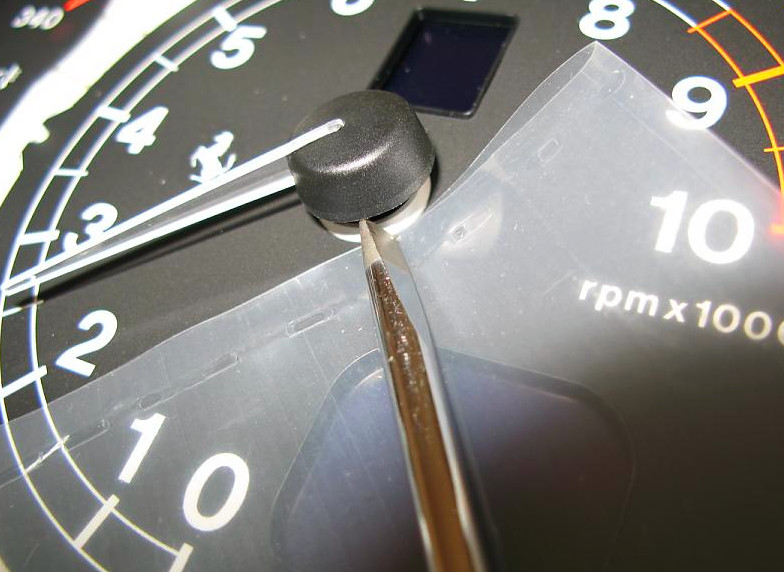
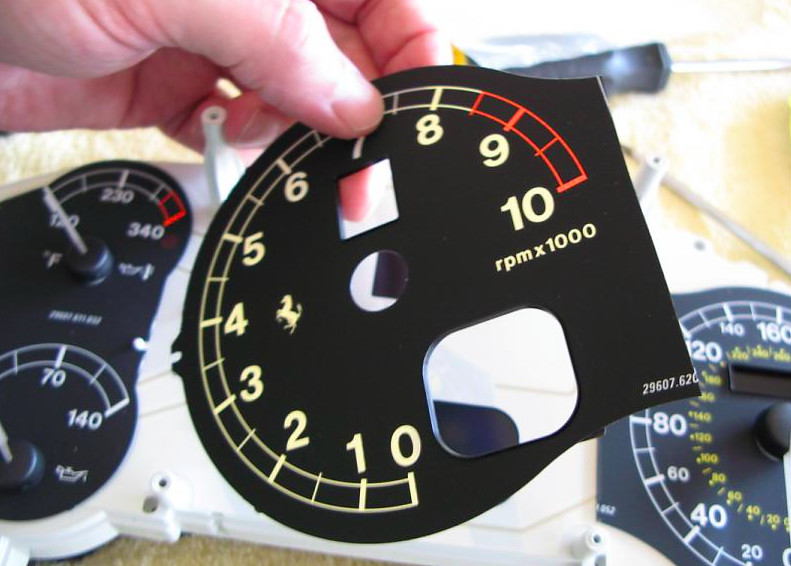
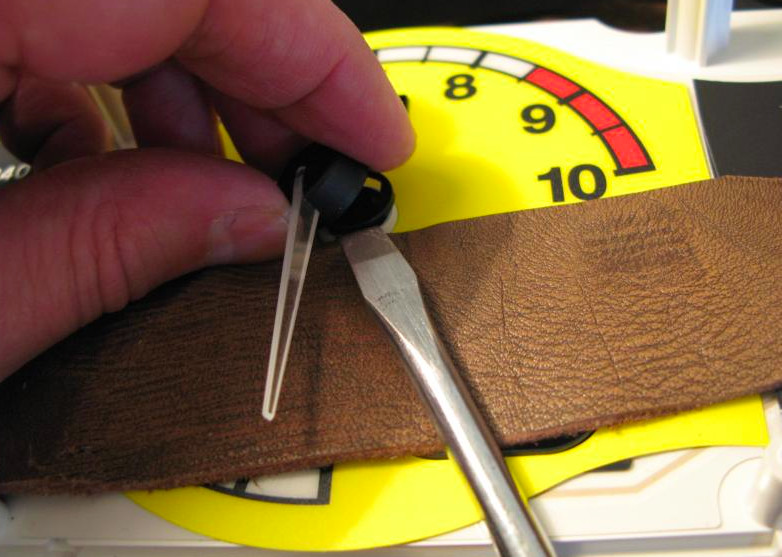
Now it's time to pry off the needle. Using a screw driver very carefully is key here to get the lip of the needle cup off, then you can use your thumb and forefinger to gently pull it off. Once it's off, the face guages come off very easily, they are so thin.

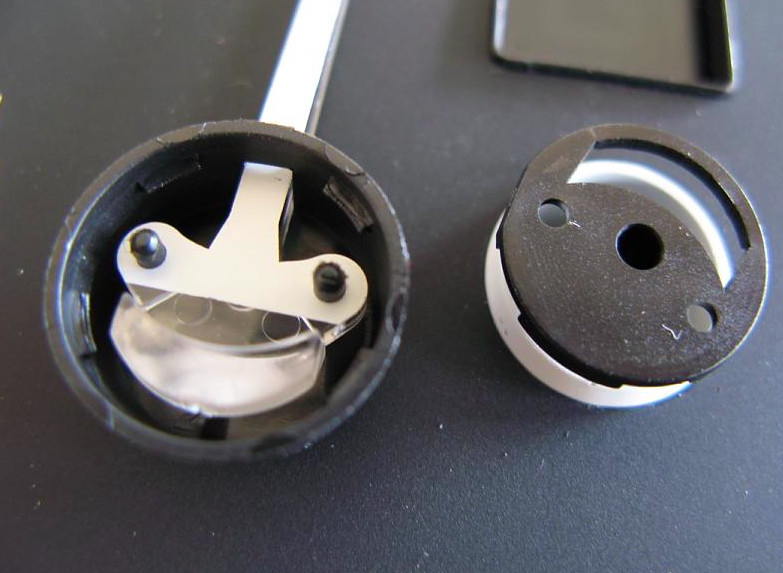

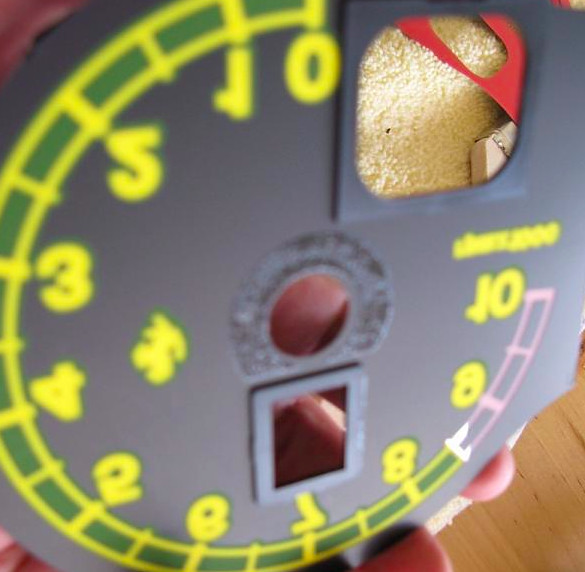
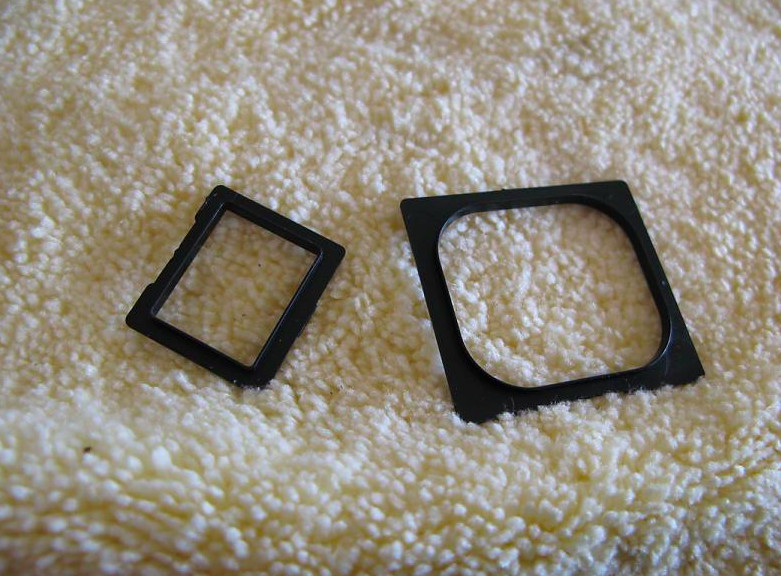
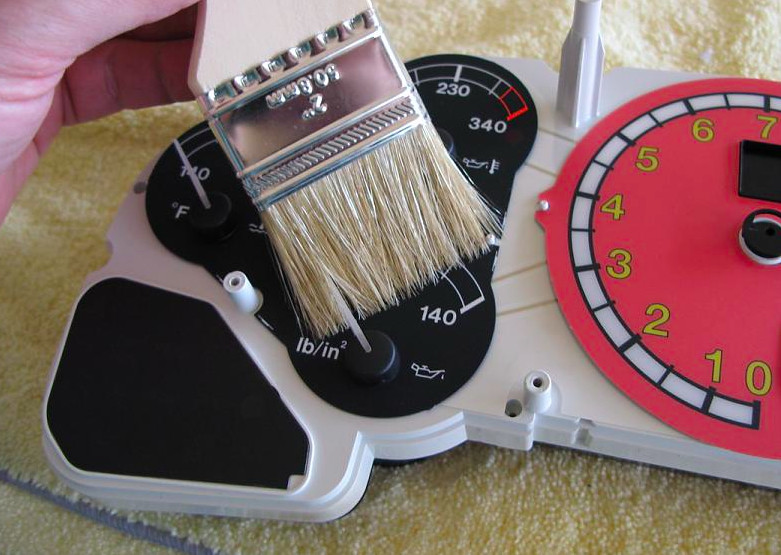
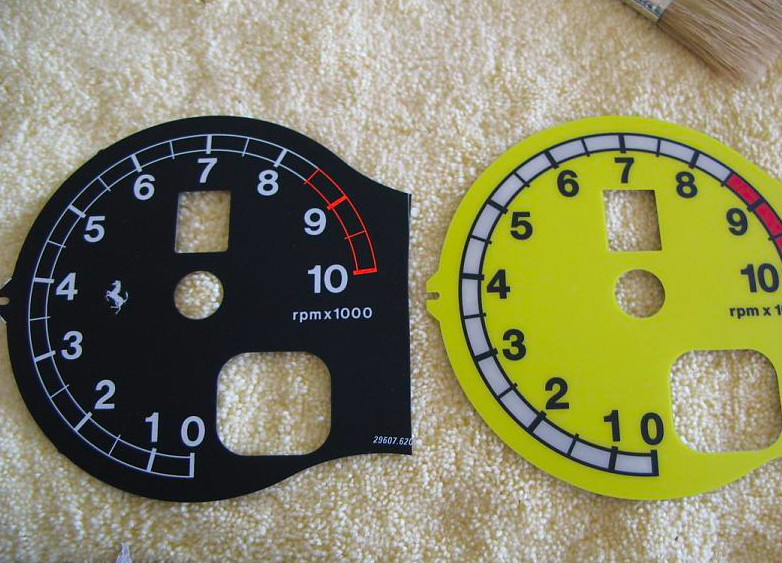
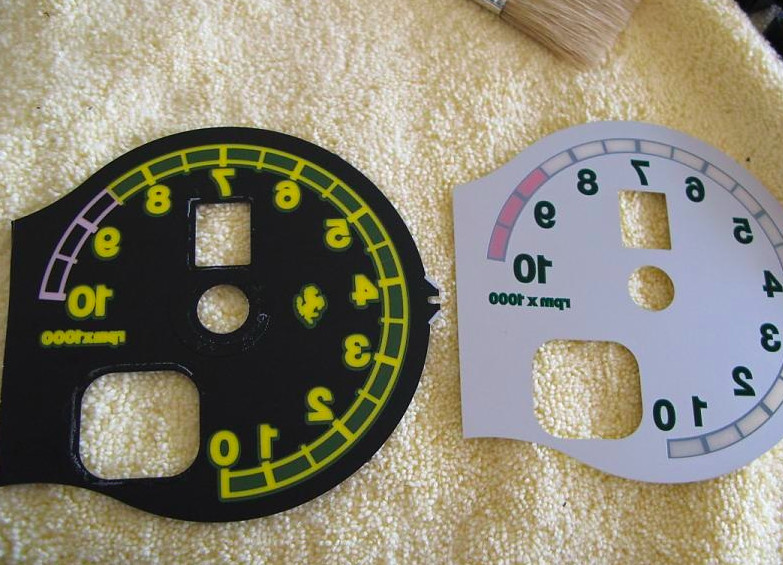
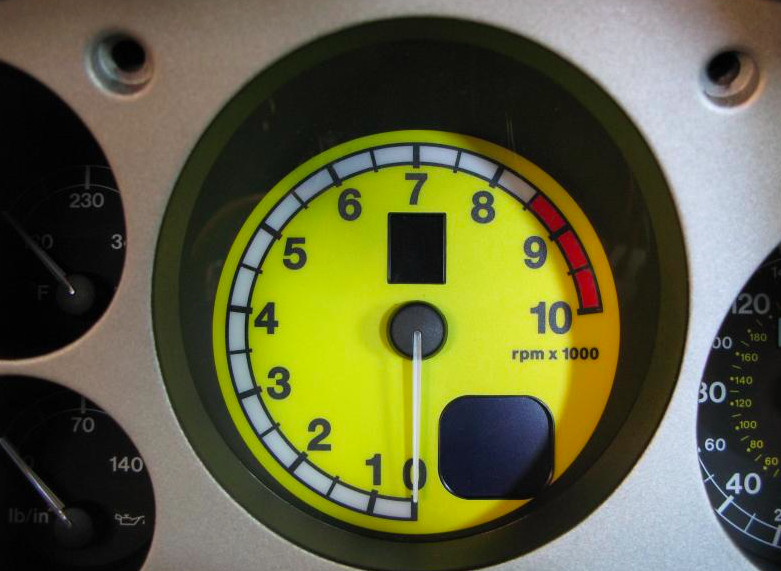
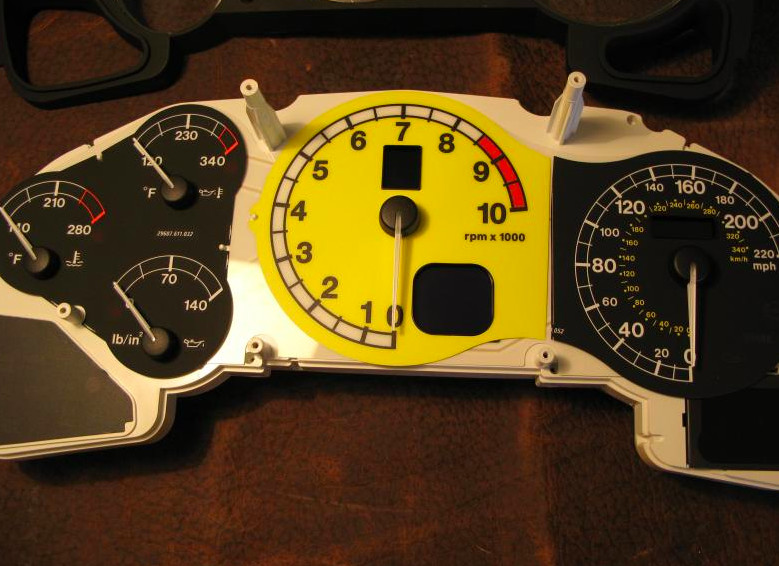
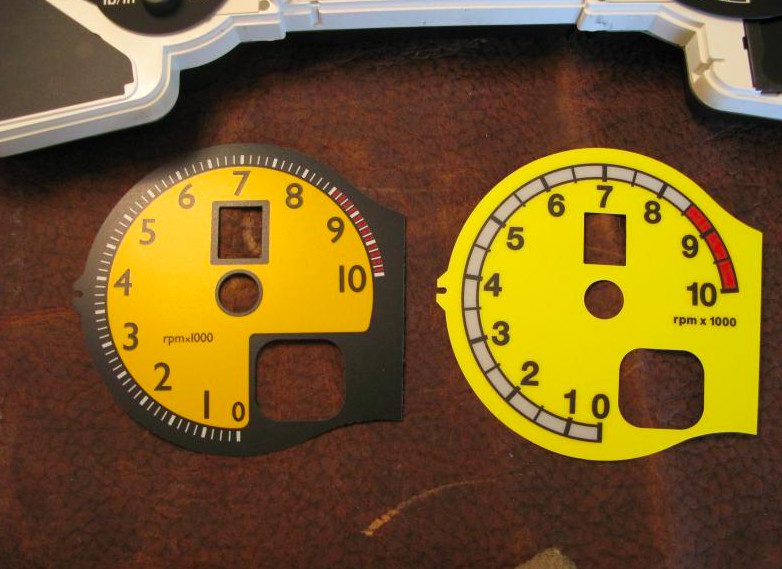
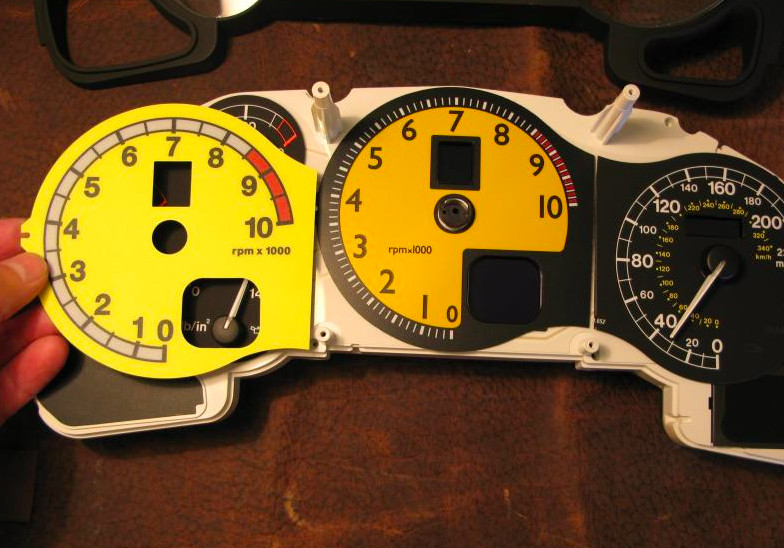
Don't forget the details, remove the window framing from the OEM face (see pics) and install it in the intended new one. Place the new face in place and sweep up with a gentle brush to get all the dust out, then blow for grins to be certain. Also, here's a comparison shot of the OEM and the replacement. We'll chat about this some more later. I actually installed the red on first, the the yellow.

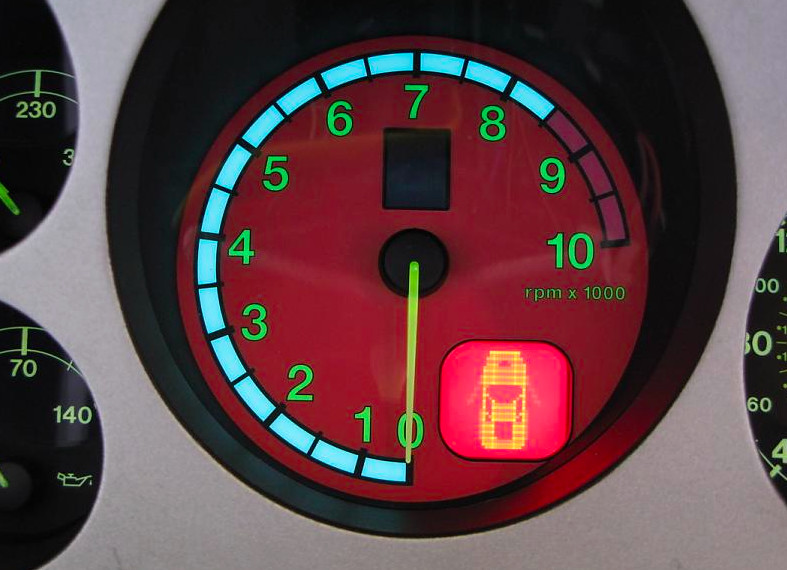
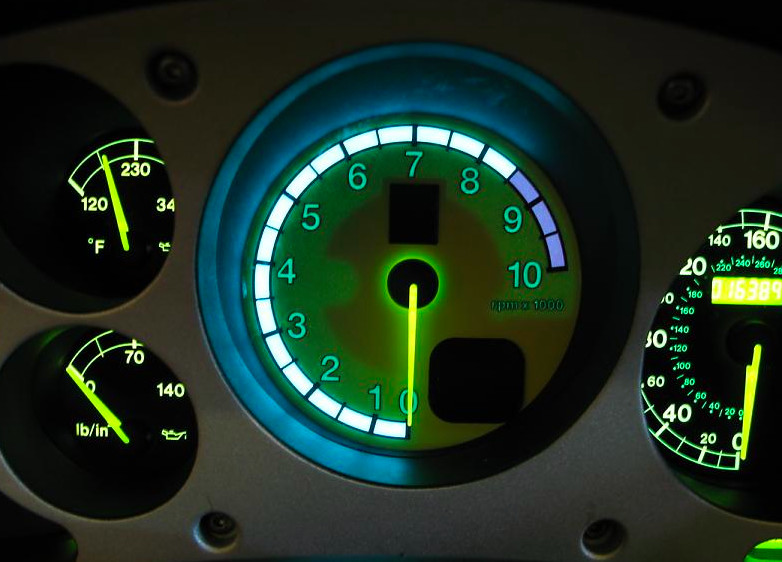
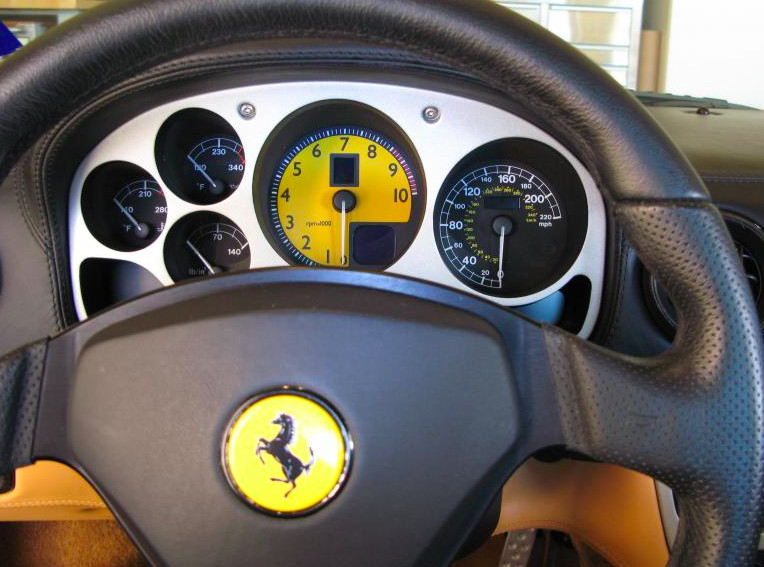
Okay, now put it all together in the reverse (literally). It goes together twice as fast as it did coming apart. Strange, I know, but it does. Here's the red after all is said and done. Pretty cool, eh? Please note, these photos have NOT been altered in anyway, so the color rendition is dead on.
Let's chat now. The color of the bars along the peripherie is an aqua blue, while the center remains very, very dimly lit in the red. Also, please note the various dial colors. Don't be misled by their brightness. Someone thought through this process and brightened or darkened the color so it would be more in line with Ferrari colors (the red and yellow for that matter). While the red appears to light, put it in and it looks perfect. The yellow to bright, put it in and it looks perfect.
Also, there appears to be some metallic on the Ricambi piece not on the OEM. This might have to do with some of the light transmission reduction of the intended color. Don't get me wrong, they look great.
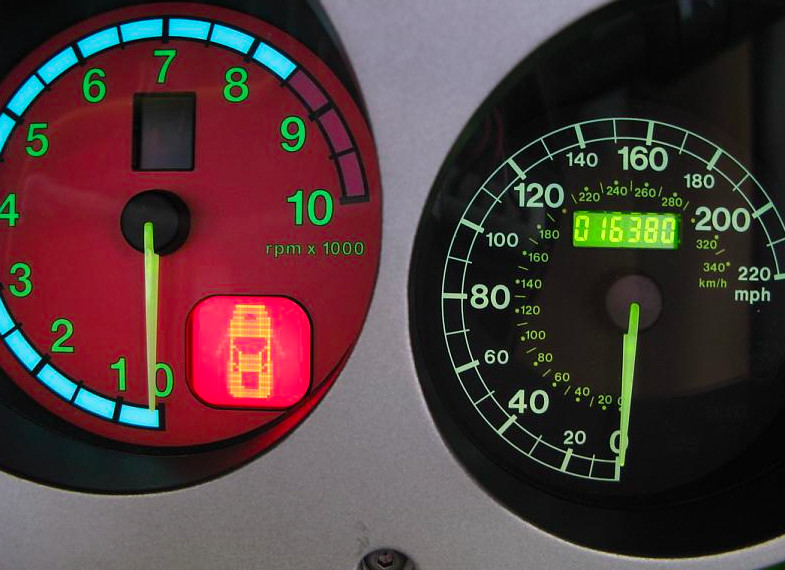
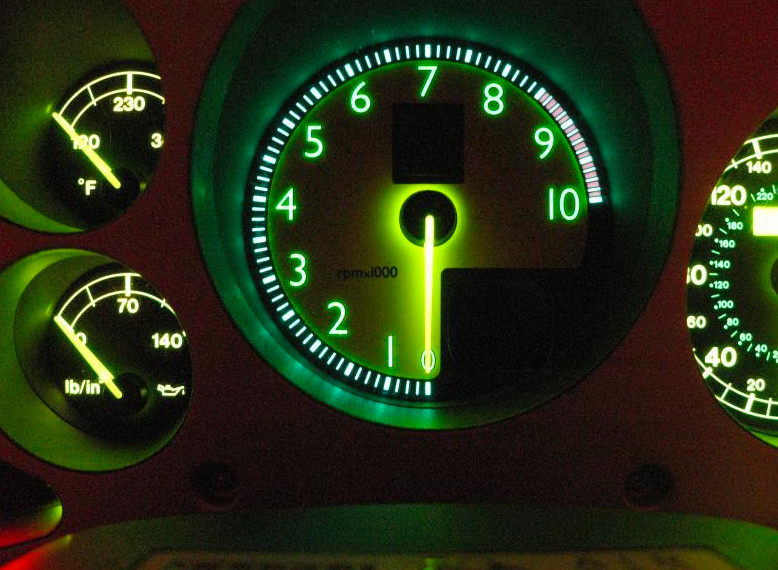
After looking at the red for some time, and knowing I wanted more torture, I pulled it all apart and put the yellow in too. I kept the yellow. It just looked right. In the second to the last pic, I slowed the shutter speed down to two seconds to burn-in the color, that shadowing is NOT visible to the naked eye at all. Burn-in is a process where it allows the faint light to have a chance at the film so you don't just get the bright colors--note the speedo numbers overexposure in this shot.
Again, these colors are DEAD on--no altering.

Oh, if anyone says it's easy, give them the finger for me. It takes time, patience and some pretty tactile fingers to get it done. If you like working with your hands, you'll enjoy the challenge of getting the upper steering column piece off-the hardest part of the job in my opinion. I do love the results. Just wanted to add that b1tching in. I feel better now.
12-2-2007
I did some more work today and wanted everyone to know there is NO way to change the shadowing of the face guage(s) as the lighting panel is the culprit, and the lighting panel determines the light throw. The lighting does not extend 100% around the guage so it is impossible to add to it. There are areas not lit, so no matter what you do to the after market face small shadows will exist due to lack of lighting in that area.
On the 430 the entire area is lit by the luminescent panel. This is intentional by Ferrari as they never expected anyone to remove them and place aftermarkets in, desiring a more comprehensive lighting pattern. If you look at the Ferrari face tach it's blacked out in the area we would like to have lit to gain that 430 look. Well, it ain't going to happen unless you manufacture the luminescent lighting panels and add to it. I also noticed the other guages have unlit areas as well so you can't get around (forgive the pun) it there either.
They still look fantastic and add an incredible twist on the "old", if you know what I mean. It's nice looking down and seeing a different color. I'm glad I have both red and yellow.
e-me with any questions.
12-19-2008
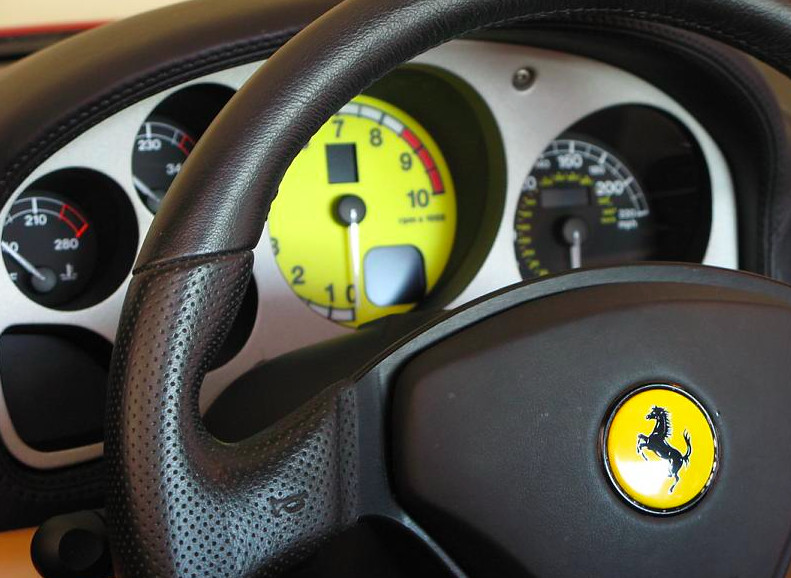
Okay, here we go again. I have purchased the new faces Daniel has come to market with, and I must say, it is a must have. It is an incredibly nicely finished product with appropriate screening where it is results in perfect shadow and light throw.
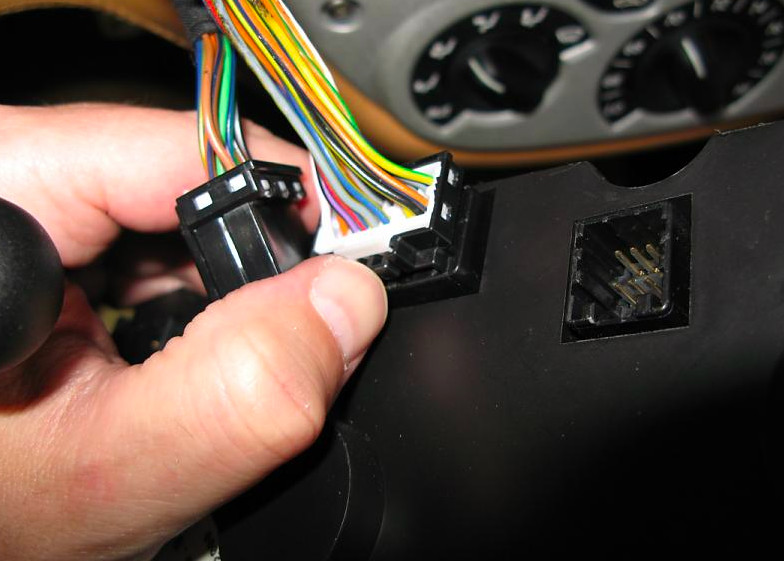
I added some pics to help, a reminder for me and others. When removing the dash guages cluster, you can actually fold it over and on top of the dash, but be careful and very gentle. It makes it real easy to take out the stubborn plugs. Wiggle them horizontally while pushing that black little tab. That damn tar baby crap will get on your hands but don't worry, it's a pain to get off your hands.
I can't stress this enough; take your time, force nothing, and be gentle and patient. It all goes together and comes apart, but requires some smoooth hands.
My observations: wow!! I am really impressed. When Daniel said he had these redone, he's not kidding. I took some time in taking these pictures so they would provide as close as a real world image as possible. They are UNTOUCHED by any photo software. I just slowed down the shutter speed to allow the light to burn in a little to replicate what you would see (for the night shot), and I was successful.
I highly recommend this face. I am just stunned at the quality. Congratulations Daniel, you've really done a great job.
Have a look....
More details....

I was out for a drive last night and am really impressed by the new face, it has great light transfer. It really does seem like it should have been on the car all along.
Cheers~