You must be logged in to rate content!
10 minute read
Fox Body Solid Steeering Shaft Conversion COMPLETED
Compliments of aod109 @ forums.corral.net
11-5-2009
UPDATED WITH INSTALLATION & TEST DDRIVE INFORMATION STARTING @ POST #71
Ok. So I am a cheap bastard! Why pay for something that I can build for myself?
I wanted a solid steering shaft, but did not want to pay $200+ for an aftermarket one. Especially since I knew I could build one for less than $10-$25 that would perform the exact same function and will be just as safe. So I dug out the camera, sheet aluminum, JB Weld, tools and a couple spare steering shafts. The whole project will take you about 2-4 hours to do, but you will have to wait 24 hours for the JB Weld to cure before drilling and final assembly.
This is just a preview of the full post that I will be making later. I still have to write up the step by step instructions and edit some of the pictures. So bear with me and I will try to get the full DIY / HOWTO / Tutorial posted within the next 2-3 days. Eventually I will put it all in a .PDF so we'll have a solid document to work from.
I'll go into detail on the measurements I took and the replacement Grade 8 hardware I used and the couple extra parts you will have left over. It's all super easy and will make perfect sense. 
Until then here are some pics to outline the work I did and the end result.
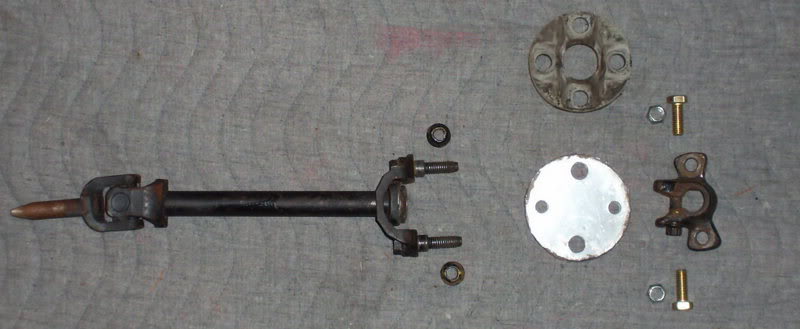
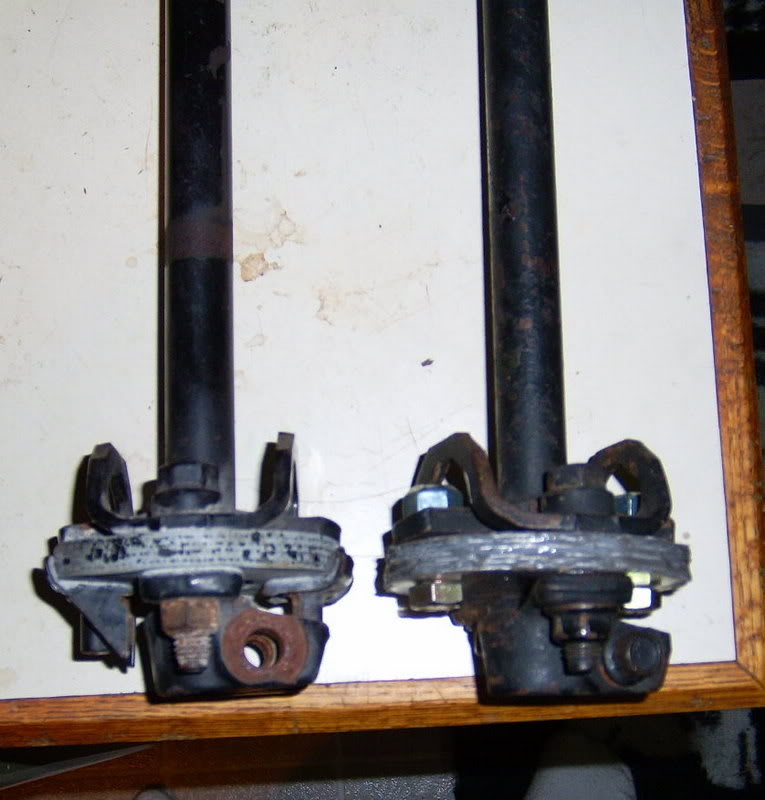
Drill out the 2 rivets.
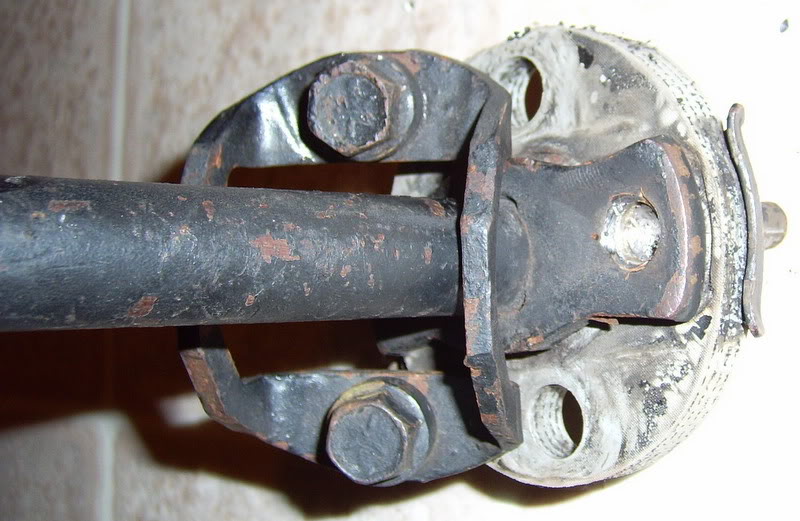
Disassemble the old config.
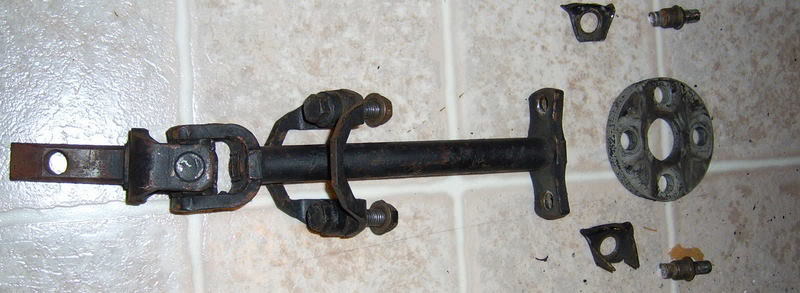
Cut your aluminum rounds and bond them together.
Drill the holes. Reassembly & VOILA! A solid steering shaft.
11-6-2009
I did take into account the fact that additional torsional stress could be introduced (and cause delamination) if I drilled the hole in a sloppy fashion causing the bolts to possibly wobble or wiggle in the holes. If I drilled the holes sloppy I would have to really crank down on the nuts and bolts to generate more clamping force which would cause crushing forces on my laminated disk and further stress the assembly.
All of that is why I drilled the holes as perfectly straight as possible and to the proper size of the bolts that would be holding the assembly together. The bolts on the input side of the AlumiRag have a good distribution of clamping forces.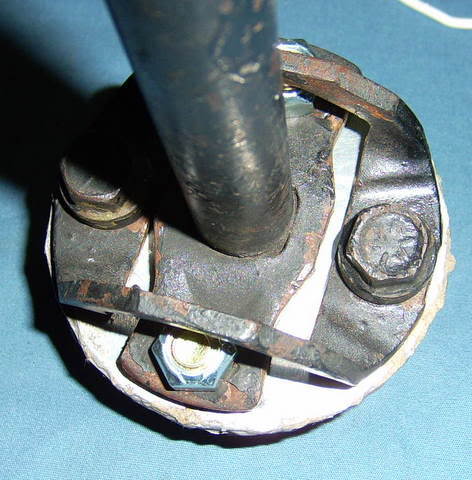
On the output side of the rag the clamping forces are only well distributed on 2 of the bolts. So I will be putting some large diameter washers on the 2 grade 8 bolts I used, to make for better distribution of those clamping forces.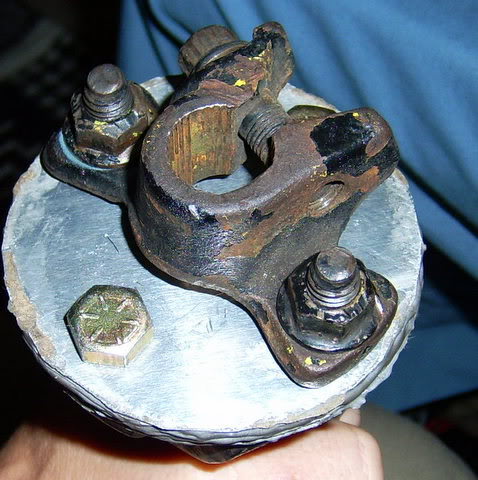
Transfering torsional forces into a wider area on the input side of rag and giving them a shorter path to travel before effecting the output side should minimize the load path and the potential for stress induced delamination.
11-11-2009
Alrighty then! (in my best Ace Ventura voice)
So I installed my DIY AlumiRag steering shaft conversion. Here are some things I noticed during the install and the 1st drive test.
Installation:
The only issue I had was that the output coupler was clocked 180deg wrong.
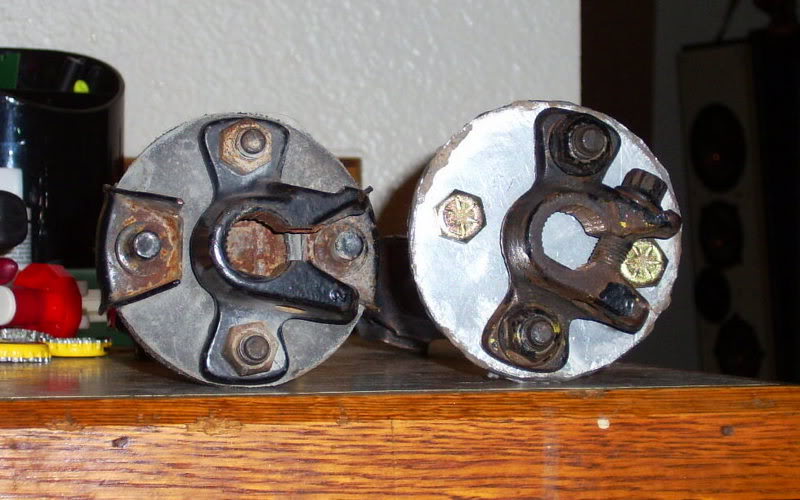
In the folllowing picture you can see the input portion of the upper ujoints connection to the steering wheel/column. If you look at the left side of the input shaft, you can see that it has concave face. The other side is flat. Basically it is a "keying" so the assembly fits together just one way. I did not pay attention to that keying.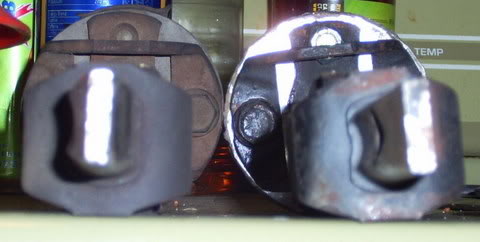
This 2nd picture illustrates then end result of not paying attention to this keying. It clocks the output coupler 180deg out.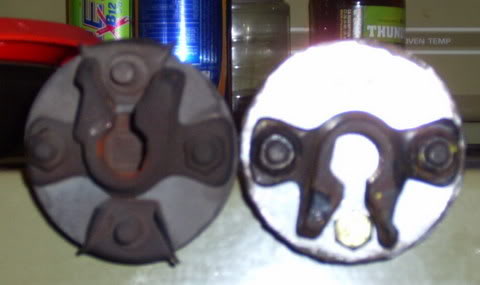
No worries. I just unbolted the output coupler and reclocked it. Just be mindful of that fact if you decide to do this project or something similar.
Other than that, the install went perfectly. On to the test drive.
The 1st test drive went perfectly. No weird steering anomalies & no major deaths. Quite the contrary. Here is what I noticed:
-All the slop in the steering was completely gone.
-Steering input was very crisp and percise.
-Steering feedback was very clear.
-Steering feel. Basically, it felt like I could "feel" the texture of the pavement through the wheel. Which is a nice improvement since I can "feel" the texture of the pavement through my left foot that is usually planted firmly on the floorboard. Now it feels like my hands and feet are getting the same input. Turning the wheel quickly from left to right while driving revealed just how much my old rag joint sucked. The car was happy to go where I told it, when I told it.
Something I noticed on the freeway. The tendency of the wheels to "wander" a little bit when driving over ruts, is now GREATLY reduced if not completely gone. I can only assume the rag (stock rubber one) was allowing a bit of torsional/rotational flex which was allowing the wheels to wander, then it would translate into steering wheel movement once it hit a threshold. Anyways, the consistency of the steering is greatly improved at freeway speed.
So all in all, I am very please with the end result of the initial testing. I only put in 10 city miles of corners, roundabouts and stop-n- go traffic. I also put in 10 highway miles on the return trip. Everything was better, nothing was worse. Except steering vibration. But I expected that to be elevated by this. I like the extra feedback. I feel more connected to the road. So I can EASILY tolerate the miniscule increase in vibration. Noise increase? No freakin idea. My exhaust and BFGoodrich KDW N/T tires are so F'ing loud that I would not notice if there was an increase
One Last note:
I figured I should give a quick run down of my steering setup on this 1986 5.0 LX. Just as a point of reference. Obviously there is alot more that effeccts steering characteristics. I have addressed all of the old or worn components during my rebuild of this car. But these are the ones that most directly effect what I was working on. This conversion seems to have been the last little link to tie everything into the steering wheel so I can really feel it.
-new Adco PS Pump (necessary 'cause I broke the old one)
-Doorman PS pulley p/n: 300003 (5.8125" vs 5.33" stock pulley.) 8.3% underdrive
-PS fluid cooler
-UPR bumpsteer kit
-87+ spindles
-new Moog ball joints
-solid aluminum rack bushings by Maximum Motorsport.
-steering shaft conversion with new & improved AlumiRag Technology. :P
Thx for reading all through this post and offering any opinions you may have had. good or bad. I'll continue to update this thread as I progress with the AeroStar ujoint conversion.
11-27-2009
So this is just a basic update.
So far the AlumiRag looks to be holding up pretty well. I do a visual inspection every 2-3 days by turning the steering wheel lock to lock in 1/4 turn increments and looking for any signs of de-lamination of the layers or nuts & bolts coming loose or shifting position.
I'll update again when I do some more work to the car and can pull the steering shaft off for a full hands on inspection for anything like:
-de-lamination
-stress cracks in the aluminum
-rounding out of the bolt holes
-etc etc blah blah blah
Everything is doing fine so far. The only snag I hit was the fact that I had to have the toe-in reset because my output coupler was off by a few degrees. So the steering wheel was slightly off center to the right. No big deal.
F.Y.I.
Firestone has a deal where you can pay $150 and get a lifetime alignment plan. BUT.... there is a catch. For those of us that want custom settings for caster/camber....they will tell you "OH! Well we have just changed policy and don't do custom alignment settings anymore. Too many people (i.e. roadracers & auto-x'ers) abuse the policy to have settings set before and after race events"!
So if you do go with the Firestone Lifetime alignment, I recommend this:
1) Ask them if they have an Alignment Tech that can actually handle custom caster/camber settings because you have a modified car that requires settings that are different than factory specs.
2) DO NOT MENTION ANYTHING ABOUT RACING! I made this mistake after finally talking them into doing some custom caster/camber settings. They got real wary about helping me after that because they were expecting to see me come in every other week asking for custom settings.
It took me 20 minutes of convincing 2 different managers that I had no intention of abusing their policy.