You must be logged in to rate content!
13 minute read
Kenne Bell Fox air to air intercooler build list
Compliments of 92rohcp @ www.corral.net
Ok guys, I said I would do a DIY and build list thread for my Fox body KB A2A project. I had most of this on another thread but this is step by step. I hope this thread helps other fox owners to find and search for this idea.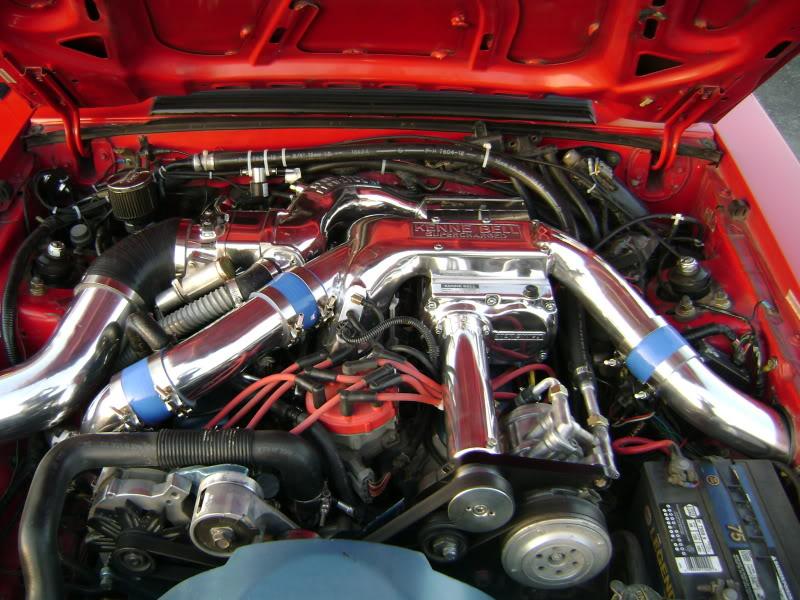
Parts list
3" intercooler pipe all 18" length
2 U bend
1 S bend
4 90 deg L bend
1 staight pipe
6 striaght silicone 3 ply couplers
2 45 deg elbows
16 stainless steel T bolt clamps
I baught this from from CX racing and I called them and had them sub i straight pipe for S bend pipe and 2 silicone couplers for 45 Deg elbows. They were very nice and didn't charge extra.
http://stores.ebay.com/CXRacing_3-In...34Q2ec0Q2em322
Intercooler also from CX racing 31x12x3" with 3" inlet outlet
http://cgi.ebay.com/ebaymotors/CXRac...Q5fAccessories
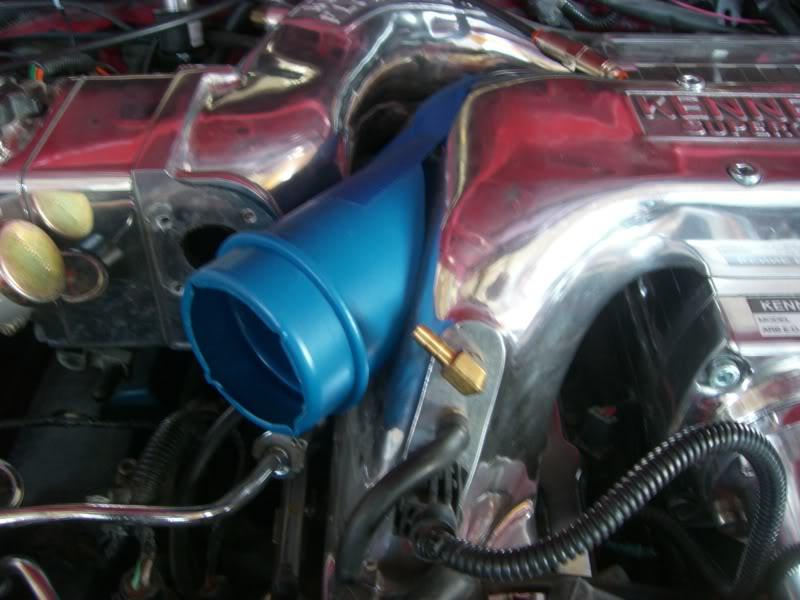
For bypass relocation
I used a piece of 1.5" pluming pipe from harware store 16" long with a 90* bend at the end. cut the end to make it fit.
1.5" 45 deg silicone elbow
1.5" ID greddy flange that was welded to 3" pipe
1.5" 45 deg bend heater hose
COST $$$$$ with shipping
Intercooler $100 Ebay cxracing( 5098)
pipe Kit $100 Ebay cxracing( 5098)
1.5" 45 elbow $17 Ebay siliconepros( 339)
1.5 plumbing pipe $15 hareware store
Greddy flange $12 Ebay wyntonm( 12149)
Welding $88 Look around there are many that can TIG weld.
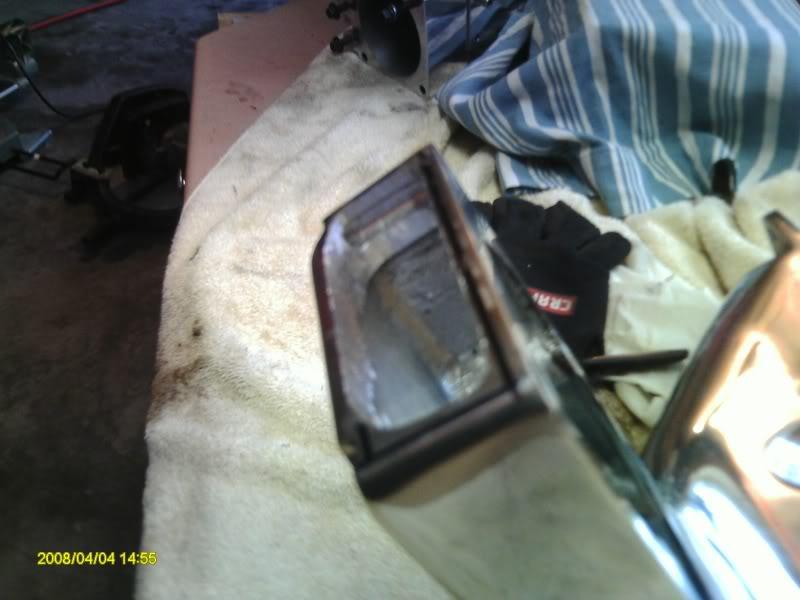
With manifolds removed from compressor start openning up the 2 areas that the 3" pipe will be welded to. On the discharge side you must first take measurements and mock up a piece and use clay to assure it will fit under hood and around the fuel rails and sensors. Just use a 3" pipe like I did and clay to check fitment.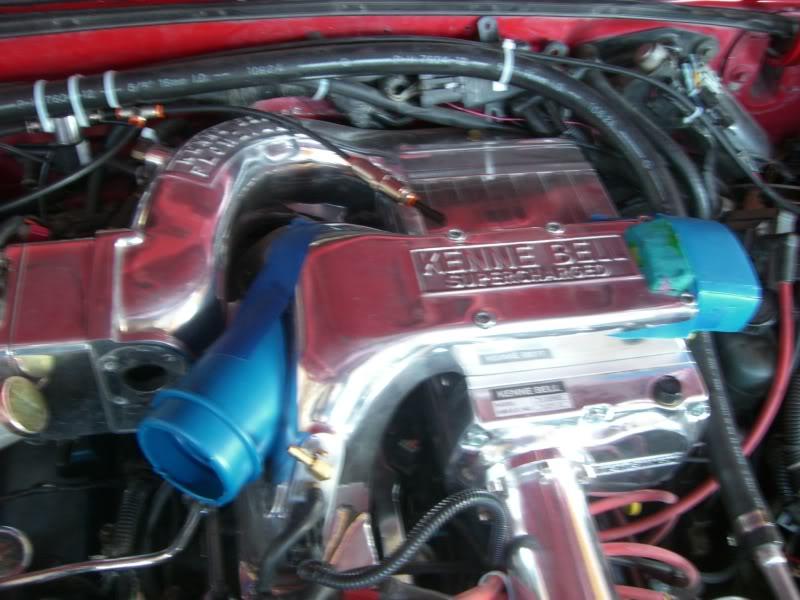
Here is how I went about cutting into the manifold. Don't be shy here just dive in, its not that hard. The first cut was with a drill so I could get my little jig saw in. I also used a carbide bur for aluminum alot of the medai removal and final shapping.
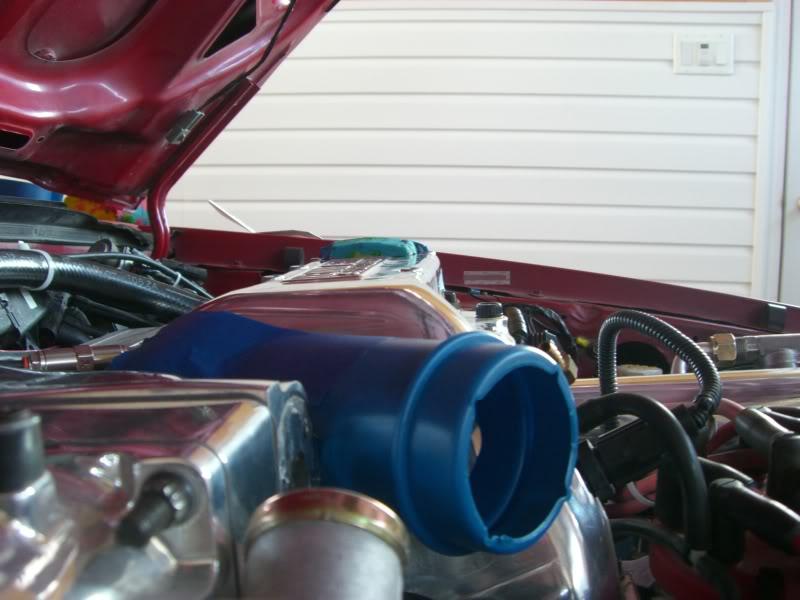
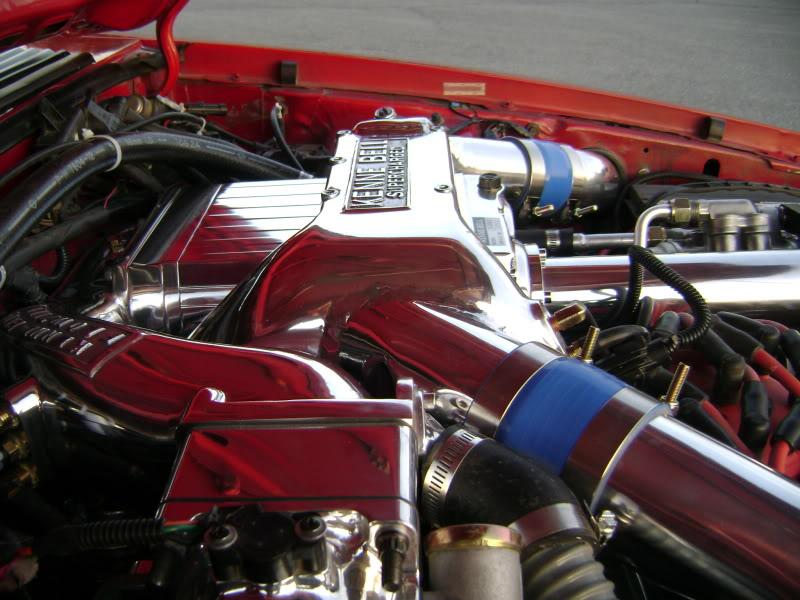
Here you need to remove and cut into the bolt hole boss to take advantage of the 3" pipe diameter. Also I don't have pics but the roof area where it say Kenne Bell on top was partly cut out and removed later for more flow.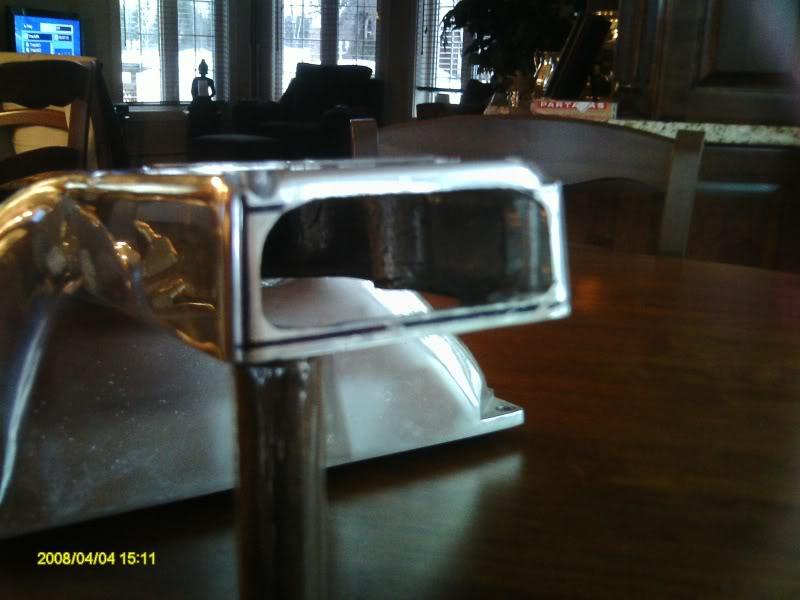
Here on this end like I said you have mock up your 3" pipe cut it at an angle that will fit then scribe or mark with perm marker the area to be cut out. Then just cut man.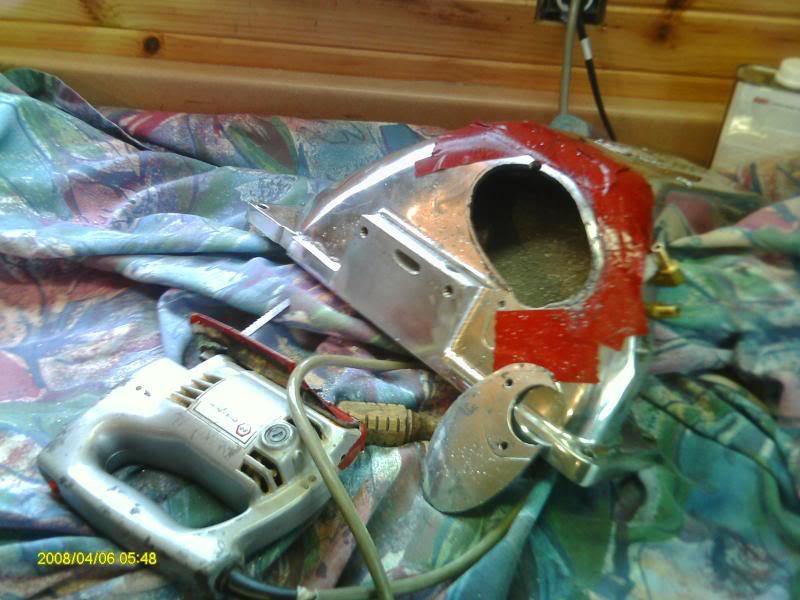
Here is the area of the roof that needs to be cut out between the bolt holes for more flow. As you can see the shaped 3" pipe is raised 3/8" above the manifold to take adavantage of the full 3" pipe area . Make sure you measure and use clay though it fit with my car.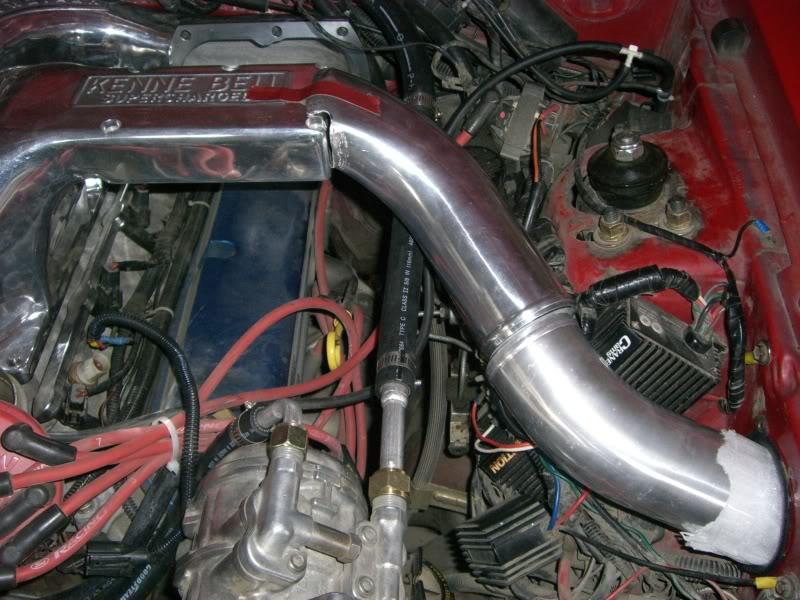
Pipe fitment and shaping takes some time but its not that bad. I cut all my pipe with a radial arm saw with a regular 10" carbide blade, it works but be carful and go slow as it can grab the aluminum and throw it too. I also used another mider saw with a cutting wheel for some shaping and cutting smaller pieces. You can cut all the angles as well just go slow.
This pipe fabrication and fitment took the longest. The hard part was making sure the bend would clear the brake fluid cap area and of course it had to be angled down and also flatened and somewhat squared to fit the end of the KB discharge open area. I went slow and it took me about 3 hours to get it right. I can't remember the angles I cut but it wouldn't matter anyway as I'm sure there are slight differences from each vehicle and engine.
The next pipe inline is the S bend with the white rap that goes into the hole which is used for the windshield washer tank. Yes that means tank no more.
This is a pic of the inside of the drivers fender well. Take out the liner and its all exposed, tank and horn removed for installation of the next pipe that joins the S bend. Here you need a 45 degree silicone elbow and then a 90 deg L pipe. And below that one is another 90 deg L pipe that joins to the intercooler. Yes one side done.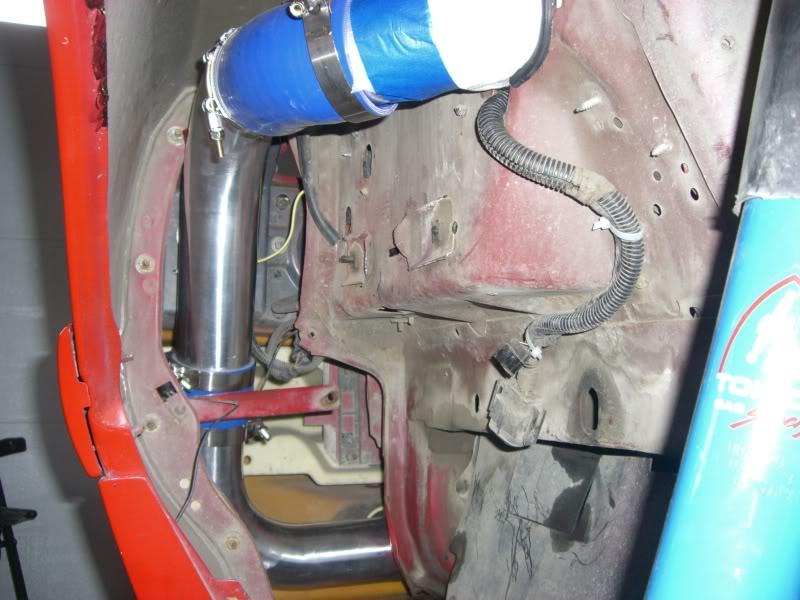
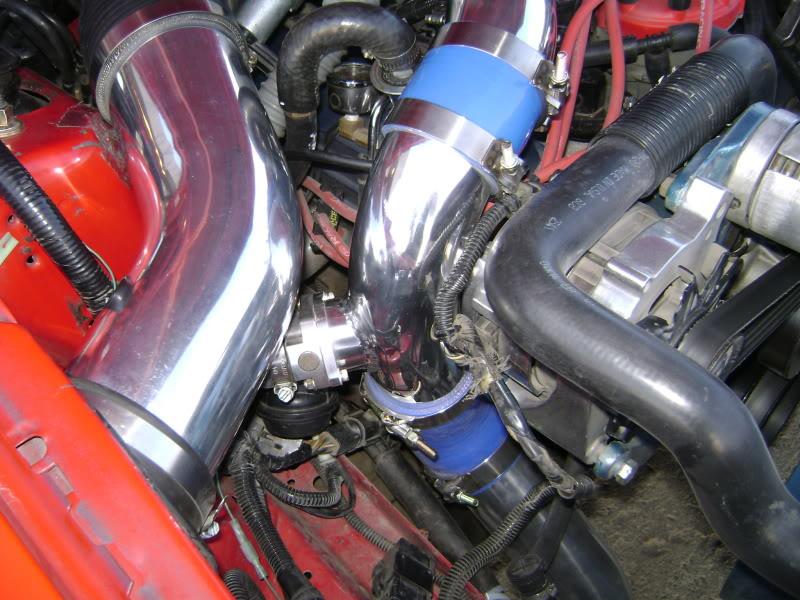
Here is the front where it joins up to the intercooler right side of the pic.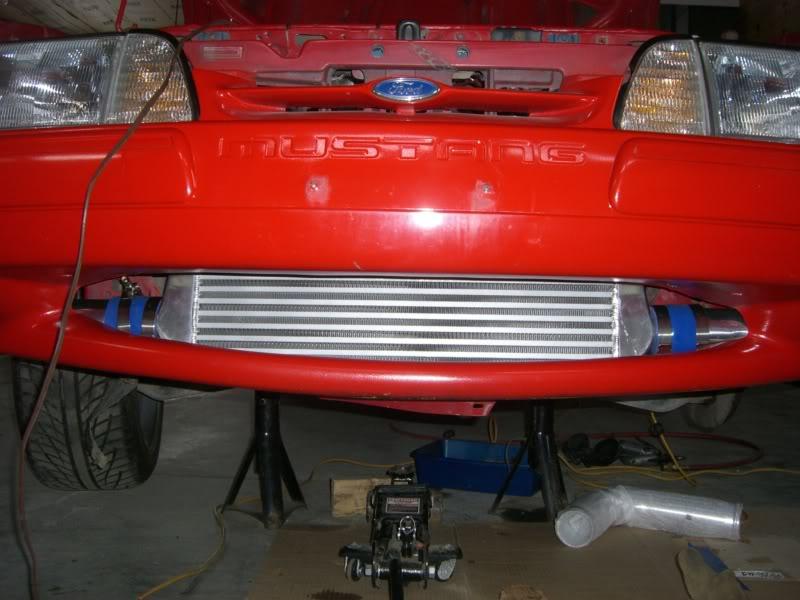
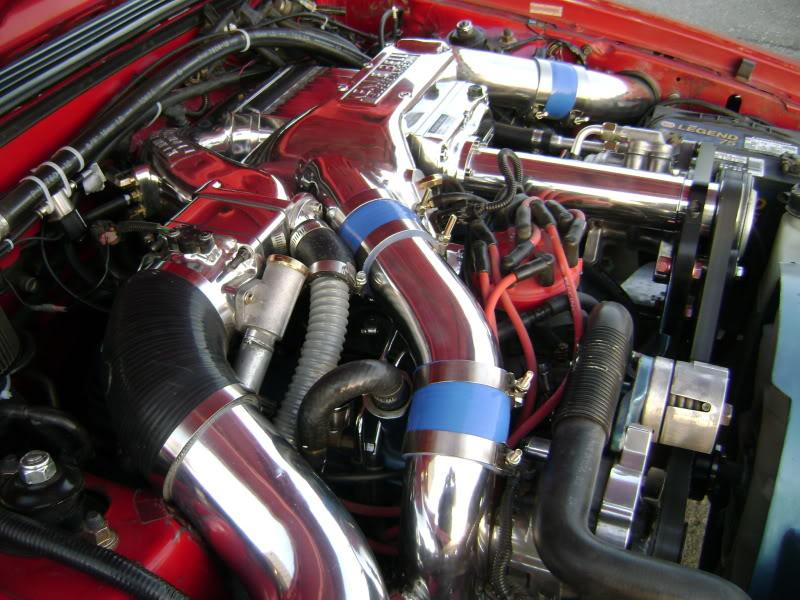
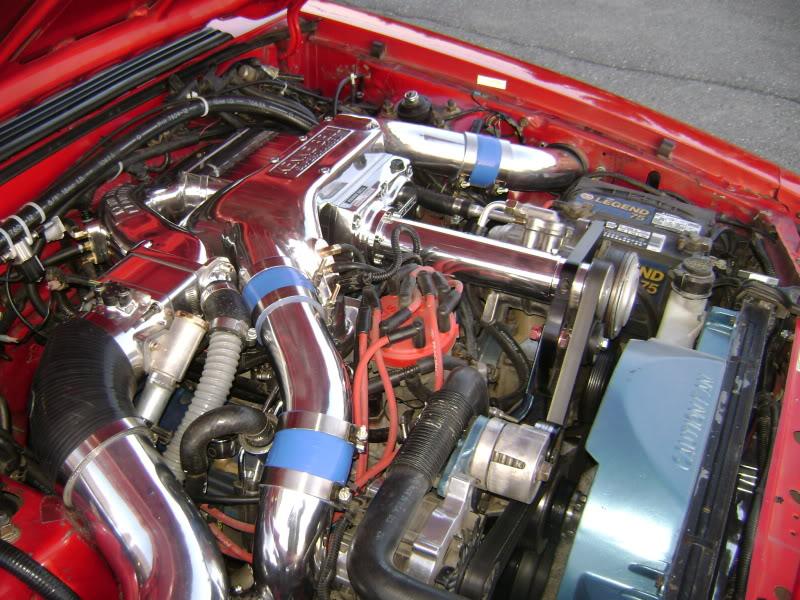
Now for the other side intercooler (cold side) leading back up to the KB discharge start out from the intercooler with a U bend pipe.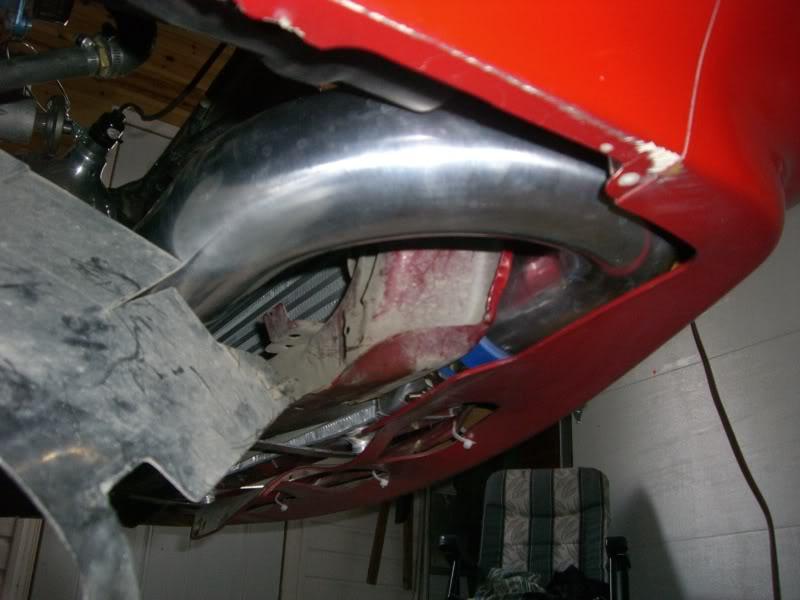
Here in this pic from the top of the engine area you can see how the U pipe joins nicely with the intercooler and then ends up in position to lead up between engine and frame rail. I also had to trim the plastic shirt for the pipe in the end, its pulled out of the way now. Oh yeah the black box which is the charcoal canister has to be removed along with the metal bracket. Just unbolt it.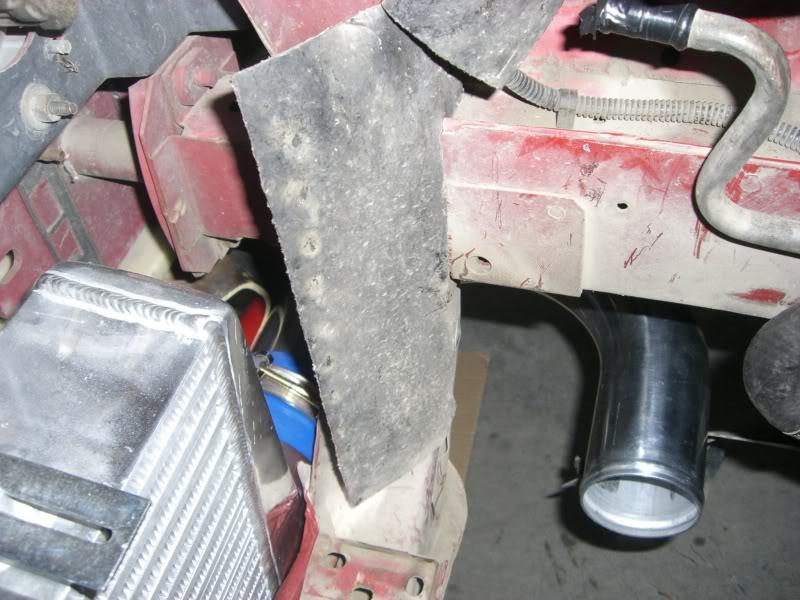
The next pipe here that connects to the U pipe is a 90 deg L that had about 3 inches cut off the short end. I would advise checking your own fitment here before cutting.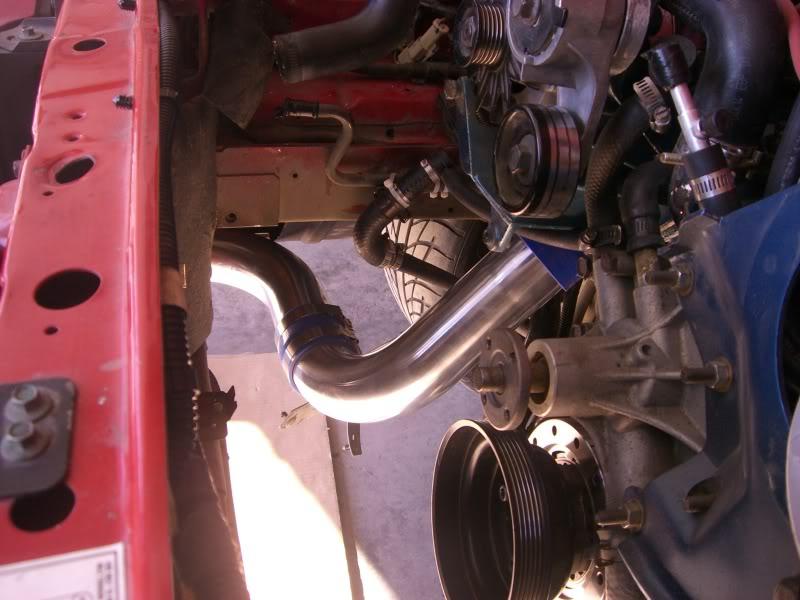
OK from this pic you can see the next pipe is the one next to the alternater and it is joined to the lower pipe with a 45 deg silicone elbow. This pipe is one half of a U pipe I cut in half. The other half was used at the beginning, driver side pipe to KB manifold. The one I spent 3 hours shaping.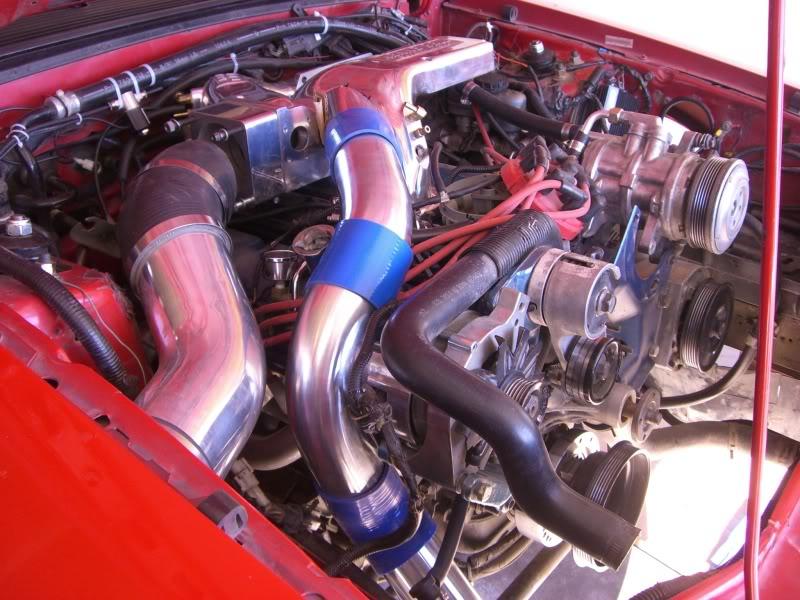
The next pipe here has to be cut and you will have to make your own measurements to make it work and fit for your car. I cut it from a 90 degree L and both ends were cut. I shortend the straight end to leave me with enough room for the pipe that is welded to the KB discharge manifold. And the other end with the curve had to be cut to join to the pipe at its curve the one next to the alternater.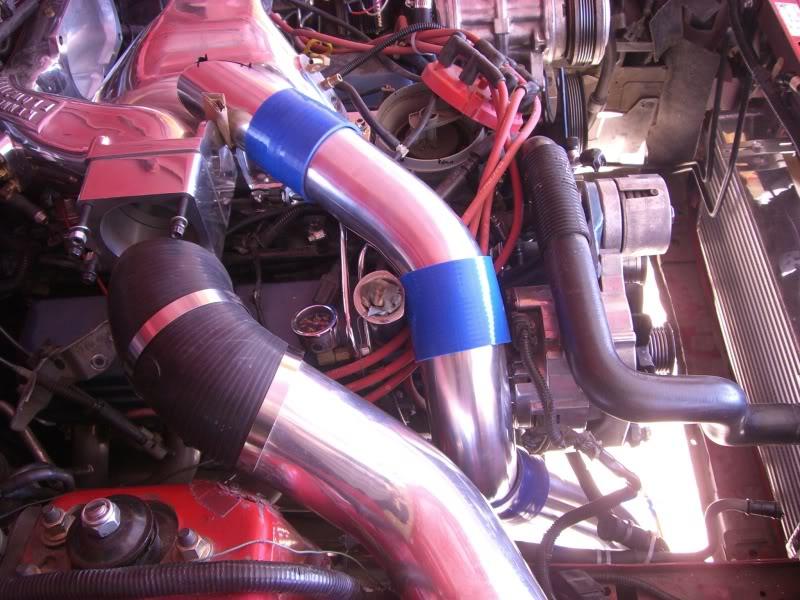
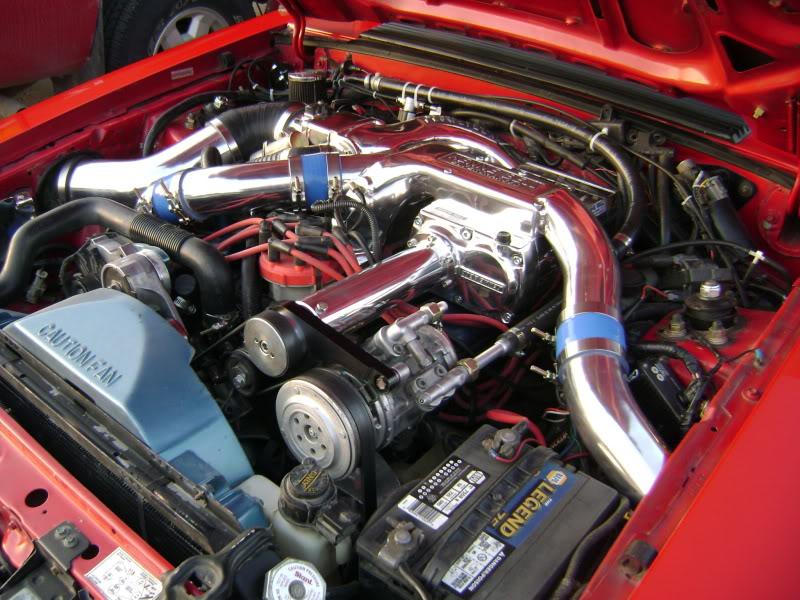
Here is how it should look from other angles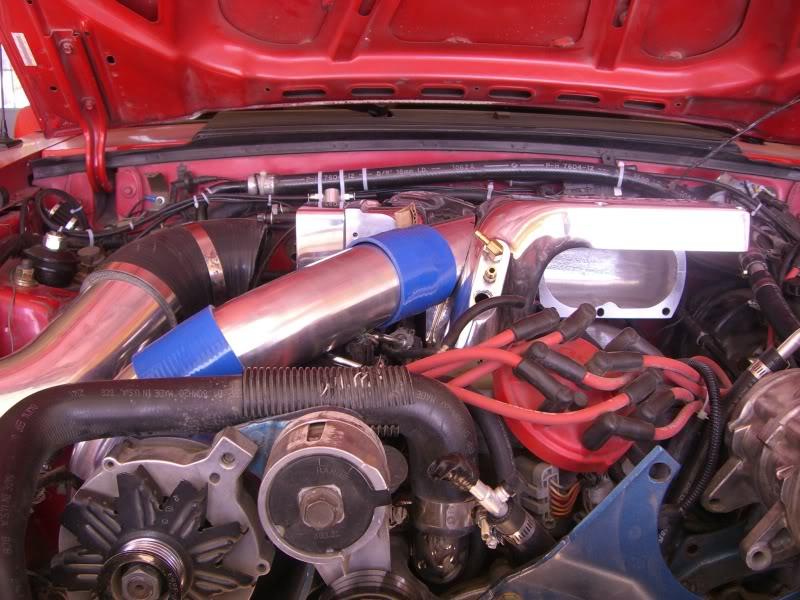
You can see her is used clay points on the pipe area to make sure I had hood clearance.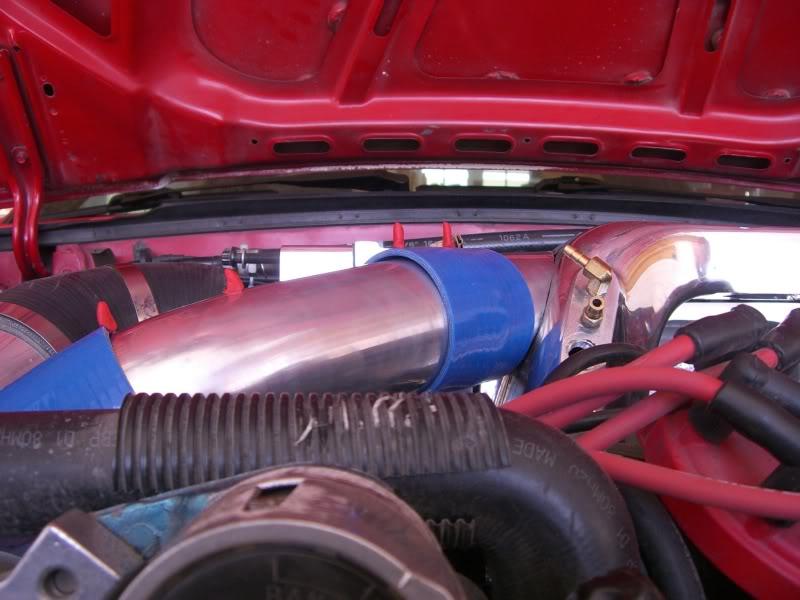
This is what it should look like in the end. If it doesn't do some more polishing :-) LOL.
Frankenstien Kenne Bell. Check it out.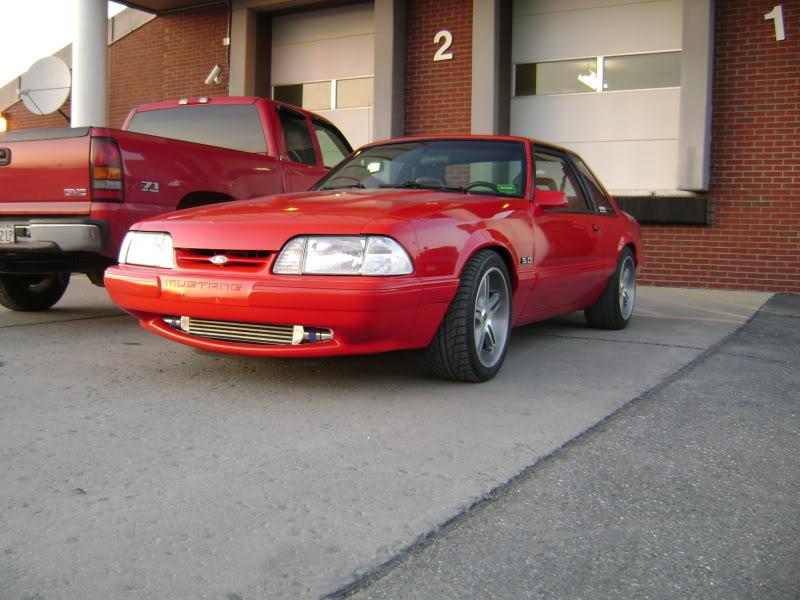
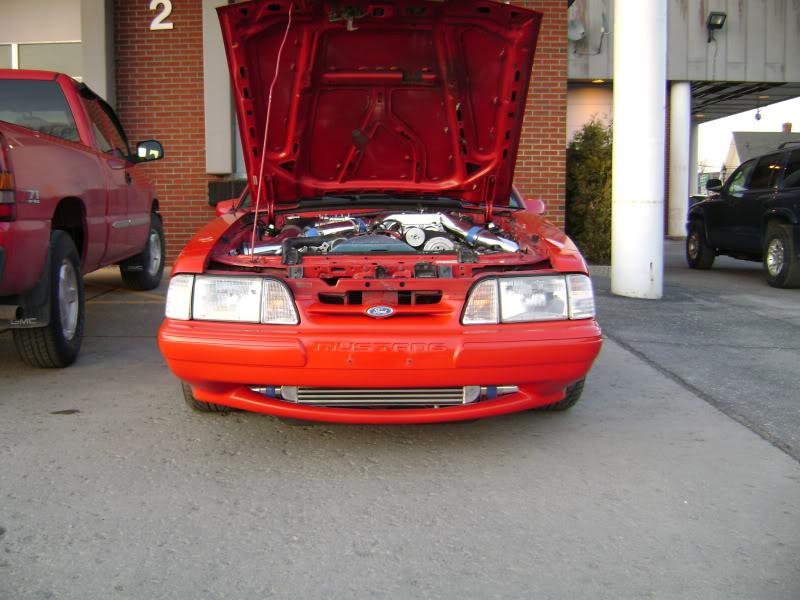
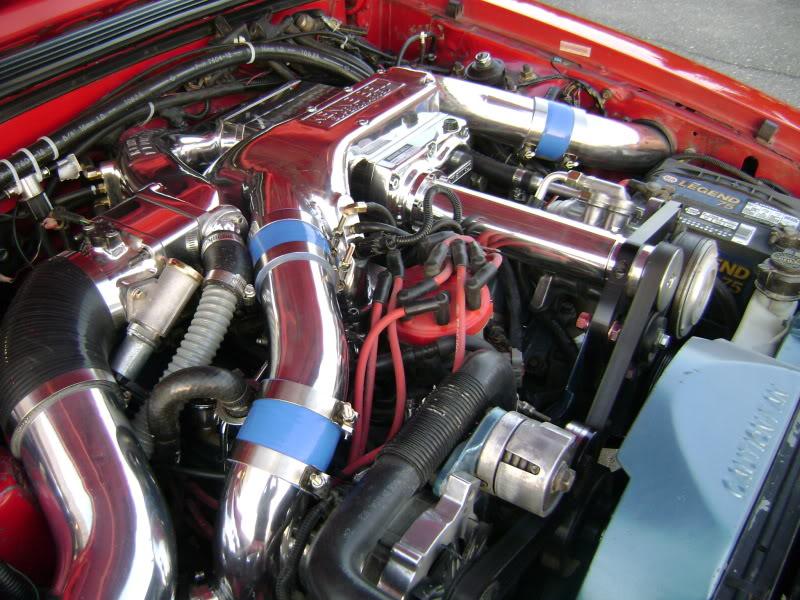

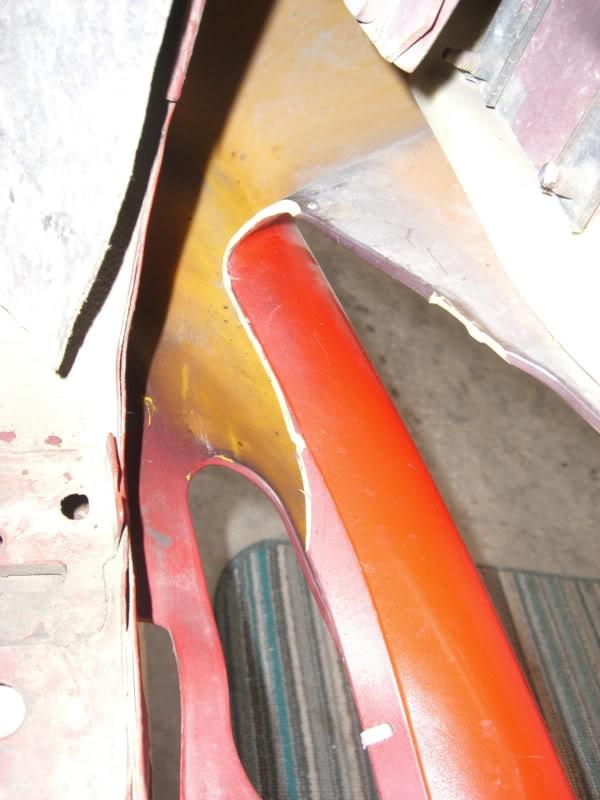
I gues I could cover mounting the intercooler too. My obseravtions are if you use a 31x12x3 intercooler the A/C heat exchanger could be retained, however I tossed mine anyway. I would have preferred the 31x12x4 intercooler for its better cooling and flow. That one I'm sure it would be very difficult to retain the A/C heat exchanger. I didn't remove the front bumper or cover I did all my mounting from inside the engine bay as I removed the radiator which gave me plenty of room to work. The only trim work I had to do was on the sides of the bumper cover where it looks like a mouth opening. And that was for the ends of the intercooler the inlet outlet area where the pipe connects. I used a stiff type razor blade or carpet knife for most. I just kept shaving slices out until It all fit. Check out the pics. I also did some work openning up the mouth area of the cover to get better air flow on the intercooler. It does change the look, but I'm going for maximum effect here.
I used screws to pin the mouth up to the bumper support and drilled holes in the bottom and used zip ties to make the lower lip thinner.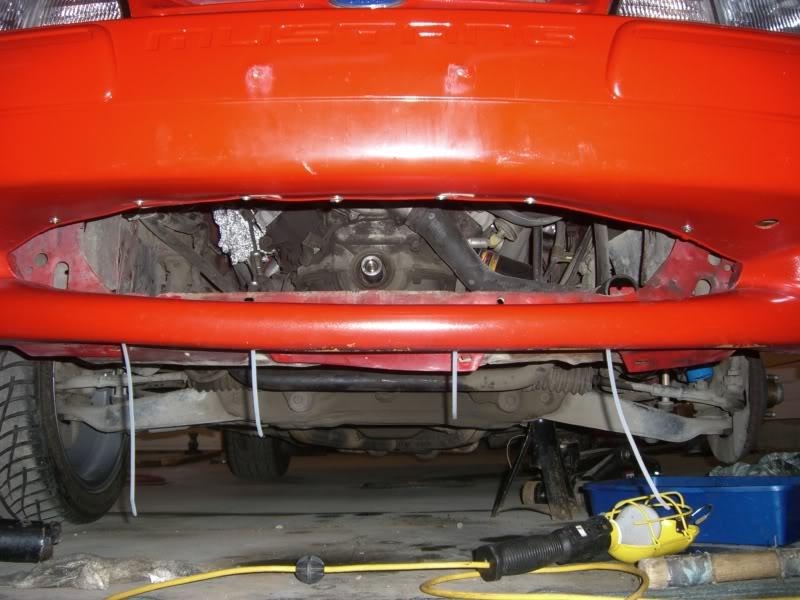
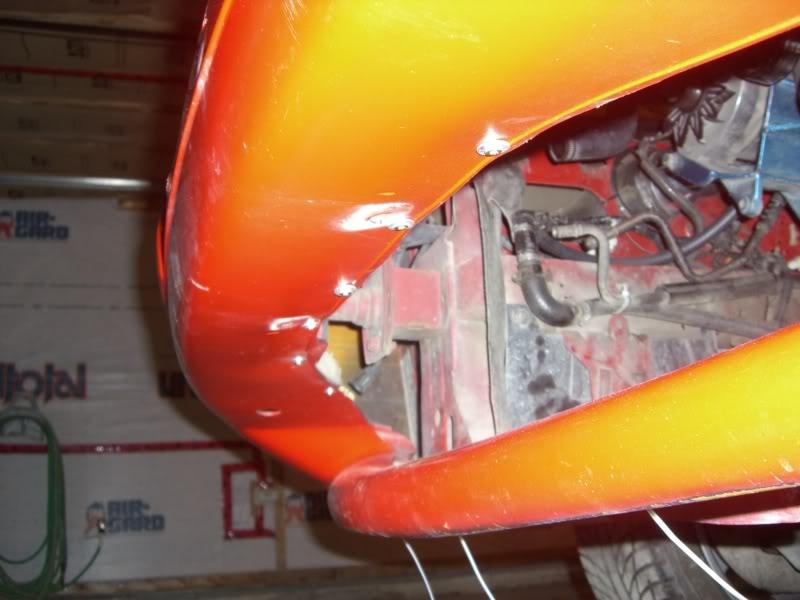
Here is where I clearanced the inside of the front bumper cover to clear the 3" pipe.
Here the intercooler is bolted with the supplied brackets to the black plastic bumper support on top and below I bolted it the bottom of the radaitor support frame.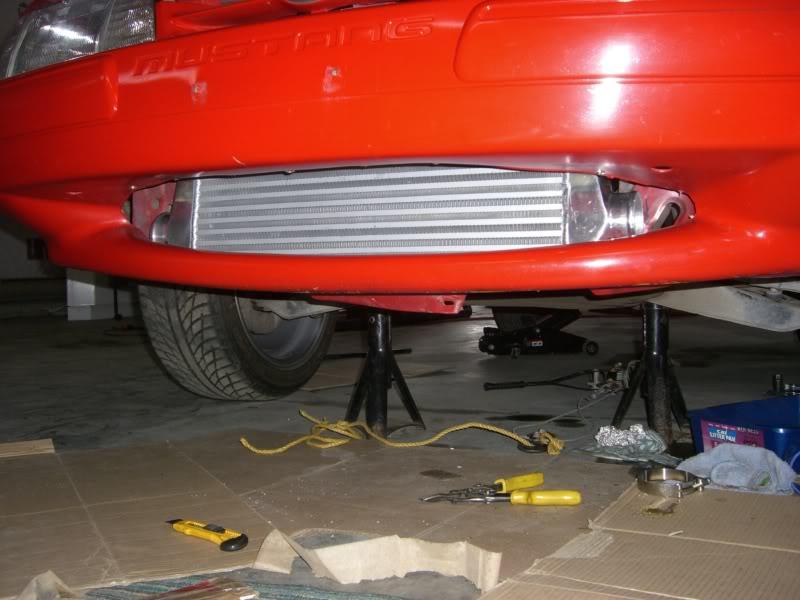
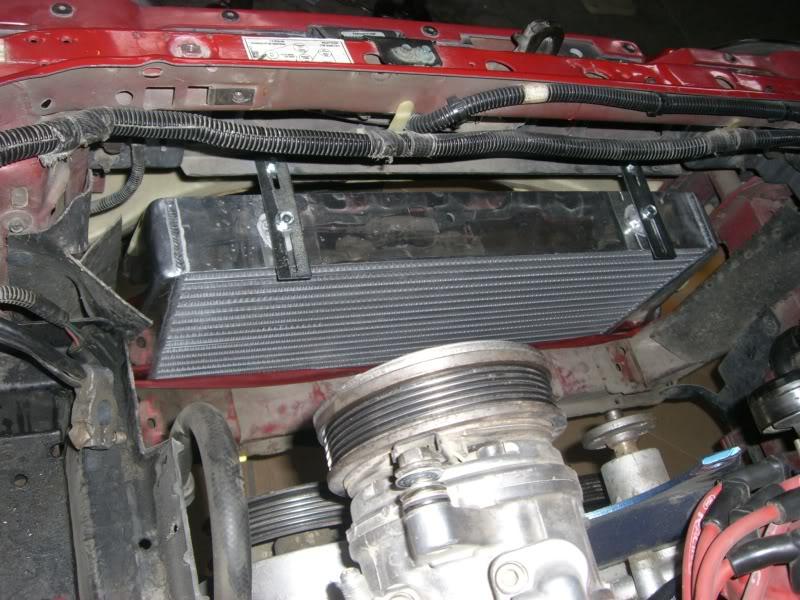
Here you can just barley see one of the bracket bolted on to the bottom of the intercooler and radaitor support.
'll post the results her agian but its in the body of this thread. All my results are from recorded data logs using Zetronix system so ACT temps air logged in volts then I convert to degrees.
Before
6.5" crank and 2.5 blower pulley resulted in 14.5 psi max
ACT temps 220-240 degrees max WOT
Cruse temps 185 degrees
After Custom Intercooler without Meth
6.5 crank 2.5" blower pulley 13 psi max
ACT temps 10-15 degrees above ambient
I'm seeing 70-80 degrees now.
Cruse temps 10-15 degrees above ambient
about 75 degrees.
The skinny is I lost about 1.5 psi through the intercooler and piping
Lowered ACT temps more than a 100 degrees
Gained a **** load of power (seat of the pants), but I can tell you this its the biggest gain I have ever felt on my car. Its like the first time I drove my car supercharged. I am not exagerating here. The car is completly different now. The throttle response is even better the car hits so hard at 2k now I can spin the tires even in 3rd gear at 2k just rolling on the throttle. The rowl of the Kenne Bell is even loader now very noticable inside and out of the car at any RPM evertime it sees even a little boost. I wish I would have done this long ago but I hadn't had the balls or the belief that it would work. Well boys I'm here to tell you it works and works well. Its very cool to stop after driving and feel the front of the intercooler with one hand on either side of IC and feel one hot and one cool, no ****......
how did you close off the tophat after the addition of the new inlet and outlet?
Posted by mikenapier on 7/1/22 @ 4:33:49 PM