You must be logged in to rate content!
5 minute read

94-04 MUSTANG Shift boot/E-brake INSTALLATION INSTRUCTIONS
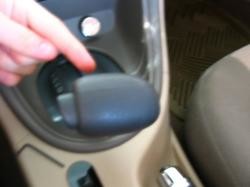
1. If you are installing our boot on an AODE-equipped car: turn the car on to the pre-ignition stage (one click before starting the car.) Depress the brake pedal and move your shifter to first (low) gear. To remove the shift knob, use a 5/64 allen wrench and unscrew the screw that faces the dash. Make sure you unscrew it fully.
If your car is a manual, remove the shift knob by unscrewing it. Use vice-grips after wrapping the knob with a towel to protect it from scratching. Make sure you hold the shift lever underneath the shift knob with another wrench to protect it from turning, which may be harmful for the transmission. You want to twist off just the shift knob, not the whole shift lever. :)
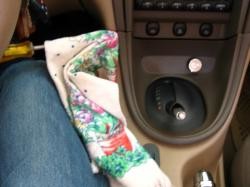
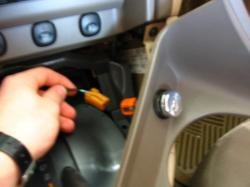
2. Pull up on the knob until it comes loose. This will take some force but be careful not to break the wires that are connected to the overdrive. Once the knob if off you will need to cut the overdrive wires somewhere in the middle so you will be able to splice them back together later.
Use a screwdriver wrapped in a cloth and gently pry off the shifter bezel beginning at the top.
3. Once the bezel is loose disconnect the cigarette lighter and place the bezel aside. Remove the existing boot by unscrewing the 6 nuts that hold it on. Install the new boot in it's place.
If your boot is not connected to the bezel with the 6 nuts, it may be attached to a metal ring that was permanently mounted on plastic studs. The plastic studs had the tips melted to hold the metal ring & original leather boot. There is then no way to remove the original boot without destroying the attaching method. Epoxy our boot directly to the bezel, taking care to place it properly.
You need to use a zip-tie make sure the top of the boot holds up against the shift lever. Flip the boot inside-out, slide it top-first onto the shifter and secure with a zip-tie. Then pull the boot down over the shifter. Doing that on an AUTO, make sure the OD wires are routed through the boot properly.
Unless you are installing the ebrake boot, you are almost done - proceed to step #7.
4. To install the ebrake boot, first remove the two screws near the radio bezel that holds the center console on. Remove the two screws inside the center console compartment that hold the compartment to the console. They are covered with rubber limiters that the armrest lid rests on.
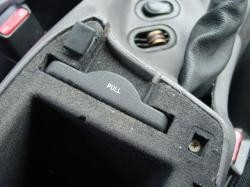
5. Remove the screws that attach the console to the floor visible after you removed the center console compartment lining (this should completely unattach the console from the floor).
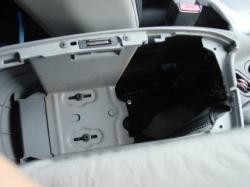
6. Pull the e-brake up as far as possible, work the existing boot over the e-brake and remove the center console.
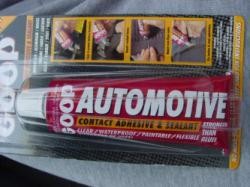
If you car is a 94-00, it did not come with a vinyl factory boot, all it has is a rubber dust guard. Remove the dust guard and install the boot instead of it. You can use the dust guard to hold the boot to the center console or remove it altogether. As for installing the e-brake boot, you might want to glue it to the center console. Use any epoxy-based glue (Automotive GOOP or a similar product) and take your time.
7. Reinstall the shifter bezel and shift knob at the very end.
ENJOY YOUR NEW LEATHER BOOTS!
Useful tip
You have installed a product made out of genuine leather. As you know, to maintain a leather product in good condition, you should take care of it. We suggest occasionally (every 4-6 week for example) applying some leather conditioner/UV protector to keep your leather from drying up in the sun and cracking.
Redline Automotive Accessories Corp. will not be held liable for any labor, incidental or consequential damages of any kind. Proceed at your own risk.