You must be logged in to rate content!
4 minute read

DOOR INSERT INSTALLATION INSTRUCTIONS 05-09 Mustang
1) Remove the insert cloth from the door panel - just pull it away starting from one of the edges - it comes off pretty easily.
Tthen remove all the foam residues - sand down the whole insert surface and make sure you do not leave any tiny piece because this will be visible under the leather and will spoil the effect.
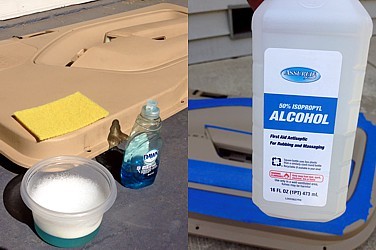
Clean the surface thoroughly with grease remover or alcohol. If your Stang did not come with any cloth/vinyl fabric on the insert, just clean the area.
2) After you achieve smooth surface you can proceed with applying the glue but first dry-fit the cover onto the panel to make sure you know how it should be laid and avoid making too much corrections when gluing. Ideally, you should try to just glue the cover without any corrections at all. Therefore you shouldn't apply the glue to the whole surface.
Useful tip: Before applying glue, protect the plastic door panel along the groove with paper masking tape so that you are not left with lots of glue residues there that you will have to spend long time cleaning once it dries.

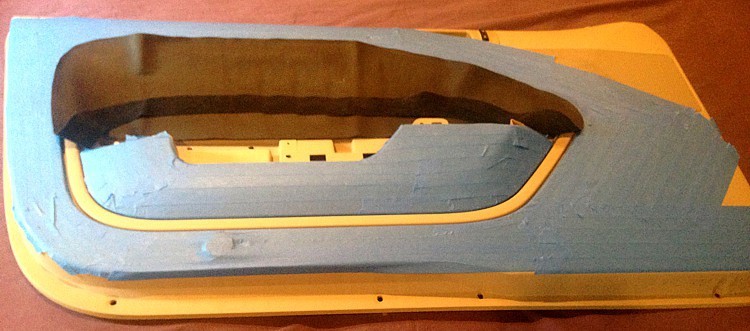
3) Now the simplest part - apply the glue gradually to the insert surface - start with rear upper part of the door panel and apply the leather to no more than 1/4 of the area of insert above the armrest - this part is especially important due to recess there, you need to follow the instructions from glue manufacturer strictly and press the leather really hard against the door panel without stretching it too much - in fact do not stretch it at all here to make sure the leather will not delaminate in the future. Once you have this area glued properly, you can proceed gradually towards the front of the door doing it in stages - applying the glue and pressing the leather.
4) Once you finish the top part you can finish the edges - apply a decent amount of glue into the groove around the insert and press the leather there - you may find a wooden kitchen paddle useful here to tuck the leather into the groove and press it to make the glue bond properly. Do not use screwdriver as it may cause damage to the leather. But before you apply the glue into the groove, dry-fit the leather to see if it needs trimming - in fact it will surely need some trimming as there is always some oversize - the leather may shrink during transportation as it experiences great temperature and dampness differences and we need to make sure that the product you will receive is not too small.
5) Once you know how to trim the leather proceed with applying glue and tucking the leather into the groove.
Repeat the same all the way with the long narrow bottom part.
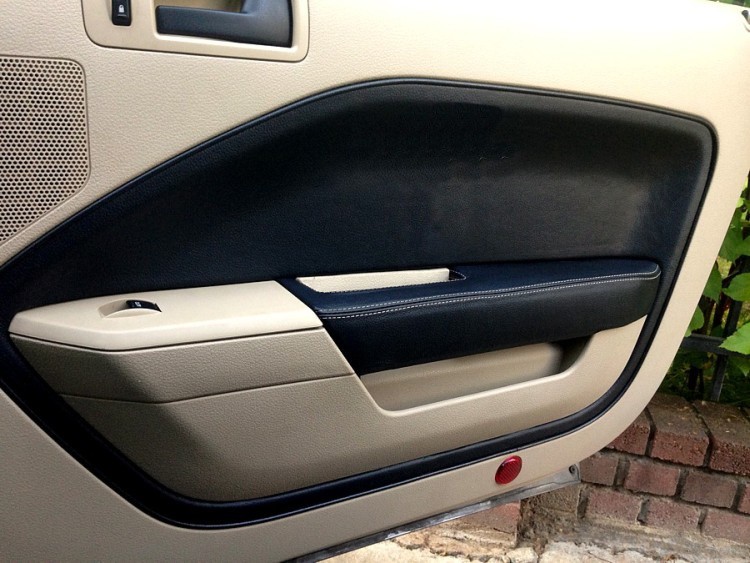
ENJOY YOUR NEW LEATHER INTERIOR UPGRADE :-)
Useful tip:
You have installed a product made out of genuine leather. As you know, to maintain a leather product in good condition, you should take care of it. We suggest occasionally (every 4-6 week for example) applying some leather conditioner/UV protector to keep your leather from drying up in the sun and cracking.
Redline Automotive Accessories Corp. will not be held liable for any labor, incidental or consequential damages of any kind. Proceed at your own risk.