You must be logged in to rate content!
8 minute read

RedlineGoods Door Insert Covers for Ford Focus ST 2011-16 - Installation
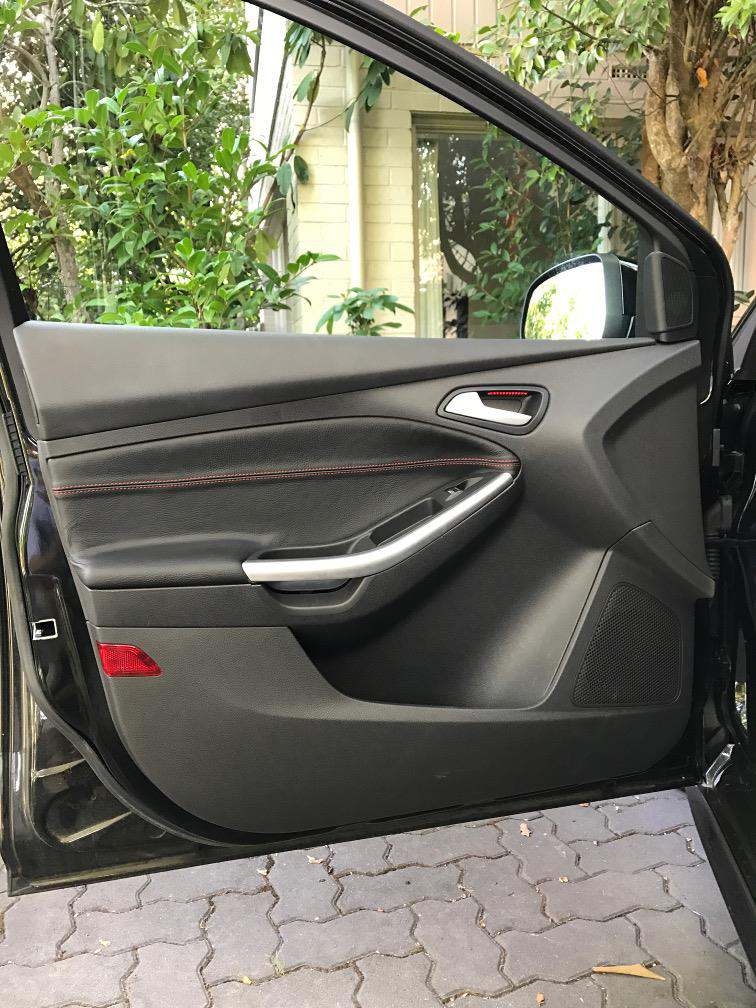
STEP 1 : Door panel removal.
Lower the window all the way before you start.
Remove the outer plastic tweeter cover [near side mirror] by pulling from the car side to the door side. Then carefully pull the inner section door side to car side; there is a cable attachment that needs to be detached. The lower of the two plastic pegs can sometimes detach and stay in car. If so remove with non scratch object and refit to tweeter mount.
Remove the plastic cap behind the inner door handle. The simplest way is a bent paper clip, small pick or finger nail from the bottom while you push the top towards the door which flares the lower part slightly. This exposes a hex screw which you remove.
Remove the elongated plastic cap from the end of the inner panel, this is above the door latch mechanism. This exposes a hex screw to remove.
Remove the red plastic light cover from bottom of door by firmly sliding it away from the car. This exposes a hex screw to remove.
Remove the chrome arm rest trim by using a non scratch thin object to pry the upper part [closest to car] away. It is difficult to do the first few times. Once it clicks out work along its length with your thin object and click the chrome trim out. The lower portion slides into a recess and the entire trim hinges out from the bottom hence starting the removal at the top. Do not pull the trim away without using a prying object, it has a tendency to bend alarmingly at the mid point and threatens to snap. Work slowly along its length.
The door controls lift upward from the outer edge [furthest from car] from a hinge point at the closest point to the car. There is a cable to remove & this exposes two hex screws to remove.
The panel is now attached by its pegs only and needs to be lifted slightly upward from the base as it is pulled outward. It requires a lot of force the first few times and will suddenly give way so be forceful but careful. It is easier to use a non scratch object to pry the panel away to get some purchase on it from beneath.
Once its detached you need to disconnect the small lighting cable feeding the interior door handle, this pulls out. It can be very difficult to do especially if you are balancing the door at the same time. Using a small screw driver to flare its housing makes it easier as you pull the clip out. There is a cable connector near the tweeter mount that needs removal, again it can be sticky and make need flaring with a screw driver as well. The door handle itself is attached by two flange clips, on the car side that you have to push in while pushing the door handle mount away from the panels interior. The door handle is hinge clipped at the door side and once it pops out push it through the panel, turn it sideways and put back through its hole freeing the door panel.
All of these steps can be found in a few different Youtube clips that can be Googled easily.
STEP 2 : Insert Removal & Leather fitment.
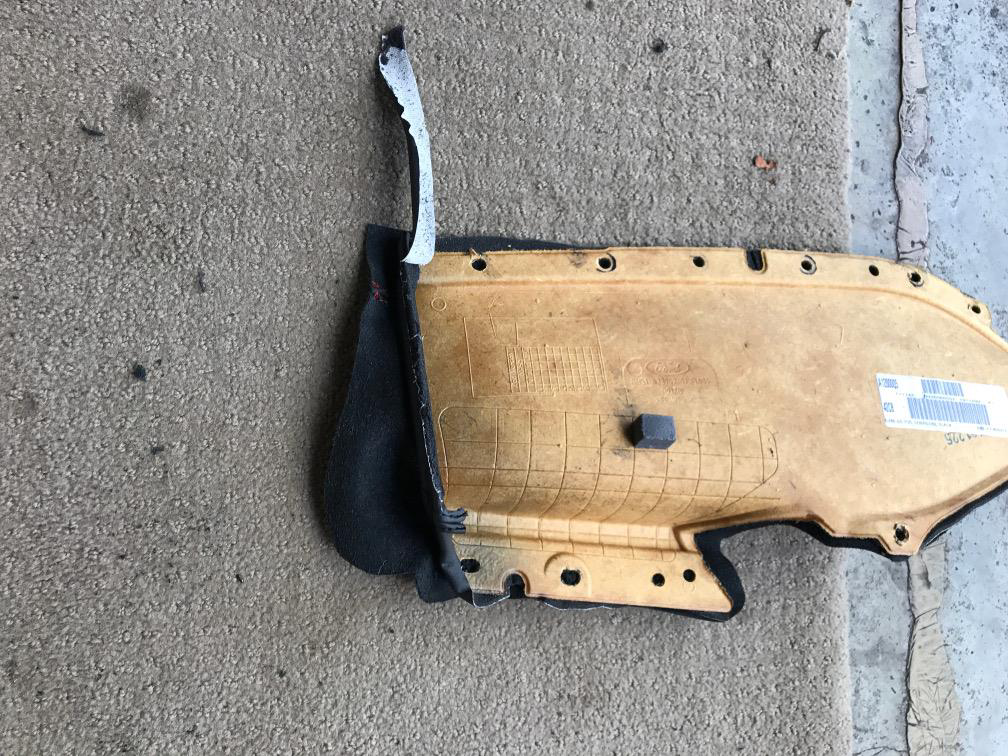
The vinyl covered insert has been spot heat sealed to the door panel. Using a drill with a sharp 8mm drill bit you break these seals by placing the bit against the heat seal and pulsing the drill for a fraction of a second. You are not trying to drill the heat seal out but rather snap it off. If it partly comes off then the process can be repeated on the remaining portion but be careful not to push downward on the drill, remember you are not drilling but rather using the point of the bit to bite into the heat seal and break it.
Once this is done the insert comes loose, it is attached by a claw clip at the far end and this is easily lifted and flicked over the inserts edge. The plastic mount for the arm rest clips over the insert beneath the claw clip, gently lift the plastic mount to free the insert.
Trim the vinyl at the edge where the claw clip attaches. Remove the foam underneath as well. With the leather, vinyl and foam the claw clip will not fit over the extra layers. Only trim it from the inserts raised 'edge', that is enough to allow for the leather.
The leather cover is glued to the vinyl, ensure there is even overlap at all edges. Given the shape of the leather and its stitching position you will end up with a 'fold' near far edge of the arm rest side, working the leather over the glue and stretching it gently helps to make the fold as small as possible.
When glue is cured, with a 6mm drill bit drill out the leather where the insert has holes, make sure you don't pinch the leather and tear it from the glued vinyl. A sharp bit at high speed works best. Trim leather holes with clippers or scissors.
Trim the leather all the way round following the existing shape of the insert. At the outer edge where the claw clip attaches leave a 10mm flap.
STEP 3 : Insert attachment.
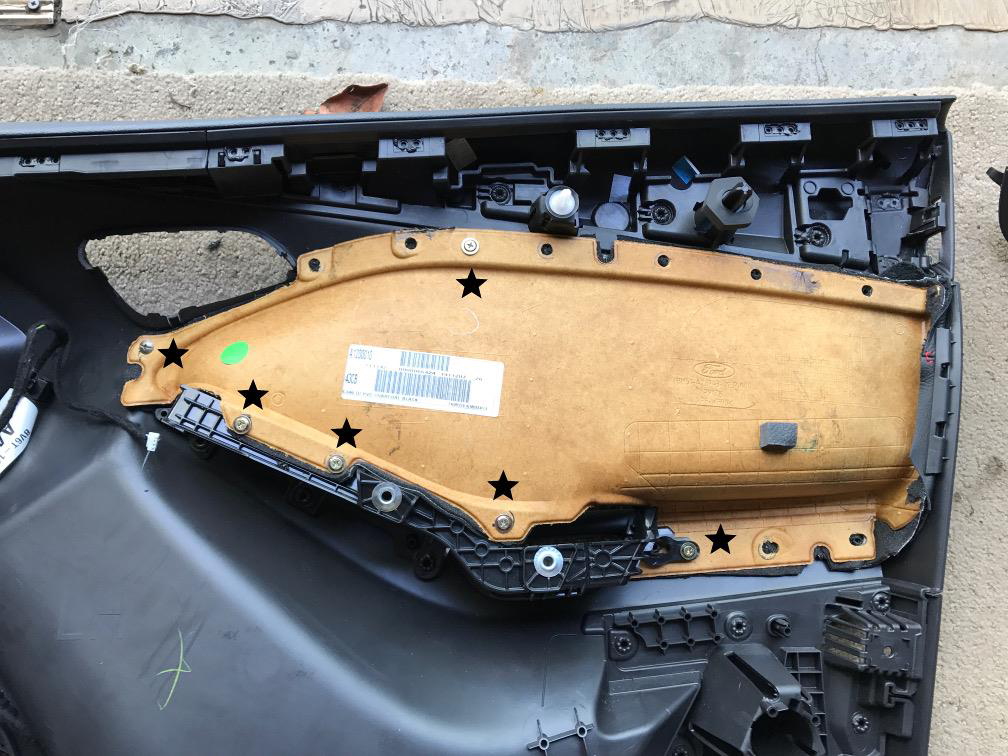
Place the insert into position folding the claw clip over the outer edge, make sure the two long plastic pegs [that look like they weren't heat sealed] are pushed through the holes in the insert. Make sure from the inner side it can be pushed into position to sit as it should. The two long pegs [on at upper edge of insert & the second near the plastic arm rest mount, below the claw clip] are to be cut level with the insert. The insert must be pushed firmly against the panel to make sure the correct height as you do this to ensure good fit. For example press the insert against the panel with a pair of pliers and cut the pegs level with a dremmel.
Using 15mm long, flat head screws [10mm diameter] hand screw into the three holes attaching the black plastic armature that mounts the arm rest. Once tight remove these, trim 5mm off the end of the screws with pliers and refit them. This prevents them scraping on the door control insert. Take 5mm off the end of 3 more screws. Hand screw the insert into the 2 pegs you trimmed; one at the top & the other at the base of the armature attachment below the claw clip. Repeat for the heat seal point at the closest hole just below the door handle hole. Be very careful to not penetrate the inner side of the panel, the 10mm trimmed down screws should not do this. Be careful not to over tighten the screws since this will break down the delicate heat seal pegs you are attaching the last 3 screws into [especially the one near the door handle].
STEP 4: Getting it together.
This basically reverses the removal process. There are only a few things to be careful &/or aware of.
Don't over tighten the screws back into the door, the plastic will break down.
When you refit the control insert there are some pegs underneath that need to line up. Make sure you start with the hinge at the car side, then push the insert gently towards the leather side, since its now thicker than before it tends to not line up correctly. Maintaining pressure towards the door push the insert into place. If you have done it correctly then there shouldn't be a large gap between the leather and the control insert and the two halves of the passenger side insert will be flush. If not remove and repeat.
If you have the insert in position correctly the chrome trim will snap into place neatly, over the top of the control insert itself. If it doesn't line up correctly, or you seem to use significant force to get the trim in place then you have not likely lined the control insert correctly.
STEP 5: Done. Congratulations!
Redline Automotive Accessories Corp. will not be held liable for any labor, incidental or consequential damages of any kind. Proceed at your own risk.