You must be logged in to rate content!
4 minute(s) of a 210 minute read
4-13-2021
I didn't realise I hadn't updated this since February! It will appear like a brief catchup of what has happened in the meantime but quite honestly it's been fiddly/tedious jobs that seem to eat time with little to show for it!
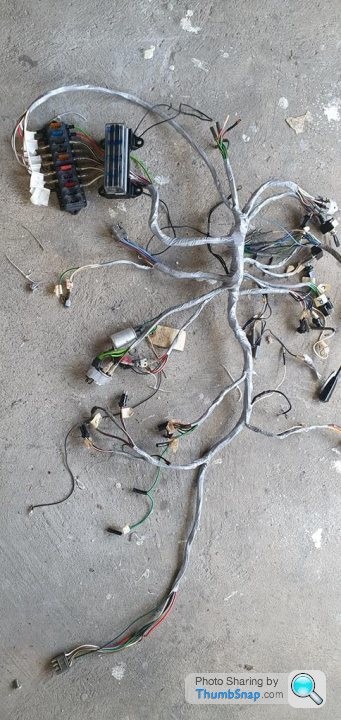
I wasn't happy with the wiring loom, I had been getting an inconsistent 12v at the coil. Whilst looking into this issue I had also found that the fuel pump would run randomly despite wired to not, this is when I found I had a bigger issue with the live feeds.
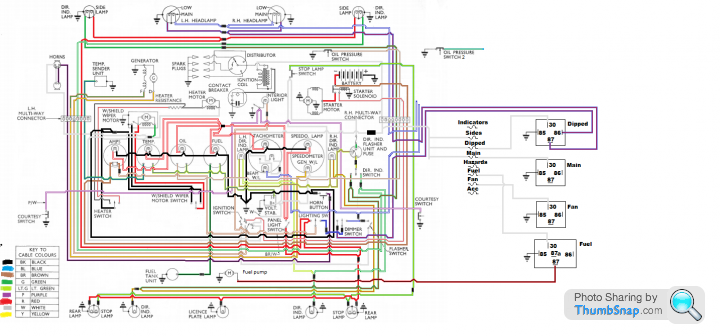
This is the original loom plus the relays I had added, I had coloured this in on paint and then broke the loom down to it's systems; engine, lighting accessories etc
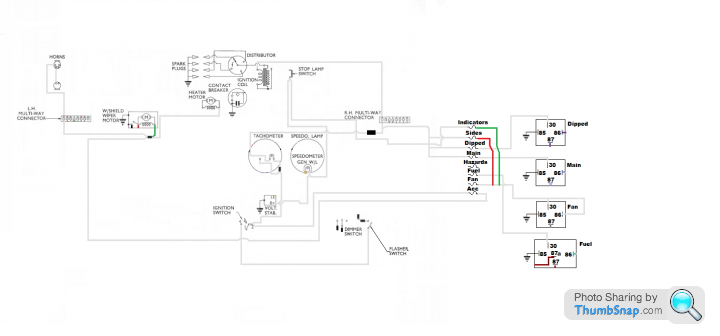
The switched lives are fed by white cable, more specifically 1 white cable that has double joints and branches that go from the ignition switch, across the dash feeding all sorts and then into the bay to power the coil on the drivers side and the horn on the passengers side - needless to say this was the issue.
I didn't like the look of the wiring for the fuse box and relays and decided to fix the issues I had and to make things look neater, after doing some research I came across a modular 12v fuse box that has various interchangeable blocks and can be built as individual items or can be mounted in a 4 or 5 bay holder.
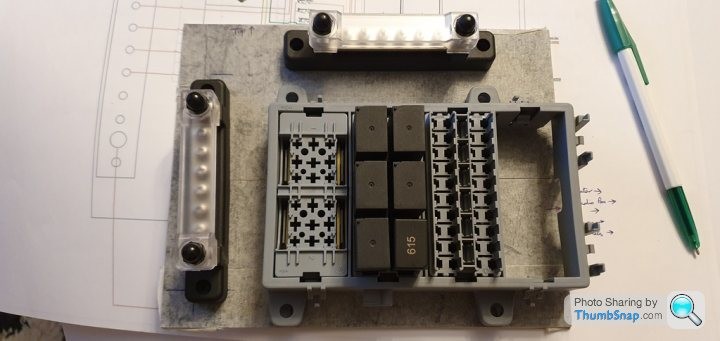

I figured as I was starting afresh I would also give myself some more room to expand and future proof; instead of the 8 fuses of the old box I now have 20 meaning everything has an individual fuse, I have 6 relays instead of the 4 - the 2 additions have been wired and would only need a feed wire running to the item but have been ear marked for fog lamps and reverse lamps, the 3rd bay is for the indicator and hazard relays as they were floating on sky hooks.
After 2 weeks of wiring in the evenings I had it finished
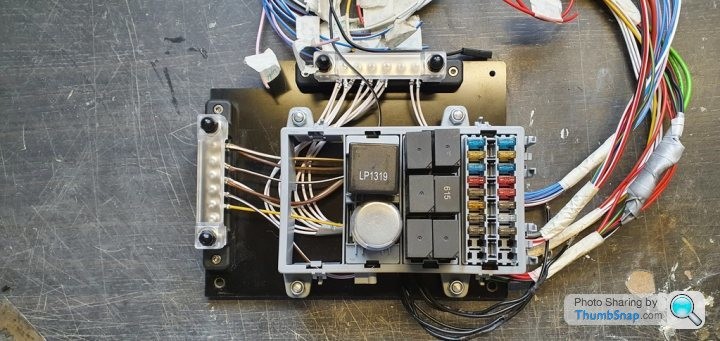
to eliminate the live feed issue the relays and components are fed via a bus bar which reduces the overall wiring and means that should I want to add anything else I don't need to break into existing wiring. the panel is 2mm fibreglass to further isolate it from the body and is plugged into the loom via 4 connector blocks; Indicators/ hazards, lighting, engine and accessories
Before
After

I'm just working on final checks now that the loom is finished and the engine is running (more on that in a moment) but it's been successful so far and looks far neater. In the middle of all that I sent the rev counter away to be repaired as it was positive earth and when the Cortina was positive earth when I first bought it it would idle at 3000rpm (the rev counter not the engine!) I'll get some photos of the dash when I've finally fitted the finished loom.
Comments
Great work mate! Loved the taillights and fins on these cortinas. Remind me of the old type 34 VWs.
Posted by MPower on 10/31/20 @ 3:15:41 AM

Thank you! I had never made that connection before, you're right!
Posted by Jim_builds on 11/16/20 @ 2:29:18 PM
Thank you Steve I appreciate the support, it feels like a lifetime since I did a lot of the work! Hopefully I'll be back on the road early next year so I can finally put some miles on her.
Posted by Jim_builds on 10/26/20 @ 12:08:47 PM
Beautiful Cortina! Looks like a lot of work but you did a bang up job! Glad you saved this one!
Posted by stevegolf on 10/22/20 @ 11:06:39 PM
Thanks for all the photos! Such a cool car!
Posted by Diggymart on 11/12/23 @ 10:55:36 PM