You must be logged in to rate content!
7 minute read

FIESTA ST SHIFT BOOT INSTALLATION
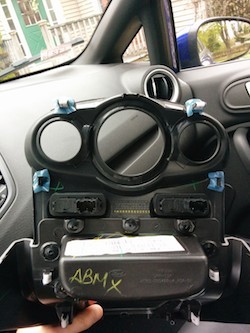
1. Start by prying up the locations marked A on the image. You should be able to use your fingers and are pulling up on the lighter textured part of the cover. Once those clips are released, continue to the location marked B. The upper section to be removed next is the darker slick plastic.
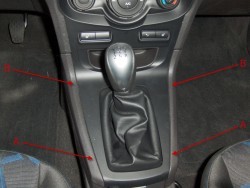
2. Continue prying up the cover at locations C, D, then E. There will be electrical connectors at location F if you have heated seats or ambient lighting.
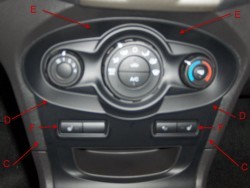
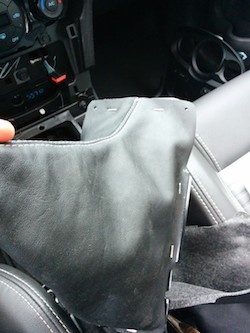
3. For reference, here is the back of the cover, with the clips and electric connectors.
4. The connectors will have to be removed before the cover can come all the way off.
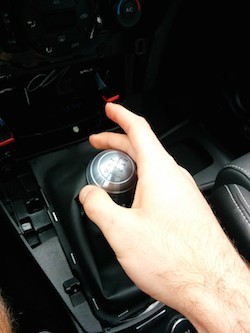
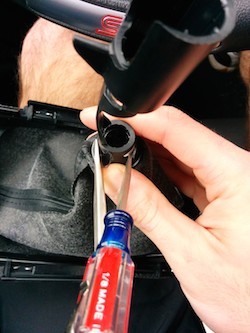
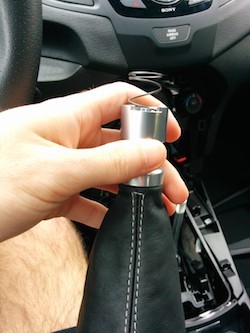
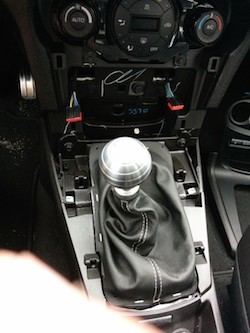
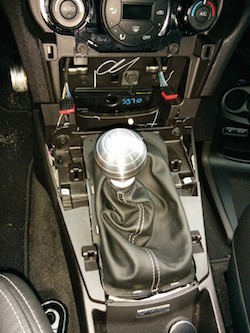
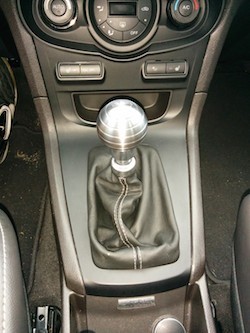
5. Unscrew the shift knob.
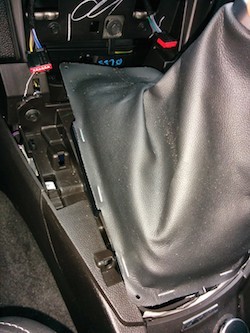
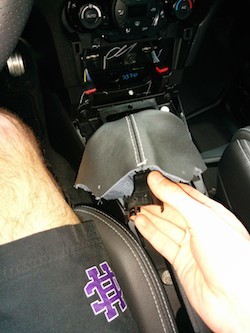
6. Lift the shift boot of the console with the reverse lockout still attached. Before doing so, take note of the position of the black piece and how it functions as a lockout. The part that extends down and to the left must be on the drivers side of the car when reinstalled on the new boot.
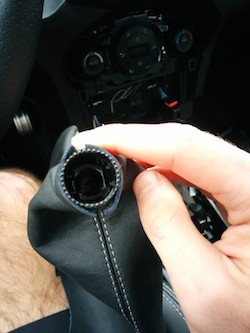
7. Flip the boot inside out so that the reverse lockout can be removed from the boot.
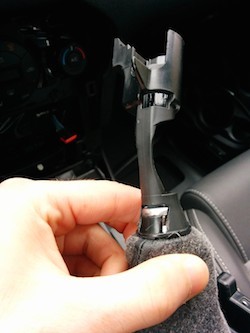
8. Use two flathead screwdrivers to hold open each of the two black clips on the reverse lockout. Then, pull the silver piece free of the black piece to separate the two pieces.
9. Hold the shift boot as if you were to install it, with the longer side of the base facing the front of the car. In order for the reverse lockout to work properly, you need to make sure that the black plastic part that extends down and to the left must be facing the drivers side of the car (as noted in Step 6). You will notice if you did this wrong once everything is reinstalled.
10. Slide the black piece up under the new shift boot, so that the top of the black piece sits flush with the top of the shift boot, as pictured. You can use a very small dot of super glue between the boot and the black piece in order to hold the boot and the black piece flush and properly aligned. Only use one very small dot so that the boot and black piece can be separated just in case of an error.
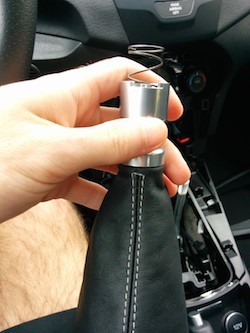
11. Once the black piece is properly lined up in relation to the new shift boot (and any glue used is dry), insert the silver piece into the black plastic piece. The very top of the silver piece (the piece that will go up into the shift knob when reverse is engaged) has two small notches. These notches must face the rear of the car, as pictured, in order to clip properly into the black piece. You will notice if you did this wrong once everything is reinstalled. Make sure that the top of the boot is fitting inside the silver piece, but still around the outside of the black piece.
12. Push the two pieces together so that you hear and feel the silver piece clip back into the black piece. It may take some force to clip the pieces together but it will work. You can also carefully flip the boot inside out and push the clips inwards with a screwdriver until they clip.
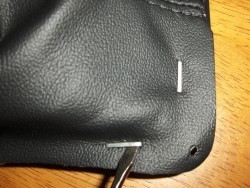
13.Remove the staples from the base frame attached to the old shift boot by straightening them out and pulling them from the top using needle nose pliers like this:
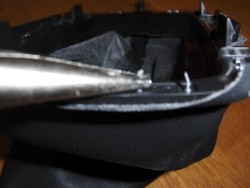
14. And this:
15. You can install the new boot onto the frame by lining the frame with super glue or by stapling the boot to the frame using the factory staple locations. I used small spring clips to hold the boot in place while stapling the boot on the frame.
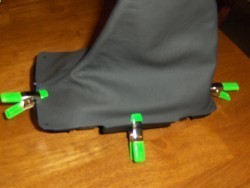
16. Pictured is the boot restapled:
17. Guide the black piece onto the shift stick and slide the reverse lockout assembly back onto the stick so that the top of the stick protrudes through the silver piece.

18. Screw the shift knob all the way back on to the stick. Make sure the reverse lockout still functions properly. Here you will be able to tell if you properly followed steps 9 and 11. If the reverse lockout is not working properly, revisit steps 9-11.
19. Push the frame down into place. There are notches to align it.
20. Set the console cover back on top of the console and reconnect the wires.
21. Push the cover back into the clips, starting with the upper portion at the heater controls, then moving to the lower portion over the boot.
ENJOY YOUR NEW LEATHER BOOTS!
Useful tip
You have installed a product made out of genuine leather. As you know, to maintain a leather product in good condition, you should take care of it. We suggest occasionally (every 4-6 week for example) applying some leather conditioner/UV protector to keep your leather from drying up in the sun and cracking.
Redline Automotive Accessories Corp. will not be held liable for any labor, incidental or consequential damages of any kind. Proceed at your own risk.