You must be logged in to rate content!
4 minute read

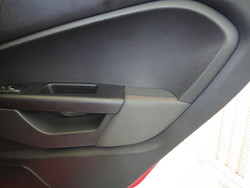
REAR DOOR ARMRESTS Fiesta 11-19
1. Remove trim cap inside door release.
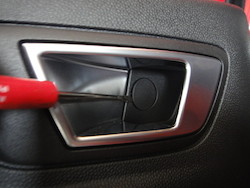
2. Remove the screw located under the cap.
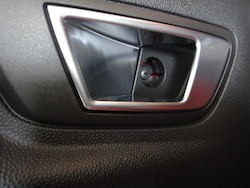
3. Remove the two screws below the door pull.
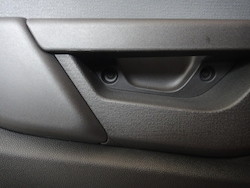
4. Pop off the door panel.
5. Disconnect the electrical connector for the window swtich.
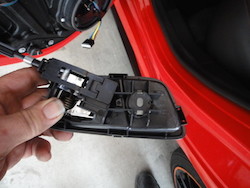
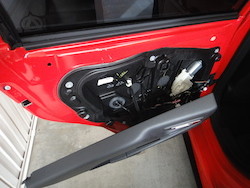
6. The door release assembly pushes from inside the door panel then turn and push back through the door panel. There is no need to remove the release cable.

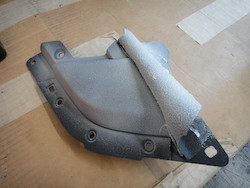
7. Place door panel on work bench and fold back the white insolation.
You will require tools to remove the melted tops of the plastic post retainers holding the arm rest in place. I used a rasp and a sanding disk both can be used with an electric drill. In addition you will need a utility knife.
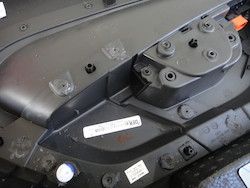
8. Remove the melted tops of the plastic posts. Be VERY CARFUL not to remove any of the plastic post below the level of the arm rest.
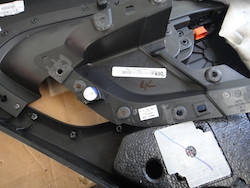
9. Pop the arm rest up and remove.
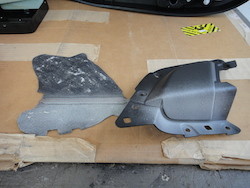
10. After test fitting the new leather cover. Use spray adhesive to attach it to the arm rest. I suggest you first work with only half of the cover. It is easier to get the correct placement this way and minor adjustments can be made. Working from the seam line you can smooth the leather down.
11. Next add spray achieve for the rest of the cover.
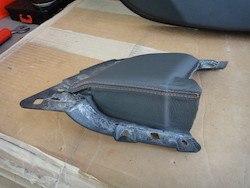
12. Working from the seam line you can smooth the leather down. Because of the very tight fit you will want to trim the leather from around the mounting area. Do cut directly in the corners so that edges are not exposed when assembly is finished.
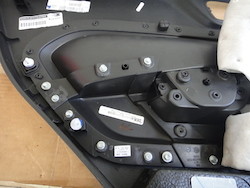
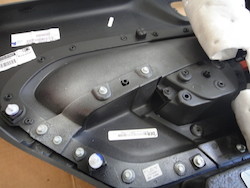
13. Here is the tricky part. There are no screws available that are the correct size. You will need to cut them. A bench grinder works great for this as you can also deburr the tip, do not sharpen to a point.
A #12 x 3/4 inch driller screw works well for this, you need to cut them to 3/8 inch. Additionally you can use washers under the head if needed. The important thing here is not to let the screw poke through door panel.
Install the arm rest back into the door panel using the cut screws. The screws go into the same posts you cut the tops off earlier. Reinstall the door panel back onto the car. Reverse removal steps for reinstallation.
14. A little spray adhesive to reattach the insulation.
ENJOY!!
Useful tip
You have installed a product made out of genuine leather. As you know, to maintain a leather product in good condition, you should take care of it. We suggest occasionally (every 4-6 week for example) applying some leather conditioner/UV protector to keep your leather from drying up in the sun and cracking.
Redline Automotive Accessories Corp. will not be held liable for any labor, incidental or consequential damages of any kind. Proceed at your own risk.