You must be logged in to rate content!
6 minute read

95-97 FORD CONTOUR/MONDEO SHIFT BOOT INSTALLATION INSTRUCTIONS
1. First unscrew the shift knob to take the shift boot out.
2. With an x-acto knife or scissors cut the zip tie at the top of the shift boot.
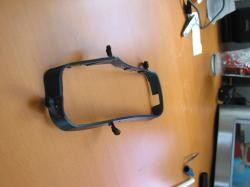
3. Carefully pry along the trim along the edges of the boot to take it off, you can either use your hands (which I did) or a screw driver with towel wrapped around it.
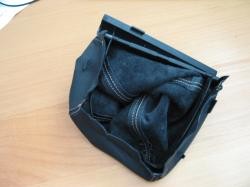
4. Now that the shift boot and its trim are out look inside it and you will see staples holding the boot to the plastic trim piece. Using a small screwdriver carefully take out each staple until the boot is out.
5. To install the shift boot you must first wedge the boot in the front section of the trim. I found out that 2 plastic cards work the best for this. Just wedge the plastic cards with the shift boot to get it in to the trim.
6. After that's done make sure the stitches line up at the corners and put the smaller trim ring on the shift boot.
7. Now its only a matter of stapling the shift boot to the trim rings. I used heavy duty staples and just took my time and pressed them in. You could also drill a hole in the plastic trim pieces and use pop rivets to secure the boot.
8. The center console must come out to install the e-brake boot so, we have to take out the 3 screws in the centre console compartment, 2 screws which are on both sides of the center console towards the front (these screws have caps on them, to take off the caps carefully pry with a small screw driver until they pop out), lastly there are 2 screws which are hidden and to get to these screws you would have to take out the compartment under the radio and the little trim piece above that. The 2 screws are hidden behind the trim piece between the radio and the compartment that's under the radio.
9. Now that all the screws are out disconnect the 2 wires going to the cigarette lighter and make sure there isn't anything else connected to the center console.
10. Carefully take out the center console out the car (takes a little patience)
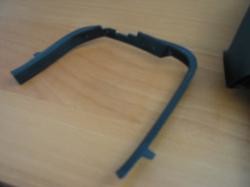
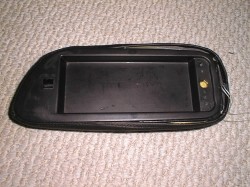
11. Now flip the center console and you will see how the e-brake boot is attached. There are 5 tabs which are melted on, to take them off I used a flat head screw driver and a torch, heat the screw driver and place it in the middle of the tabs and gently wiggle the piece off it. Once you free the 5 trim pieces from the center console you can just pull it right out along with the shift boot.
12. Now you will see that there are a couple of staples. Take off the staples using a screw driver or similar and take the boot off the trim piece.
13. Once the boot is on using a regular stapler staple the boot to the piece, its important that you staple through the existing holes in the plastic to make your life easier.
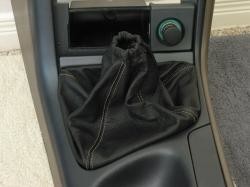
14. Now its time to put the trim and the boot on the center console. First line up the trim piece with the tabs in the center console, then take your heated screw driver and melt the tabs to the trim piece and now sit back and enjoy your new e-brake boot.
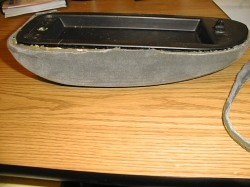
15. Remove the armrest from the console by unscrewing it from the hinge.
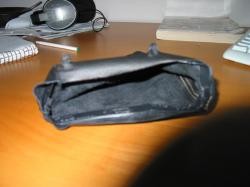
16. The cover is held in place by a string that is tightened around the armrest base. You need to pry the string out to cut it to remove the cover. Do this by placing a flathead screw driver in the groove and gently pry back the cover with the screw driver.(See Pic) Once the string is exposed cut it.

17. Cut off the edge of the old cover that goes into the groove off. Roughly 1/2 inch.
18. Now place the new cover over the old one. Start with the front and slowly work the edge into the groove til you get all the way to the back. (See Pic) You will want to leave the back area out of the groove so you can tighten the string easier in the next step.
19. Once the edge is in place you will use the string to tighten the cover onto the armrest. Once the string is tight and the cover is where you want it tie a knot with the string to hold everything in place. Once the knot it tied and the extra string remove then place the back area of the cover into the groove.
20. Reattach the armrest to the hinge on the console.
Useful tip
You have installed a product made out of genuine leather. As you know, to maintain a leather product in good condition, you should take care of it. We suggest occasionally (every 4-6 week for example) applying some leather conditioner/UV protector to keep your leather from drying up in the sun and cracking.
Redline Automotive Accessories Corp. will not be held liable for any labor, incidental or consequential damages of any kind. Proceed at your own risk.