You must be logged in to rate content!
6 minute read

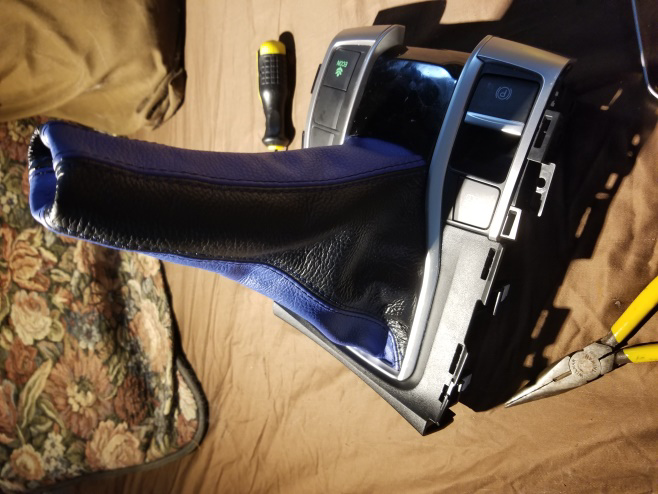
RedlineGoods Honda Civic 2016+ shift boot installation
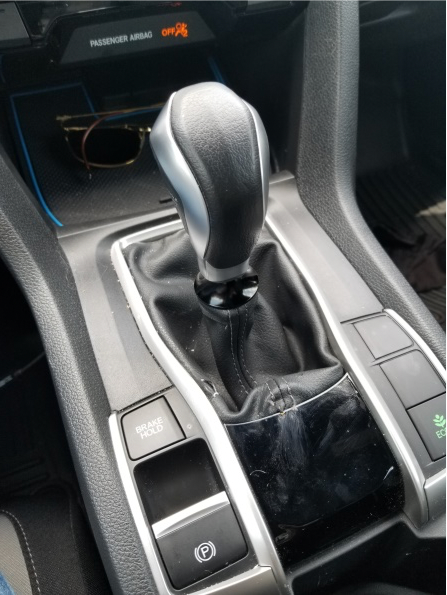
First you need to remove the shifter boot with a screw driver (usually just pops off) then you can remove the knob, most just screw off.
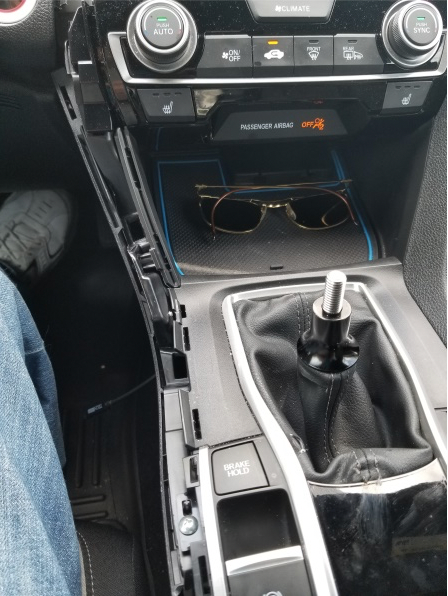
Then use a screwdriver, or plastic pry tool, to get the two side pieces off. Start at the bottom by the parking brake and pop the clips upward, be especially careful on the top clips by the climate control (They are at an angle) – when replacing side pieces start at the top and pop the clips in)
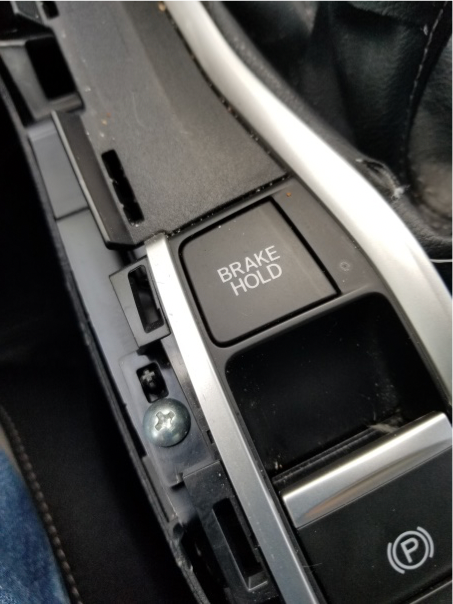
There are two screws on either side under the brackets you removed, remove them, then take a pry tool and start at the bottom to begin popping loose the clips that hold the center piece in.
Redline Automotive Accessories Corp. will not be held liable for any labor, incidental or consequential damages of any kind. Proceed at your own risk.
RedlineGoods.com – All rights reserved. Use for advertising competing products will be prosecuted.
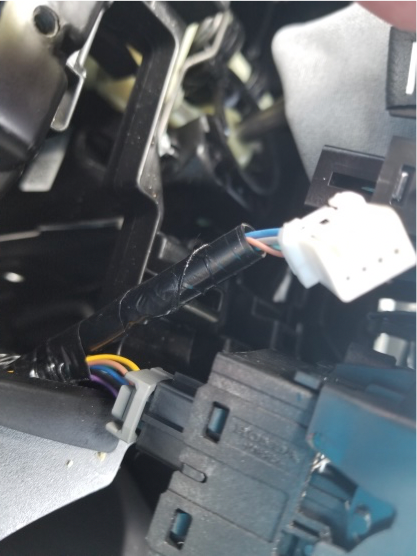
Once you get the center piece free, you will need to disconnect the electrical plugs, 2 on the left side, and 1 on the right side. Each plug has a small tab that you push in to release it. Then you should be able to pull the whole assembly off, if you have an aftermarket spacer like I have you will have to cut the zip tie attaching your shift boot to it.
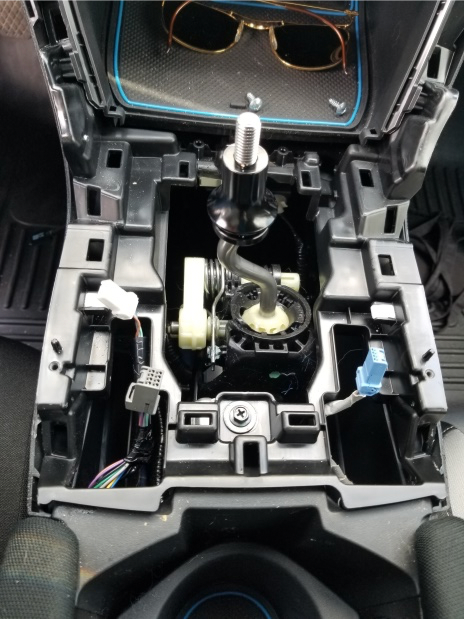
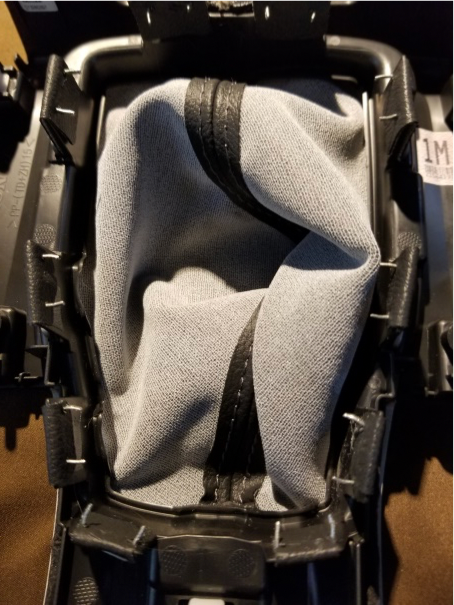
You should now have the center piece free so you can work on removing the shift boot.
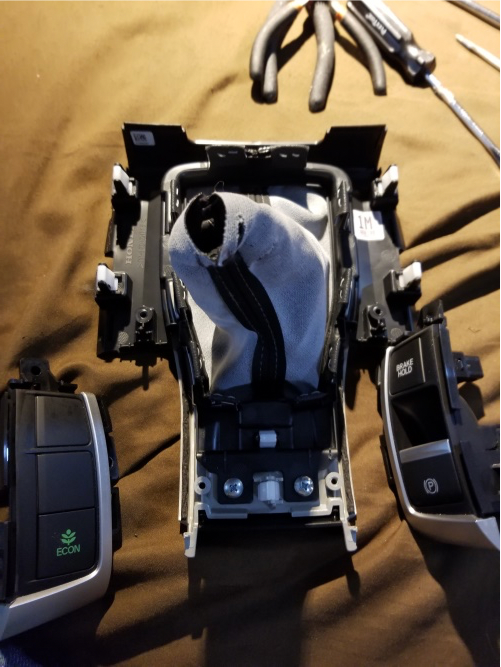
Next you will need to remove the electronic switches from the shift boot assembly – there are two screws holding each one on so remove the four screws to get them loose from the assembly.
Redline Automotive Accessories Corp. will not be held liable for any labor, incidental or consequential damages of any kind. Proceed at your own risk.
RedlineGoods.com – All rights reserved. Use for advertising competing products will be prosecuted.
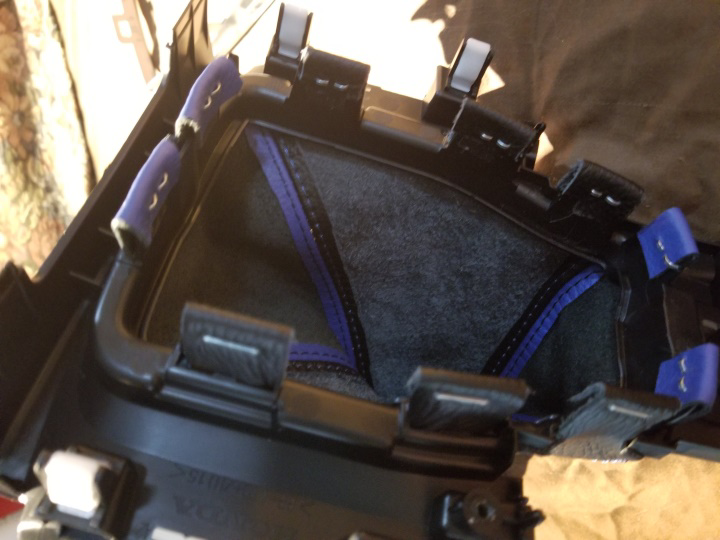
Now that you ready to start to remove the shift boot. You will see that there are 10 tabs ( 3 on each side and 2 on the top and the bottom) that are stapled to hold the shift boot in place. You can use a small screwdriver or a pair of needle nose pliers to pry up the ends of the staples.
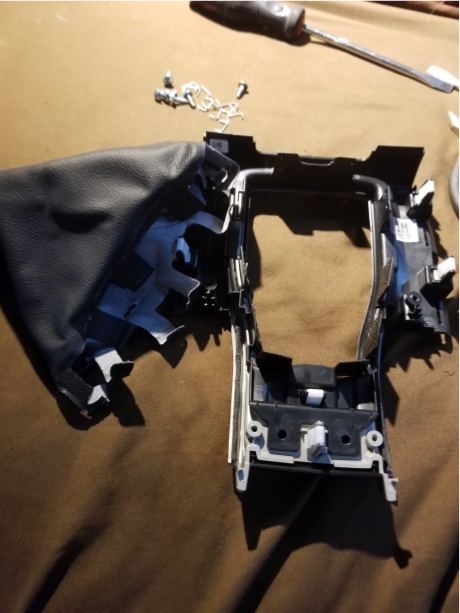
Go around to all 10 staples prying up the ends, then you can remove them. After removing all the staples, you will find a small bit of adhesive holding the tabs in place, pull them away from the adhesive, then you should be able to pull the shift boot out of the assembly.
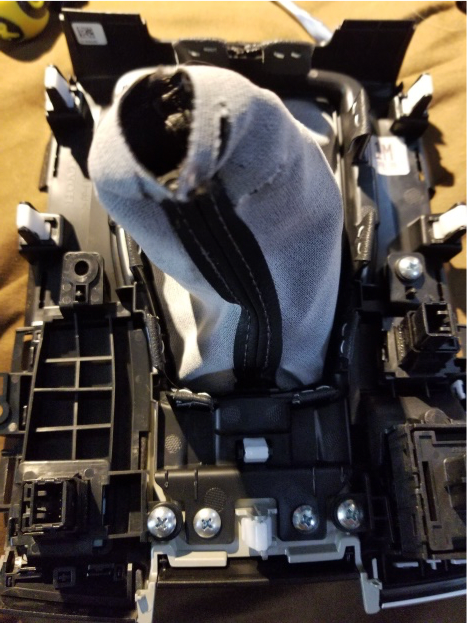
Then you should remove the two remaining screws at the bottom of the assembly, this will allow you to pop loose the silver retaining bracket around the shift boot (be very careful when doing this because this piece is very fragile), it will need to be removed so that you can install the new shift boot.
Redline Automotive Accessories Corp. will not be held liable for any labor, incidental or consequential damages of any kind. Proceed at your own risk.
RedlineGoods.com – All rights reserved. Use for advertising competing products will be prosecuted.
Redline Automotive Accessories Corp. will not be held liable for any labor, incidental or consequential damages of any kind. Proceed at your own risk.
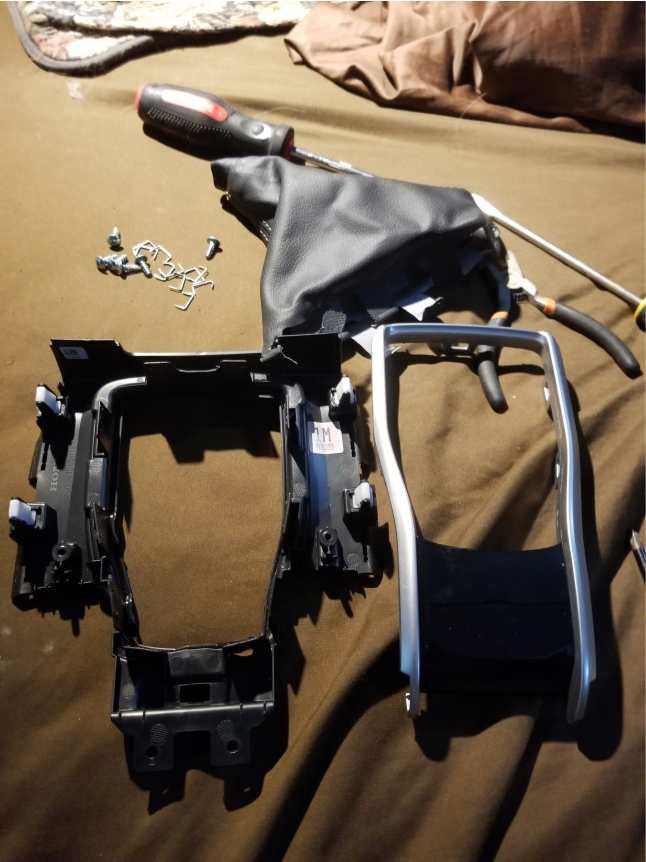
This is how everything should look once it is disassembled, you will now be ready to install your new shift boot.
RedlineGoods.com – All rights reserved. Use for advertising competing products will be prosecuted.
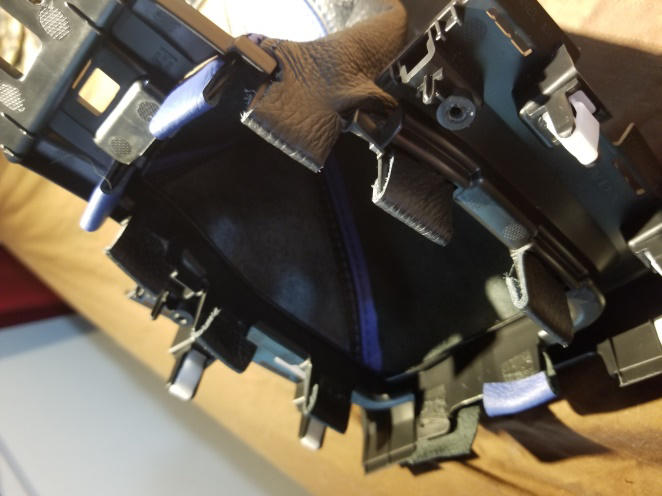
Pull the tabs on your new custom shift boot through the slots – You can use glue or double- sided tape to hold them in place.
Before stapling and permanently attaching the boot, make sure that you work the silver retaining clip into place ( you may need to use some Petroleum Jelly to clip it into place because it is a tight fit).
Now you can go around and staple the 10 tabs into place to secure the shift boot – you will have to use a somewhat heavy duty stapler for this to go through the leather and plastic tabs.
Redline Automotive Accessories Corp. will not be held liable for any labor, incidental or consequential damages of any kind. Proceed at your own risk.
RedlineGoods.com – All rights reserved. Use for advertising competing products will be prosecuted.

Reassemble your dash, you will need to attach the shift boot to the shift knob you are using – mine had a nut that used a zip tie to secure it to the shifter. You may have to spin the entire assembly, with your shift knob, onto the shifter rod before reassembling your dash panel.
Redline Automotive Accessories Corp. will not be held liable for any labor, incidental or consequential damages of any kind. Proceed at your own risk.