You must be logged in to rate content!
4 minute read

92-96 HONDA PRELUDE SHIFT BOOT/E-BRAKE INSTALLATION INSTRUCTIONS
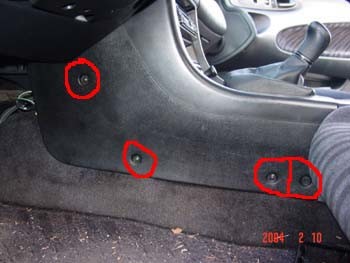
1. First remove the 4 screws on each sides of the console.
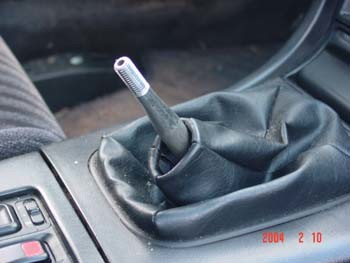
2. Next, remove the shifter boot from the knob. This is done simply by pulling it down. Next step – remove the knob by unscrewing it.
3. You should be able to remove this section of the console now.
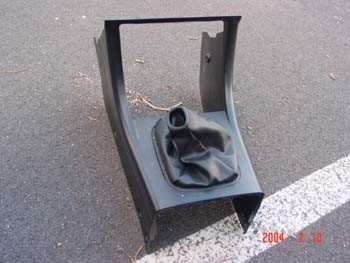
4. Next we want to take apart the shifter boot area. This is simply done by flipping the piece over and removing the two screws.

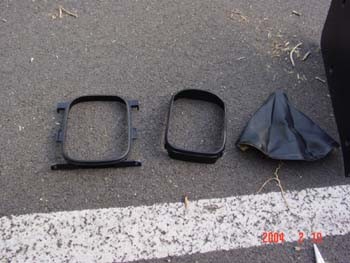
5. Next you want to separate the two pieces, they are stapled in at the factory. This is where I used the mini ice pick tool. It came in very handy. Use the needle nose pliers to pull out the staples. Then it should fall into three pieces.
Now install the new leather boot in place of the old one. Proceed slowly, line it up against the plastic carefully and make sure to re-insert the staples (or replace them with small bits of wire ran through the holes and twisted together) to hold the construction as you proceed (you will need to punch little holes in the leather boot). Then take a rubber band and wrap it around the boot and knob to hold the boot securely to the knob and to keep the unfinished ends from popping up. This part gets tricky, because you have to screw your knob on to the shifter. Then you have to take the shifter console and put that back on. Once you get that done you are ready to move on. The hardest part is over now.
6. Now to the easy part, the e-brake boot install.
If you are smart you will do the e-brake boot while you have the shifter console out. You may want to remove your seats to have easier access, depending on what you want to do.
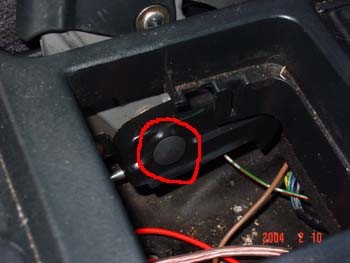
Remove your cup holder. You need to get to that plastic clip right there. On the picture, the old boot is already off. Your boot should be wrapped around that clip. Much like a carpet clip.
7. Once that is done just slide off the old boot.
I chose to take out my console to have more working room. You may not have to, but it came in handy for me. There are four screws near the back of the console that will need to be removed. Two are easy to get to and the other two are not, unless you remove the seats. This is where the bent screw driver comes in handy, a long one may work, but a short stubby one will not.
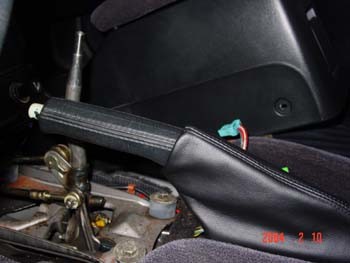
I turned the boot inside out and used the rubber band trick.
8. Next step is to turn the boot right side out. Then reassemble your console. The finished product should look like this.
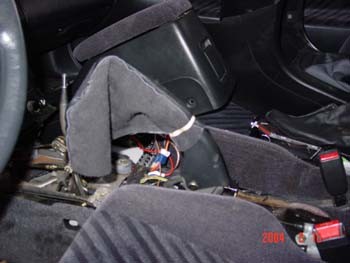
9. Here is another picture with the console back in the car.
