You must be logged in to rate content!
7 minute read

98-02 HONDA ACCORD COUPE DOOR PANEL AND ARMREST INSTALLATION INSTRUCTIONS
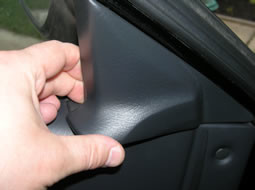
1. Remove the door panel. Remove the mirror garnish. It is held in place with two clips.
If you are familiar with removing the door panel, skip to Step #12.
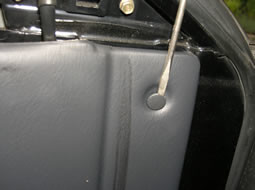
2. Remove the clip under the mirror garnish.
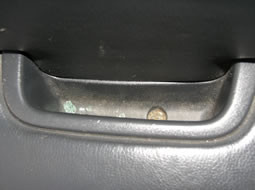
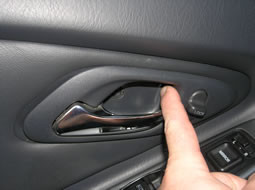
3. Remove the screw in the door pull.
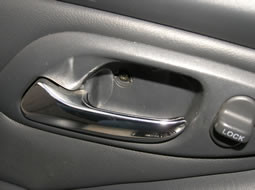
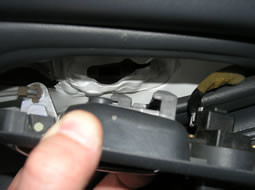
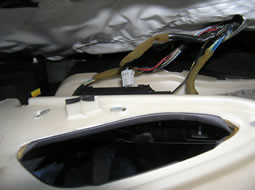
4. Open the screw cover behind the door handle. Remove the screw.
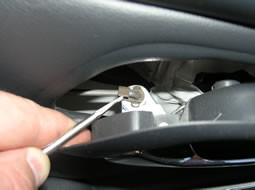
5. Push the door handle to the front of the vehicle.
6. It is now possible to pull the door handle away from the door. Unplug the connector behind the door lock button.
7. Push the clip holding onto the door latch rod. The clip rotates; rotate out of the way and lift the latch rod out.
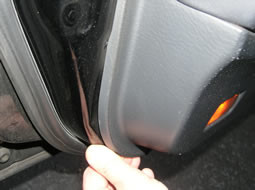
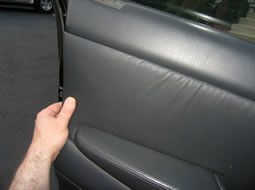
8. The door panel is held in place with 10 clips around the side and bottom edges. Pull out all clips. I find it easier to start on the front side and work my way around. It is not necessary to use a door puller.
10. On both doors, remove the door light from the panel. On the driver's side door for cars with factory security, unplug the security status light (near the door lock).
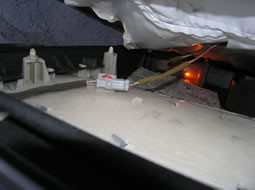
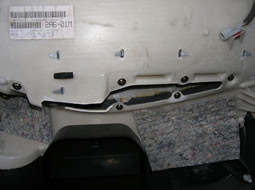
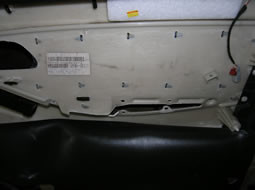
11. Lift the door panel off the door.
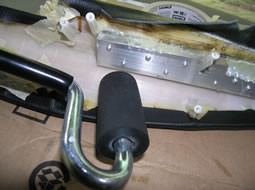
12. Remove the armrest from the door by unscrewing the seven screws holding the armrest on the door panel.
If you are only replacing the door insert covering, you can skip to Step #20 at this point.
13. Remove the door pull from the armrest.
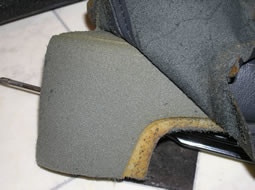
14. Remove the old material from the armrest.
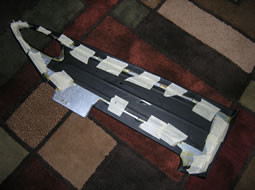
15. Temporarily tape down the leather on the armrest. You can make adjustments, as needed, at this point. Once you start gluing down, adjustments will be more difficult.
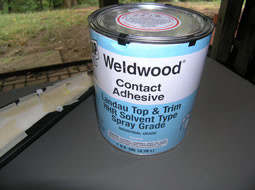
16. I used Weldwood HHR (High Heat Resistant) contact cement. It is intended to be sprayed but can be brushed easily enough. You can probably use web spray cement (spray can), too, but considering only the edge is being glued, I decided to brush the cement.

17. Remove the tape you used to hold the leather one section at a time and glue down each section. Whether you're using spray or brush, the concept is the same. Apply cement to both the leather and the insert. Wait until dry, pull tight and press to lock in place.
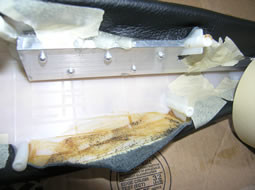
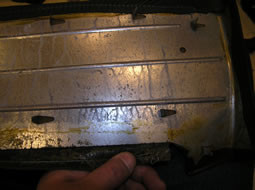
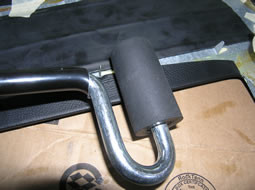
Ignore the aluminum brace; your armest will not have this. My armrest was cracking so I reinforced it with aluminum before putting on the new leather.
18. Use a roller to ensure a good joint. Continue around the armrest until complete.
19. Finished gluing.
If you are also replacing the material on the insert, continue to the next step.
If you are only replacing the material on the armrest, you can skip to Step #26.

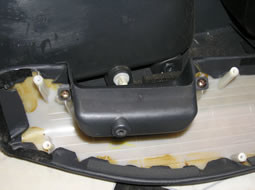
20. Remove the insert from the door panel. This is accomplished by carefully bending the tabs.

21. Remove the old material from the insert.
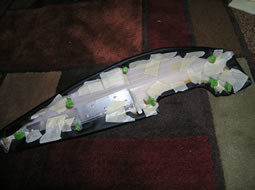
22. Temporarily tape down the leather on the insert. You can make adjustments, as needed, at this point. Once you start gluing down, adjustments will be more difficult.
24. Remove the tape you used to hold the leather one section at a time and glue down each section. Whether you're using spray or brush, the concept is the same. Apply cement to both the leather and the insert. Wait until dry, pull tight and press to lock in place. Use a roller to ensure a good joint. Continue around the insert until complete.
25. Finished gluing; onto reattaching the insert to the door panel.

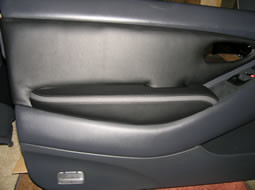
27. Better than from the factory!
Powered by Froala Editor
Nice DIY!
Posted by Diggymart on 3/19/23 @ 2:37:02 PM