- Upholstery spray adhesive (designed for high temperatures) Rubbing alcohol
- Lint-free cloth
- Sharp razor blade
You must be logged in to rate content!
6 minute read

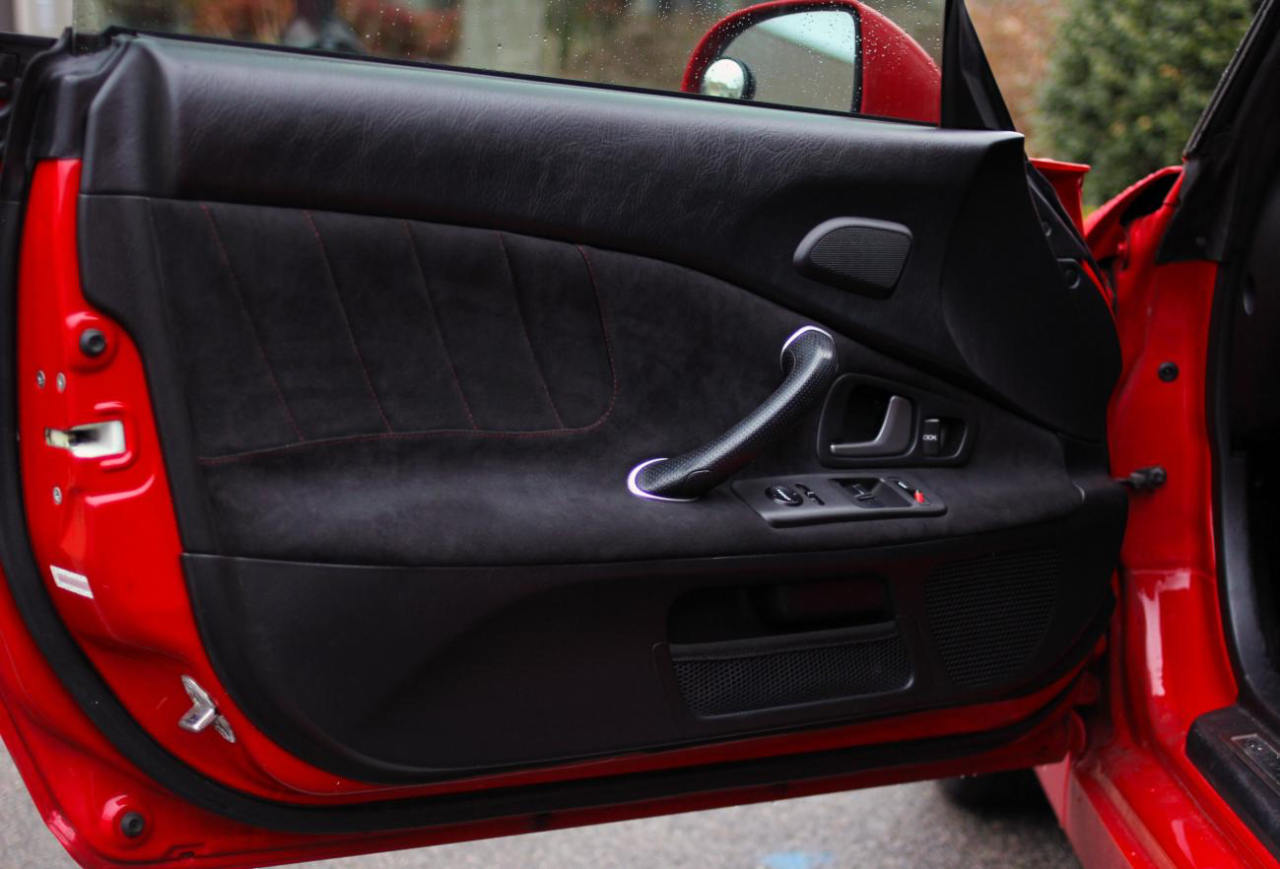
DIY S2000 Door Card Upholstery Installation
While it may seem difficult, this is actually a simple process provided you think it through and take your time. Remember to test fit before you apply adhesive, to work in sections from back to front, and you will be fine.
Step 1: Clean the door card surface – Using your rubbing alcohol and lint-free cloth, clean the entire surface of your door card OEM leather to provide a dirt and oil-free bonding surface for the upholstery adhesive. I used standard Isopropyl rubbing alcohol which can be found at your local drug store (Figure 1).
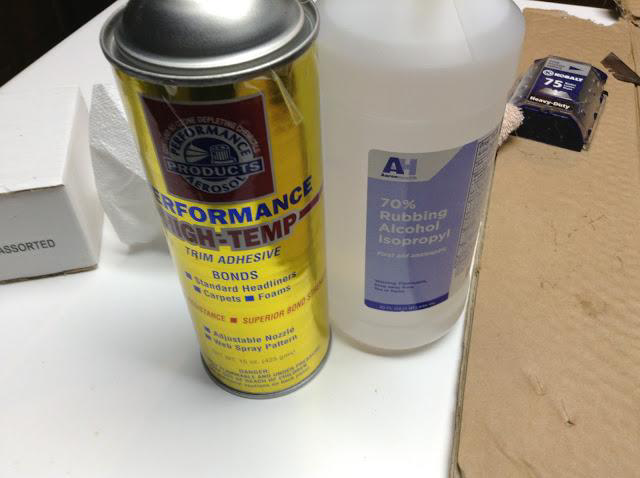
Figure 1 – You need an auto upholstery glue that is designed to withstand high temperatures that your interior is subjected to during summer months
Step 2: Gluing the fabric – Before you start to glue your new fabric onto the door card, you want to make sure it is properly aligned. The best way to do this is to place the fabric over the door card such that the fashion stitching lines up perfectly over top the OEM stitching. Then, use tape or clamps to hold the front half of the fabric in place. Verify that you have everything in the correct position, then fold the back half over the front so you can apply adhesive to both surfaces.
Tip: To avoid accidentally spraying the good side of your fabric with glue, use a large sheet of paper as a block as shown in Figure 2 below.
Now, spray an even coat of adhesive to both the door card AND the back side of your new fabric. It’s CRITICAL that you get good coverage but don’t over-saturate the surface (especially if you are working with Alcantara – if you spray Alcantara backing “wet,” the adhesive WILL soak through onto the good side. BE CAREFUL!)
Allow the adhesive to dry to a tacky touch as instructed by your particular adhesive product’s directions. When ready, fold the back half of your upholstery fabric over and press it to the door card, working your way back, taking care not to cause any wrinkles in the fabric.
Once in place keep applying some pressure (especially in the most curved areas) while the adhesive forms its initial bond. Do your best to press and glue the fabric onto the outside edges of the door card’s OEM covering. You will take care of the excess fabric later.
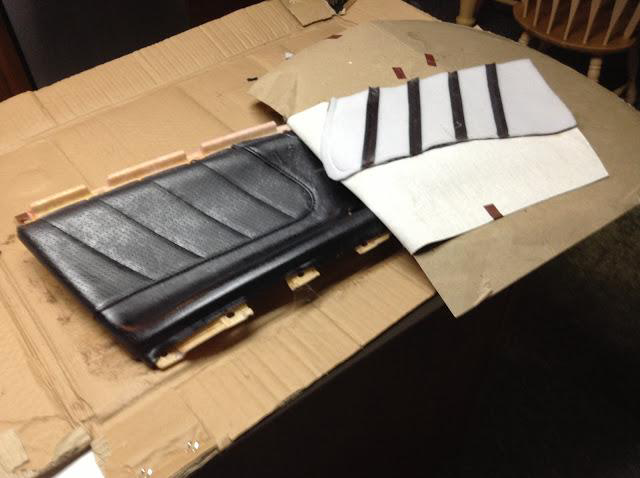
Figure 2 – Note the cardboard sheet I used to protect the “good” side of the fabric from overspray
Step 3: Gluing the front-half of the fabric – Once the rear half has been glued, move on to the front. The process is the same as before but there are a few more complex curves to deal with. Also, the cutouts for the door handle, door latch, and window controls are not cut out of the fabric. You need to make sure to press the fabric securely around the OEM cutouts. In a later step, you will make cutouts in the fabric so all of the door attachments can be reinstalled.
Referencing Figure 3 below, you’ll see the process is exactly the same as before. Test fit before you glue so you know how you’re going to have to work the fabric. If you wish, you can break the front into two sections, but you don’t have to.
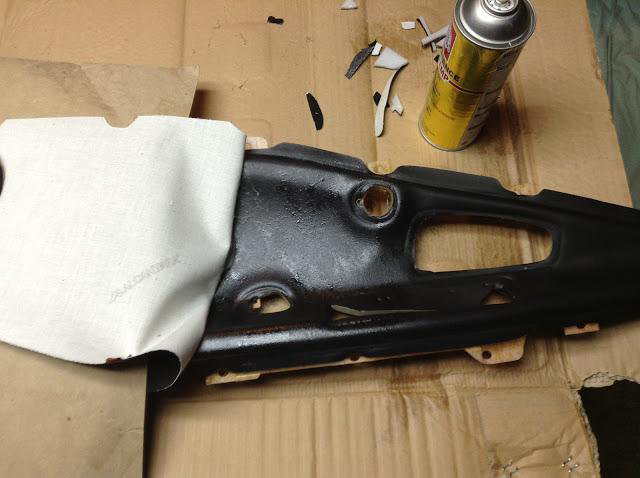
Figure 3 – You can glue the front half all at once or in two sections. Whatever method you choose it is important you press the fabric firmly around all of the contours
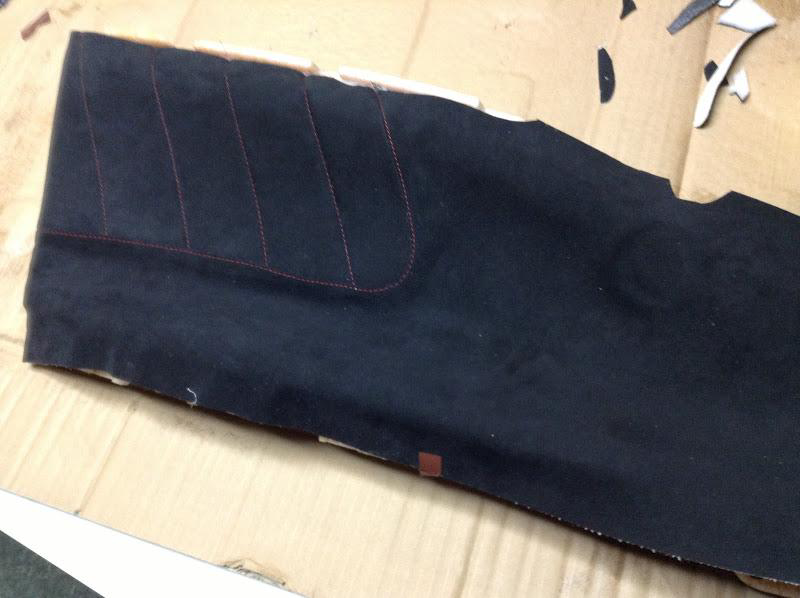
Figure 4 – Press the fabric firmly into all of the contours of the door card. Don’t worry too much about the excess fabric, this will be cut later and when the door card is reinstalled to the panel the edges will be held taught
Step 4: Cutting the fabric – Once you have glued everything in place and have given the glue some time to dry (per the instructions of the product you have chosen to use) it’s time to make all the cuts necessary to reinstall the door handle, window controls, etc.
The best way to do this is to flip the door card over and cut from the back. Cut out the fabric to match the cuts in the factory upholstery. Fold and glue over any excess (see Figures 5, 6.) It is a good idea to have the door handle, window controls, etc. on hand so you can test fit to make sure your cuts are correct (Figure 7.)
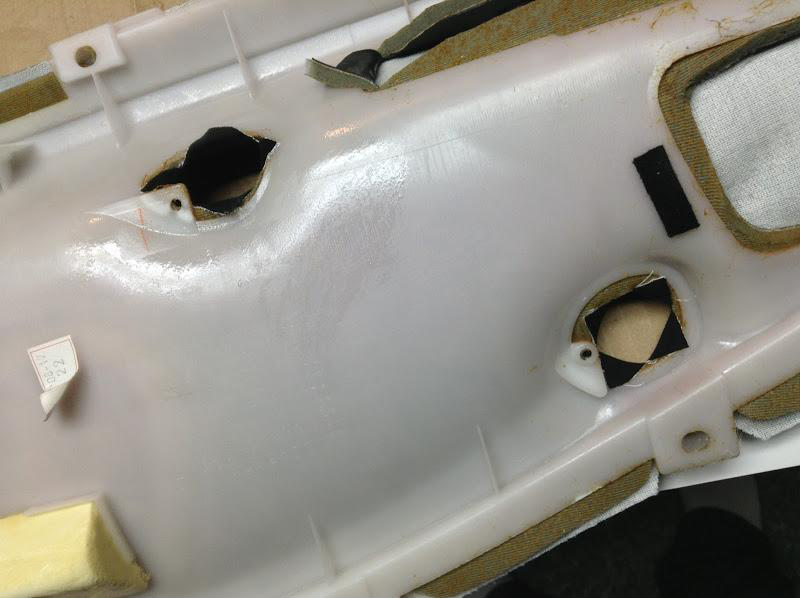
Figure 5
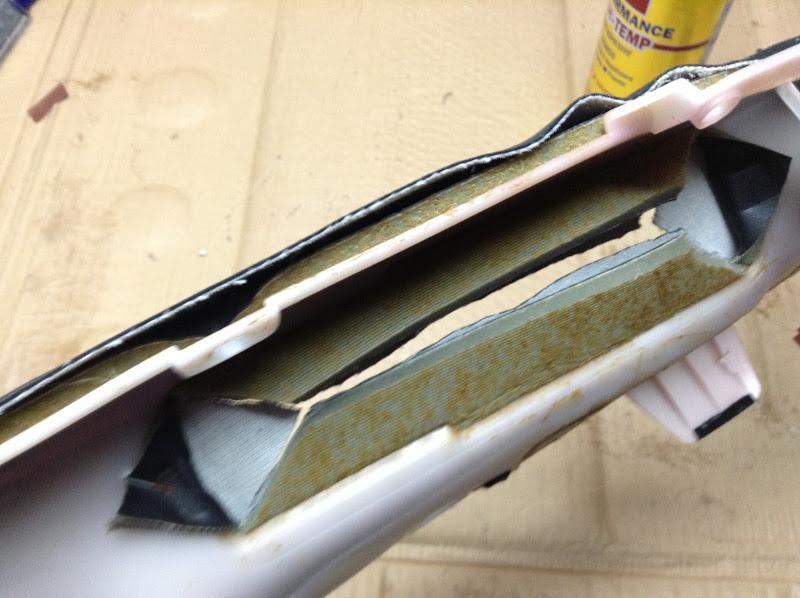
Figure 6
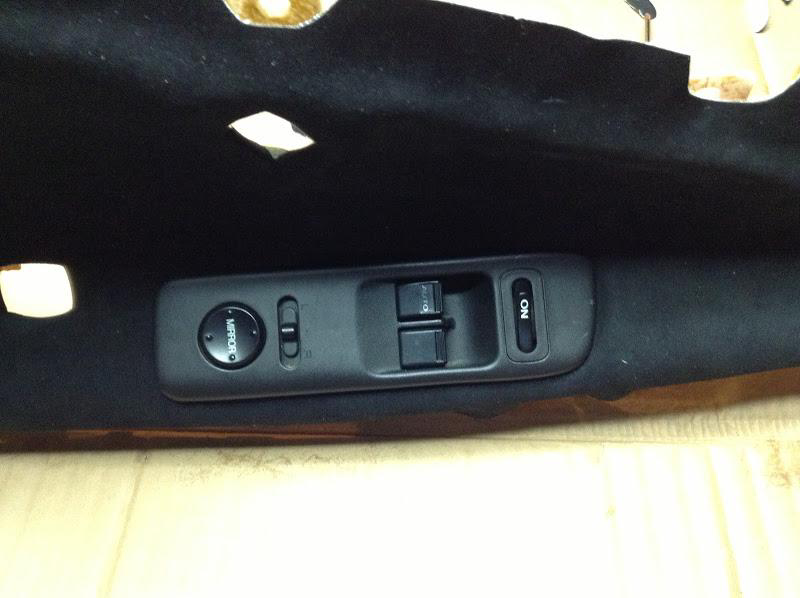
Figure 7 – Test fitting the window controls. I highly suggest you test fit everything so you don’t have to go back and make adjustments.
Step 5: Reinstall the door card – To reinstall the door card, follow the inverse of the uninstall procedure. Asyouscrewthedoorcardbackintothedoorpanel,checktomakesuretheedgesofyour new door card fabric are pulled taught and no wrinkles are forming. You will likely need to cut small notches out of the excess fabric around the screws.
Conclusion: You have successfully reupholstered the door cards in your S2000. Provided you took your time your newly refreshed door cards should look great. I hope this DIY guide helped with your interior project!
Enjoy! - Steve