You must be logged in to rate content!
4 minute read

92-98 HONDA CRX delSol SHIFT BOOT/E-BRAKE INSTALLATION INSTRUCTIONS
1. The center console consists of two parts. The front section has the shift boot trim piece and the rear section has the armrest. Remove the screws that hold the rear section of the center console into place. There are 2 on each side front and rear and one inside the center console. Start at the rear.
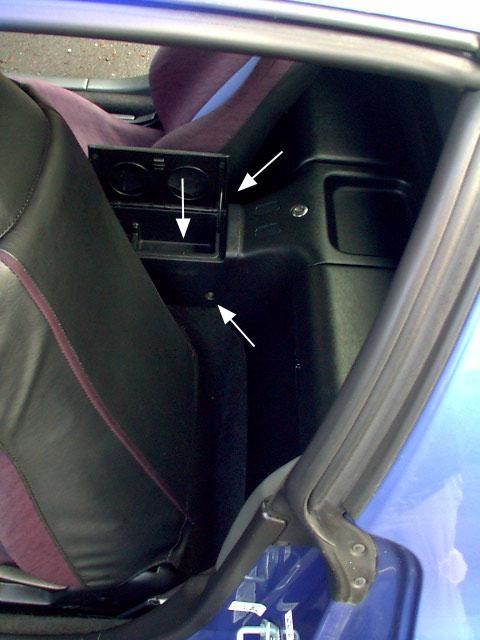
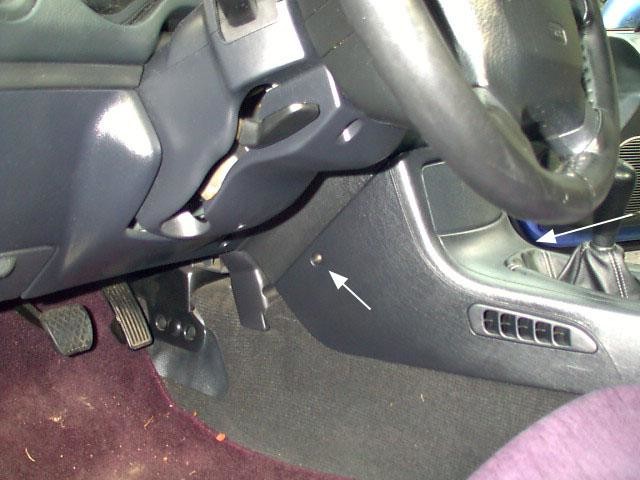
2. Proceed to the front and remove the two screws under the dash.
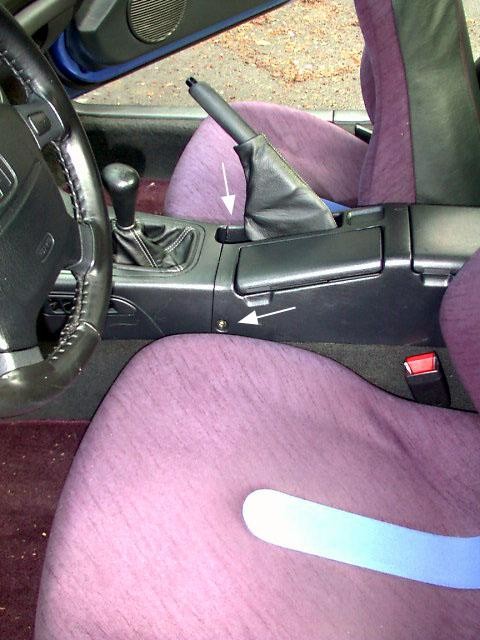
3. Remove the rear console section and slide it back (to completely remove it, you would need to unplug the cigarette lighter cable):
4. Unscrew the shift knob. It may be very tight, so if you cannot do it by hand, use vise-grips for extra leverage. Make sure to wrap the shift knob with a cloth or a towel to prevent from scratching it. Then remove the two screws holding the front section of the console:
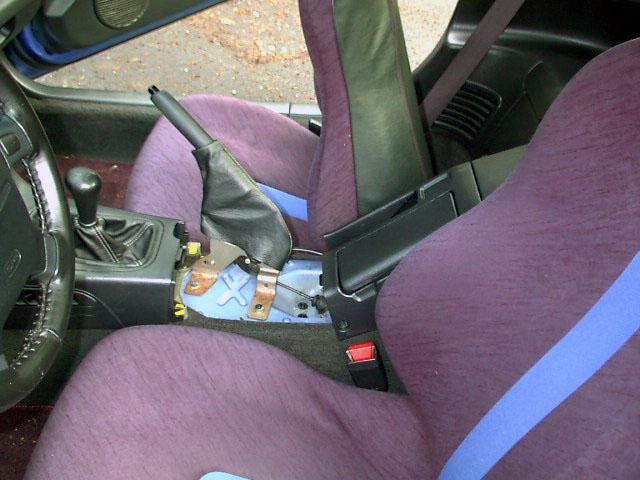
5. To completely remove the front section, gentle pry it rearward to free the two clips holding it to the upper dash above the stereo opening. Because it is blocked by the e-brake, you will need to lift the section upward while spreading the "wing" sides (where the screw holes are) and rotating it at the point of contact with the e-brake. After it's removed, turn over the front center console section for removal of the shift boot collar - there are two screws that hold it into place:
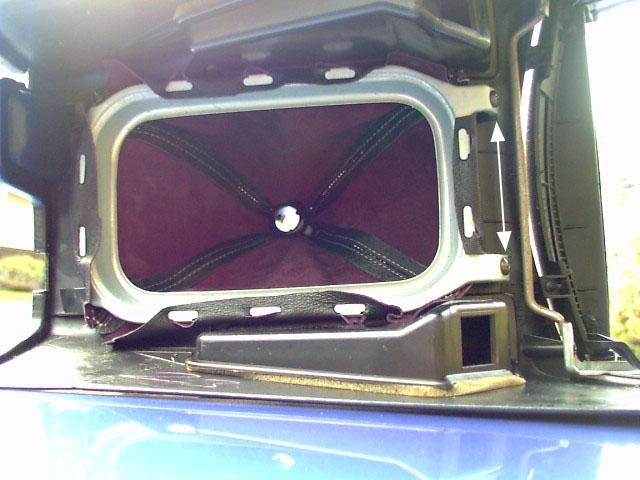
6. Unwrap the metal frame from the shift boot (take note of how it is originally attached) and turn it inside out and remove the rubber band to free the plastic plug-like ring. Turn the new boot inside out and slide the plug-like piece (smooth end first) into the boot starting from the wider end.
After it's been worked in all the way (and this will require some effort) use a ZIP-tie to fasten it to the boot. Then turn the boot back to right side out. Now wrap the boot around the metal frame just like the factory boot was positioned, and mount the frame back to the console piece with the two screws (refer back to the photo above).

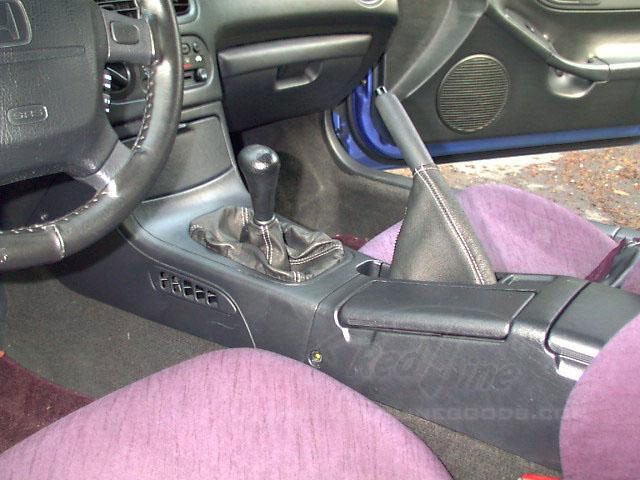
7. Remove the original e-brake boot and replace it with the new boot (this is by far the easiest step). Reinstall the front console (being careful to ensure the two clips are properly positioned), reinstall the rear console, reinstall the shift-knob and... enjoy!
Useful tip
You have installed a product made out of genuine leather. As you know, to maintain a leather product in good condition, you should take care of it. We suggest occasionally (every 4-6 weeks for example) applying some leather conditioner/UV protector to keep your leather from drying up in the sun and cracking.
Redline Automotive Accessories Corp. will not be held liable for any labor, incidental or consequential damages of any kind. Proceed at your own risk.