You must be logged in to rate content!
2 minute read

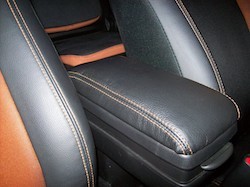
11+ HONDA CRZ ARMREST COVER INSTALLATION INSTRUCTIONS
1. Open console lid and remove the five screws as seen in the photo (remove only center screw from the hinge at this time.)
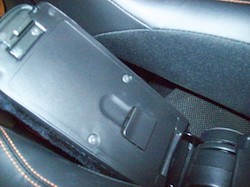
2. Pull the plastic cover back, revealing the other two hinge screws. Remove them and the console from the car.
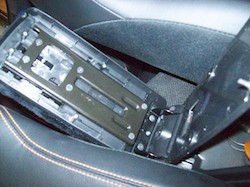
3. Turn the Armrest upside-down and slide top cover open to the extended position, and remove only the four screws that are revealed as the cover is extended.

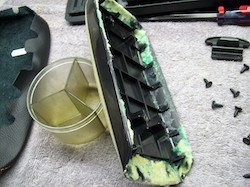
4. Remove OEM padding/material by gently pulling/scraping the edges from the plastic, then remove the excess glue/adhesive that remains.
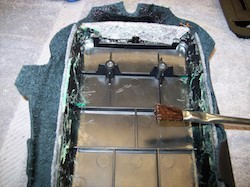
5. Fit the RedlineGoods cover over the lid's base, carefully ligning up the stitching to get it even on the sides/edges. Brush on a light layer of fabric glue/adhesive to the mating surfaces.
6. Reinstall removal steps to complete your installation and ENJOY! :)
CONGRATULATIONS - YOU HAVE SUCCESSFULLY INSTALLED YOUR NEW LEATHER BOOTS!
Useful tip
You have installed a product made out of genuine leather. As you know, to maintain a leather product in good condition, you should take care of it. We suggest occasionally (every 4-6 week for example) applying some leather conditioner/UV protector to keep your leather from drying up in the sun and cracking.
Redline Automotive Accessories Corp. will not be held liable for any labor, incidental or consequential damages of any kind. Proceed at your own risk.