You must be logged in to rate content!
4 minute read

11+ HONDA CRZ SHIFT BOOT/E-BRAKE INSTALLATION INSTRUCTIONS
1. Remove center console trim.
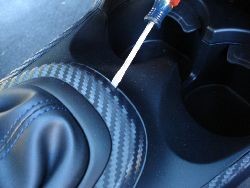
2. Remove 4 screws holding shift boot base.
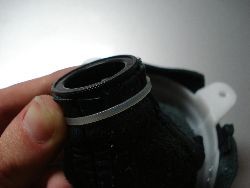
3. Pry plastic shift retainer ring off the metal centerpiece.
4. Remove shift knob by unscrewing counterclockwise; you may need to loosen lower locking nut.
5. Unscrew lower locking nut.
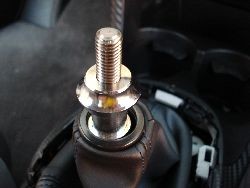
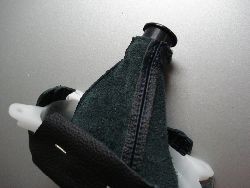
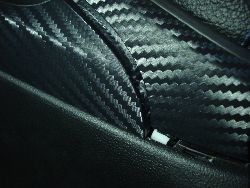
6. Remove shift boot and clip white zip tie holding it to retainer ring.
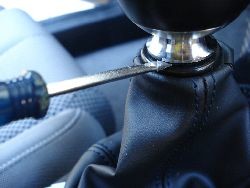
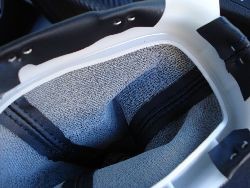
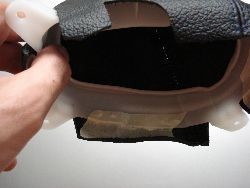
7. Remove 6 staples holding the boot on shift boot base.
8. Place new shift boot over shift boot base. Pull down until snug.
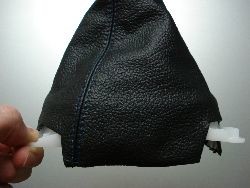
9. There are different ways to attach the new boot. The easiest is a staple gun to replace the staples. Then adhesive (an epoxy-based glue will work perfectly, 3M makes these, Contact Cement and Automotive GOOP have both been used with good results. If you need to either re-use the staples or have access only to a typical desk stapler, this is what you should do: tape shift boot to shift boot base.
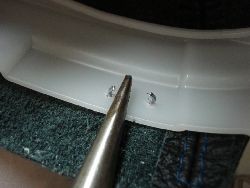
10. Drill through the existing holes in the shift boot base to create a hole in the leather (a small needle may also be poked through, but drilling works best)

11. Peel off tape.
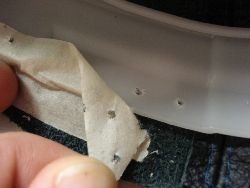
12. Poke staples through the drilled holes.
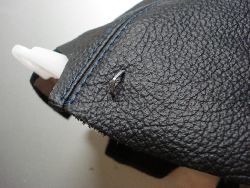
13. Using pliers, bend staples until they hold the new boot firmly in place.
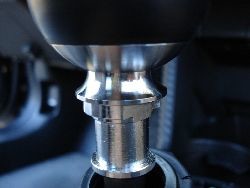
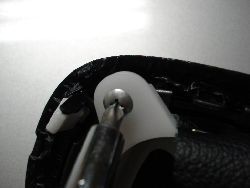
14. Place shift retainer ring inside new shift boot.
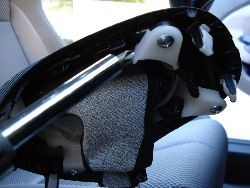
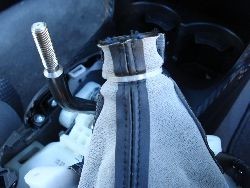
15. Place a new zip tie around the shift retainer ring.
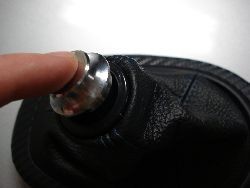
16. Screw in shift boot base back onto trim piece.
17. Slide the e-brake boot partially over the e-brake handle. The boot is not symmetrical; it angles slightly toward the front of the car. Reinstall the boot base in the reverse order of removal.
18. Push locking nut back onto shift retainer ring.
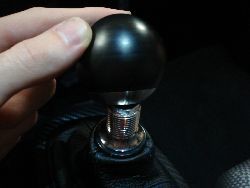
19. Screw locking nut back onto shifter. Screw on shift knob. Reinstall the trim pieces of the center console.
CONGRATULATIONS - YOU HAVE SUCCESSFULLY INSTALLED YOUR NEW LEATHER BOOTS!
Useful tip
You have installed a product made out of genuine leather. As you know, to maintain a leather product in good condition, you should take care of it. We suggest occasionally (every 4-6 week for example) applying some leather conditioner/UV protector to keep your leather from drying up in the sun and cracking.
Redline Automotive Accessories Corp. will not be held liable for any labor, incidental or consequential damages of any kind. Proceed at your own risk.