You must be logged in to rate content!
46 minute read

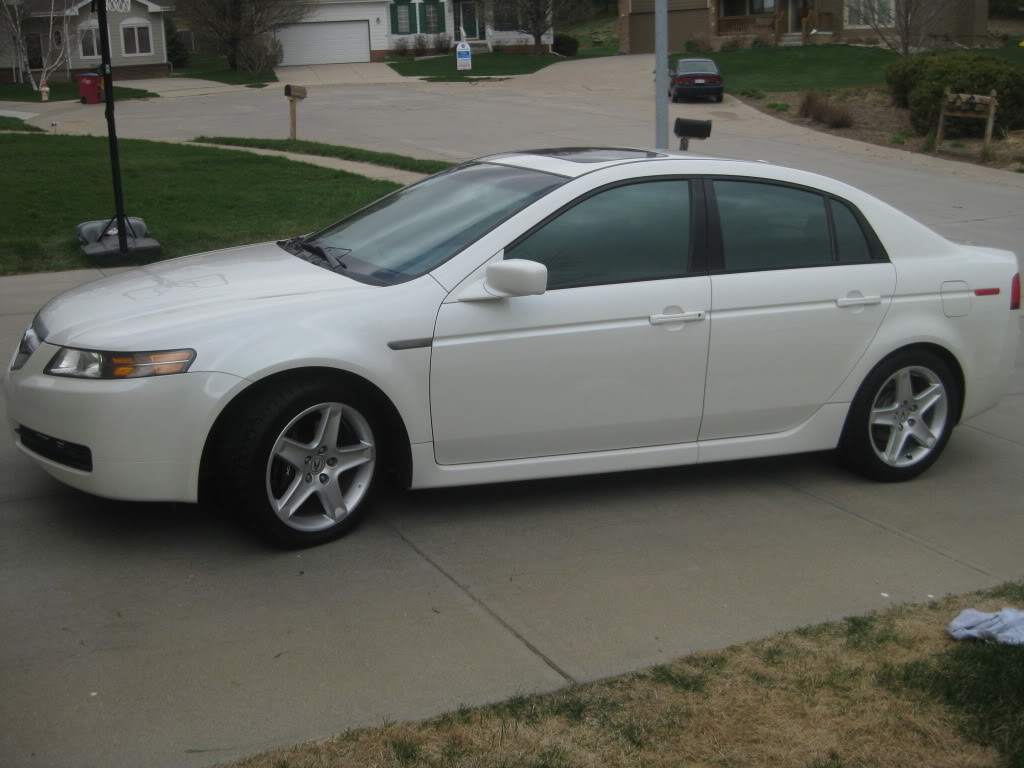
High Definition Mobile Audio Demo Car 2004 Acura TL - Dynaudio/ARC/MS-8 *Pics Galore*
Compliments of niebur3 @ http://acurazine.com
1-15-2011
Well, I have decided to turn my hobby/obsession into my new profession. I have started High Definition Mobile Audio in Omaha, NE. I will be featuring high end products such as: Dynaudio, Rainbow, Hybrid Audio, Tru Technology, Arc Audio, Image Dynamics, Digital Designs, etc. I have decided to build a new demo car to showcase a factory integrated system aimed at being as good or better than my firebird, which placed in “Q” at USAC World Finals in 2009.
The demo vehicle is a white 2004 Aucra TL that I purchased in August 2010 with 48,000 miles. I will add that this is a demo car, but the family had some requests for the car, which I honored. I am hoping to complete the install by the 1st or 2nd week of February and will try to update this log daily. I am open to suggestions as well as this build will go fast and I may overlook some things.
System Plan:
Factory HU (Pioneer DEH-P01 Incase I have problems with the factory HU)
MS-8 Processing
Dyn 102 Tweeters
Dyn Esotar2 650 Midrange/Midbass
Dyn Esotar2 430 Midrange (if I decide a 3-way is necessary - but isn’t a 3-way always necessary....lol)
Dyn Esotar2 1200 Sub (IB or Aperiodic)
Dyn Esotar2 430 for center channel (will attempt a 162GT) and a Dyn tweeter
Dyn System 240GT (102 tweet and 162GT MR/MB) for Rear Fill
3 ARC Audio 4200 SE Amps
Alpine touch screen monitor (TME-S370) in dash that can control Nav and Video
Alpine Navigation (NVE-M300)
Pioneer 6-disc DVD 1 din DVD player (XDV-P6) – Kids Request
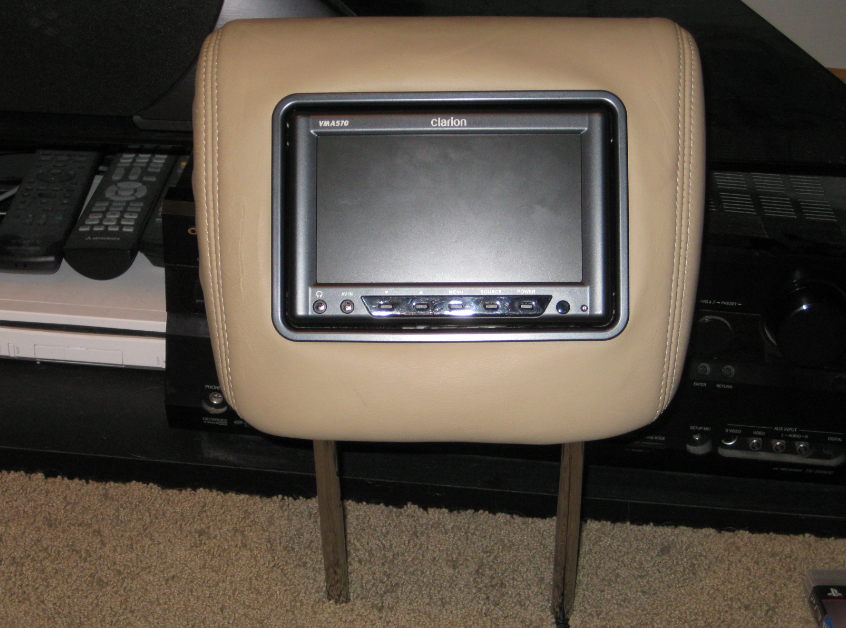
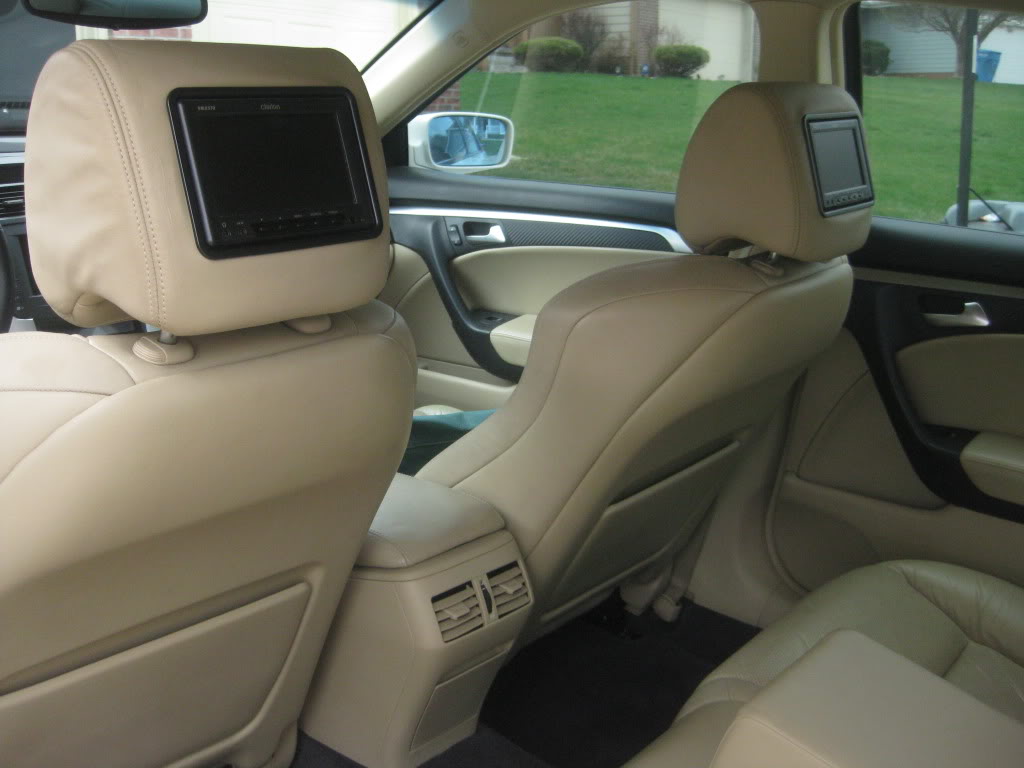
2 5” Headrest Monitors (Clarion WMA570) – Kids request
Cascade sound deadening
IXOS Wire
I will update this as I go and I promise I do not have ADD, it has turned very cold here (as it does every winter, -25 wind chill last week) and this build is taking place in my non-heated garage. Therefore, my decision on what I work on, on a daily basis, will be determined by the weather.
Please let me know if I have left anything out!
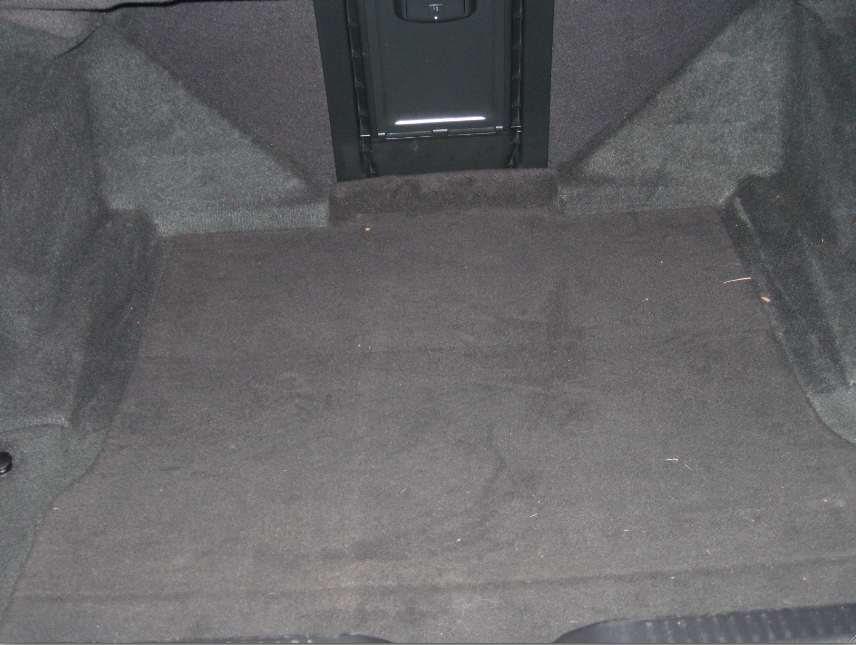
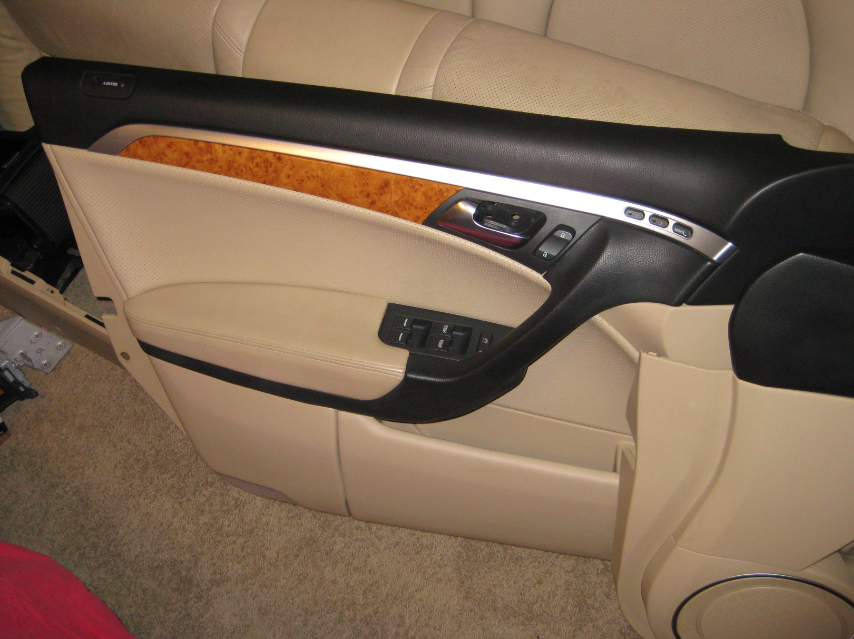
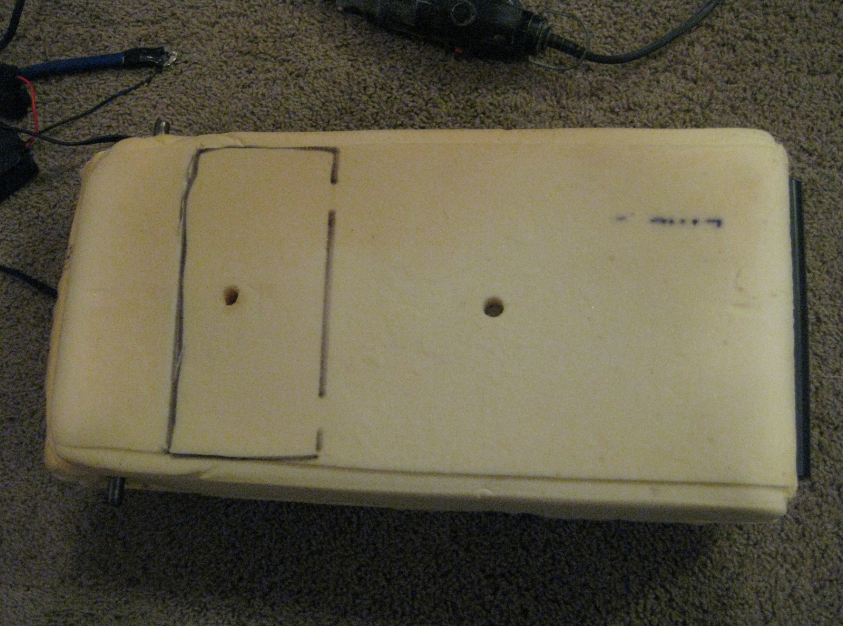
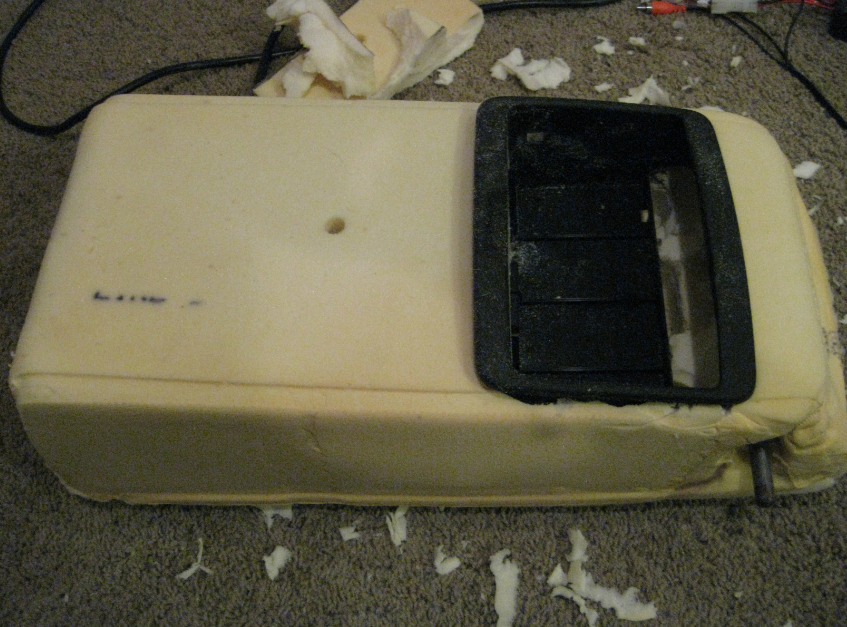
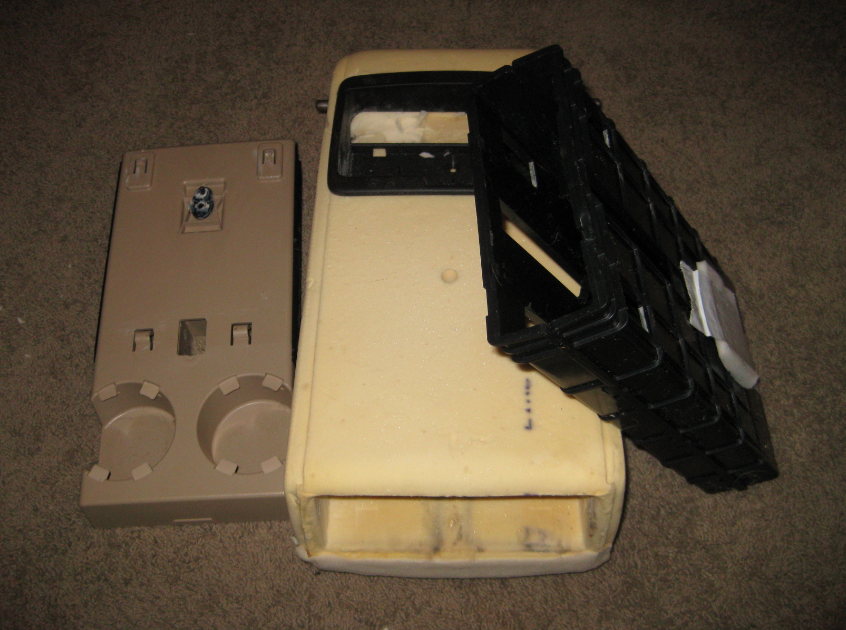
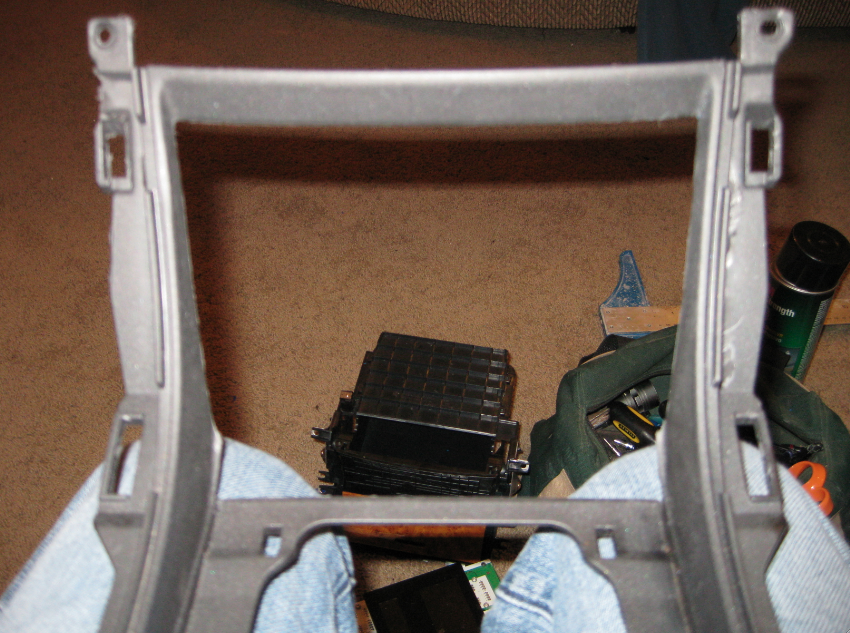
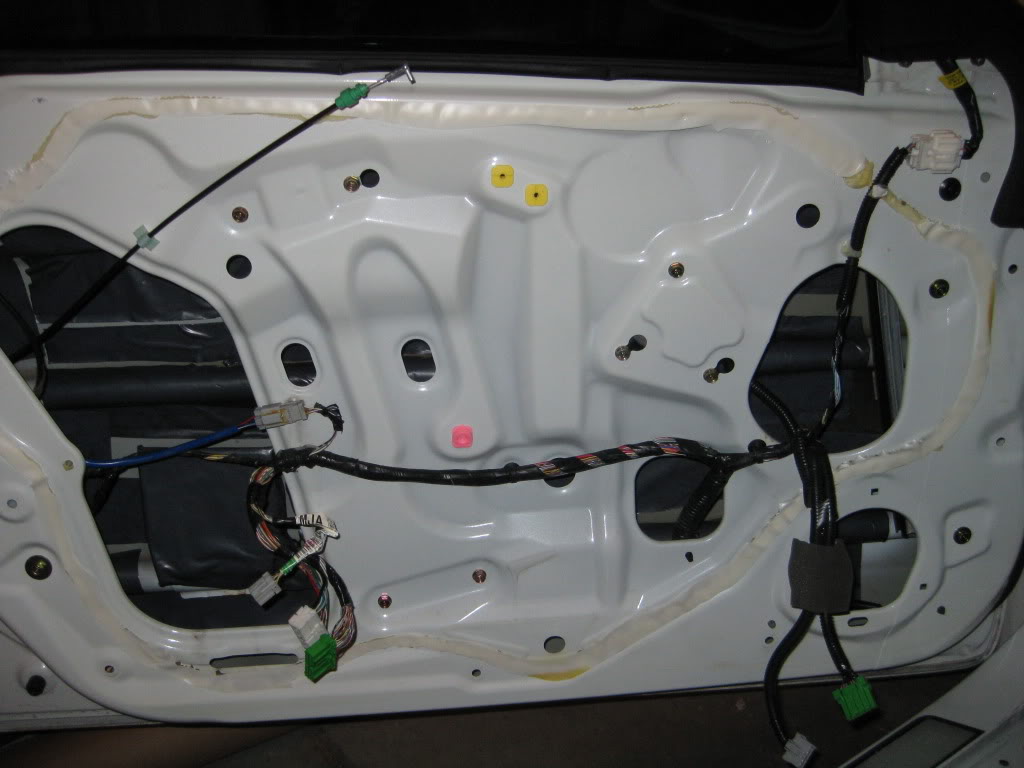
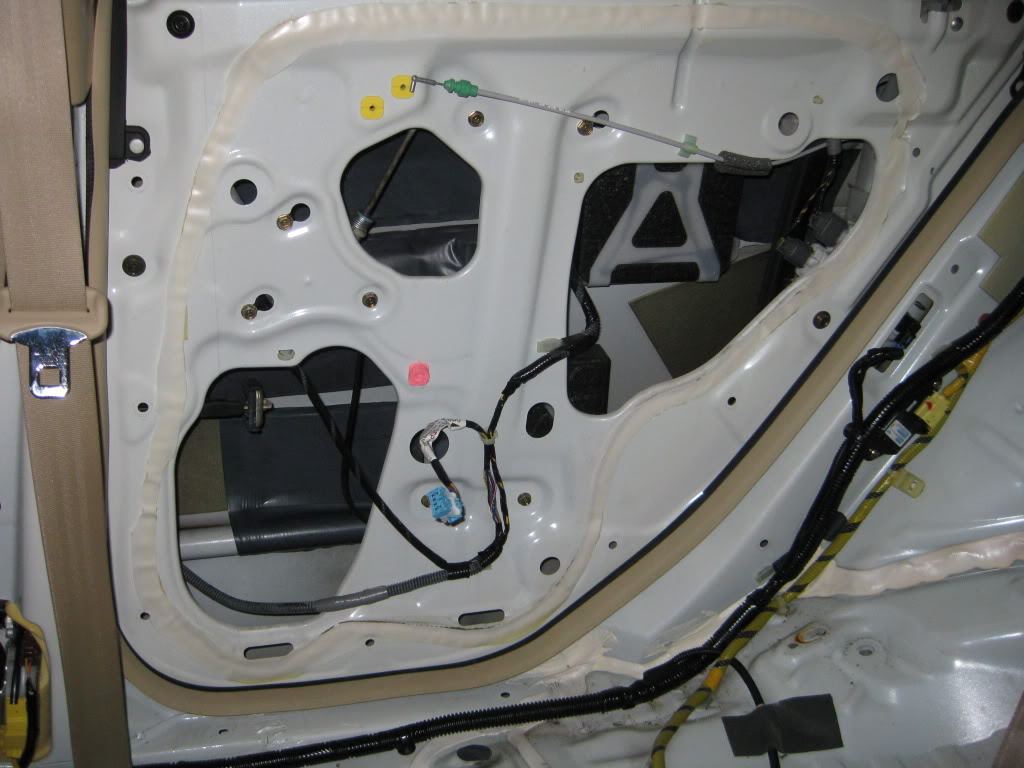
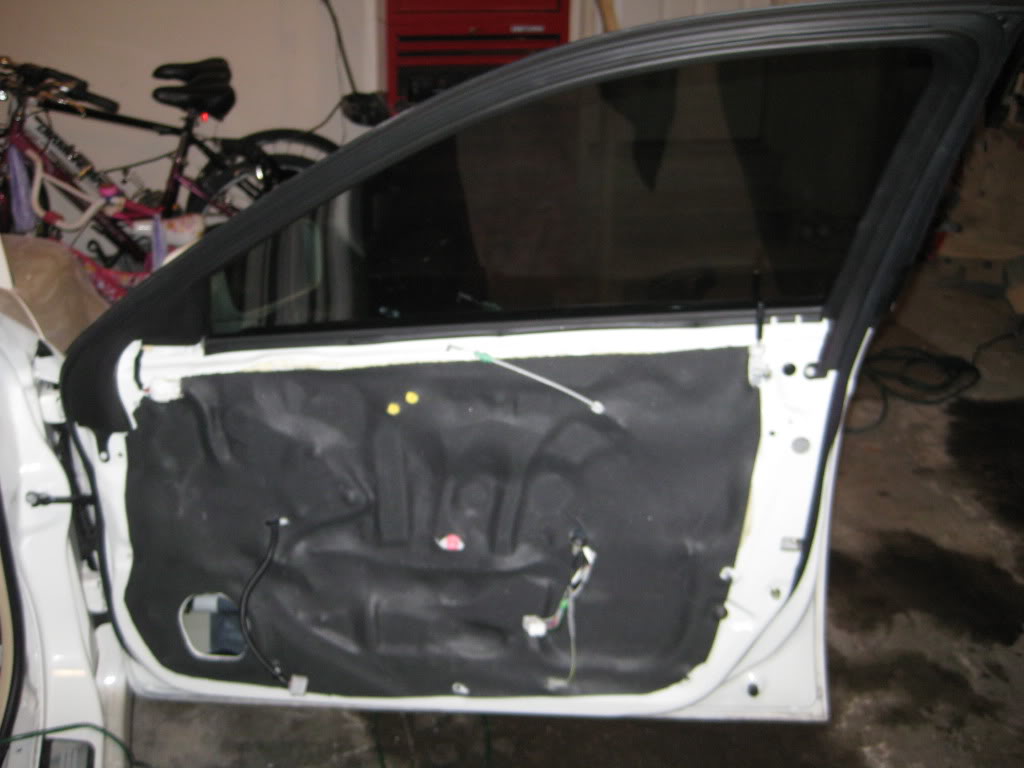
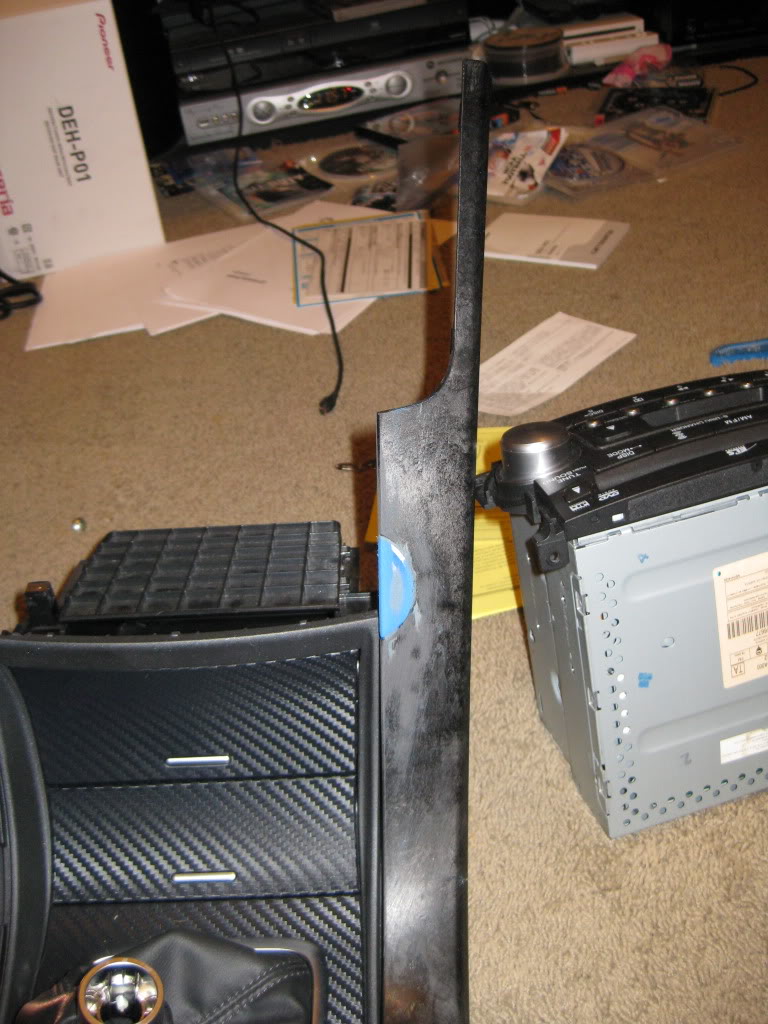
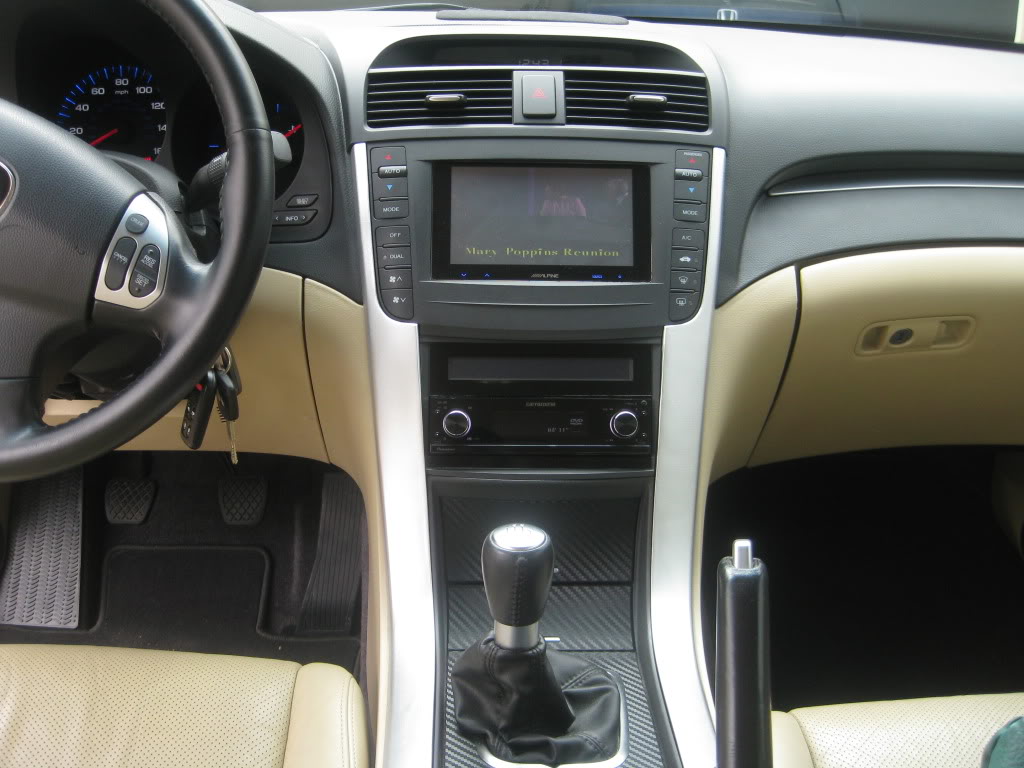
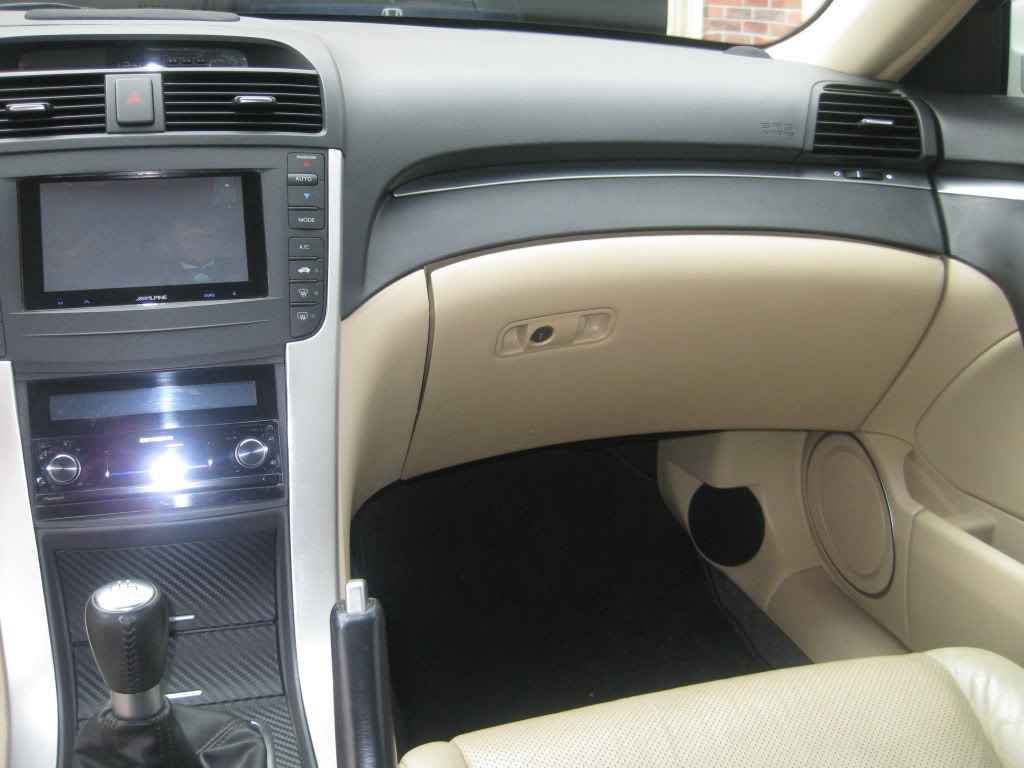
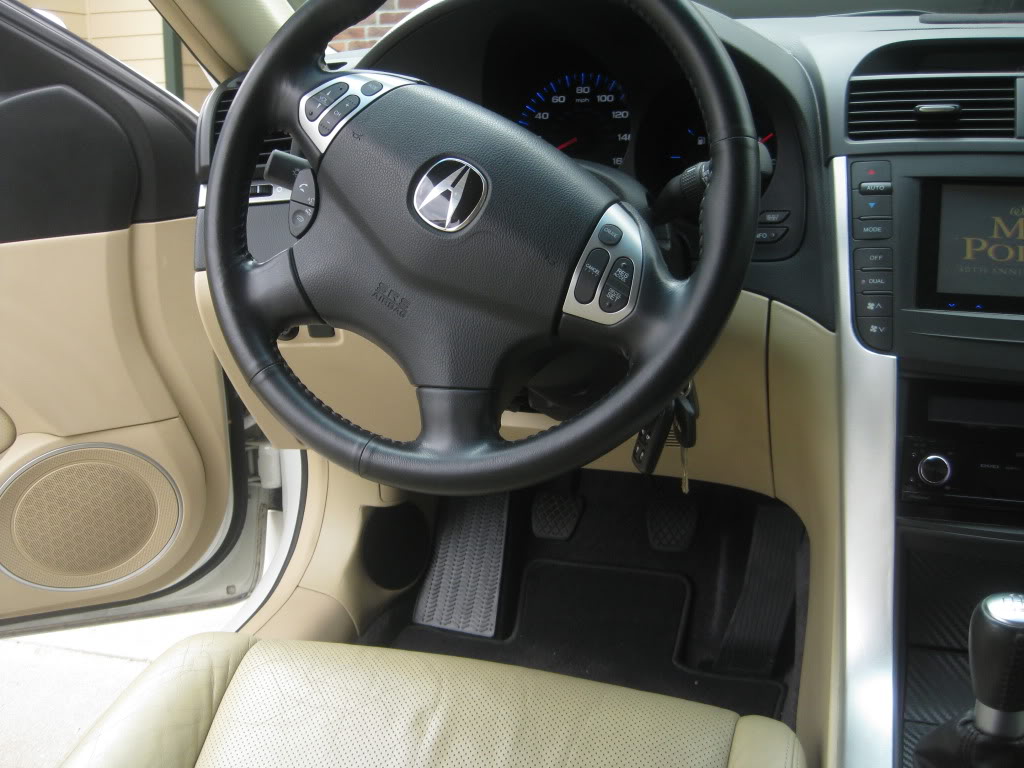
Here are some inside pics of the car before any system construction:

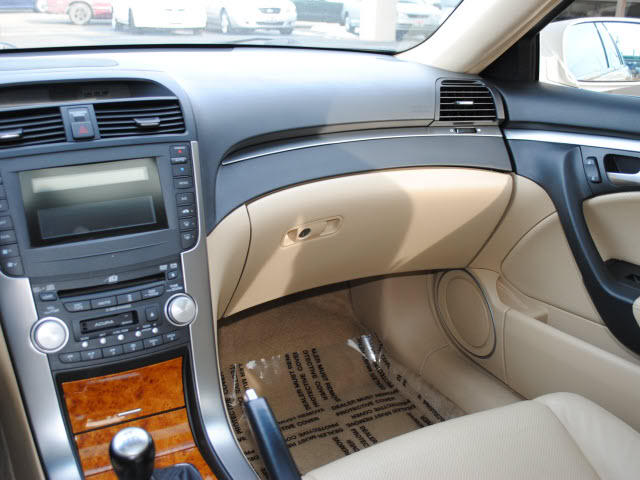

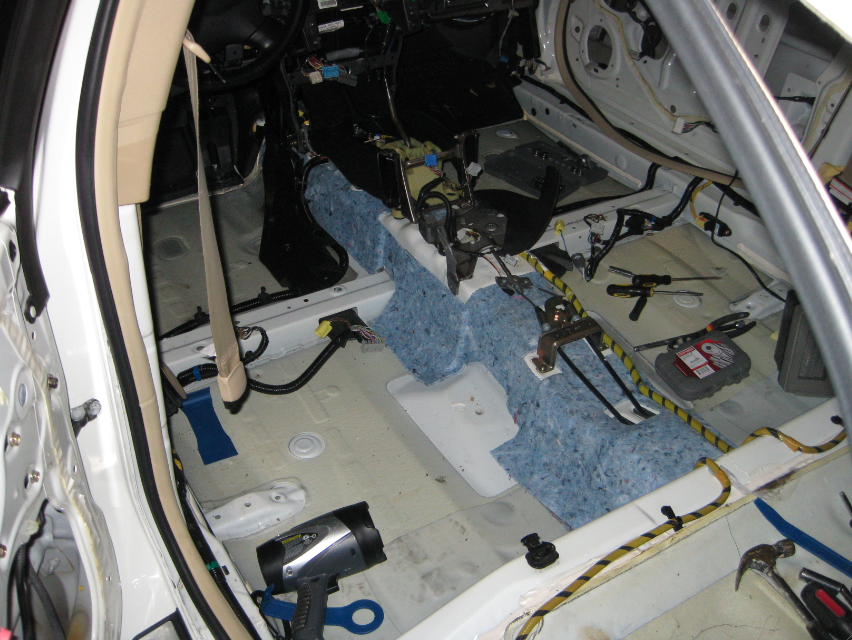
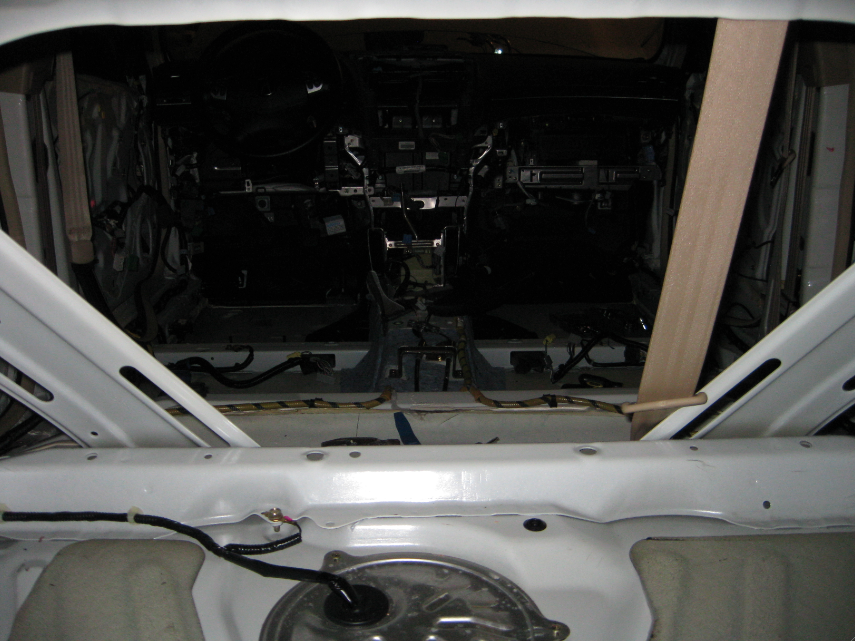
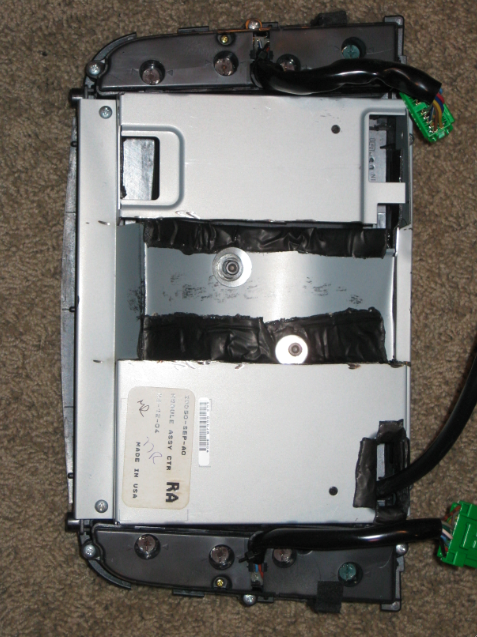
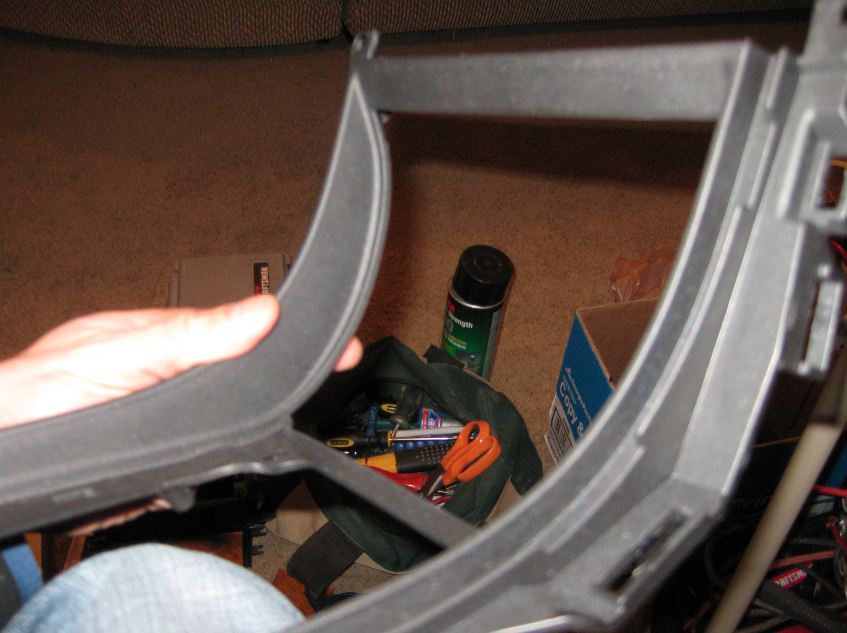
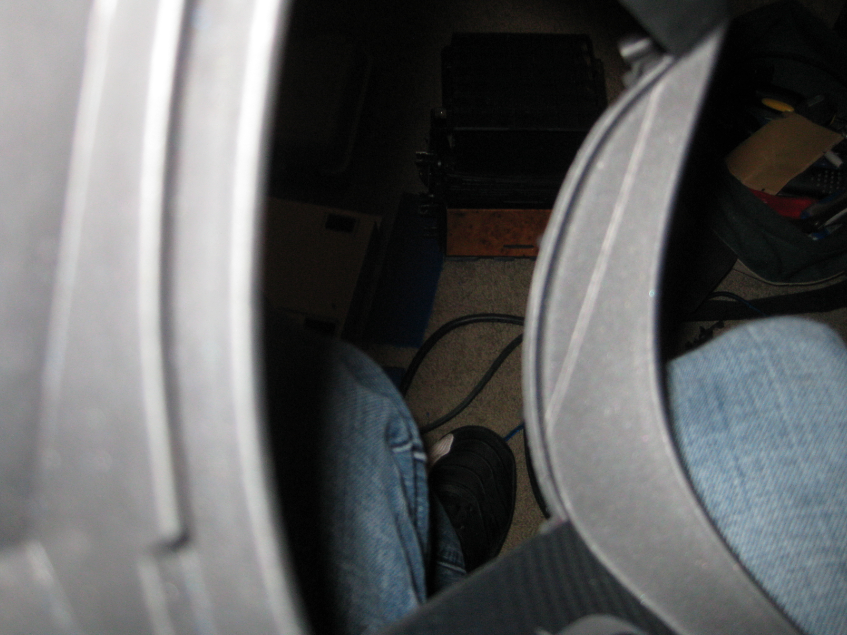
Pics after tear down:
This car (since it has the tan interior) comes with Tan carpeting. I have to kids (age 5 & 9) and tan interior + kids + winter = a whole lot of mess to clean up and stains that do not come out. With that said, I ordered black/graphite carpeting from Acura that will replace the tan after the sound deadening is complete.
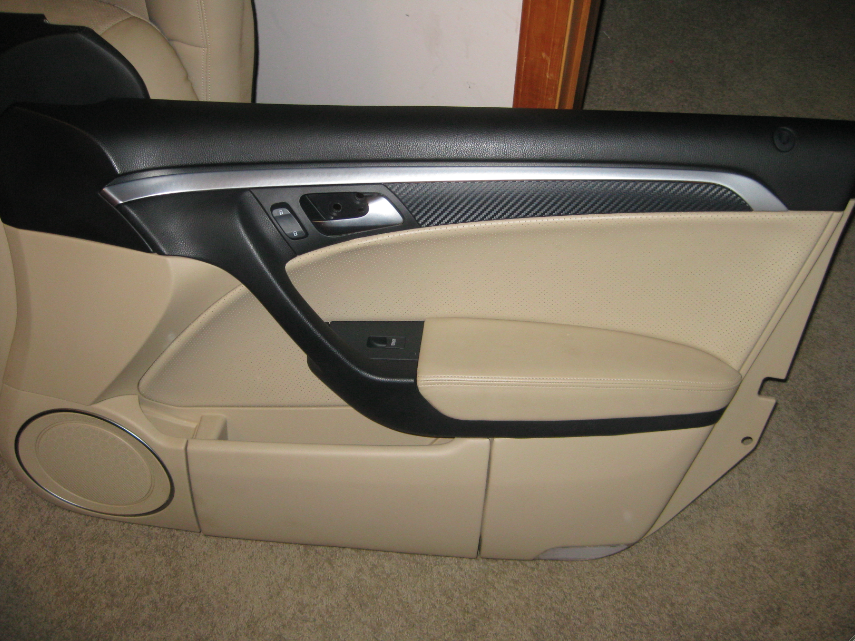
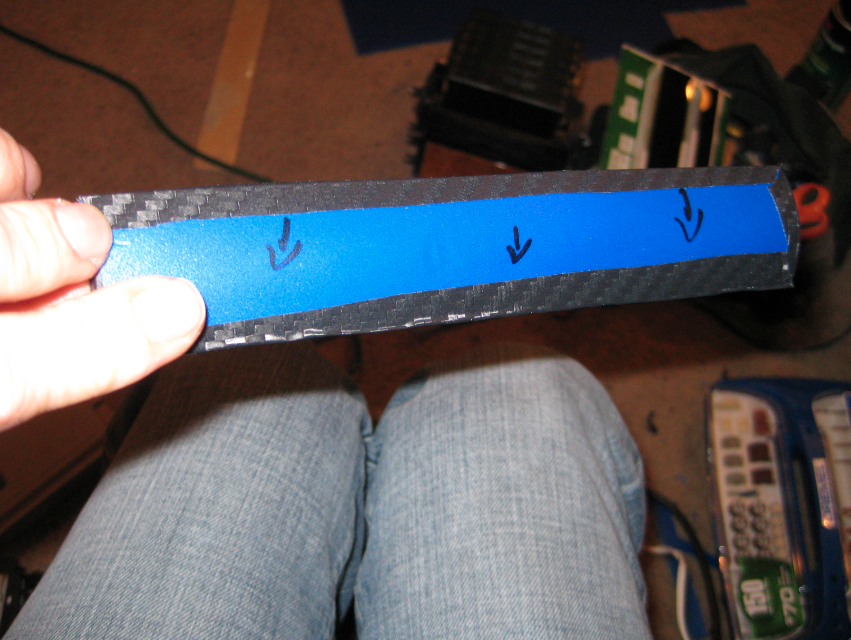
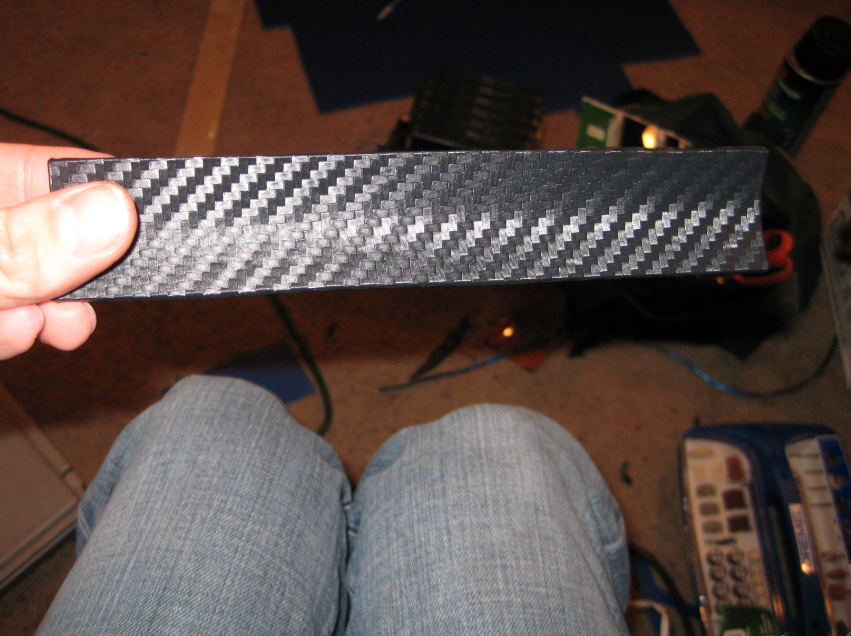
The next thing I had to do is get rid of that fake wood trim. A pet peeve of mine. So, I decided to go with a low cost option of 3m Di-Noc carbon fiber wrap. This stuff is extremely easy to use and provides a very nice finish.
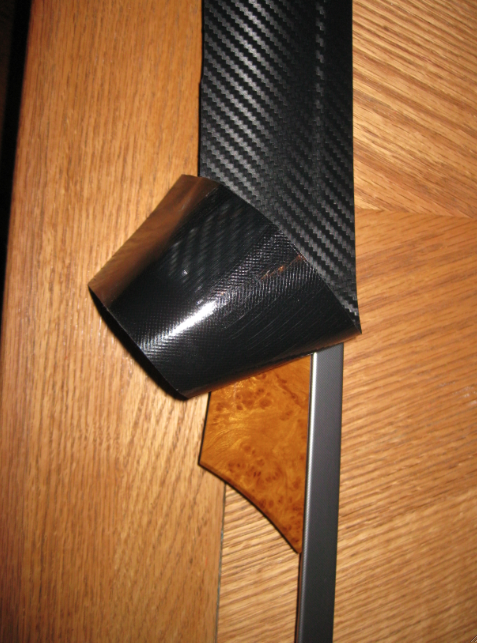
Before:
After:
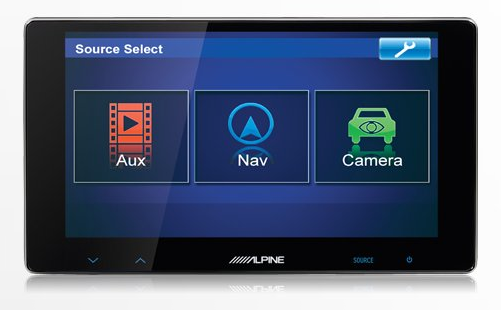
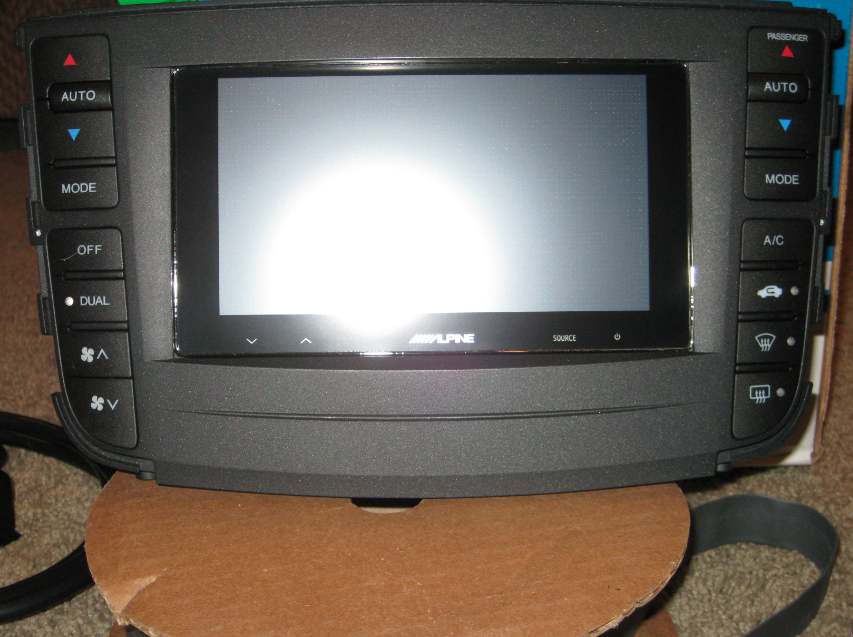
Okay, My TL is a Non-Navi version. Many TL owners have tried different things to implement Navigation. One method is to purchase a conversion kit (at a cost of $1700 from a private party) and then another $150 piece to "hack" the navigation display to show DVD video from an external DVD source. After researching this thoroughly, I decided to go a little different route. I am installing an Alpine TME-S370 in the dash with an Alpine NVE-M300 Navigation Unit.
This touch screen has a nice looking interface:
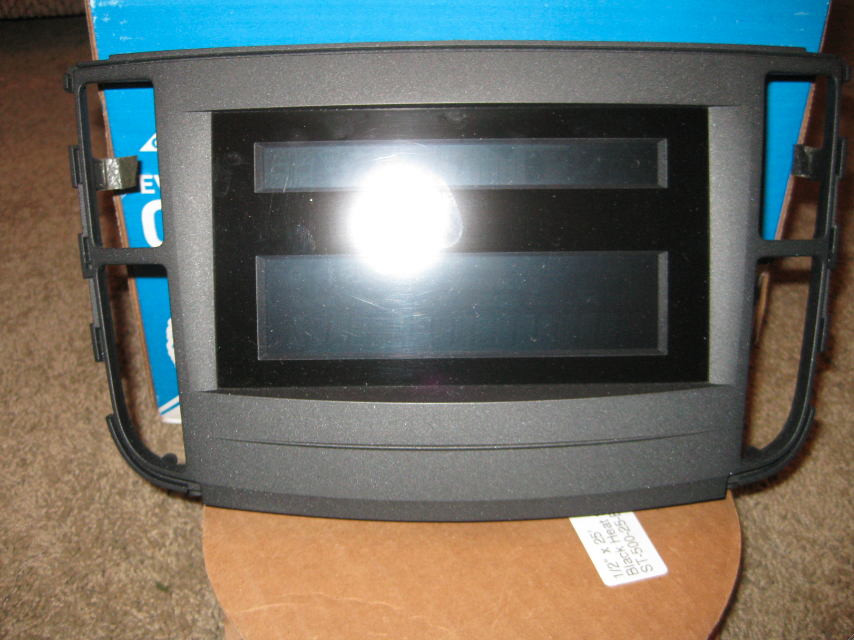
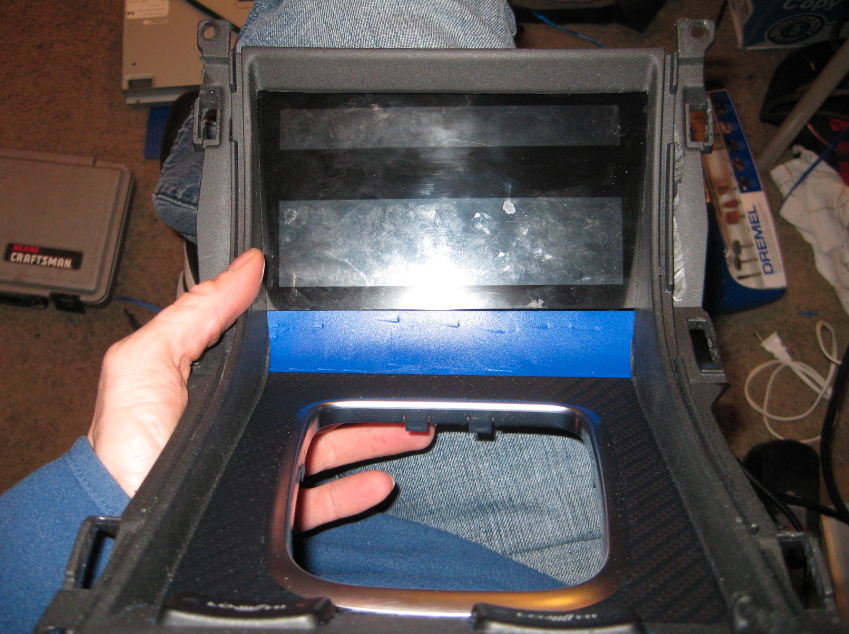
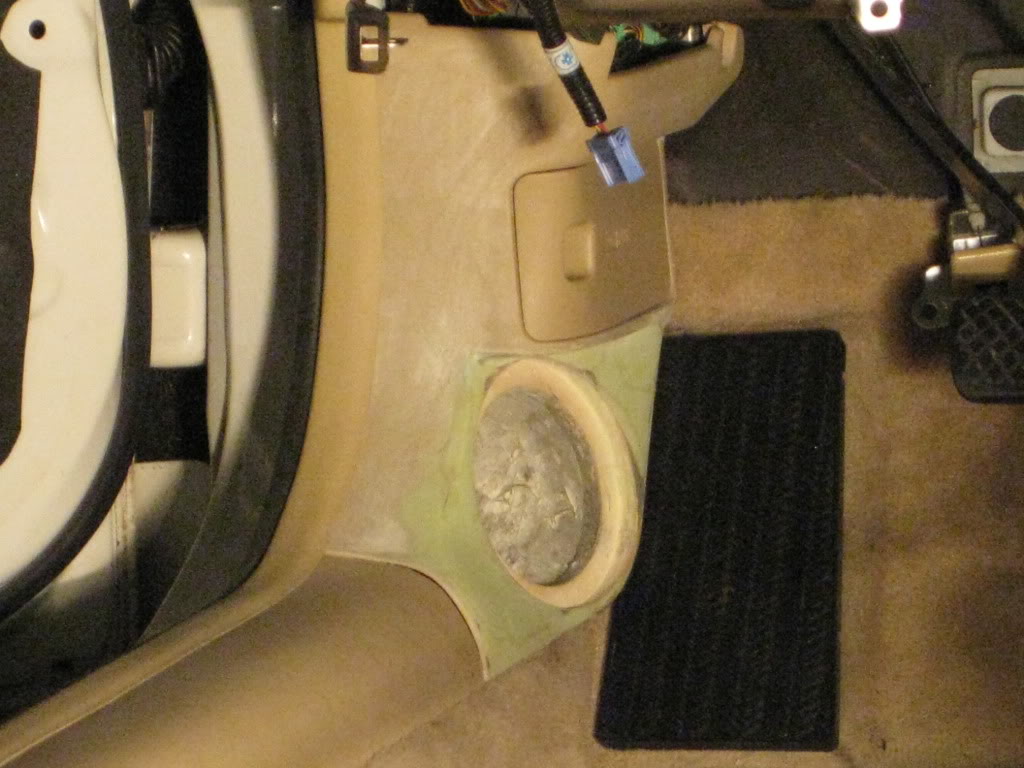
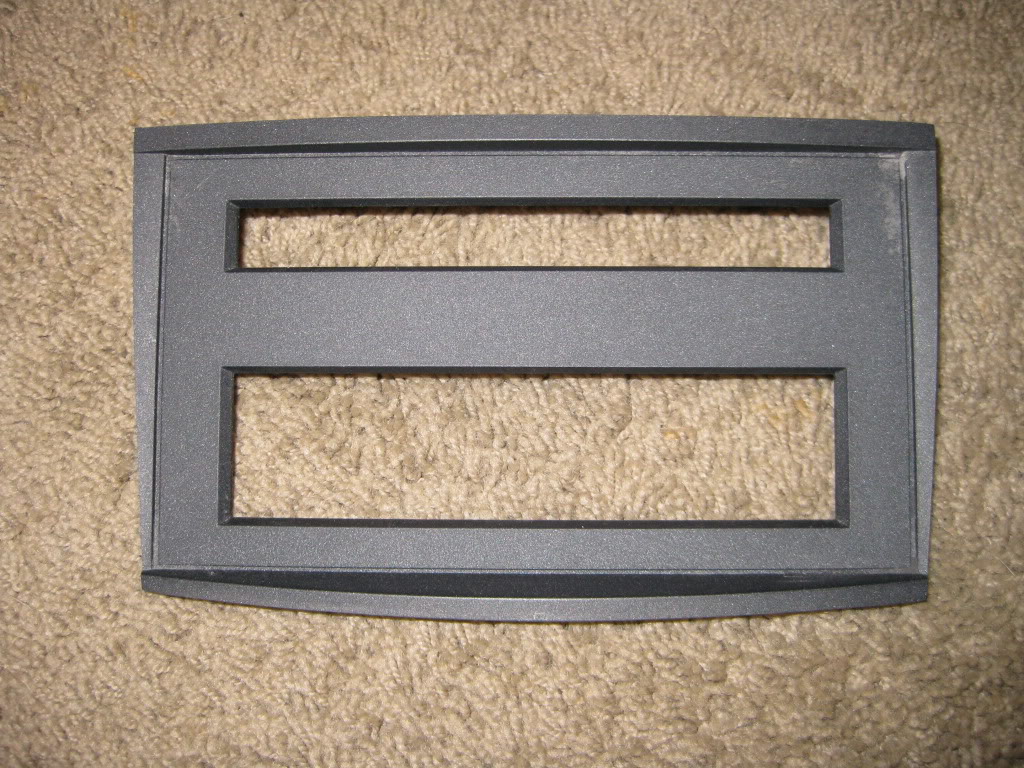
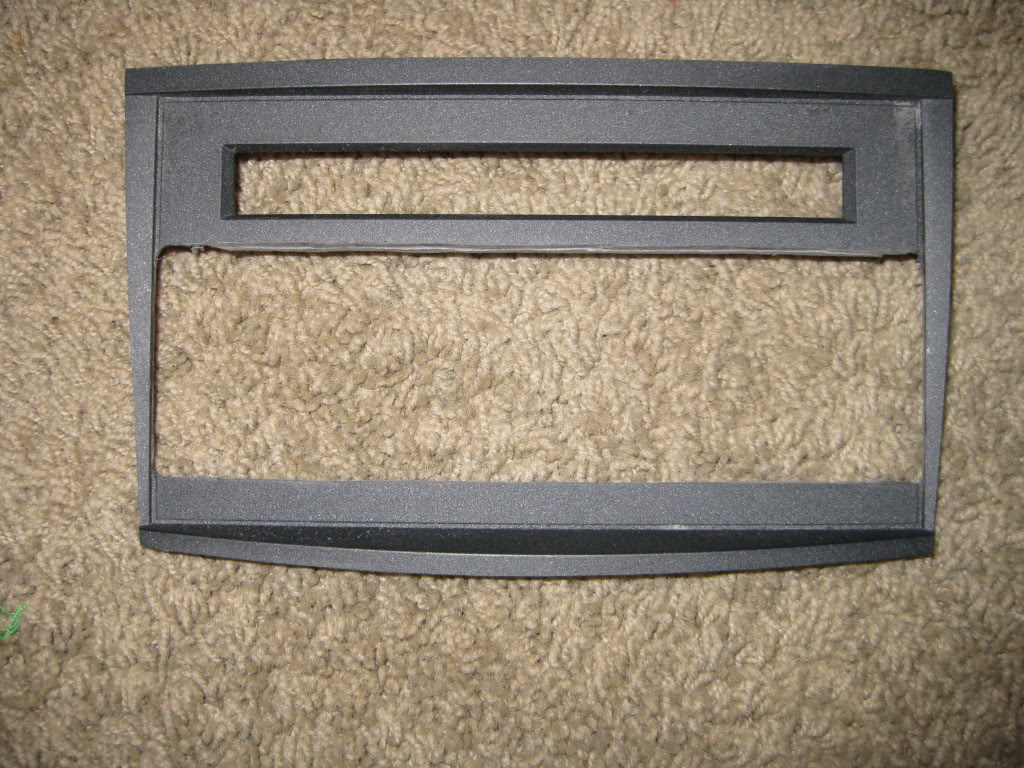
I plan on installing this where the factory navigation is and move the HVAC/Radio Display to where the pockets are below the radio. So, first, I had to cut the bezel to fit the screen:
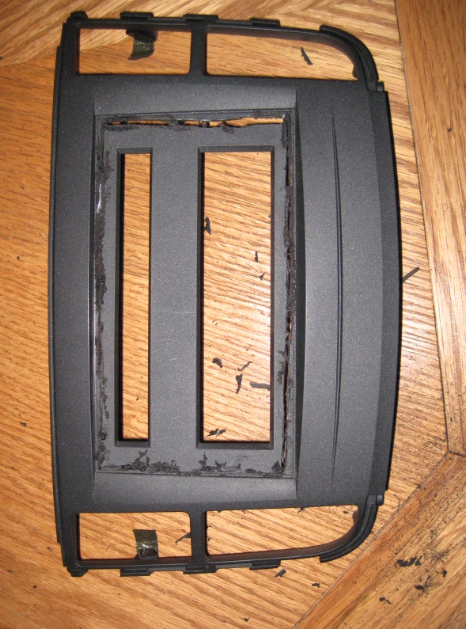
My Dremel is my friend...lol!
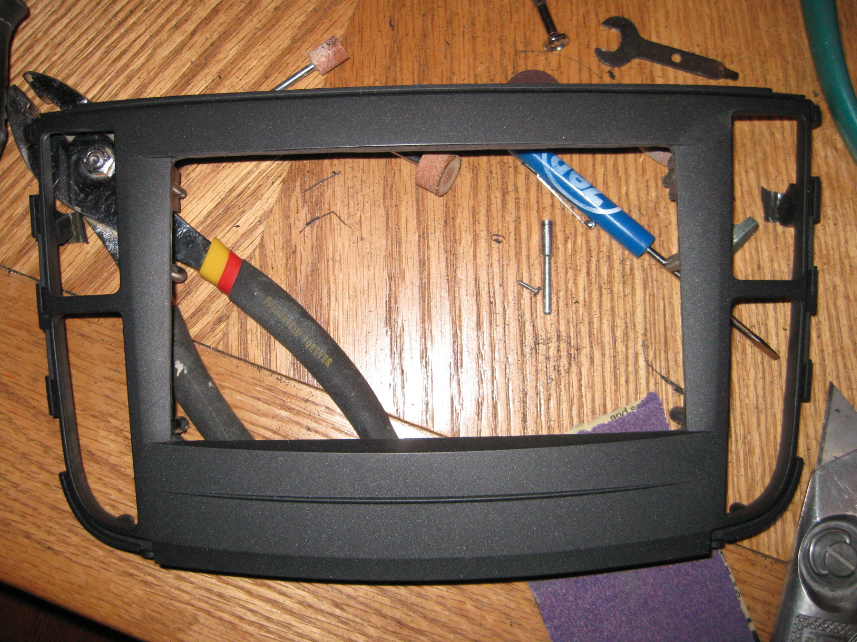
I used multiple cutting and sanding tips to provide the best finish possible as to not have to refinish or paint the bezel. I then wet sanded all the cut edges to make it as smooth as possible (2000 grit was the final finish).
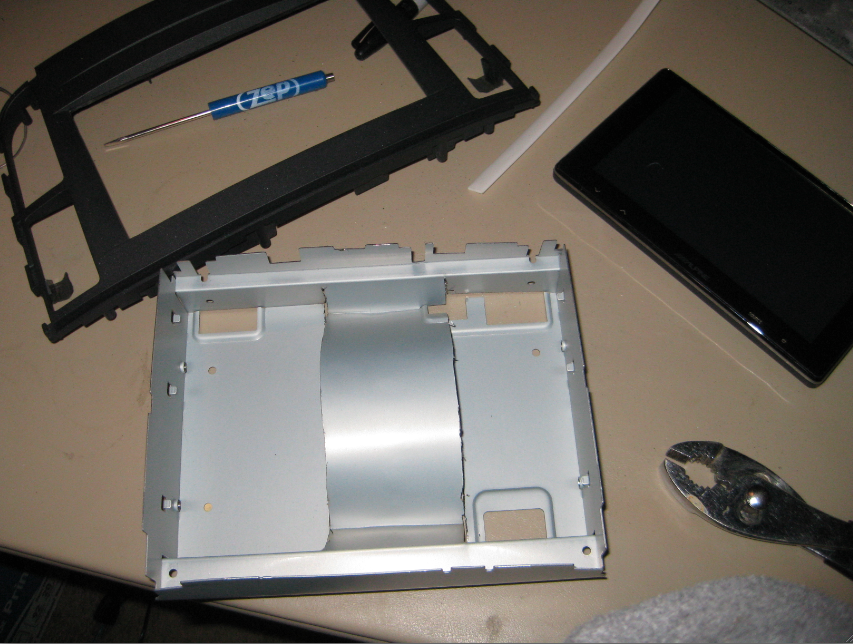
I used the factory metal box that contained the HVAC/Radio information screen to install the screen in and cut/modified the box to attach the screen.
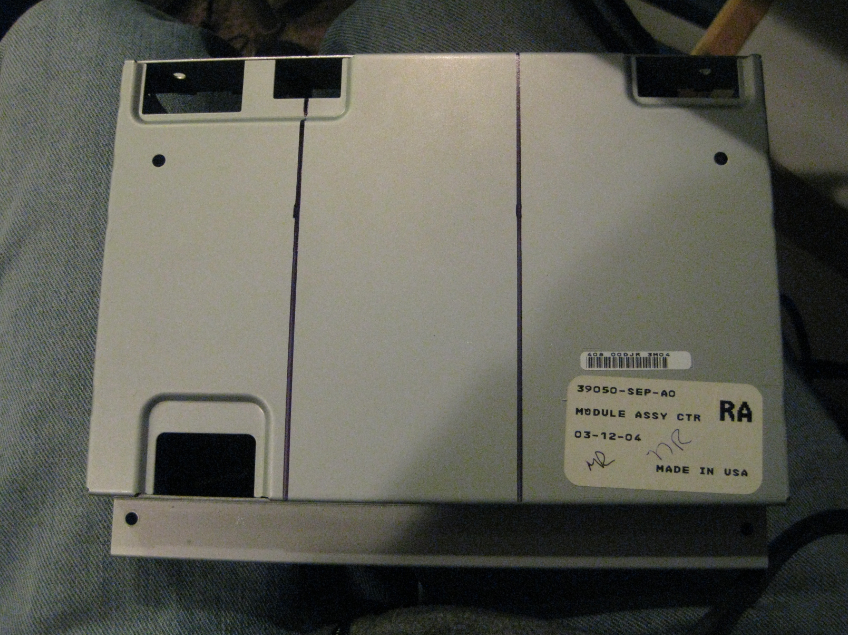

The box was completely sound deadened (just to be sure)
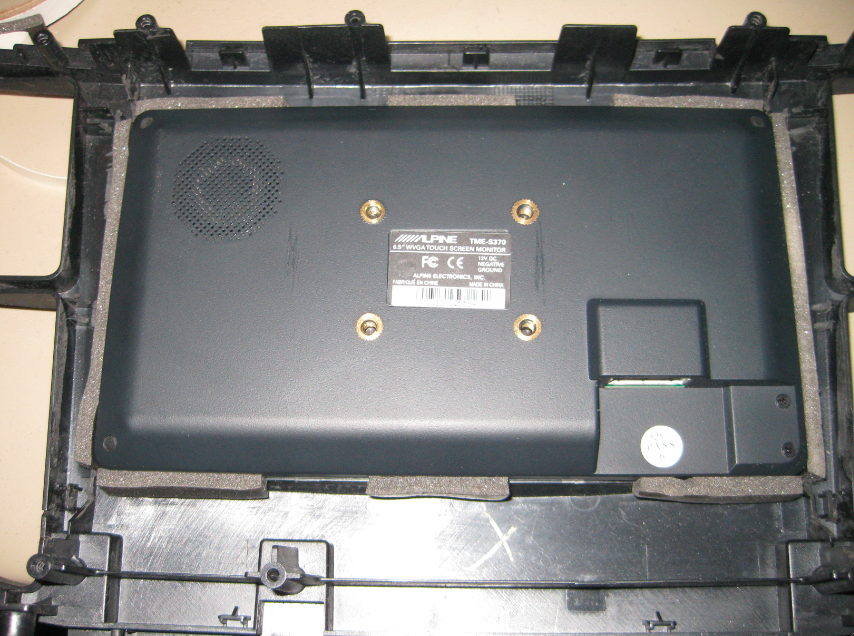
I screwed the screen to the metal box and lined everything up with the plastic front bezel.
Before:
After:
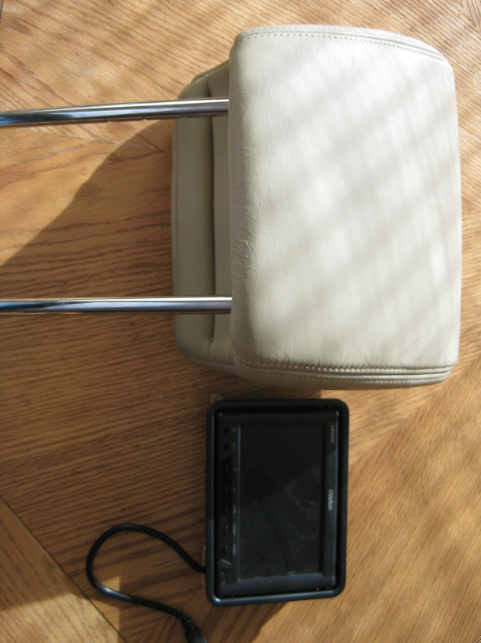
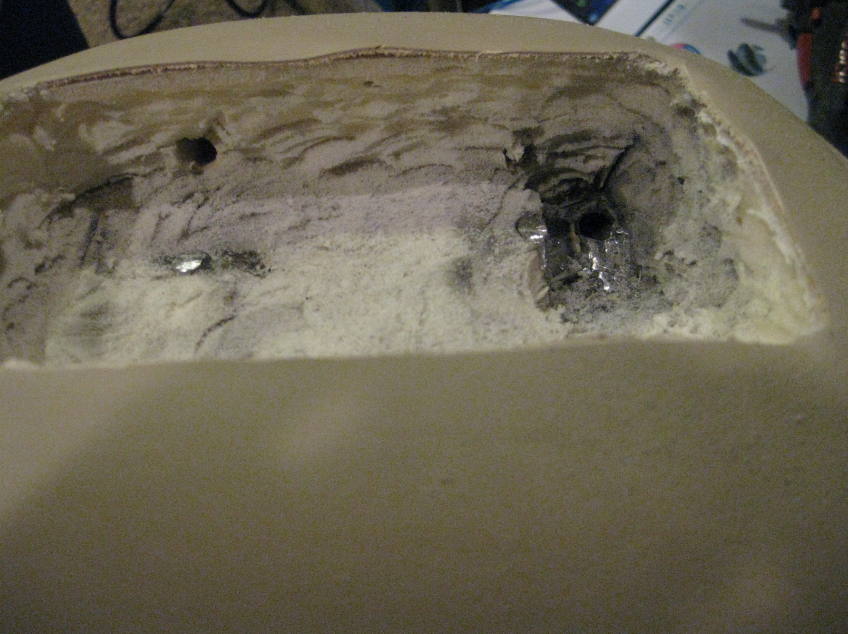
Since it is still very cold out, I worked next on extending the wires for the Head Rest Monitors so I can run the wire inside the Head Rest pole. I cut the wire and located the power, ground and video wires. These are the only ones I extended for my particular installation.
Head Rest and monitor pic:
Pic of the wires being cut:
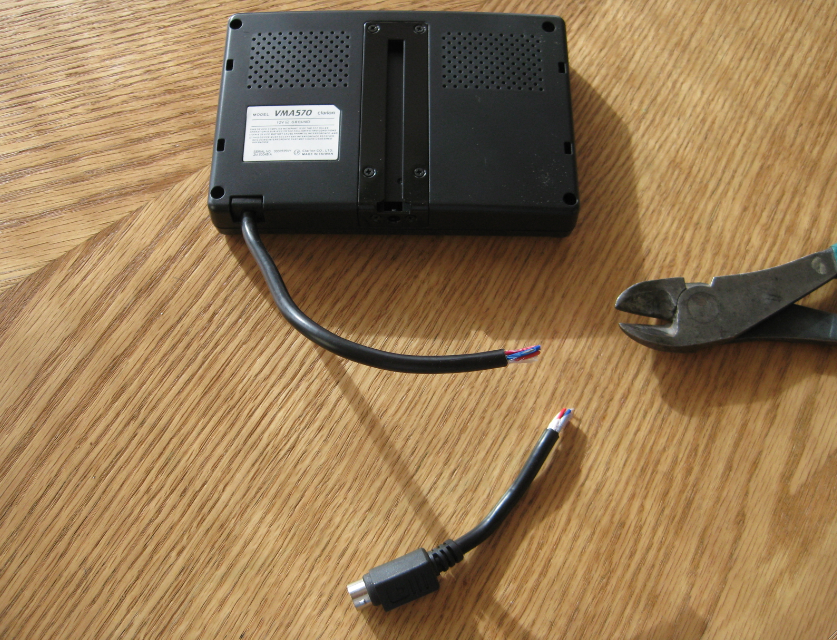
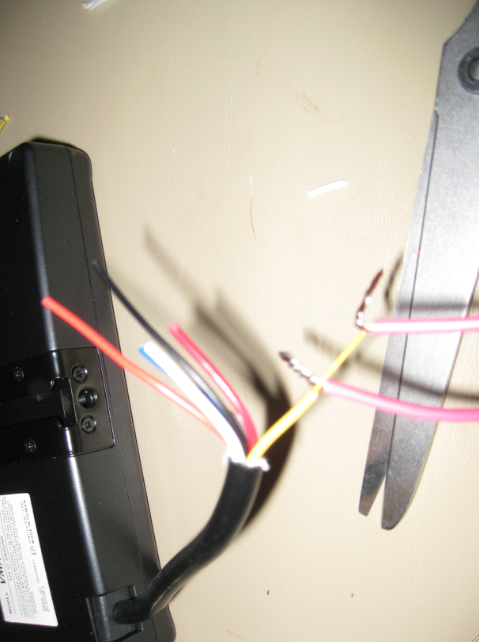
The wires were soldered with heat shrunk applied:

Final Pic:
I will test the monitors and then install them in the head rests.
Thats all for today!
1-17-2011
Update time....
Well, not real fun stuff to look at today, but I did get some things done that needed to get done this weekend.
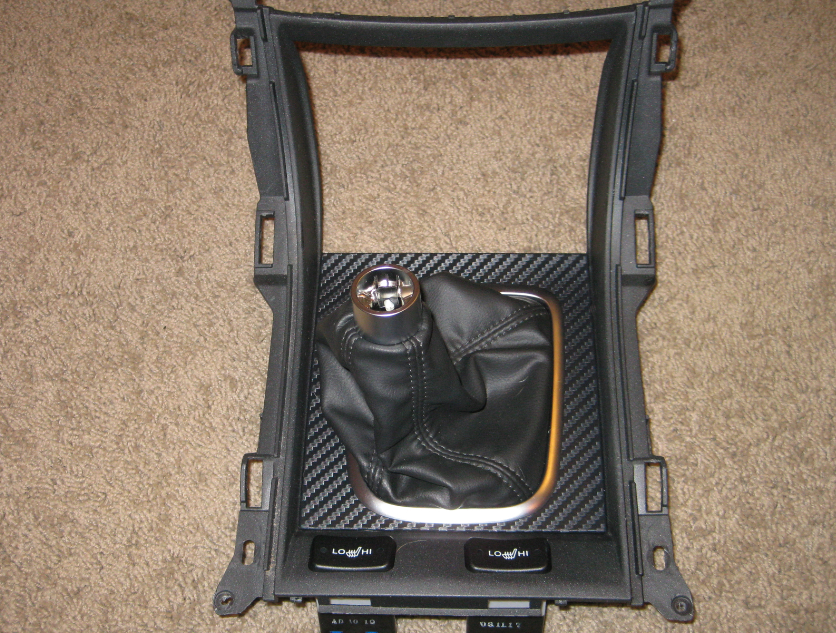
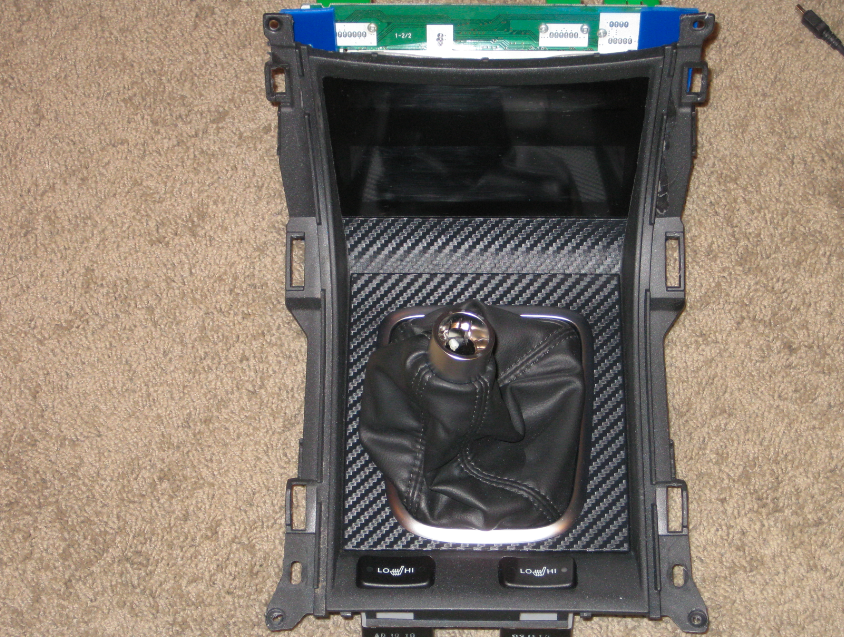
First off, I forgot to post this pic of the Carbon Fiber wrap I did around the shifter to cover the fake wood there:
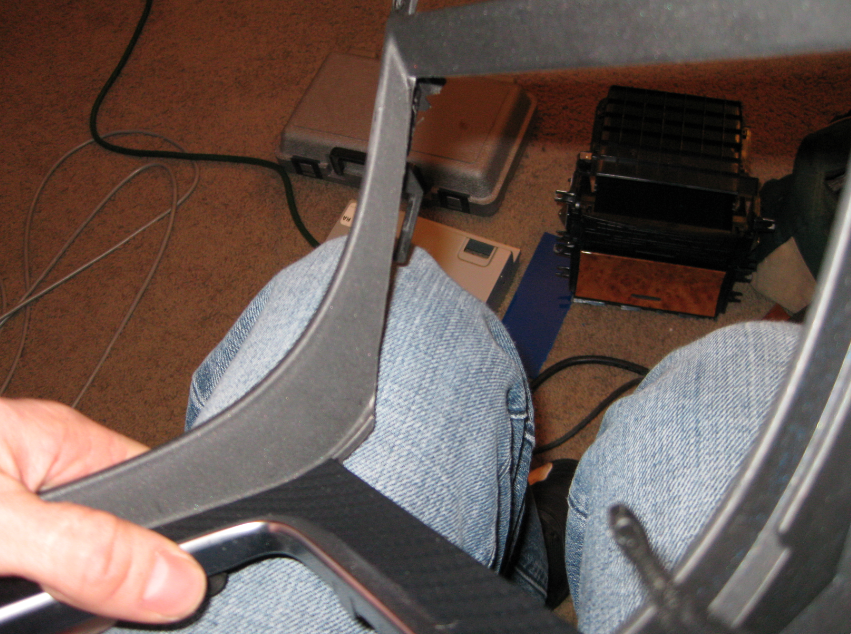
Next is mounting the headrest monitors. This is always a point where you better be sure you measured twice (or maybe 3-times or 4-times) before you start cutting.

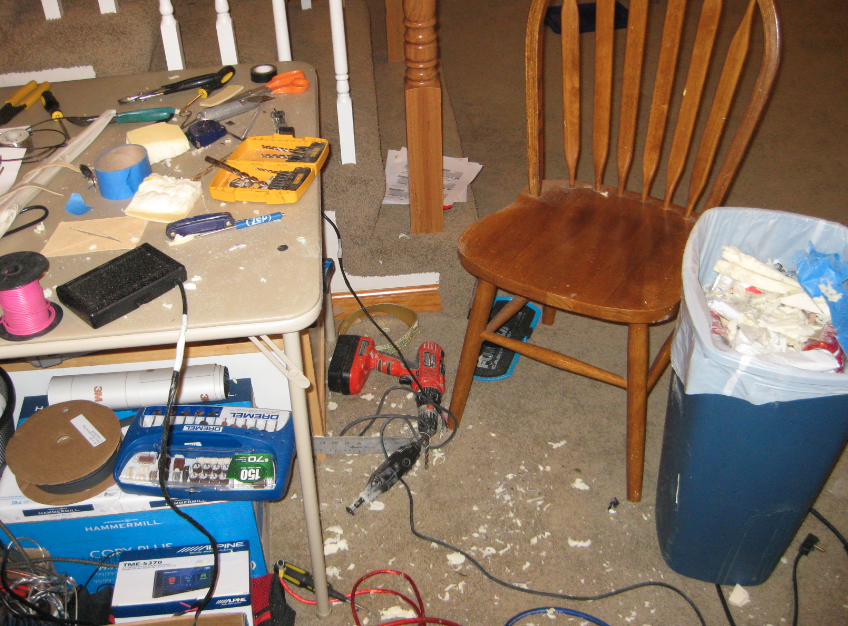
I found that using the dremel with the cutting disc works great for shaving the inside foam....makes a huge mess, but works really well.
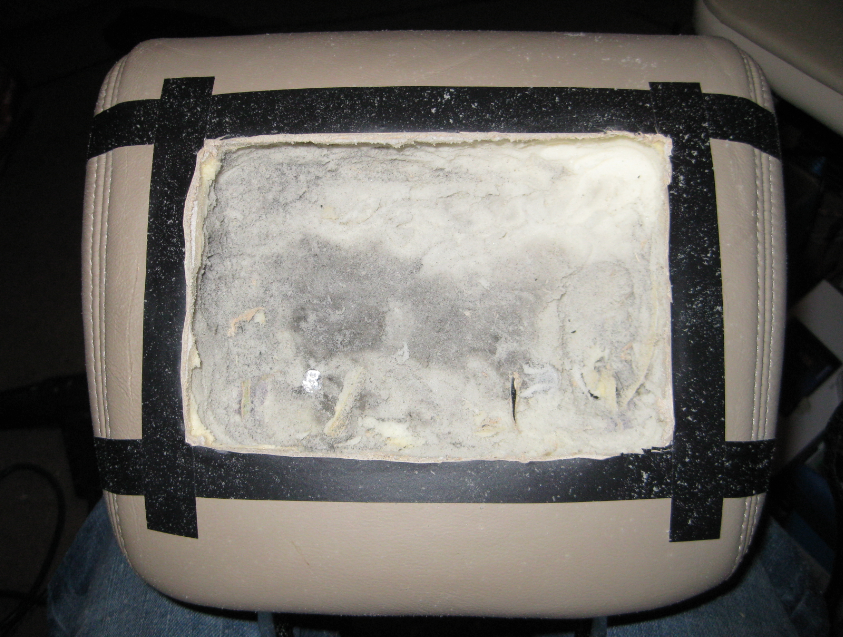
Huge Mess.
Some metal that had to be cut and I had to cut a hole in the metal pole to run the wire inside.
Screen bezel in place:
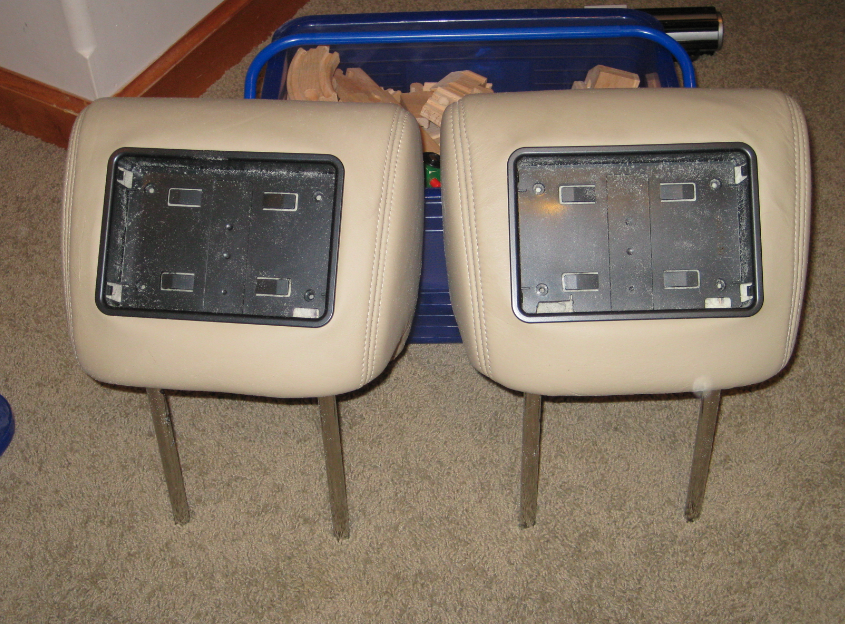
Wire connected and screen snapped into bezel:
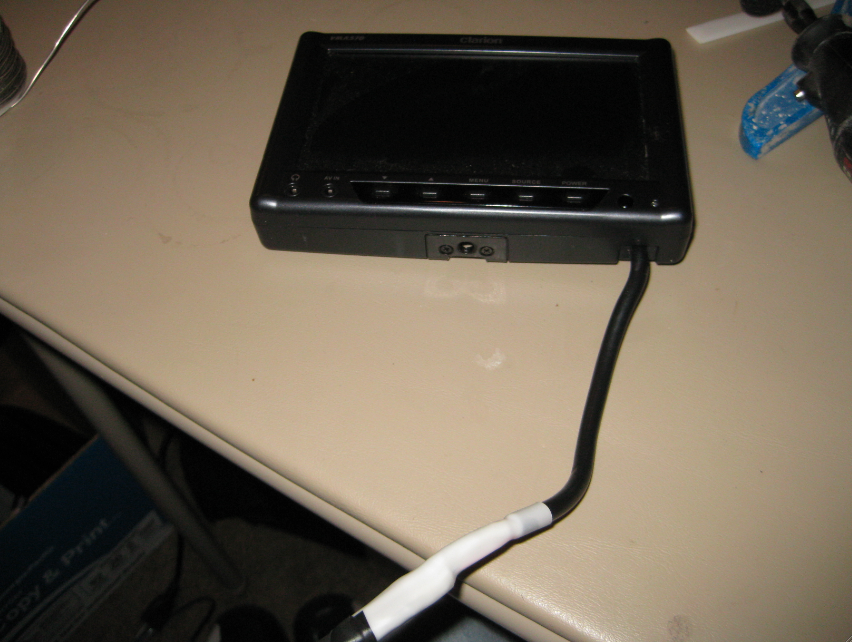
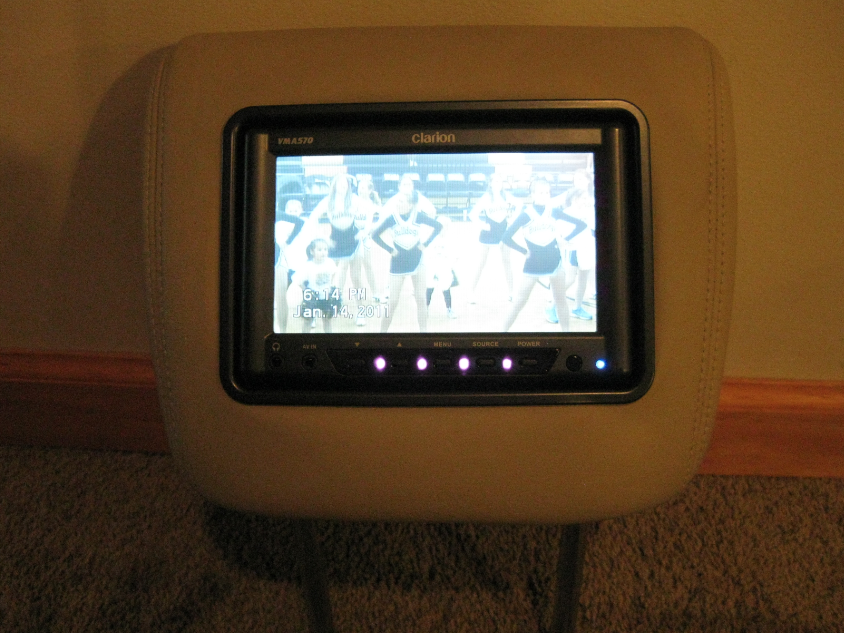
Tested to make sure everything works:
More to come....
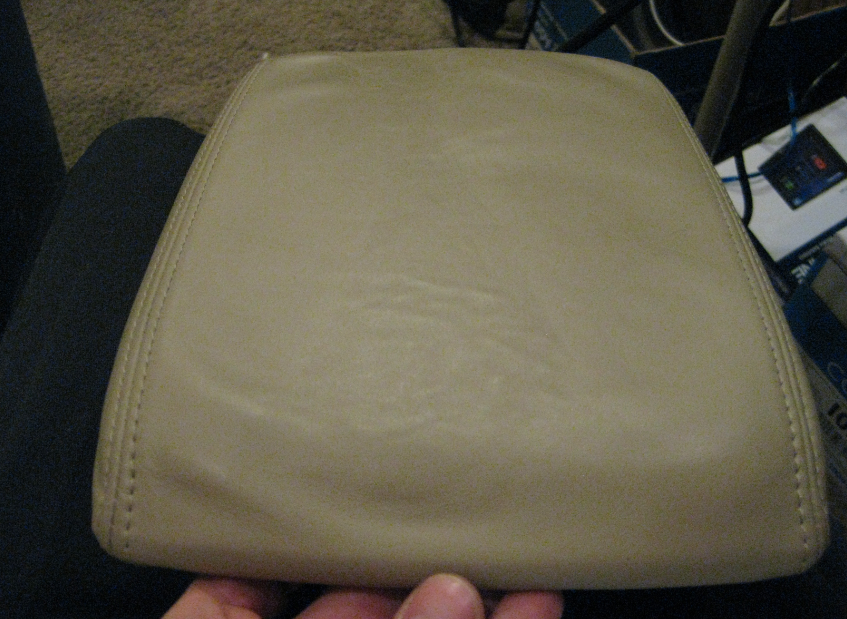
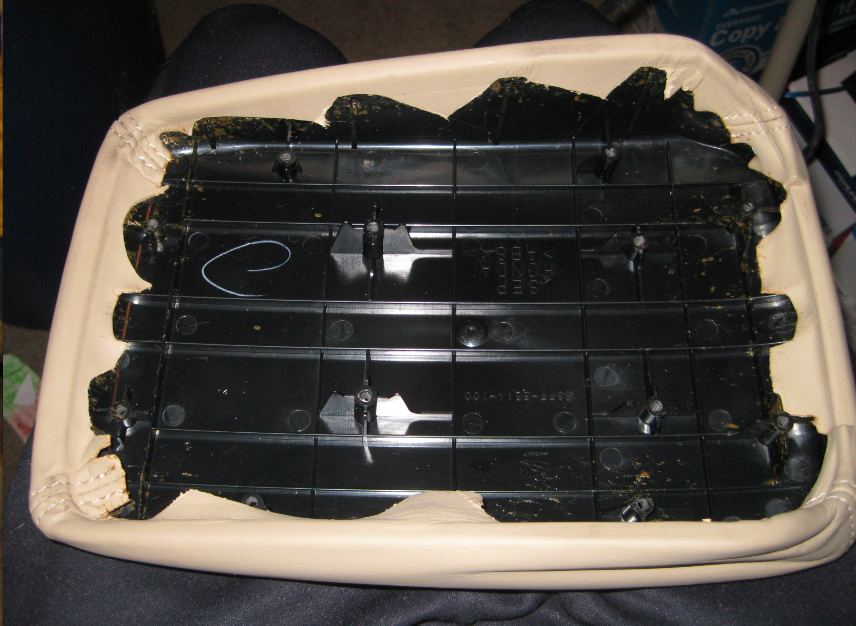
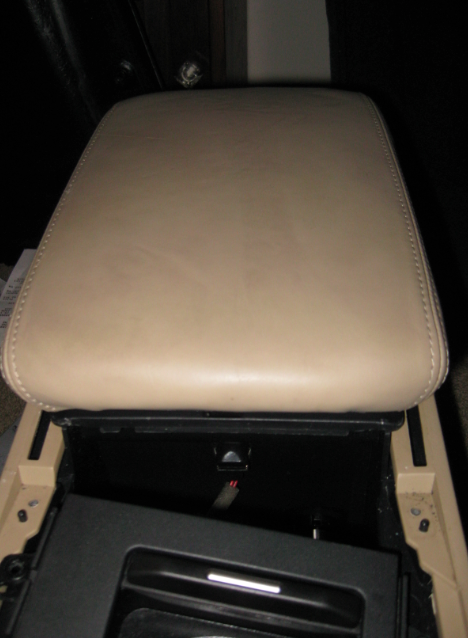
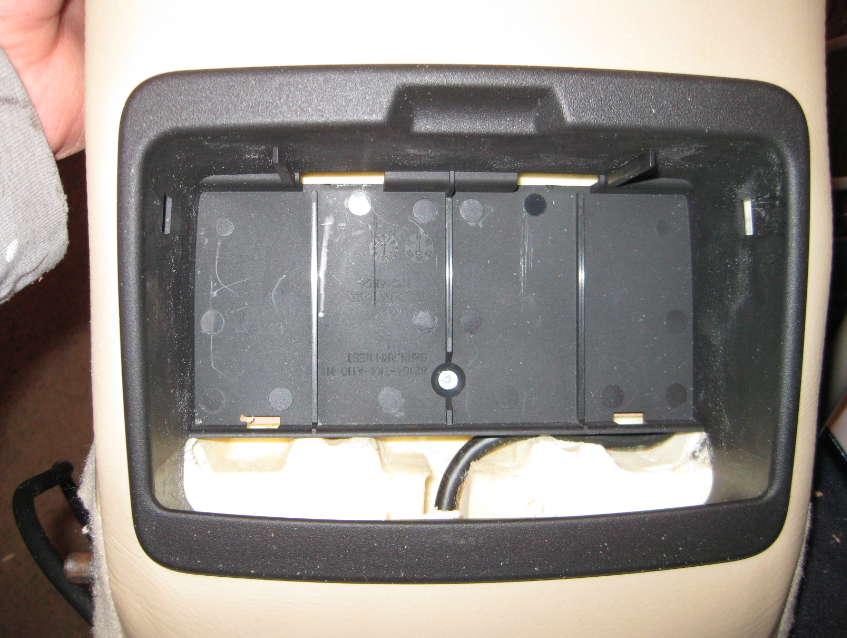
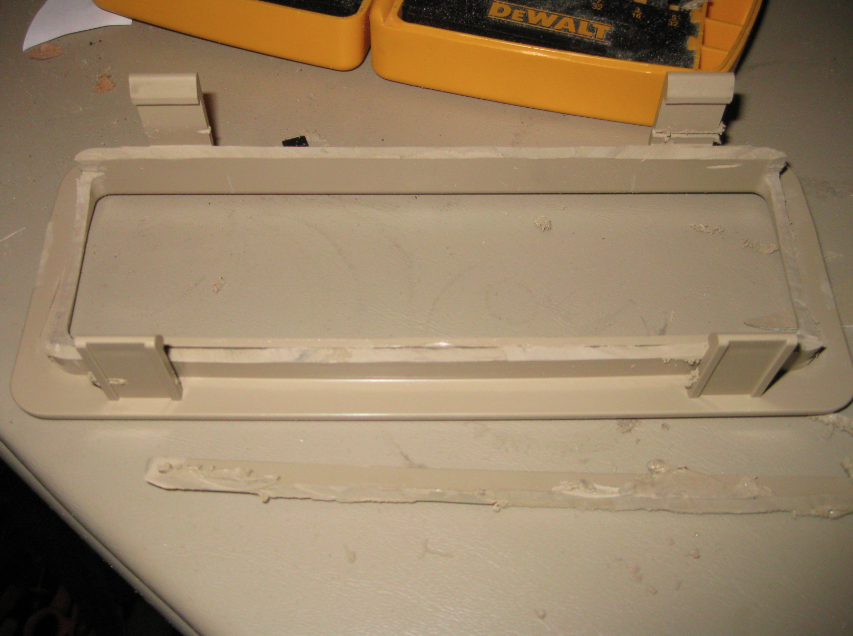
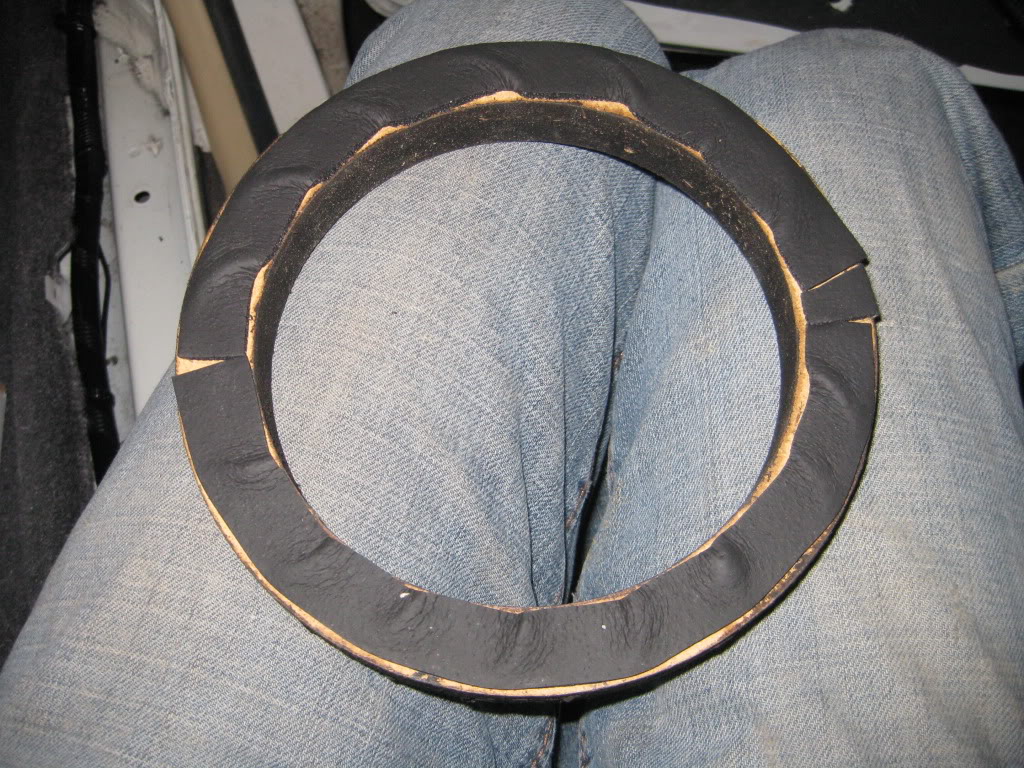
I ran across a thread by SRT-11 here at Acurazine detailing the repair of the front center console armrest. On these generation TL's the armrest looks like this after a little while:
So, I decided to fix it quick while I had the thread open and all the stuff ready. I did use some different methods that worked really well.
After removing the armrest, this is what it looks like.
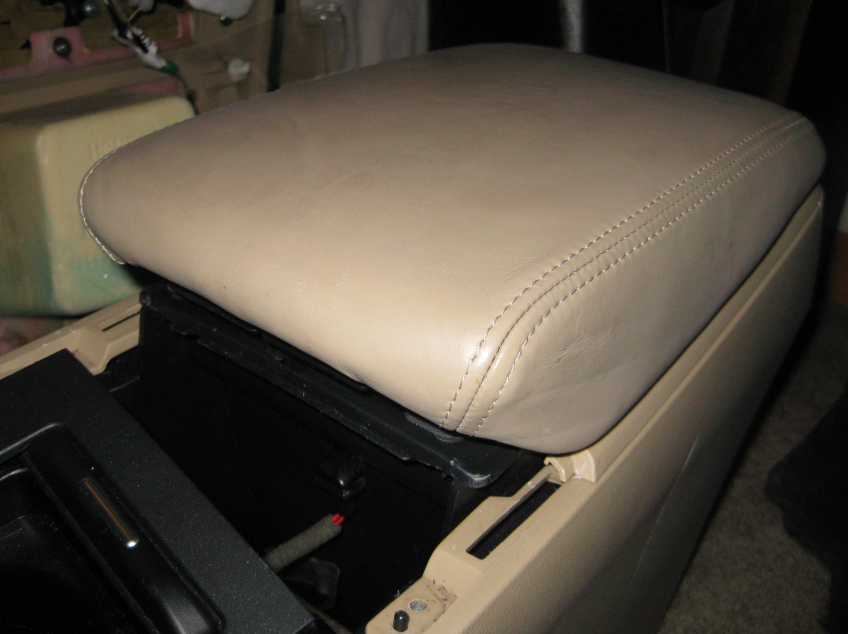
I then used a heat gun to heat the glue and the leather pulled off easy with my fingers and no stress to the leather.
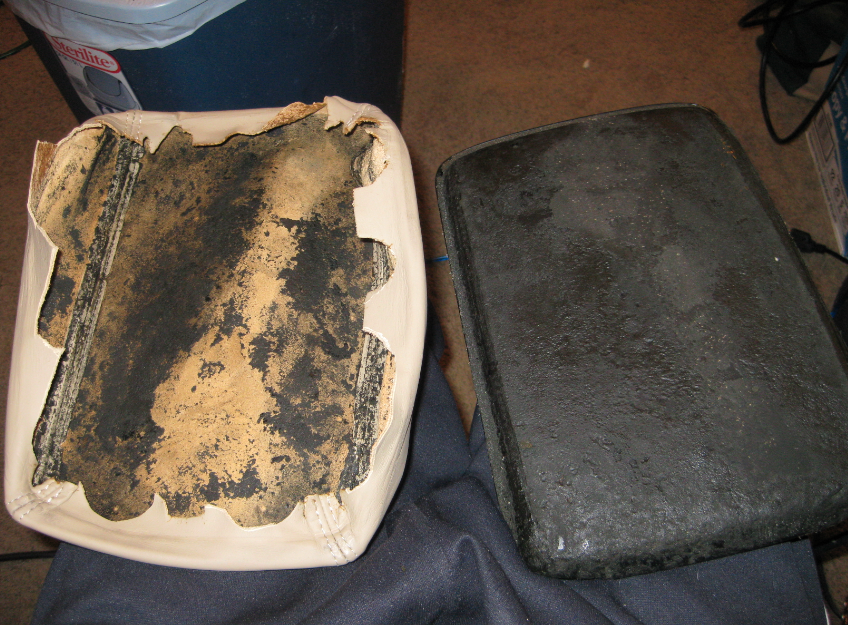
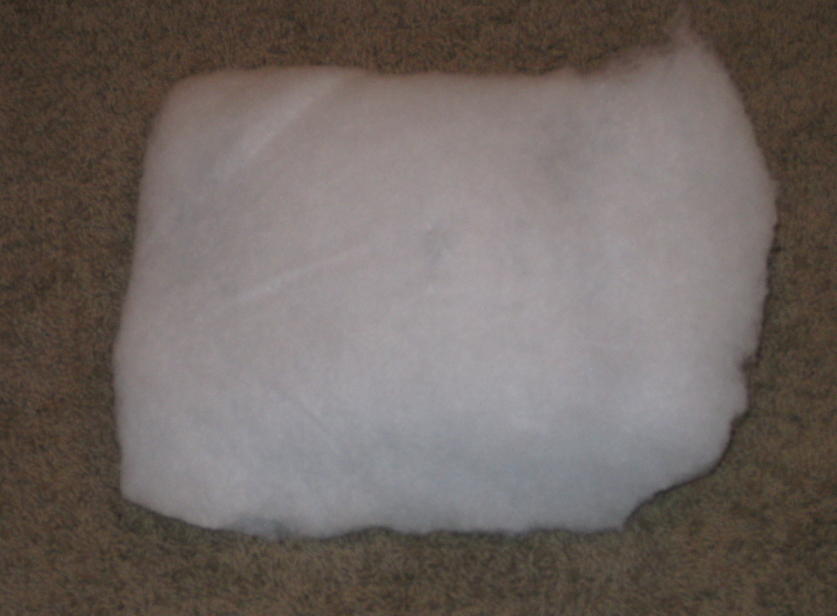
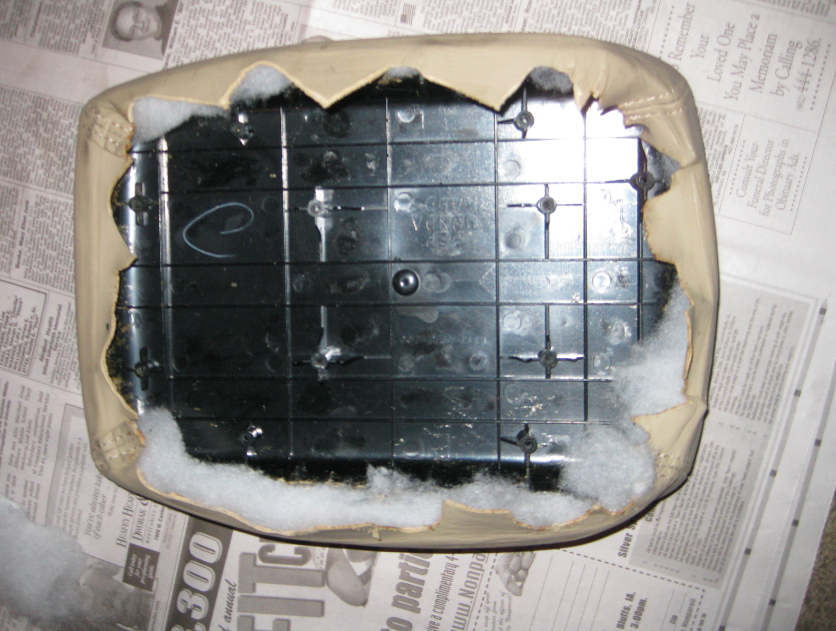
I scraped the "goo" that used to be padding off and replaced with some batting. I used spray glue to hold the batting in place with I shipped the leather back on.
I then used hot glue on the edges of the leather cover.
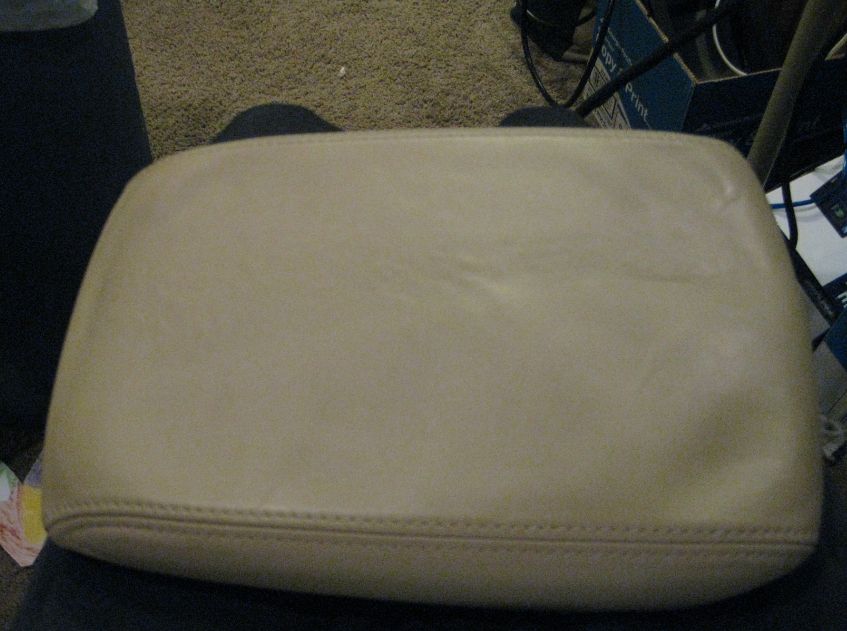
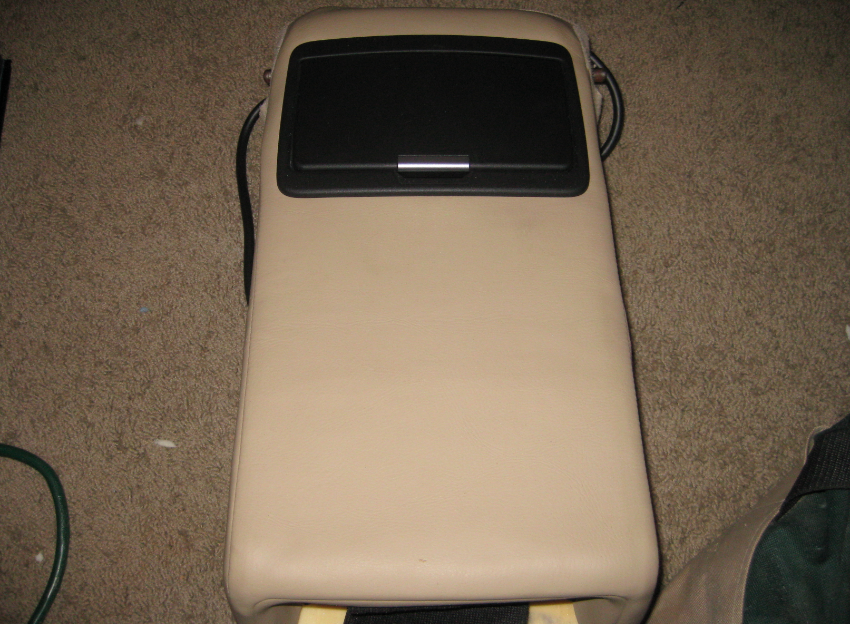
And here is the result, mounted back to the center console.
A couple more pics on the way....
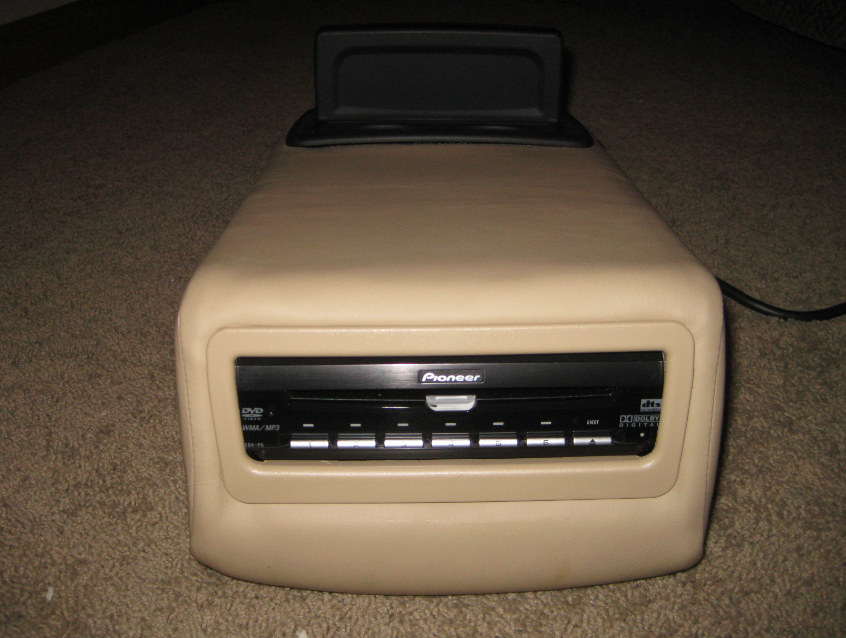
Just a few pics left, then back to work. I started on installing the Pioneer DVD changer into the rear armrest. Here is my progress so far.
Removing the leather from the armrest:
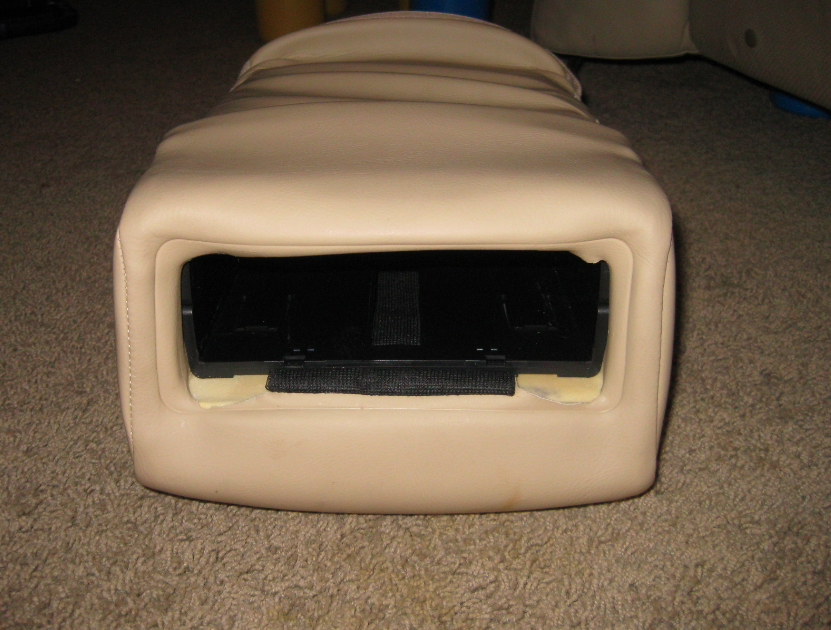
After removing the large plastic insert for the cup holder in the foam, I was able to test fit the DVD player.
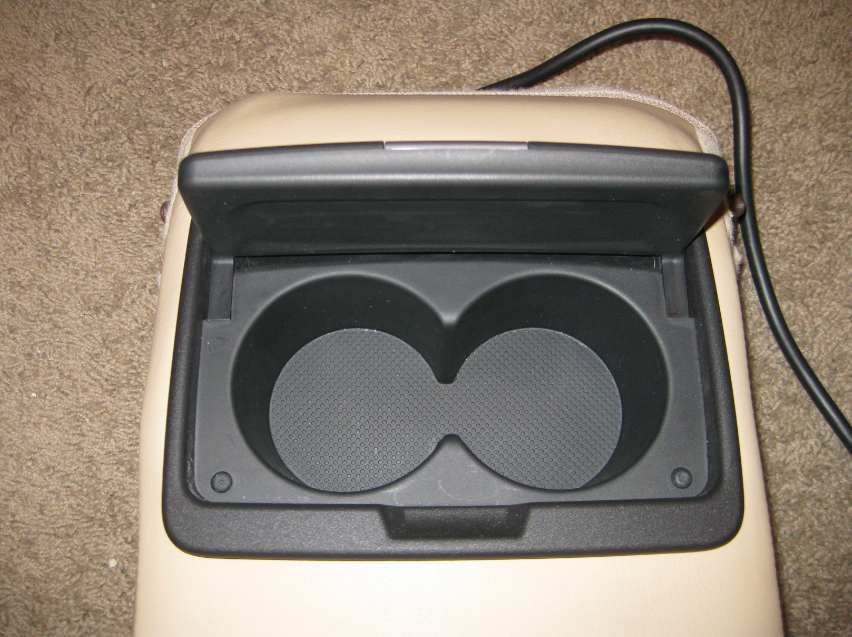
Next, since I can't have a car with kids and no cup holders, I bought the rear cup holders out of a 2010 Acura TL (dealer thought I was a little off, since mine is a 2004) and I am installing them in the top of the armrest (where they are located in the 2010-up TL's). This also stops me from having to tell rear passengers where the cup holders are, since they always asked previously.
That was it for last night.....had to go take care of some "business" with the wife . I should finish mounting the DVD playerand cup holder today!
1-18-2011
More updates....
Today was a "warm" day by our standards, so I spent most of the time I had working in the garage. The TL is prone to bad door lock actuators, so with the fact I will be sealing the doors tighter than fort knox, I decided to replace the front actuators before starting the sound deadening...no pics, since this was just a mechanical fix.
I did get a chance to finish up mounting the DVD player in the rear armrest.
Here is a pic of what has to be removed from the inside to get rid of the old cup holder. All this for just a crappy cup holder???
I next ran the wire inside the armrest and put the leather cover back over it.
Next, I cut the leather to match the opening I already cut in the foam part of the armrest to mount the cup holder.
Cup holder is mounted. I hot glued a piece of plastic to the foam underneath the cup holder, and then hot glued and screwed the cup holder to the plastic. Here are pics of the new cup holder opened/closed.
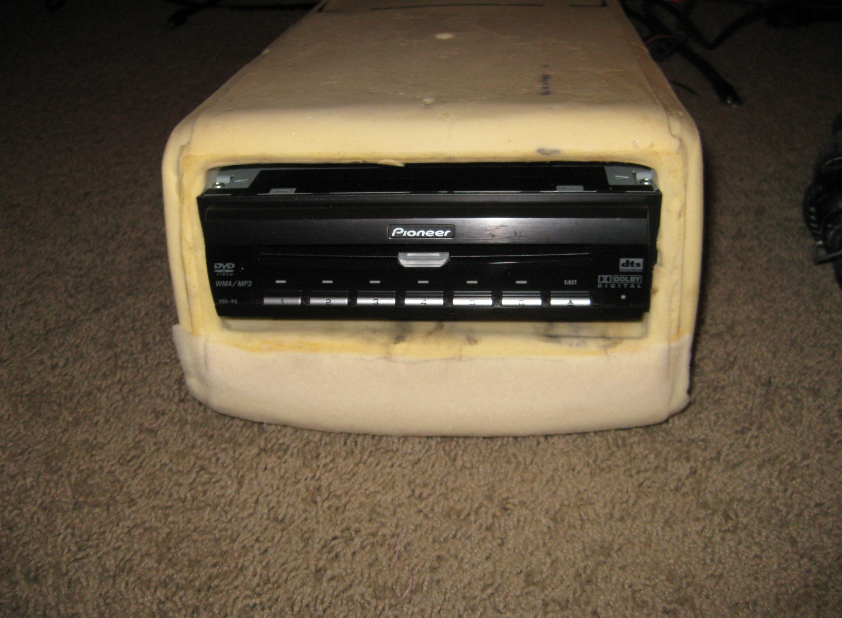
I then mounted the DVD player using the same method as before on the cup holder and started working on trimming the front cup holder bezel to fit the DVD player.

Here is the finished product.

That was it for yesterday. Today I am planning on spending some time testing the DVD player with all the screens just to make sure everything will work correctly before installing. I then plan on working on relocating the factory HVAC/Radio LCD. Today is supposed to be a high of 11....ouch!
1-19-2011
Another update....
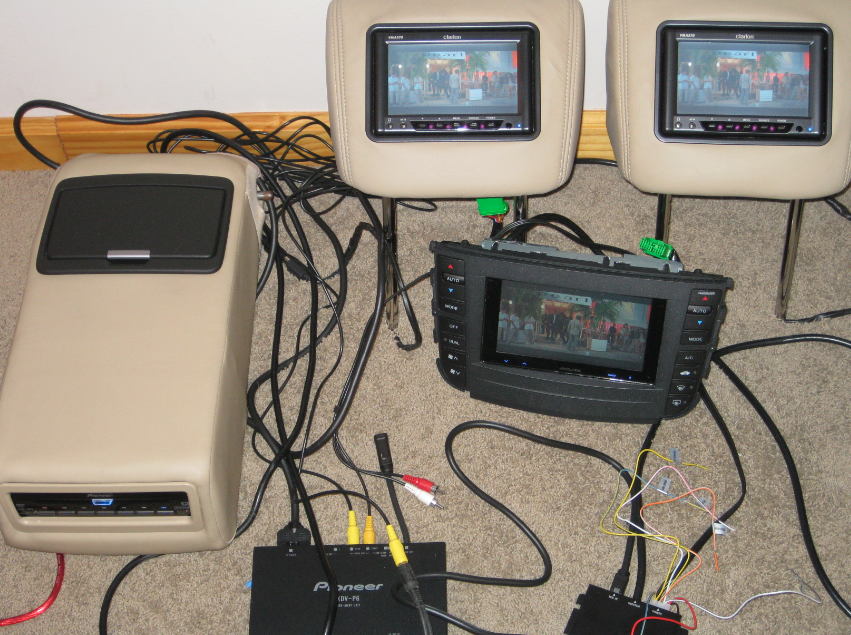
I tested the video setup to make sure everything was "talking" to each other correctly before installing. Here is a pic of the video:
Next...I worked on mounting the HVAC/Radio Display to the lower part of the console where a few useless cubbies resided. The trick here is the lower section has two different curvatures going on at the same time.
Here are pics of the relocation:
I first trimmed the bezel to take out one of the curvatures.
Then I cleaned up the inside edges.
Here is the piece I made out of low temp plastic to bridge the gap.
Covering the piece in the carbon fiber wrap.
I hot glued the piece to the bezel.

More.......
Next was to attach the display to the bezel. I had to get a little creative here and use a few different methods.
I used 3M double sided industrial tape to attach the plexi front to the bezel and the plexi front to the display.
I then used low temp plastic to screw the display to and the plastic is then screwed to the bezel....I did trim the edges flush when I finished (not shown in pic).
I then made a final mounting bracket out of the plastic to secure the bottom of the display.
Here is the final pic of how it looked when finished!
That it it for today. I will see if I work at all tomorrow (supposed to by a balmy 15 degrees outside).
1-27-2011
An update....
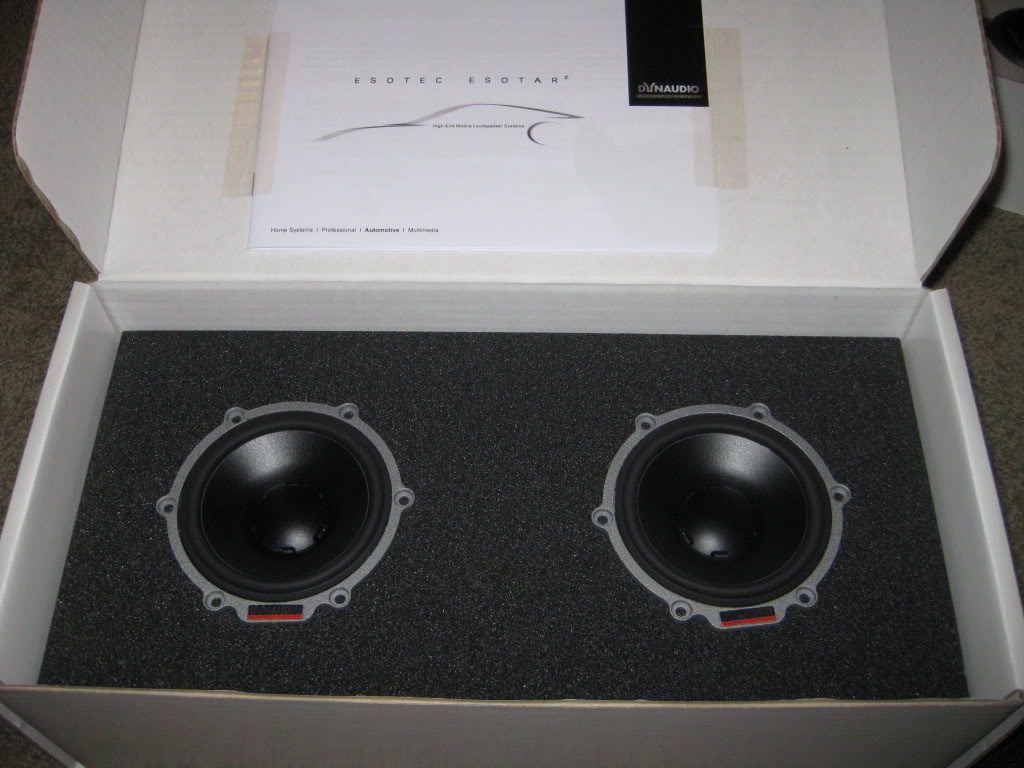
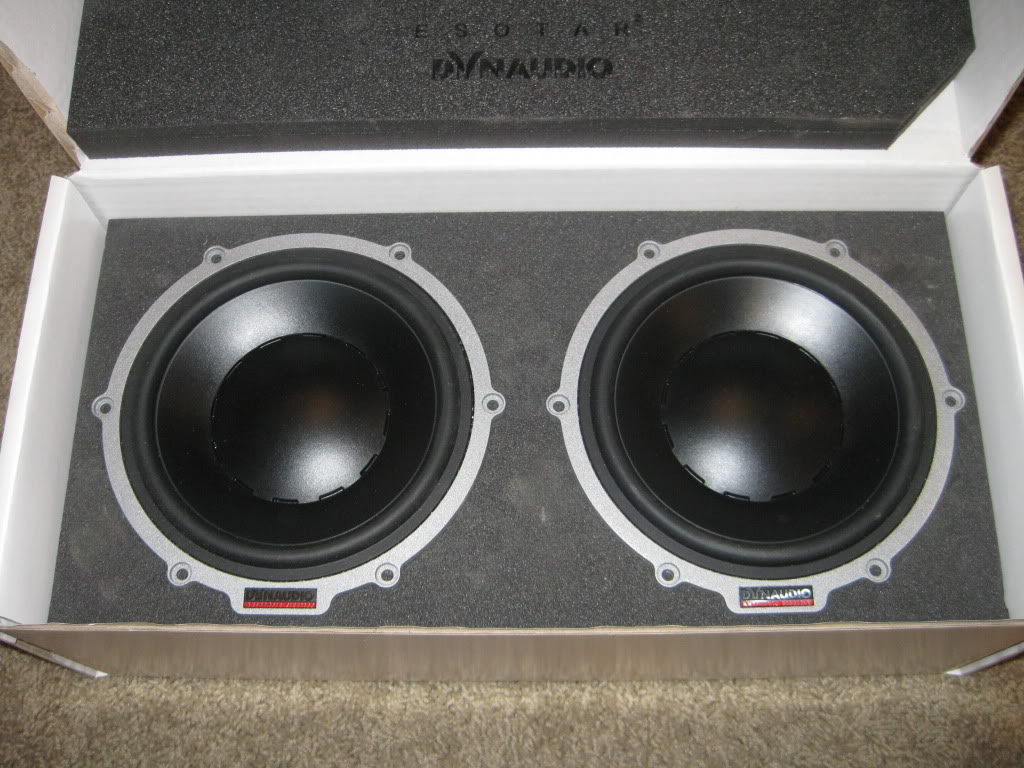
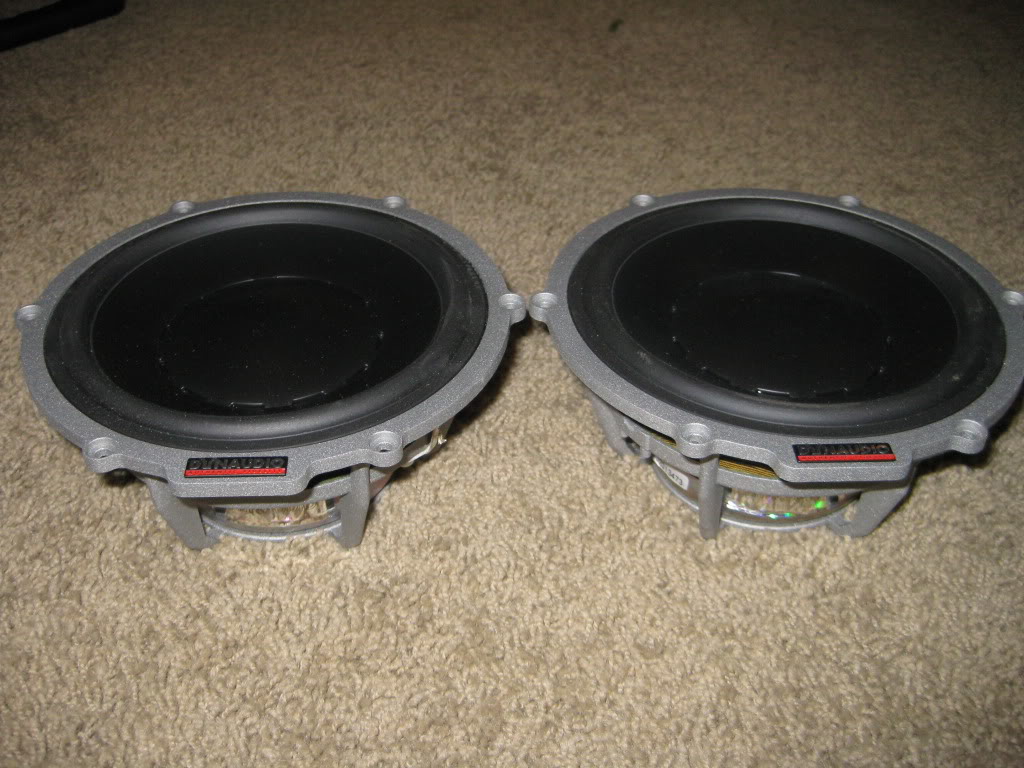
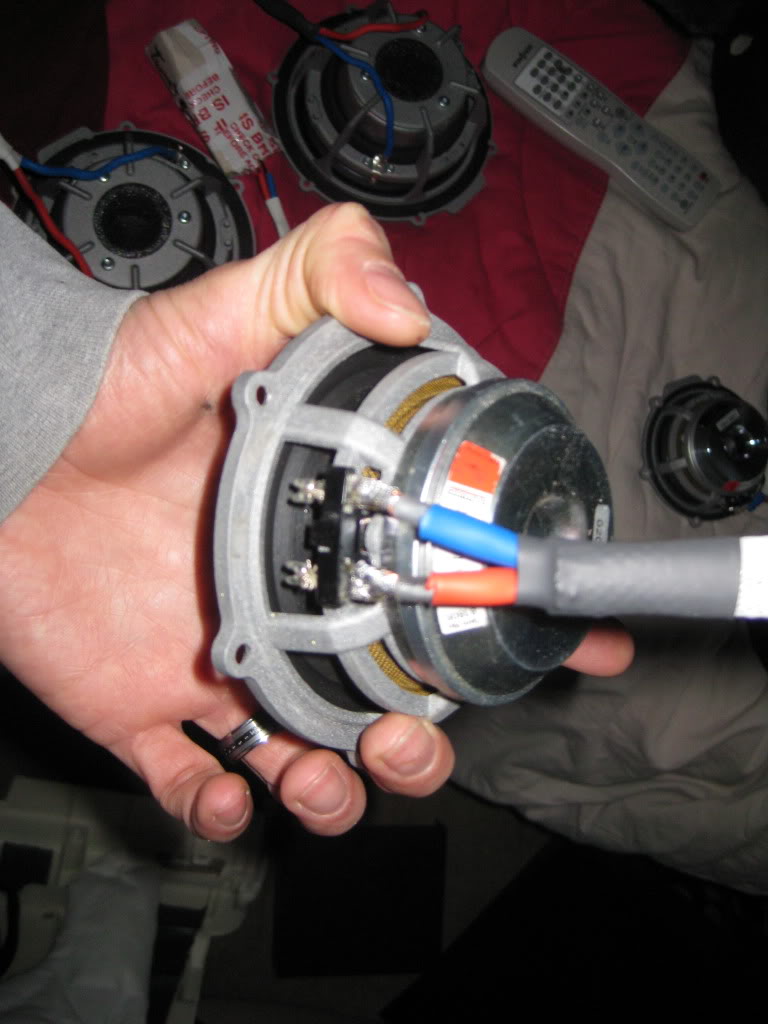
Been working through weather and other issues, so I haven't updated in a few days. I do have some stuff done, but before I go any further I think it is time for a little porn (for us audio guys).
This is what was removed....factory system (cute little amp).

Here is what is going in.
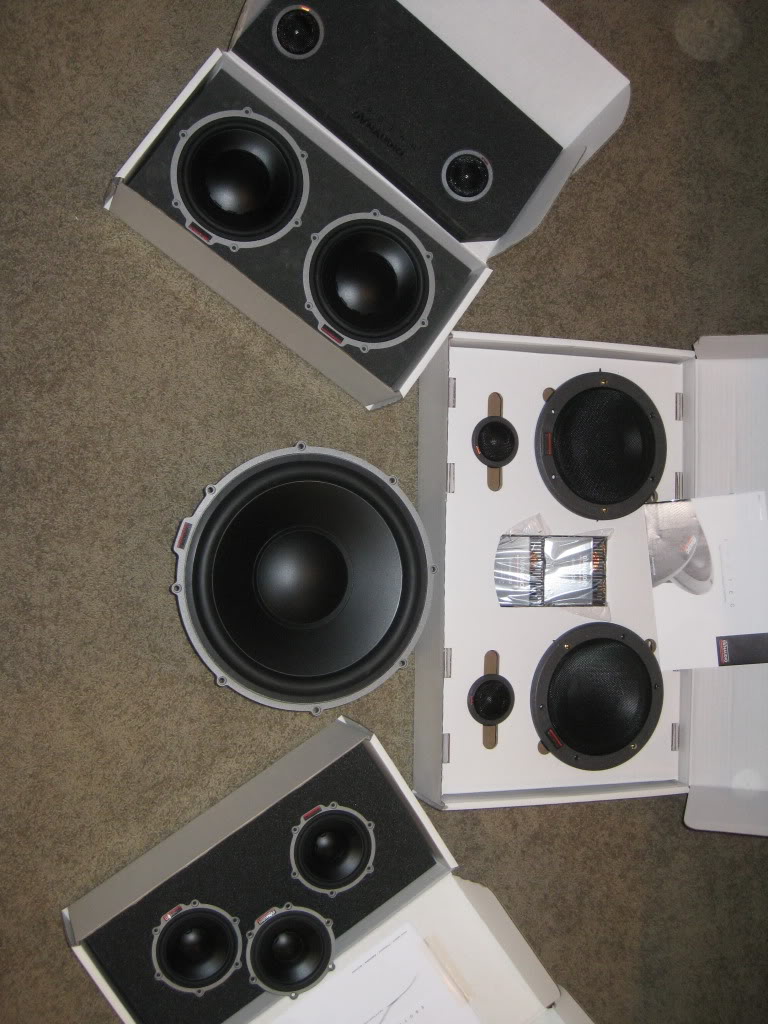
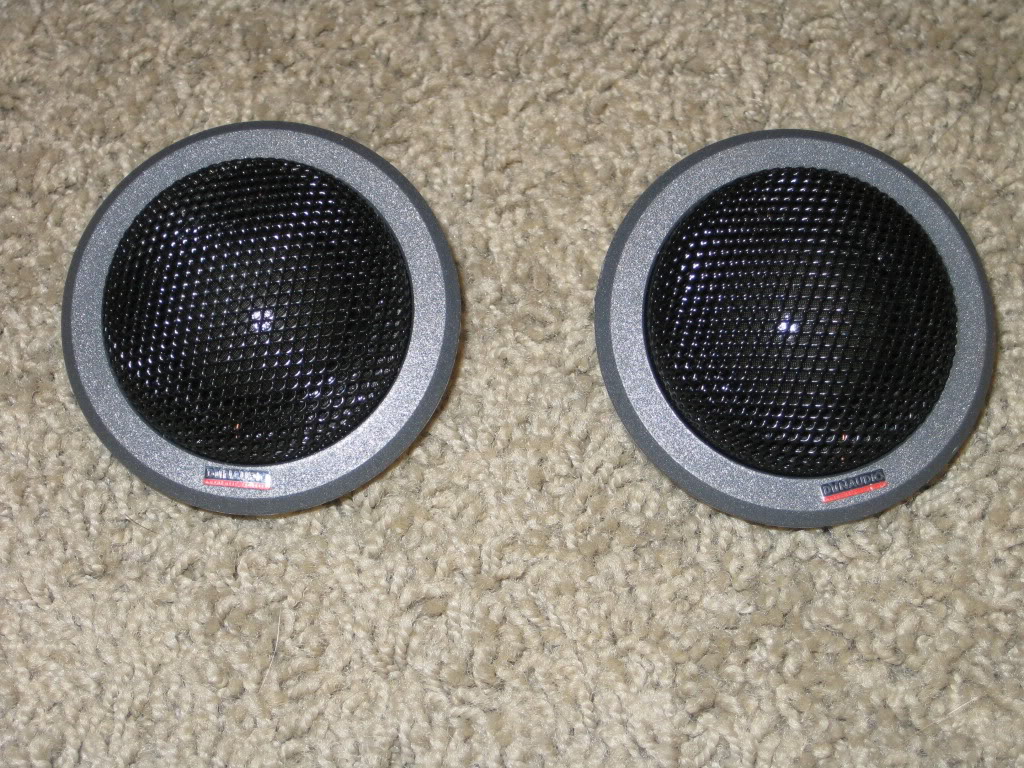
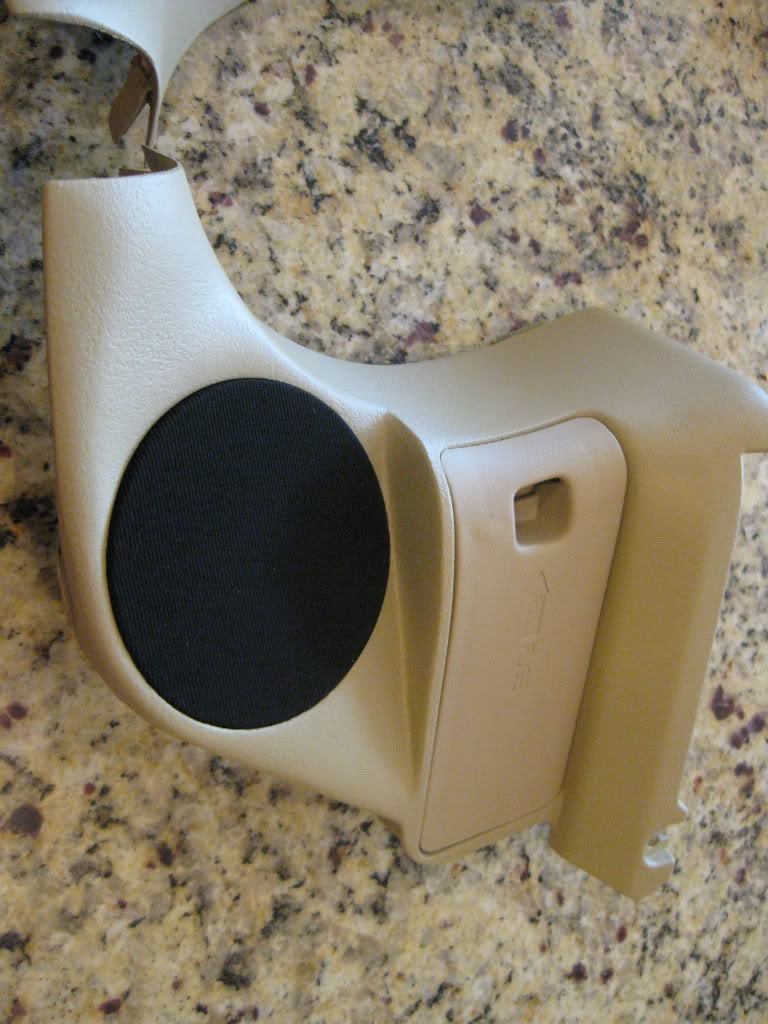
Front Tweeters:
Front Midrange/Center Channel:
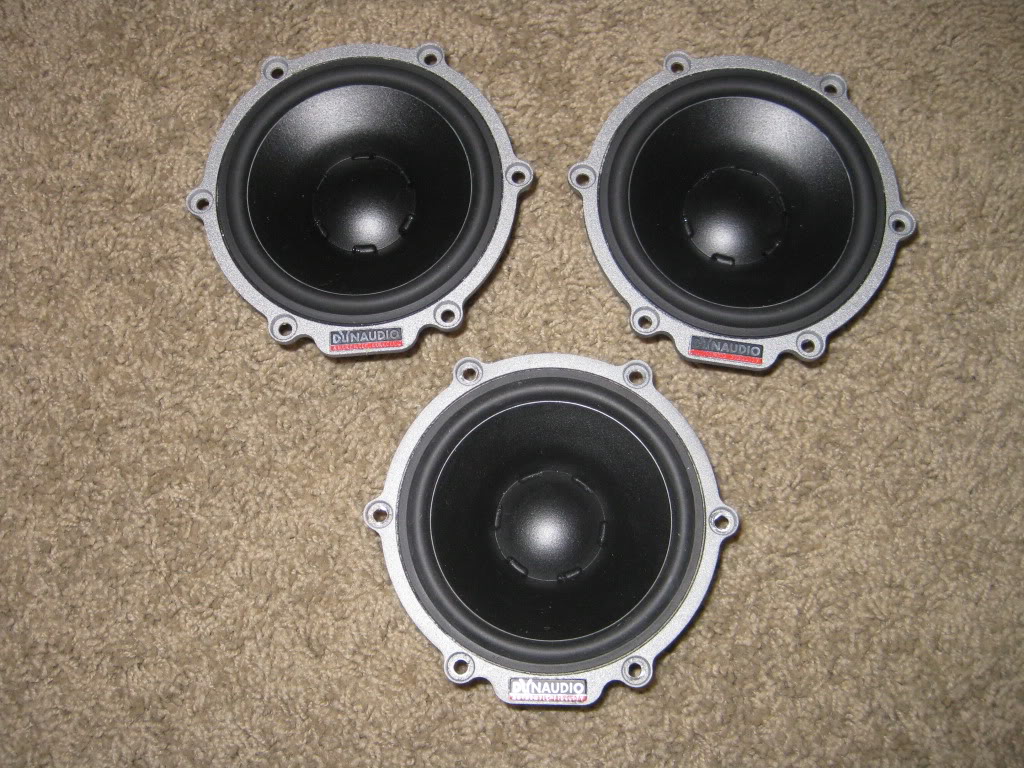
Front Midbass:
Rear Fill:

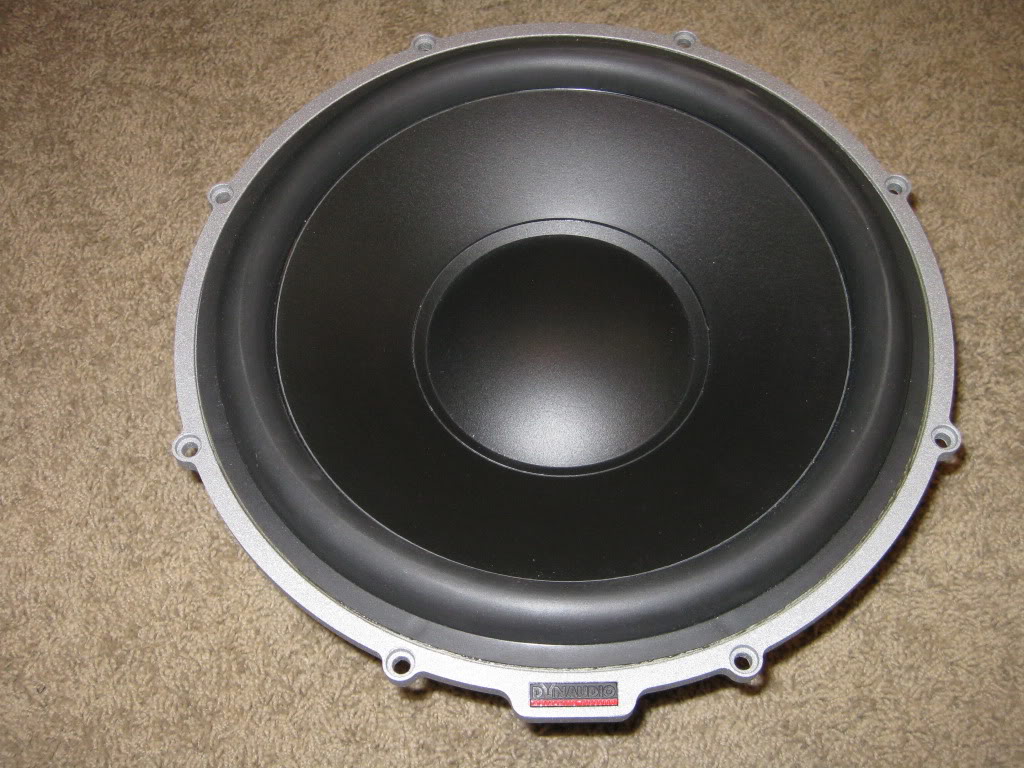
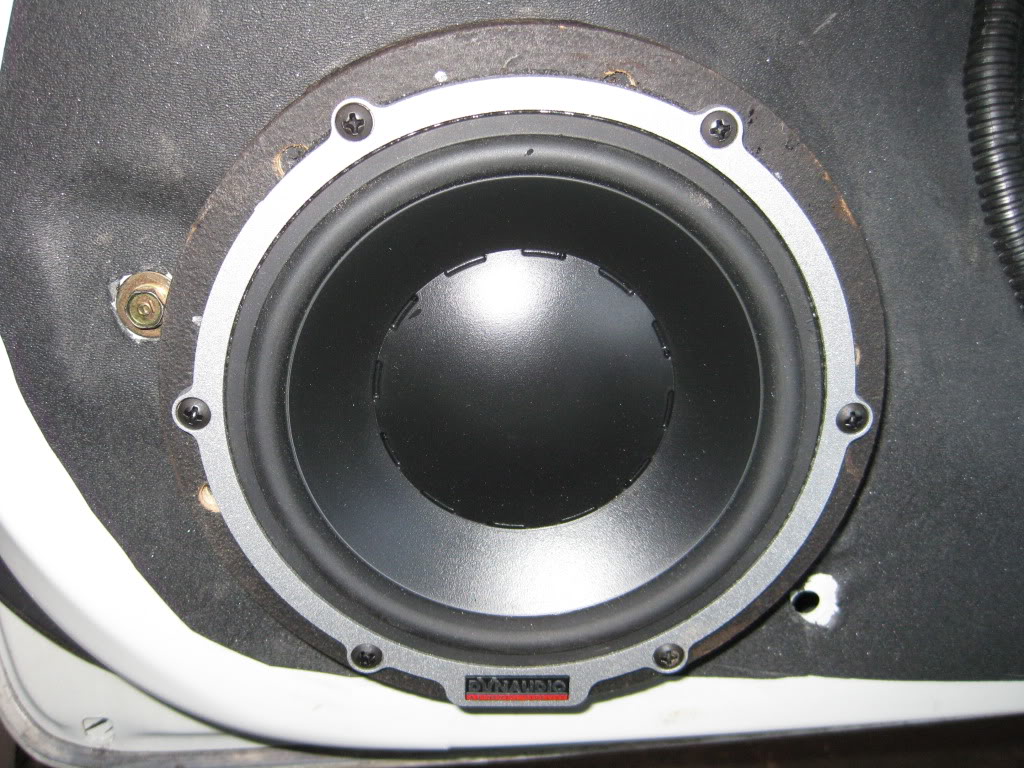
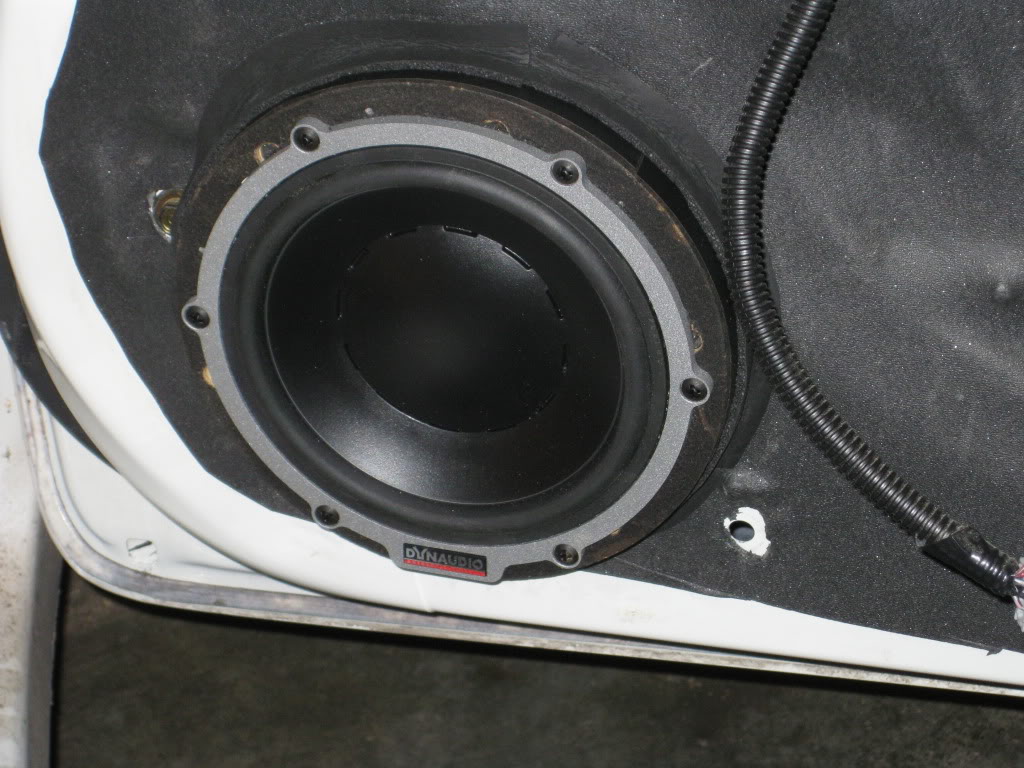
Subwoofer:
more to come....
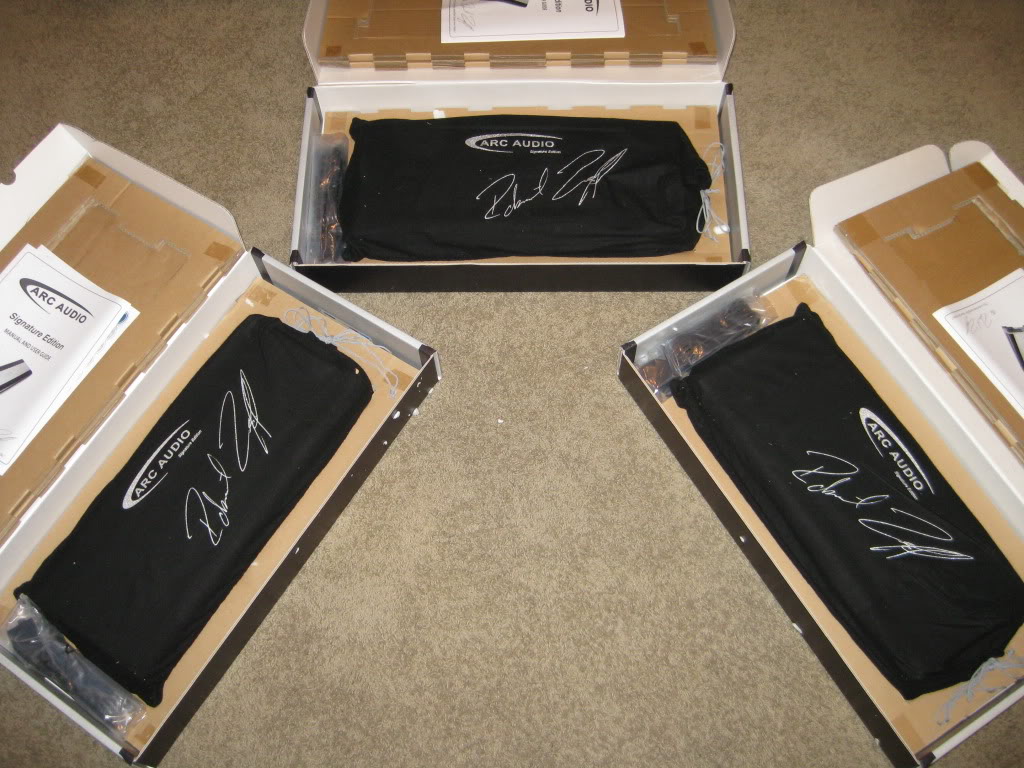
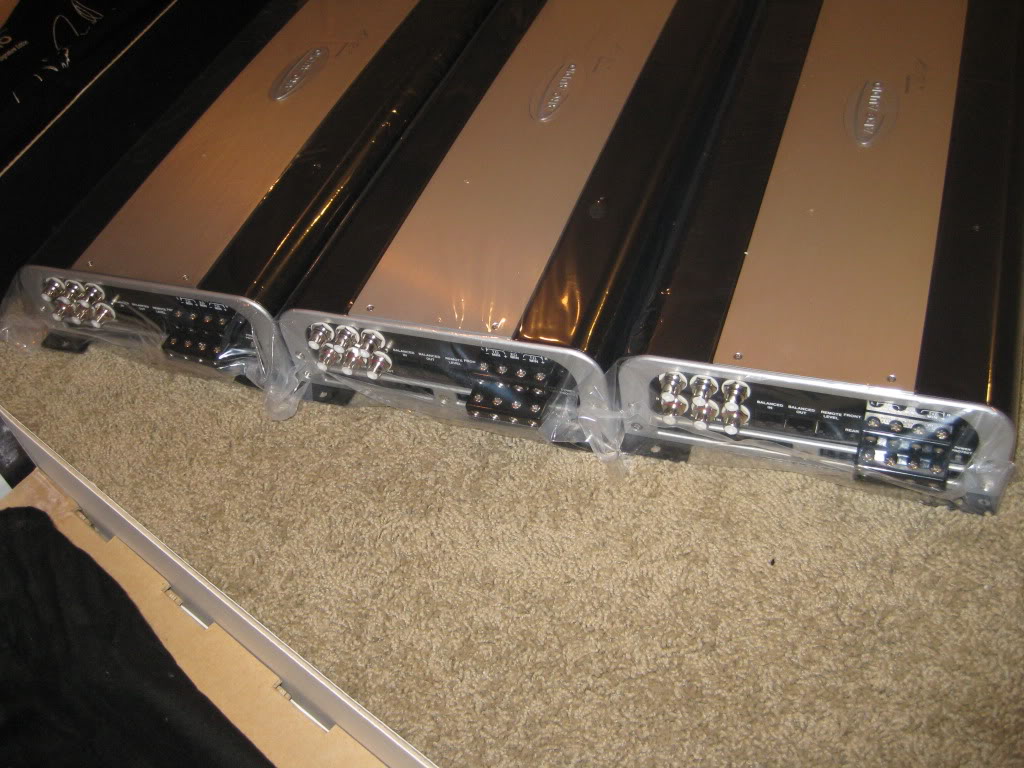
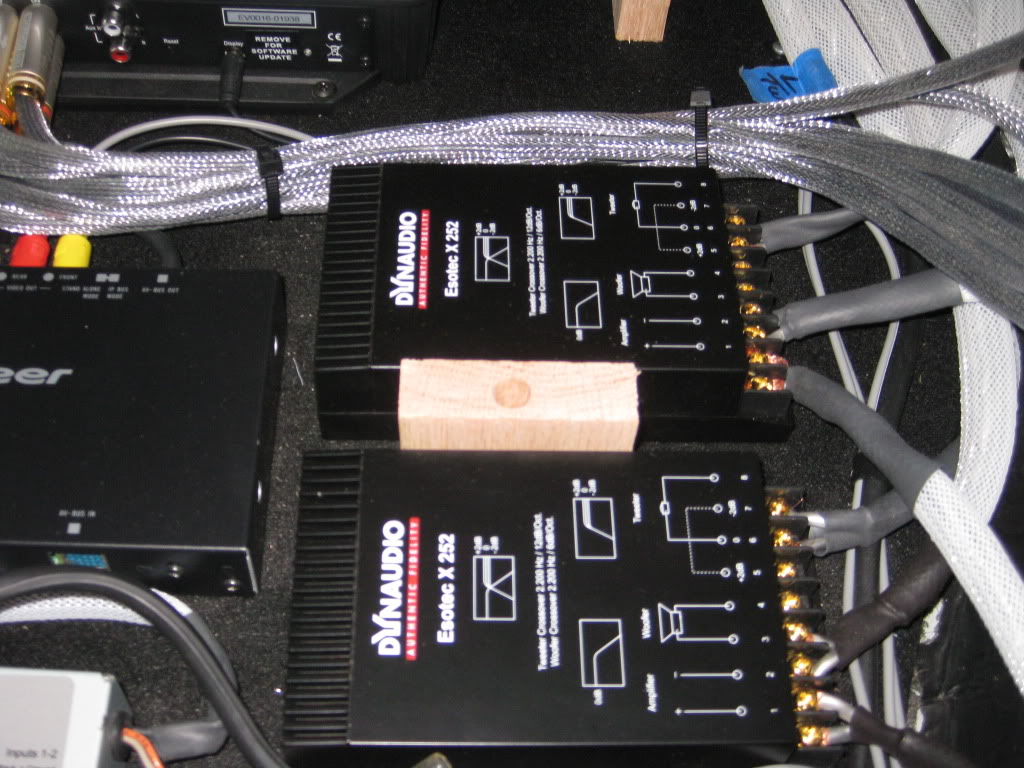
Now for the amps.......
All these speakers will be driven by (3) ARC Audio 4200se. The guys at ARC have been extremely helpful and are great to talk to, especially Fred!!!!!


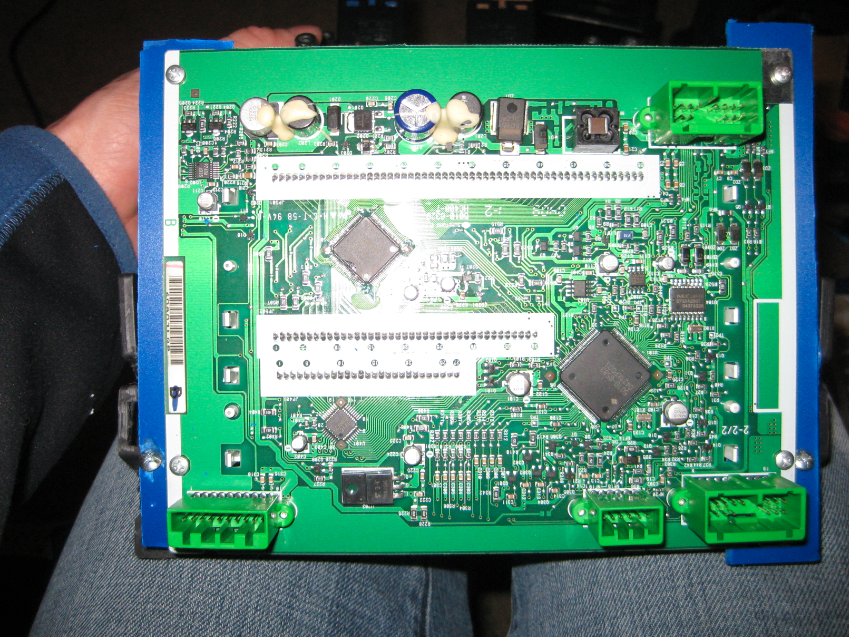
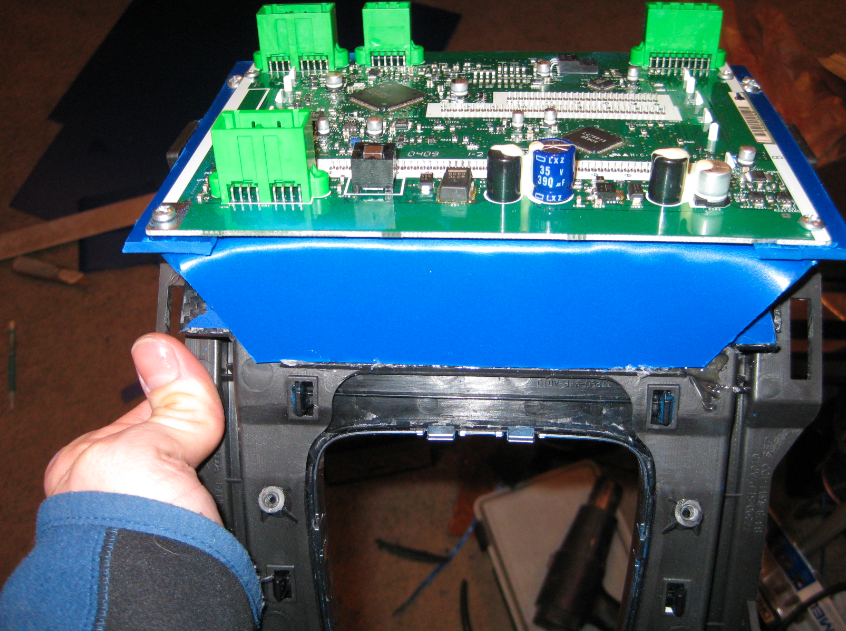
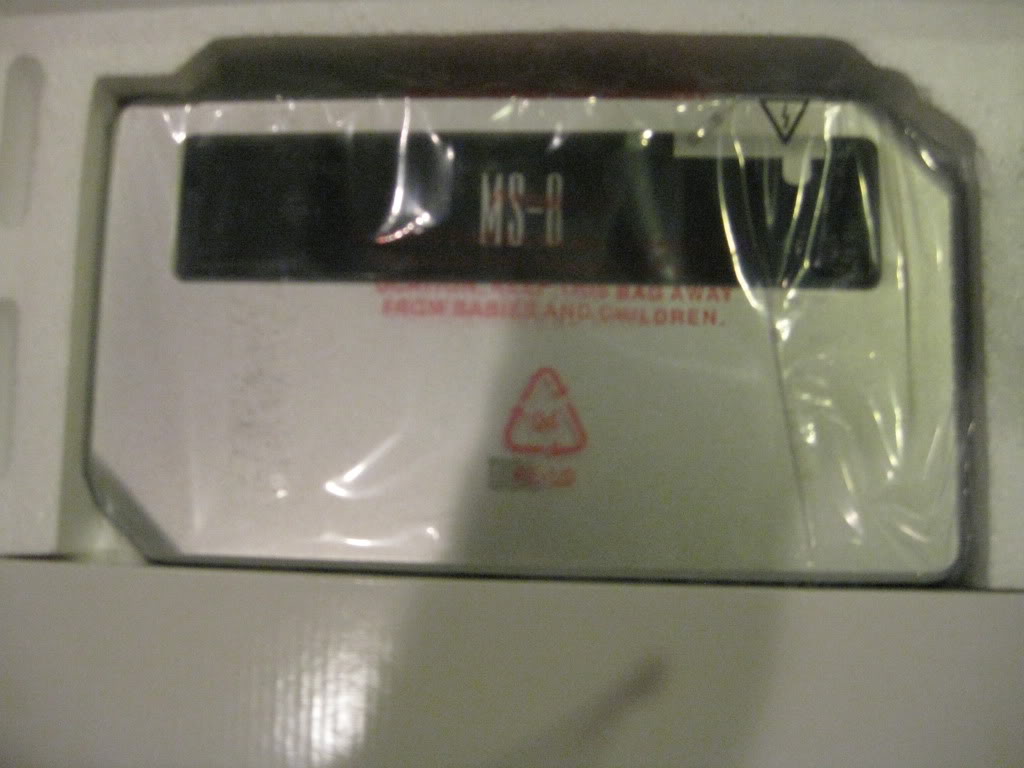
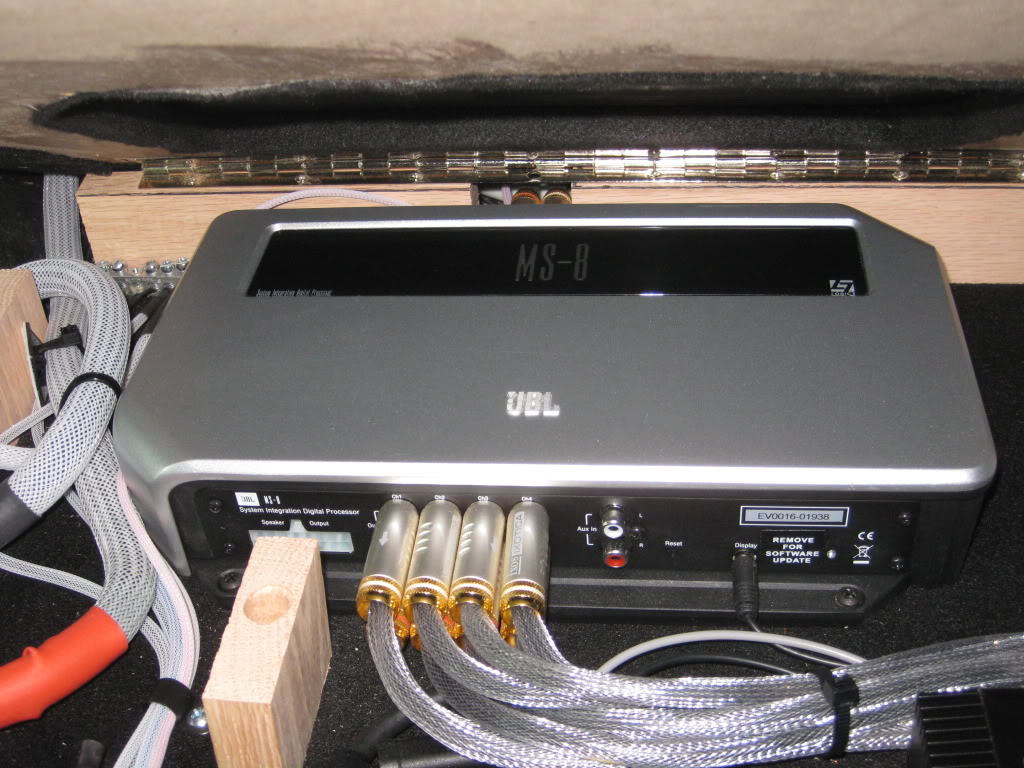
Here is the processor:
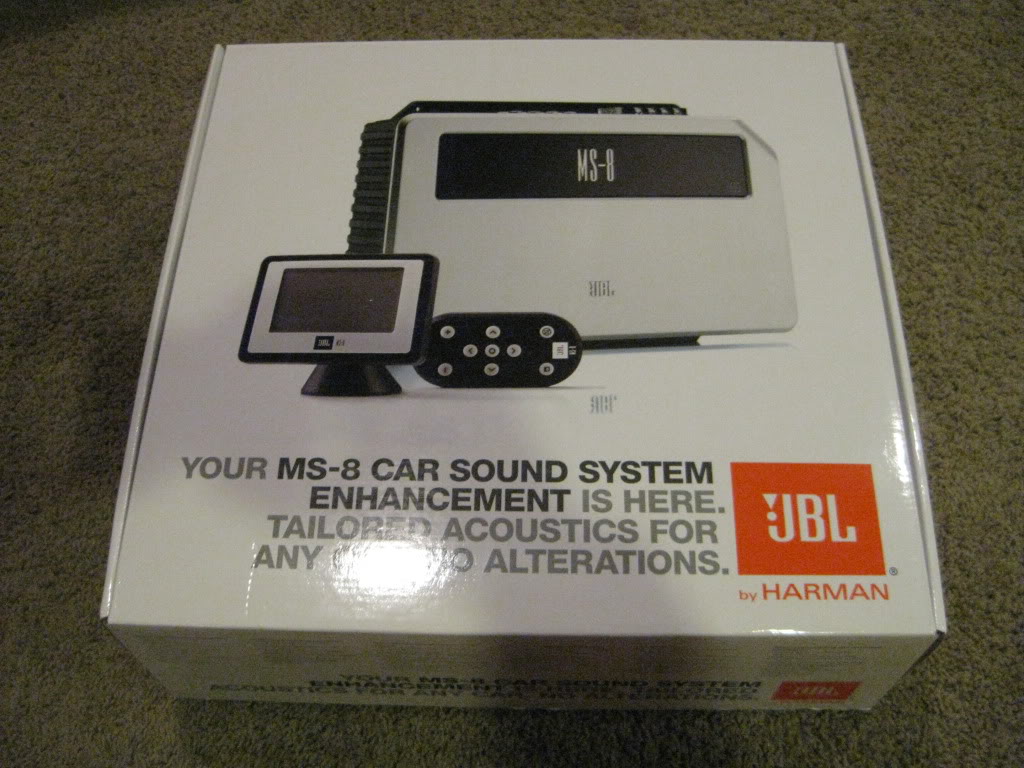
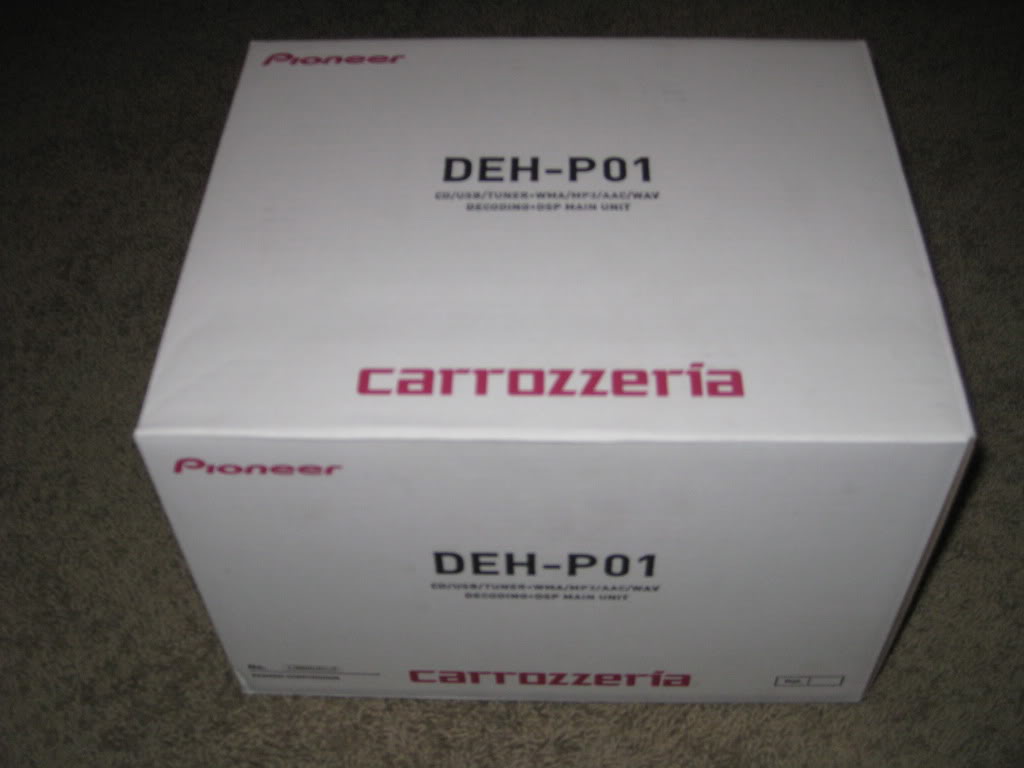
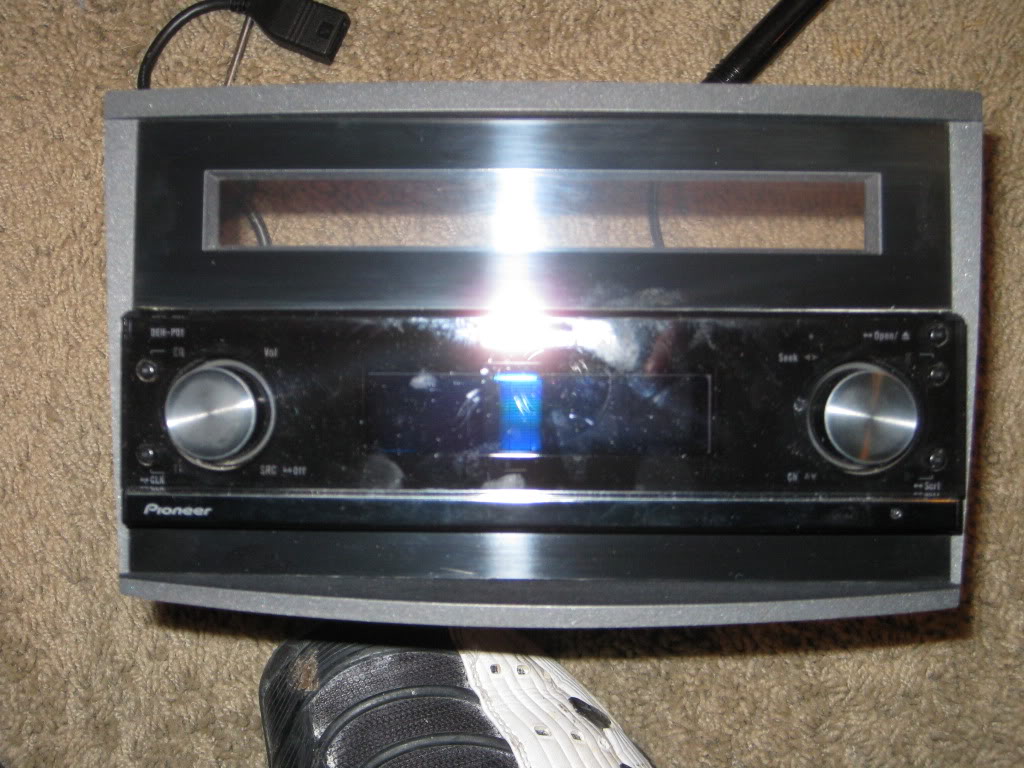
And I have decided to change thing up a little. I have had some issues with my factory Head Unit and therefore decided to change to using an aftermarket. Here it is:

That is it for now.
1-31-2011
Now for some more work....
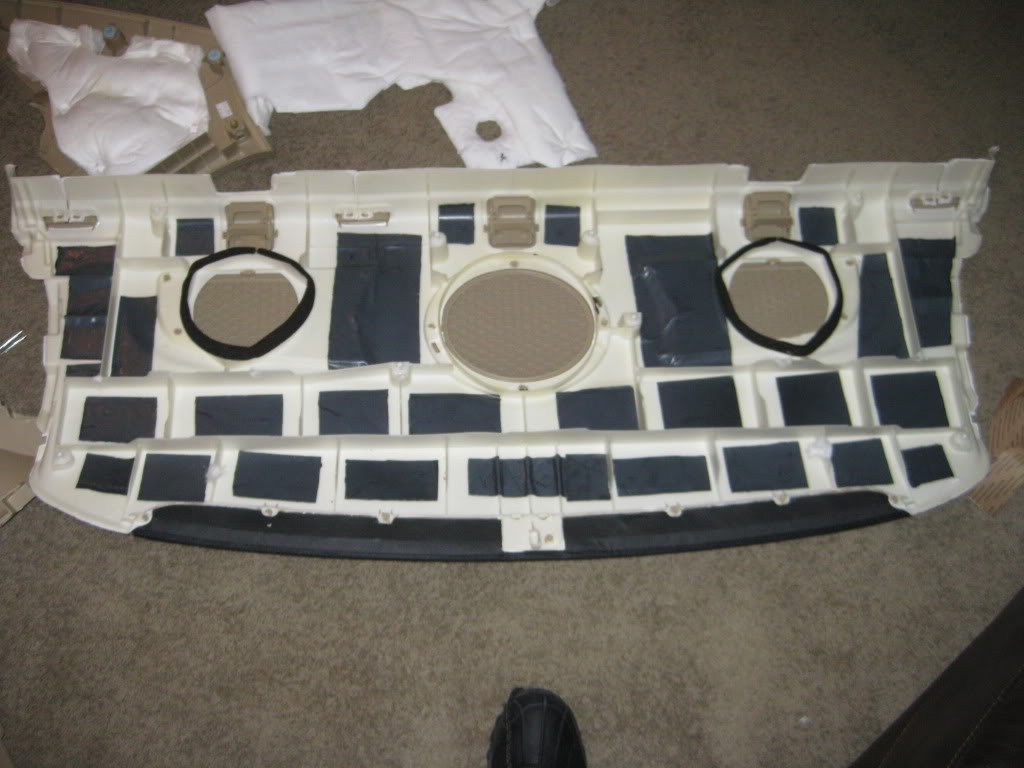
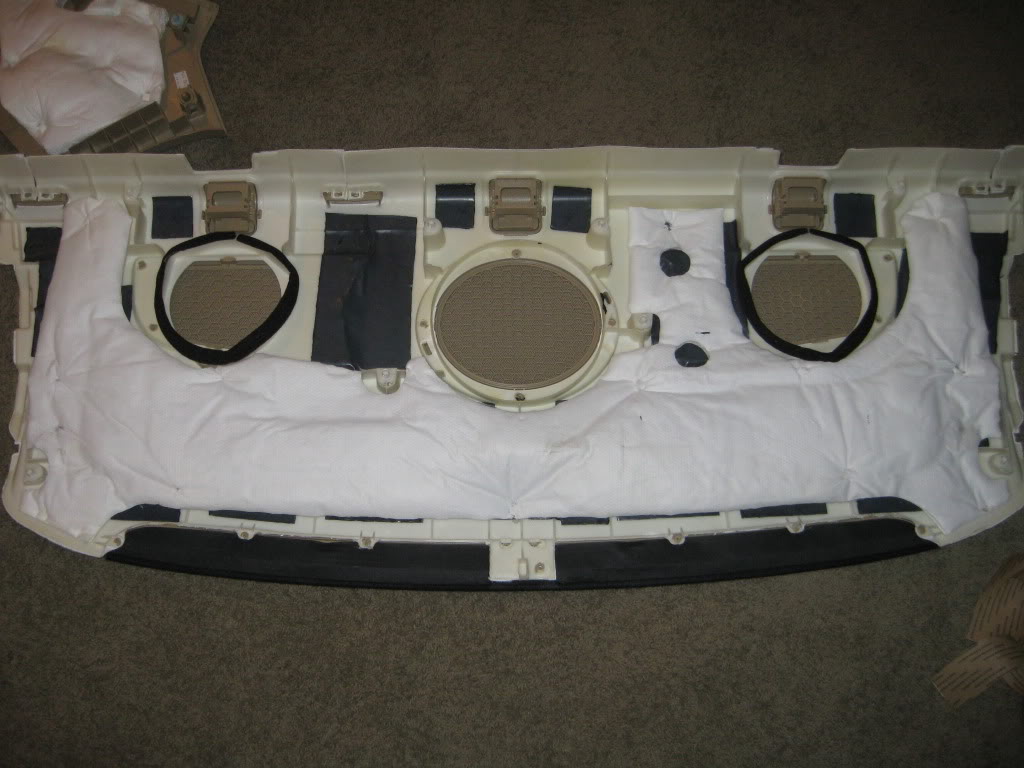
Sound Deadening pics. Pretty much self explanatory here. I also have a decoupled floor barrier that will be installed after the wiring has been run.
All sound deadening is using Cascade Audio Engineering products....awesome stuff to work with, very easy and does a great job!!!
All 4 doors deadened inside.
All 4 door look the same...here is the finished door!
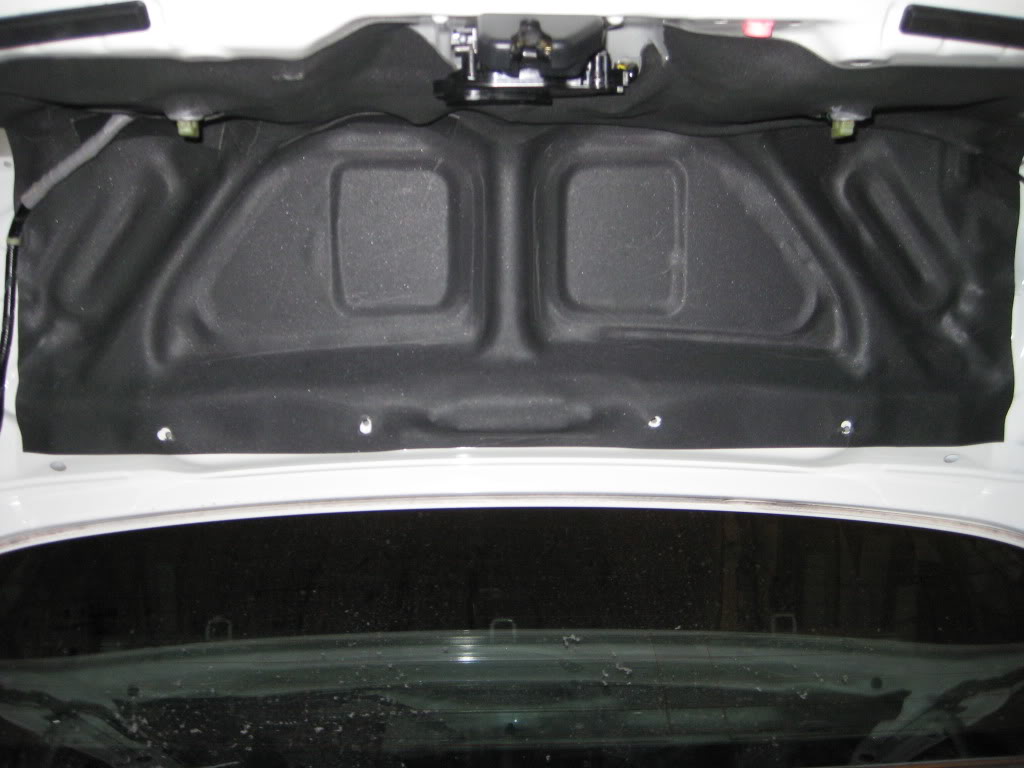
Trunk lid before:
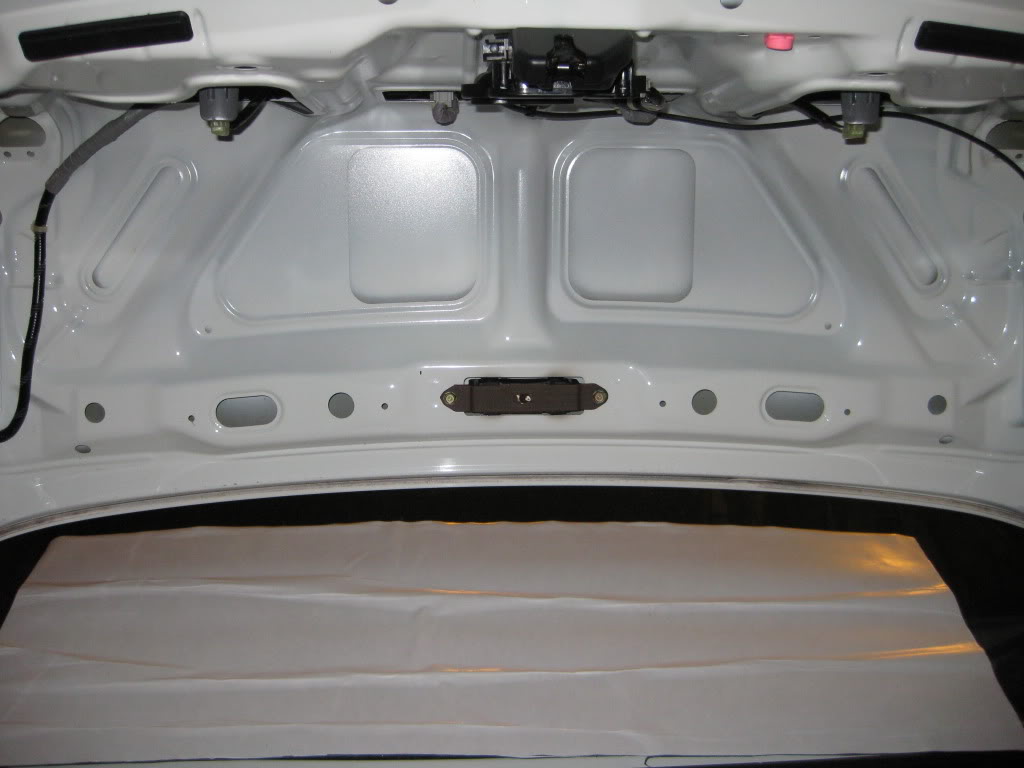
Trunk lid after:
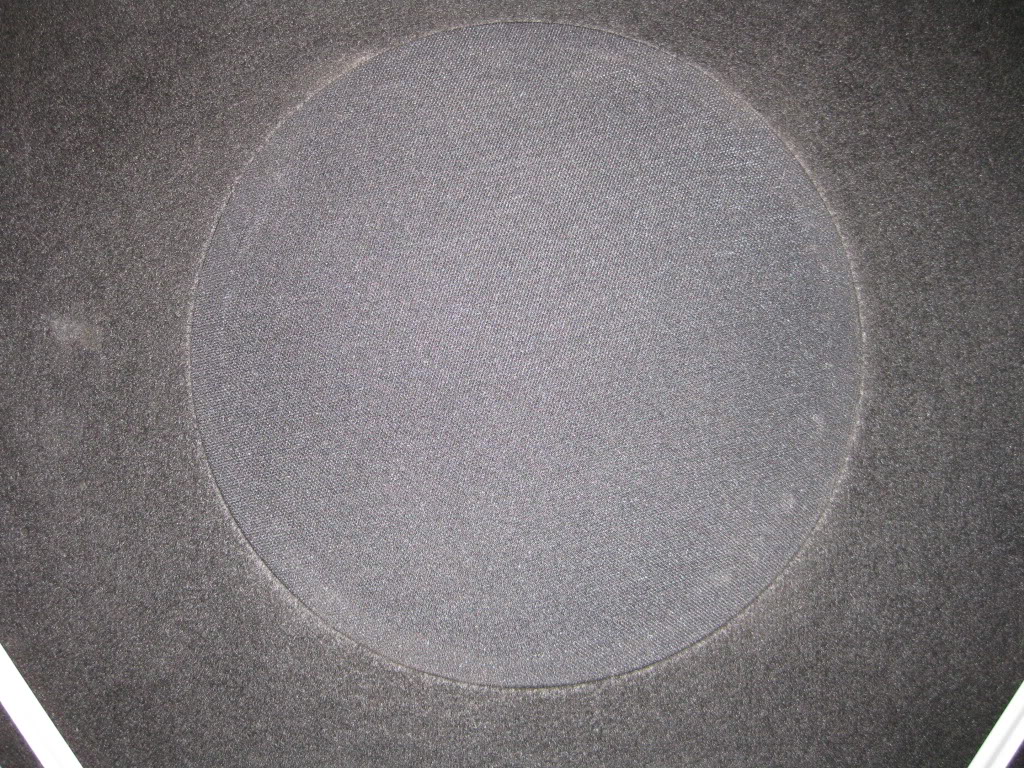
Rear deck...kinda hard to see.
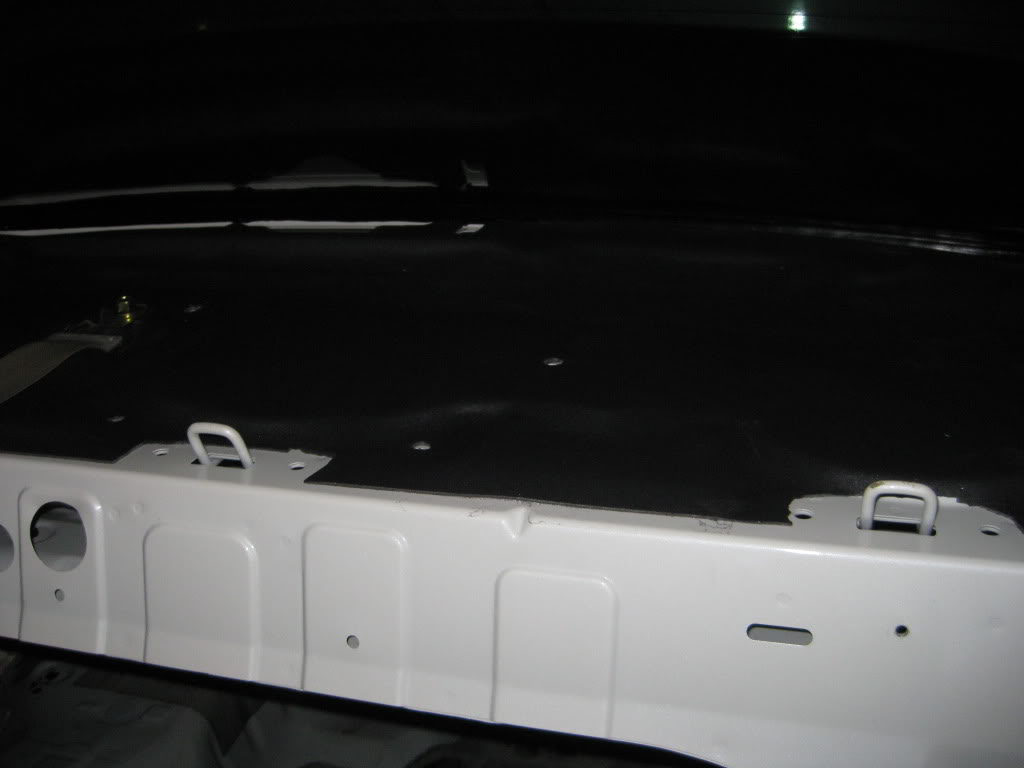
Trunk.
Plastic interior pieces. All white factory "deadening" removed, cascade deadening applied, and factory deadening re-applied with hot glue. This process was done with every plastic panel in the car. Here is an example:
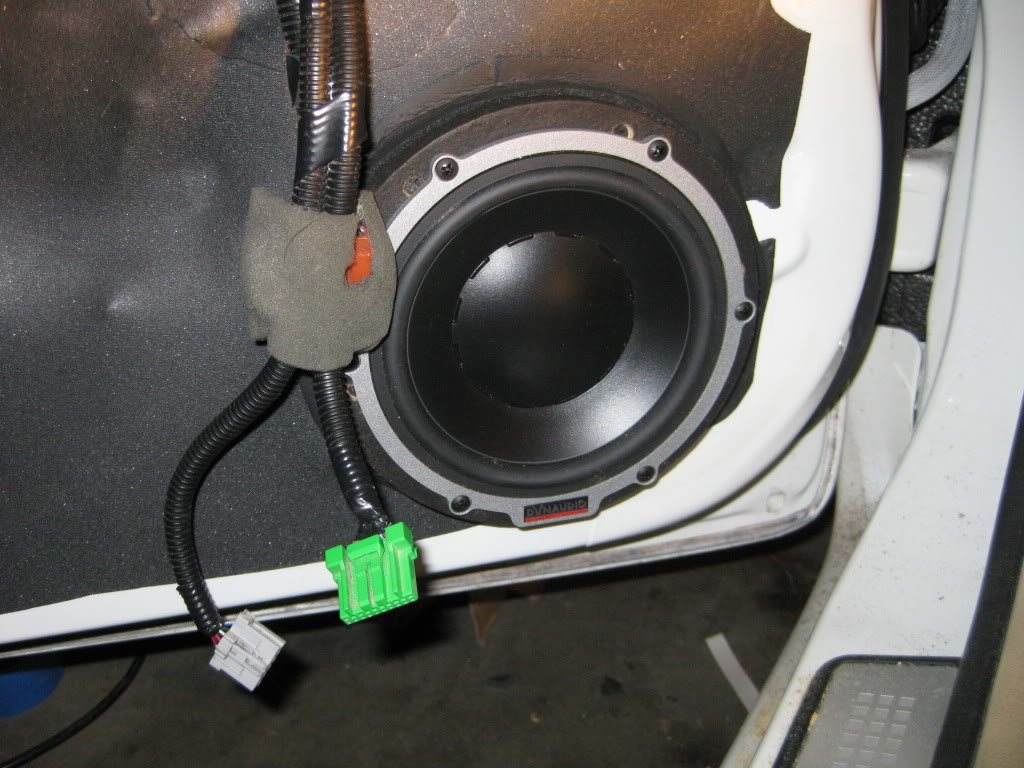
The wiring is on hold at the moment as I was sent the wrong type and had to exchange, will be here by Friday. So until the, I will be starting on making ring for mounting the door speakers, fabricating kick panels for the mids, installing the tweets, etc. I will post more pics soon!
2-2-2011
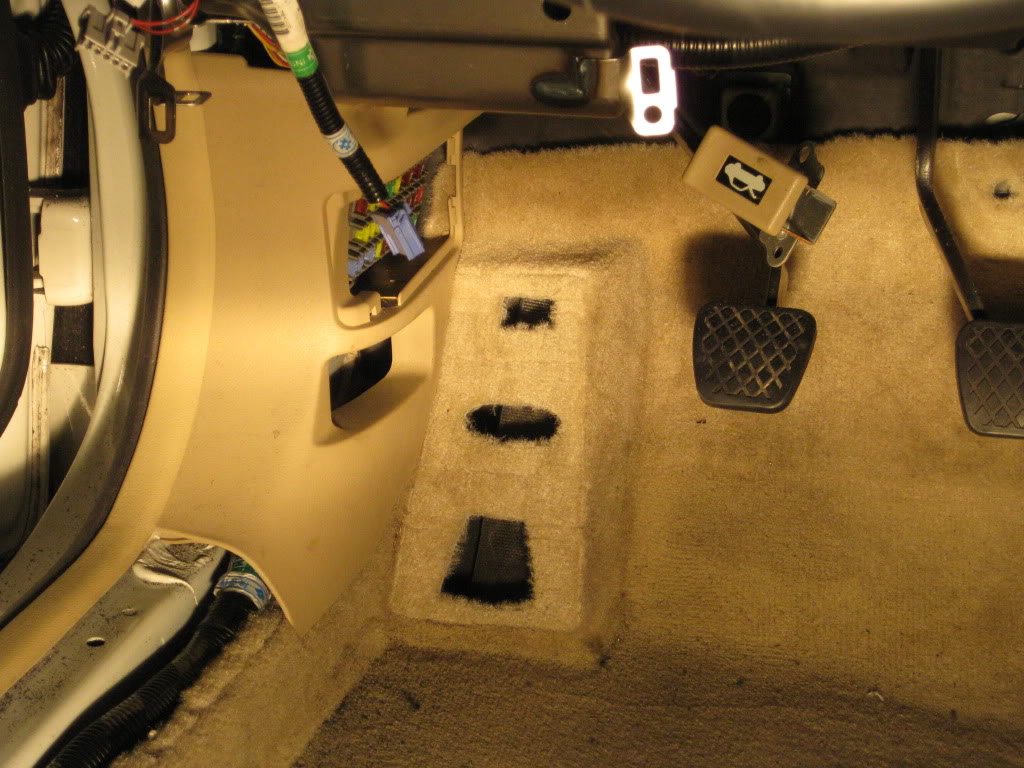
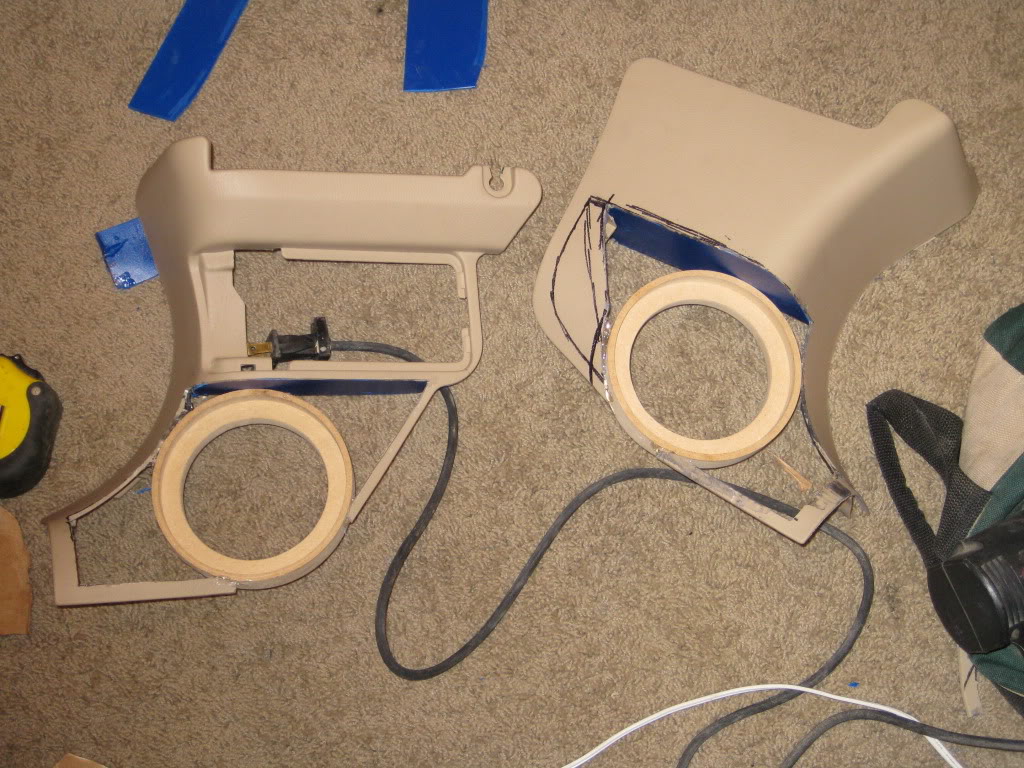
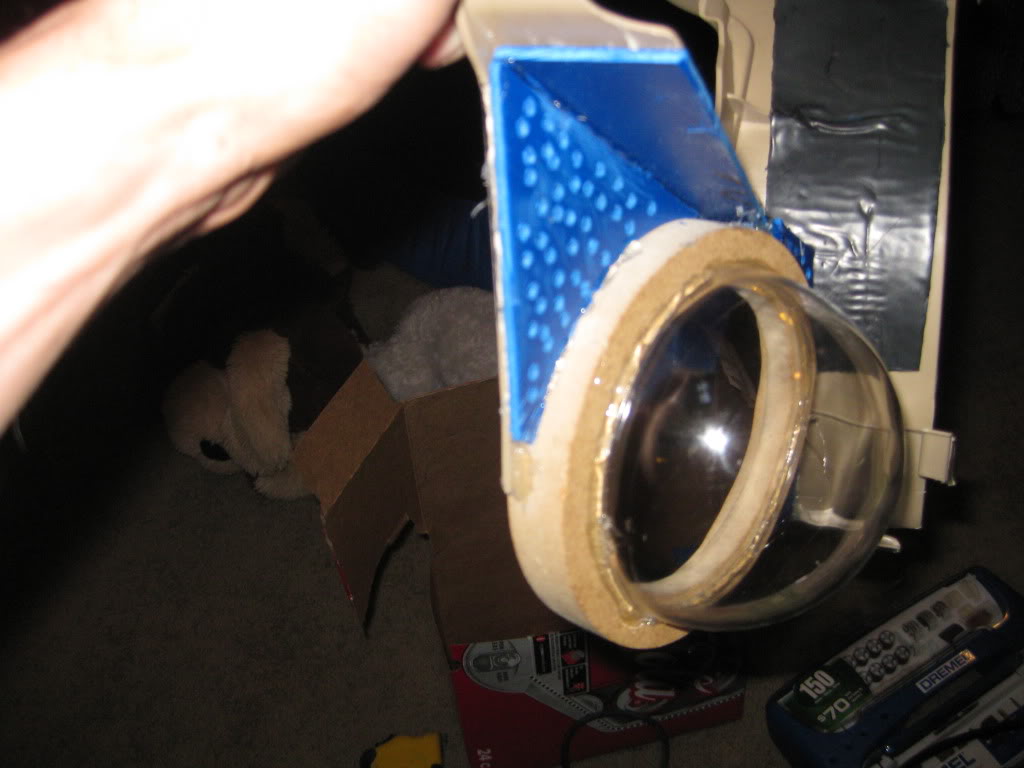
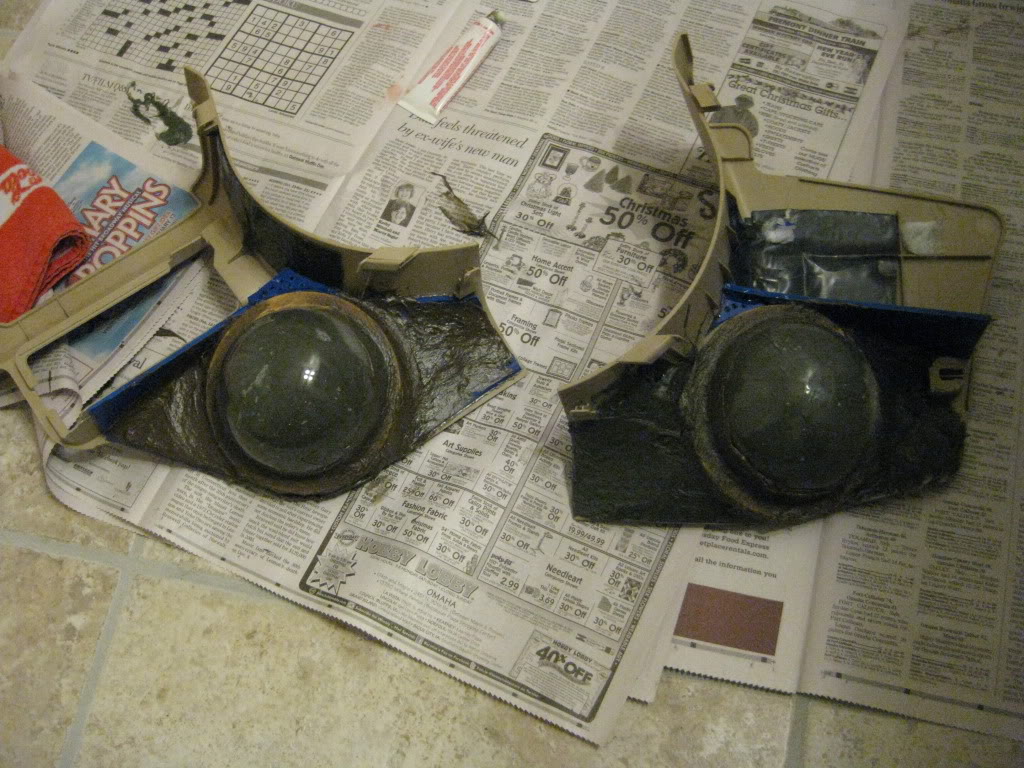
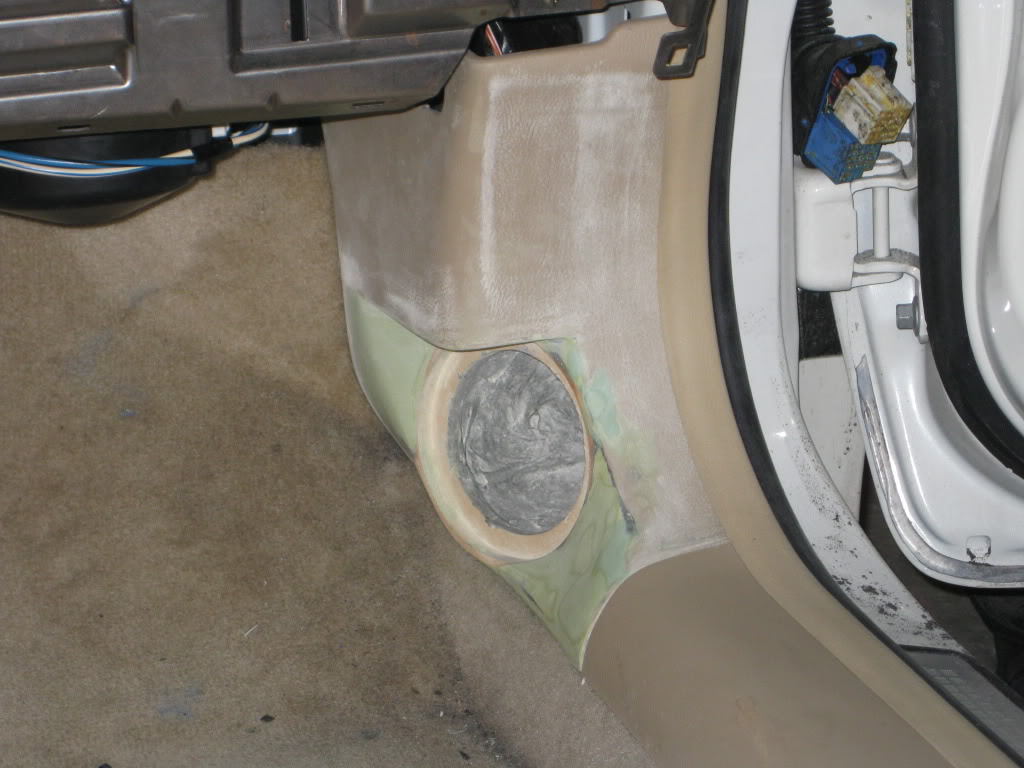
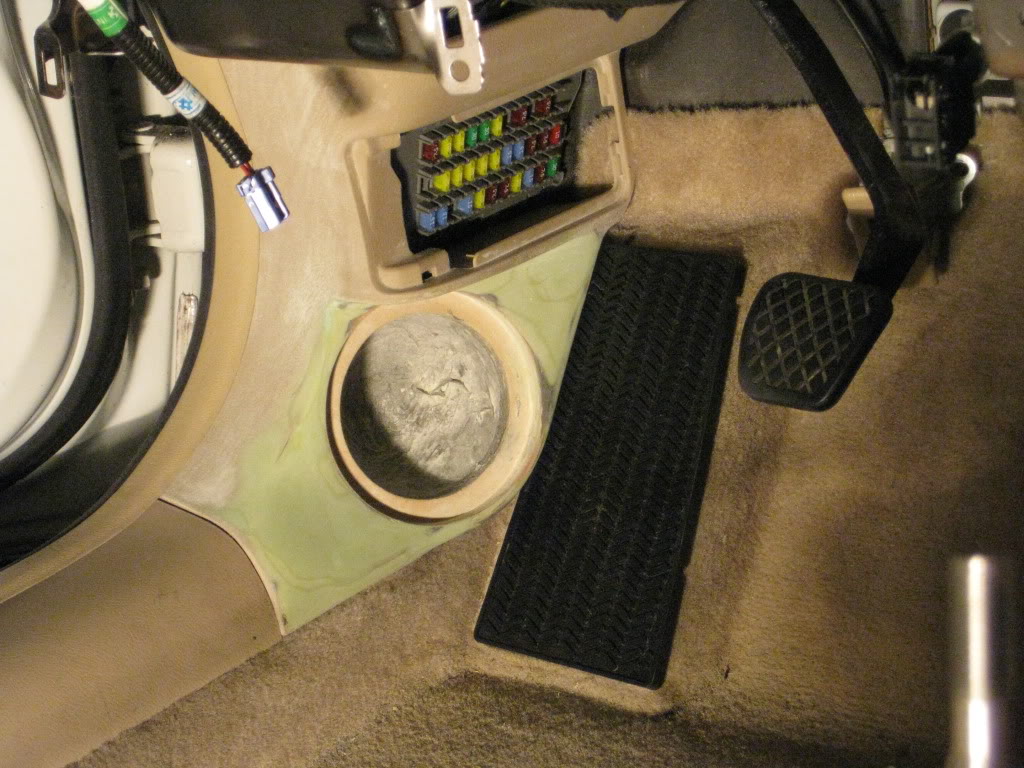
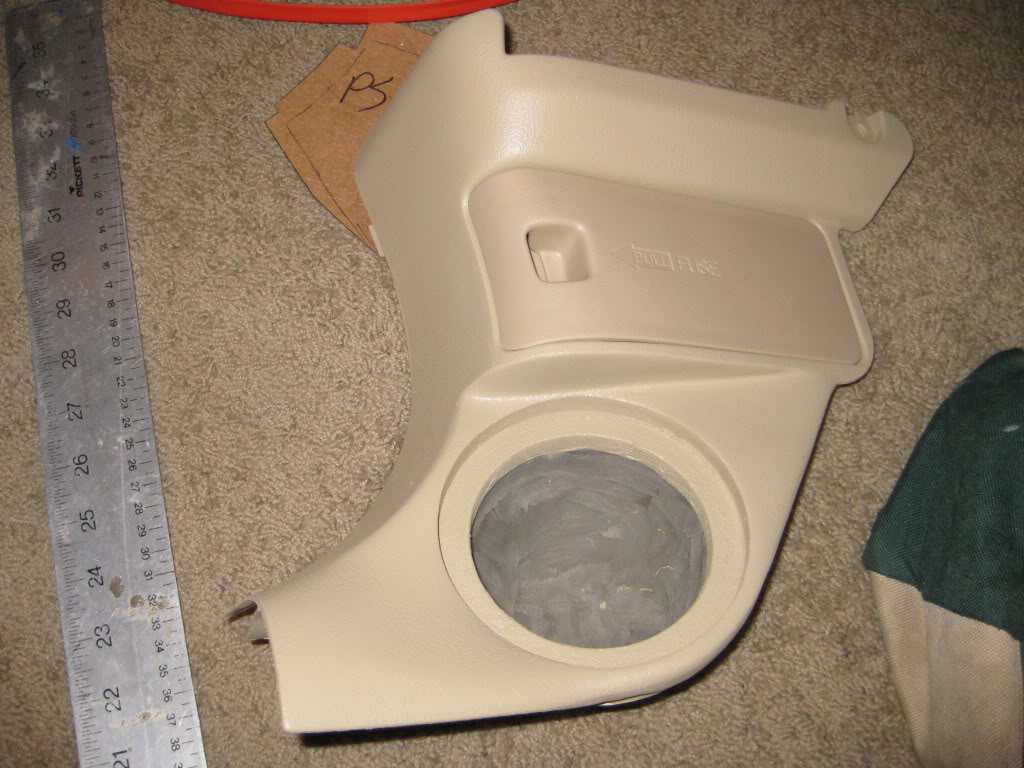
Alright...still waiting on wire, so I started working on the kicks. The goal here was that the foot rest be completely usable (since the car is a manual and the foot rest is used) and to be able to still access the fuse box (located in the drivers side kick panel). I also wanted the enclosures to be completely sealed for optimum speaker performance. The Esotar2 430's require a .005 ft^3 sealed enclosure....which is basically small enough to fit the driver.
Here are the before pictures of the kicks.
Drivers side:
Passenger side:

Trim rings:
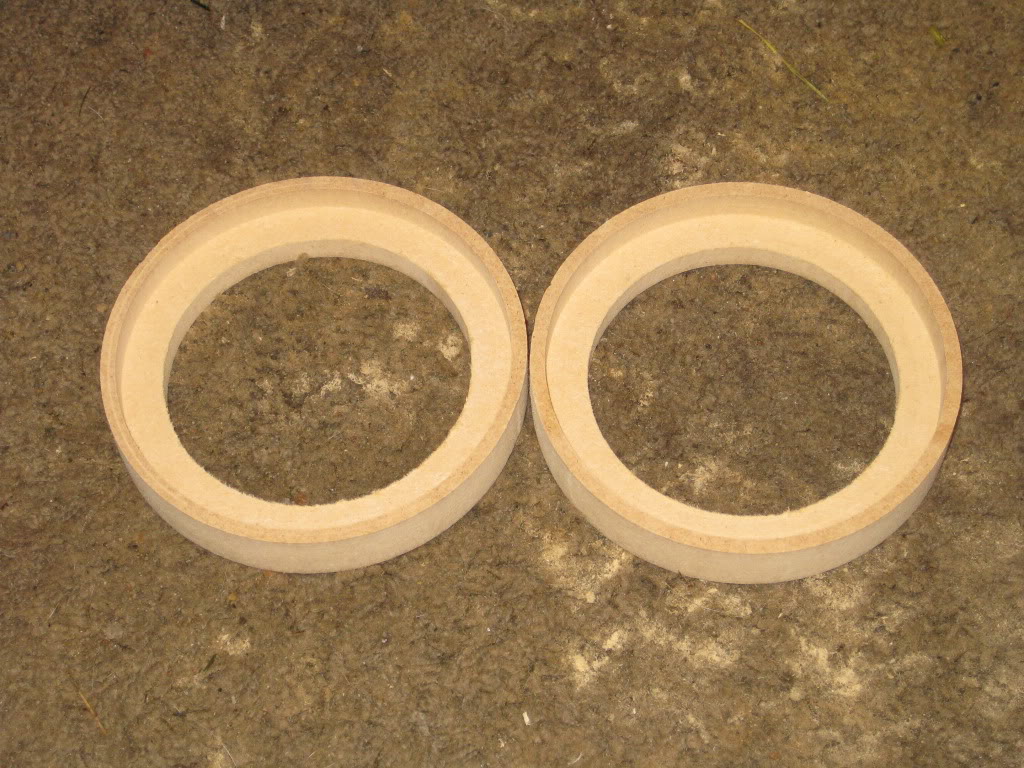
Cutting and mounting the trim rings:
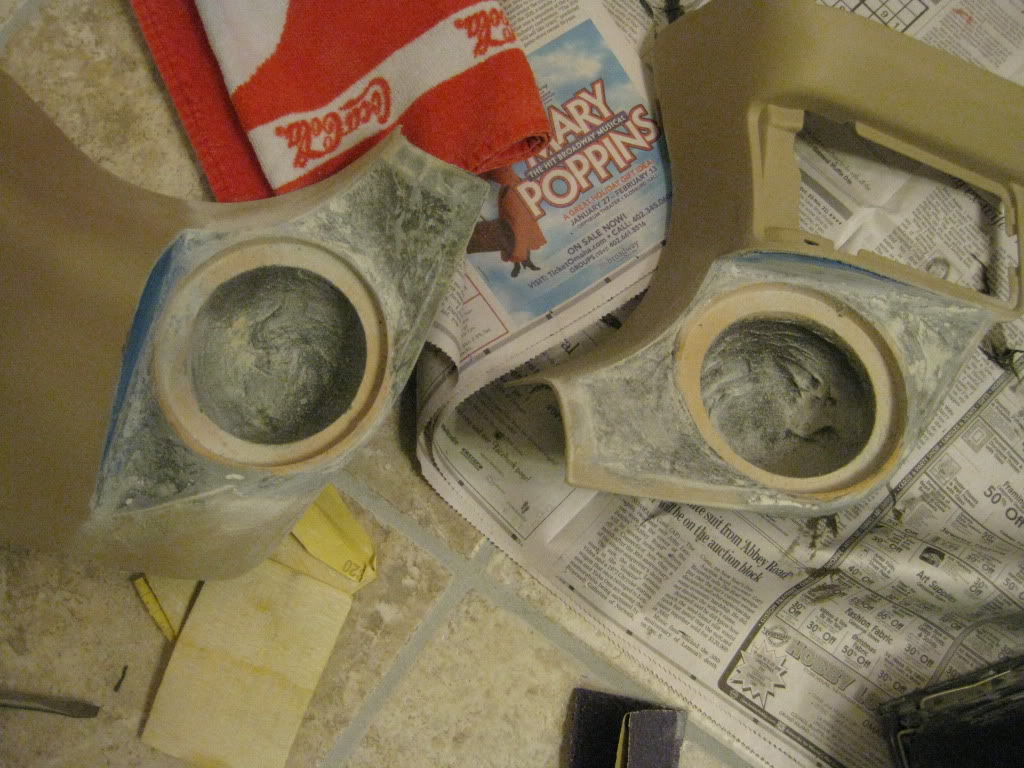
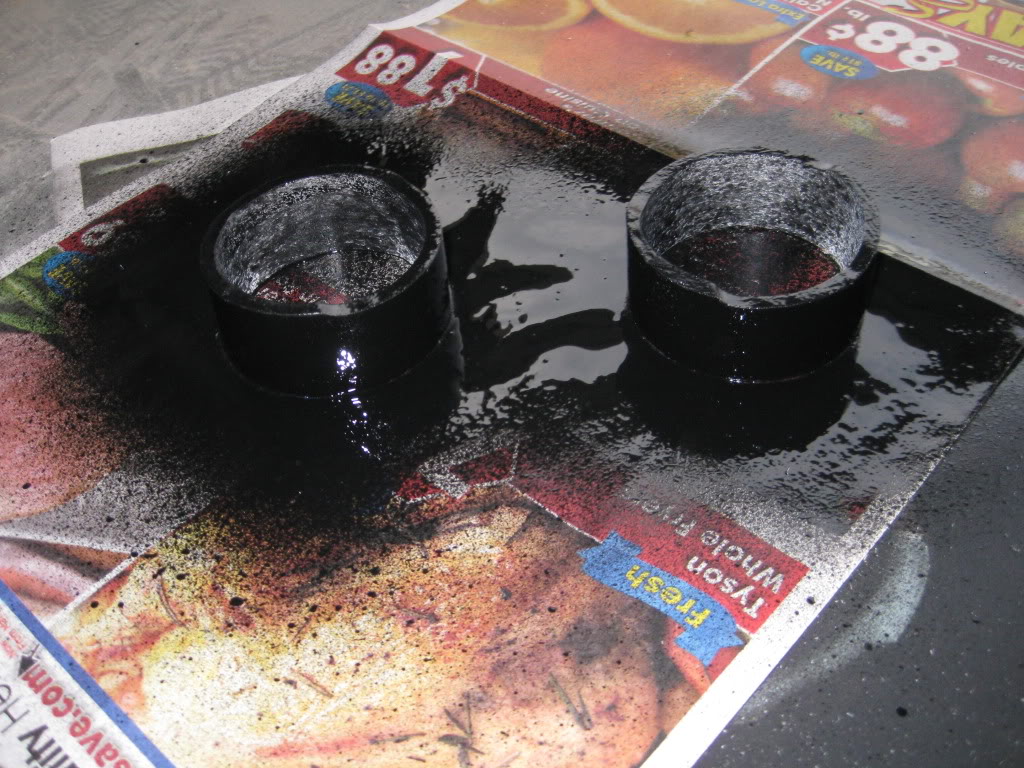
Next, I filled in the gaps using low heat plastic. I drilled holes and sanded for better adhesion with the dura-glass.
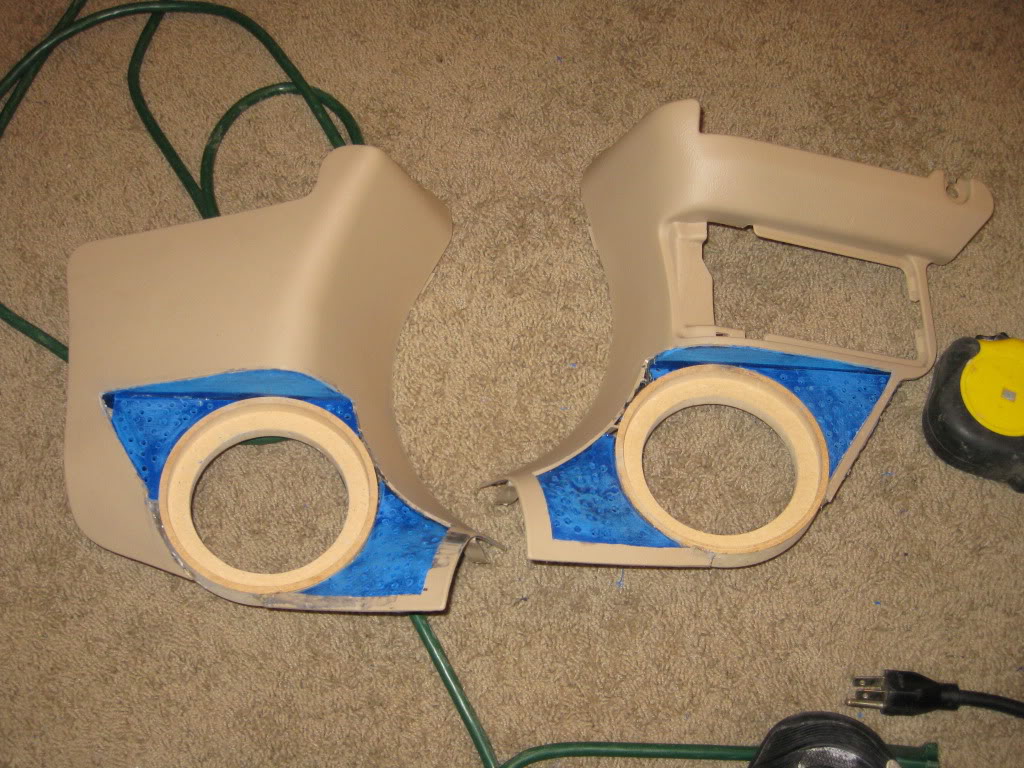
Plastic ornament thingy from Hobby Lobby attached to the back with hot glue:
More....
Dura-glass applied:
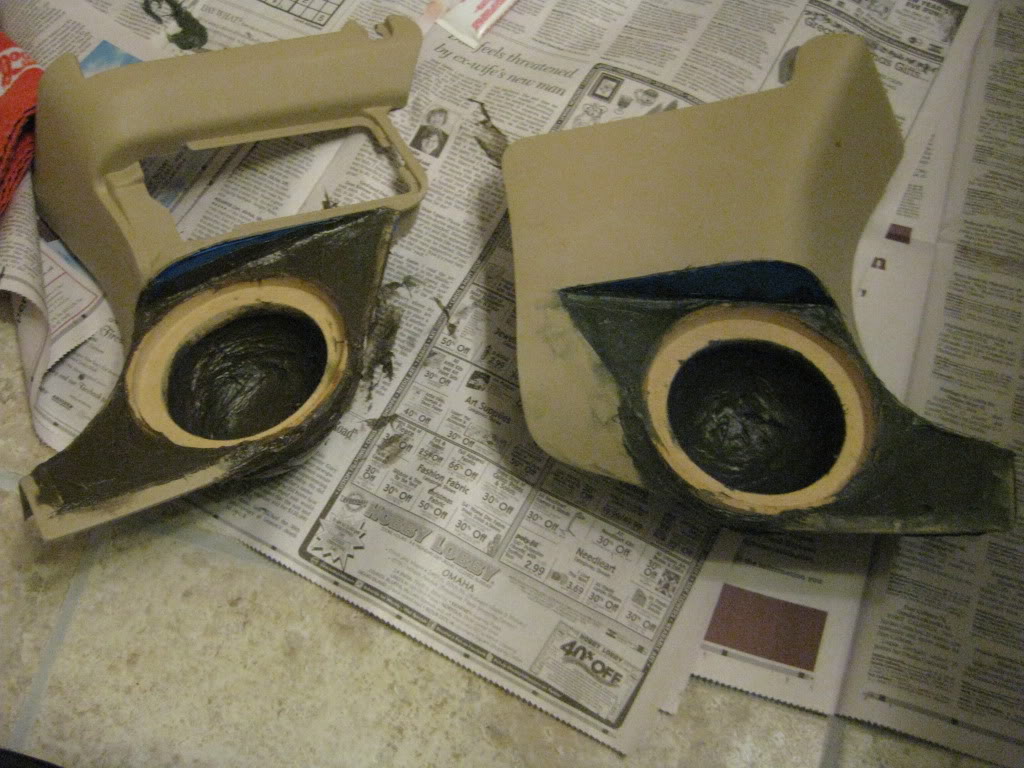
Sanding and Rage Gold Body Filler applied and sanded:
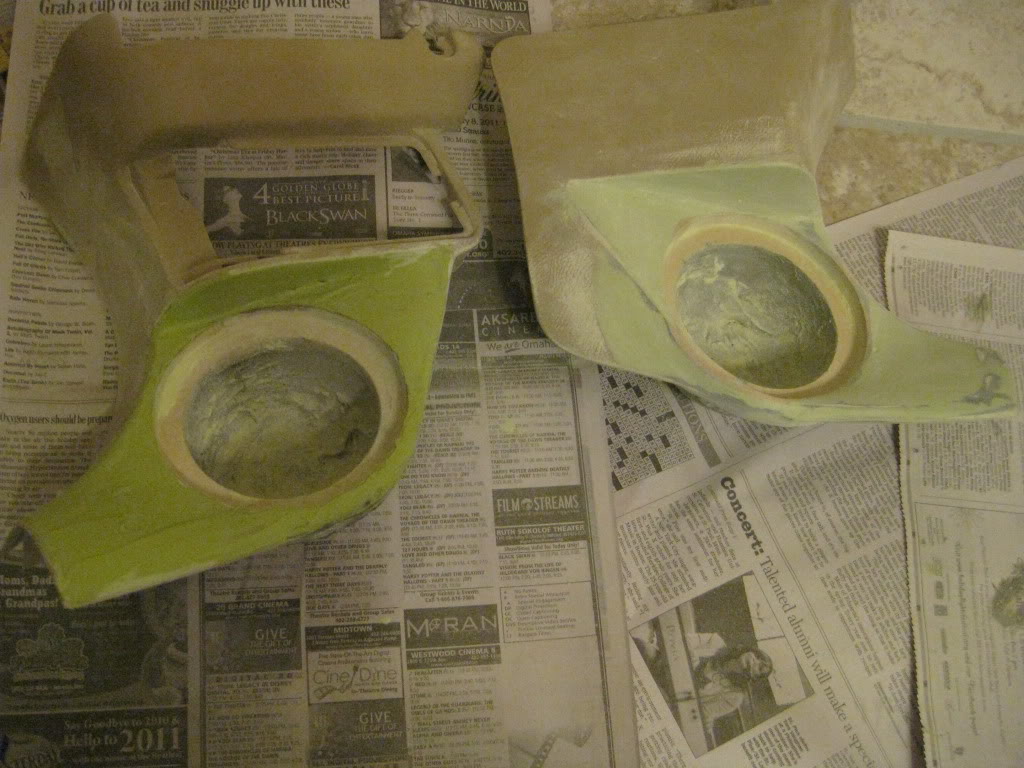
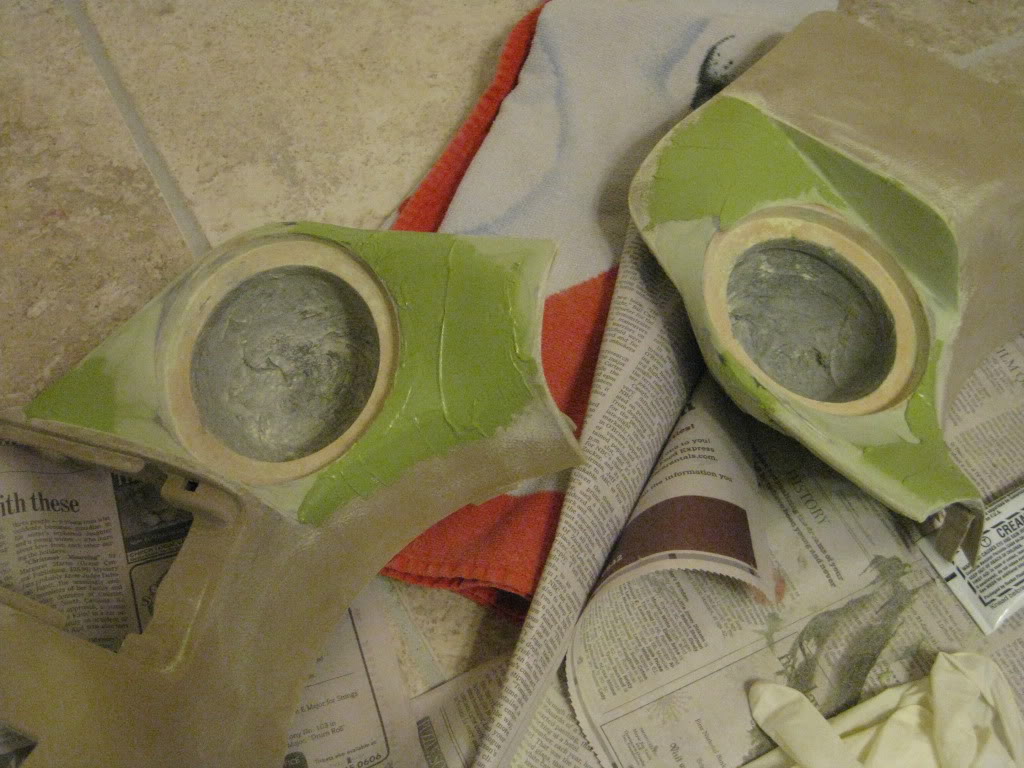
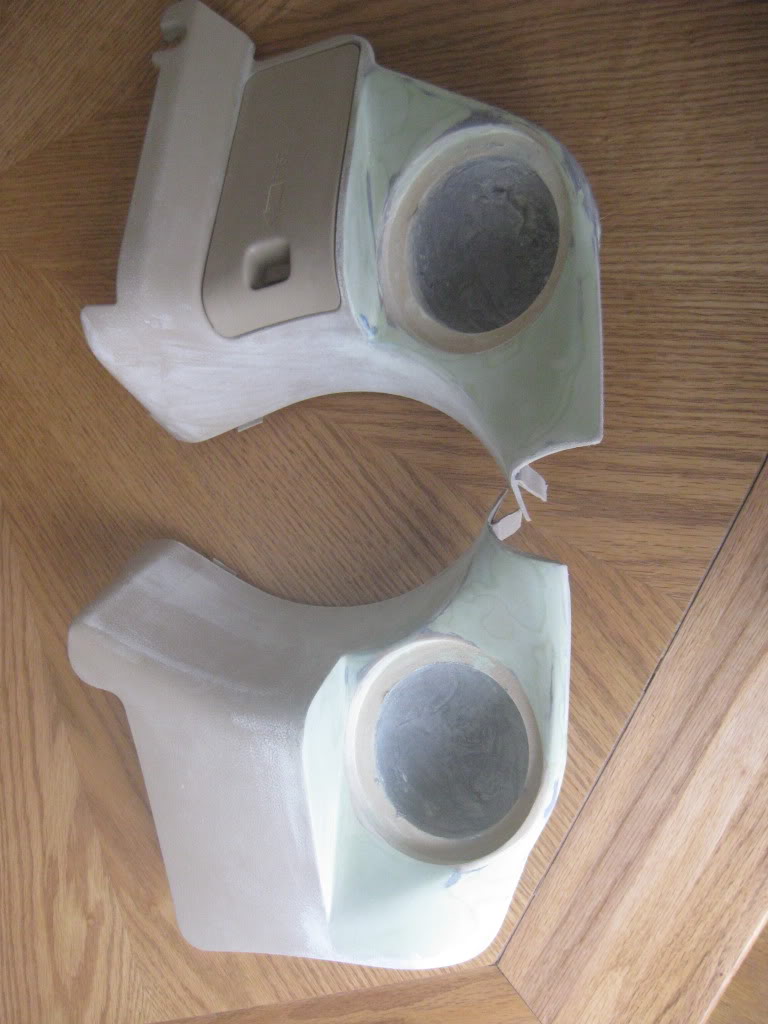
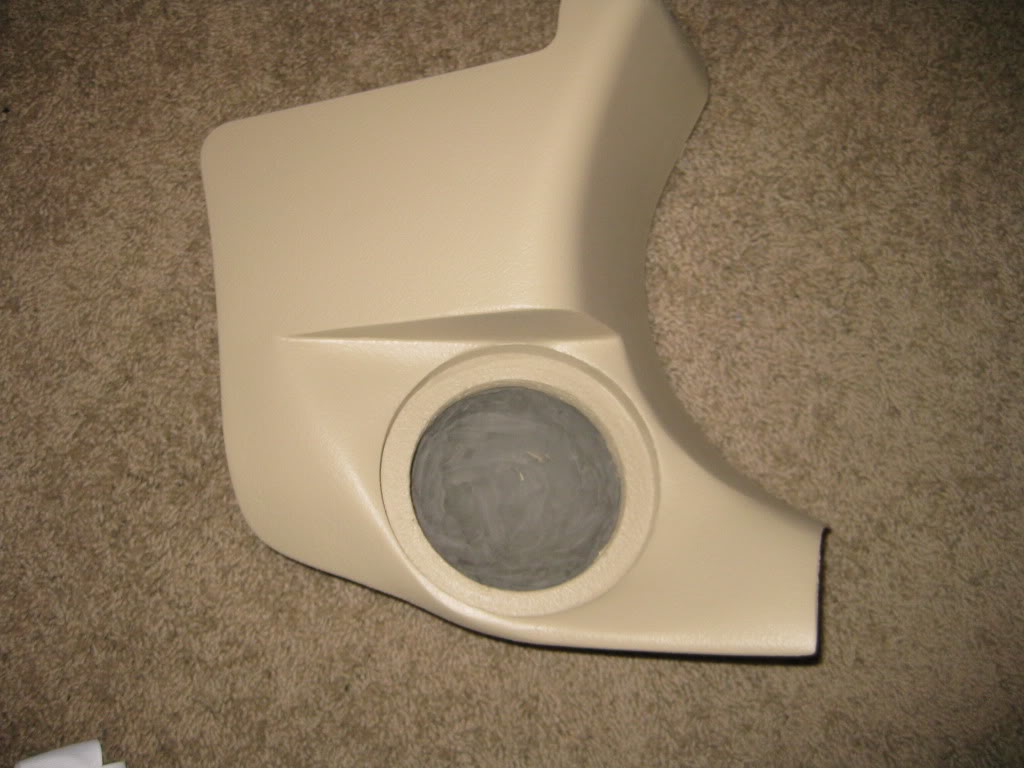
Test fitting in the car:
I will finish these by painting them with texture to match the interior.
That is all for now!
2-10-2011
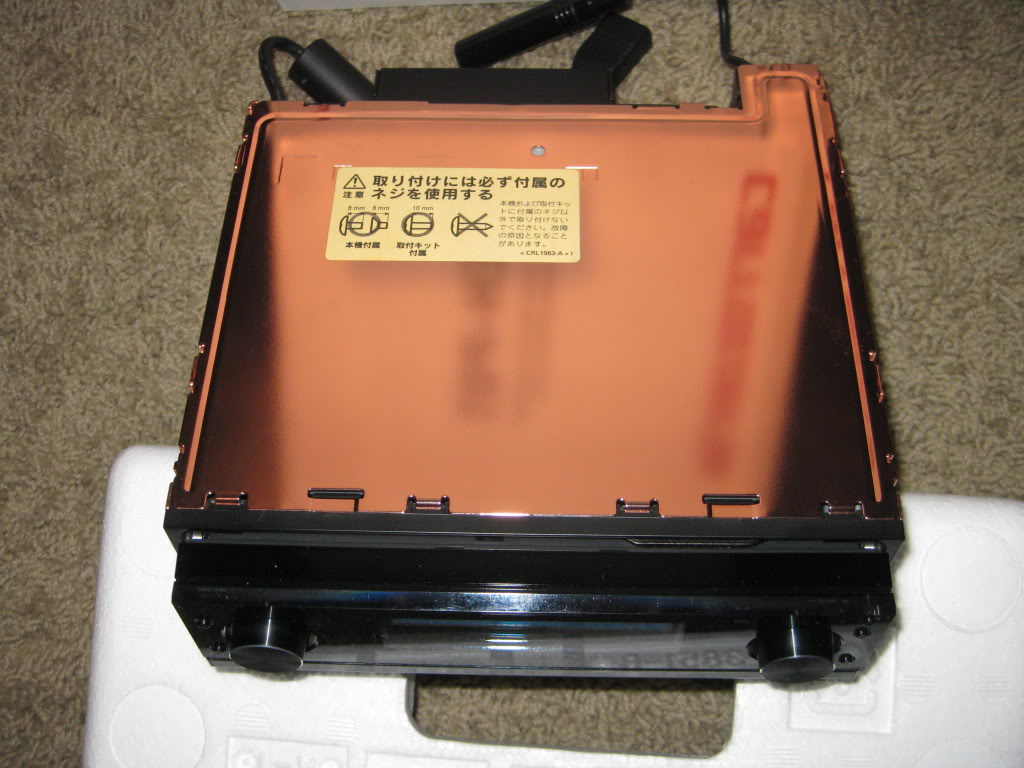
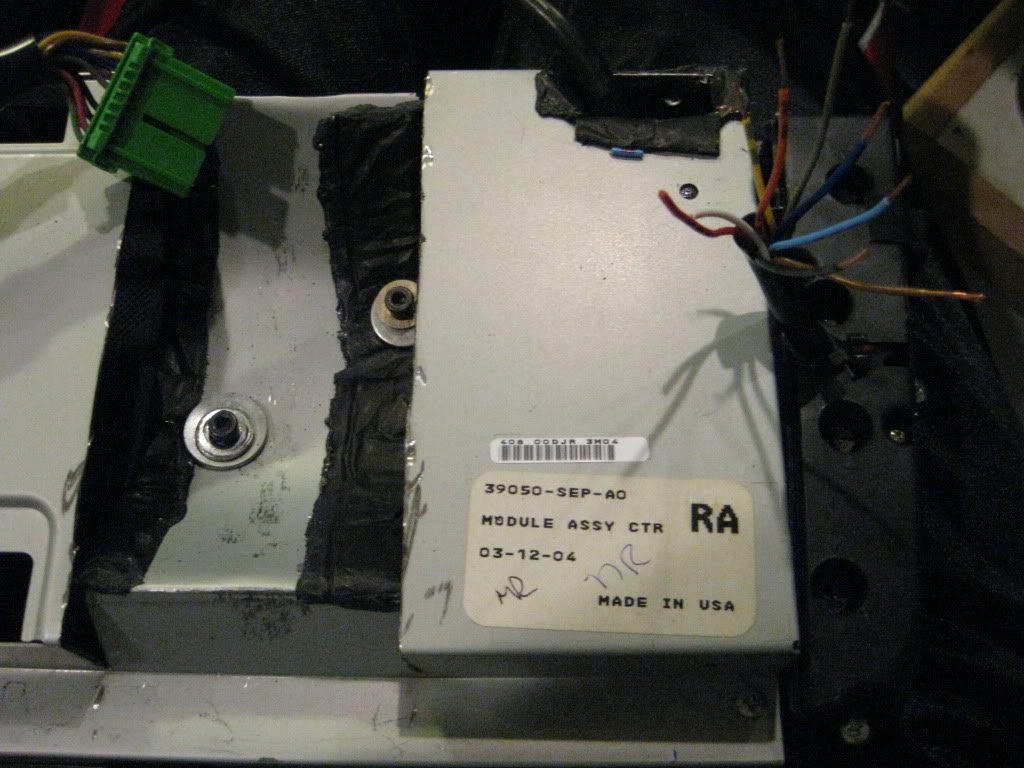
Okay....an update is finally here. Due to weather difficulties, I have several things half finished, but should have tons to post in the next week. Here is one of the things I have about 90% finished. Since I decided to go aftermarket with the head unit (P01), I wanted to make sure it looks as factory as possible. Here is the result.
Before:
After (well kinda):
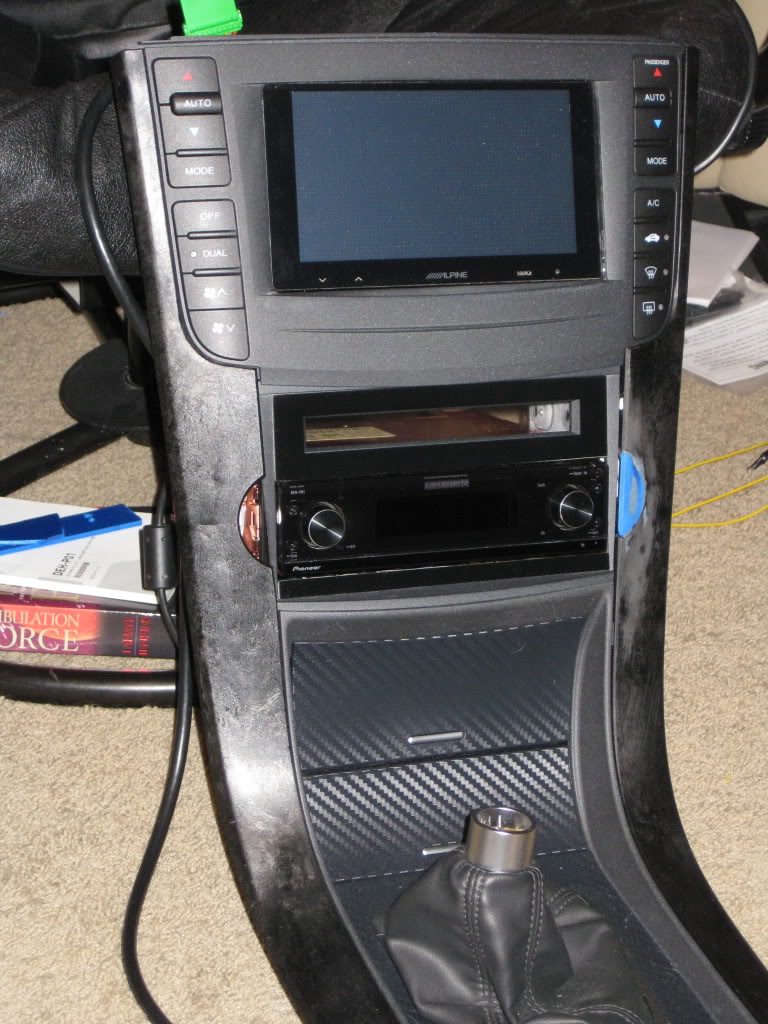
I purchased a second HVAC/Radio sub display to complete this look (the original one the car came was cut a fabricated to fit the monitor). I used this because it already had all the curves from the factory built in with a flat surface to work with.
I started trimming:
I then cut the factory plexi and started test fitting the new head unit.
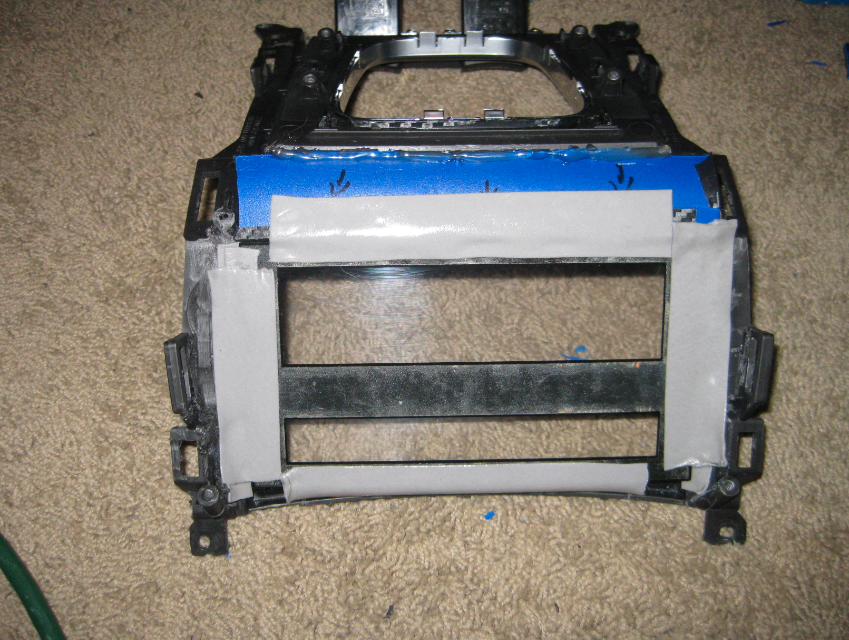
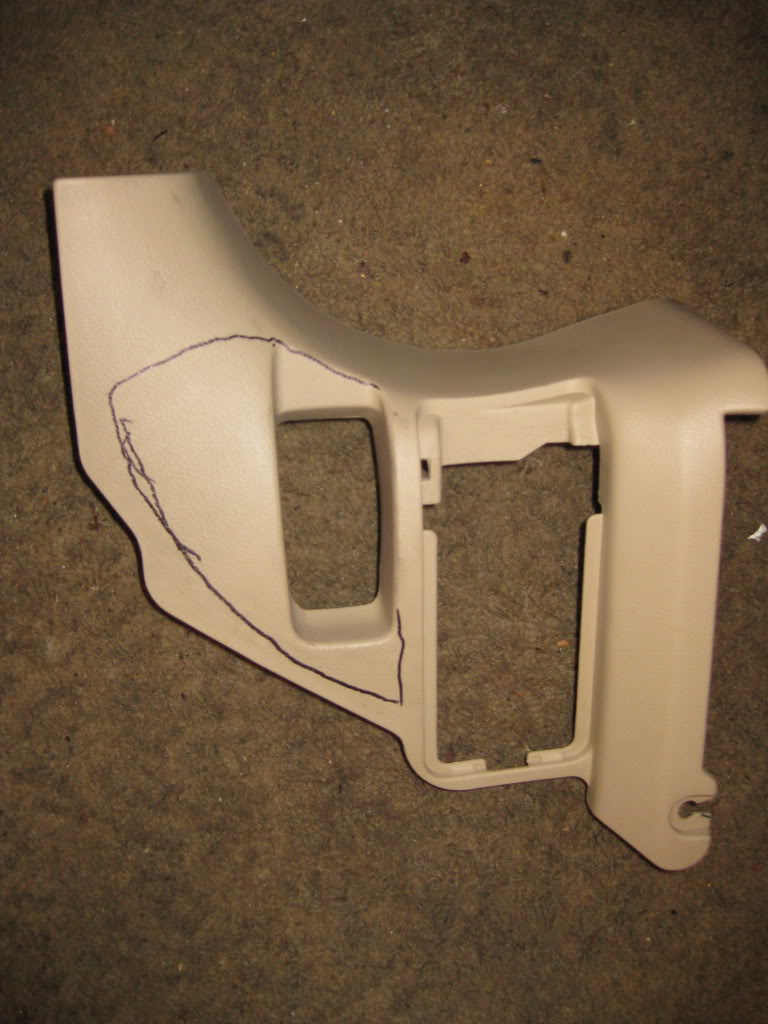
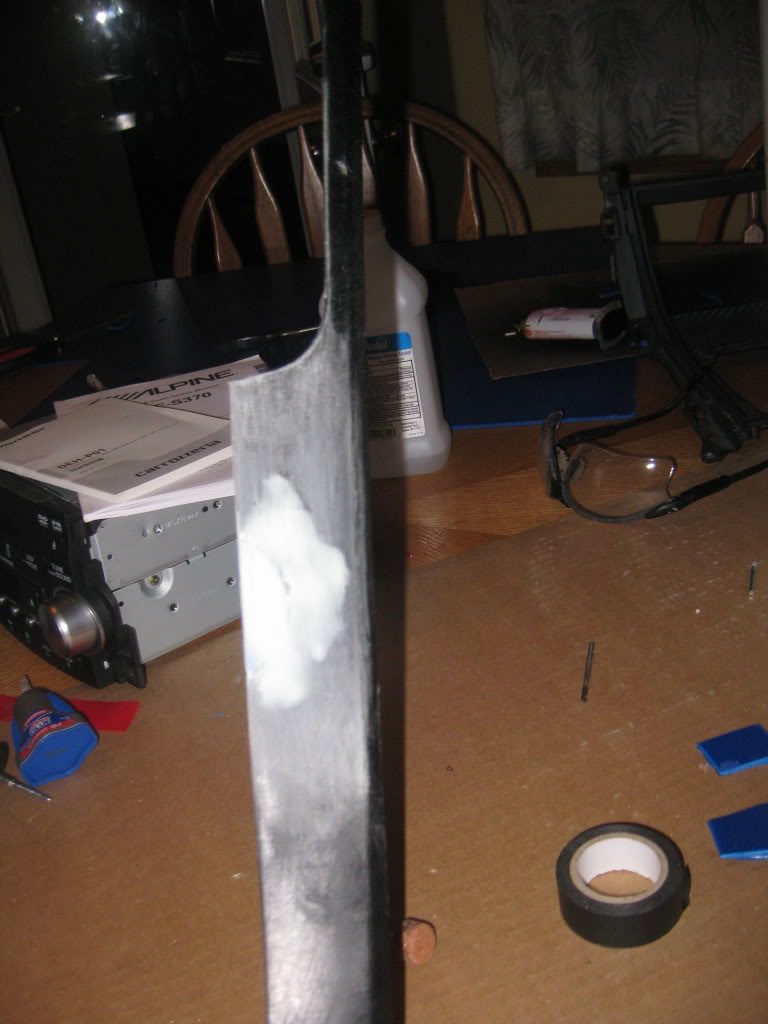
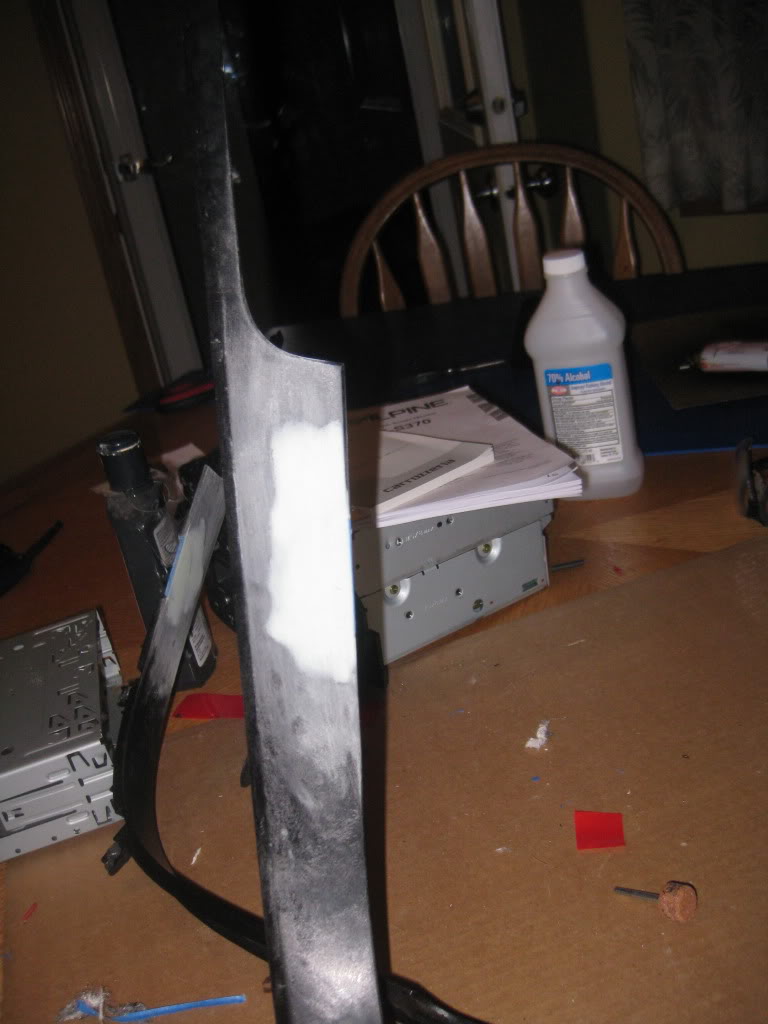
Now, the factory trim pieces covered with aluminum need to be addressed. These pics give you an idea how I am dealing with this. The aluminum was removed and the 1/2 circle was filled (on 1 for now), then I stopped until I can get everything mounted in the vehicle to see if any further filler will be needed around the radio. The final pieces will be covered in Di-noc brushed aluminum wrap.
The sub display for the HVAC will be desoldered and extended with wire from the factory board so it can relocated in the opening right above the head unit. I will provide pics as soon as I am finished.
Thats all for today!
2-16-2011
Here is an update....
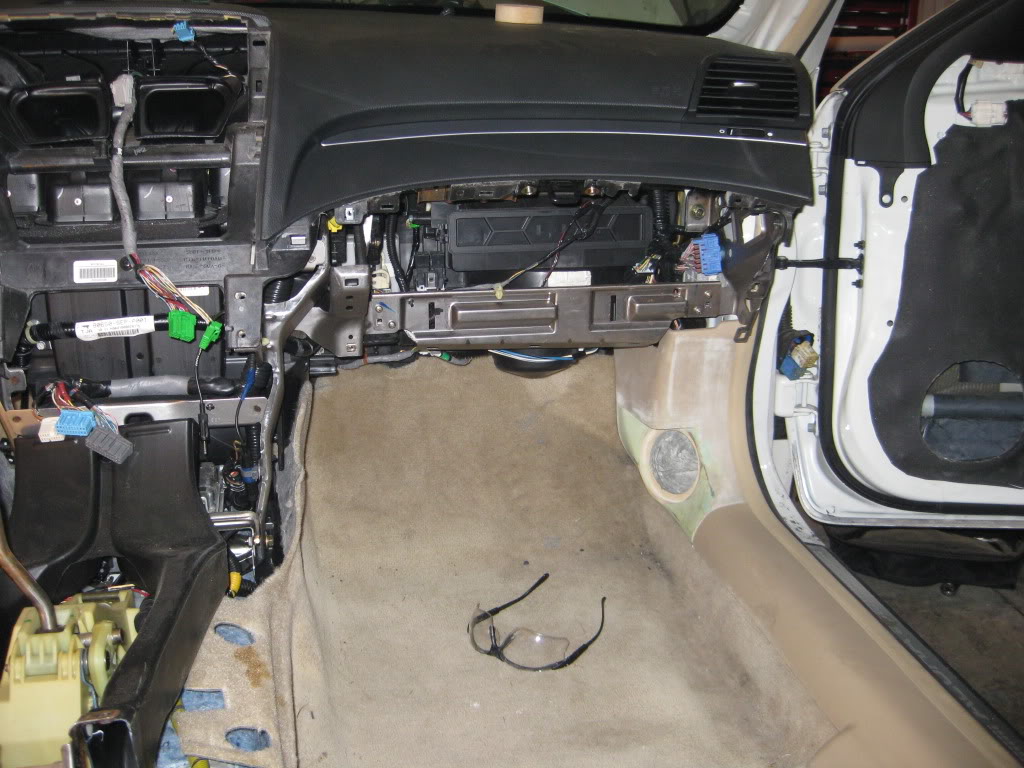
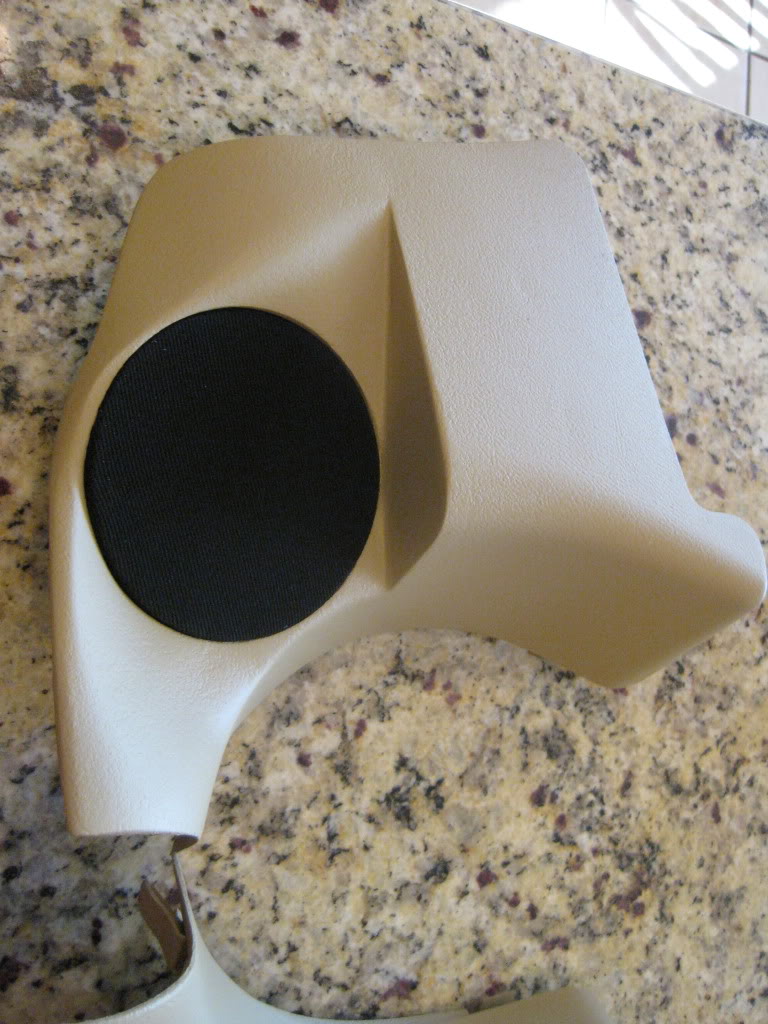
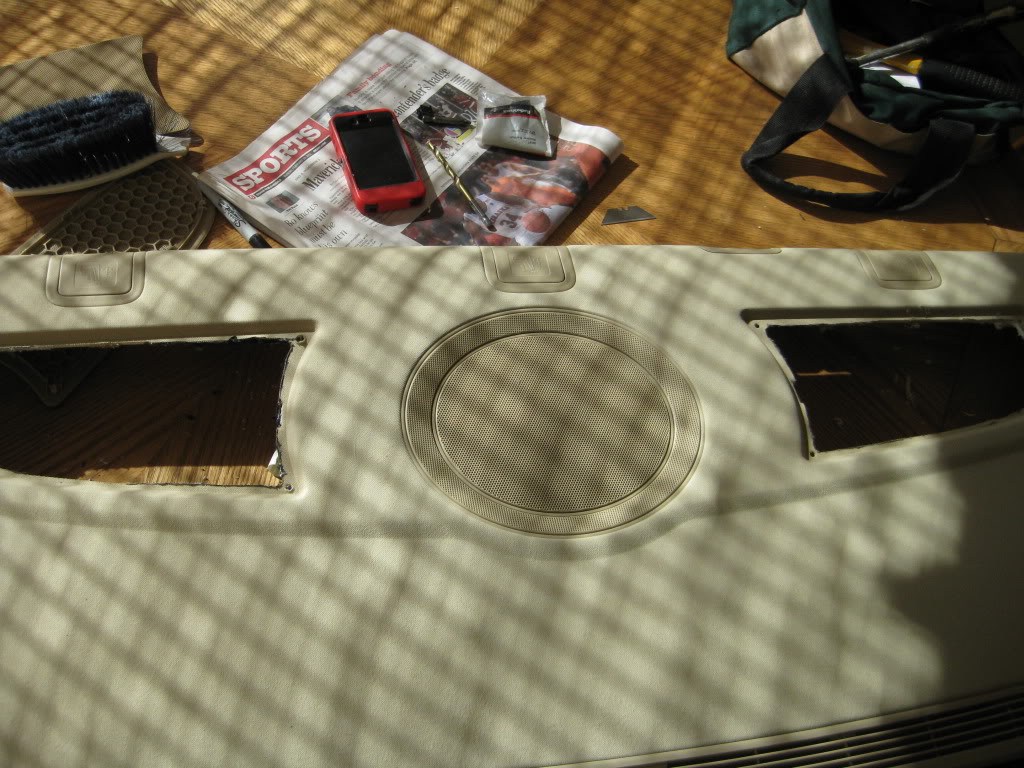
The kicks are done and just need to be mounted in the car. Here are the pics of the completed kicks - with grills!
more to come...
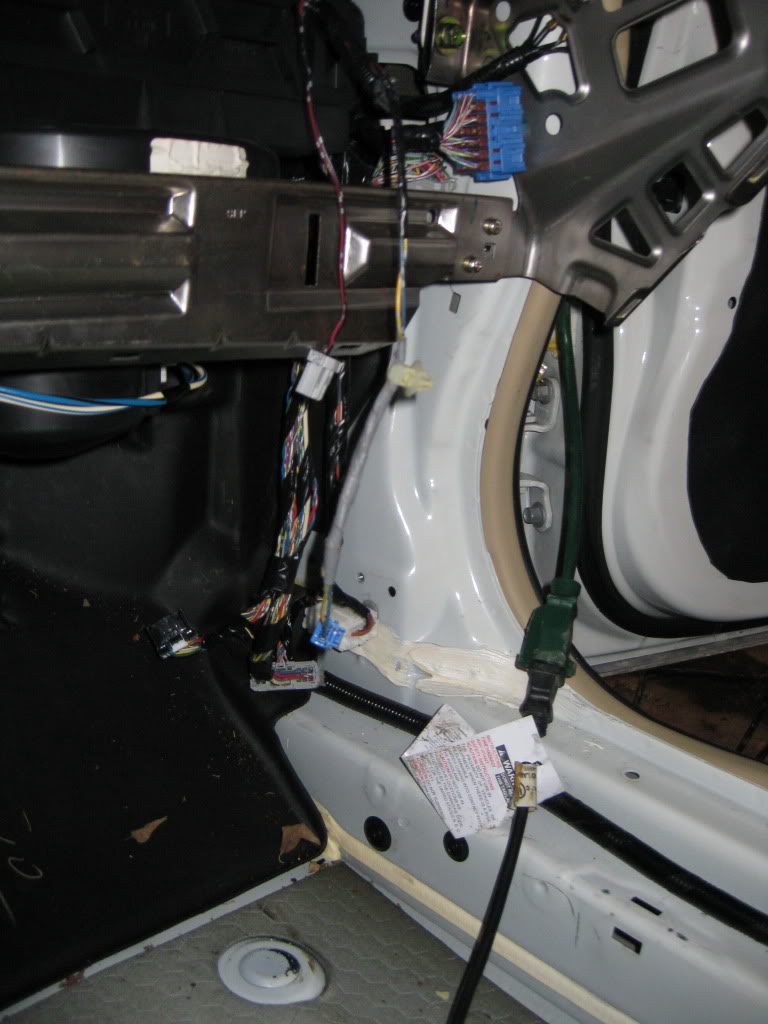
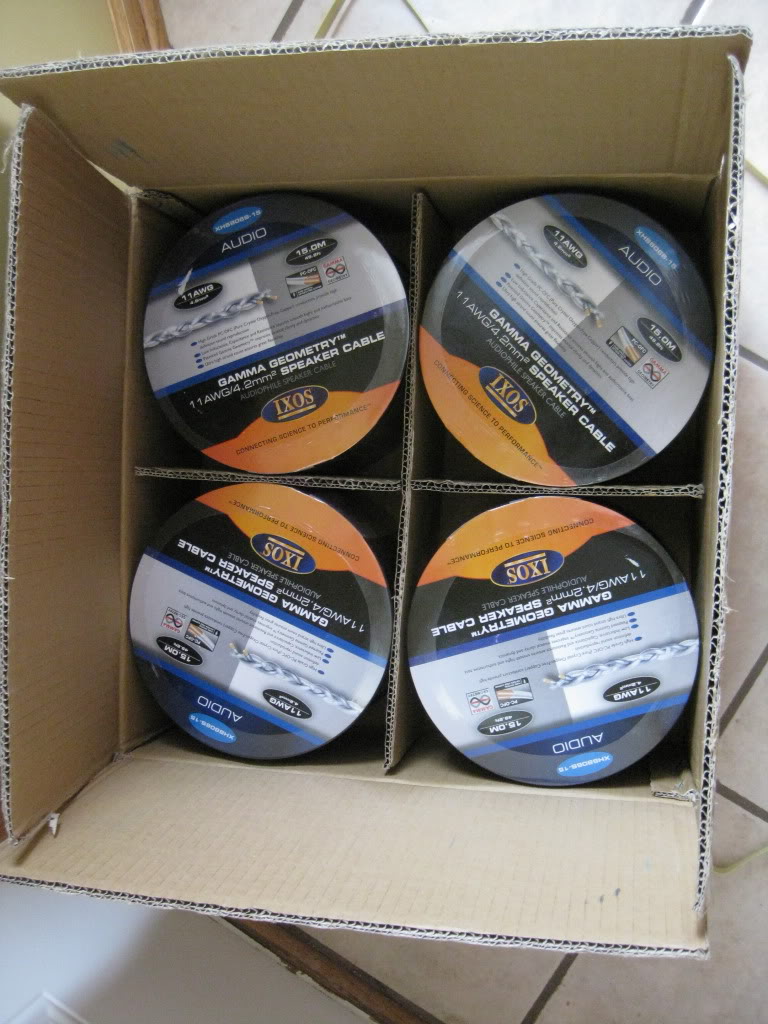
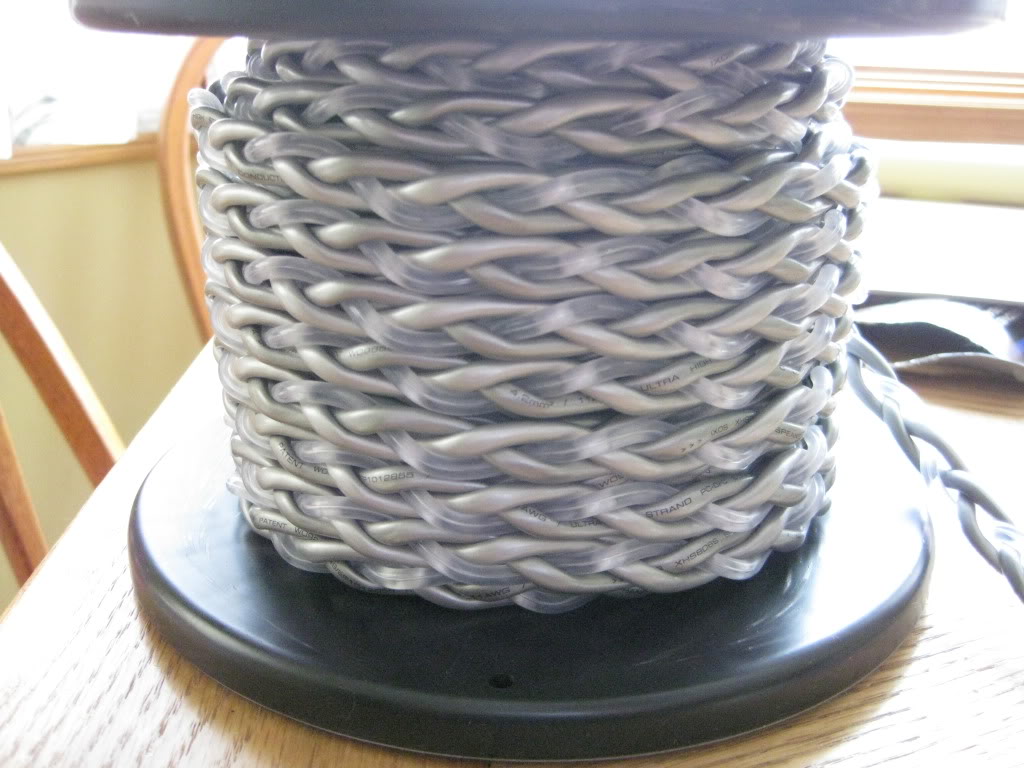
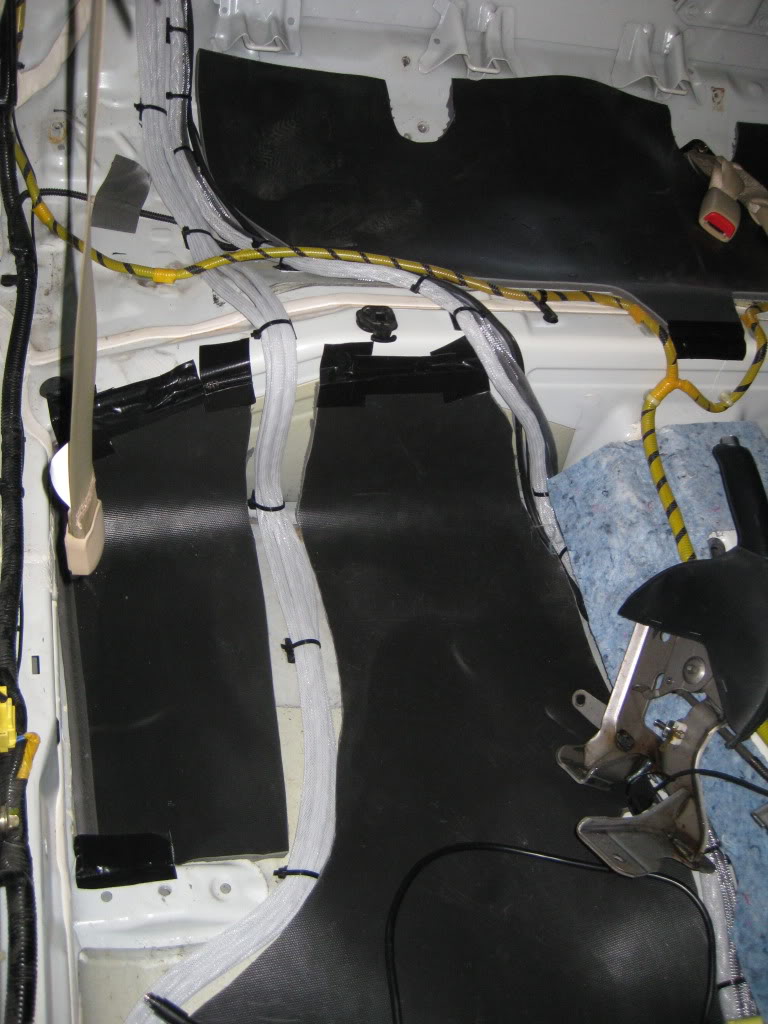
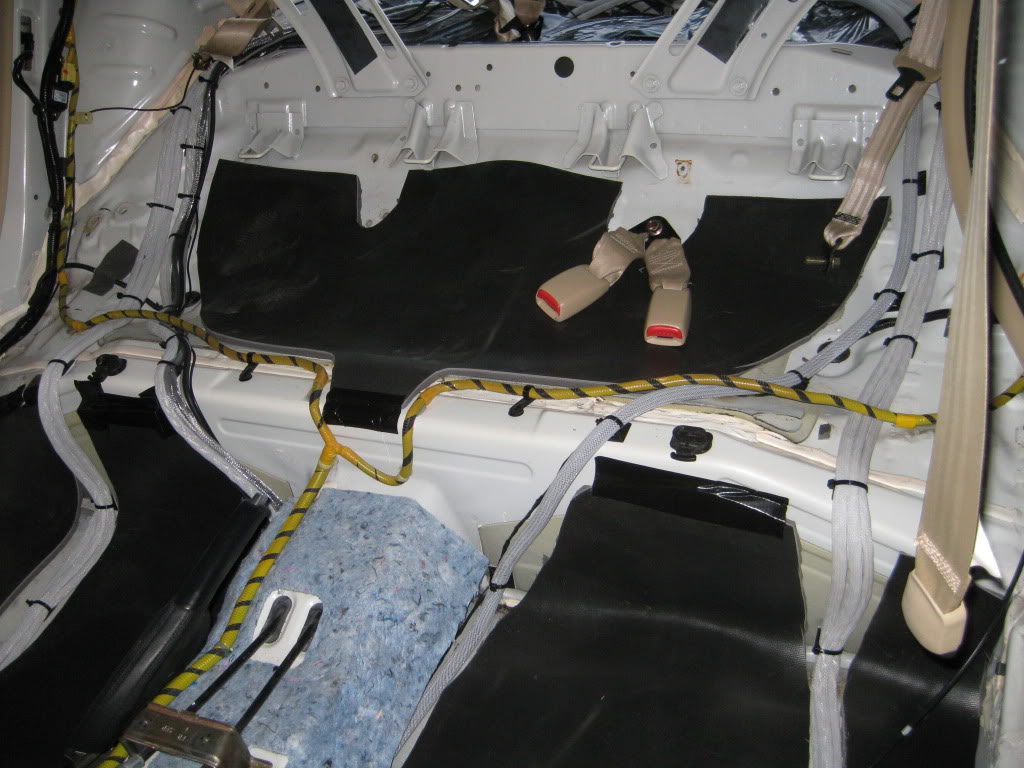
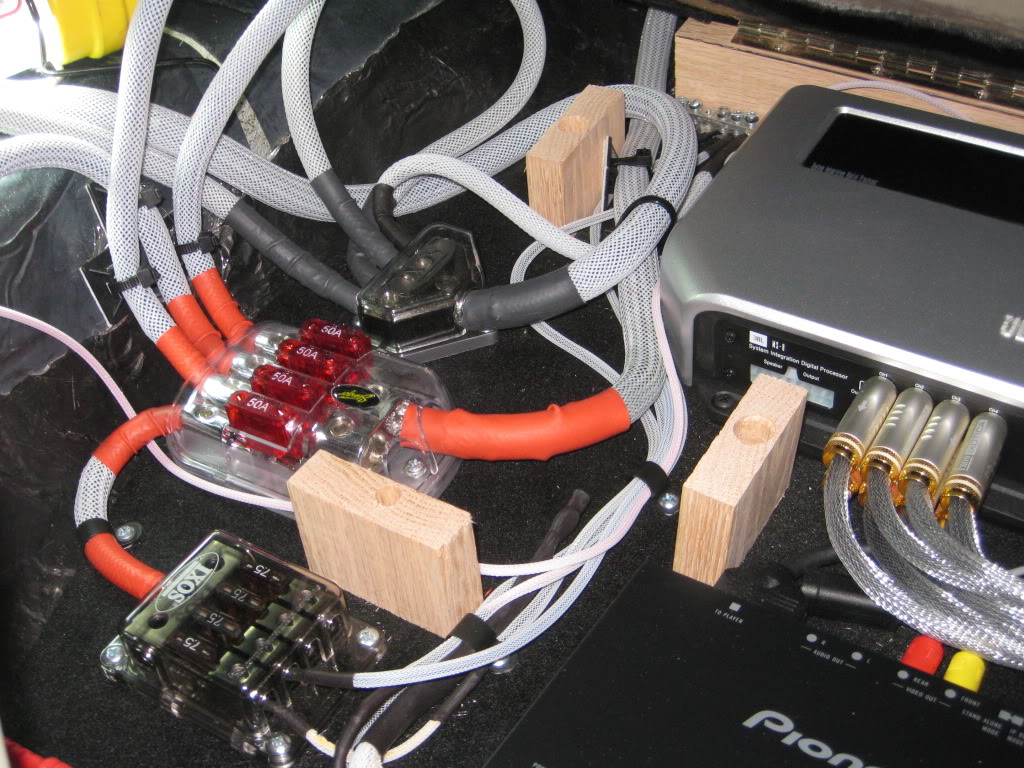
I also got the wiring completed and the decoupled floor barrier down. I use all IXOS wire (0 awg power wire, gamma speaker wire and Ixotica RCA's)
Here is the speaker wire:
Here are the RCA's:

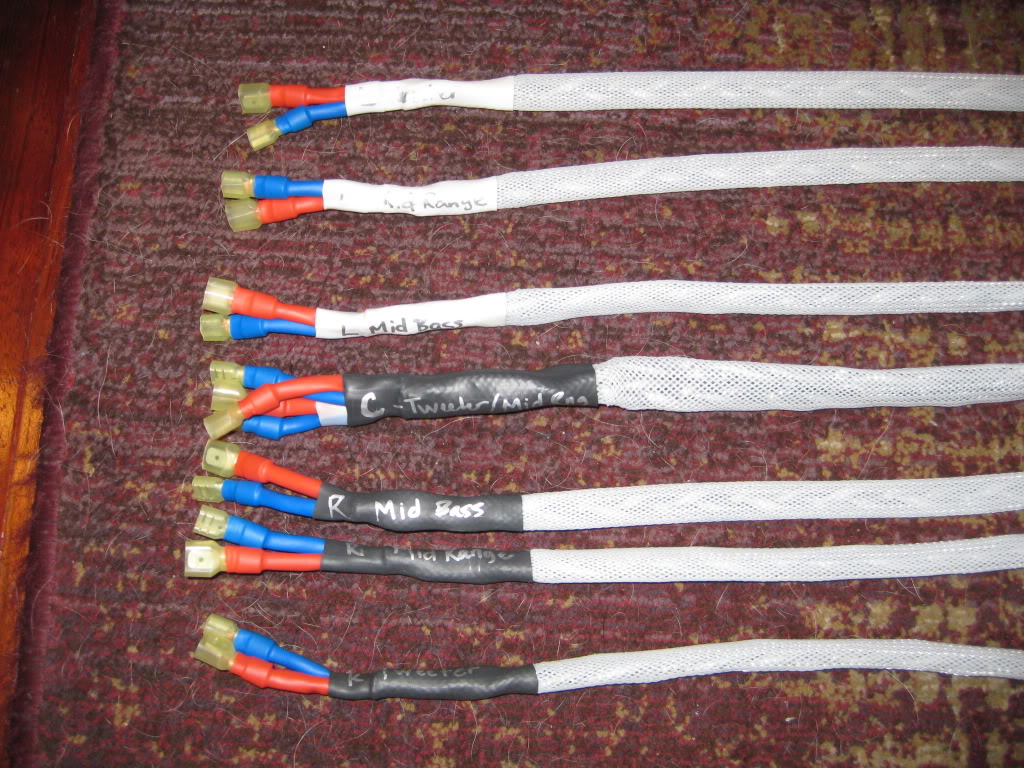
Pics of the wire termination:
Wire runs in Techflex and tied down every 6 inches or so:
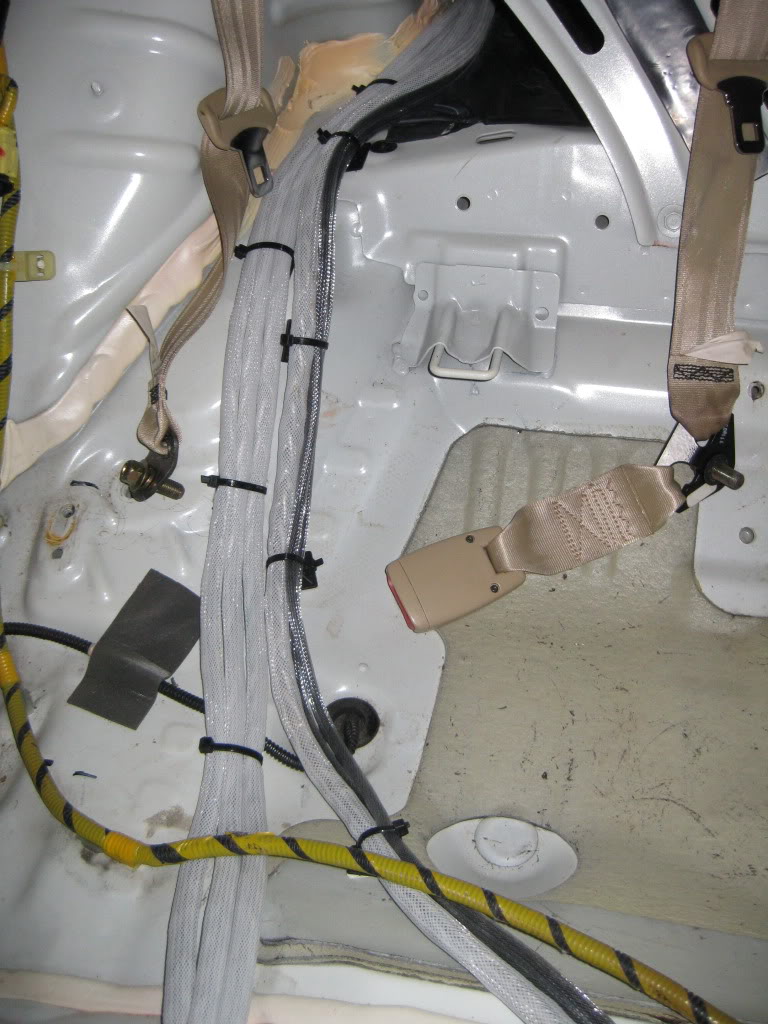
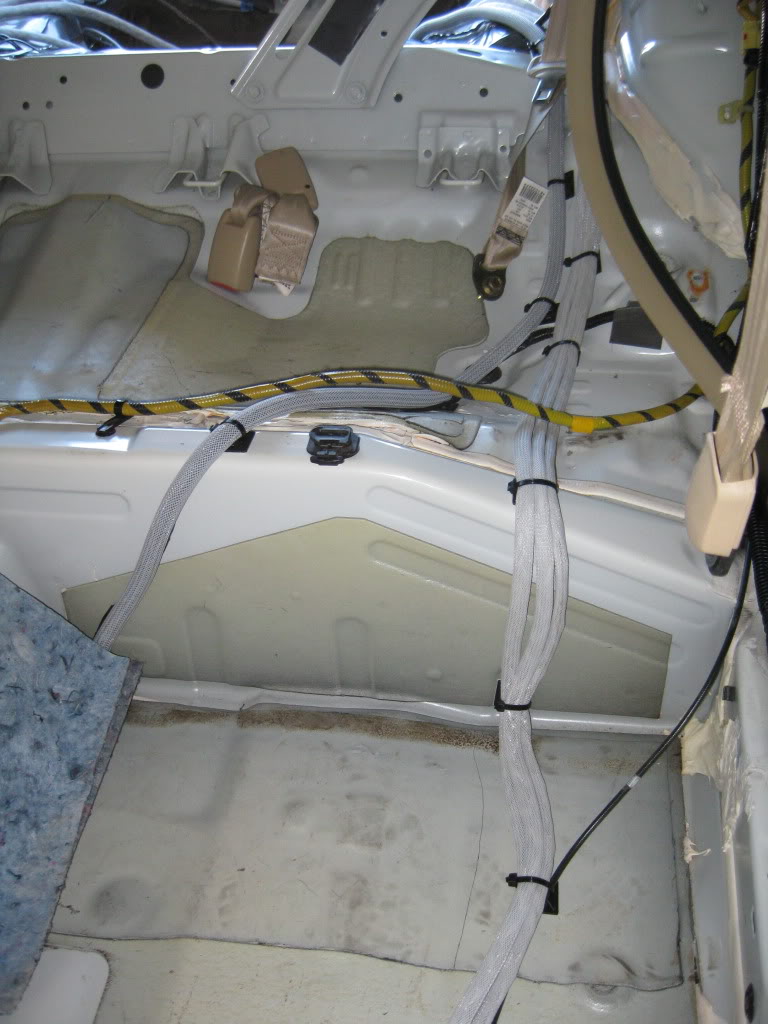
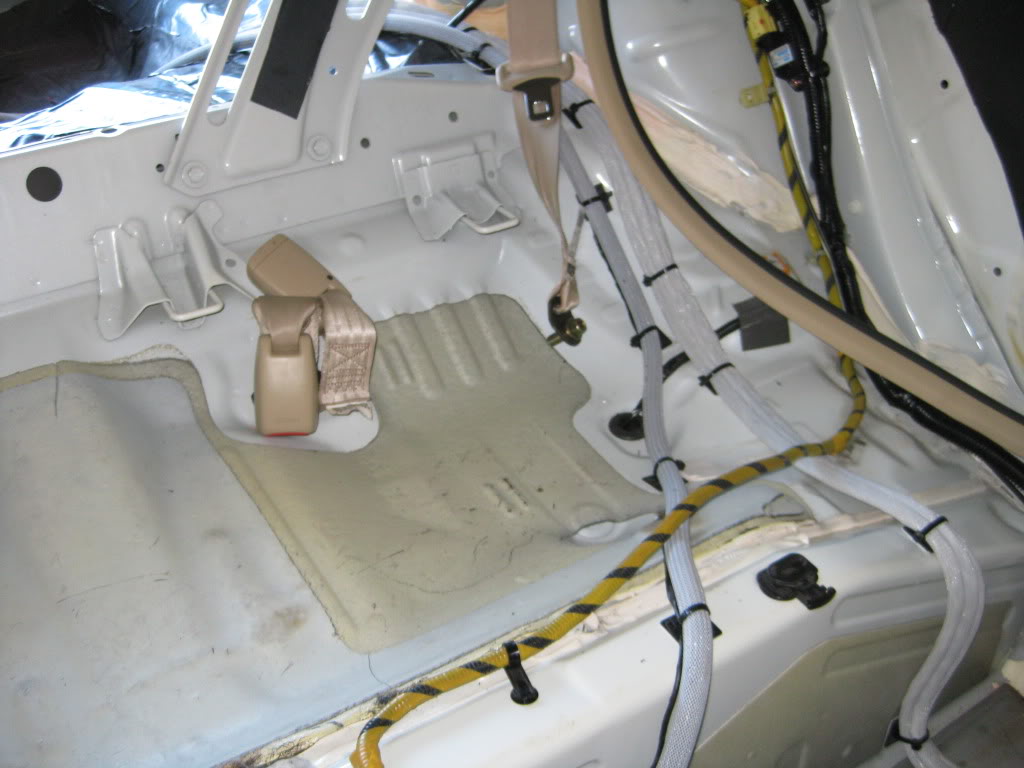
And finally the floor barrier down:
Center Channel Pics Next!
Center Channel Pics!
First I cut a piece of MDF the same shape as the original center channel cover.
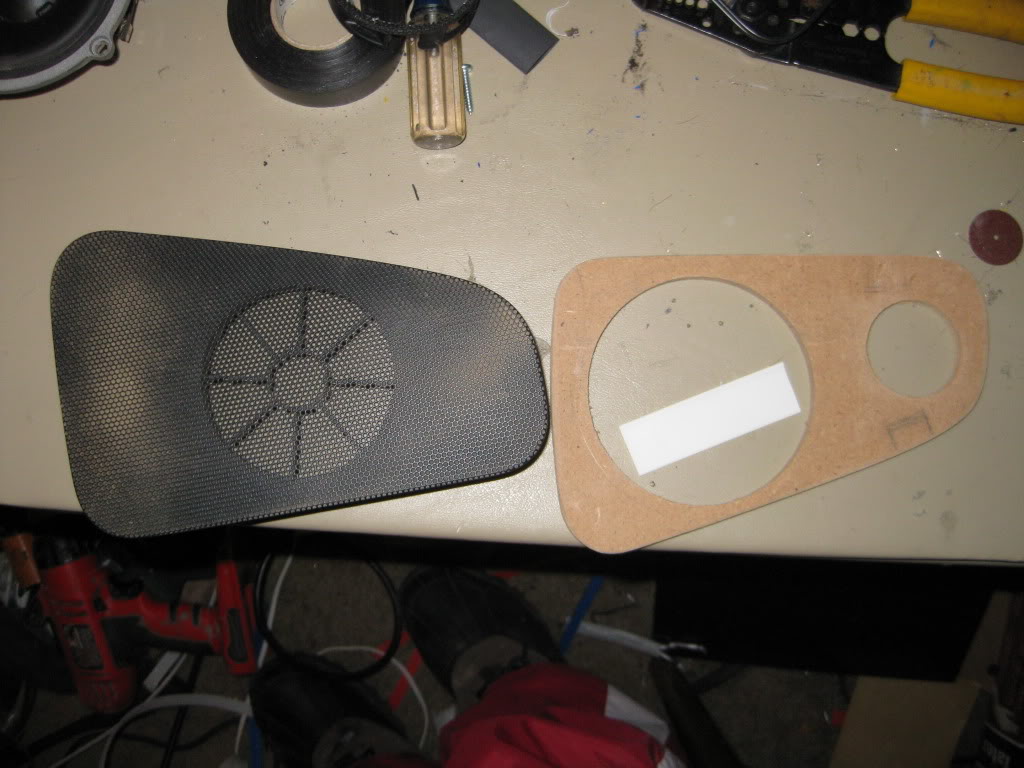
I then did a test fit with the speaker and the cover.
I added a mounting piece for the tweeter.
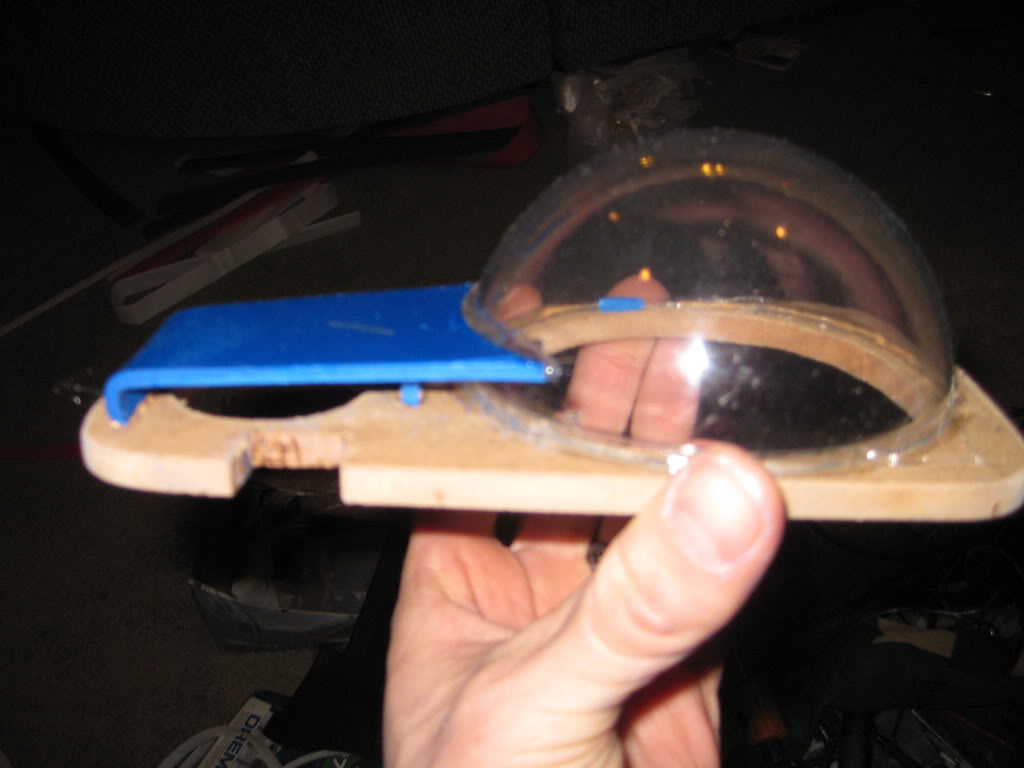
I had to (very carefully) trim some of the edges where the old cover mounted to fit the new MDF piece.
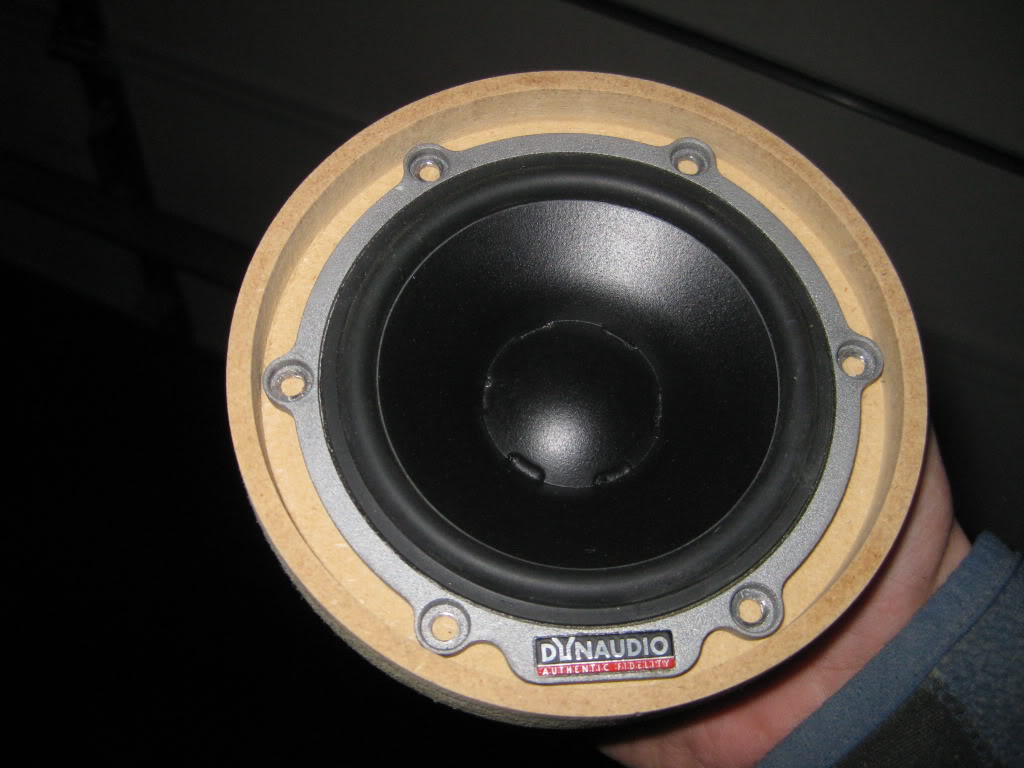
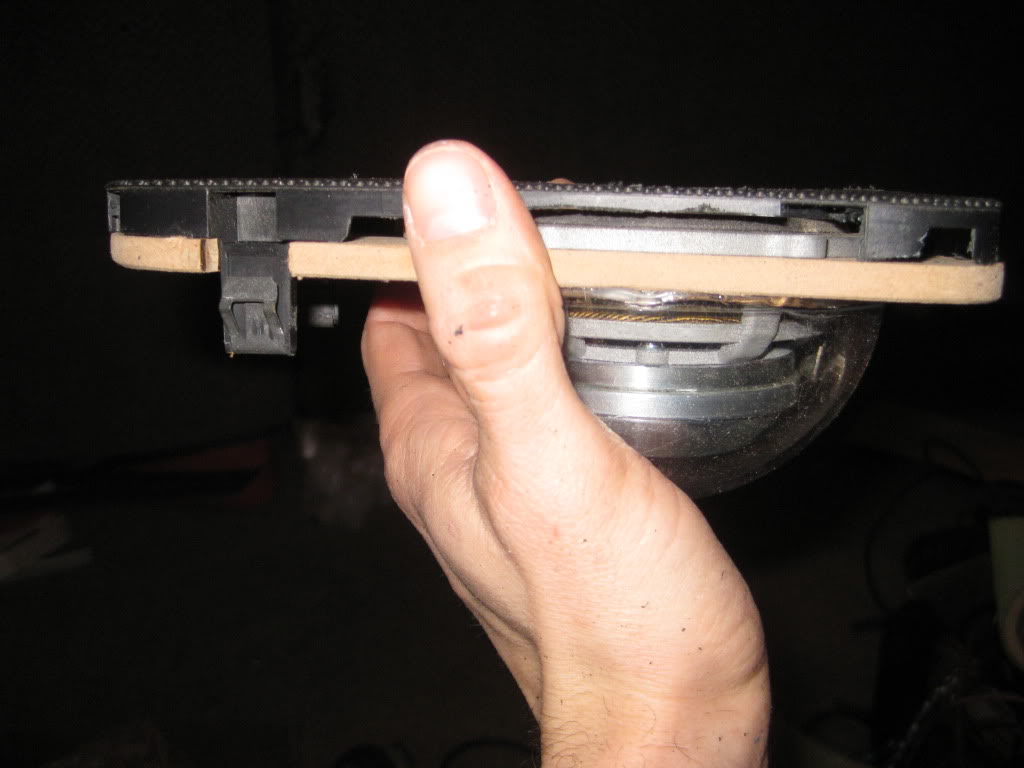
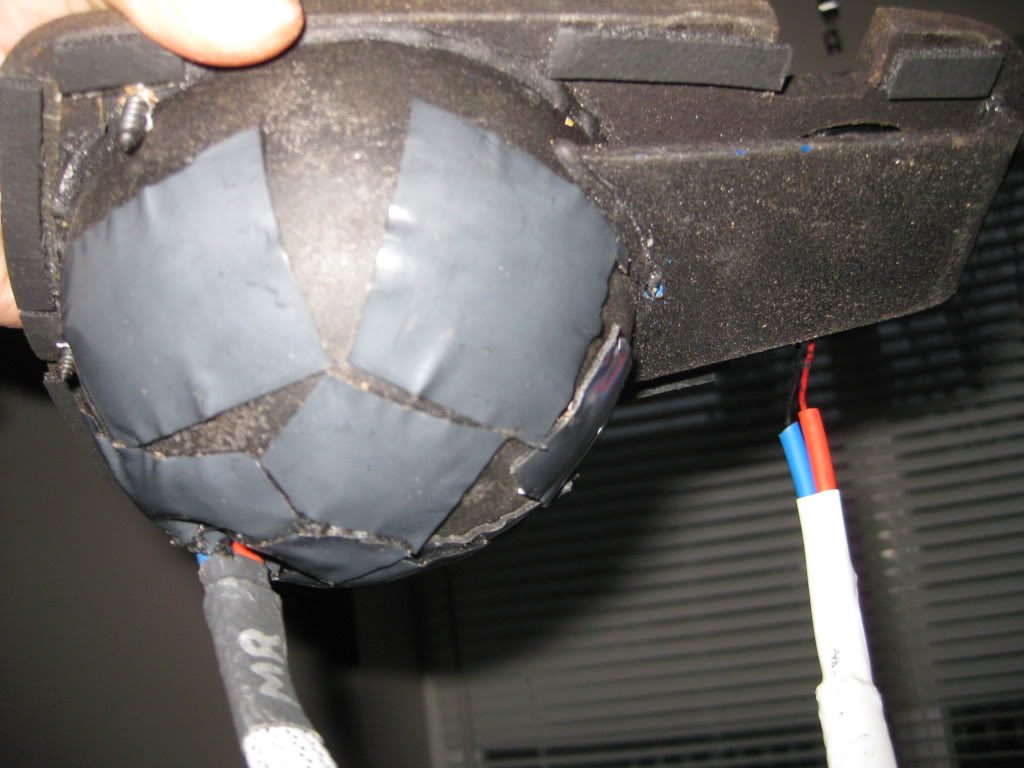
Here is the Dynaudio Esotar2 430 with the Dyn Tweeter mounted.
I added some deadening to the outside of the orb.
Center Channel mounted in the car.
A view from underneath when mounted in the dash.
A couple of pics with the grill in place. I just covered the factory grill after cutting the openings for the speakers with grill cloth.
That is it for tonight. Will be working all day tomorrow!
3-1-2011
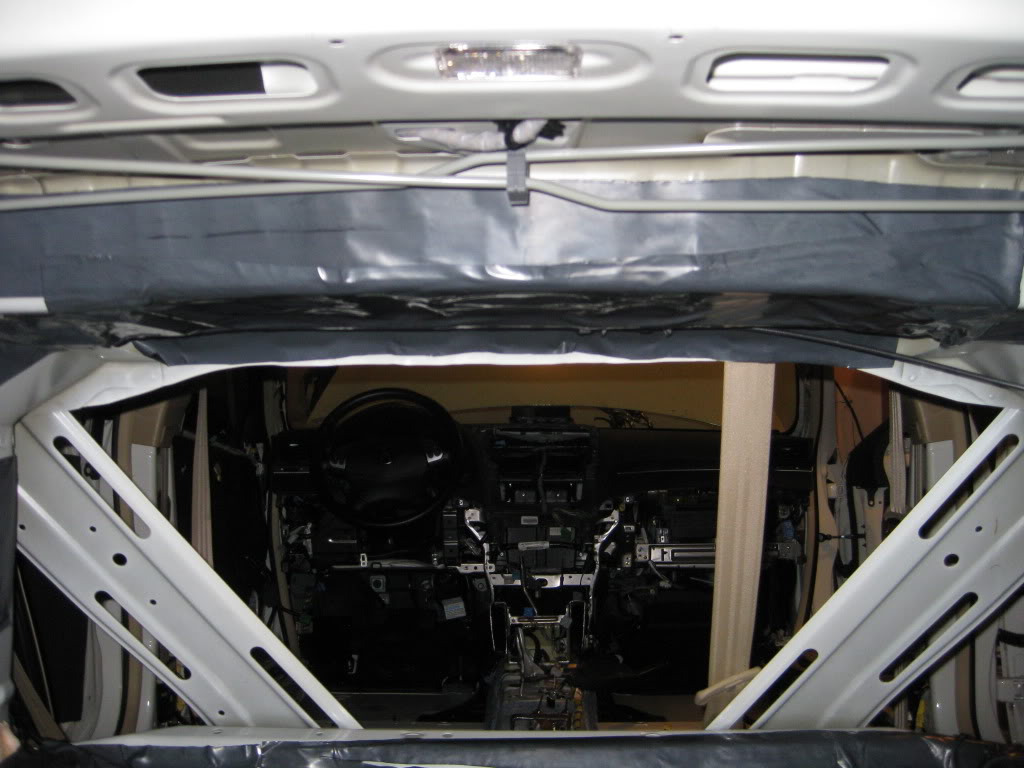
Time for updates...A few of you know I have been battling an ankle injury since last June and had to have surgery in November. I was told Wednesday that I needed a second surgery to repair nerve damage from the 1st surgery, so I have been working like a dog to try and finish the car. The car is not finished and I had the surgery yesterday. Here is an update on everything I did get completed and at this point, it is very close to being done.
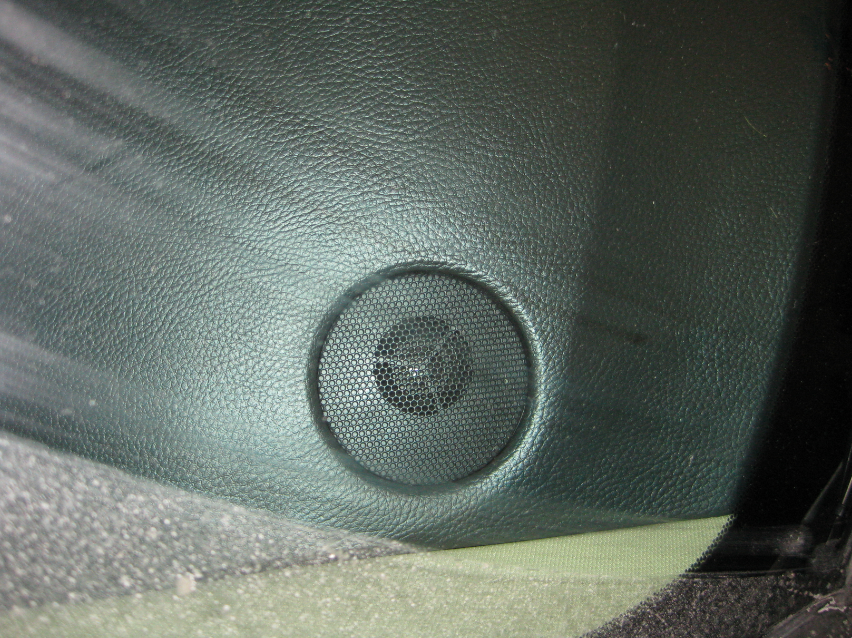
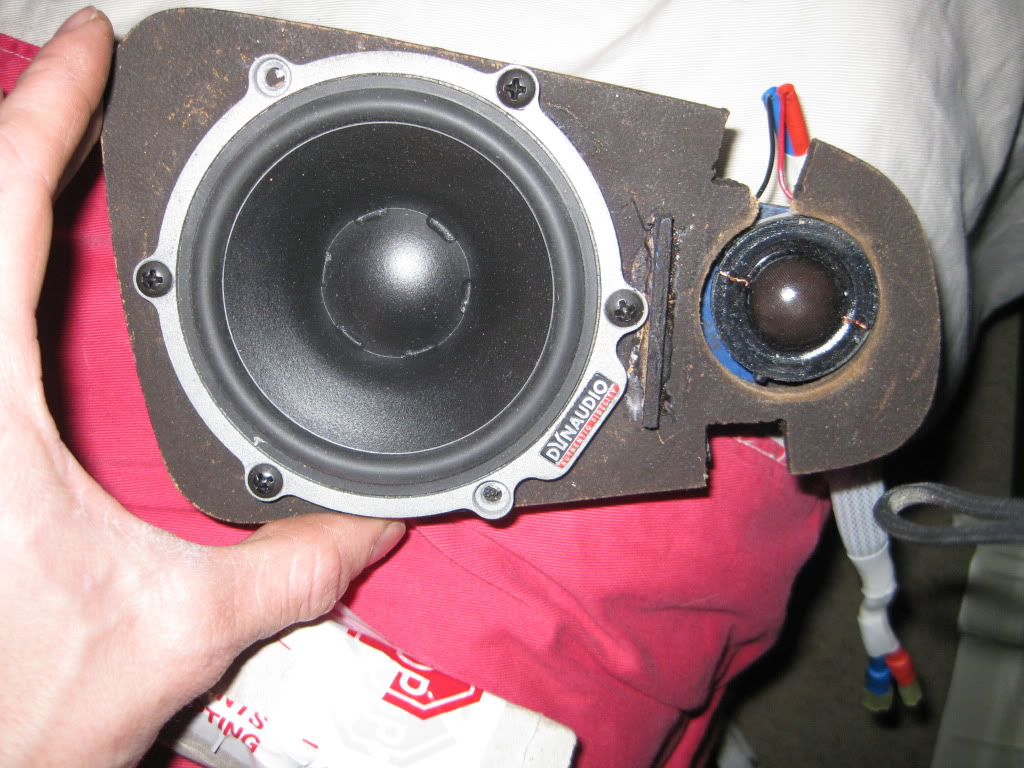
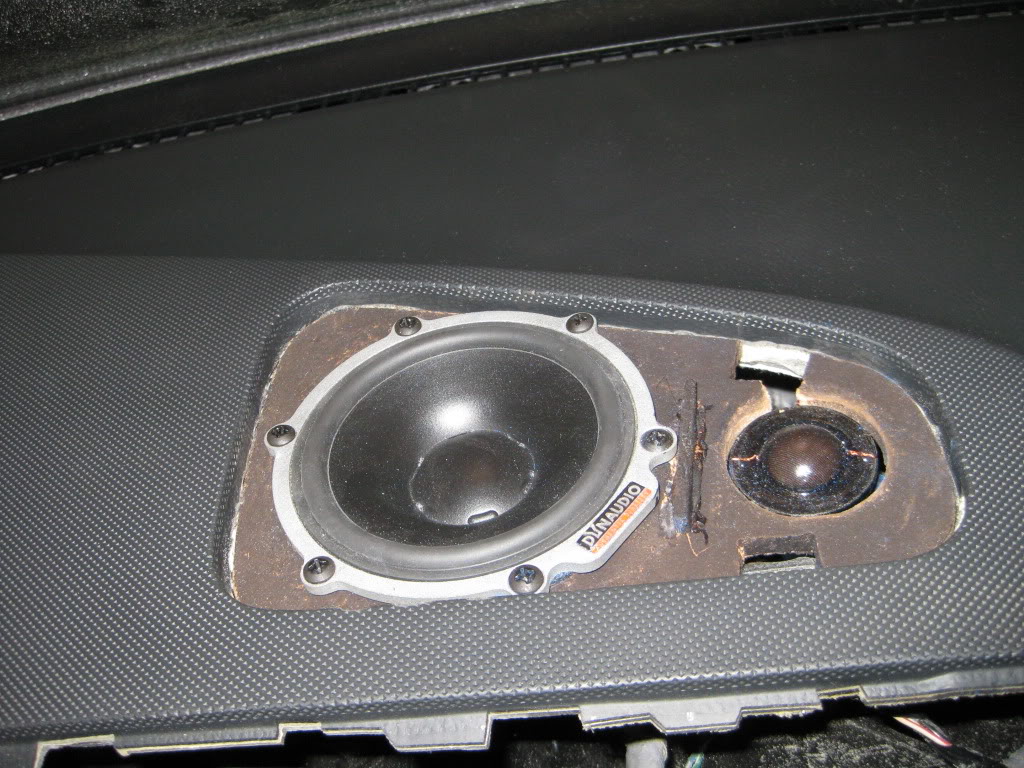
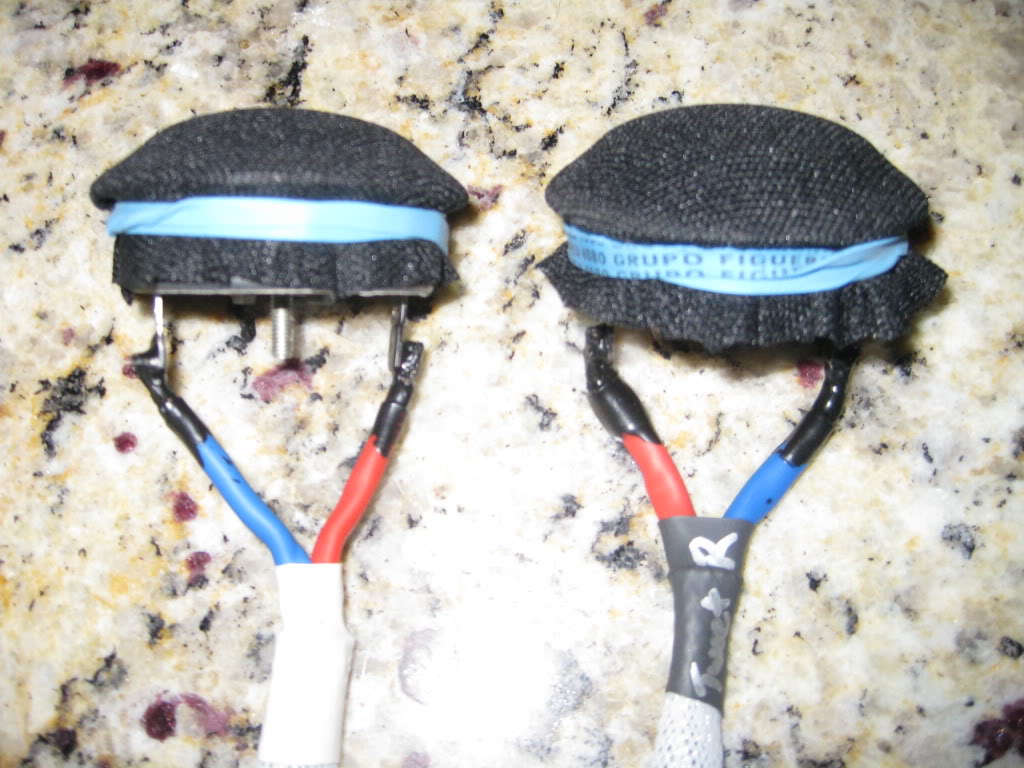
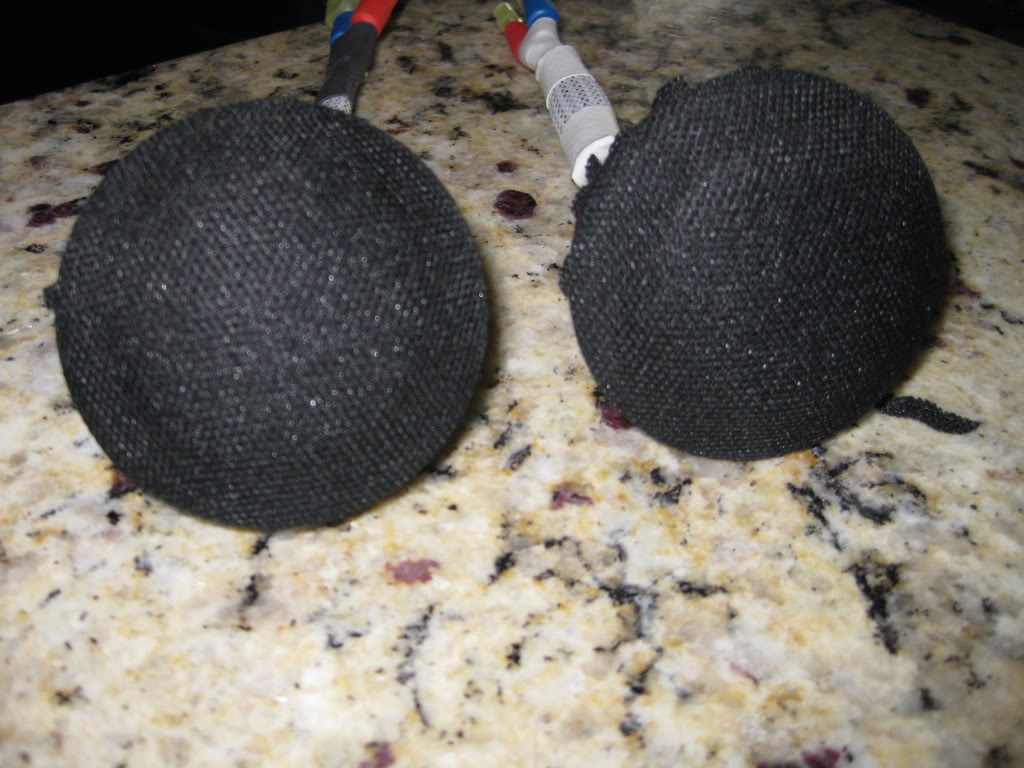
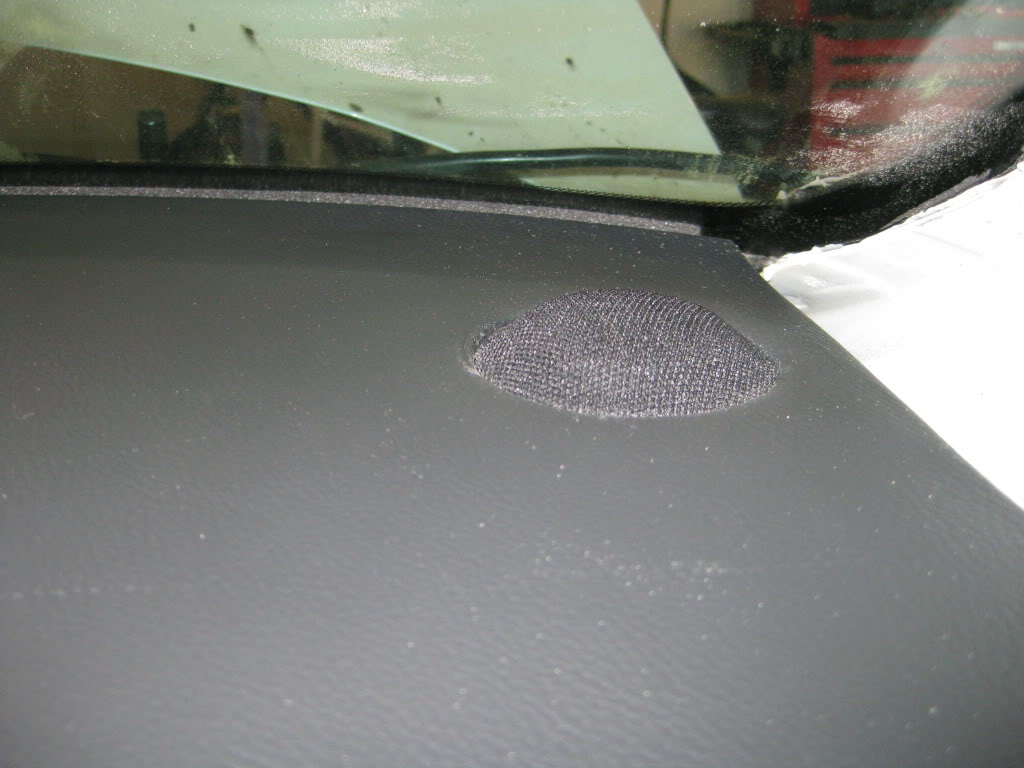
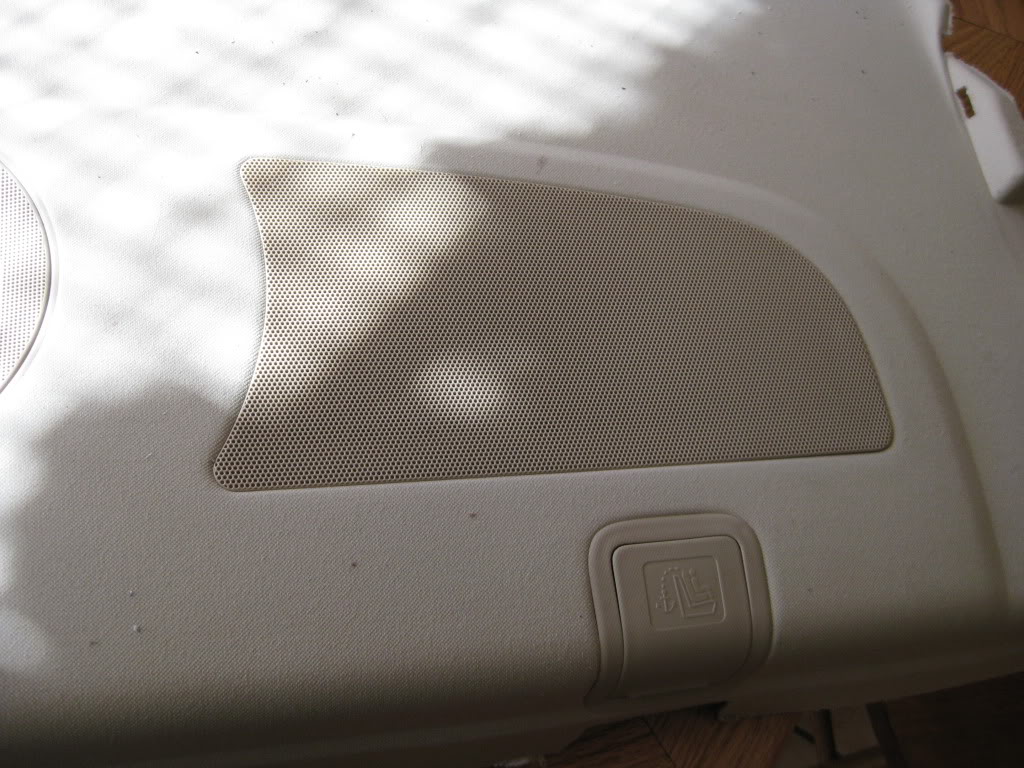
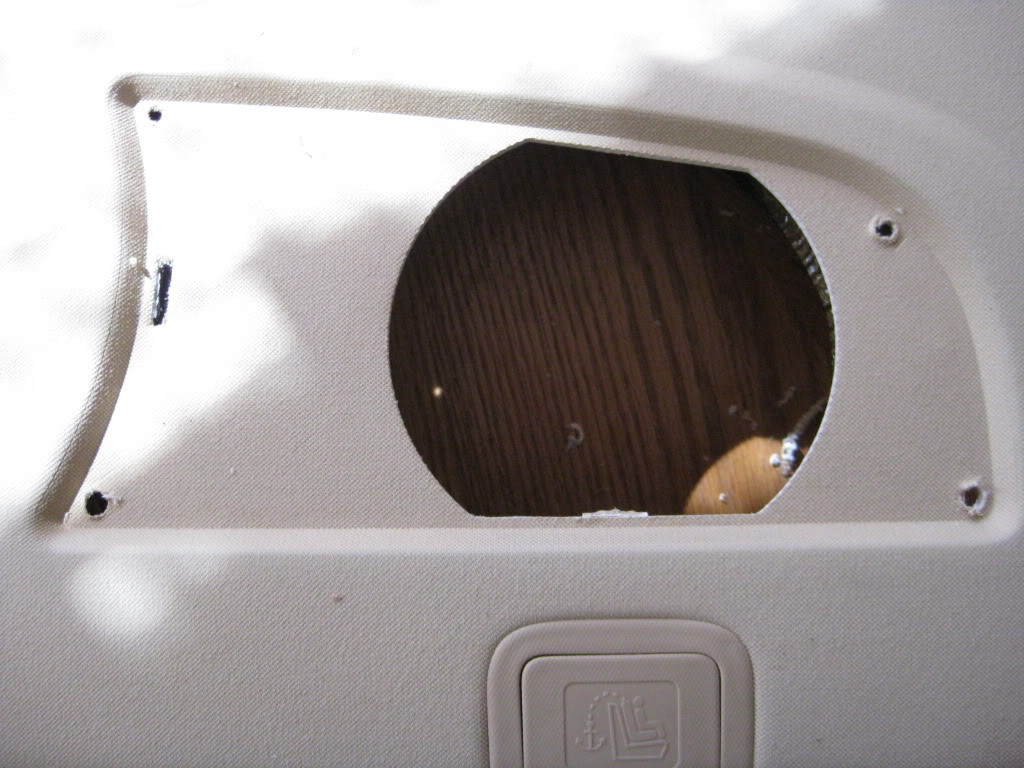
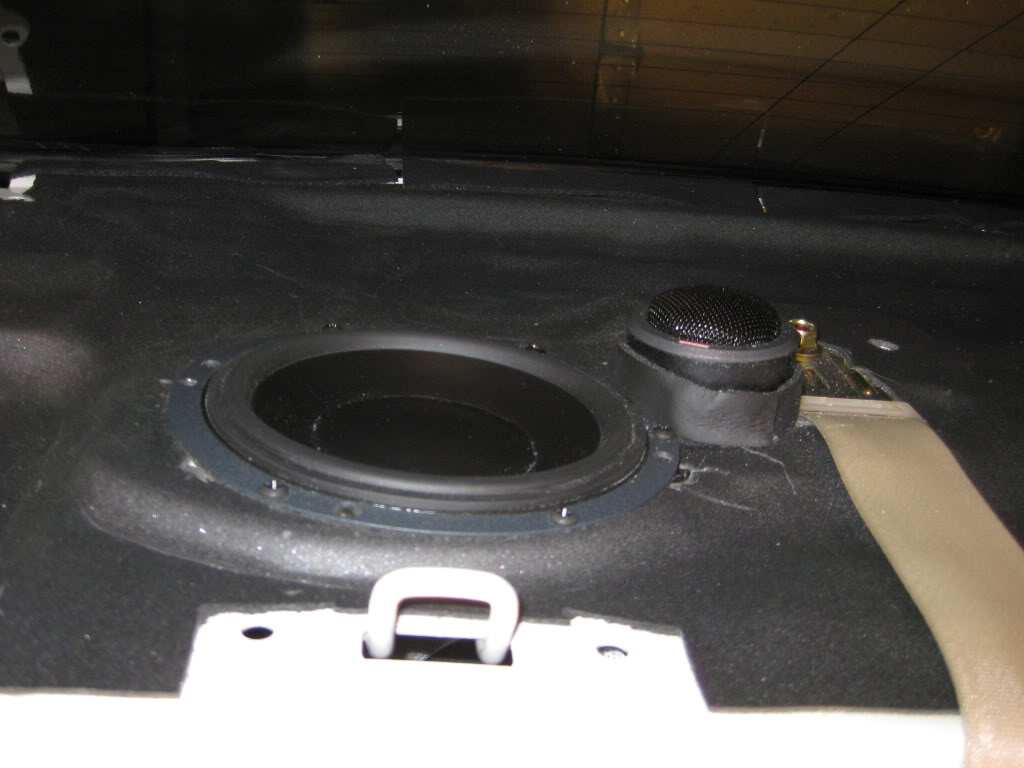
The tweeters (Dynaudio MD102's) were installed in the factory location. I removed the factory grill and (after trimming the inside hole a little) installed them in the factory location. I covered them in grill cloth just to maintain the theme of the installation.
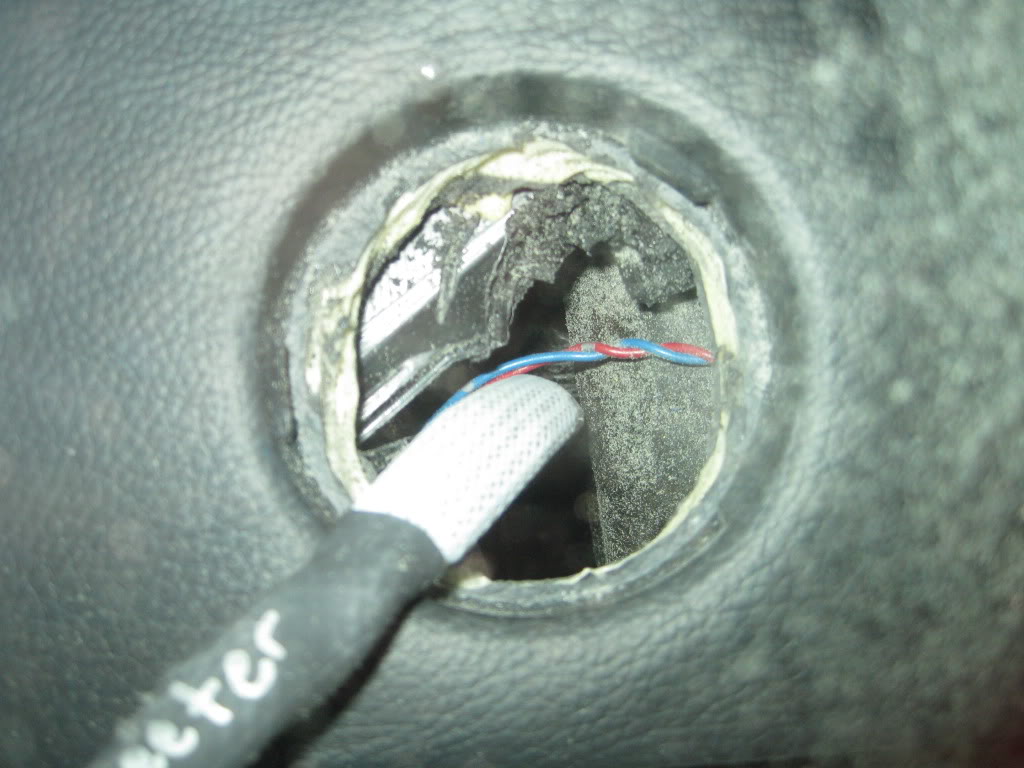
I know, just rubberbands....well, why make it harder than it really is. I was going to use hot glue, but didn't want to leave any residue.

Next were the door speakers. I just made some spacers from 3/4 mdf and sealed the wood with rubberized undercoating. I did use cascade gasket material between the spacer and door and between speaker and spacer.
Pretty simple. More to come....
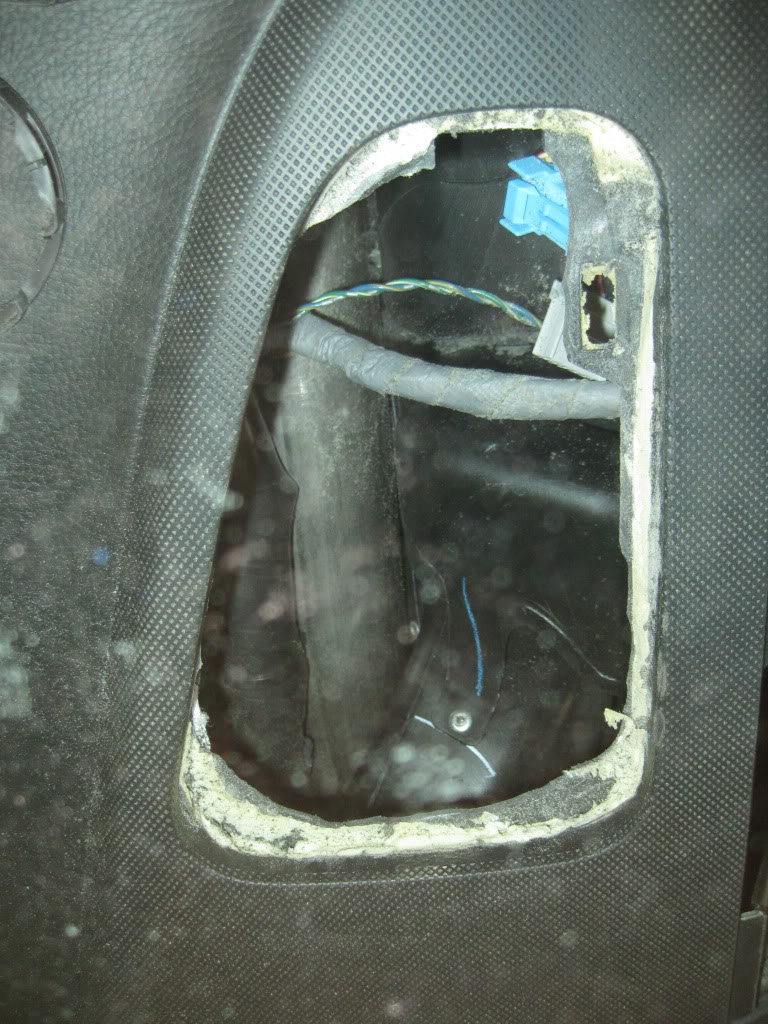
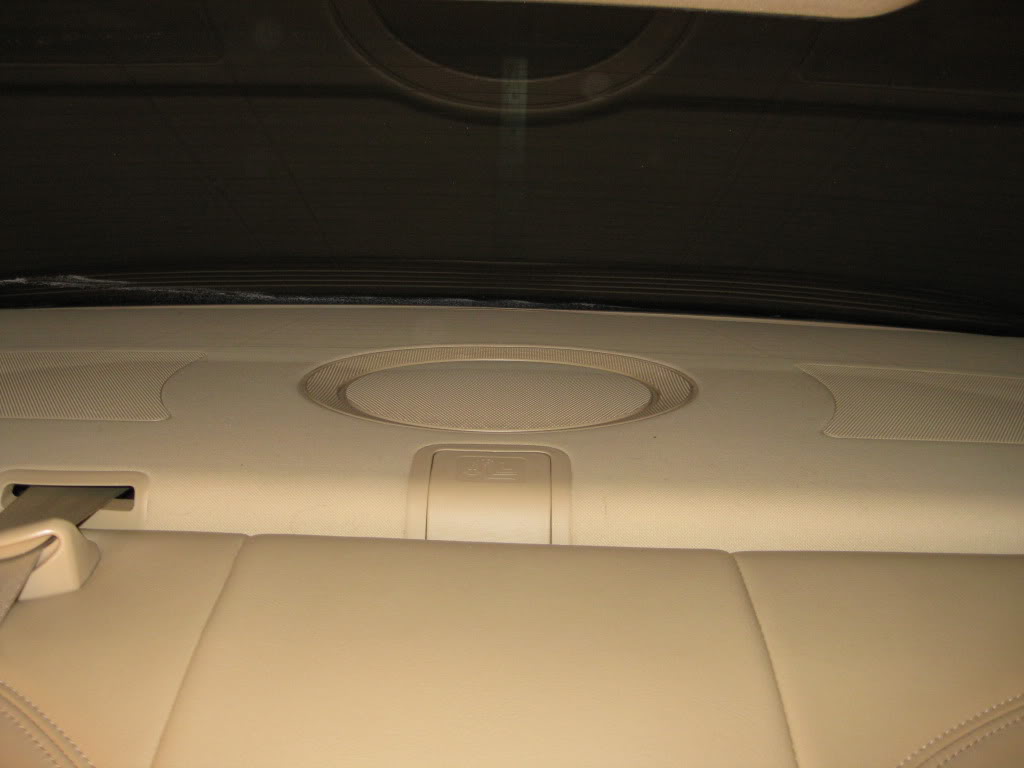
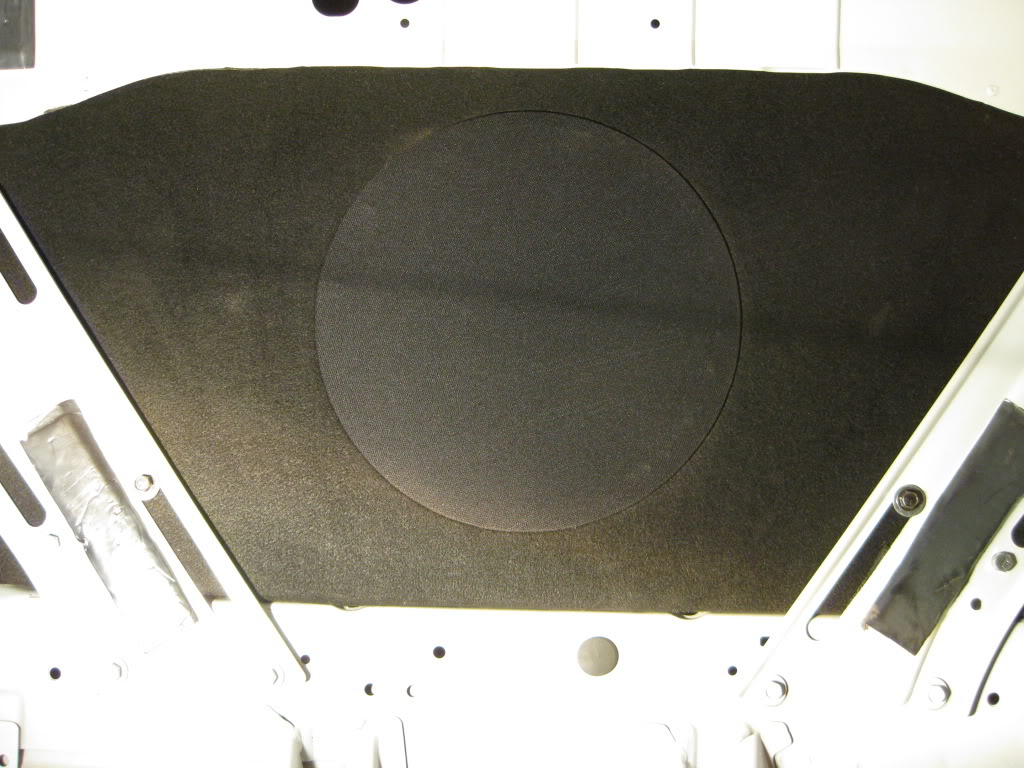
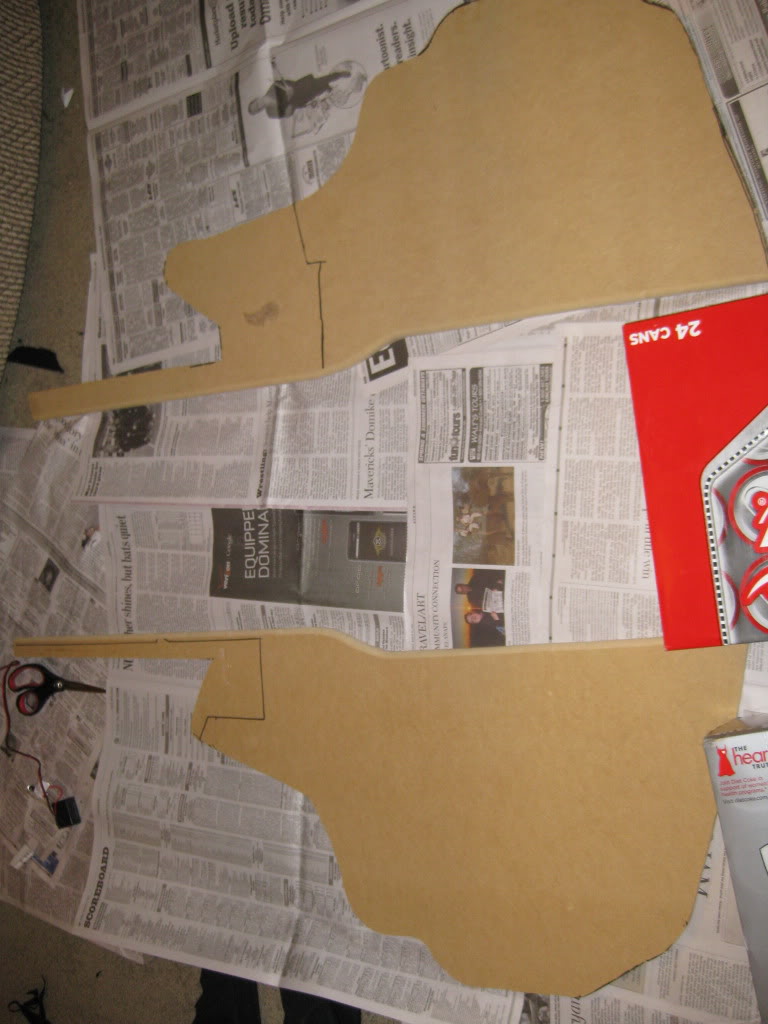
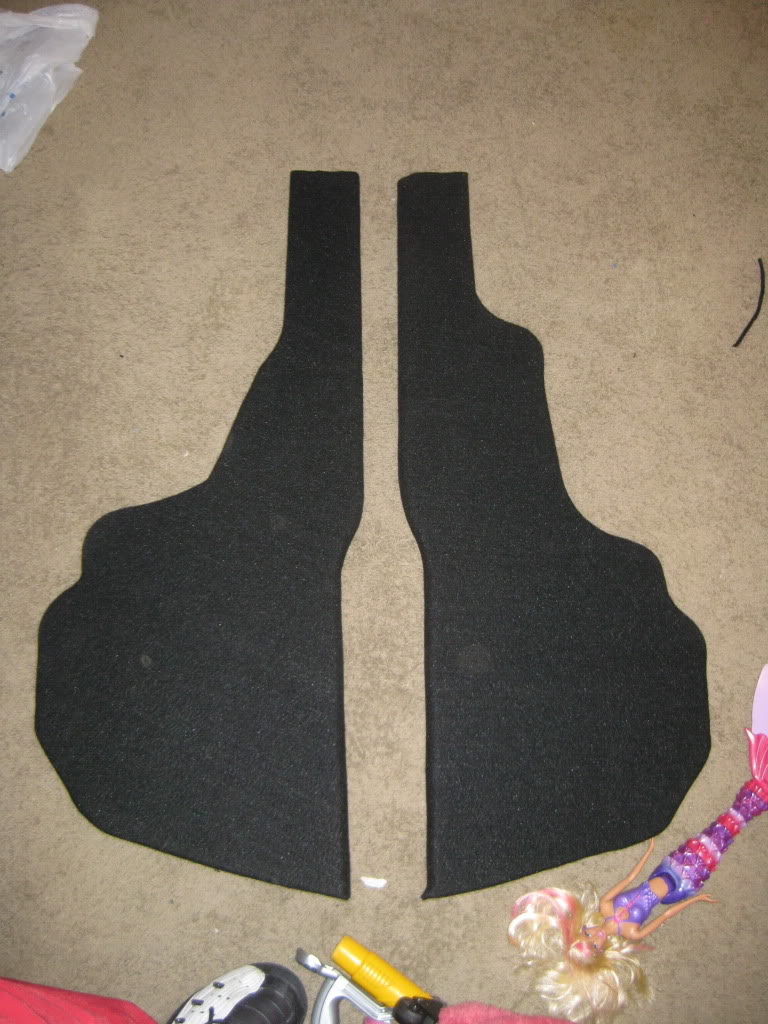
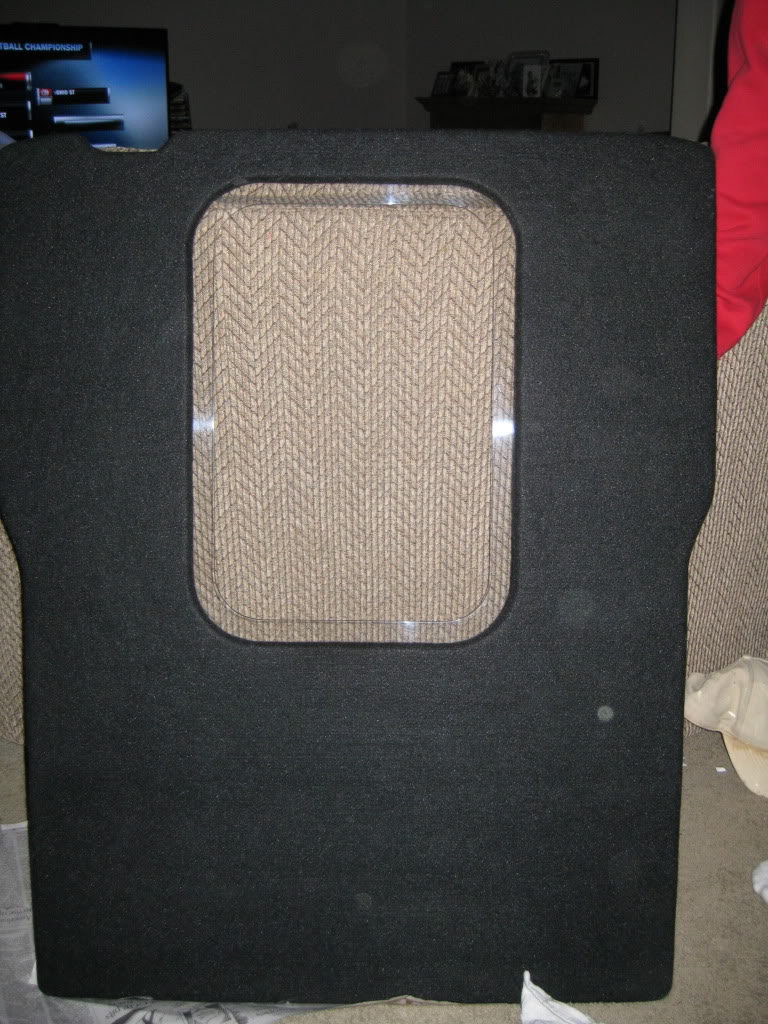
The rear deck was quite interesting. The Acura's rear deck is enclosed from the bottom side. So, you have to do everything from the top (unless you are willing to cut out a ton of metal) and then you have a seatbelt in the way on one side of the left speaker and metal from the enclosed section in the way on the other side. So, in order to install a set of components, I had to get a little creative.
The rear deck had to be modified so that the grill opening already there could be utilized fully.
Here is the grill beforehand:
This is the opening the factory gives you:
Here is how I opened the space:

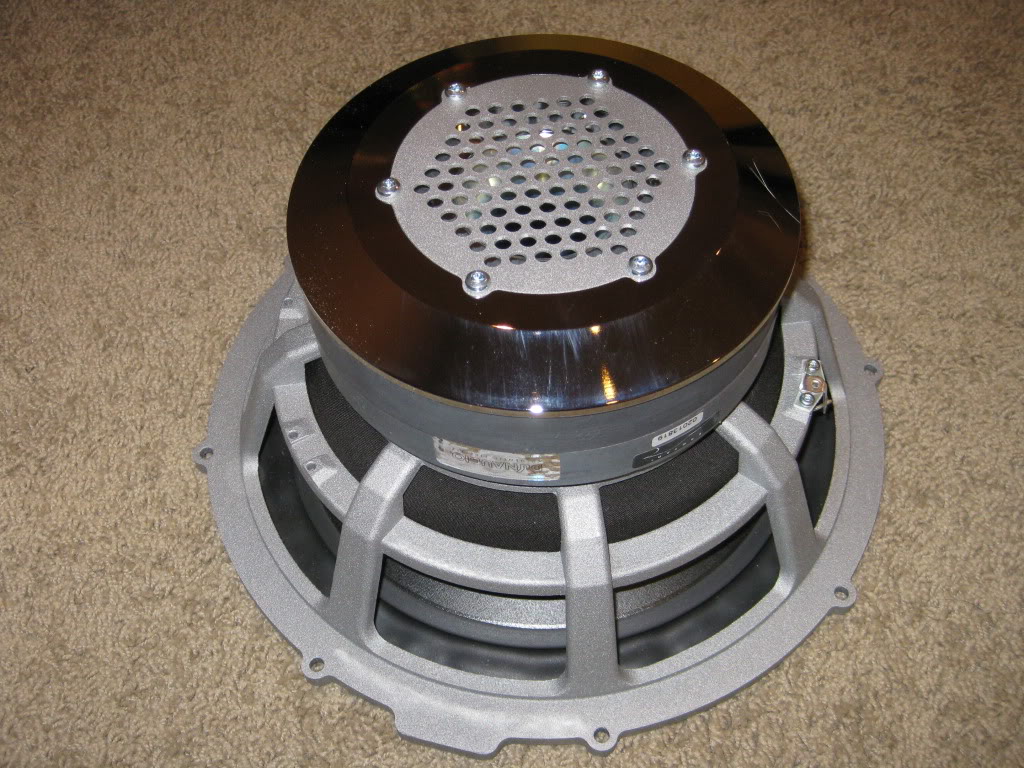
The Dynaudio MW162GT's fit right into the opening but like I said, there was no room to cut for the tweeters, so I surface mounted mounted them under the factory shelf.
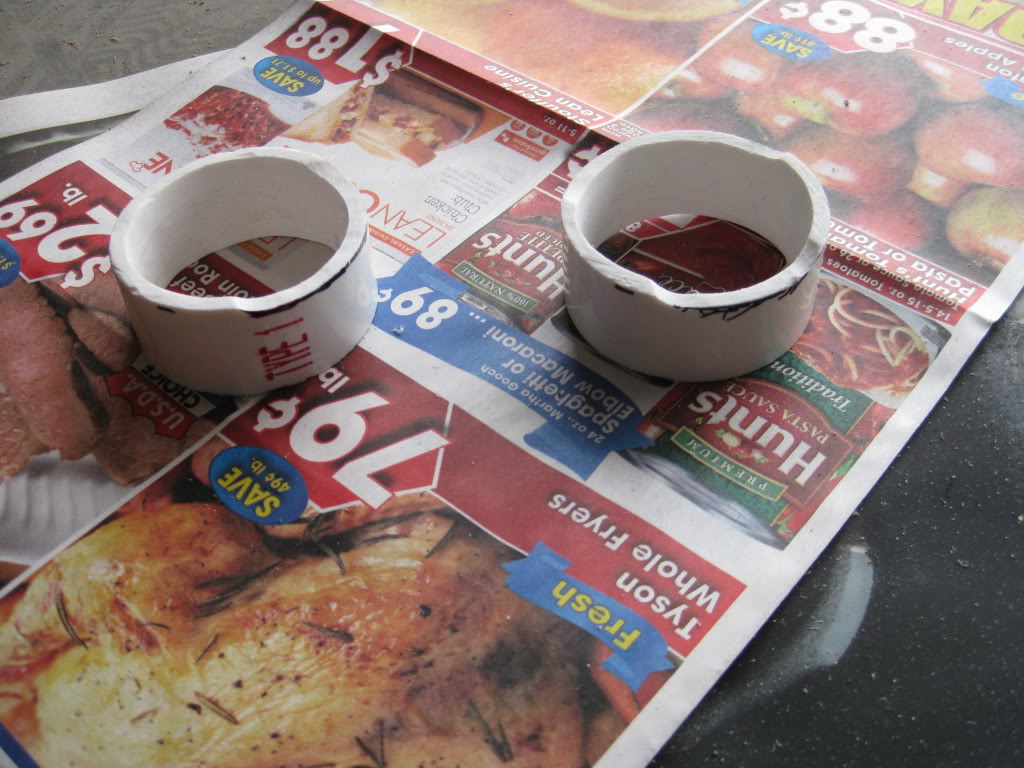
I used PVC to make a nice thin mounting ring. I then secured the ring to the rear shelf.
I had to shave off part of the terminals so they would fit.
Mounted in place.
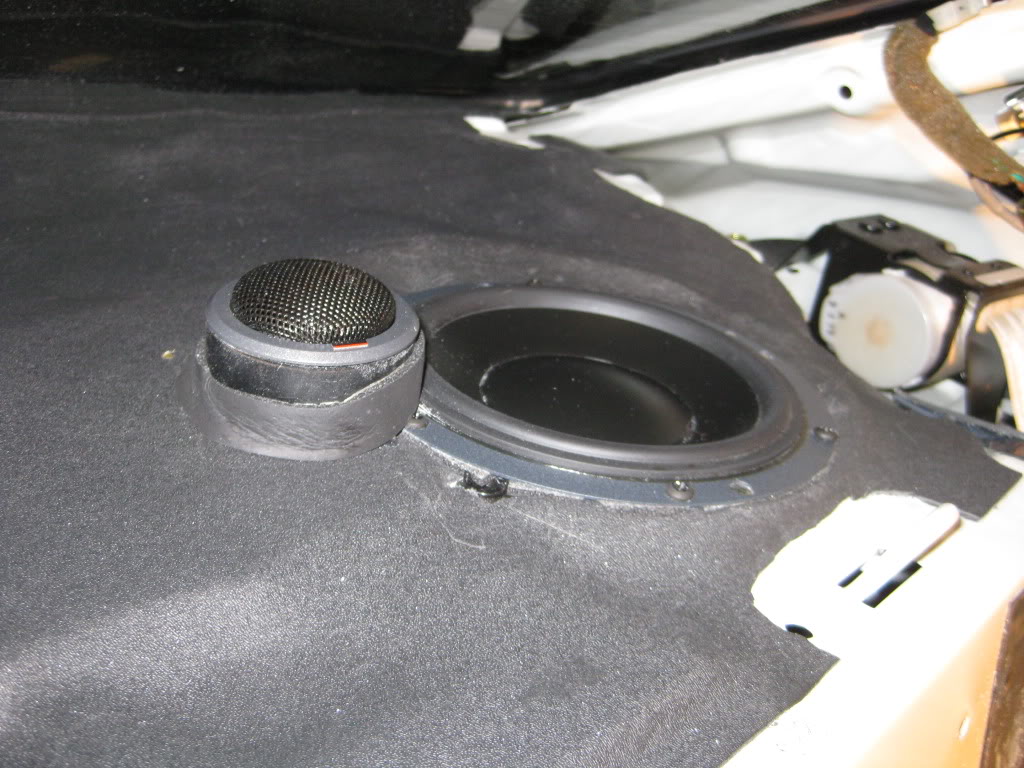
I then reinstalled the package shelf and it fits perfect.
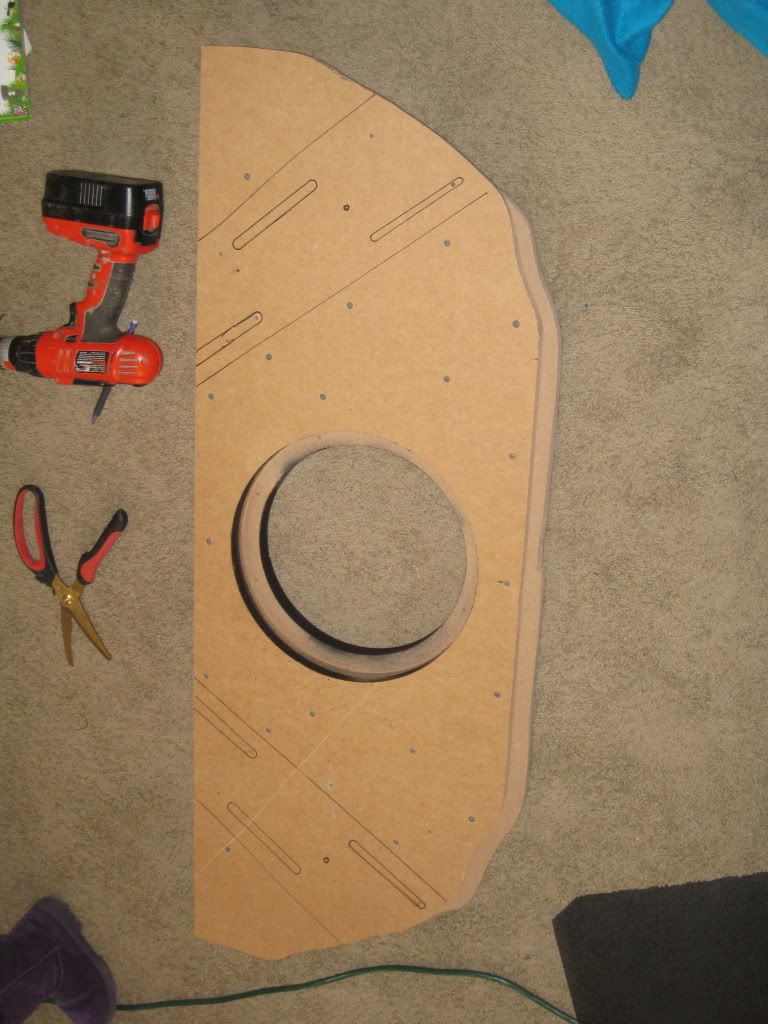
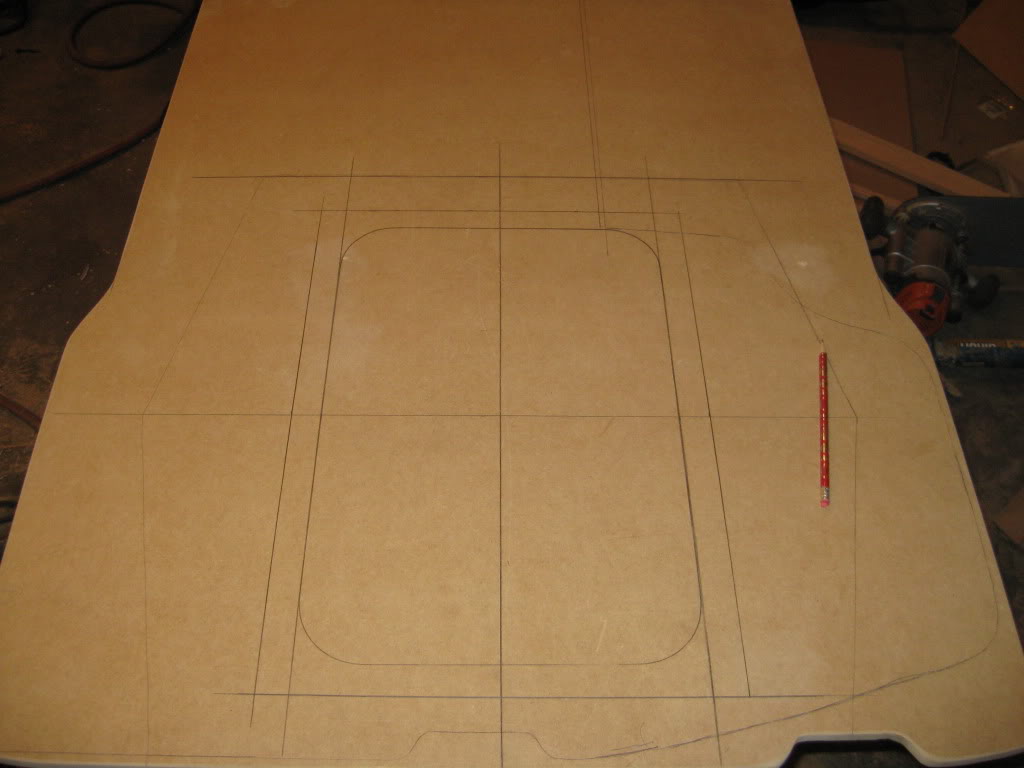
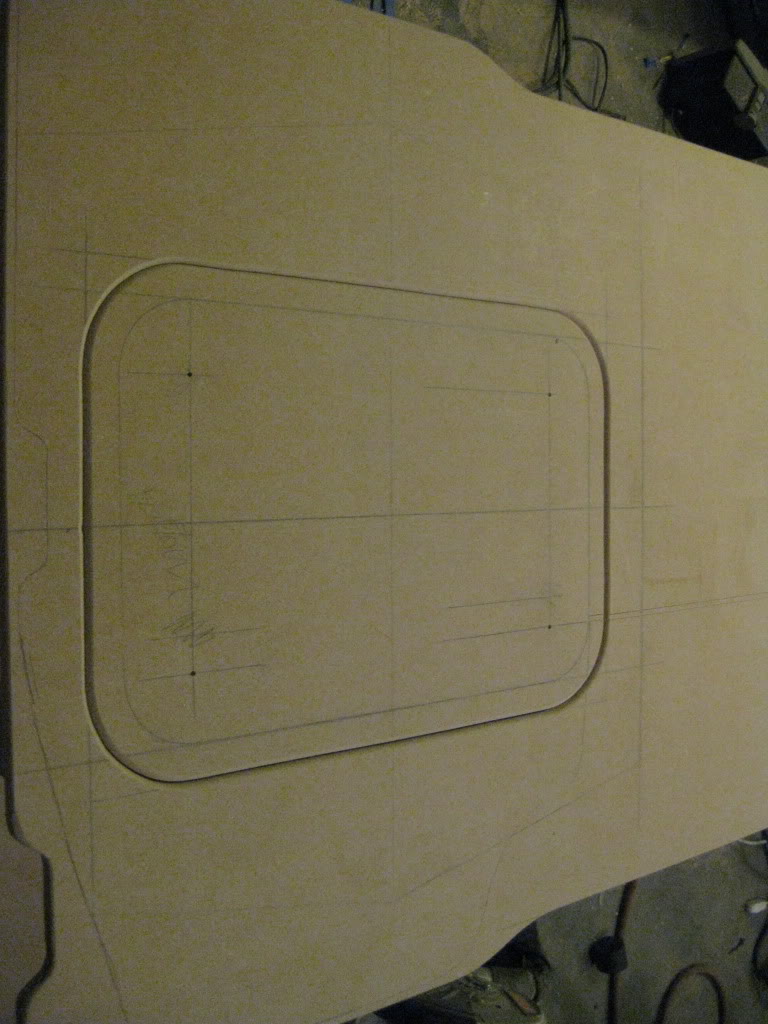
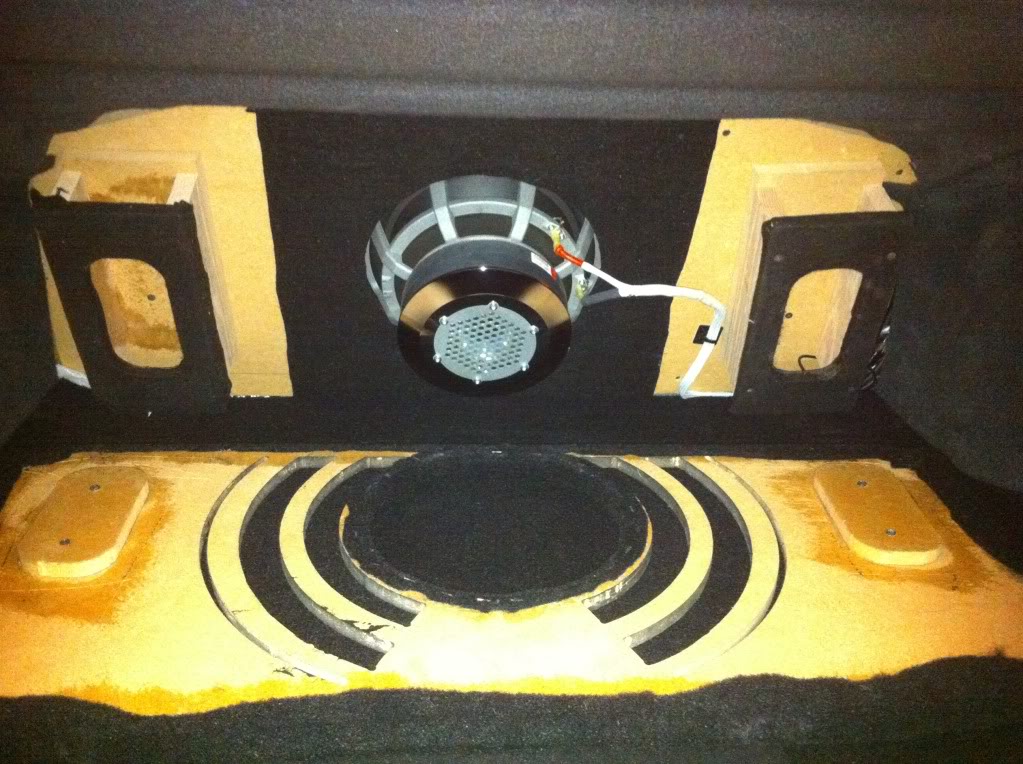
Time for the Infinite Baffle. After a very long process of pros and cons, I decided that I would go with an Infinite Baffle over the Aperiodic Membrane. The Dynaudio Esotar2 1200 can perform exceptionally in either. I read that flexing is the biggest problem with these (have only done sealed, ported and AP's in the past), so I tried the best I could to prevent possible flexing.
I first made the front baffle out of 3/4" mdf.
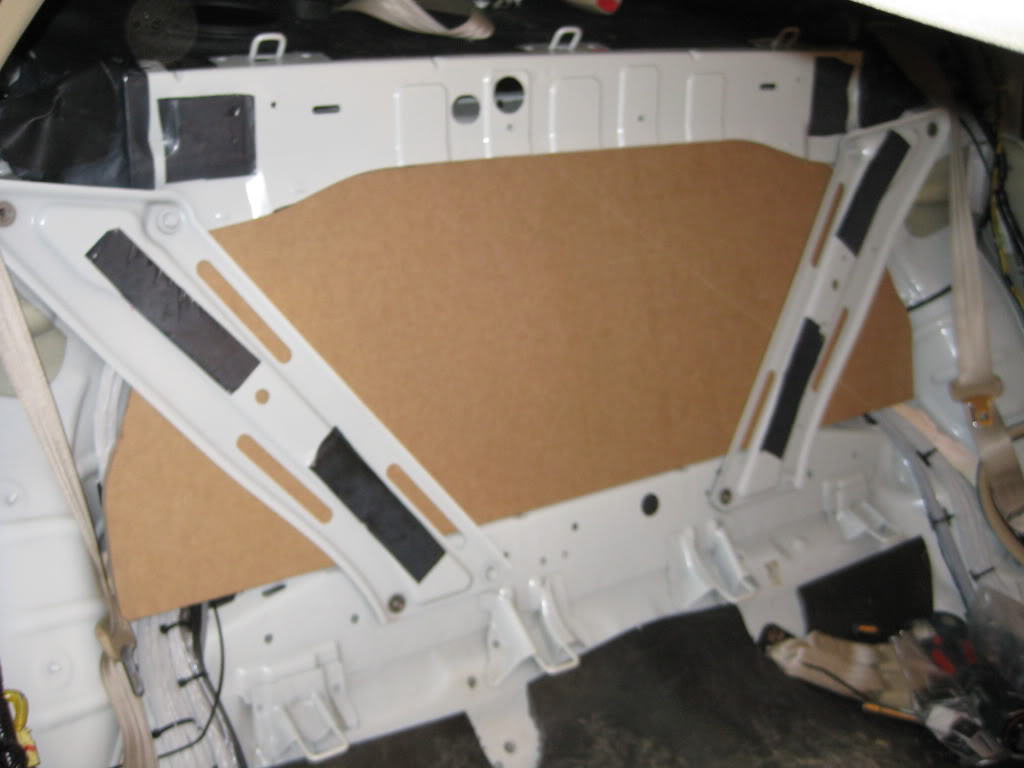
I then glued and screwed (in about 20+ places) another piece of 3/4" mdf.
I also attached a 3rd piece of 3/4" mdf in the center around where the sub mounts for more support.
I then decided to attach the baffle to the braces.
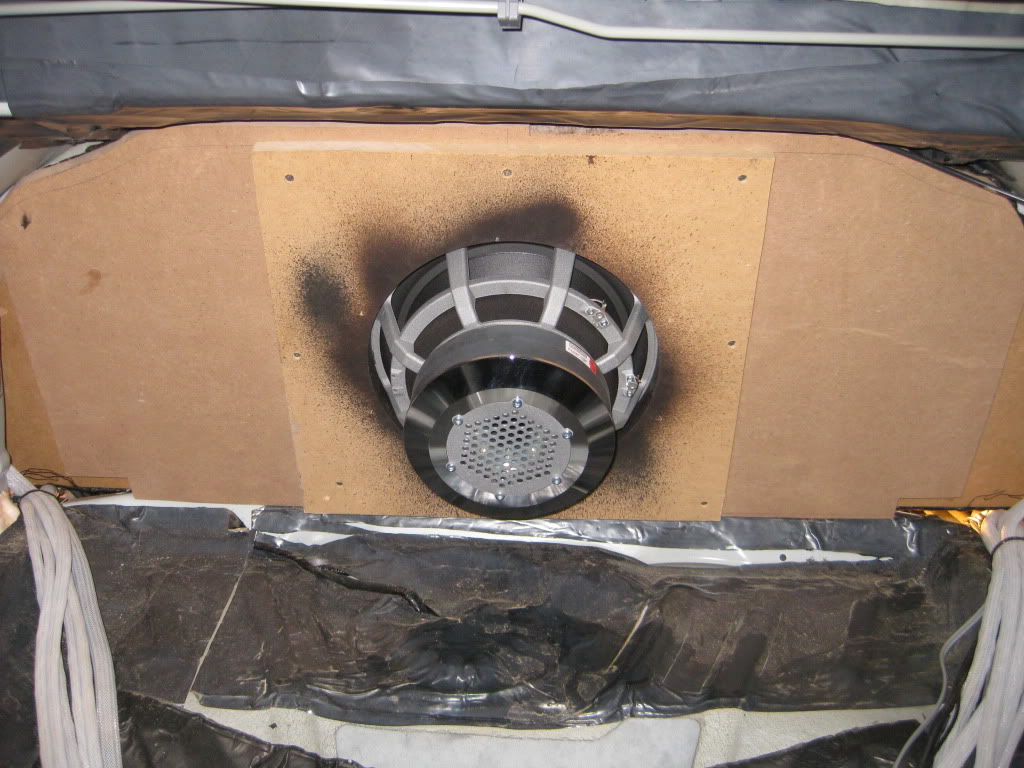
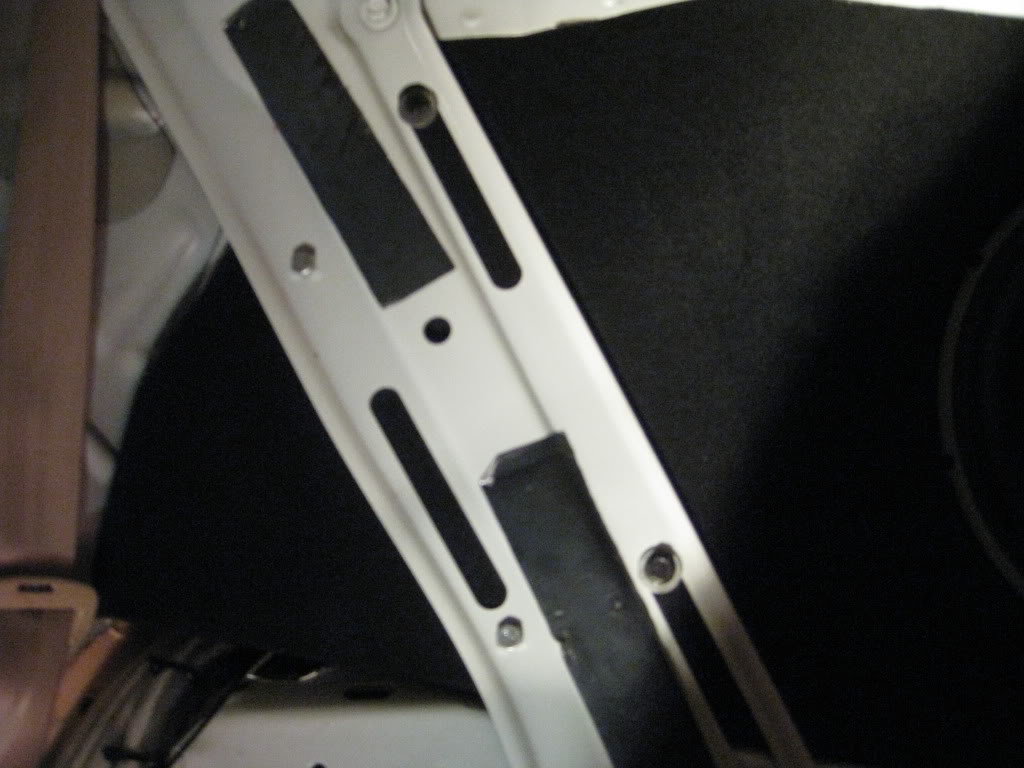
Here it is covered in carpet and mounted to the braces. I also sealed any and all openings between the cab and trunk using Cascade Audio products and expanding foam. The baffle was attached to the braces using a total of 8 lag bolts/washers (4 per side).
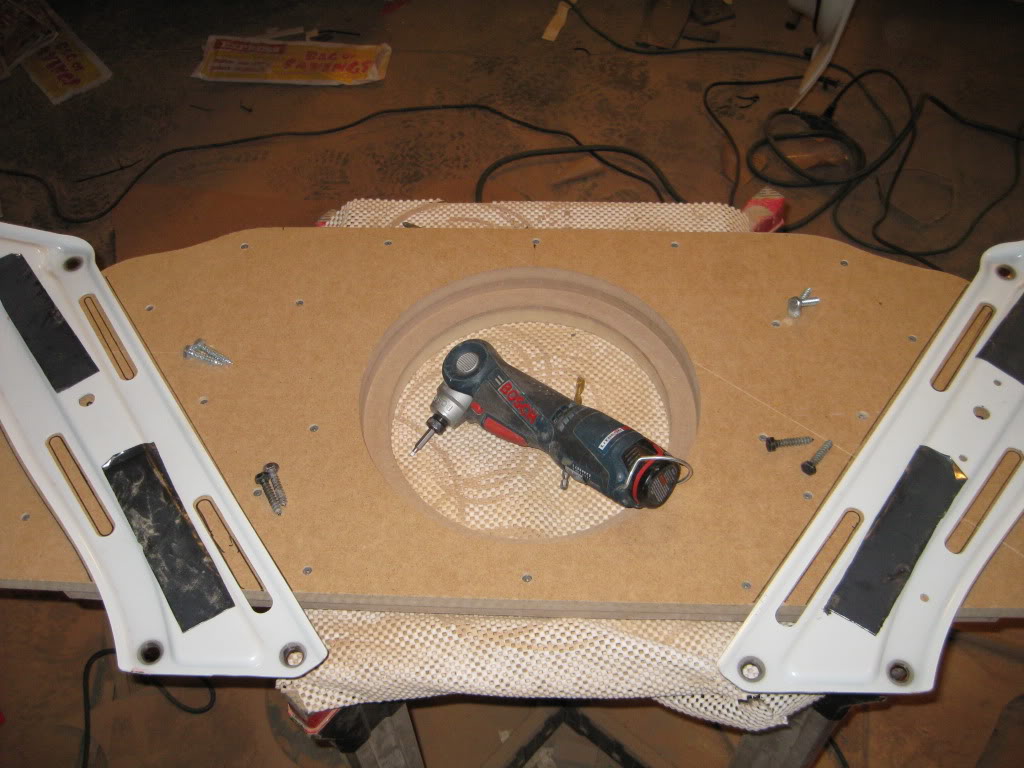
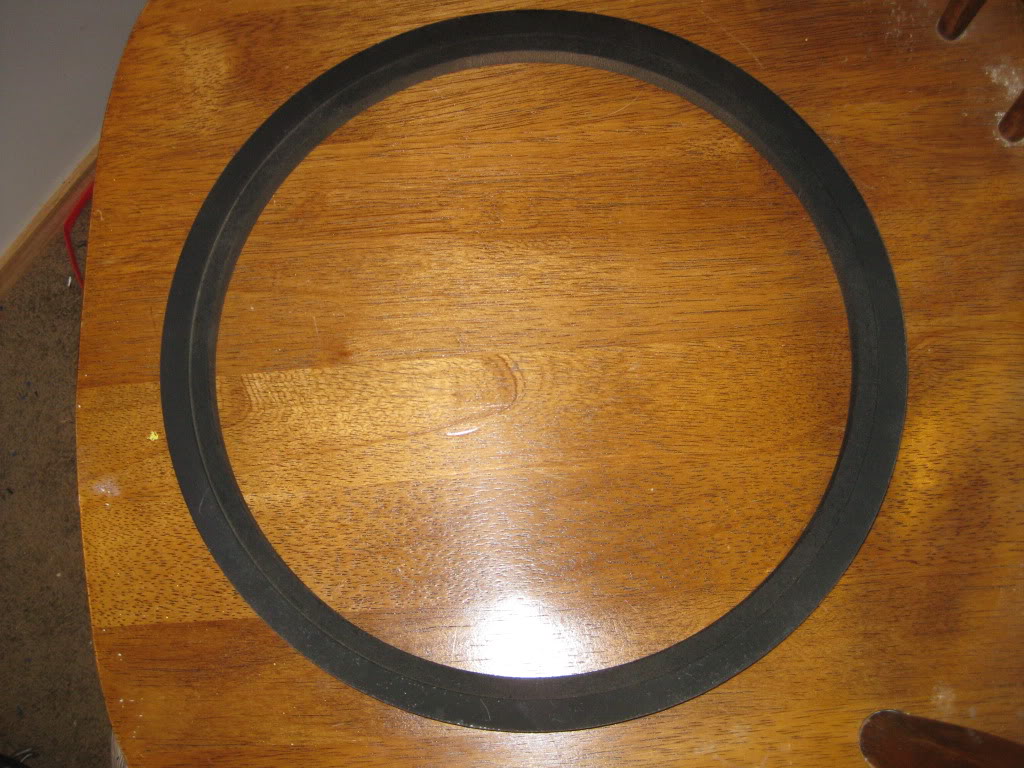
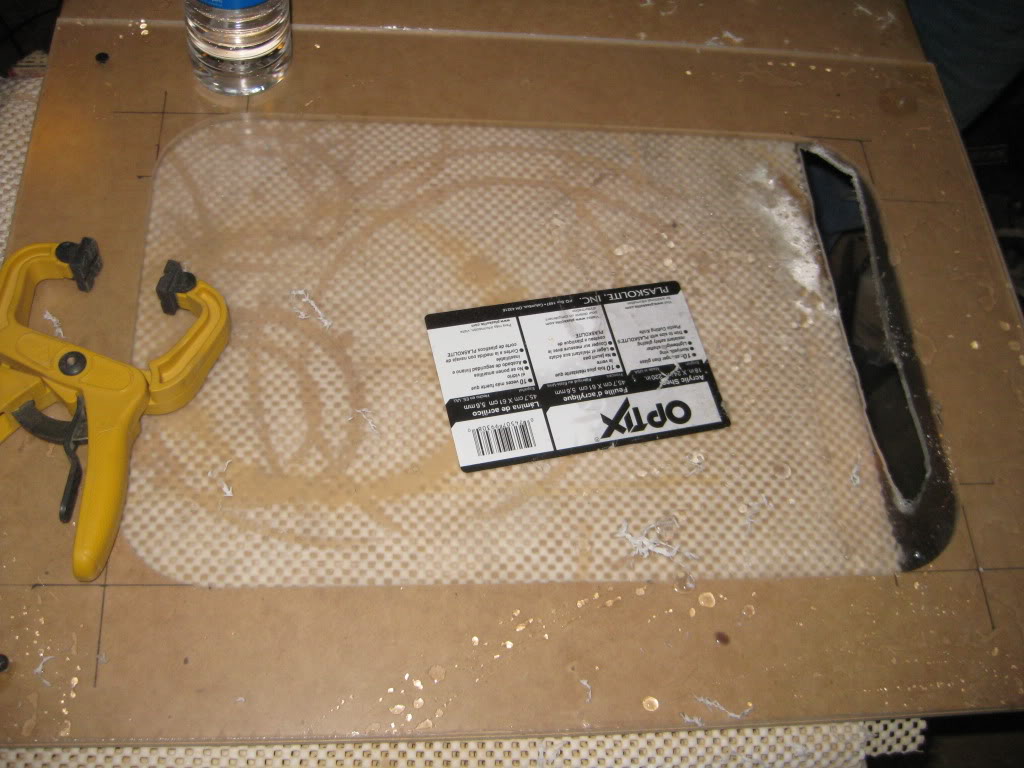
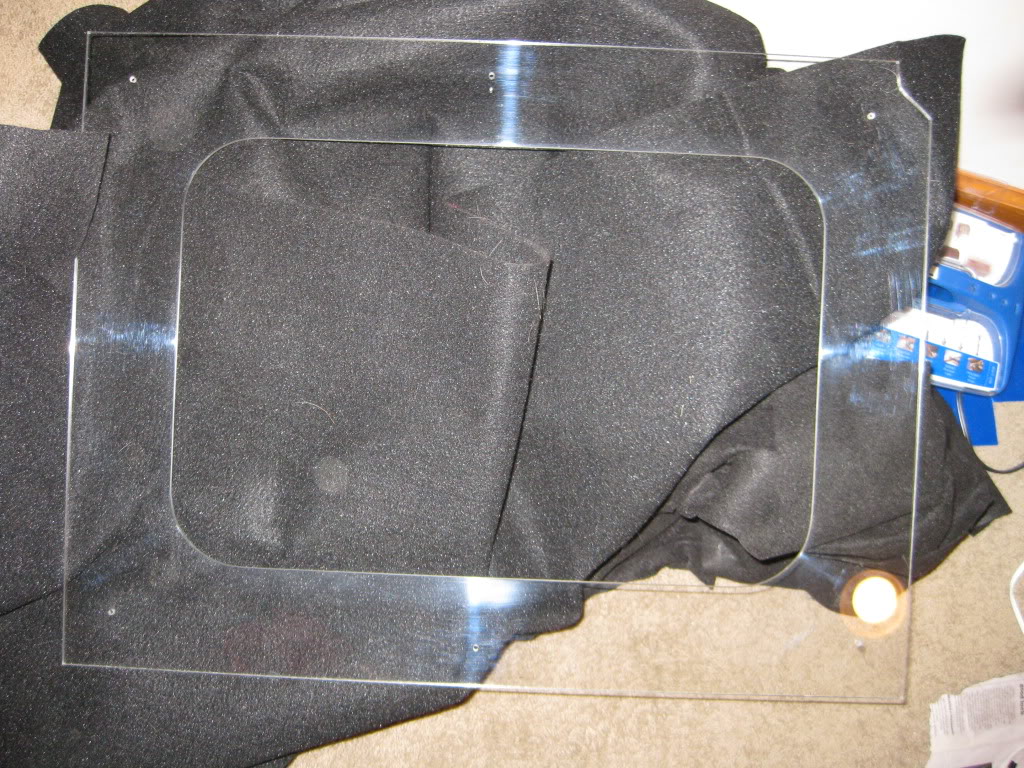
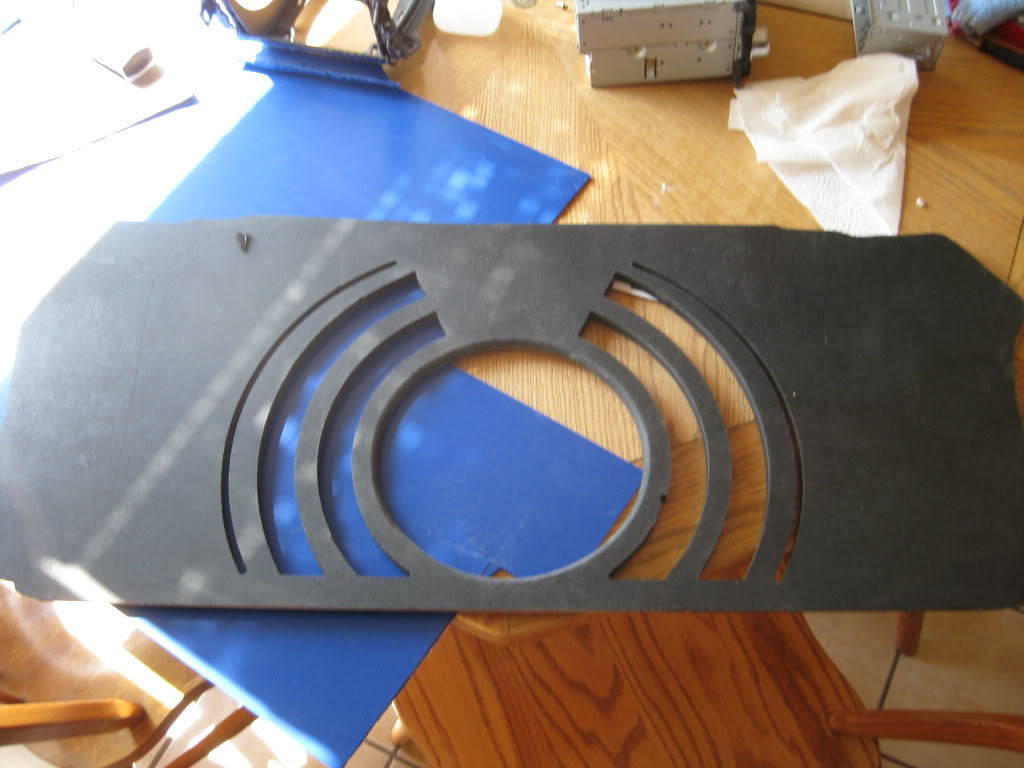
Here is the trim ring I made for the front grill.
I then cut a piece of metal grill material, secured, and wrapped the entire grill in grill cloth.
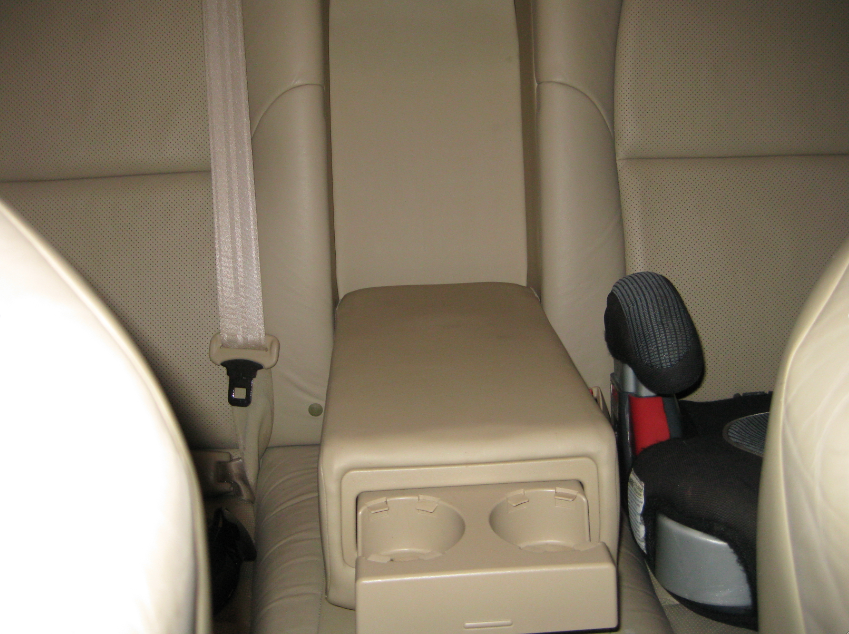
Here it is.
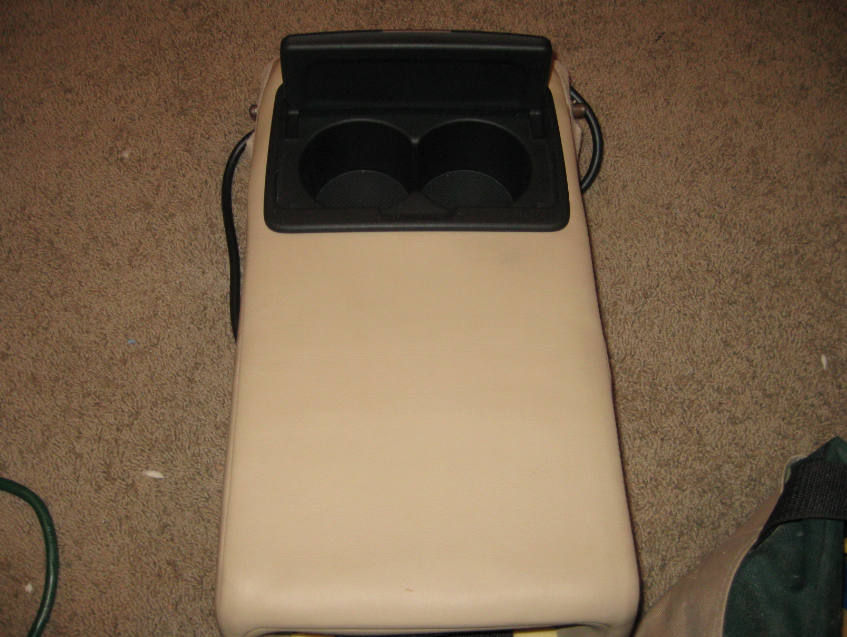
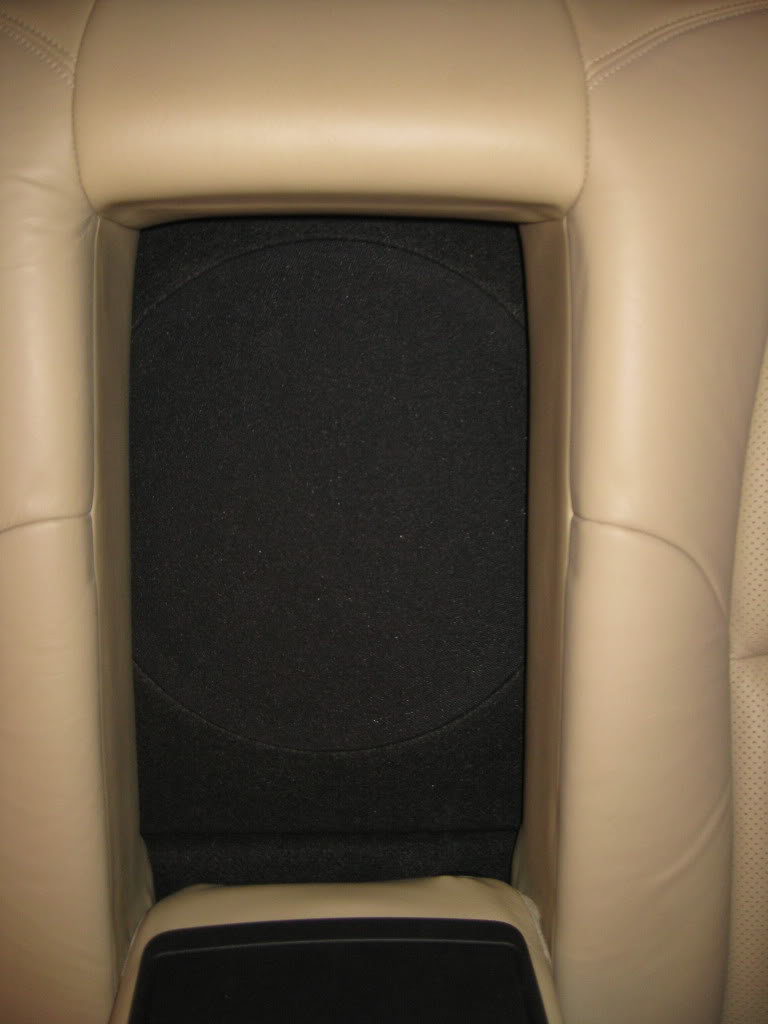
This is what you see with the center of the arm rest down!
Only the trunk and finishing installing into the dash, all of which progress has been made.
I almost forgot. I also installed a switch to be able to independently turn off the rear monitors and leave the front still going (incase the kids are not with us and we are on a trip or something).
Simple switch install, designed to look factory.
Before:
After:
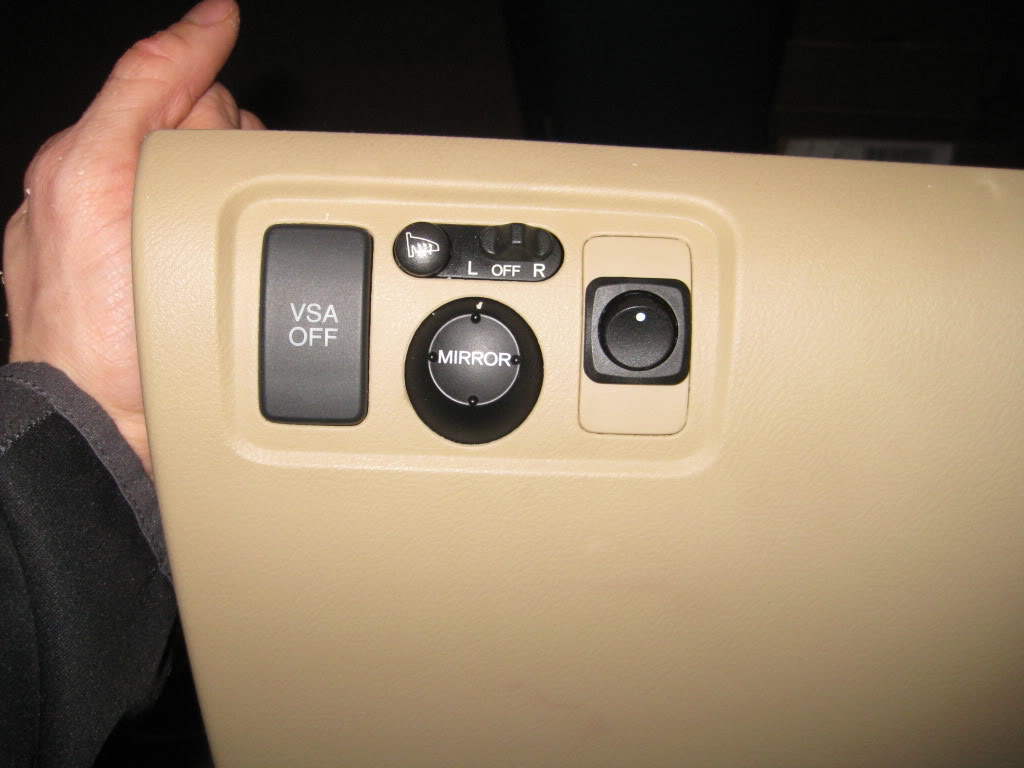
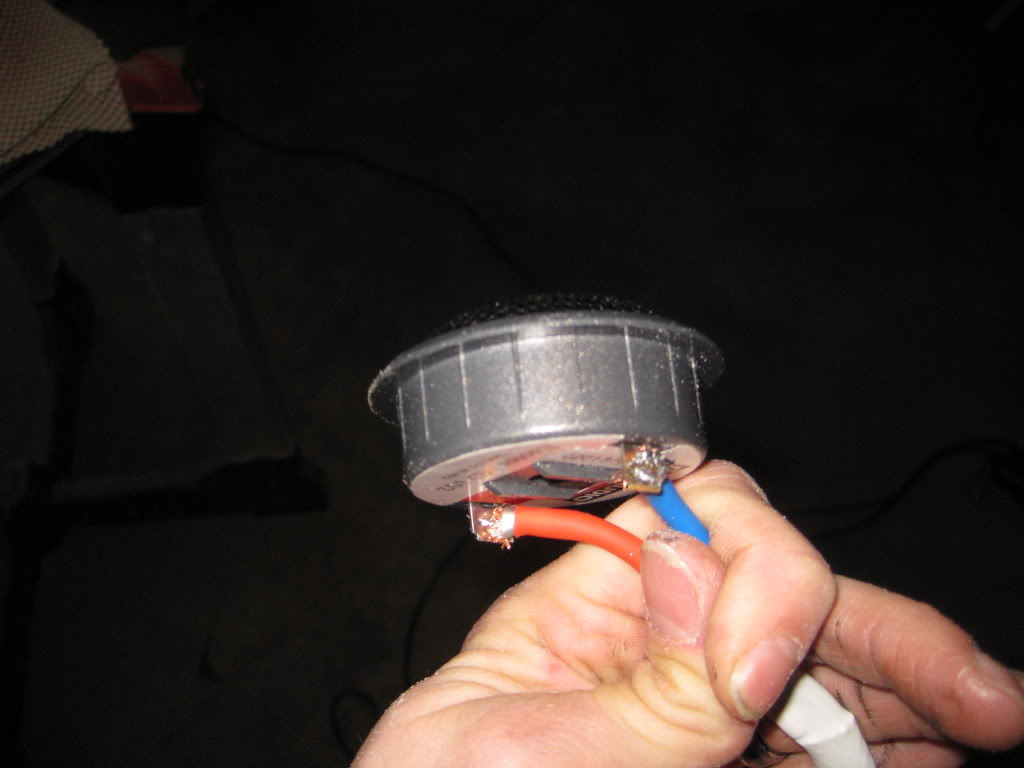
The back of the switch with quick disconnects soldered on:
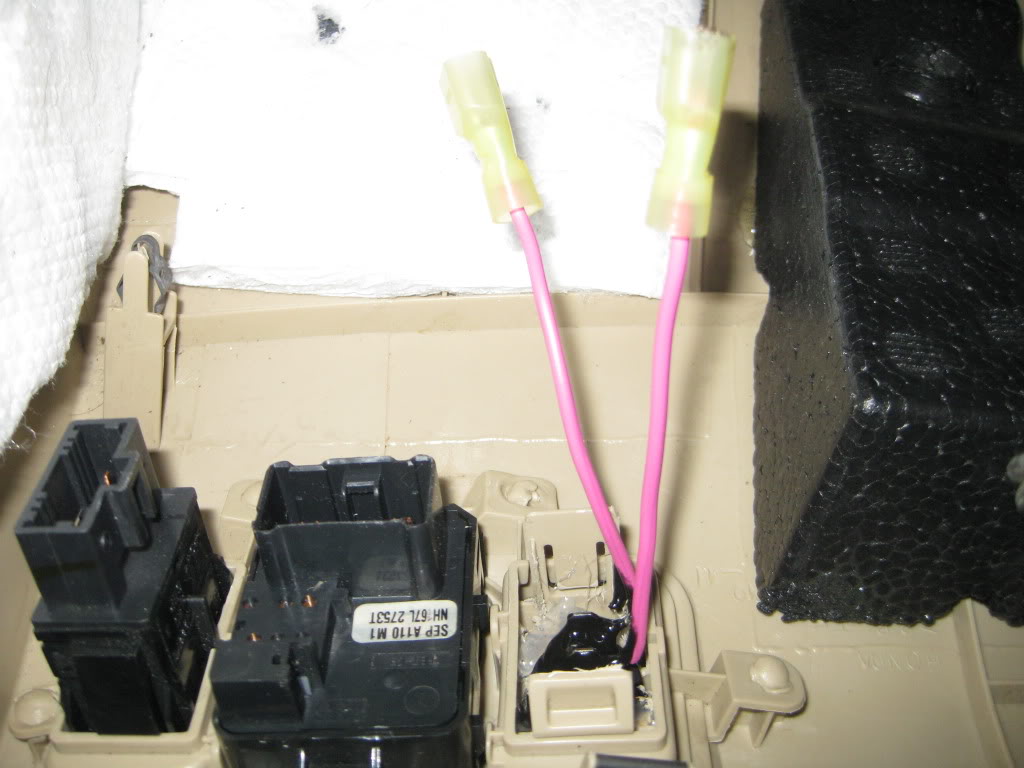
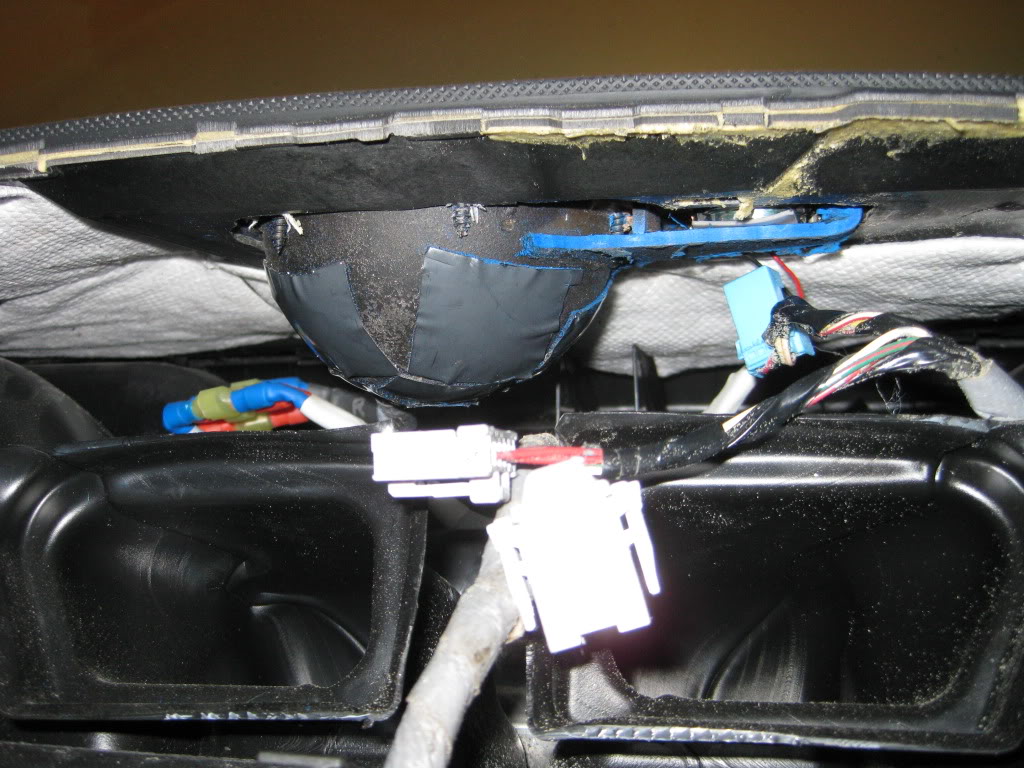
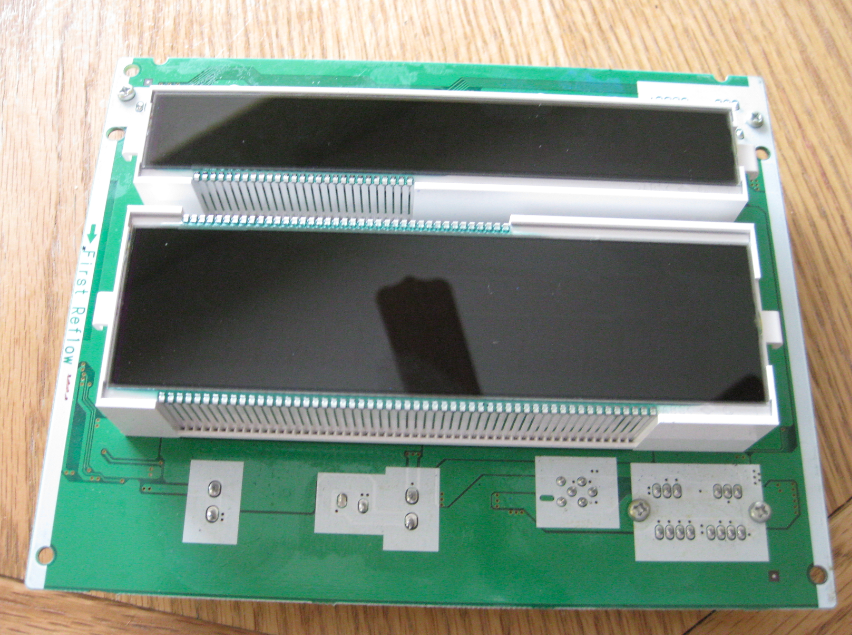
I also finished with the modification to the front HVAC display. In order to move it, I had to extend the display from the board, add new led's, and extend the the wires for the HVAC controls. Again, this display will now go above the Aftermarket HU, right below the HVAC controls and will allow me to bury the factory HU display in the dash.
Original Display:
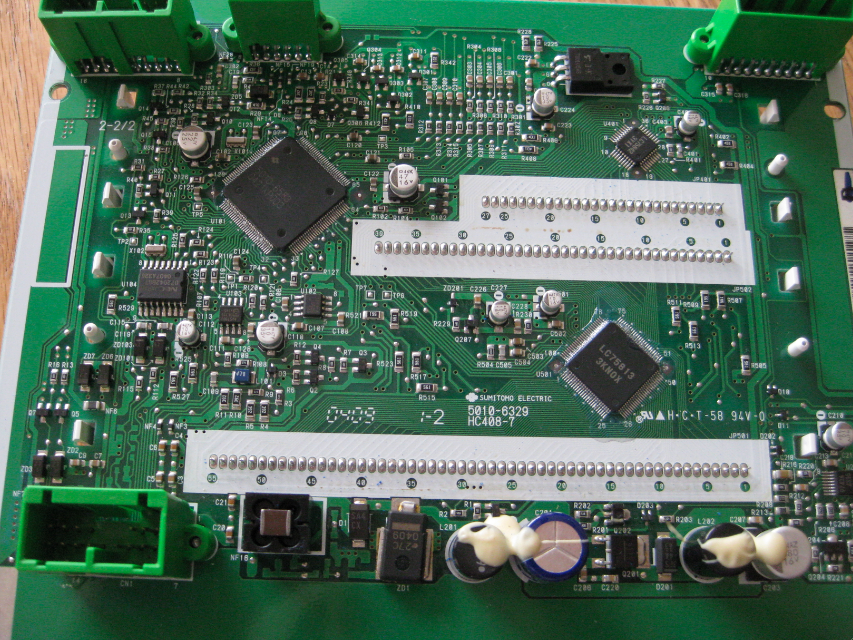
Display extended from the board:
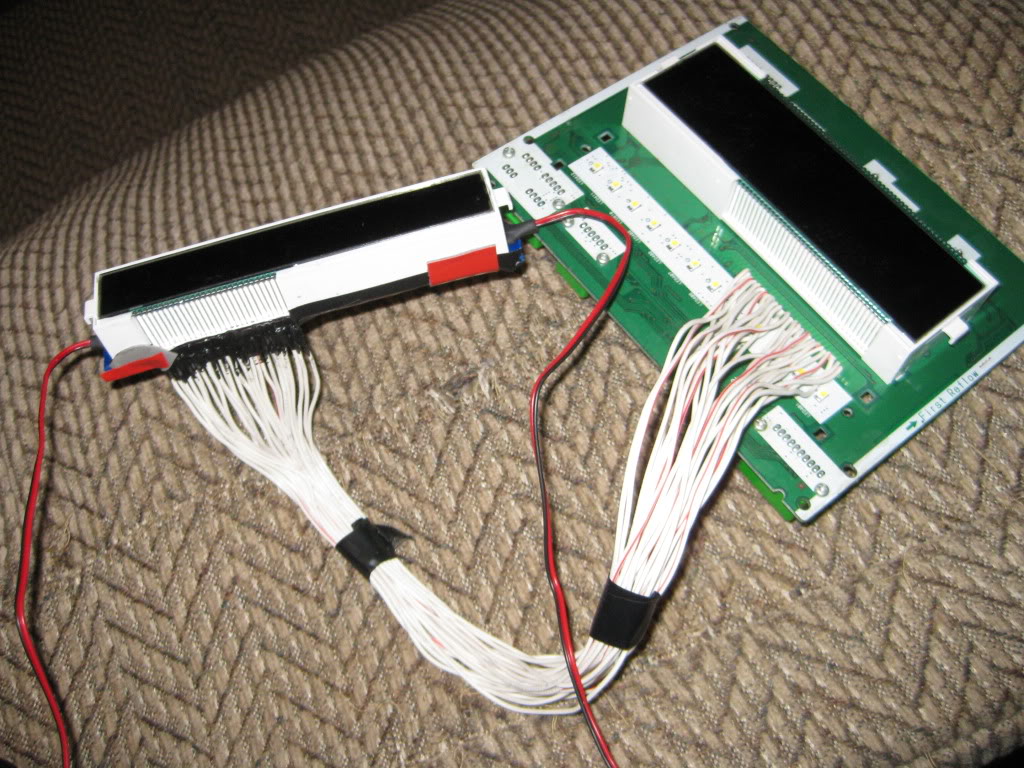
Connectors cut and extended. All wires were soldered and heat shrink applied.
This is truly it for now!
4-15-2011
I finished the car a couple of weeks ago and have been swamped catching up on other things, so here are the final build pics.
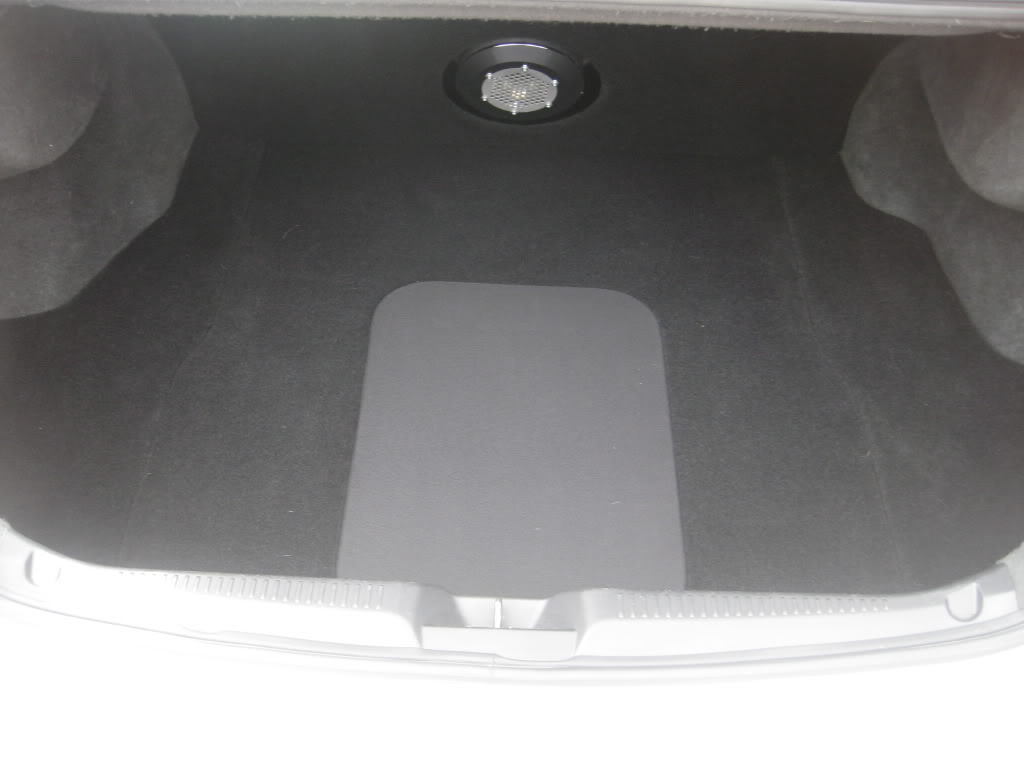
I believe I left off at the trunk.
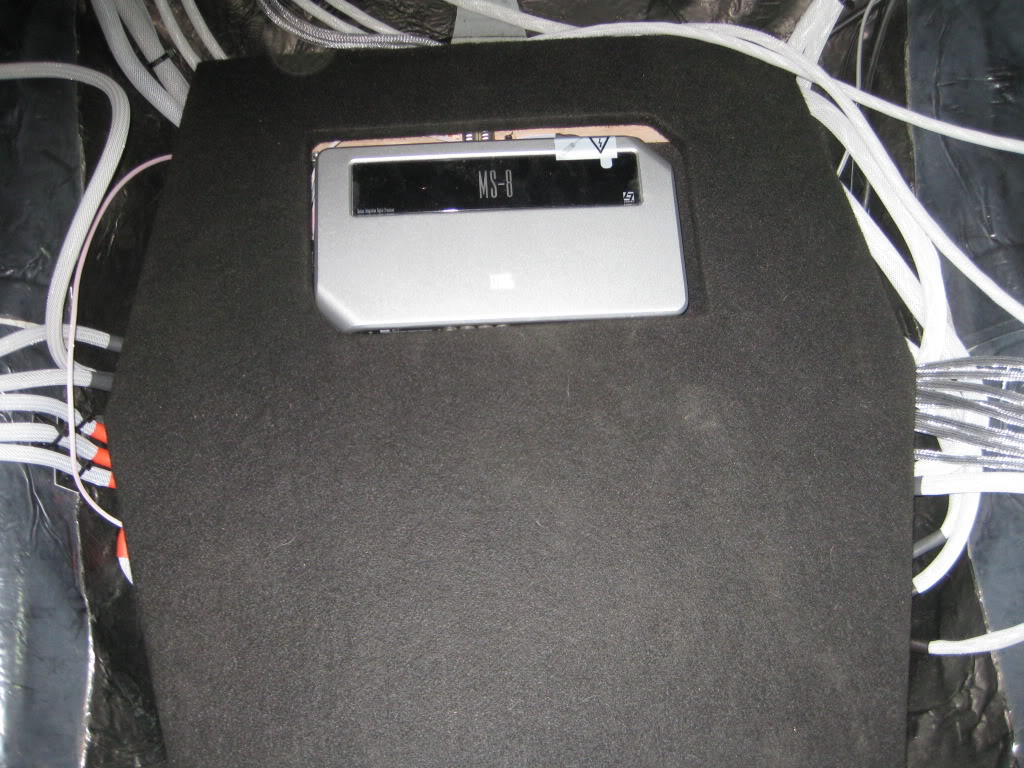
I decided to build a 2 tier system in the trunk for mounting everything. On the very bottom I mounted all the fuse blocks, passive crossovers for the rear speakers, video components and the MS-8 (more on that later).
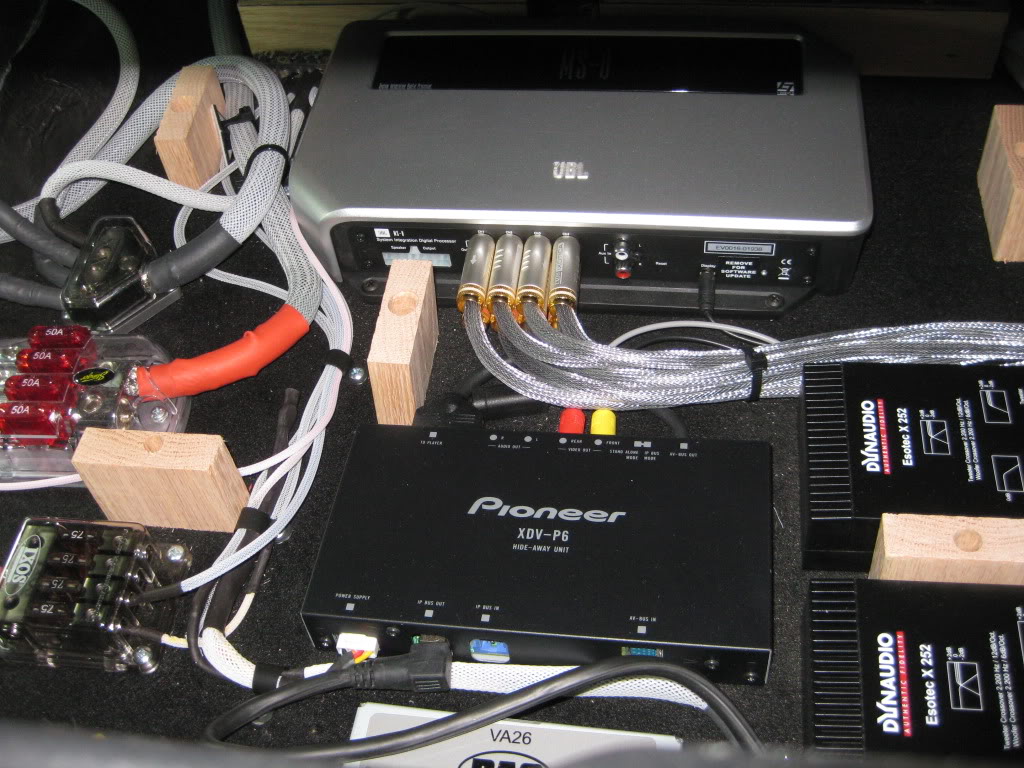
I did not want to have to raise the floor of the trunk for the finals panels, so I recessed the board the amps mount to so that there is 1/4 inch between the top of the ms-8 and bottom of the amps even though I used 1/2 inch wood...it is much more clear in the pic.
The amps were then mounted.
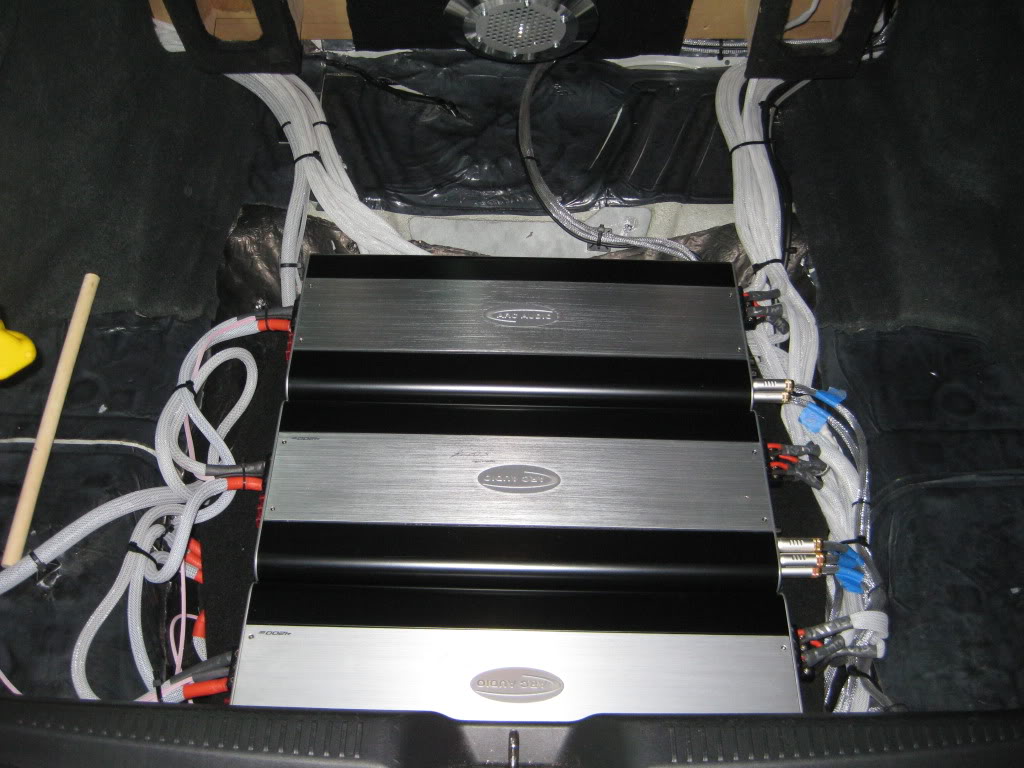
There is a hinge that allows you to get to the fuses and everything below the amps.
I then started working on the final trim pieces and plexi for the trunk.
More to come.....
More trunk finishing......
I attached white LED strips to the edges of the plexi, but I can't get the light to show up in pics, so you will have to take my word for it...lol.
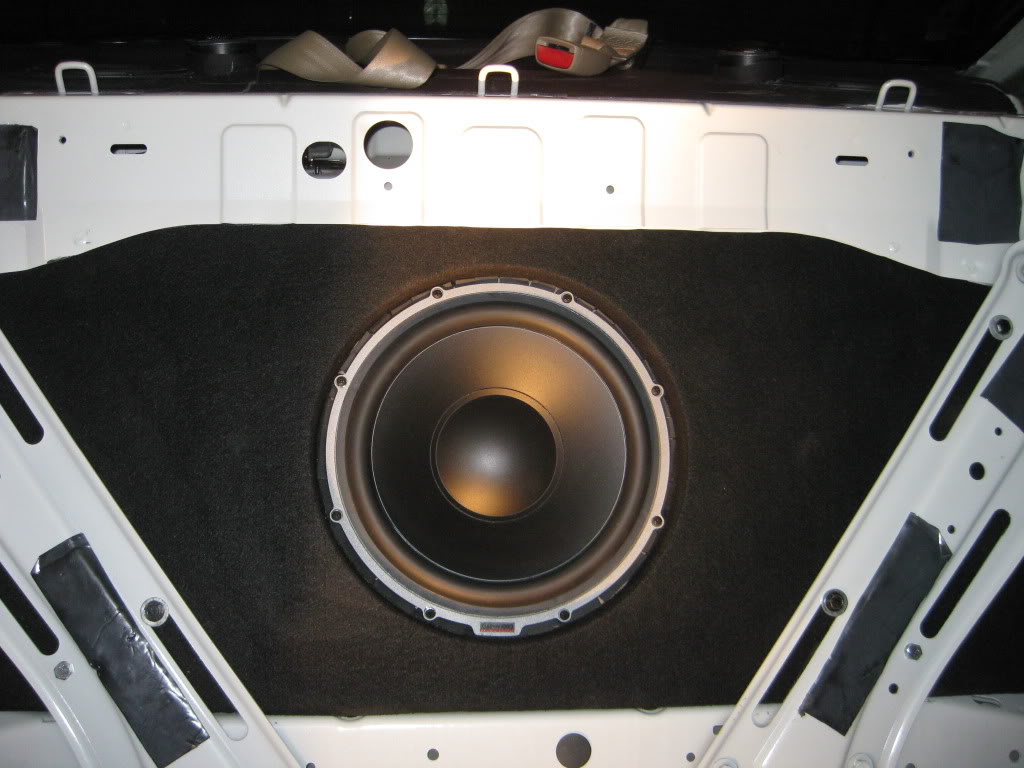
I made a finishing panel for the Dynaudio Esotar2 1200 Sub in IB. I made sure plenty of the back panel was cut out and then covered it with acoustically transparent carpet.
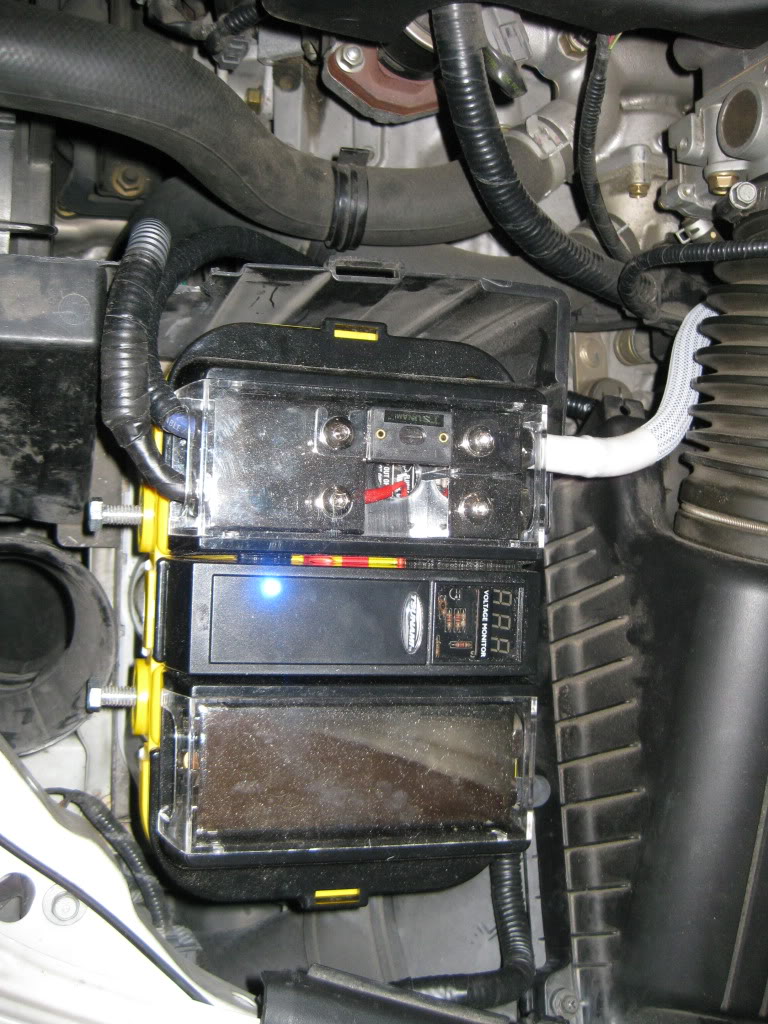
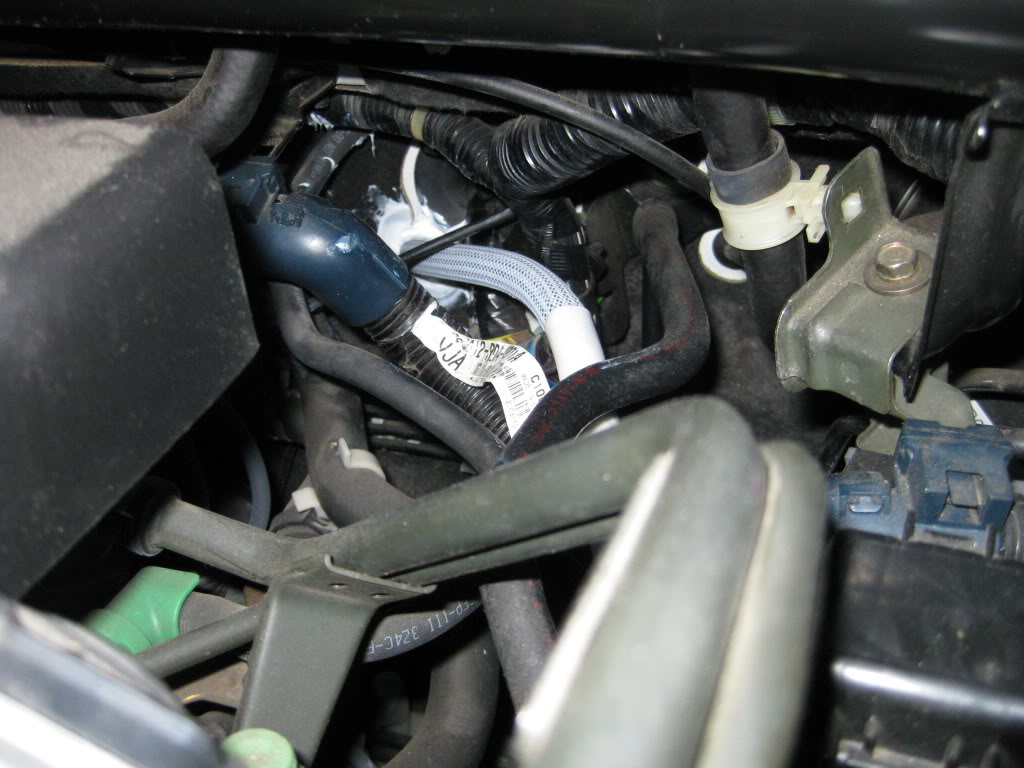
Under the hood, I finished by installing a topper on my battery and sealing the rubber grommet where I ran the power wire.

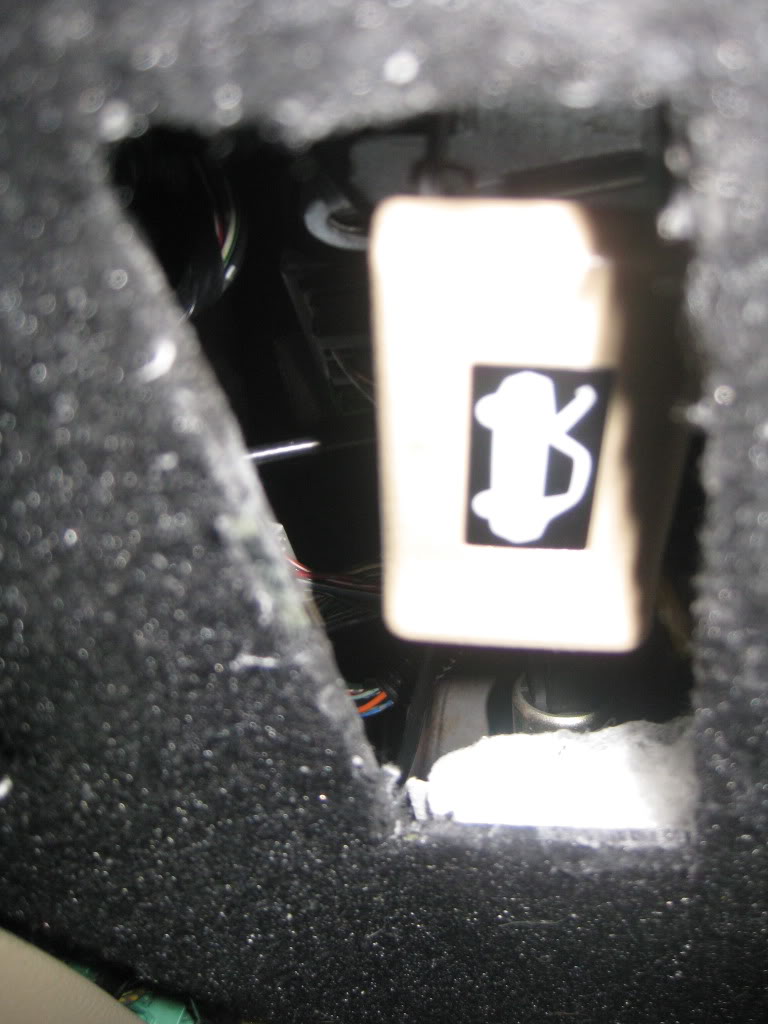
Also, I relocated the hood release and it is accessible through the plastic panel (which I covered in carpet for acoustic purposes) the goes under the steering wheel area, back to the firewall.
more to come....
Now for the silver trim pieces beside the radio!
For those not familiar, they have a 1/2 circle cut out due to the factory radio that needs to be filled in. They are covered in real aluminum from the factory, so here is what I did.
I used a little bit of plastic, then rage gold over the top and finally fiberglass resin.
When done, I covered in Di-Noc brushed aluminum finish. I thought it was important to use something aluminum looking to keep the factory look and feel.
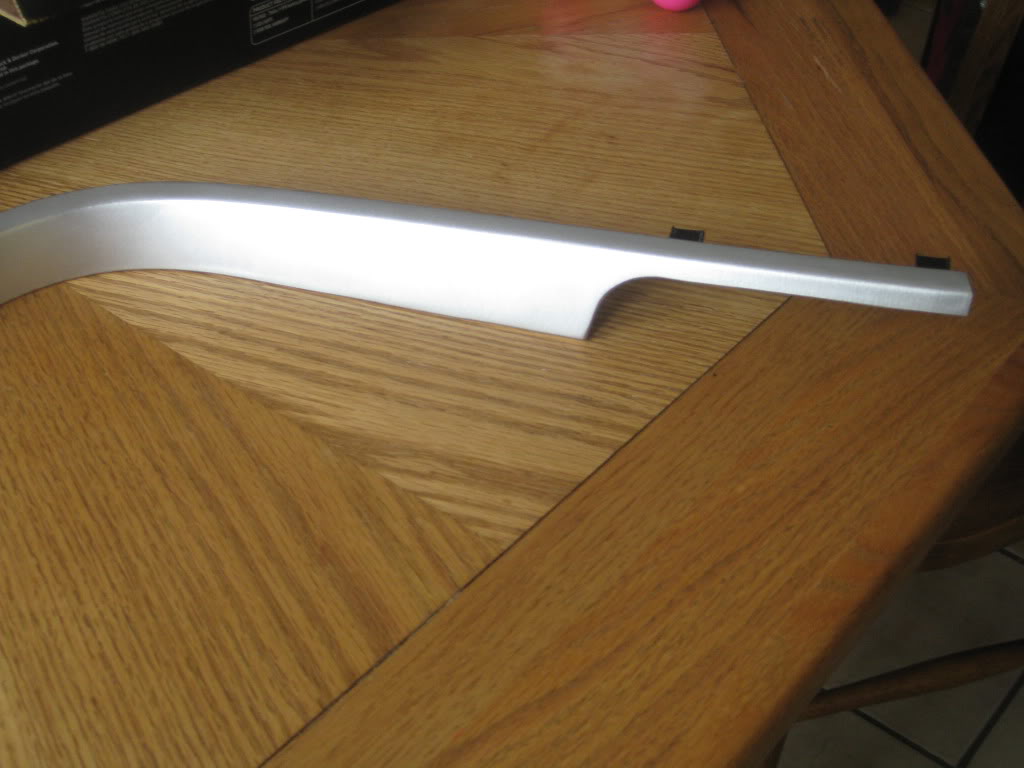
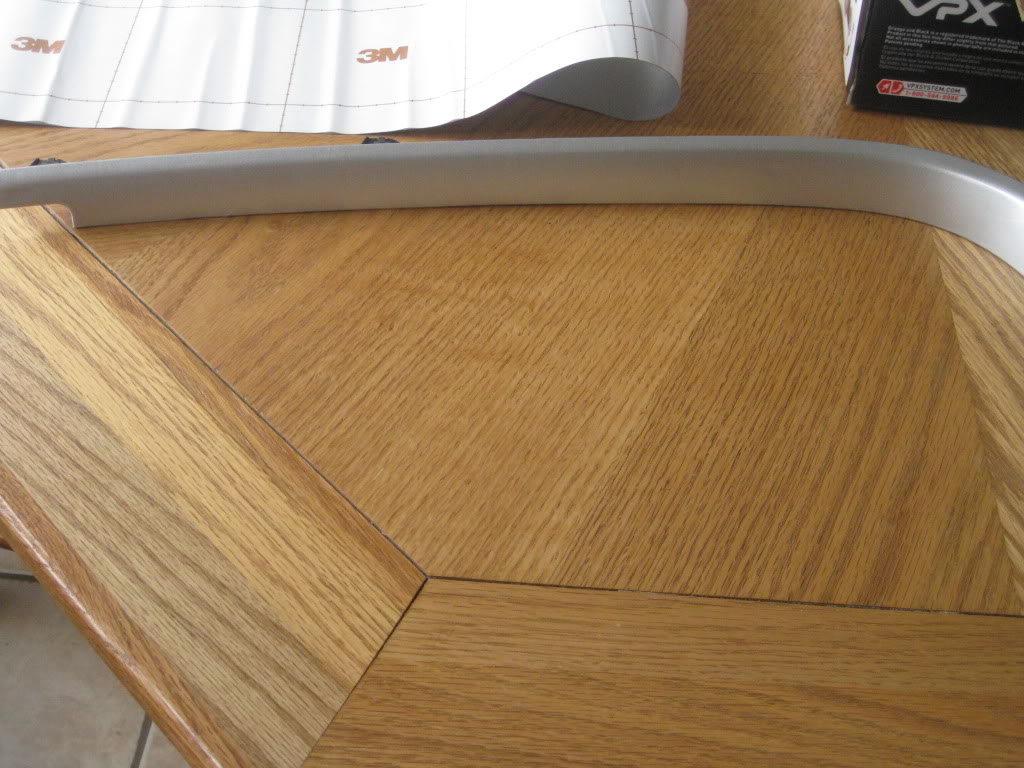
Up Close...
So that is everything....all finished. Ok, Ok, here are the final pics (I hope I didn't forget anything)!
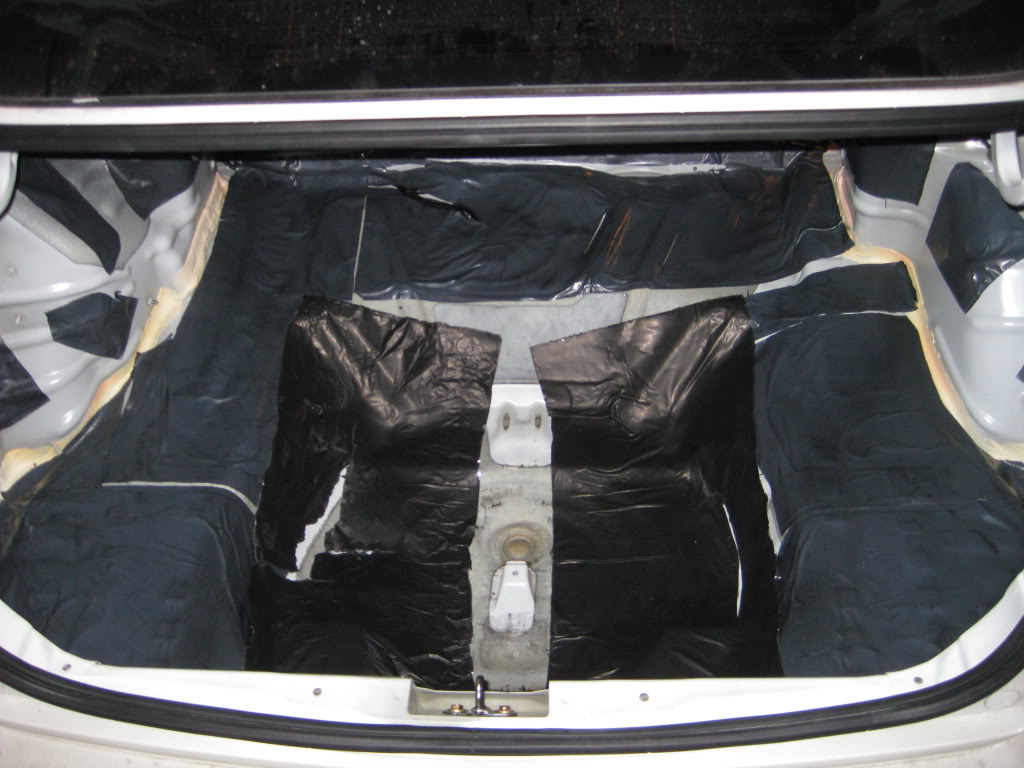
What you see when you open the trunk....
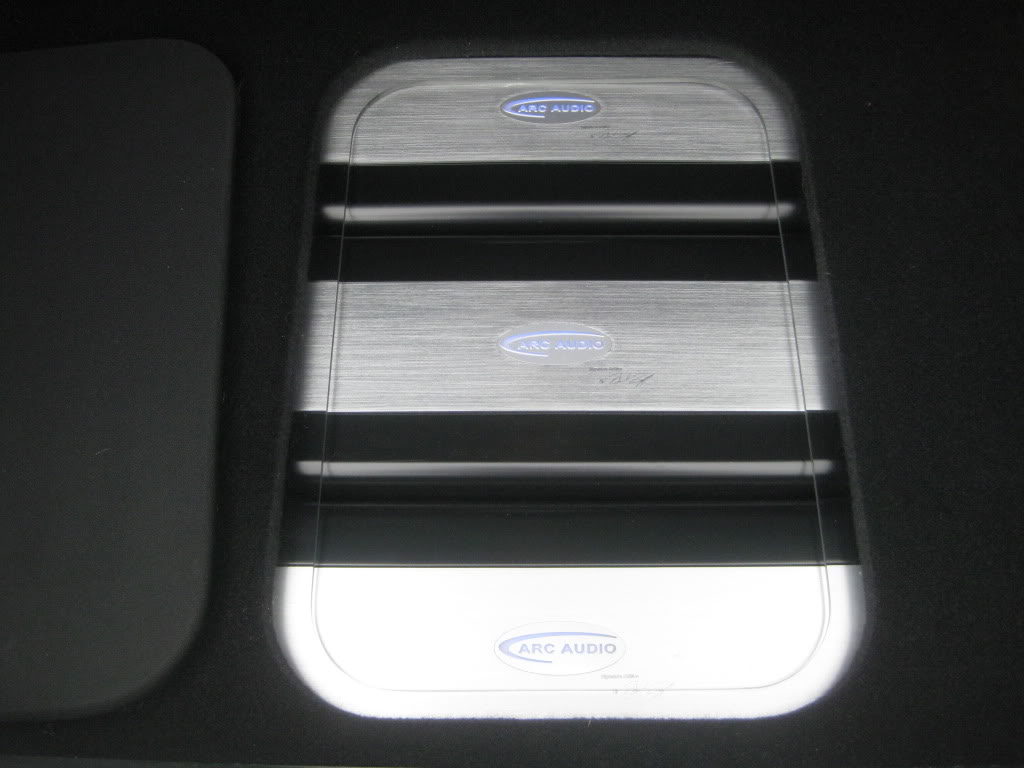
When you remove the center panel.....
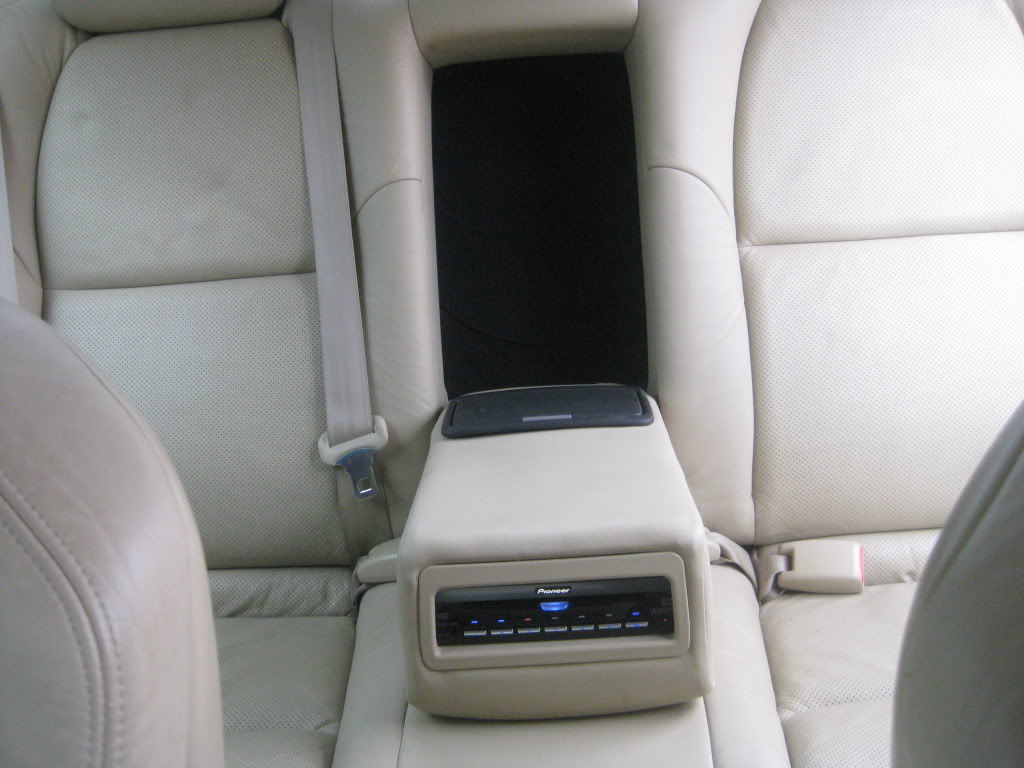
Rear seat...
Front switches (I agreed about the comments with the switch I installed to turn on/off the headrest monitors, so I removed that and installed a fog lamp switch from a 2006 Honda Accord. I changed the light condoms to match the interior lighting and everything looks as it should and matches interior backlighting).

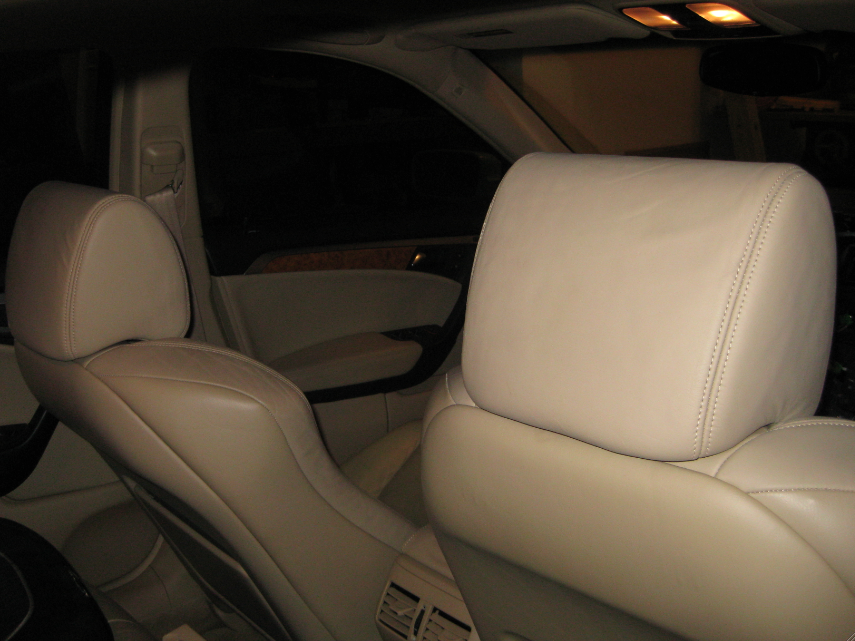
Back of front seats....
more.....
Here is the finished center console, front stack and kick panels. Also notice the new black factory Acura carpet (I hate tan carpeting, especially with 2 kids).

Final thoughts and listening impressions. This is part of why it took so long to get these final pics posted. I configured the MS-8 following all tips/instructions given by various members. I can say the the center image was dean on amazing! The rest was meh! I was NOT impressed at all. It sounded very, well, processed. It sounded lifeless with all the emotion seeming to be removed from the music. The highs sounded a little odd, trying to be airy but not sounding natural. Overall I was very disappointed. I had my wife take a listen and she sat in there for less than a minute before telling me what I already knew about how it sounded. It almost seemed like something choking the amps and speakers from doing what they want to do. I played with it for 3-4 days and could not get it any better. I bypassed the MS-8 and used the potent internal processor in the P01 Head Unit, and it was like night/day. My RTA curve was within 5dB (highest peak to lowest dip) all across the board, without me using the eq. It sounds so natural and transparent and really really good. Everything is just seamless between the speakers and the upfront bass is just astounding. I had a friend (Mike) who dabbles in home audio listen and Mike said, "I am a little confused. I saw the sub in the back, but it sound like it is up in the dash somewhere...this is really neat"
I really have to hand it to the products I used in this install, the Dynaudio Speakers and Arc SE amps together, make beautiful music. I understand install is one of the most important aspects of a build, but using products that can really take advantage of good install practices is also important. I am honored to be a dealer for both of these fine brands!
I almost forgot...the car!!!
4-17-2011
I could tell ya, but then I would have to kill ya.....
It's a little hard to explain and if I should just go out a take a pic, but I don't wanna right now...lol. It is pressure fit. I basically made 2 little boxes (about 8" x 4") and attached them to the baffle board, one on each side of the subs. On the face of the little boxes I cut an oval out...oh, hell.....here is a pic and it is self explanatory:
I had to get a little creative to not use any visible hardware for mounting.