You must be logged in to rate content!
6 minute read
034 breather hose kit installation - AEB (early) A4 B5 1.8T
Compliments of BaseDrifter @ www.audiforums.com
Disclaimer: I'm not responsible for you blowing your motor up or smashing your hand. Blah blah blah, do all this at your own risk. Good luck.
Is your breather hose split? Has it cracked or just gone and snapped off? If you're sick and tired of removing an oil soaked belly pan then it's time to replace the breather hose.
This DIY is for early 1.8T AEB motors, A4s or Passats. This work was performed on a 97. Note that the vacuum and breather components changed in 98 or 99 and a portion of this will not be applicable.
Tools needed:
1. 5mm hex bit socket
2. 6, 7, & 10mm sockets
3. Philips and flat headed screw drivers
The breather hose acts as a vent for the motor. The movement of the pistons in the block creates some pressure and that airflow needs an escape route. The breather hose provides an outlet for this airflow. On its way out it picks up some oil and leaves as a vapor along with any blow by from the rings. The vapor has two escape routes, it can be sucked up directly into the intake manifold or it can be routed back to the compressor inlet.
Between the intake manifold and the breather is a one-way port called a check valve. This is to prevent metered air from being blown into the crank when the intake manifold is no longer under vacuum.
Now to the work.
There are two ways to replace the breather system. You can choose to leave the intake manifold in place and sneak your arm underneath. Or you can remove the intake manifold and have clear access from the top. I have removed the intake manifold for this DIY.
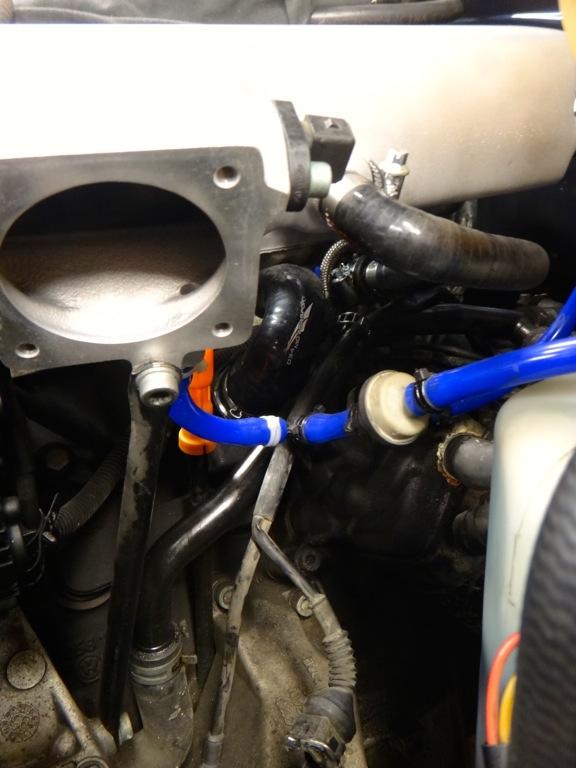
This is what we are looking to remove and replace. The plastic elbow (which cracked off while removing it) connects to the block. The line coming off the side of the T goes directly to the intake manifold port closest to the intake air temperature sensor and coolant tank. The hard pipe runs behind the head and routes back to the PCV and compressor inlet.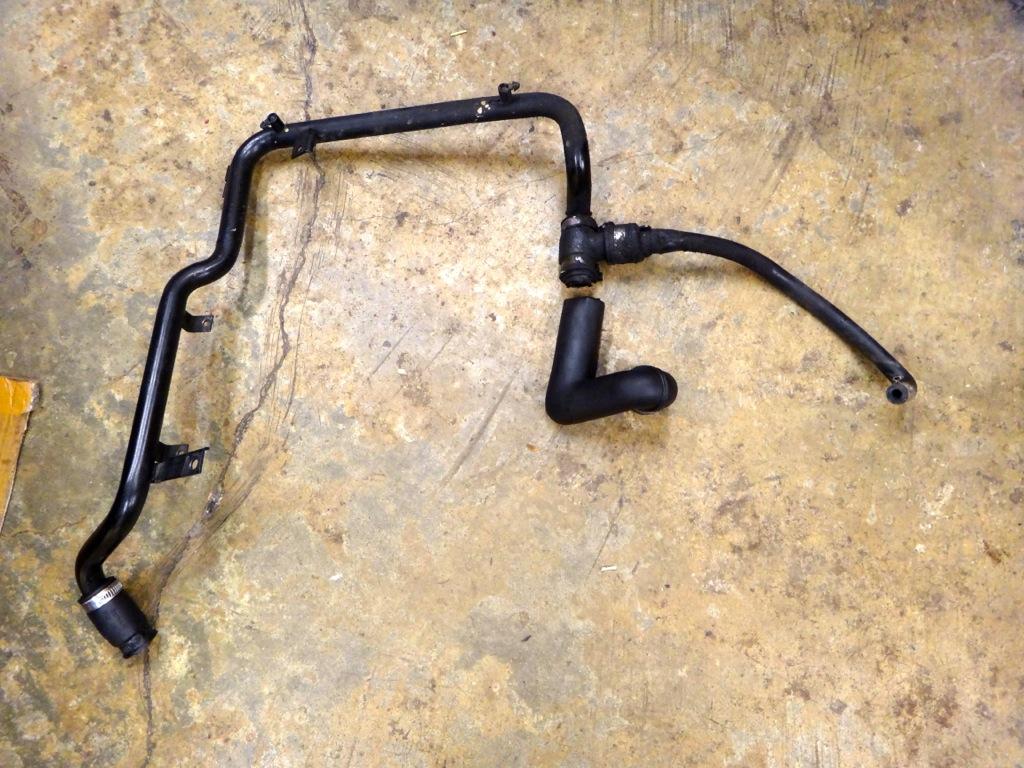
The new 034 breather kit replaces all of the components above. Please make sure that you have the correct "L" hose before attempting this installation. There are two versions. The correct version should have a step down in both inside and outside diameter.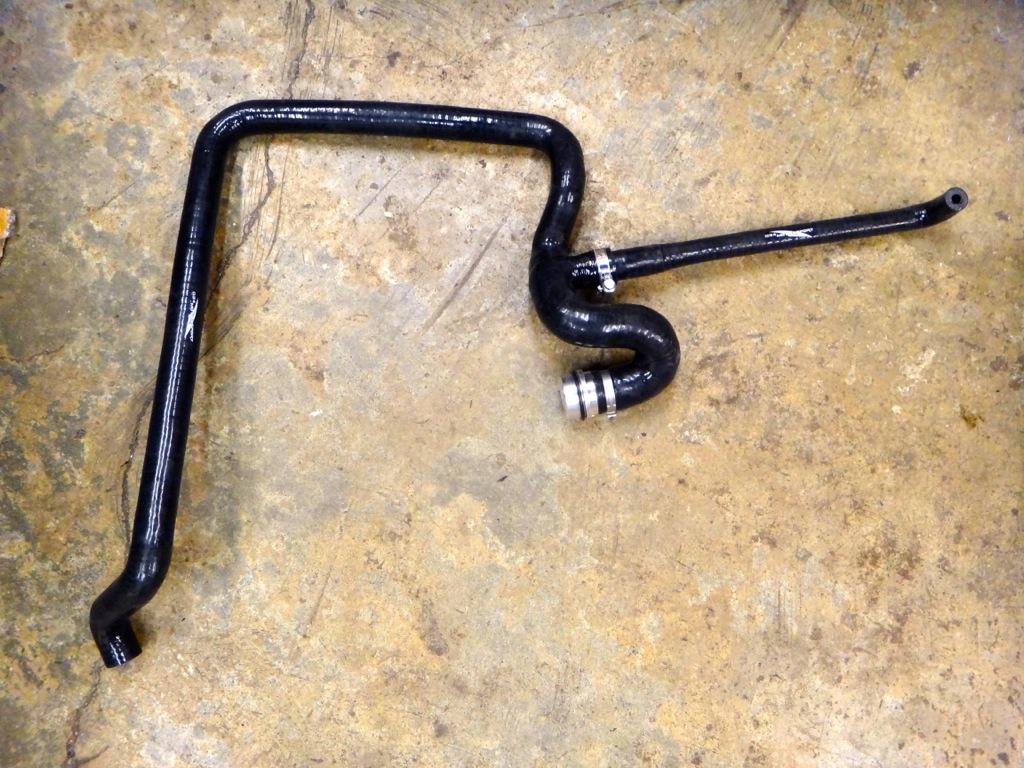
Follow the Bentley procedure for removing the intake manifold. When I do a write up for removing it I will link to it here.
With the intake manifold removed there is clear access to the breather components. Nasty lookin'!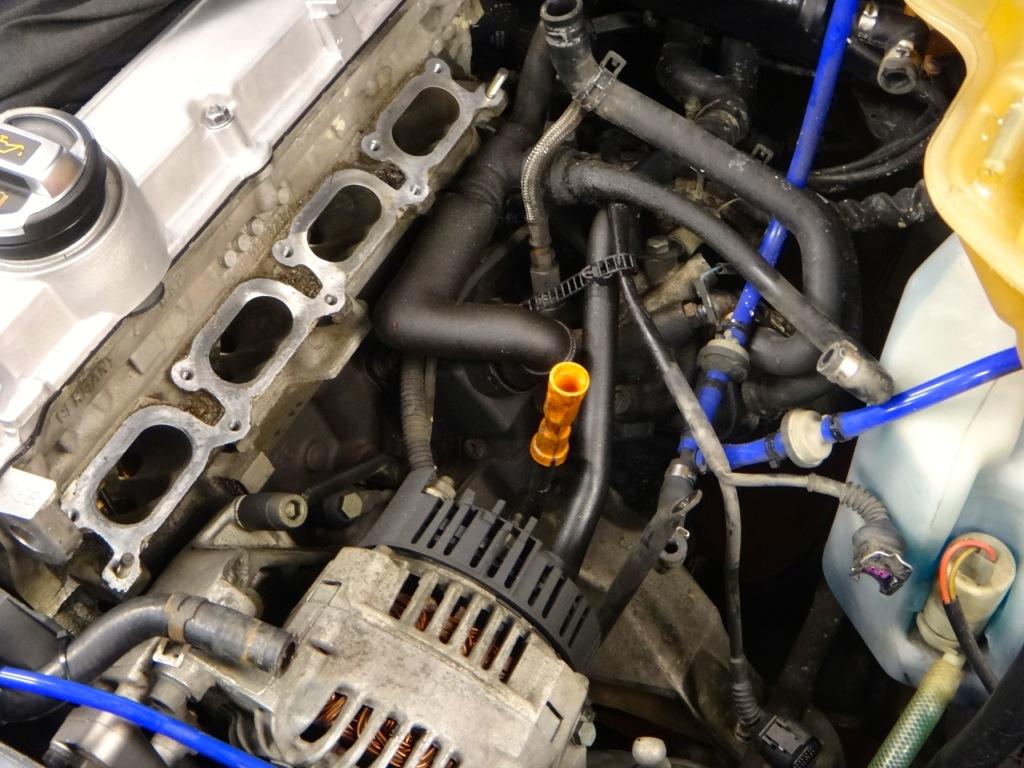
Start by unbolting the metal breather pipe. It is secured with two 5mm bolts and 3 philips head screws. Remove the hose clamp from the PCV valve and pull the pipe free.
When I went to try and remove the T from the block elbow it cracked right off after wiggling it. Pull the green clip from the block and remove the elbow. Make sure the o-ring comes with it and avoid dropping anything into the gaping hole you just opened up leading into your motor.
To remove the pipe you'll have to unclip the coilpack harness and swing it out of the way. A 10mm bolt secures the coil pack ground. You should now be able to pull the metal pipe and T fitting out along with the L hose and check valve.
Old breather stuff removed.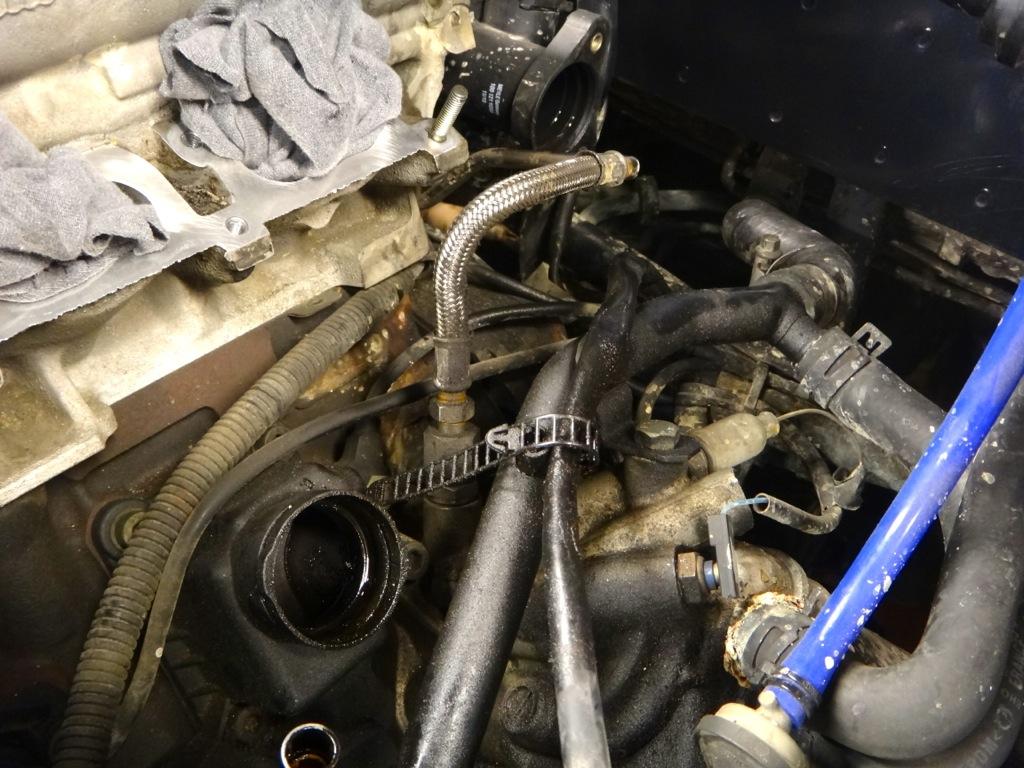

Before putting the 034 main hose into place insert the new check valve into the large T port and secure it with a hose clamp. Also check that the supplied o-ring is seated at the top of the block adapter. Apply a little motor oil to help it seal. Slip the hose around the back of the head and push the breather down into place in the block. Reinsert the green clip to lock it into place.
You can now slip the L hose onto the check valve and secure it with another hose clamp.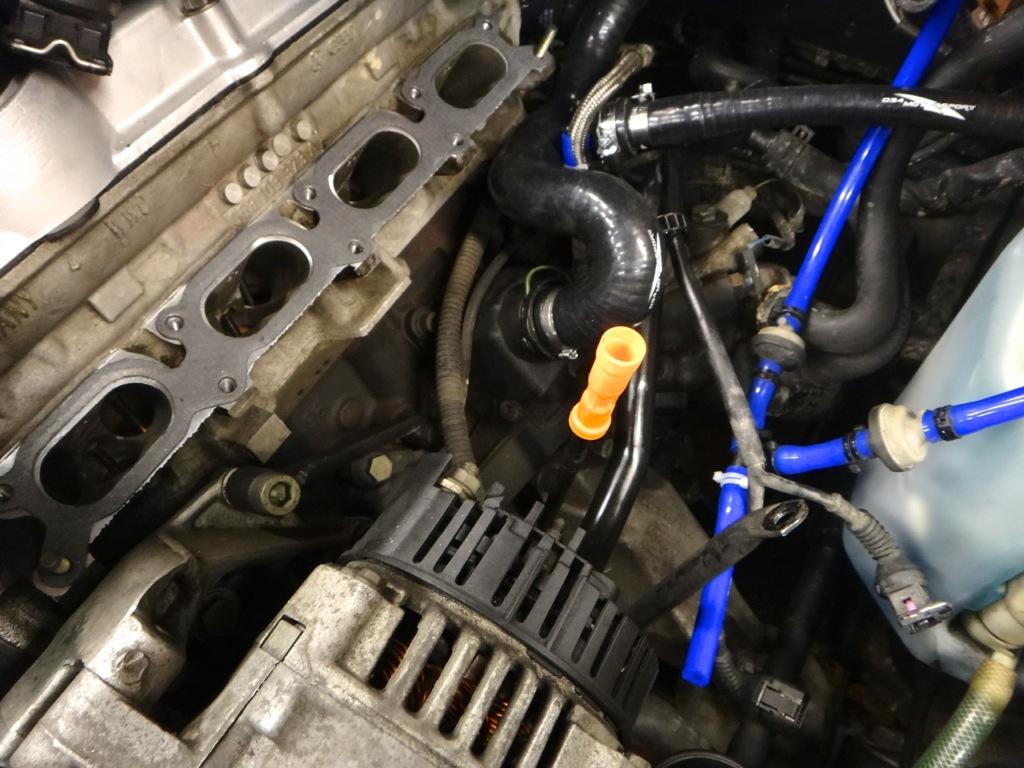
I noticed that the new hose was rubbing on the turbo oil feed line. To protect the breather hose I slit open a 2" piece of silicone vacuum tubing and wrapped it around the turbo oil feed line and secured it with a zip tie.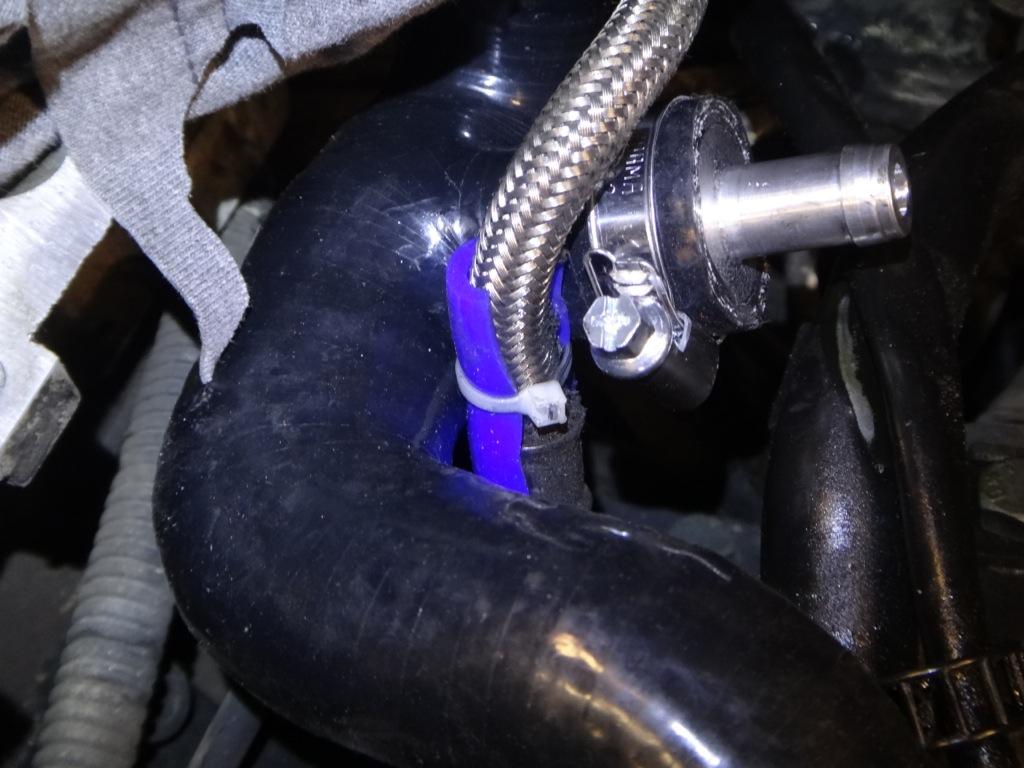
Reinstall the intake manifold and connect the L hose to the port next to the IAT sensor. Secure it with a hose clamp.
Go back to the other side of the engine bay and connect the hose to the PCV valve and...secure it with a hose clamp. The last step is to anchor the new breather hose so that it doesn't slide around. A large clamp is supplied. I tried to get it to bolt into the turbo heat shield but couldn't get the bolt to thread properly. I have it secured with a zip tie through the clamp to the heat shield right now.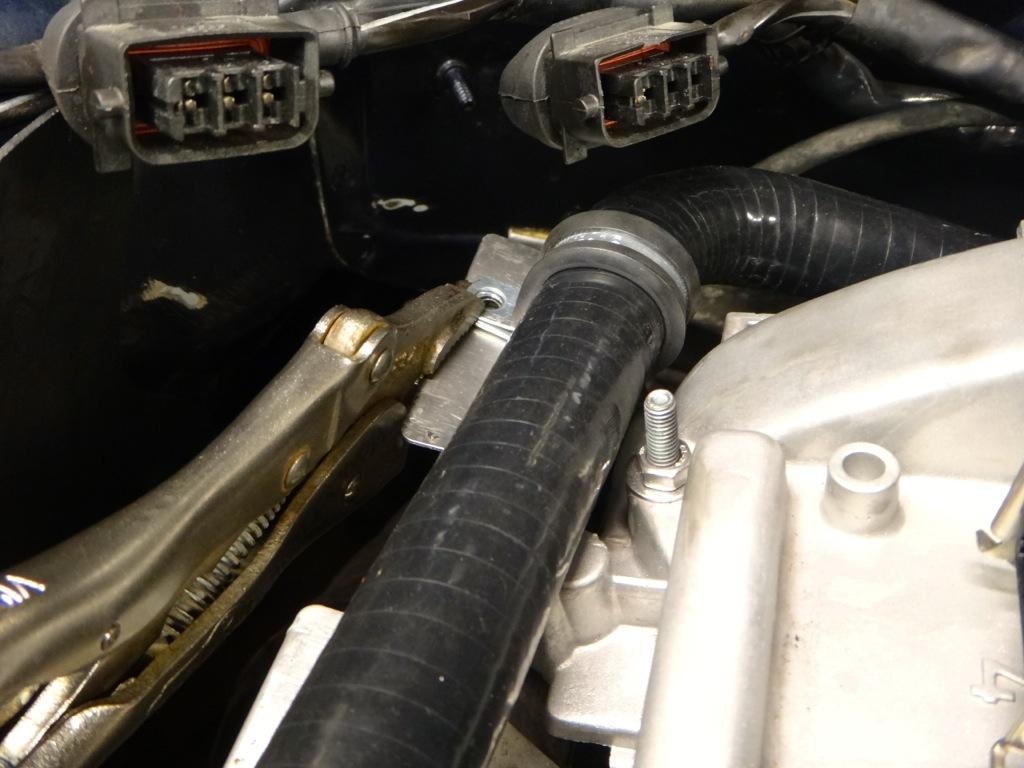
That's it! Double check your connections and make sure any plugs or hoses you disconnected are reconnected. Enjoy your newly sealed PCV system.
Diy!
Posted by Diggymart on 4/18/20 @ 3:39:34 AM