You must be logged in to rate content!
2 minute read

DASH TRIM INSTALL
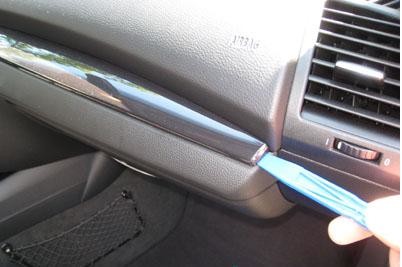
1. Start at the edge closest to the passenger door and gently pry up. Work your way to the other side gently prying up and releasing the clips.
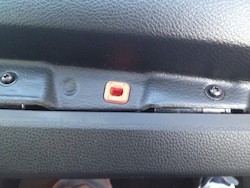
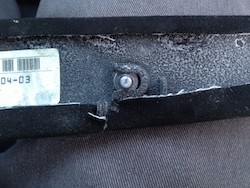
2. This is the receiver clip that the rivets push into. Again, pull the dash trim straight out.
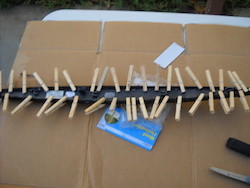
3. This is what the clips on the back of the dash trim look like. They are a small metal rivet so they pull straight out of their clip.

4. The same principles applies to putting on the RedlineGoods dash trim. Apply glue to both the suede and the dash trim. Then stretch the fabric over the dash trim. The only thing you need to be aware of is that the stitching is straight on the trim. Align the stitching toward the top of the dash piece. I had to test fit the suede many times to get it right. If you find that you have glued the fabric down and it is not straight, pull it off and start over. To clean the glue off of the BMW dash trim, you can use paint thinner, soap, and water.
5. Here are the rivets reinstalled onto the dash trim and the fabric clear of the clips.
6. Install is the reverse of removal. Push the trim piece back onto the dash and the rivets into their clips. Use your removal tool to stuff any excess fabric in behind the trim piece.