- - Allens
- - 19mm socket/wrench
- - 17mm socket for lugs
- - 10mm socket/wrench
- - Hammer
- - Flathead screwdriver
- - Small bearing 2/3 jaw bearing puller. Autozone has them for rent.
- - 36mm thin wall socket. The OEM brand that the auto parts stores will not work. Sears has them for 9$.
You must be logged in to rate content!
6 minute read
Front wheel bearing replacement
Compliments of bejbis @ r3vlimited.com
2-18-2010
e30 Front wheel bearing replacement.
Today I had to do a wheel bearing replacement on my 89 325i. This guide should be 100% the same through any model year e30, and probably a few other models as well. I saw quite a few rear bearing replacement DIY's but no fronts, so I took a few pictures along the way.
-Diagnosis
Most wheel bearings will present themselves in an audible noise when they start to fail. This will sound like a constant rumble or groan when driving, and get louder with increased speed. The noise usually lessens when you take load off of the bearing that is making the noise, a gradual turn should change the pitch or intensity. A left hand turn takes the load off of the drivers side wheel, right turn takes it off of the passenger. The noise can also be accompanied by a noticeable vibration. You can sometimes feel a bad wheel bearing by jacking the car up and rotating the wheel, but you will hear/feel it while driving long before this is possible.
-Tools needed
- Allens
- 19mm socket/wrench
- 17mm socket for lugs
- 10mm socket/wrench
- Hammer
- Flathead screwdriver
- Small bearing 2/3 jaw bearing puller. Autozone has them for rent.
- 36mm thin wall socket. The OEM brand that the auto parts stores will not work. Sears has them for 9$.
-Preparation (10 min)
To get started you will need to jack the offending wheel in the air and support the car with a jack-stand for safety. You will also need to remove the wheel.
-Replacement (30 min)
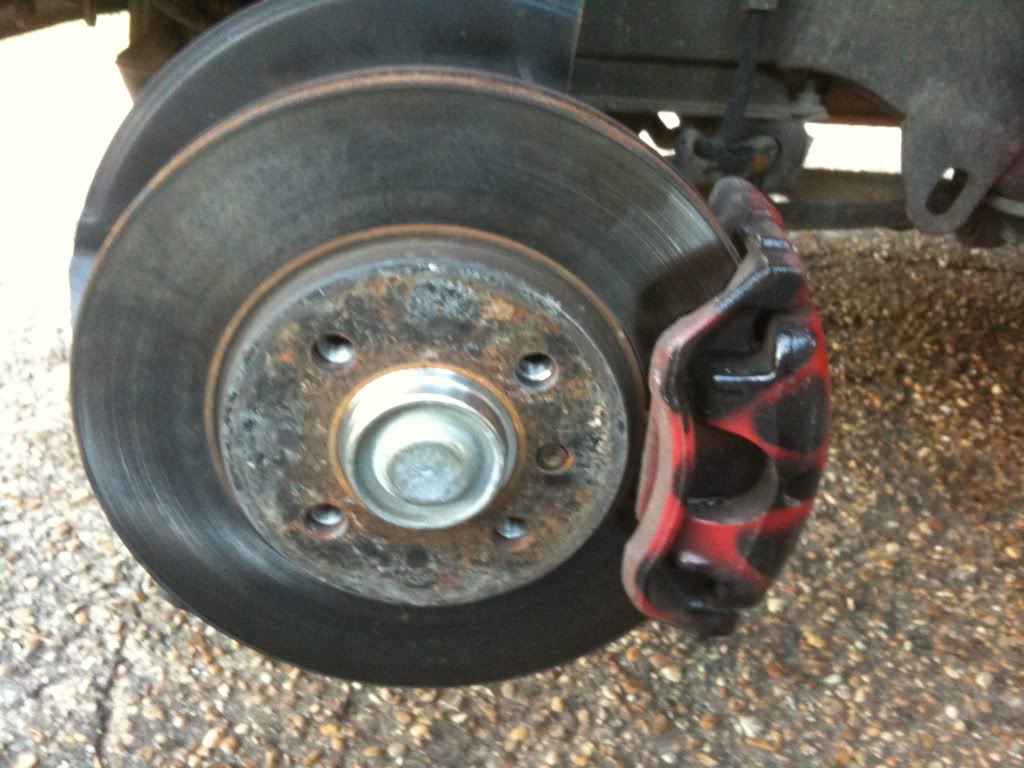
1. Remove the brake caliper by loosing the two 19mm hex bolts holding the caliper to the strut base. Support the brake caliper so the weight of the caliper is not being hung by the brake line. I usually stick the wheel under the car and place the caliper on the tire. (Picture #1)
2. Remove the allen bolt on the brake rotor. The rotor will fall off when you remove this, be sure not to let it fall on your leg. (Picture #1)
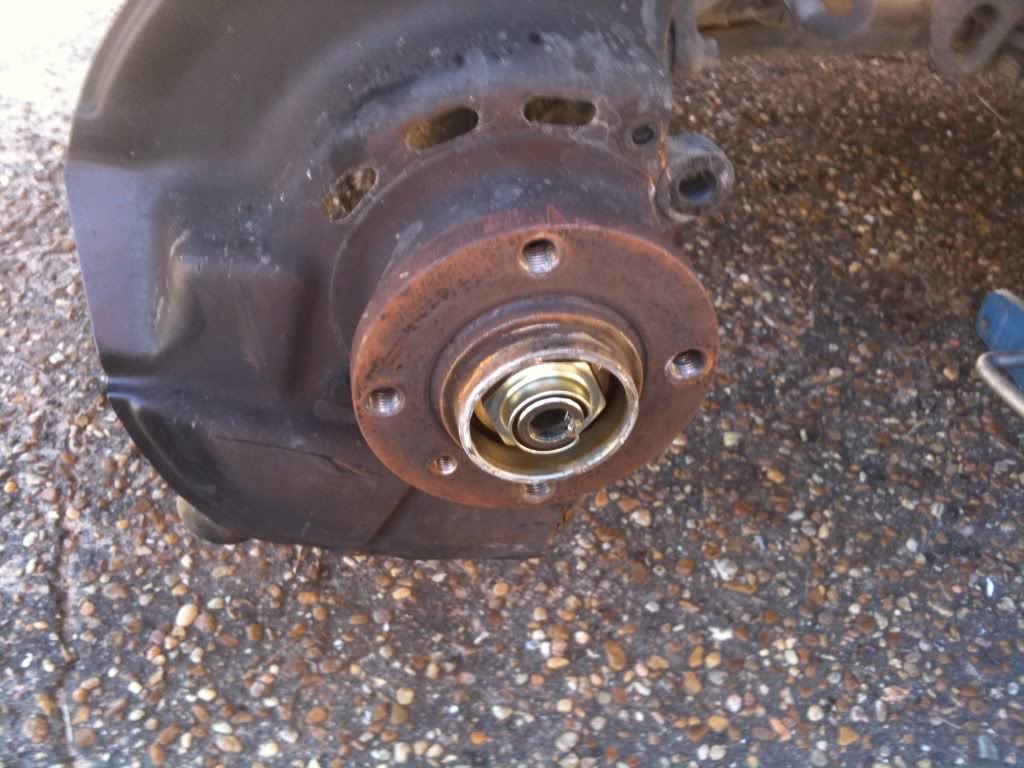
3. Remove the bearing cap in the center of the hub. Use the flathead screwdriver and the hammer to gently tap the cap out of its hole. When this is off, you will see the hub nut. The nut has part of it bent into a relief in the axle to act as a lock. Unbend the nut with the screwdriver and hammer combo. (Picture #2)
4. Remove the 36mm nut in the center of the hub. I used a 3ft breaker bar. Use what you have, it should not require a impact. (Picture #2)
5. (Optional) Remove the two 10mm hex bolts that secures the brake dust plate onto the hub. I only removed this for easier access and to clean things.
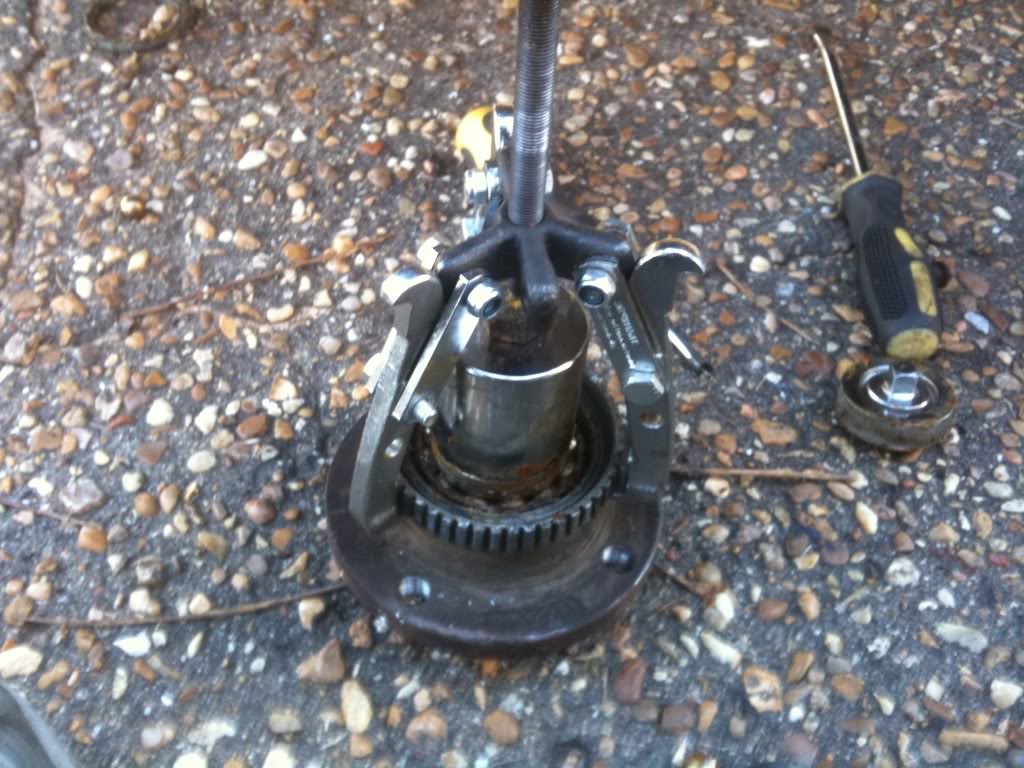
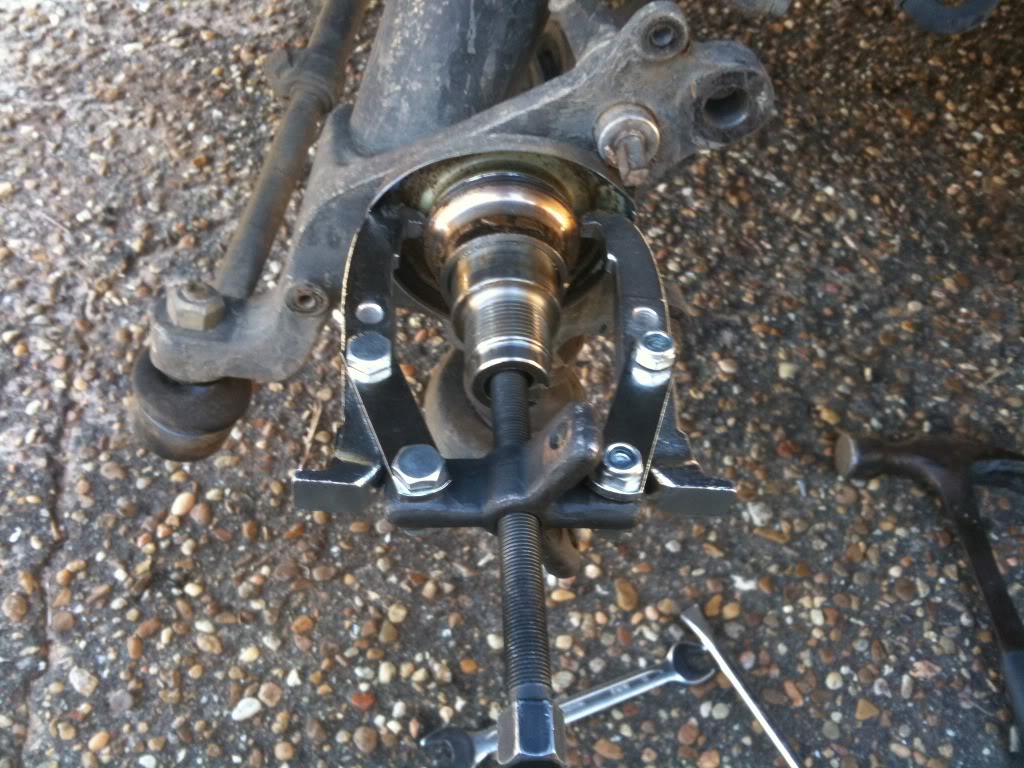
6. Use the bearing puller to pull the hub off of the axle. I had part of my inner bearing race separate from the hub. If this happens You will have to bend the metal inner shield to get your puller onto the race. I didn't have to bend it much and was able to straighten it back out once the race was off. (Picture #3)
7. (Optional) My hub came without the ABS tooth ring on the new hub. This made it mandatory for me to take my ABS ring off of my old bearing and put it on my new one. I used the puller to take it off, and put it on the new one with a vice using it like a press. Make sure the solid part of the ring is towards the inside of the new hub. (Picture #4)
8. Reinstall everything opposite of removal. To press my hub back on the axle, it required nothing more than pushing it as far as I could with my hands, and kicking it with my foot the rest of the way. I only kicked it until I was able to get the axle nut on and tighten the nut. There is probably a torque setting on the axle nut. I just tightened mine until the tab lined up with the relief in the axle, and the nut was tight. Make sure you re-bend the tab on the axle nut into the relief on the axle.
-Pictures
#1
#2
#3
#4