You must be logged in to rate content!
9 minute read
How to install the GAS E3010 amp rack (warning: LOTS of pictures)
Compliments of StereoInstaller1 @ r3vlimited.com
9-9-2011
This is a tutorial to show you how to install one of our new amp rack kits.
The goal is to help you create a world-class look while retaining as much trunk space as possible.
You will of course need RCA cables, power cables, and the other basic parts.
There are a few additional supplies that you will need to complete this install. The list is:
- An assortment of butt connectors
- Crimp tool
- Something to strip wire with
- Invisible Glass aerosol, or other appropriate plastic cleaner
- Microfiber towel
- Basic hand tools
- Some sort of cordless power screwdriver
We highly recommend a good selection of wire ties, including screw-eye wire ties.
You're free to connect the wires as you see fit, but our recommended method is a proper crimp tool and quality crimp connectors.
It is required that all trunk tar be removed prior to starting this installation. This is the only modification to the car necessary.
Start off with disconnecting your factory amplifier (if applicable). Carefully cut the wires one by one, as you will be needing most of these wires - but not all. You can use the chart here to connect to your existing factory speaker wires. You will also need to connect to red, brown, and white to power the fans in your amp rack. Your connections should look like this:
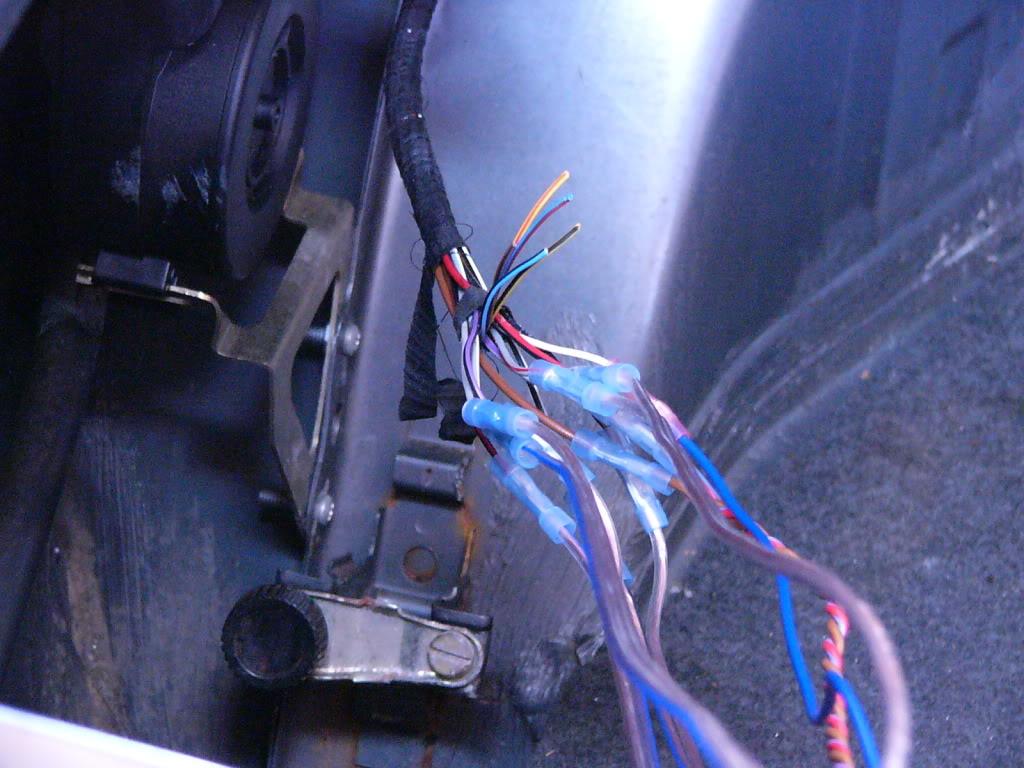
The wires you add to this connection should be about 4' long each. You will want to make sure you have enough wire that you can reach the other side of the trunk as needed for your installation.
Next, run your RCA cables. Run them through the factory grommet, following the factory routing.
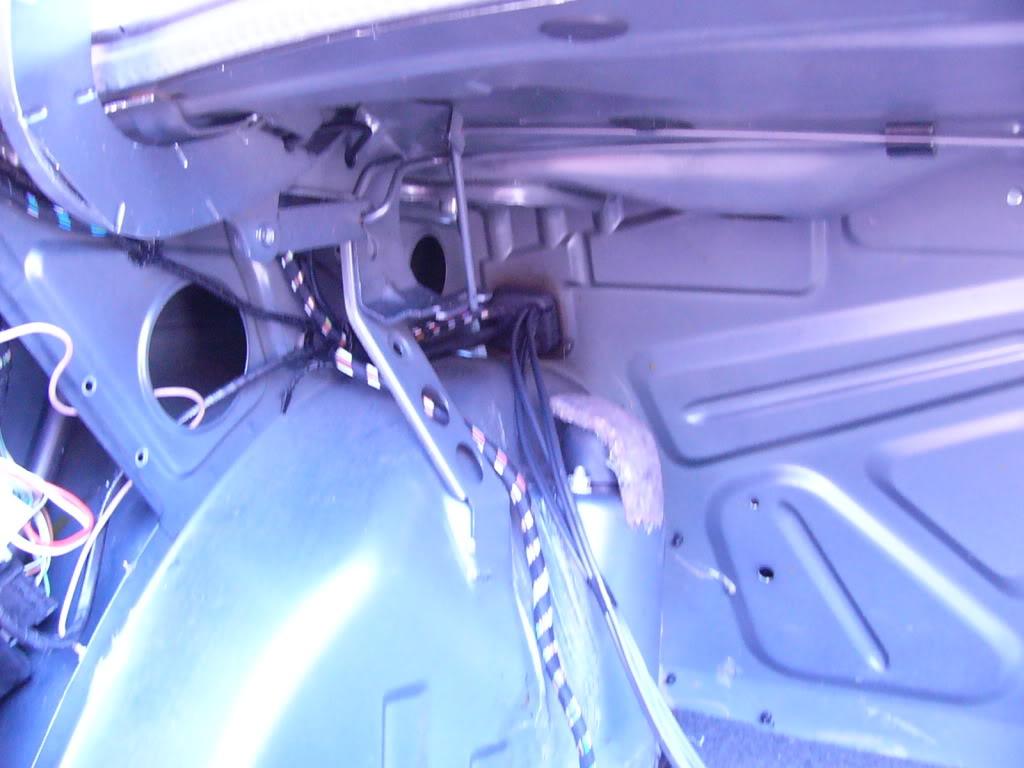
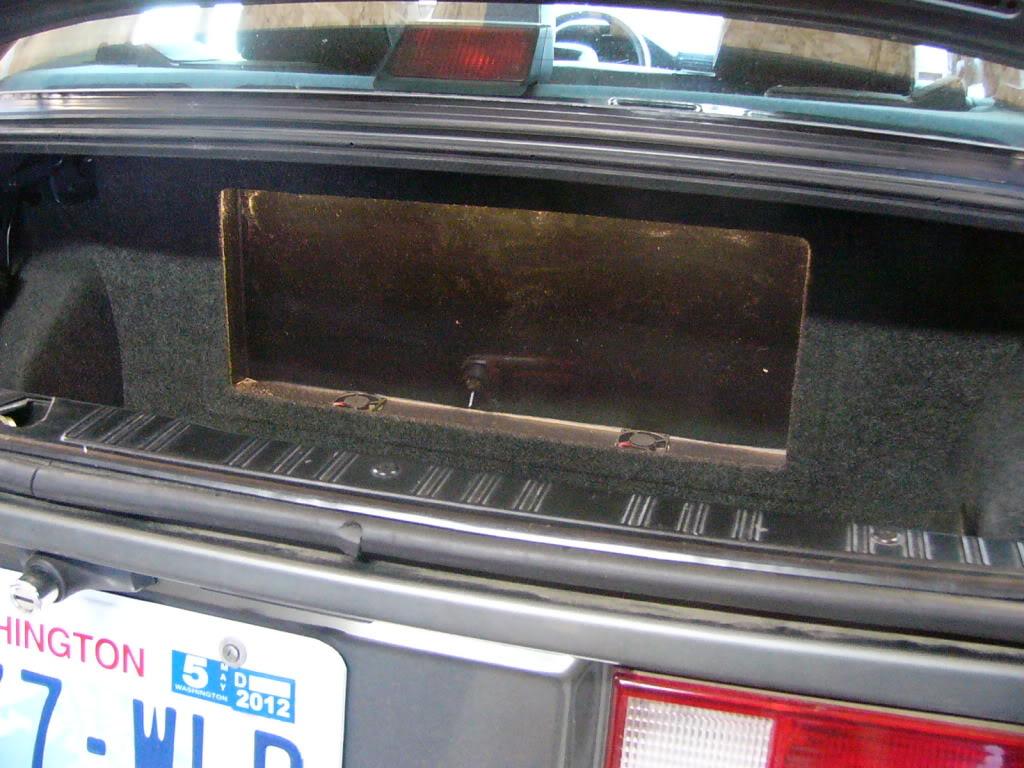
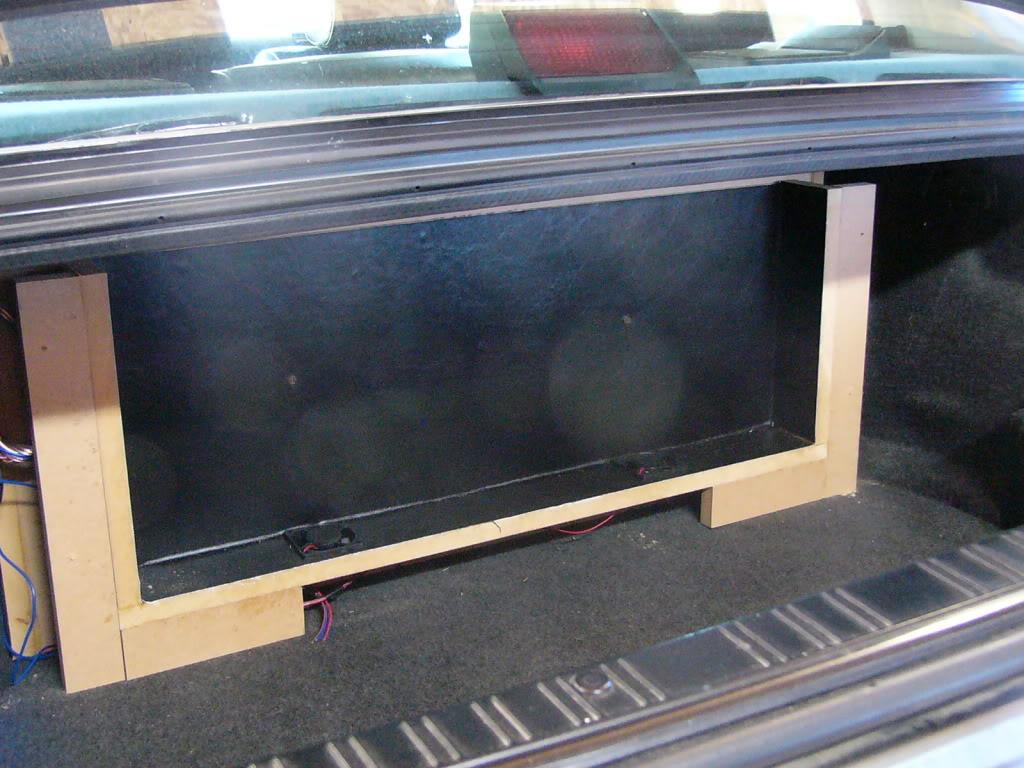
Next, install the box. Make certain it's properly screwed in place and your trunk carpet is nice and flat. This example we upholstered around the ski pass opening in the back seat because the car has a fold-down arm rest.
Note the four screws near the corners of the ski pass. These are necessary to provide a proper air seal.
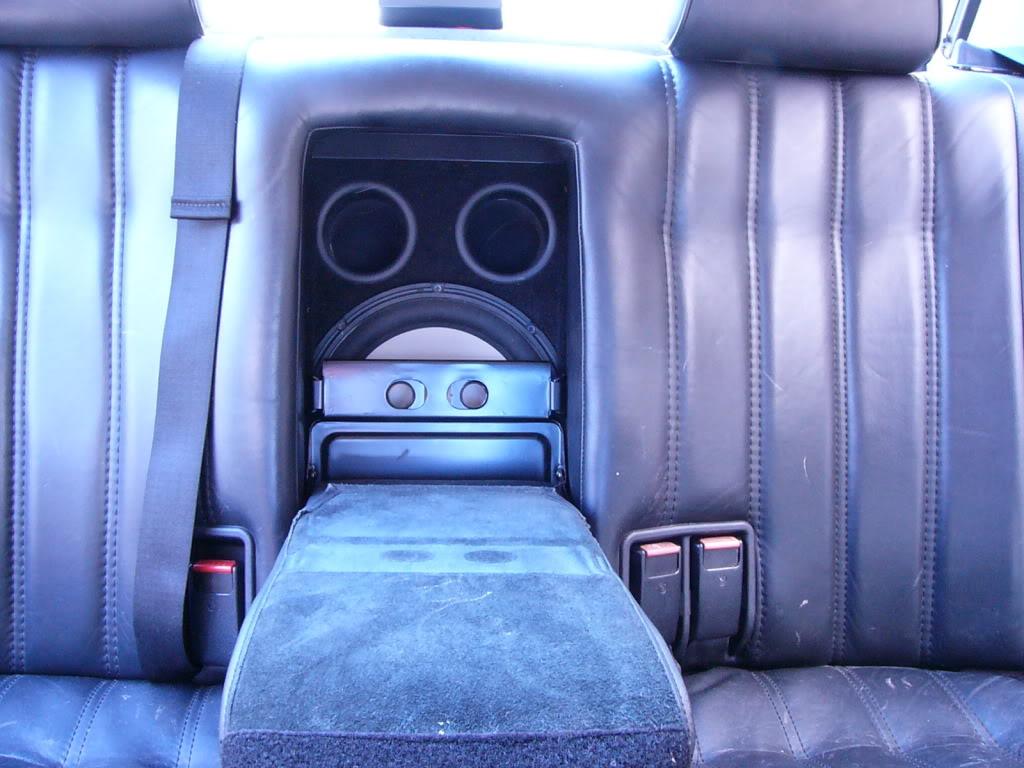
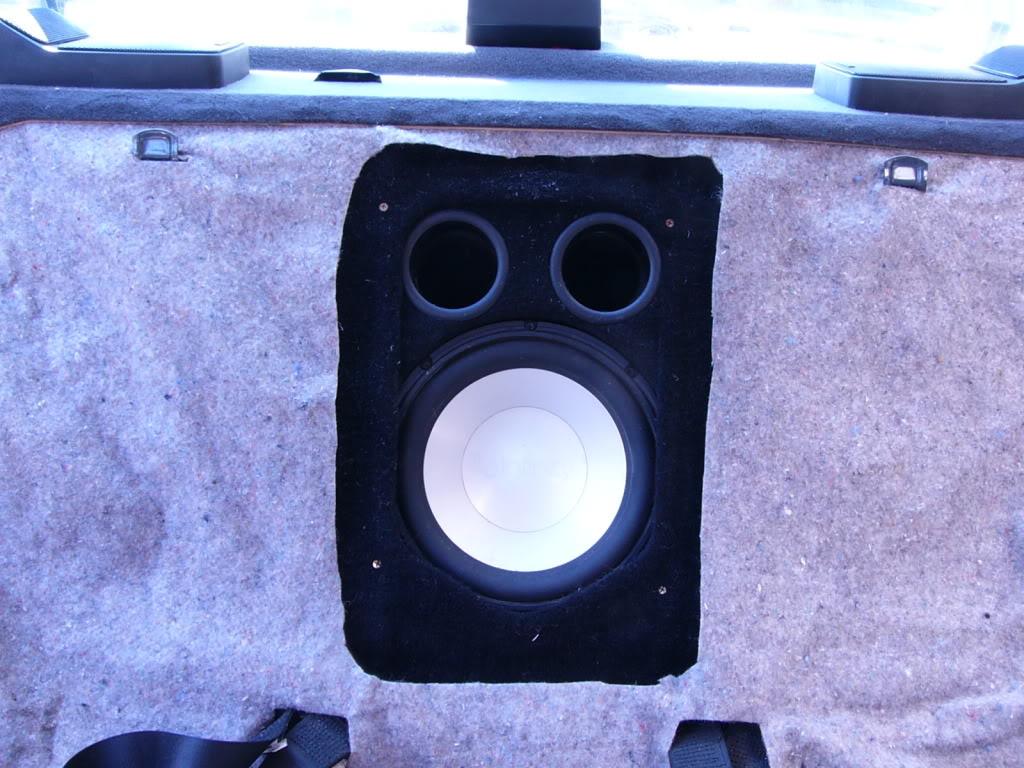
So, now that your box is installed and your wires are run, tuck your wires next to the box and place the amp rack in position. Make sure everything fits perfectly - note how the notches at the top of the box fit under the trunk hinge assembly. It's important that it line up perfectly at this point.
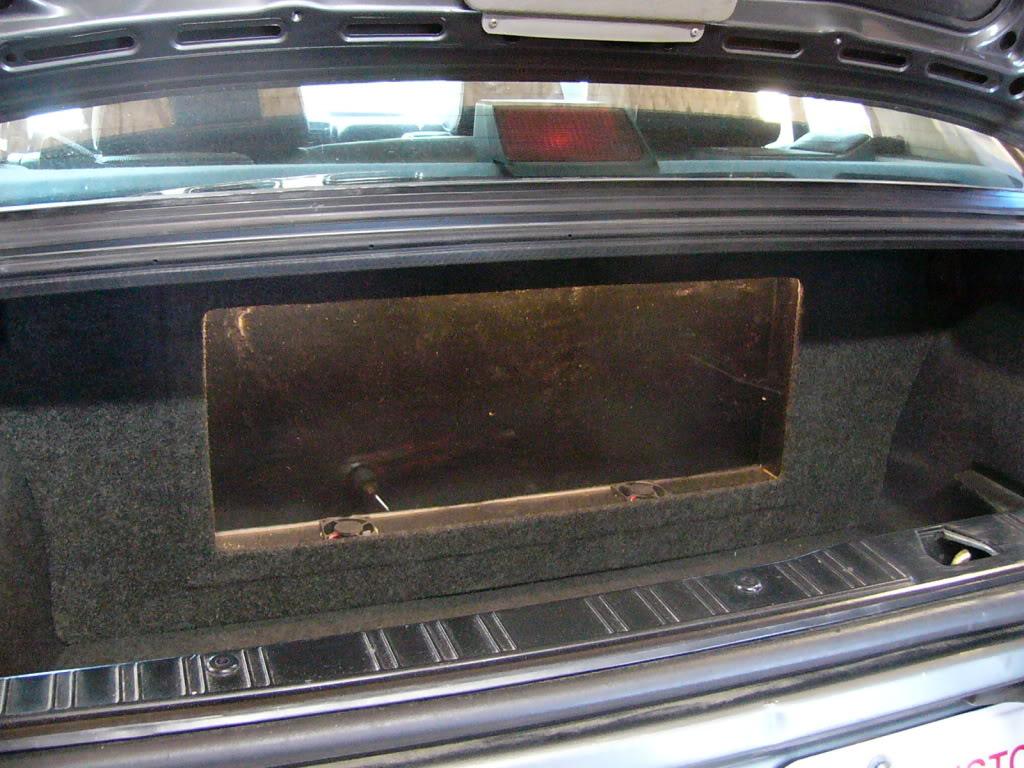
Now that you've had a test fit, it is time to remove the window. You must unscrew the face of the amp rack from the rack itself. The screws are hidden under slits in the carpet (which will become important later), so look for all six screws carefully. They will be difficult to find.
Now that you have the window out, replace the front on the box using at least four of the screws. Reposition it back in the trunk (AFTER WINDOW REMOVAL). Now that the amp rack is in its finest position, shoot a couple of screws through it. Normal drywall screws are adequate. Make certain that the screws will be hidden by the amplifiers, like so:
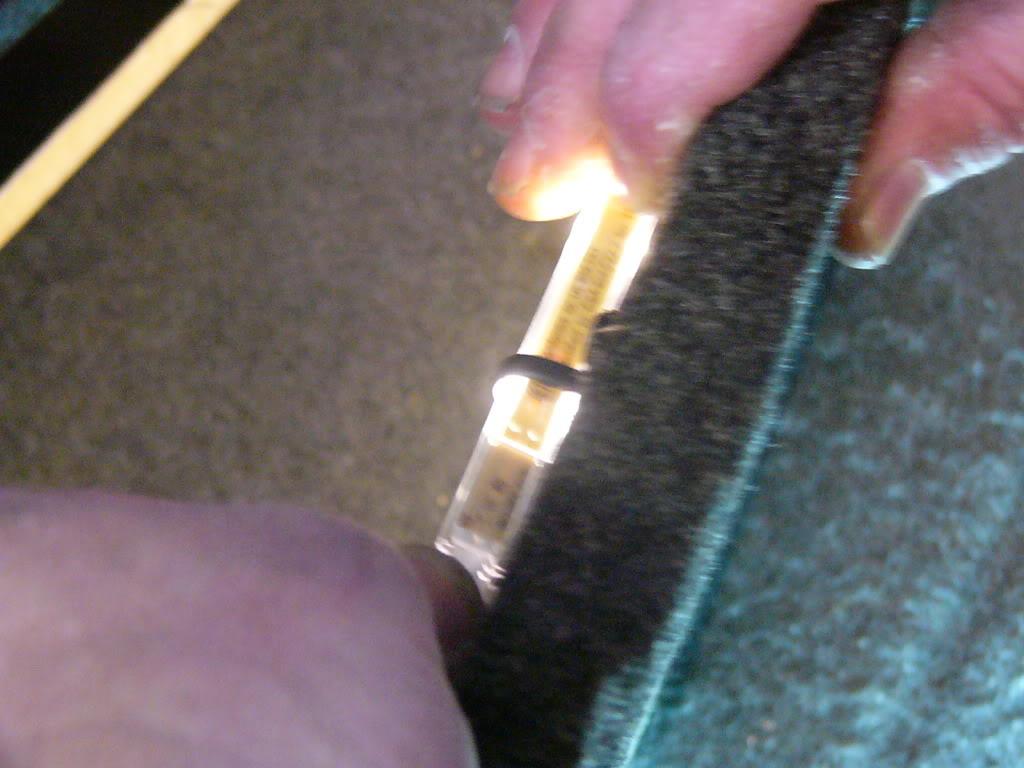
First, let's talk about the LED strip. You need to run two wires into your trunk lid. These need to run all the way up to the trunk light. I recommend you connect to the trunk light wires, leaving the trunk light out completely. Believe me, you won't miss it. Connect the two wires to the power and ground at the light, and leave them hanging in the trunk. Follow the factory routing the entire way. Connect these to the two white wires supplied with the LED strip. One of the two wires on the LED strip has raised ribs - that is the NEGATIVE. Make sure negative goes to brown and positive goes to red at the trunk light.
So now that you have the plug from the LED strip near the top left corner of your amp rack (leave a couple feet of slack so that you can plug it in easily) let's work on wiring the fan relays. The red wire from the fan relays goes to constant 12 volts. In this install, we used the main power for the factory amplifier, which just happens to be red. The brown wire from the relay goes to (go ahead, guess!) the brown wire from the factory amplifier, or any solid ground. The blue wire from the fan relay goes to amplifier turn-on. We used the white wire from the factory amplifier harness to do this. You may need to run a new wire all the way up to your deck. Whatever wire turns your amplifier(s) on needs to go to this blue wire.
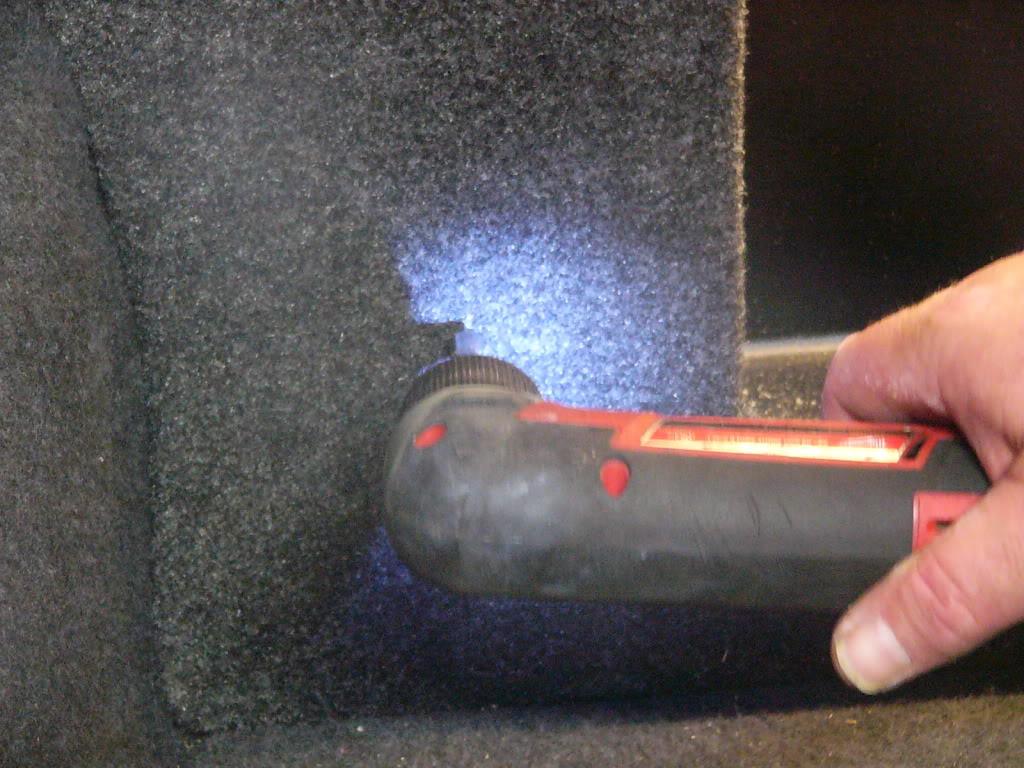
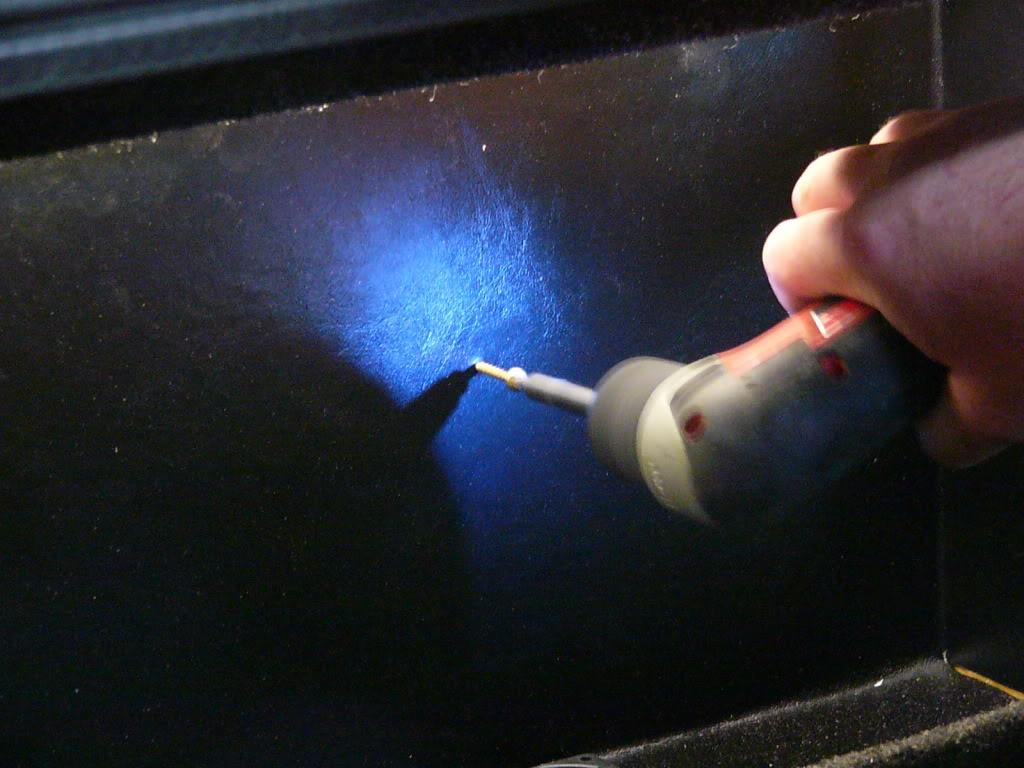
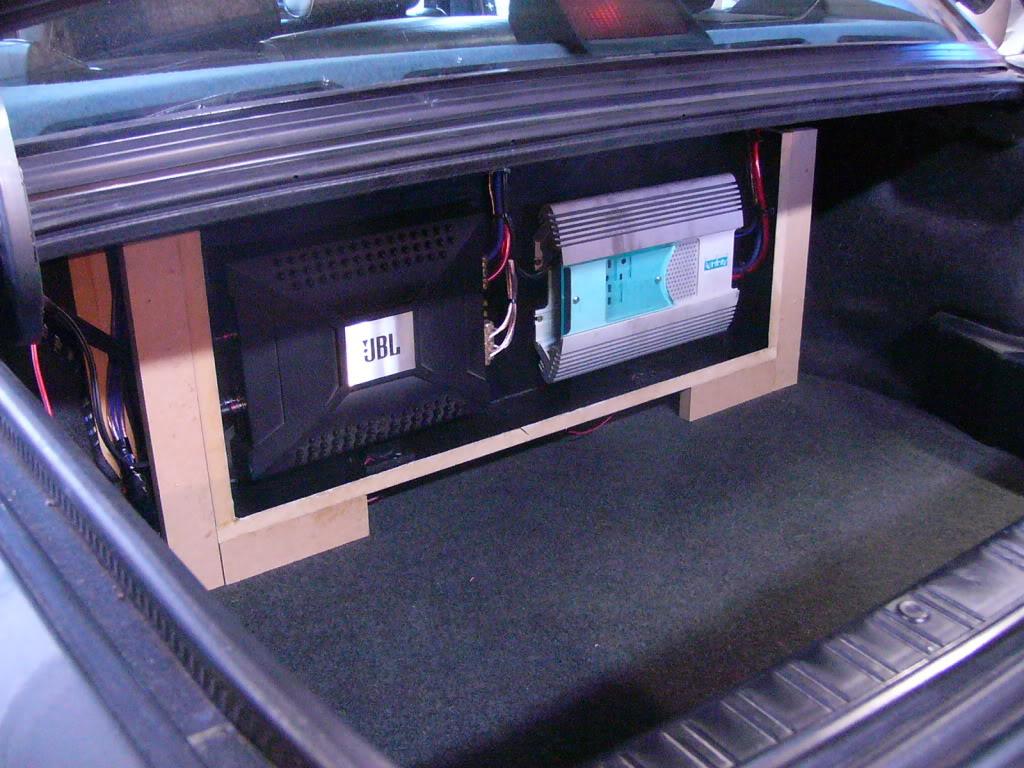
It's time for you to install your amplifiers. Make sure that the screws you use to mount the amplifiers are long enough to penetrate the box, not just the amp rack. This will keep the amp rack secured, and is important to be sure of. This part is entirely up to you and, aside from what pointers we have already offered, beyond the scope of this tutorial. However, please note the vinyl-covered holes for you to run wires through as needed - just slit them with a razor blade and run the wire through. Suffice to say they should be tidy, clean, pretty, and completely functional.
This is the last time you will ever get to touch your amplifiers. Make 100% sure you are completely satisfied with installation, tuning, sound quality, noise issues...basically, make sure it's perfect. It should look something like this when you're done with this part:
Now that you're completely satisfied with the performance of your audio system, it's time to clean the inside of your amp rack. We found it easiest to clean the dust out with compressed air. How you do it is up to you.
Next, remove the blue protective film from the window. It's not very hard to figure, but again, you're on your own.
Now it's time to clean the glass. We found Invisible Glass aerosol to be excellent, in conjunction with a microfiber towel:
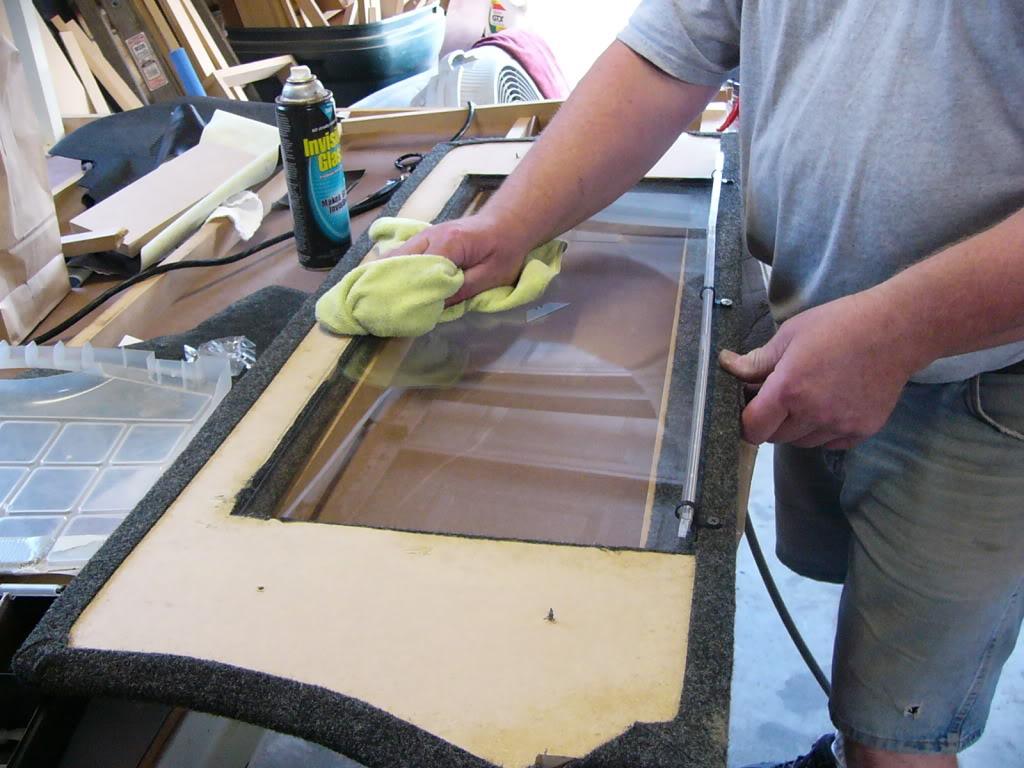
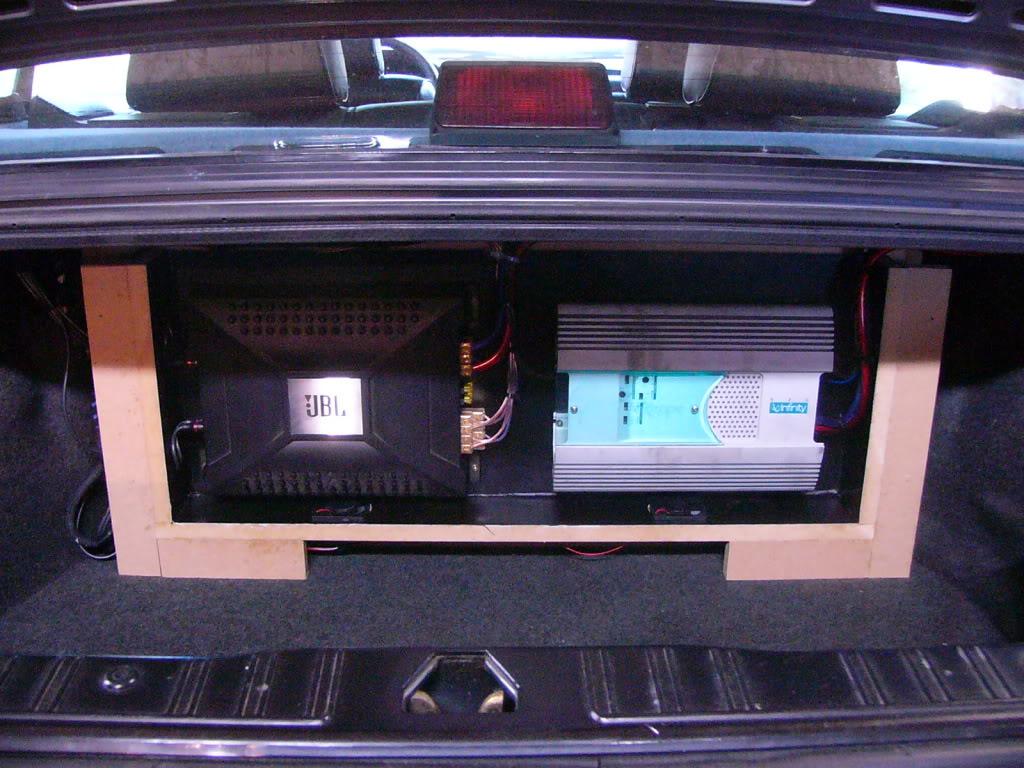
Again, this is the last time* you will ever get to see inside of your amp rack, so make it perfect. Take the extra time to get everything as clean as you can.
Now that your amps are properly installed and your window is perfectly clean, let's reattach the face after making sure the light strip is plugged in and working. Don't forget to test your fans, too!
Go back to the six screws that you removed earlier and carefully reinsert them. You should be able to pry the flaps of carpet apart so that you can put the screw head completely under the carpet and hidden. A quick rub with a thumb and generally the screw disappears, but you may need to pick at it a bit with the tip of a razor blade to get it perfect. Don't forget, every time you remove the face, you will damage the carpet around the screws a little bit - that's why it's so important to get it so perfect before putting the face back on. You may want to drive around for a few days with the face off of the amp rack, just to make sure you're perfectly satisfied.
At this point, your finished rack should look something like this:
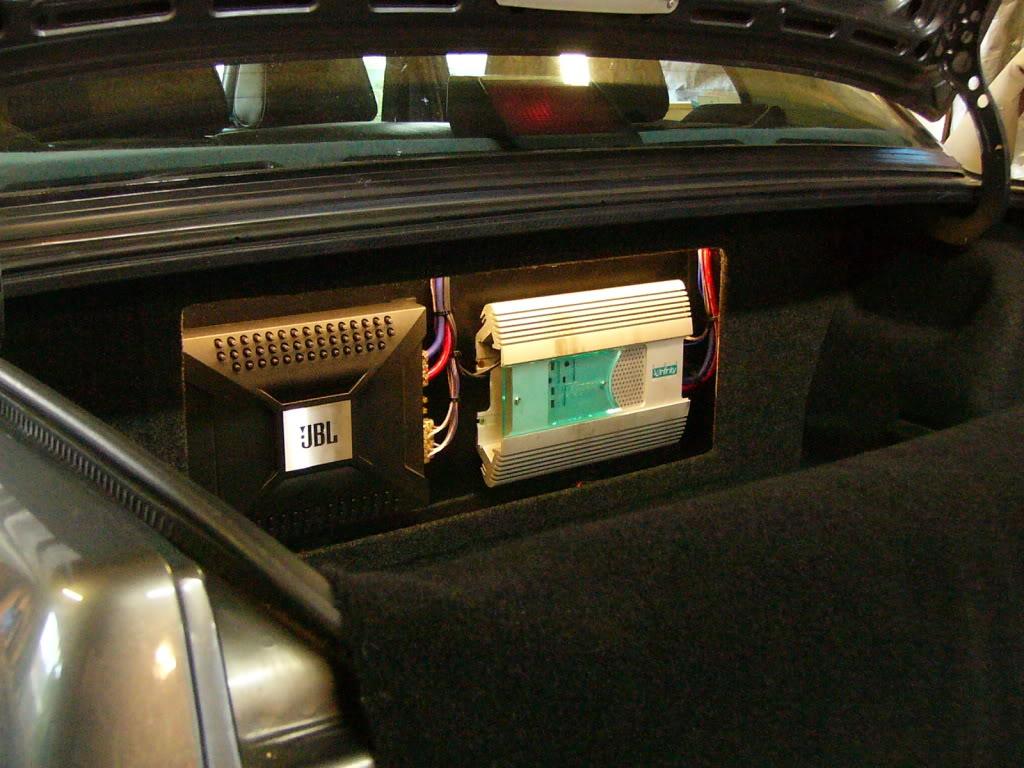
This picture goes to show that you can have a beautiful presentation even with mix-and-match equipment.
Thanks again for all your support. I hope you enjoy showing off your new amp rack!
Luke Fisher
Nigel Fisher
German Audio Specialties
*kind of kidding. But seriously, get it really, really clean. You can pull the face off by removing only six screws, but it's still a hassle.