You must be logged in to rate content!
11 minute read
How to set MotoMeter odometer mileage
Compliments of RagtopE30 @ r3vlimited.com
1-2-2011
Hi everyone! This is my first ever DIY thread so please bear with me, and don't be to harsh. Before doing this please check your local laws and ensure that you are not commiting any kind of crime.
I hate seeing all these nicely redone E30's where the owner has basiclly rebuilt the car and/or the entire drivetrain and suspension. Also I think it sucks when you spend the money for the odometer gears just so the odometer can roll over 200k on your fresh S5x swap. That being said, my DIY is how to reset your MotoMeter odometer back to 0 miles. I also will post a thread in the next day or two on the VDO version which is much easier. This DIY will work on all MotoMeter odometers. This should take you approx. 1 hour to complete, that is from dashboard to dashboard.
First off remove your gauge cluster from your car. If you need assistance on this step there are very good DIY's on this task. But honestly if you are having difficulty removing the cluster this DIY may not be for you as it is pretty detailed.
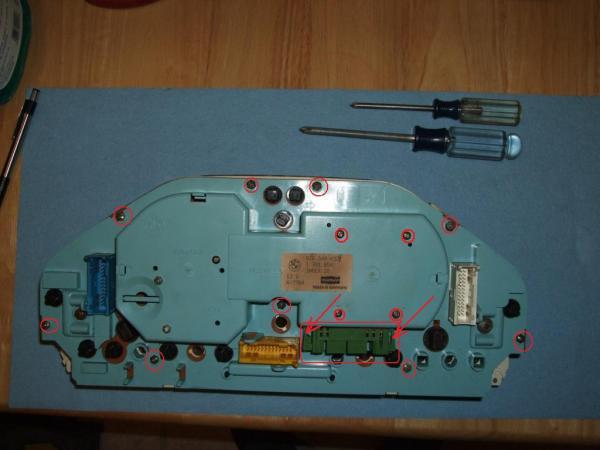
Step 1: Remove the screws from the back of the gauge cluster, including the four that hold the speedometer in place. Every screw in the picture that is circled needs to be removed. After removing the screws you must remove the green plug adapter. To remove it use a flat head screwdriver and release the arms on the side (arrows point them out).
Step 2:
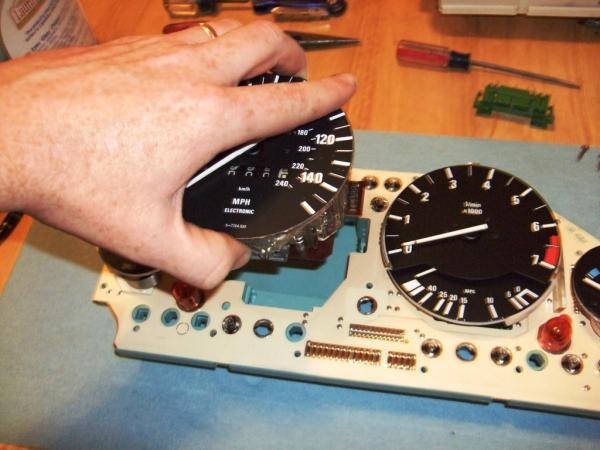
Carefully pull the back of the cluster assembly free from the front. Once you have it seperated move the front of the cluster (the part you see when you are driving) out of the way for now. Flip the back over and you will see all your gauges. Gently pull the speedometer out of the assembly and then move the base and remaining gauges out of the way. You should have just the speedometer in front of you now.
Step 3:
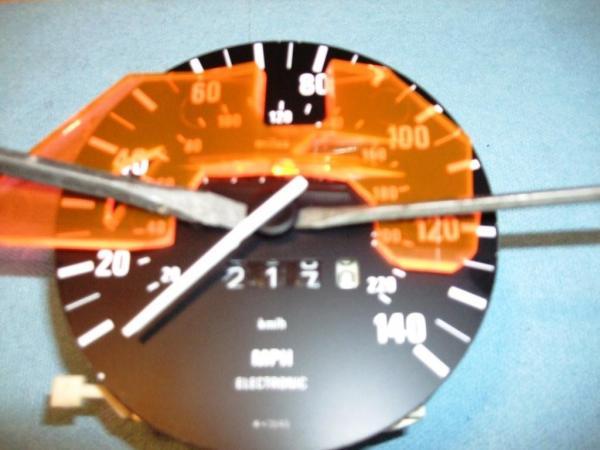
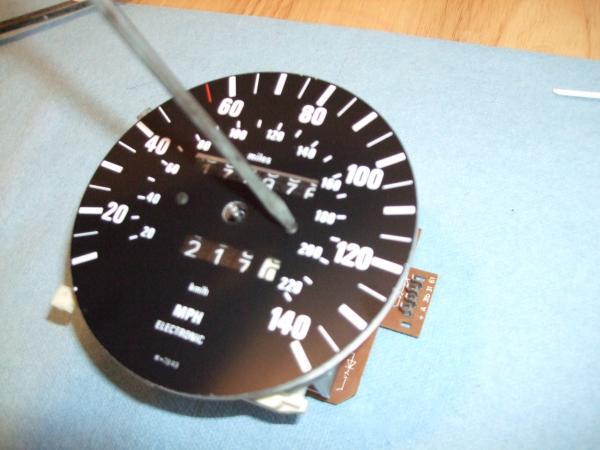
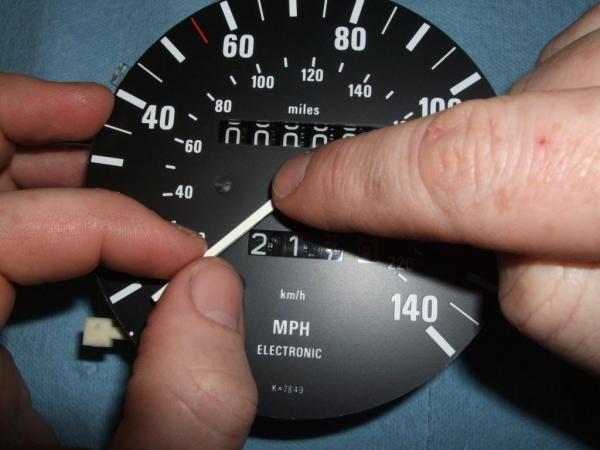
The next task is a little scary for those how have never attempted it before. Place blocking material on either side of the needle to not only pry against but also to protect the face of the gauge. Insert two small flathead screwdrivers under the base of the needle and evenly apply pressure untill the needle pops free. Dont worry about the position of the needle at this point, I will show you how to realign it later in the thread.
Step 4:
Remove the two small screws that hold the gauge face. Be gentle because the black paint scratches easily.
Step 5:
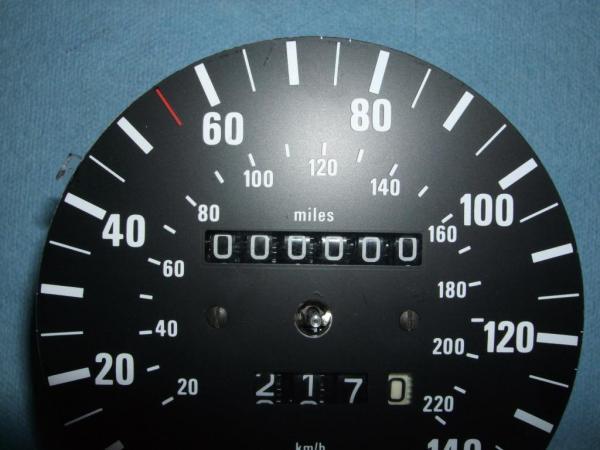
Now you should have an antique looking calculator!
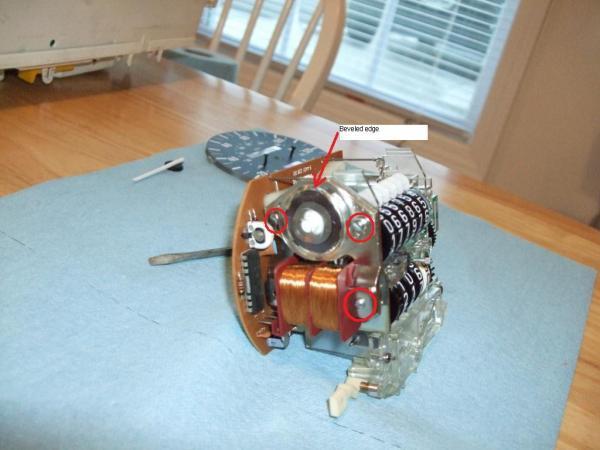
Ok, seriously. Look on the left side of the assembly and you will see a plastic plate with a round thing under it, that is the electric motor that turns your odo gears. There are three screws that hold the plastic piece and metal support on the assembly. Remove these screws (circled in picture). DO NOT ATTEMPT TO PULL THE METAL OFF OF THE ASSEMBLY! DO NOT ATTEMPT TO REMOVE THE COMPONENT BOARD! The left screw for the motor is in a tight location just be careful and take your time with a small screwdriver. Once the screws are out remove the cover for the motor. NOTE: the beveled edge goes up during reinstallation.
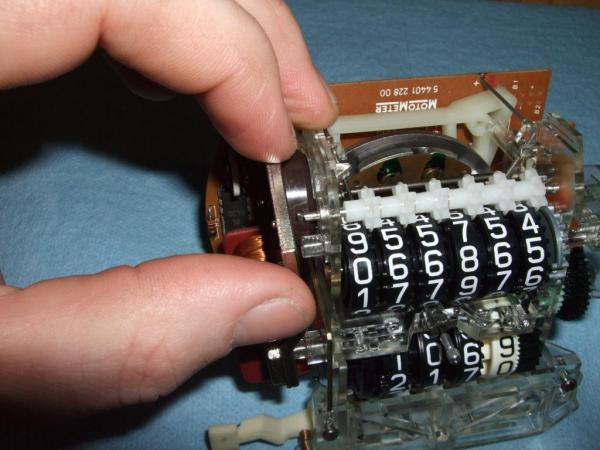
Step 6:
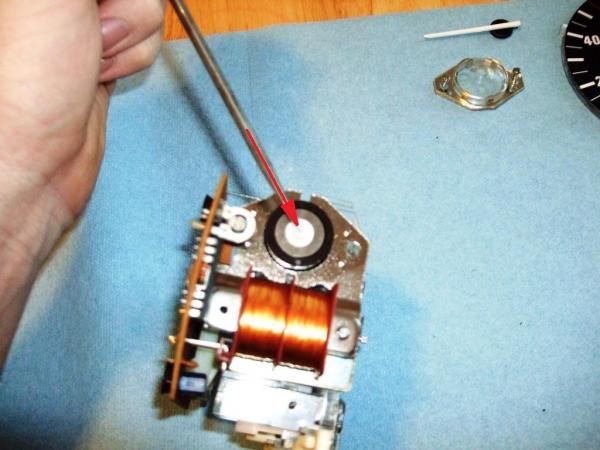
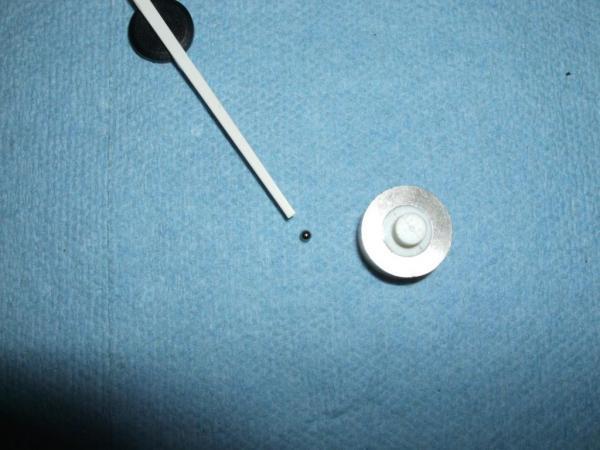
Remove the center of the motor. If you don't it will fall out later and you will never find the bearing.... YES bearing! There is one tiny metal ball that fits in the underside of the piece you pull out. Chances are, it will not fall out if you are careful and gently pull it out. I suggest placing some sort of soft light color material on your work surface. And keep an eye out for the bearing while doing this.
Step 7:
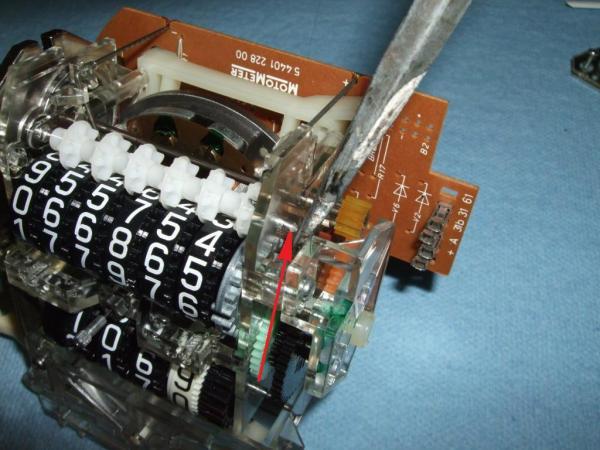
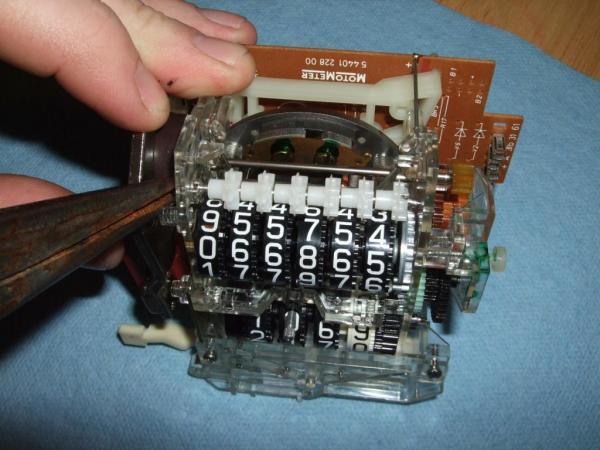
This is where the fun begins!! Look above the long row of numbers and you will see a rod with white plastic "keepers" (I don't know what else to call them). You will see where the metal rod goes through both sides of the clear plastic housing. On the right side of the housing use a medium flathead screw driver and carefully apply pressure to the rod pushing it towards the motor side (the side you just pulled the plastic cap off of) I use the gear housing for a little, once again a LITTLE leverage. Once it has moved far enough that the screw driver is no longer useful switch to the other side and slightly pull the metal bracket away from the plastic housing. Using needle nose pliers continue moving the rod untill the right side clears the plastic housing. Now for pics!
Step 8:
Breathe! Drink! Smoke!
Step 9:
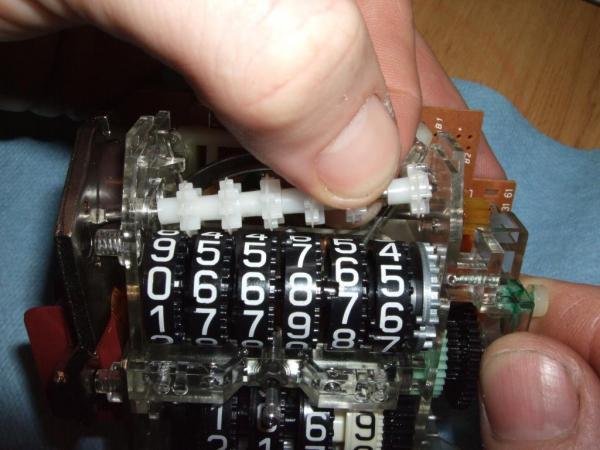
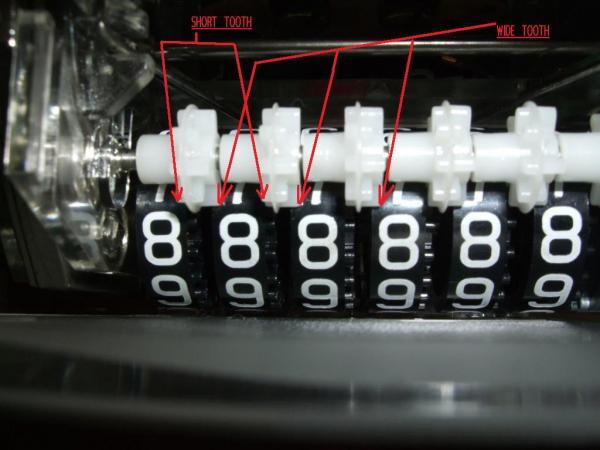
Before proceeding make a mental note of the white keepers/gears. I have included a picture but notice that the teeth alternate between short and long. Also notice how they are oriented on the numbers, as in the surface that you see touching the gears should be touching nothing other than the long teeth. This will make it easier on you when you put it back together.
Ok, Pull up on the bar of white gears but just enough to clear most of the numbers. Shift all of the white gears to the right. Start turning back the numbers from left to right.
As you get each number into position, line up the white gear so that the long tooth will be in between the 7 and 8. It will be almost touching the bottom of the 7. Once you have it lower the bar slightly to prevent the adjusted number from shifting to much. Do this for each number. Be patient, it may take a few of trys to get it right.
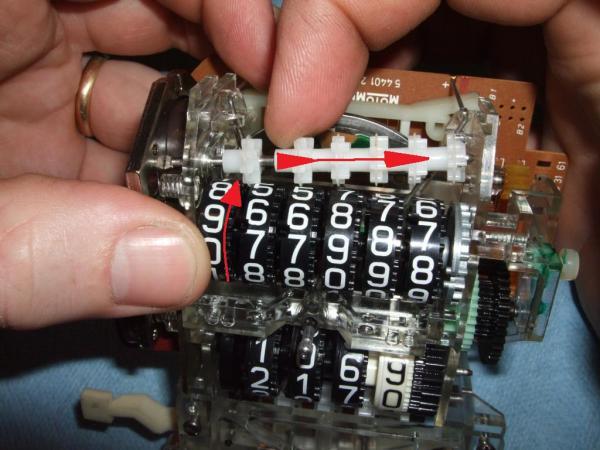
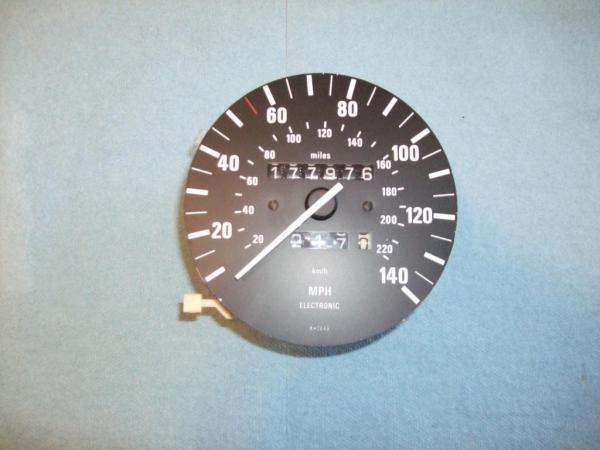
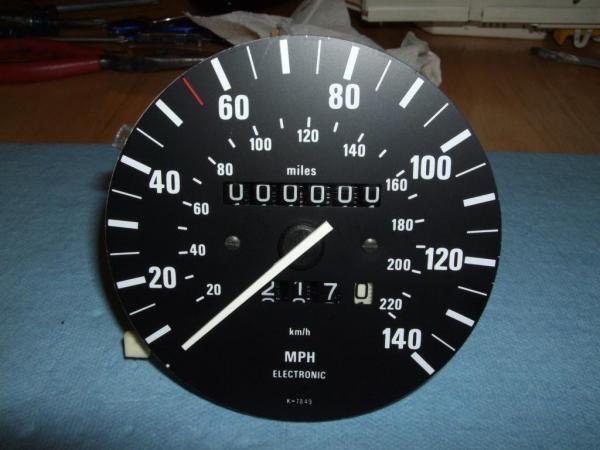
Below is what it should look like when done correctly. This picture was taken after I reinstalled the gauge face, so it is looking directly down from the top.
Step 10:
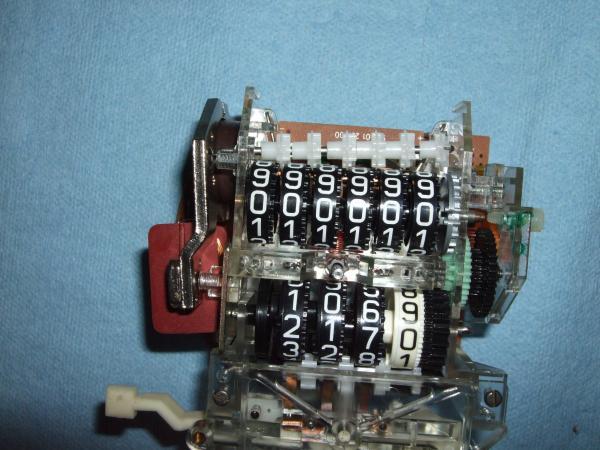
Once you feel like you got it right push the metal rod back into the hole a little bit, just enough to hold it. Reinstall the gauge face to see if the numbers line up correctly. Below is an example of a FAIL!! Like I said it may take a try or two. The picture above with the red lines is after I got it right. So check out my FAIL below.
If this happens to you dont pull out any hair. You are really close. Just refer to the the picture above this one and line up your gears correctly. But hopefully no one has this problem since I put the picture of the correct setup above.
Step 11:
If your numbers are lined up remove the gauge face and put the gauge assembly back together. First push that metal rod fully back into place. Then put the electric motor back together and put the plastic cover back on and replace the screw further down on the metal plate.
Take this opportunity to clean the clear backing plate for the gauge face and the back of the gauge face. It sucks to completely finish this only to realize you have a big greasy fingerprint that you can't get to.
Screw the face back onto the gauge.
Step 12:
Reinstalling the gauge needle. Tricky Tricky! This is another step that may take a couple of trys to get right.
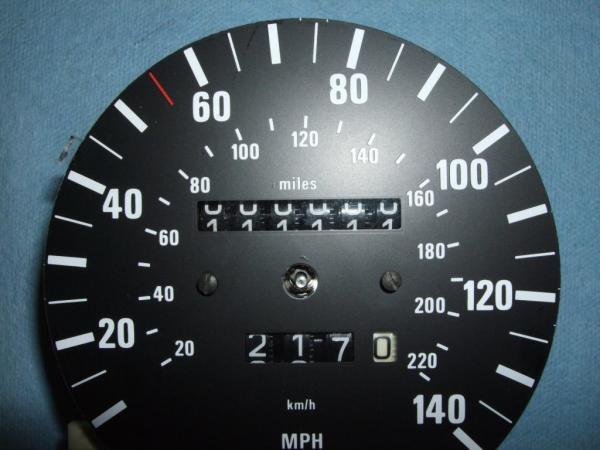
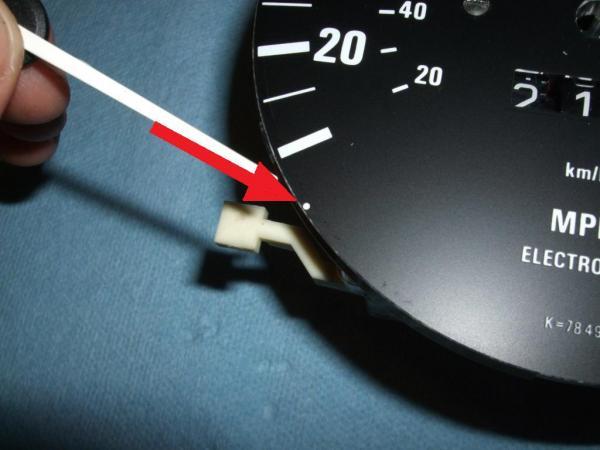
Look at the gauge face and you will see a small white mark on the edge about 1/2inch below the 10mph mark. This is the alignment mark for the needle.
Side Note: the white part of the needle is very thin metal and easy to bend, SO HANDLE CAREFULLY!
Line the needle up with the alignment mark and push down on the black plastic circle at the end of the needle just enough to engage the post. Let the needle relax and verify your alignment. Keep in mind that the speedo on the E30 runs fast anyways so if your needle is above the white mark at all you are just making it worse. I had to try 3 different times to get it to line up. Just take your time and get it right. Once you are satisfied with the alignment press down on the black circle to seat the needle. When seated correctly you shouldn't see the teeth on the post when looking under the needle base.
Step 13:
Reinstall gauge into the cluster being sure to line up the fingers on base to the female slots on the gauge. Then continue reassembly in the reverse order of disassembly.
Step 14:
ENJOY!!
I hope this is helpful to somebody. I have seen a few people ask how to do this so I figured I would do it. Like I said above I will post the VDO version of this in the next day or two, it is much easier!
The title for my vehicle already states that the Odometer doesnt reflect the actual miles on the vehicle. So in my case the incorrect mileage has been disclosed. As I said at the beginning of the thread, make sure you are not committing a crime prior to doing this. Most E30s with broken odo gears that have been bought or sold have the mileage disclosure already on their titles. Thank you for reinforcing the warning I put at the start of my thread.
True the title could have been worded differently, I can not change it now. I did not intend to "encourage odometer fraud" by any means. I simply saw that DIY's exsist on this forum for every other nut and screw on the E30 except this. Perhaps this DIY was not on the forum due to it's content, who knows. This information was provided as strictly information, not a call to action.
I can't fix the title but I can fix my sig!