You must be logged in to rate content!
10 minute read
HK Midrange Speaker Replacement DIY
Compliments of jmanscotch @ bimmerfest.com
10-27-2010
The following is a HK midrange speaker replacement DIY that I performed on my coupe with the HK Midrange/tweeter combo that exist in the door directly in front of the door handle.
If you are like me and have suffered from a busted stock speaker for way too long yet do not want to spend the $200+ on the upgaded BSW speakers or another $100 on ONE stock replacement that will likely blow prematurely again then pay attention and we will get you on your way to happy listening again while sticking to an affordable budget.
I found the information regarding the speakers I used from a post on another forum. Below is the link for the speaker I used and a tweeter and subwoofer that others believe will work just fine.
2" MIDRANGE:
$35 for a single or $54 for two.
http://www.parts-express.com/pe/show...umber=264-1046
1" TWEETER:
$43 for a single or $57 for two.
http://www.parts-express.com/pe/show...number=264-865
6" WOOFER:
$43 for a single or $66 for two.
http://www.parts-express.com/pe/show...number=295-372
Tool/parts need for the midrange replacement:
- Torx T20 Socket
- 10MM Socket (For disconnecting battery)
- Ratchet with 2"+ Extension
- Pliers
- Phillips Screwdriver (With smaller head size)
- Narrow Headed Screwdriver (for prying)
- Six (6) Count of #4 - 1/2" -or- #6 1/2" Metal Screws (Phillips head)
- Interior Panel Removal Tool (or the like)
- Super Glue of your choice
As always, begin by disconnecting your batteries negative cable. You can then move your attention to the door containing the speaker to be replaced.
Removing the door panel:
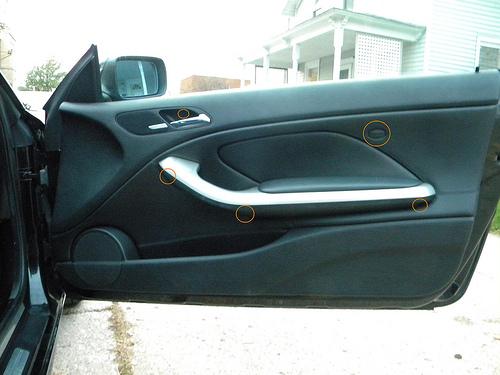
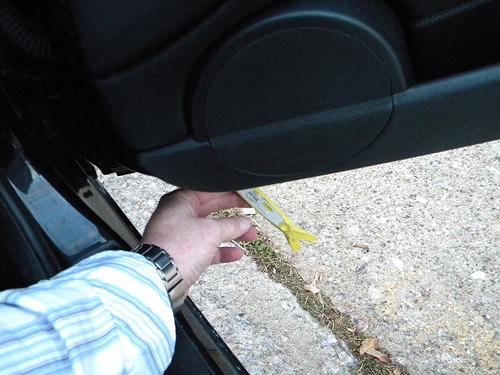
- There are five (5) T20 screws that hold the door panel on the door. Three (3) of these screws are located under the armrest and are easily accesible. The other two (2) screws are a bit hidden. One is behind a small circular disc that exist in the concave area of the door handle and the other is hidden behind the "Airbag" badge.
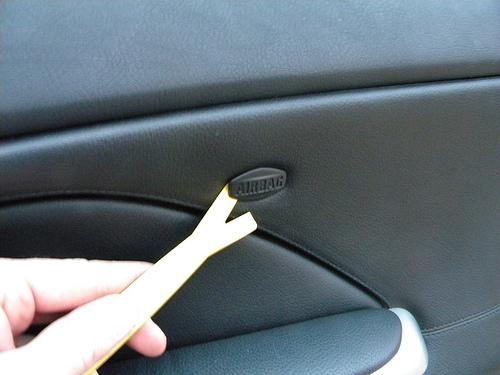
- To remove the small circular disc, pry it with a small headed screwdriver or whatever you have that will work best. To access the screw behind the "Airbag" badge, pry at one side of the badge first, then the other until it is free. The badge is simply held in with a christmas tree type design that grabs the panel ( /^\ ).
- On all screws beside the one hidden by the door handle, it is easiest to use a 2" or more extension with your ratchet to get the reach needed.
- Proceed to remove all five screws, taking note that the shorter two are for the two hidden areas and the longer three are for the others. While removing the screws, some will be completely retracted out of the metal yet remain "in" the panel...either use a magnet to retrieve these or simply leave them and they will fall out whe you remove the panel from the door.
- Now that the screws are removed, you must pry the panel off the door. Begin with inserting your panel tool at the bottom-front of the door and prying the panel away from the door. Once it has some space between the two, simply use your fingers to "pop" the rivets out of the door by pulling away. Work along the bottom towards the back then work up along both sides until you can free the entire panel from the door.
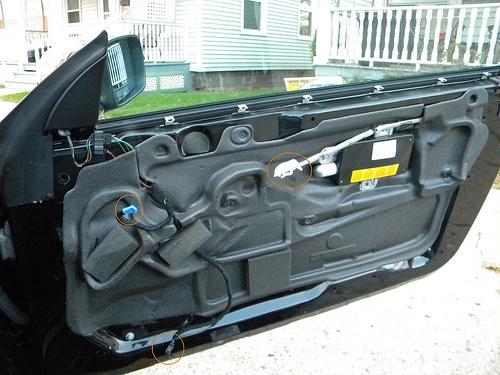
- There are three (3) connections that have to be disconnected before you can actually remove the panel: The Mid/tweeter audio feed, the lower mid-bass audio feed and the interior door latch cable. The two audio connections remove by compressing the tabs on the clips and freeing them while the door latch is removed by prying at one side of the connector then simpy pulling it out (see photo/arrows)
Looking from over the top of the door panel:
Panel off, looking at speaker connections:

Panel removed to show the three connections:
- Once the panel is off, you will need to unscrew three (3) more T20 screws to remove the mid/tweeter assembly from the panel:
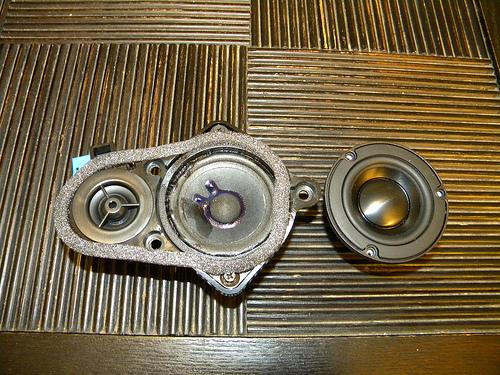
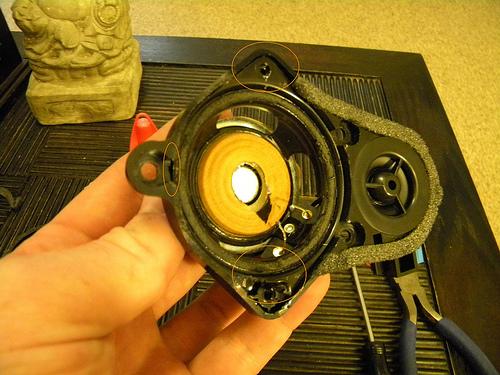
- Now, to replace the speaker. There are two phillips screws that hold the midrange in. With those removed, you will need to peel off the grey foam that borders the speaker.
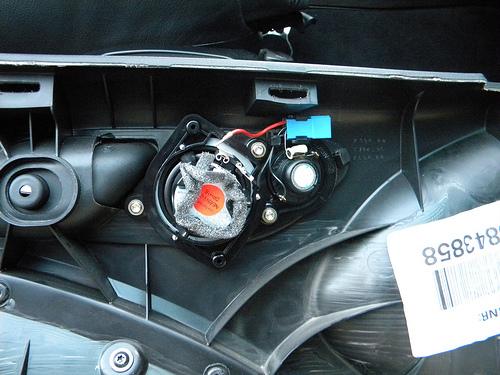
- Now you need to remove a hard plastic "O ring" that is on the face of the speaker. With those two out of the way, it is time to pry the speaker out of its housing. The speaker was origionally glued in (as well as the two phillips screws) so it will take some careful prying to free it, but it will come free. (I used the three areas circled in red to pry from).
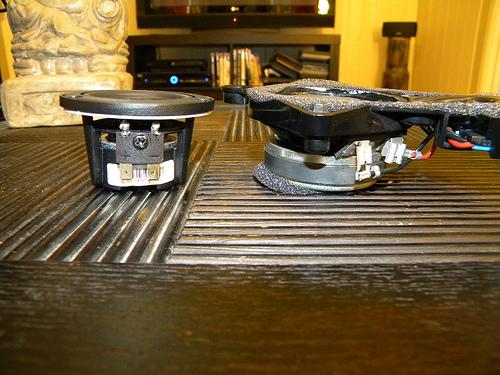
- Once you have freed up the blown/busted speaker from the bracket, you can begin the install of the new speaker. You can reapply some super glue around the back edge of the speaker where it rests in the bracket. Then, using your #4 - 1/2" metal screws**, can mount the speaker while making new mounting holes simply by apply pressure to the screwdriver. ** I tried using #6 - 1/2" screws and they did seem like they would work, it just proved to be a bit too thick of a screw to easily create the new mounting holes with...and my drill had a dead battery so I resorted to the smaller gauge screws which worked fine as well.
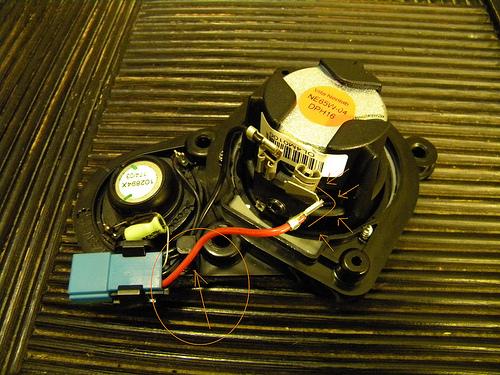
- Take note that the + and - terminals for the speaker MUST be located appropriately before you begin screwing down the speaker.
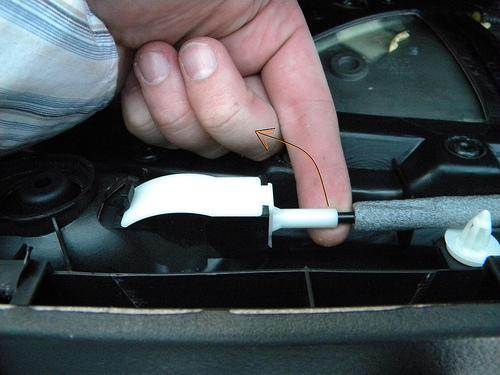
- Also note that the polarity of the terminals. The two have switched sides from what the stock speaker looked like. This is a problem as the positive cable isn't quite long enough to reach its terminal now. I solved this problem by freeing up the wire from its holder (see photo, circled in red) and bending the connector from 180 degrees to 80 degrees or so (see photo). It is worth mentioning that the male terminals on the new speaker are a bit smaller than the stock ones and so some pinching of the female terminals must be made to provide a good tight fit thus preventing the wires from rattling loose in the future.
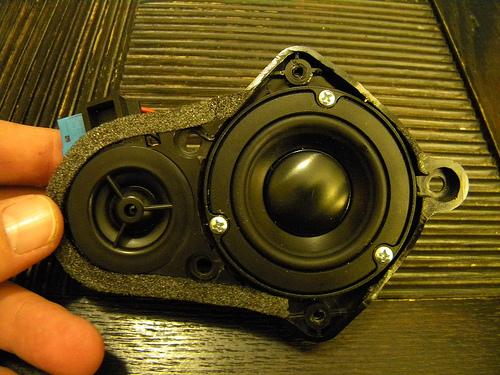
- Once you are satisfied that your audio connections are solid and the speaker is secure in the bracket, you can begin super glueing the grey foam back in place.
- Simply reinstall everything in reverse order and take the car out for a test drive to enjoy your new (crisp) sound.
Hopefully this will help others, if nothing else it should show that the speaker is a good fit.
As far as a review on the speaker quality: It seems a bit better but that might be subjective to what I've had to listen too for the last six months. It DEFINATELY doesn't sound bad 
This is my first DIY write up so let me know if any clarification is needed and I will update it.
Jake
I did it as a replacement for my blown speaker. You can't really tell in the first pictures but my stock mid was torn around 60% of the circumference.
If you browse the Parts-Express website, they have plenty of options to choose from.
12-26-2010
^ I only installed the one speaker on the passenger side door, haven't made it to the other yet. I can honestly say it sounds no worse than my other HK midrange. I did my best to listen to both, with doors open and ear up to the speaker, to get a verdit. I'd like to say it sounds better...but trying to pinpoint the sound coming out of a single midrange speaker in a car with 13 (subwoofer included) is a joke with the human ear.
Regarding the resistance...going from the 3 ohm to the 4 ohm is only going to increase the circuit resistance slightly therefore decreasing the power to it slightly, especially on a speaker with such a low power input. I haven't noticed a big drop in output from it, so I feel the loss of power feeding the speaker is indeed insignificant.
The stock speakers, even with upgraded HK, do leave something to be desired. I know BSW has had great success in simply replacing the stock system with their speakers made of better material...so I do feel the speaker quality is a big factor in the subpar sound, so in theory, switching to a better set of speakers from say, parts express, should do the trick if they are indeed better made. The main reason I went to that outfit for a replacement is simply price and availability. I could not find a good (read working/not torn) HK midrange for my car. I found a few new ones...but the price was a joke as you could imagine.
So, do these speakers hold potential to get your sound system on par with what you'd like: I highly doubt it. From what I can tell, they are a good option for replacing a set or so of speakers that have lived out their useful lifes, but are not an upgrade really.
If you want an upgraded system, they are several good reviews on the BSW, Bavarian Sound Werks, guys. They offer a plug-n-play kit that contains the 10 main cabin speakers for around $600. If you have the budget, this can be the easiest and best solution. http://www.bavariansoundwerks.com/pr...-Series-Sedan/
Powered by Froala Editor