You must be logged in to rate content!
4 minute read
DIY - Changing your Xenon bulbs
Compliments of E60orBust @ www.bimmerfest.com
2-1-2007
I did a write-up over at e60.net that I'm posting here so users don't have to register at both places to see the pictures. At E60.net there were some issues with imageshack and my pictures loading. I'll first attempt the same thing here but if the pictures dont load for anyone I'll reply with another post of the uploaded images.
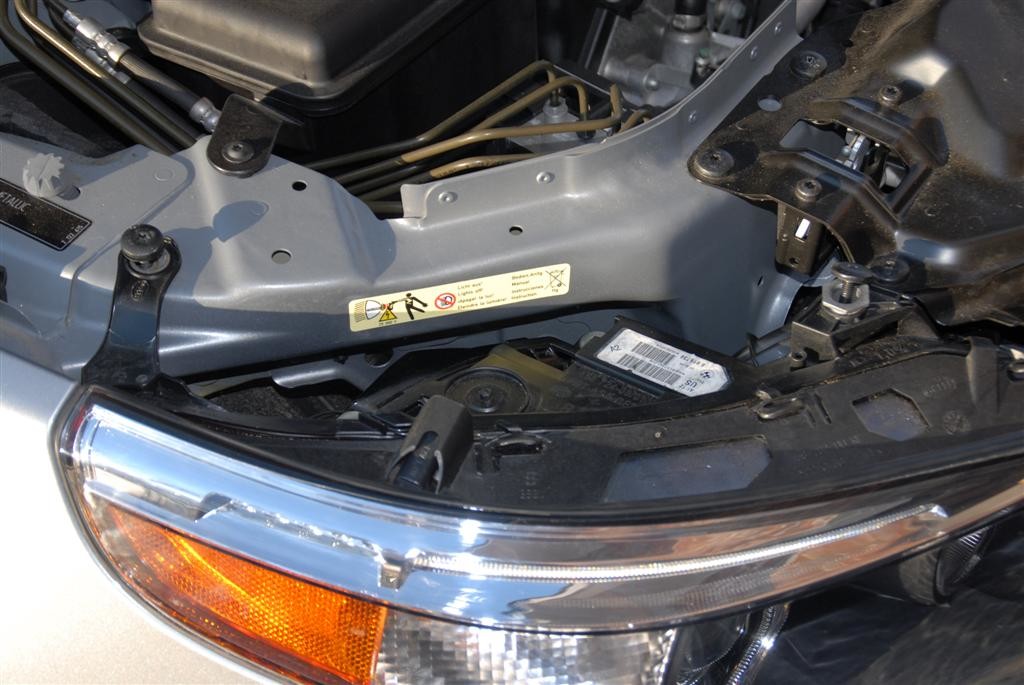
First you have to get the headlamp out, which is a royal PITA. It can be done without taking off the bumper, but it makes it a lot easier. - See DIY Bumper removal here
Whether or not your choose to remove your bumper does not affect this guide. Same bolts, same method, but you will most likely curse the engineer who designed the headlamps if you leave the bumper on. :whistle:
1A - unscrew the black bolts. they are already loose in this picture
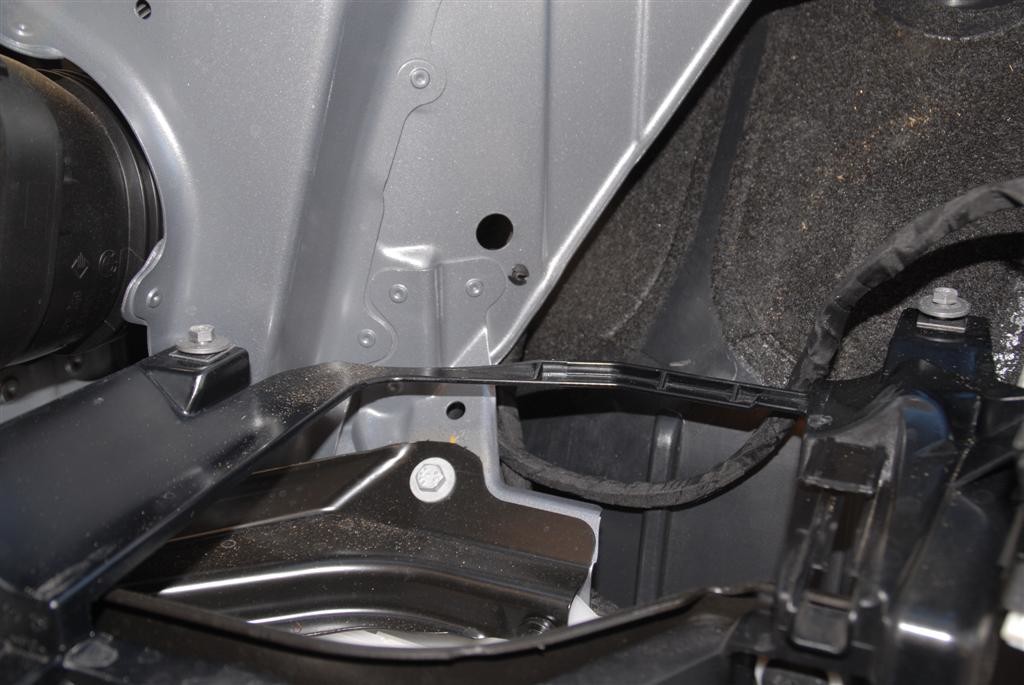
1B - there are two torq bit screws down and behind the headlamp. Do not unscrew these all the way, just loosen them.
1C - After the two top bolts have been removed and the two lower screws have been loosened, you should now be able to slide the headlamp out. Again, I removed my bumper so I have no strategies for helping you get that headlamp out with the bumper still on other than just keep wiggling.
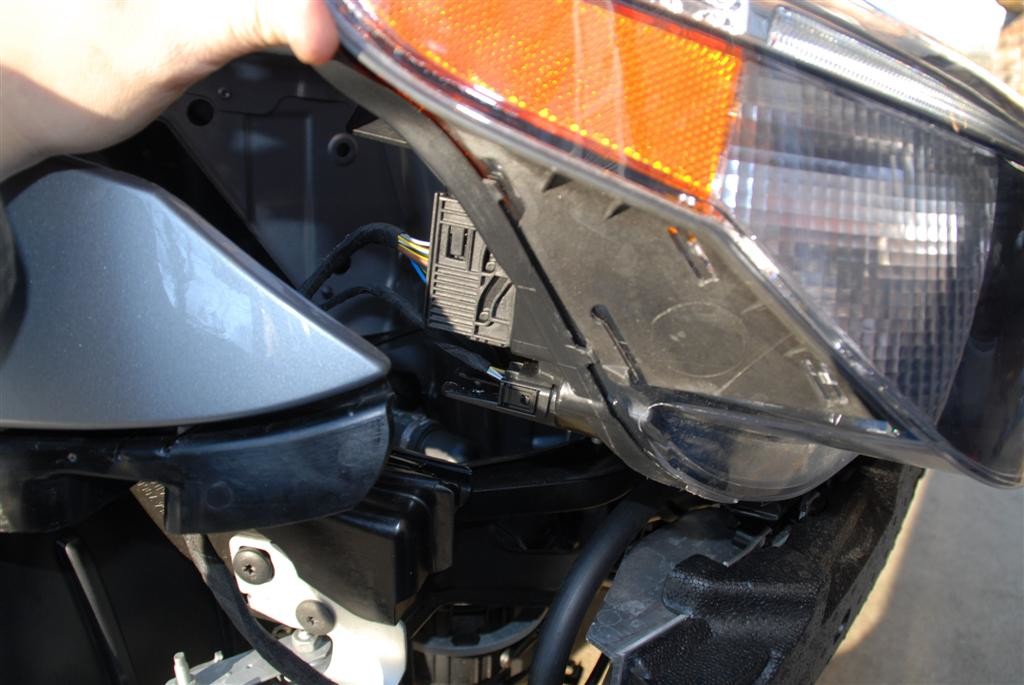
1D - the headlamp is now only attached by two power wires. Use a flat head driver to pop off the lower one first then just slide the bracket down for the top one and it will pop itself off. That's it and now you are free to move on to step two for removing the original bulbs.
2A - push down the plastic tabs. Push down from the side closest to the front of the headlamp as that part is stronger and less likely to break if you give it too much force.
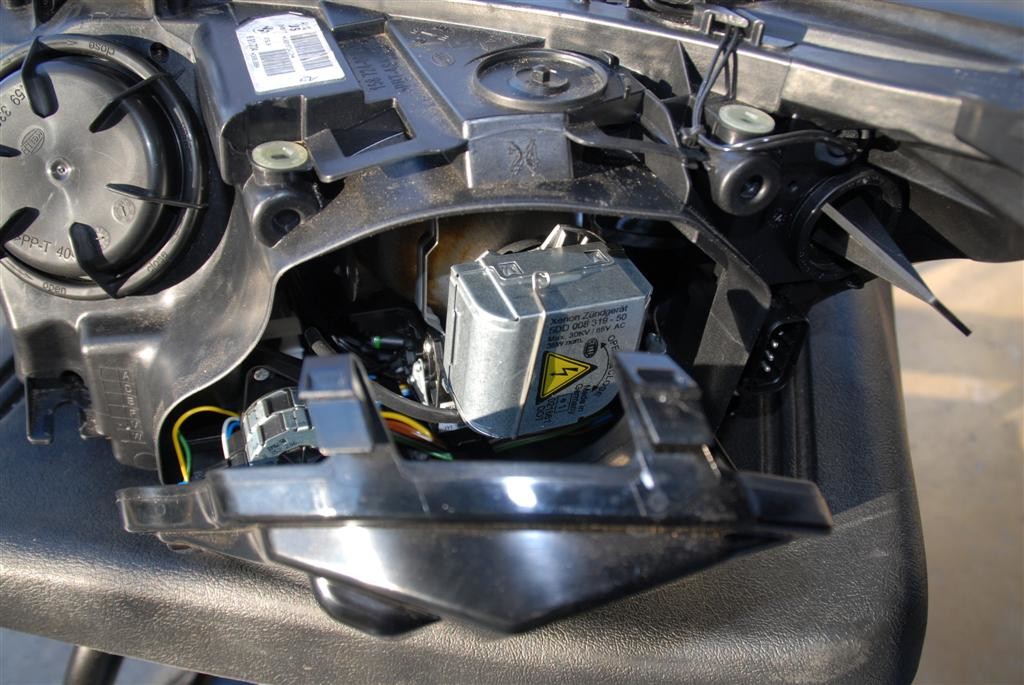
2B - remove the cover
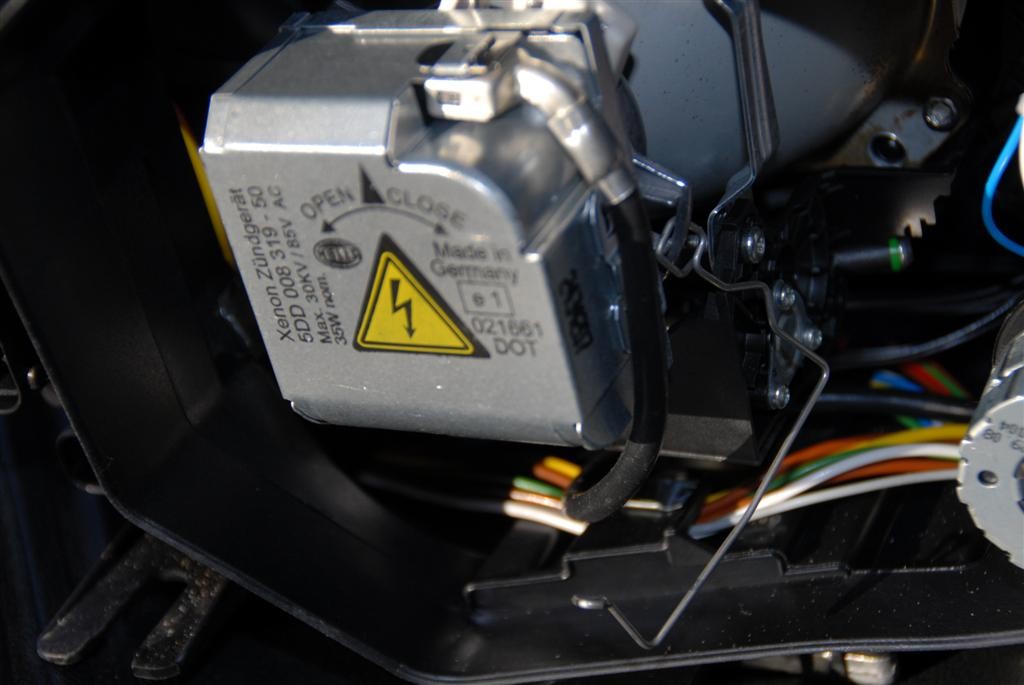
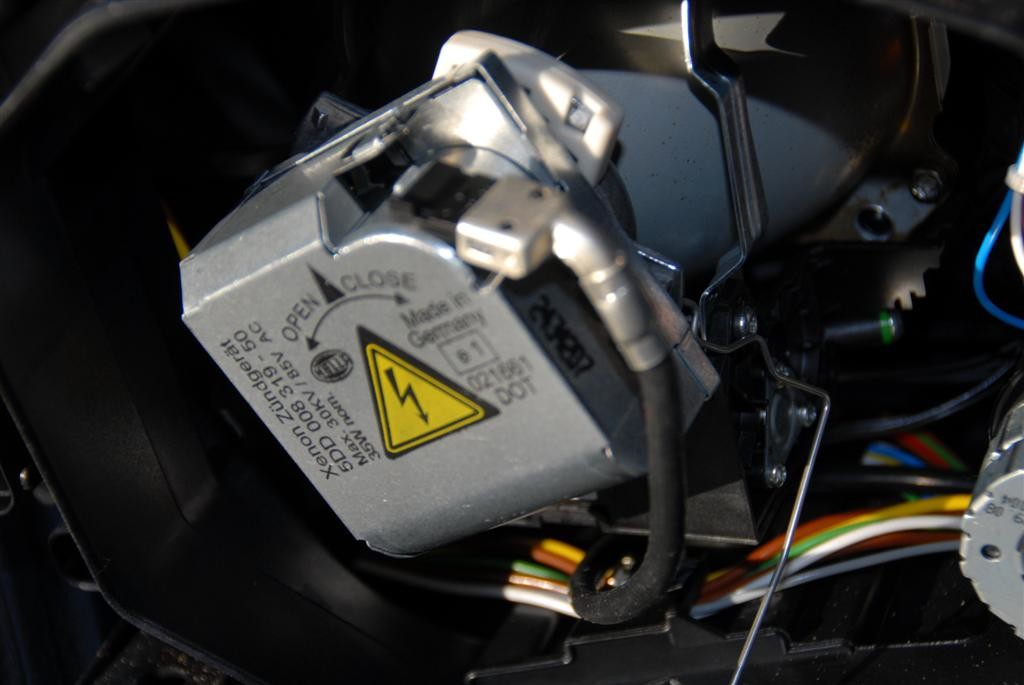
2C - pop off the metal retaining clip. Its sole function is to keep that black wire in place.
2D - twist to "open" and the black wire should come out of its socket. Now remove the metal bracket
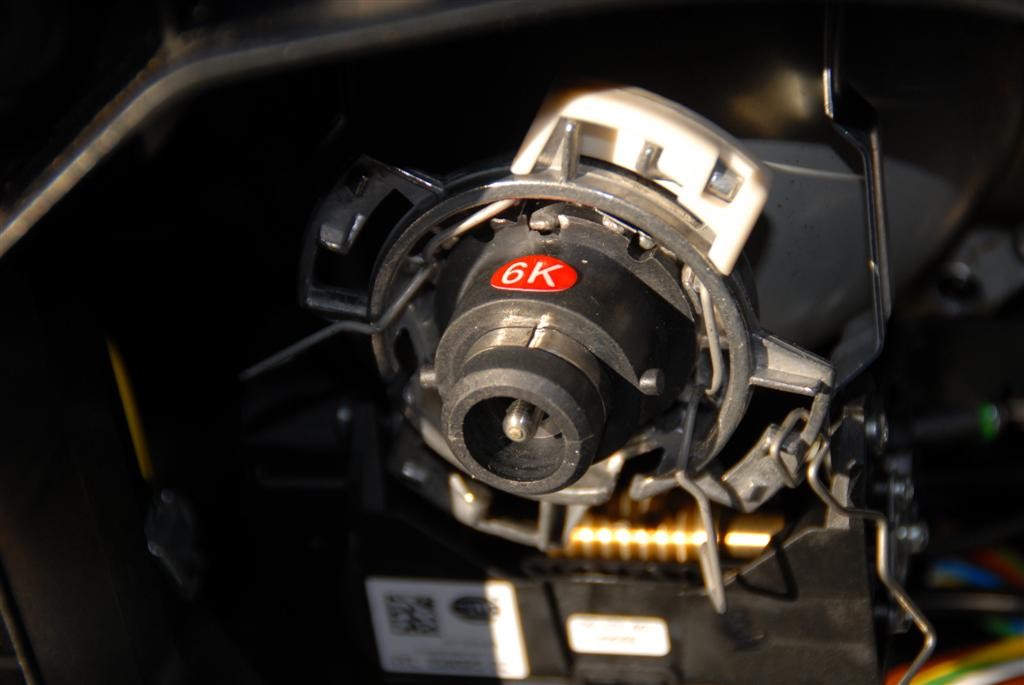
2E - squeeze the spring clips together and pull them out. Make sure you do not let the bulb fall out as now there is nothing holding it in there.
Thats it. Your done. Now put it all back together and post some pictures of your new Kolor.
Good DIY
Posted by Diggymart on 9/8/20 @ 1:22:35 PM