You must be logged in to rate content!
4 minute read

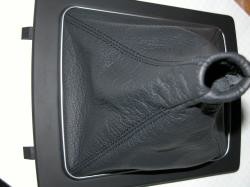
03-05 CADILLAC CTS-V INSTALLATION INSTRUCTIONS
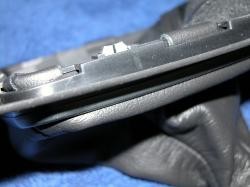
1. First, with both hands, or soft flat implement, push the boot frame forward toward the front of the car. While doing this, lift the rear of the frame and lift it out of the console. Let the boot assembly hang loose.
Next, with two hands, firmly grasp the shifter knob and pull straight up. Use some restraint and care, as it is hard to remove on some vehicles. If it does not come off, invert the boot to make the shifter stalk visible. Tap the shift handle from below with a small piece of wood and a hammer. Lock the stalk in a forward gear first.
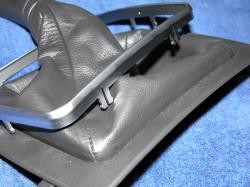
With the boot assembly off turn it upside down, you will see the tabs of an aluminum frame that holds the glued in boot, firm. With pliers or a similar tool, slightly squeeze the tabs inward and push them out at the same time. Work your way around the frame. DO NOT squeeze the tabs hard, they will break off.
2. Lift and remove the frame. Once this is done, you will also see the folded over tabs of the existing boot laced thru the plastic frame. By hand or with a small screw driver, peel these tabs back and remove the boot. Mark the front of this boot on the inside so that you can match the new boot. Its not symmetrical.
3. Next take the new boot and lace the tabs of the new boot thru the plastic frame. Tape off the old frame to protect it and use spray adhesive on the frame & tabs of the boot. When they get tacky, secure as before.
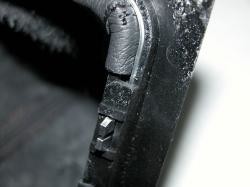
4. When this is done, reinstall the aluminum frame, tuck the boot as needed. Once the frame is installed correctly, slightly spread the tabs on the frame to keep it in place. Again, its fragile so be careful.
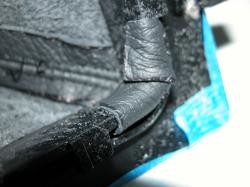
5. The old shift handle must be moved to the new boot. With the old boot inverted there is a two tab retainer that hold the boot to the knob. You have to squeeze the 2 tabs and remove the securing ring. Be careful not to break these parts, none are available separately. Install the shift handle on the new boot in the same way as it was installed on the old one.
Reinstall in the reversed order of installation.
ENJOY YOUR NEW LEATHER BOOTS!
Useful tip
You have installed a product made out of genuine leather. As you know, to maintain a leather product in good condition, you should take care of it. We suggest occasionally (every 4-6 week for example) applying some leather conditioner/UV protector to keep your leather from drying up in the sun and cracking.
Redline Automotive Accessories Corp. will not be held liable for any labor, incidental or consequential damages of any kind. Proceed at your own risk.