You must be logged in to rate content!
8 minute read

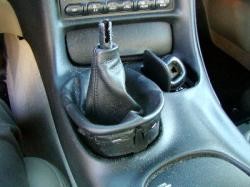
97-04 CORVETTE (C5) SHIFT BOOT INSTALLATION INSTRUCTIONS
1. Pry the plastic shift pattern piece from the top of the shift knob with a small screwdriver.
2. Using a regular set of vice grips remove the shift knob pin located underneath the plastic shift pattern you've just removed. It can be a bit tight to get the vice-grips to go in, so don't force them - find a smaller tool instead. The shift knob pin simply pulls out, however it may be necessary to use a hammer against the shoulder of the vice-grips to get it out. Wiggling and pulling up the vice-grips will help as well.
3. Remove the shift knob (turns counterclockwise).
4. The bottom of the shift boot is attached to an oval-shaped plastic ring. The ring is elastic and you can simply pull it out. To do that, pull on the shift boot towards the shift lever and part of the ring will come out. Do the same around the circumference of the ring to get the whole boot out.
5. Take the boot off the shaft completely.
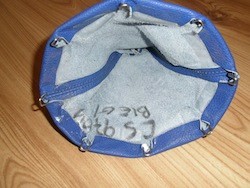
6. The stock shift boot is attached to the ring by staples and some glue. Remove the stamples and pull the old boot off the ring. Clean any residue.
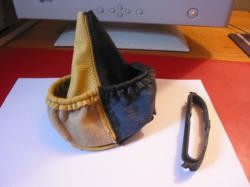
7. Attach the new shift boot to the plastic ring by tucking the exposed leather flap into each cutout behind a corresponding tooth on the plastic ring. Line up the shift boot seam to the center plastic clip on each side of the shift boot ring. Glue the leather to the plastic ring and allow it to dry.
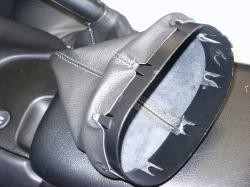
If you are installing your boor with a replacement RedlineGoods metal bracket, instead of glueing the boot to the plastic ring, fold the boot around the bracket as shown here. Duct tape will do and will hold up just fine. Alternatively use glue if you prefer.
8. Remove the top trim piece from the stock boot and install it into the new one (it's really obvious). Alternatively, you can replace it with a zip-tie: turn the boot inside-out, slide it onto the shifter thin (top) end first, attach with a zip-tie.
9. Reverse steps above to reinstall: first push the plastic ring with the new boot back in, then reinstall the shift knob, the pin and the shift pattern.
1. Convertible owners only. Remove the waterfall. There are 4 size 15 torx screws: 2 along the top, one on either side. Pull the waterfall directly up.

2. Open the armrest cover and pry off the two oval-shaped covers located towards the rear.
Use a small screwdriver, then remove the two 10mm nuts located below the covers.
3. Pry out the trim plate next to the armrest cover (the one with the A/H button and other indicators, year dependant). Pull it up starting from the armrest side. Might need a small screwdriver to pry it out, but we did it just fine with bare hands.
4. Disconnect all the electrical plugs underneath it.
5. Remove the 2 exposed 10mm nuts. Remove the connection to accessory power.
6. There is still an electrical plug you need to remove. Lift the console up and back slightly and disconnect the plug. Remove the console completely.
7. Open the ash-tray cover and remove the ash tray. Remove the two size 15 torx screws.
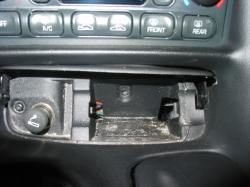
8. Remove the little trim piece next to the ignition key (pry it off with a small screwdriver from below).
9. Remove the 15mm torx screw.
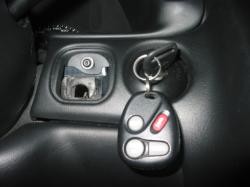
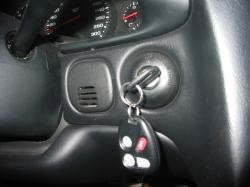
10. Remove the key from the ignition (if there's still one) and remove the center console. It will simply slide towards the rear of the car. Move it several inches first and remove the cigarette lighter connection that will be exposed now.
In a manual car, put the gear into 2,4 or 6 to make it easier. In an automatic, put the key to on (NOT START) and switch to low gear. After removing the console, switch back to park and remove the key.
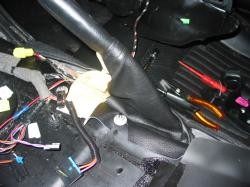
11. Remove the two 10mm nuts holding the ebrake down. Remove the handbrake boot.
12. Install the new ebrake boot instead of the old one. Do not mind the metal frame embedded in the old boot, you will not need it and it will look just as good.
13. Reinstall the center console in the reverse order of removing it. UNLESS you are installing an automatic shift boot, in that case proceed withour reinstalling it.
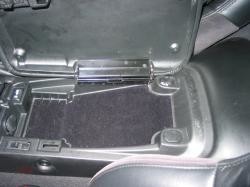
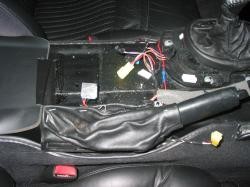
1. If you haven't done so already, remove the center console by following steps for installing the ebrake boot (1-10 inclusive).
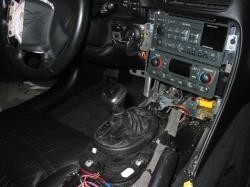
2. This is what your car should look like at this point.
3. Remove the staple that holds the stock shift knob in place (bottom of the shift knob facing the front of the car). Remove the shift knob (simply pull it off).
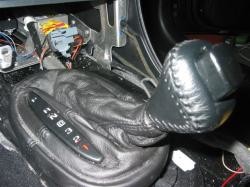
4. Remove the shift boot. Simply pull it off the frame by stretching the elastic. While doing so, you will notice the boot is still held down by the plastic frame which surrounds the gear display panel. Do not use force and do not pull on the boot just yet. 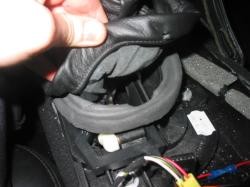
5. The plastic frame in question has two tabs at the ends of it's longer side. The tabs are held behind two small teeth. Use small screwdrivers to widen the teeth on one side and pull the tab up. You will notice the second tab will just slide away from the teeth that are holding it as you remove the boot.
6. Remove the shift boot completely (you will need to cut off the factory zip-tie holding the top of it to the shift lever) and remove the small plastic frame from it. Now comes the hard part. You need to glue the frame ito the new boot. It's best achieved by using "Automotive GOOP" or any similar glue (epoxy-based) AND by turning the boot inside-out partly as this picture suggests.
TAKE YOUR TIME! First make sure you understand which way does the frame go into the boot correctly, so that you don't have to do it twice. Make sure the leather is flush against the frame and even with it's edges. Start on one side, glue a bit and let it dry. Then move to the next section of the frame.
7. Reinstallation is the reverse order of removal. Almost. :) First mount the top of the boot with a zip-tie (you will need to turn the boot inside-out and slide in onto the lever top-first), then mount the bottom (first the plastic frame around the display indicator and into the tabs, then the elastic. Once it look like on this picture, reinstall the shift knob and the retainer staple. Then reverse the steps of removing the center console described in installing the e-brake boot (above) to reinstall the center tunnel.
