You must be logged in to rate content!
7 minute read
C5 Metra XSVI-2004 Pioneer MVH-P8200BT - Completed how-to- [now with pics]
Compliments of jcgunn @ corvetteforum.com
5-22-2010
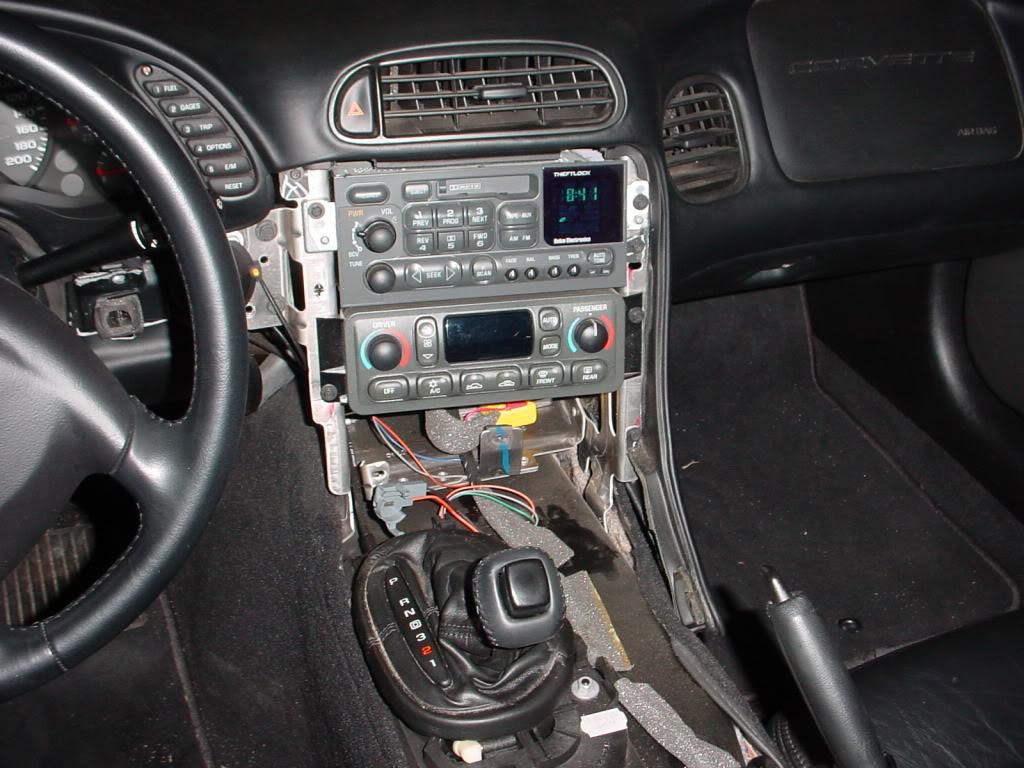
I just finished installing a single DIN Pioneer MVH-P8200BT with the Metra XSVI-2004 adaptor kit. I used a Maptech bezel.
BLUF= the install was very easy It was truly a plug-and-play setup. I retained all of the original Bose speakers, amps, subs, wires and factory connectors. I did not have to cut/splice or solder a single wire in the car. Everything powered up as advertised the first time and it sounds great. RAP still works. The car is a 2003 Vert. [NOTE 1]. Here are the details:
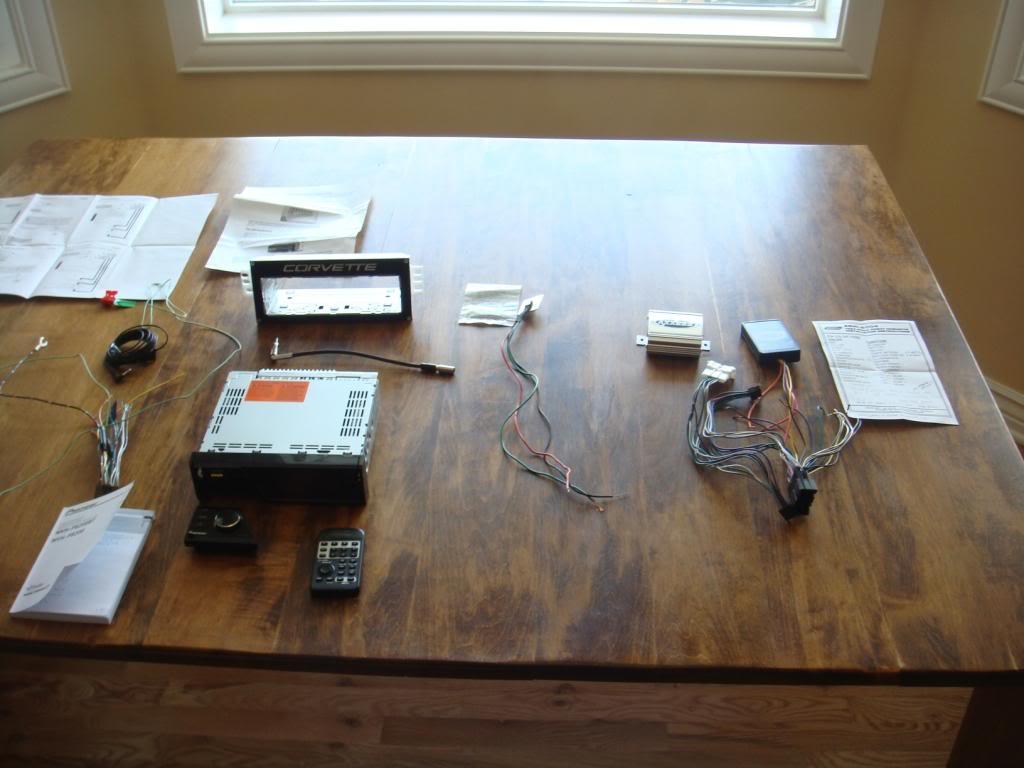
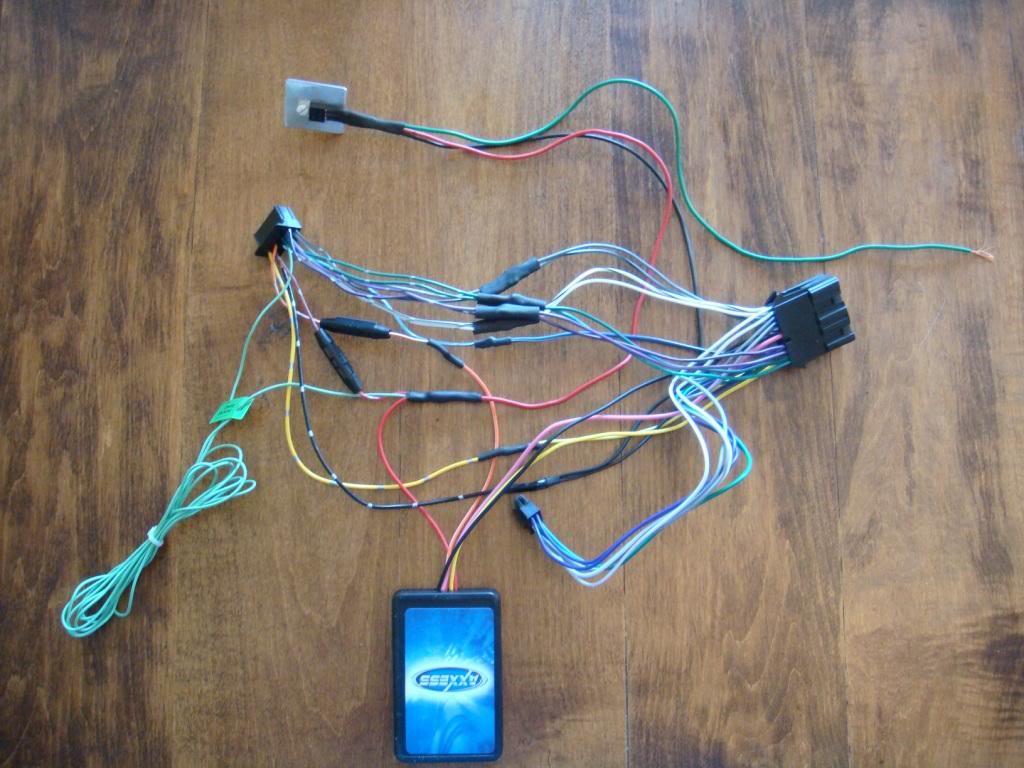
1. Connect the Metra Harness to the Pioneer Harness. The Metra directions are sparse but the EIA color codes match PERFECTLY to the pioneer wires. These are the wires you connect: a. 8 speaker wires (colors matched exactly), b. Red to Red (accessory power) c. Yellow to Yellow (battery/constant power) d. Black to Black (ground) e. Orange to Orange/White (illumination) f. Blue/White to Blue/White (amp turn on/remote on) I used solder connections and double heat shrink. All this was done on the work bench.
2. Fit the mounting sleeve to the Maptech bezel. This took a little more time than I expected as I had to remove 1/16Â top and bottom and about 1/8Â on each side. In the end the fit was tight/perfect. Bend the appropriate tabs on the sleeve to secure it.
3. Disconnect the negative cable from the battery
4. Remove the waterfall, center console, driver side knee panel and radio bezel IAW the previously posted sticky.
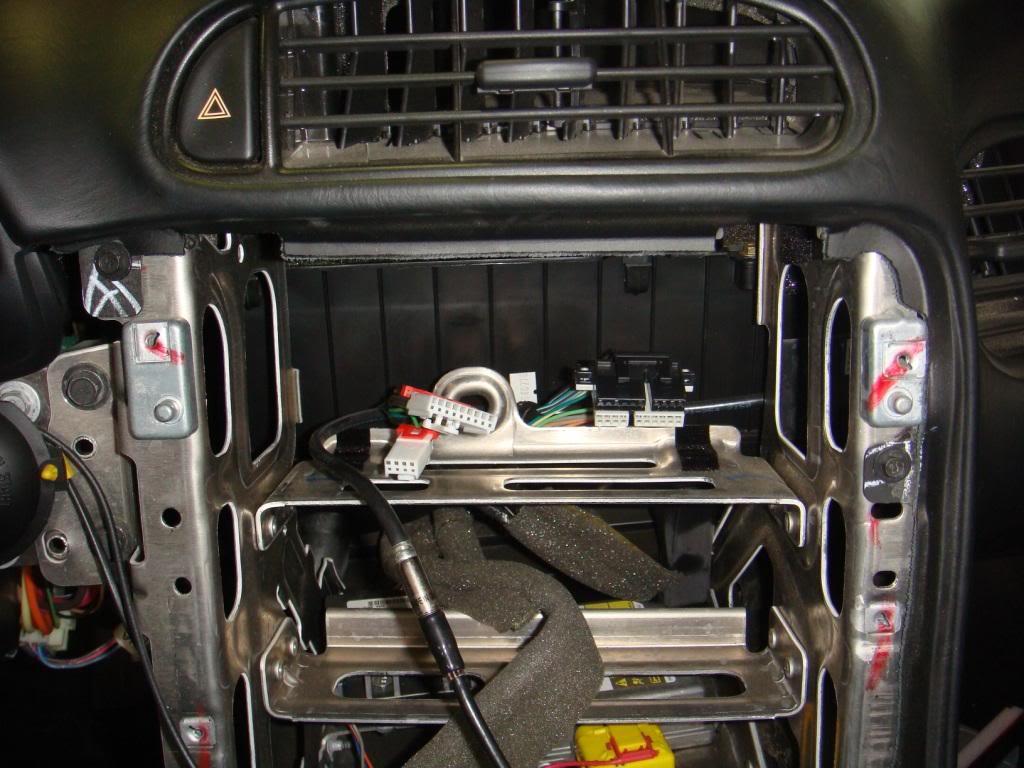
5. Unplug and remove the stock H/U and place it in your recycle bin!
6. Unplug and remove the HVAC and put it on you workbench. (I did the dim HVAC fix IAW the sticky at this time worked like a champ and only took ten minutes)
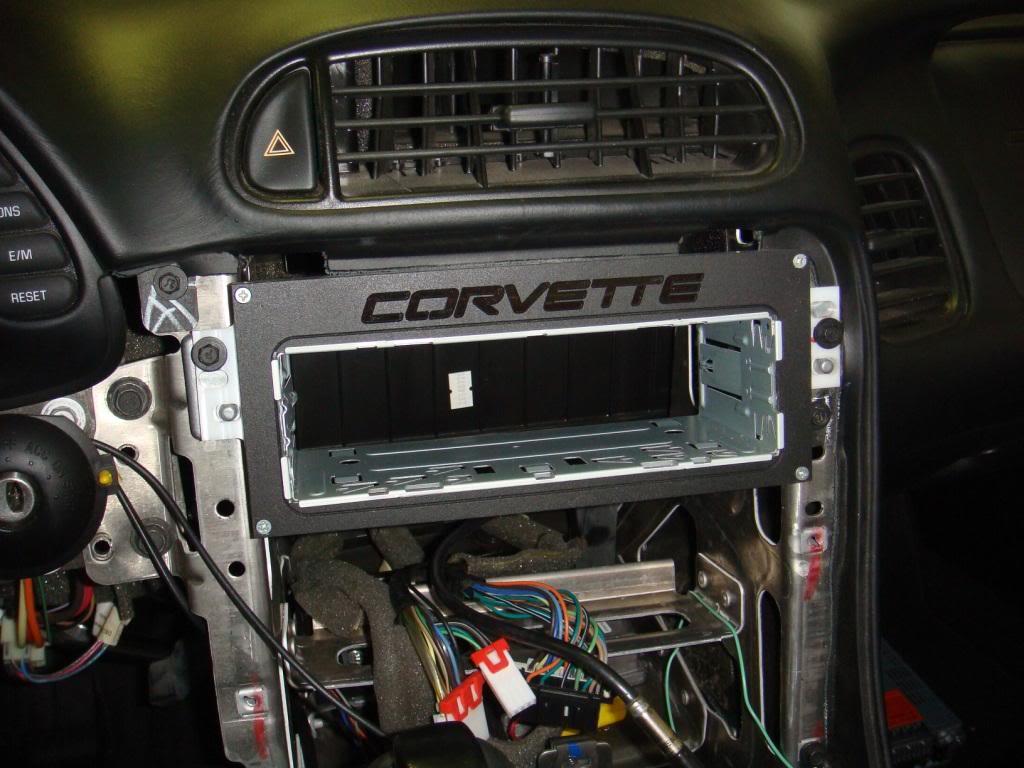
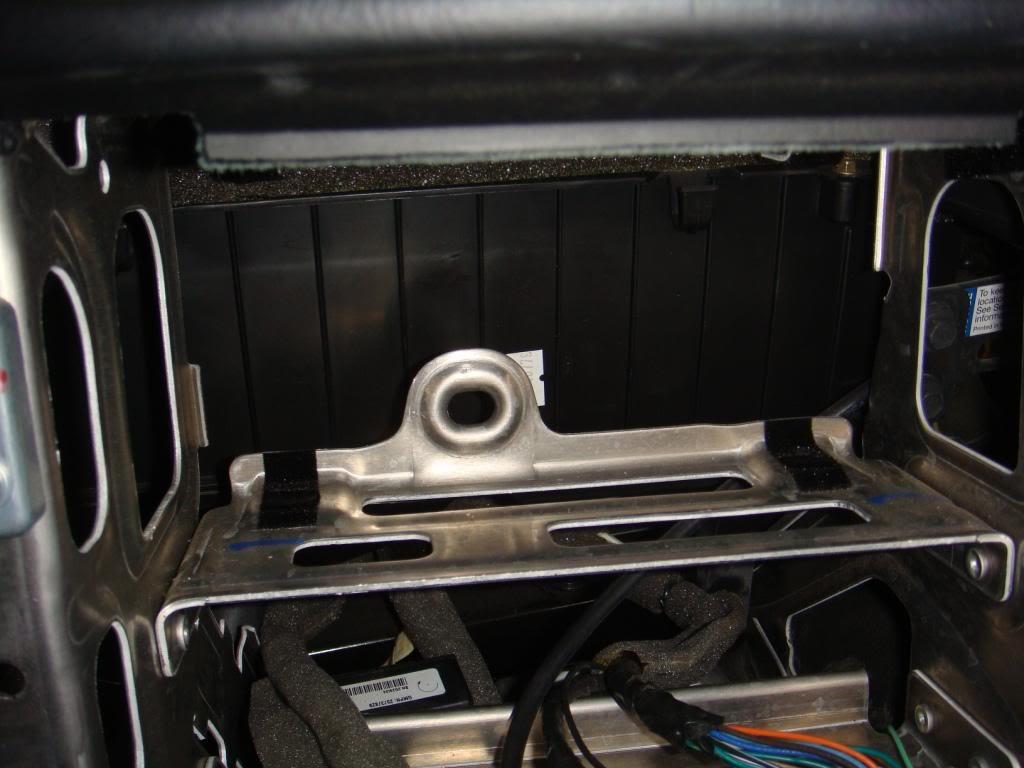
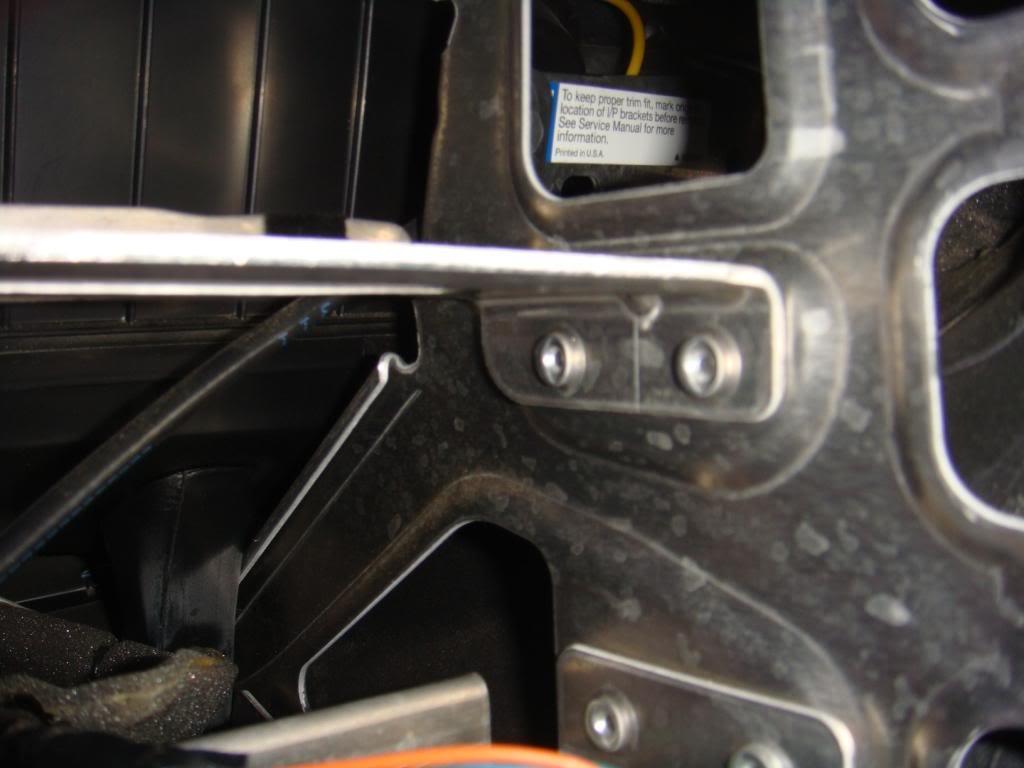
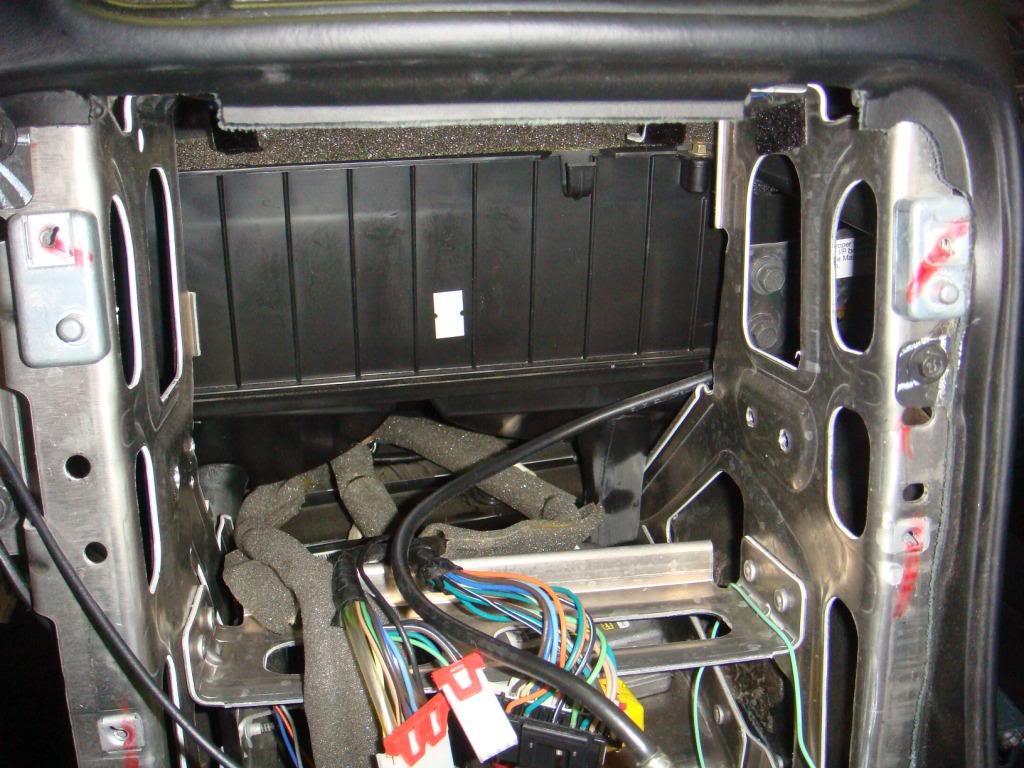
7. Next you will have to remove the stock radio bracket (the one the radio sits on). I used a 90 degree drill to remove the four rivets. Make sure to stuff some shop towels in the area and use a vacuum while drilling to catch the metal shavings.
8. Test the system: plug the Metra harness to stock connectors C1, C2 and C4 (they only fit one way, so there is no way to screw this up) [NOTE 2]
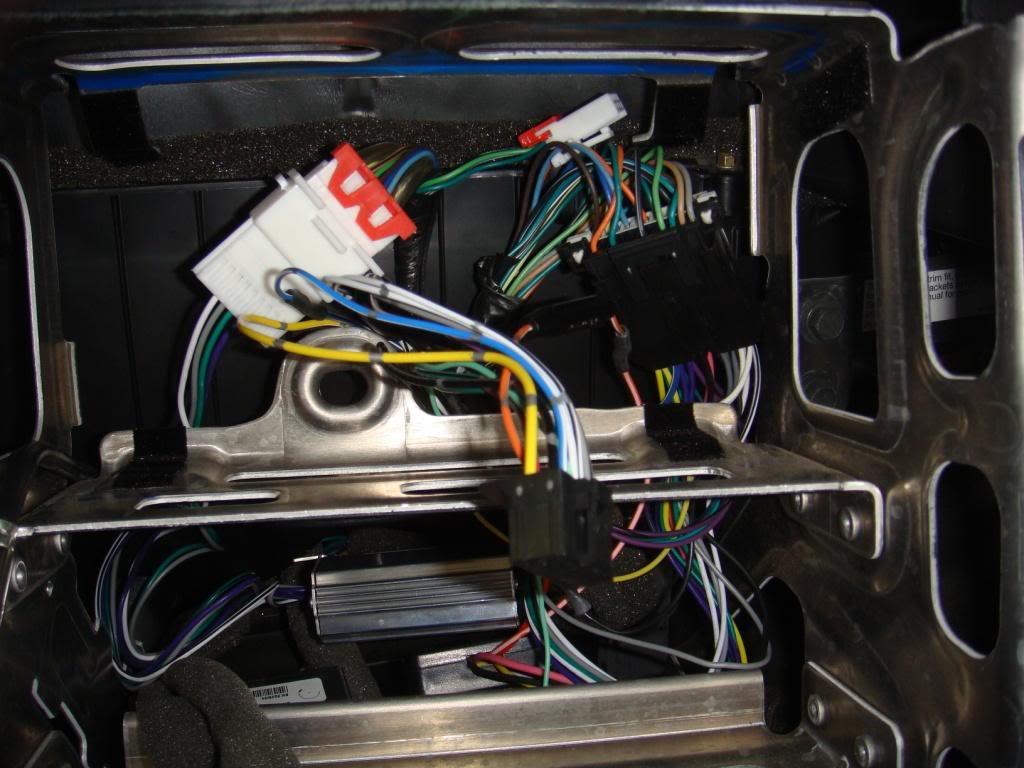
9. Plug the other ends of the Metra Harness into the silver Metra box and the new Pioneer H/U.
10. Reconnect the battery. Turn the key ON for 30 seconds and then OFF to initialize the XSVI.
11. Turn the key to ACC and turn on the radio. Check the functions of the H/U. Try various volume settings on AM/FM/USB/SD card and see how it sounds. If you need to adjust the XSVI box to get more/less from the Woofers now is the time (I did not have to adjust at all and just used the default settings)
12. If everything is working, turn the key off and unplug the radio.
13. Next you need to tuck the black and silver boxes behind where the HVAC sits. There is plenty of room and you can use a couple of zip ties to secure them. Make sure air can move around the silver box. If you are using an optional iPod cable, Satellite or HD radio receiver now is the time to place them behind the HVAC and run the cables/antenna connectors.
14. Use the supplied bracket and double-sided tape to mount the microphone on top of the steering column. Tuck the wire on top of the steering column, around the top of the ignition switch and thru the radio bracket.
15. Bolt the Maptech bezel in the using the stock screws/location.
16. Pull the H/U connector AND microphone wire thru the bezel from back to front.
17. Reconnect and reattach the HVAC unit—double check that the Metra boxes are where you want them and that there is enough play in the H/U cable.
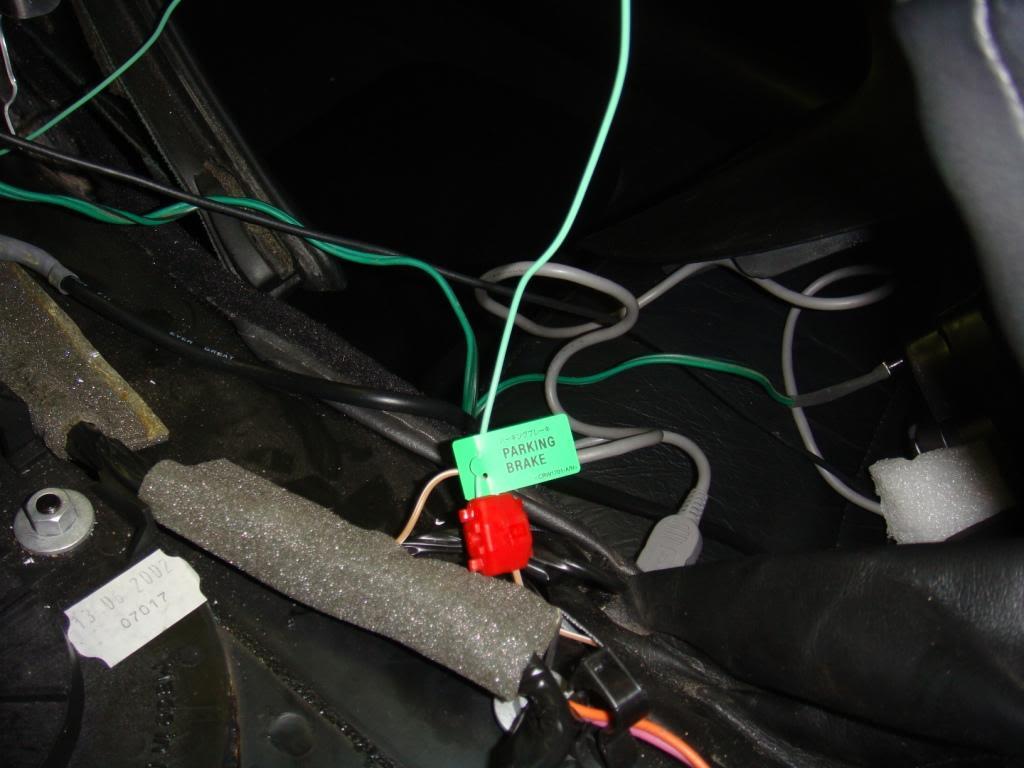
18. Run the long light green wire from the H/U thru the bezel from front to back. Route this wire behind the HVAC and thru the center console area to the parking brake.
19. Slide the H/U into the bezel until the mounting tabs on the sleeve click and secure it. Make sure not to pinch and wires or unplug the microphone cable.
20. Use the supplied connector to clip the light green wire to the tan/white wire from the parking brake switch. (I shortened the wire and repositioned the wire clip)
21. Turn the key to ON, power up the radio and make sure everything still works. Now is the time to check video playback. Remember, the lawyers at Pioneer have designed the thing such that you have to double clutch the parking brake to enable video mode. [NOTE 3]
22. Replace the center console, knee panel, stock bezel and waterfall.
23. Prepare to enjoy your new system sorry no cassette deck!
NOTE 1: as guys on the forum helped me figure out, the Verts power antenna does not need a 5V source to power the amp. If you have a Coupe, you may have to supply 5V to the pink wire on the driver side pillar to get good reception.
NOTE 2: for you experts, the Metra harness pinout is: C1 pins 1, 2, 3, 4, 5, 8, 10. C2 pins 17, 18, 19, 20. C4 pins 9, 10, 11, 12, 13.
NOTE 3: if you hook the parking brake wire to a constant source, the radio will not turn OFF even with the key in your pocket and video will not work. You could probably use a constant 12V source and a small toggle switch tucked away somewhere to bypass the parking brake switch follow all local laws, codes, customs, practices and procedures and dont run with scissors.
6-17-2010
After two weeks I ended up needing about 1/6th of a turn on the 4 pots the silver Metra box to get the subs just right. Put slightly more in the rear speakers. Everything sounds/works great. Gotta love having 1000 songs on an SD card.
The 8200BT unit connects to the positive side of the parking brake circuit--from the manual:
"Light green, used to detect the on/off status of the parking brake. This lead must be connected to the power supply side of the parking brake switch"
The tan/white wire works as advertised. I added this note to my write-up because other guys had problems where they could not get video enabled H/U to turn OFF--this may be where they had problems