You must be logged in to rate content!
15 minute read
DIY: Foglight Brake Duct fabrication
Compliments of bowtiguy @ corvetteforum.com
5-2-2010
Well I got a little antsy a few weeks back and decided to move ahead with my foglite brake duct system to help keep my new planned AP Caliper; Performance AFX/Coleman rotor; Cobalt Pad braking system cool.
This kit had been in development by Quantum motorsports but had hit some snags and at the time I fabricated the following...it was not available.
I had several goals in developing this duct system..
1) I wanted a Foglight brake duct kit that would keep the brakes cool during track season feeding from a know high pressure area of the car
2) I wanted to be able to swap in my stock foglight assemblies at will ( A.K.A. return them to stock).
3) I also plan on running an MTI "chin spiler" with a self fabricated carbn fiber under-tray for improved aero in the near future. This would block off the " bottom feeder " design from GM. stay tuned for that post...
4) I wanted it to look nice when completed, as close to factory as possible.
5) I did NOT want to take any air away from the feed into the oil cooler, A/C condensor or Radiator
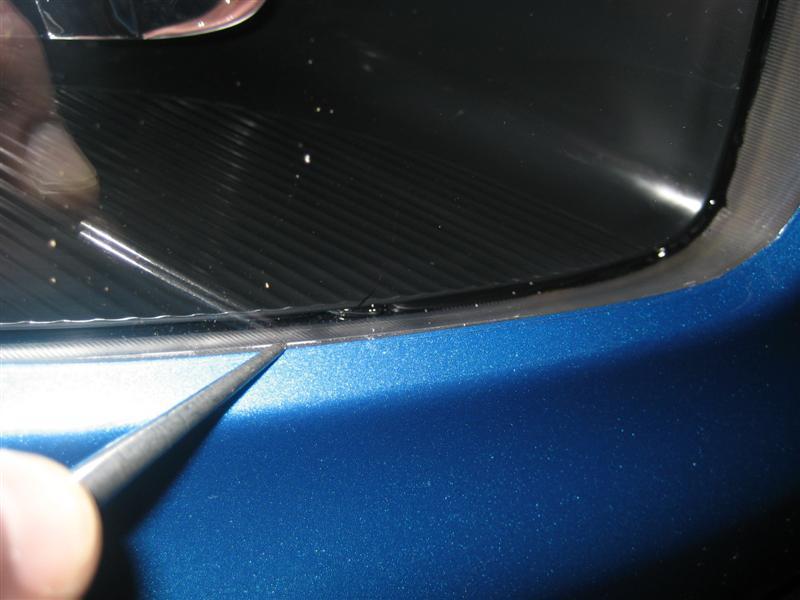
Step #1
Etch the surface of my stock foglite assemblies with a scratch awl so the center sections could be cut out upon their removal.
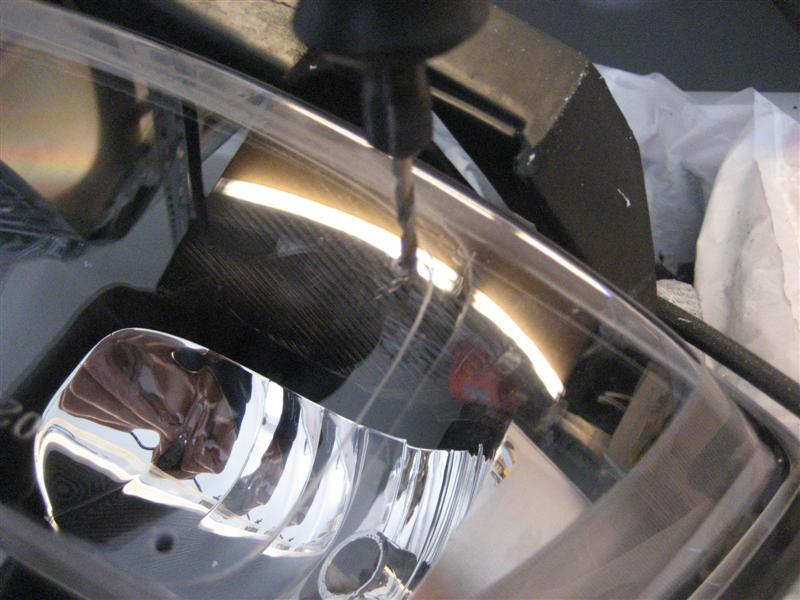
Step #2
Pre-drill the lens once the foglight assemblies were removed
Step #3
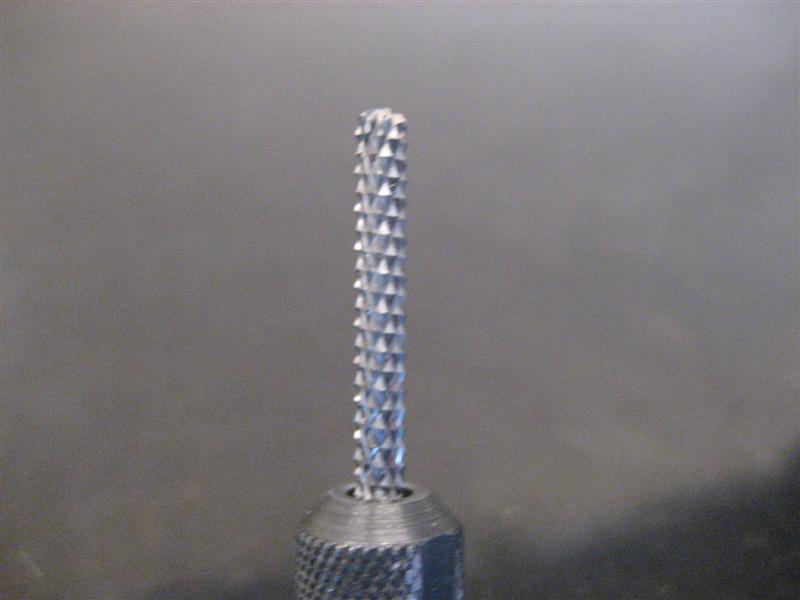
Use a tile "diamond burr" and a hand file to smooth out the lines of the new opening
Step #4
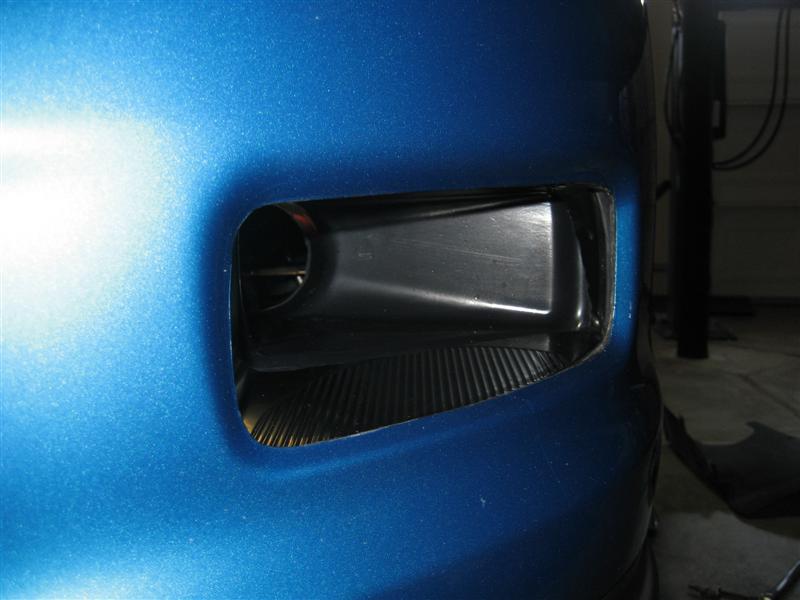
Mock-up and cut the adjustment portion of the foglight assembly off to make room for the hand formed NACA duct with 3" output

Step #5
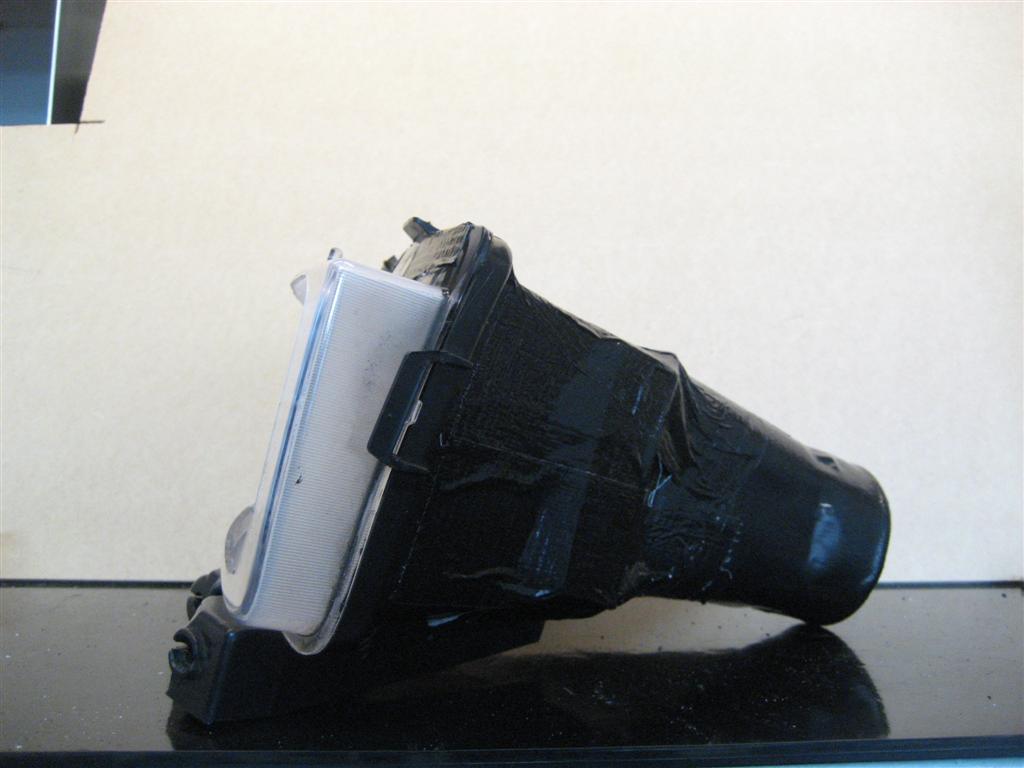
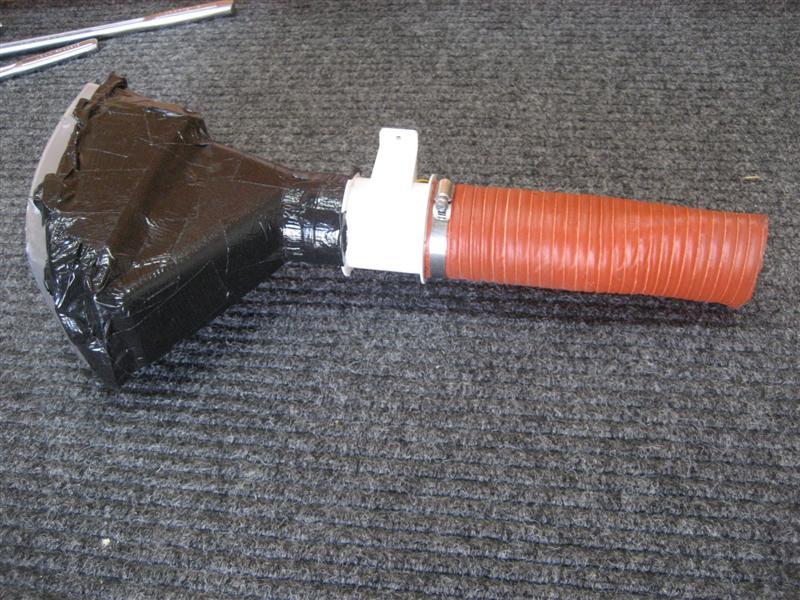
With the aid of a heat gun, some wood blocks, and a pair of gloves ( to protect my hands) I carefully cut the extra trim off the NACA duct and hand formed it around the modified fog-light assembly( sorry I was to focused at this stage to take pics before covering it up). I secured it in place using 2-part epoxy and sealed everything of with Black duct tape for a cleaner look and to insure no leaks.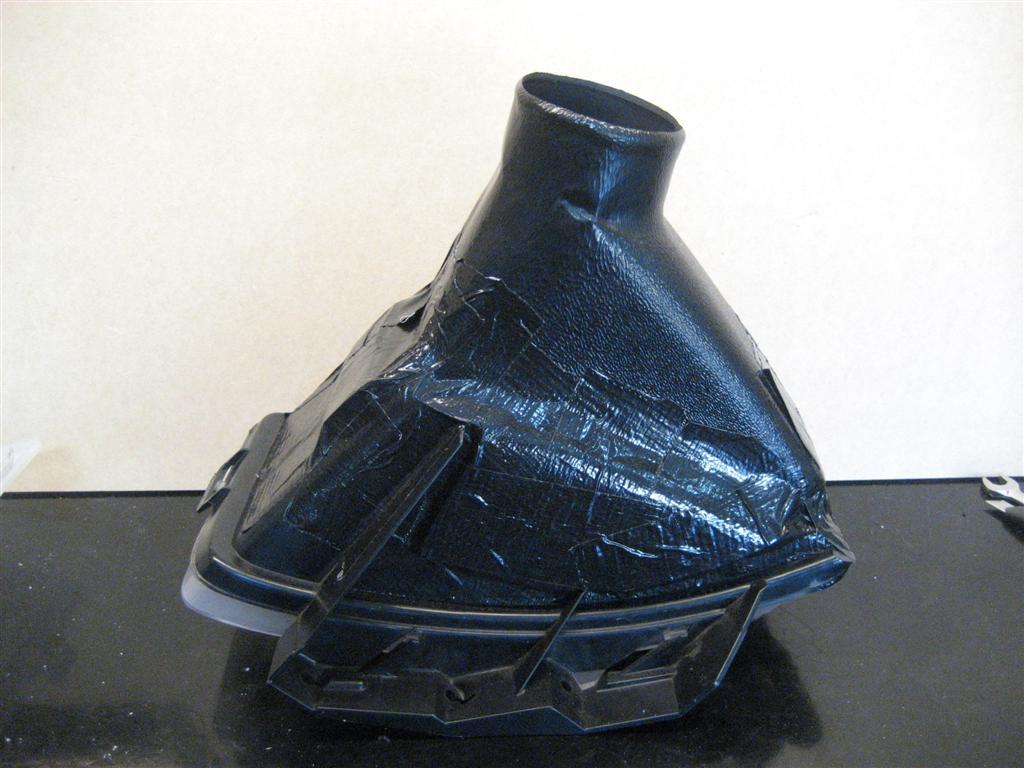
Step #6
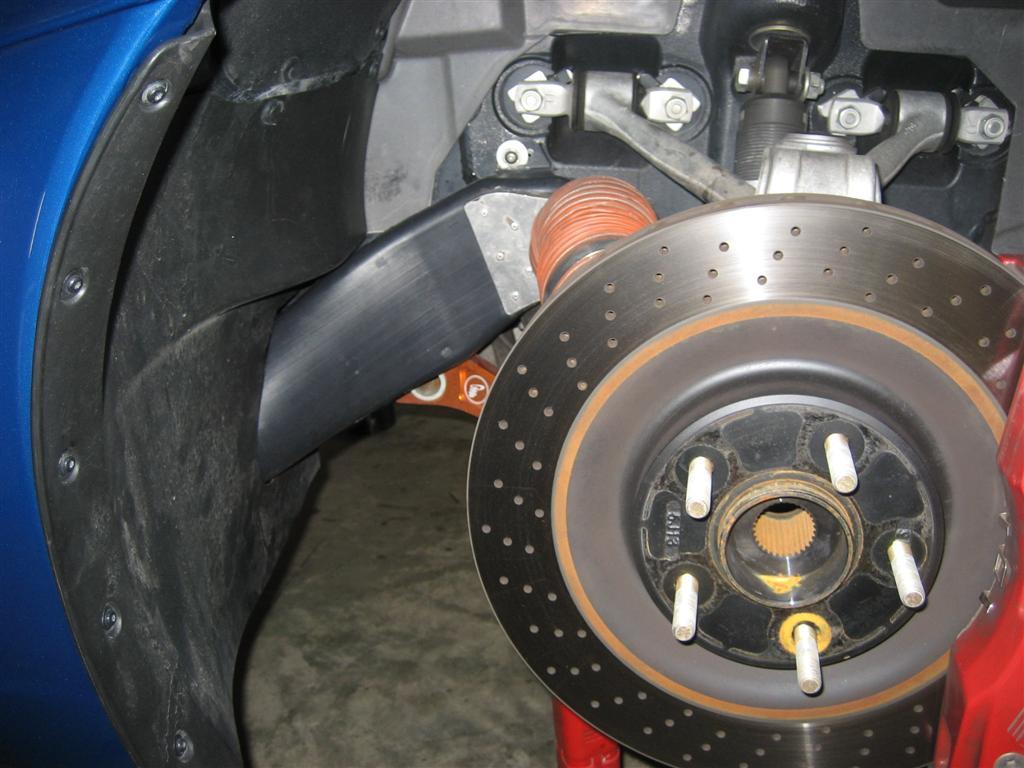
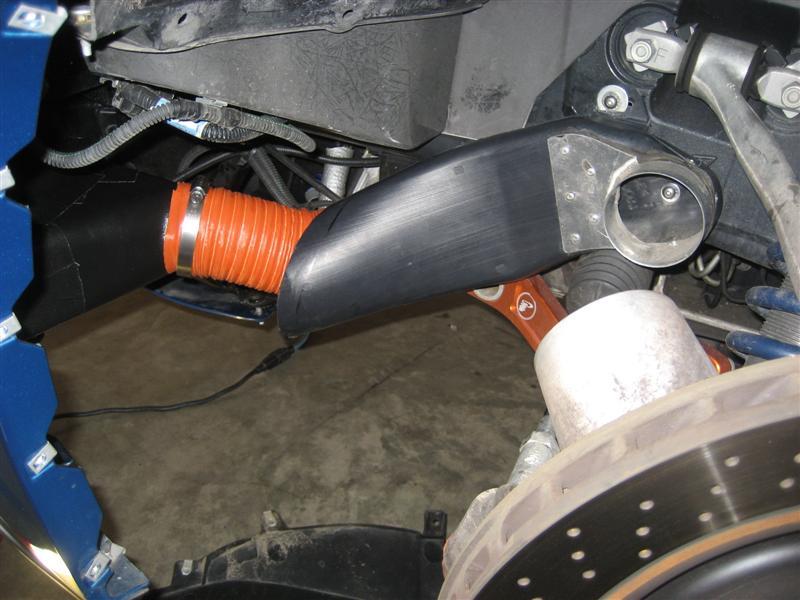
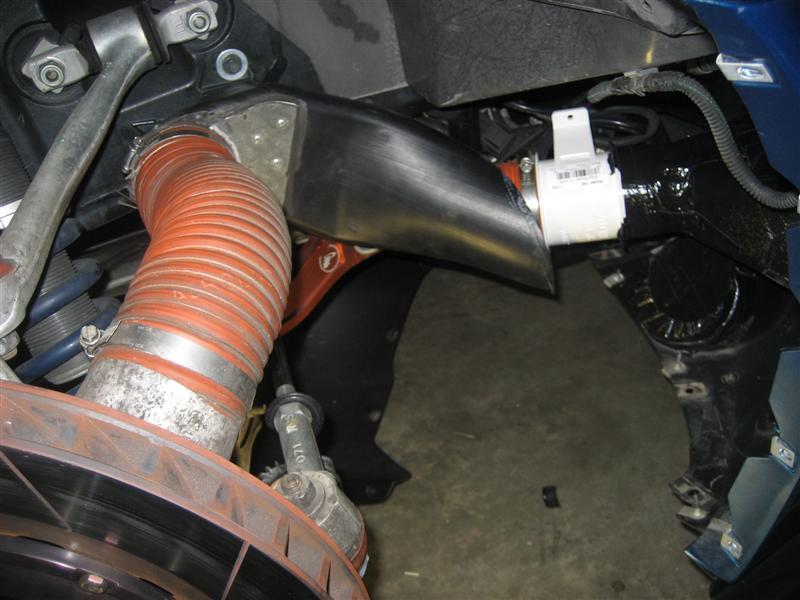
I marked the factory brake ducts as the extend "into" the front inner spalsh sheild. I cut them off approximately 1" into the front facia area and proceeded to run 3" silicone hose into that duct being carefull to conform the wire supported hose to fit as closely to the oval I.D. of the factory duct. ( I later sealed this off with black duct tape)
Step #7
from here, I just put everything back together as stock. with NO clearance issues because I had already modified my stock brake ducts mounting position to clear both my stock wheels and my wider CCW front race wheels and 295 tires.
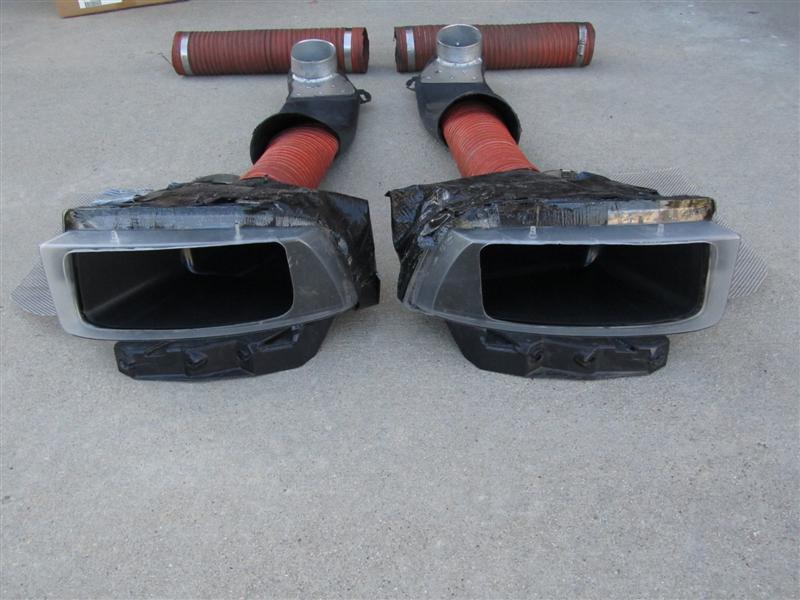
The Final Product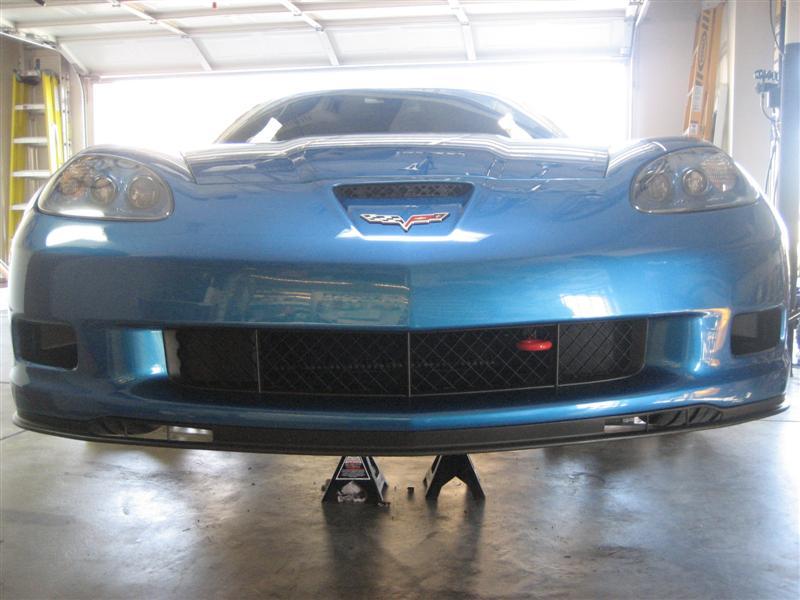

Did they work???
you bet! almost too well as I had a hard time getting the pads up to temp in low 40 degree weather as we hit the track in the morning at PPIR with NASA a couple of weekends ago.
- I had MORE brake than the GT3 porsche in our group
- I experienced NO fade running group 3 ( w/in .5 sec of fastest TT cars)
- I did NOT have to bleed the system , NOT even once!( castrol fluid)
- I ran (7) 35 minute sessions ( 4 of which pretty much all out)
I can not wait to try this set-up once the Temps get warmer, maybe I'll add fans next and control them with my foglite switch as Quantum had proposed. I hit 140-150 mph on the front straight at HighPlanesRaceway so I may not need that.


5-8-2010
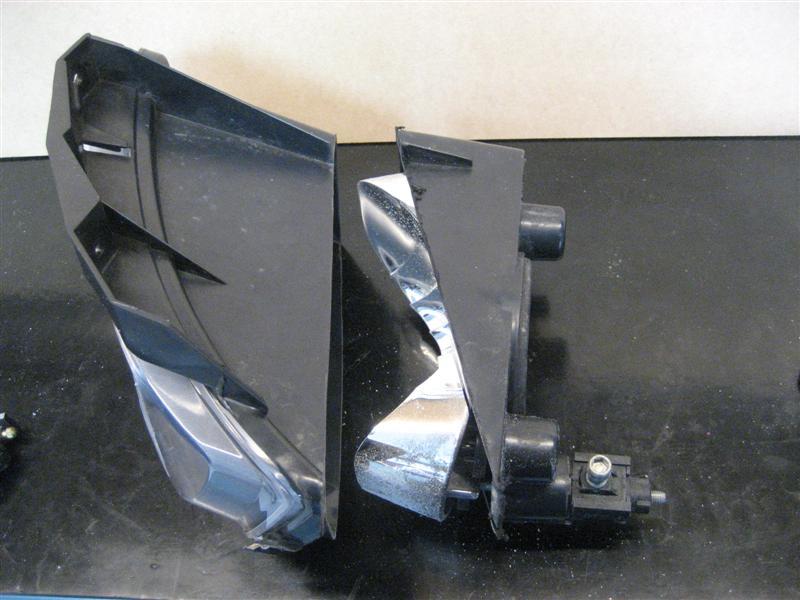
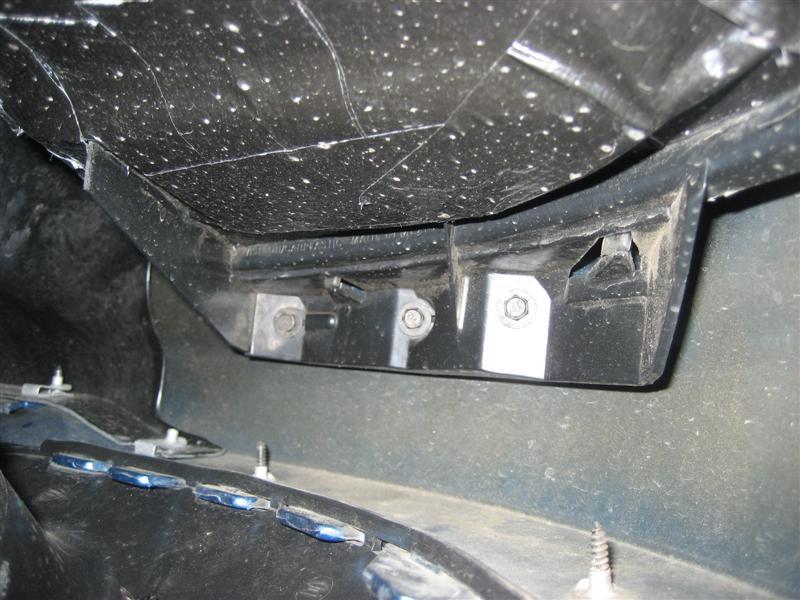
The top of the factory foglite is held in place by two tabs molded into the clear lens ( thats why you can not cut the entire thing off.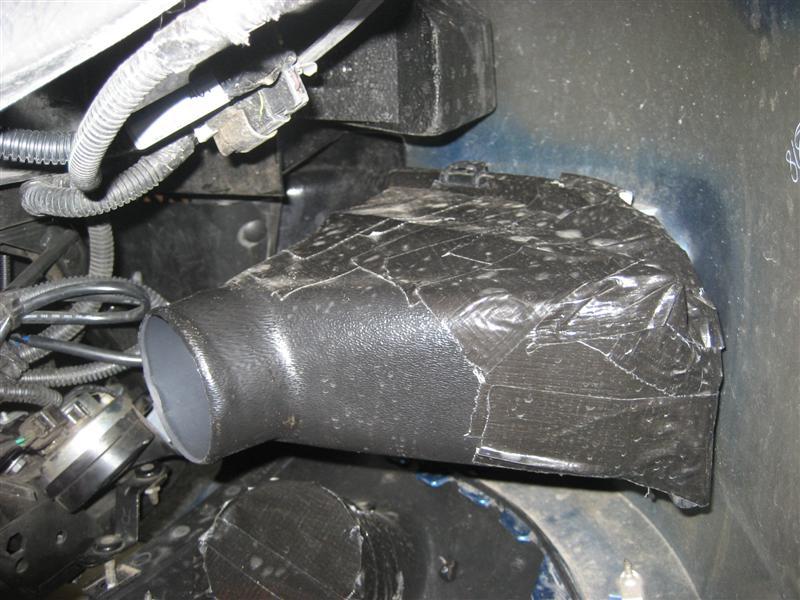
The Bottom is held in by 3 screws that are very short so as not to penetrate the outside of the facia. That would be....

This shots shows how everything is angles towards the factory bract ducting for a more ven flow and no "bending around corners"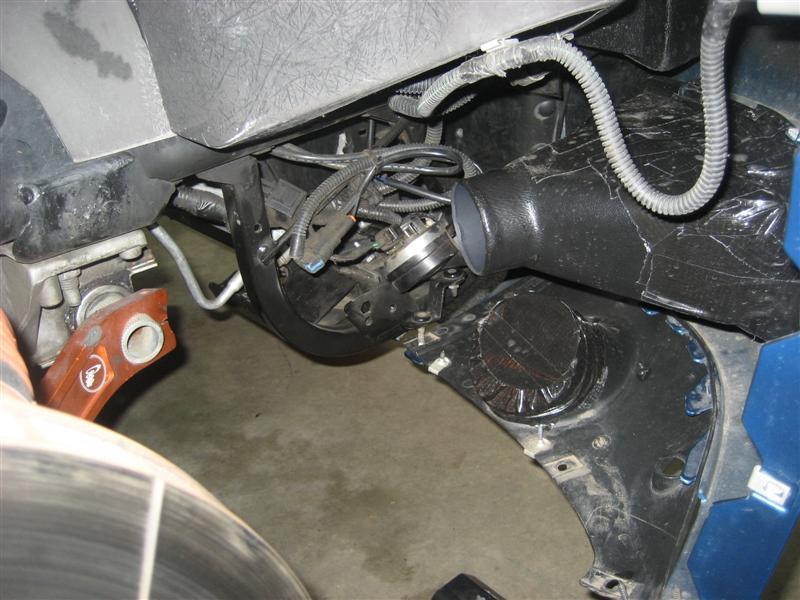
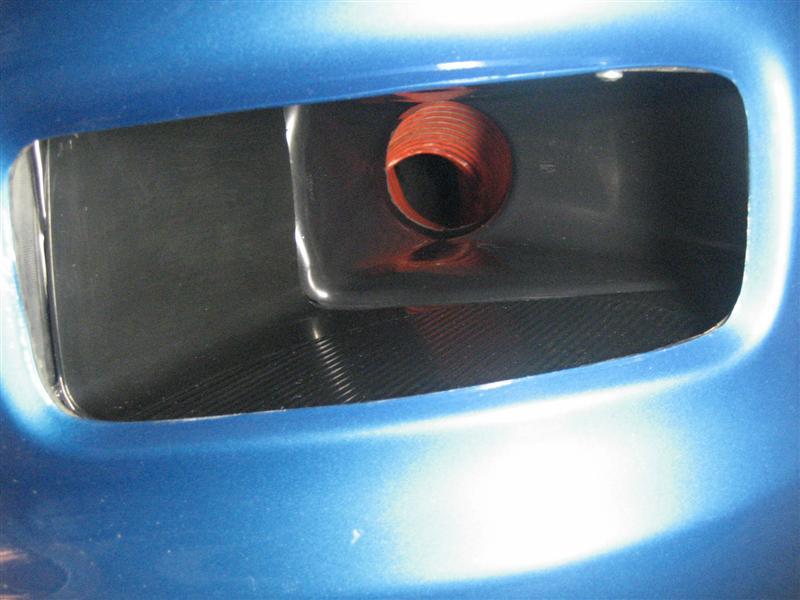
Finally, what the passenger side looks like from the outside. I gotta find some little black foam ***** to stuff into these when I'm not at the track..too much cooling on a DD basis. Guess my nearly 4 old won't mind a trip to Toys R us..we need more nerf gundarts anyhow.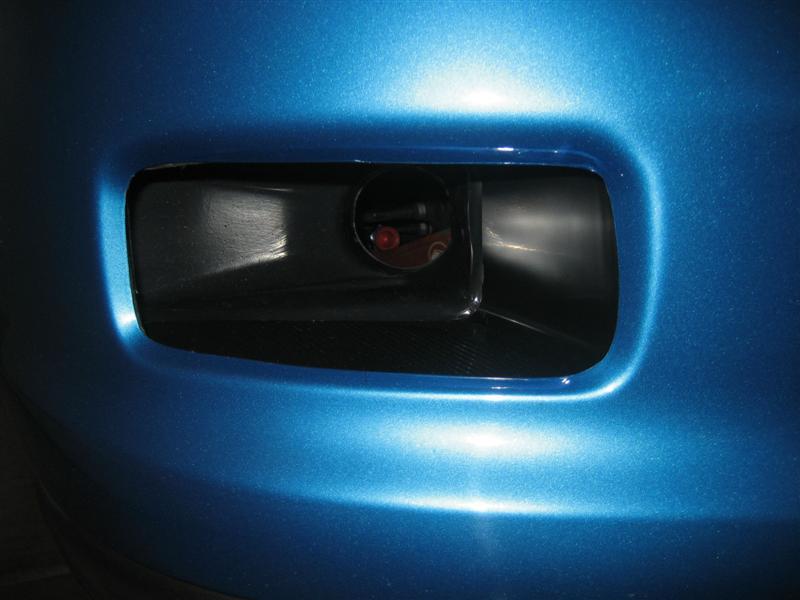


10-15-2010
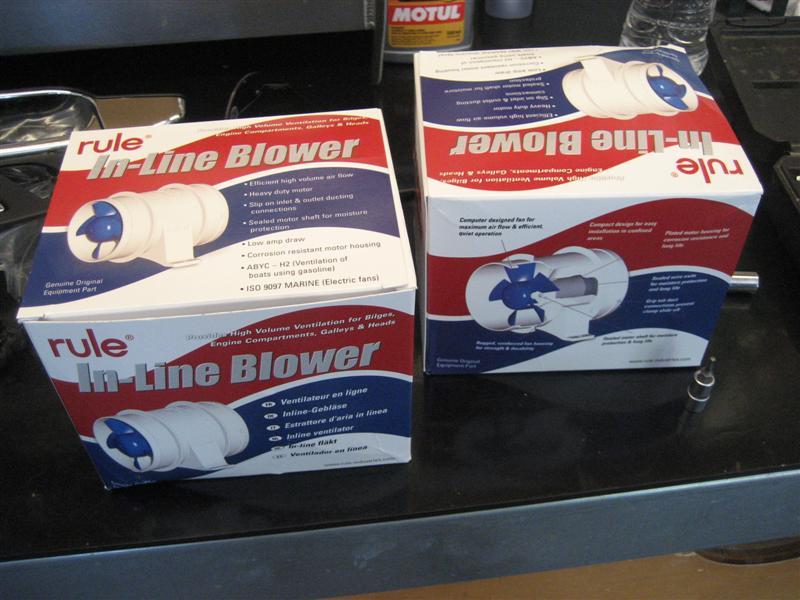
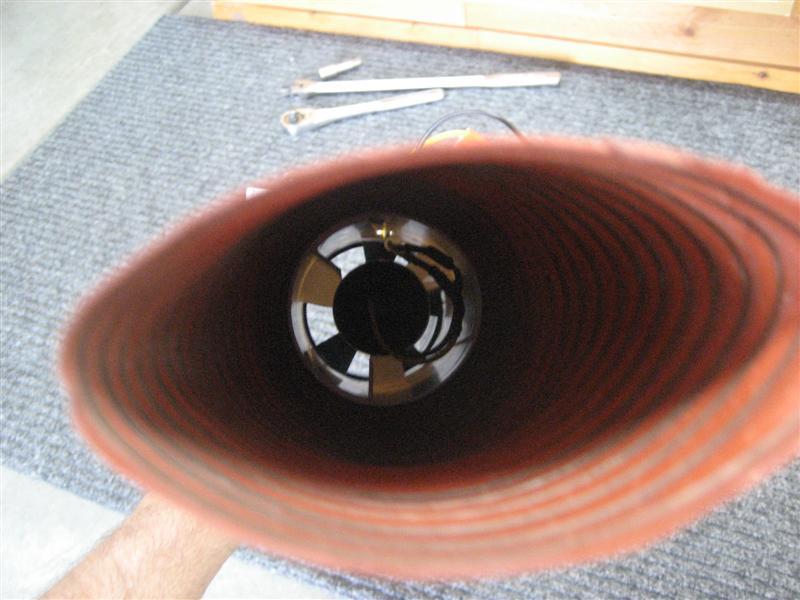
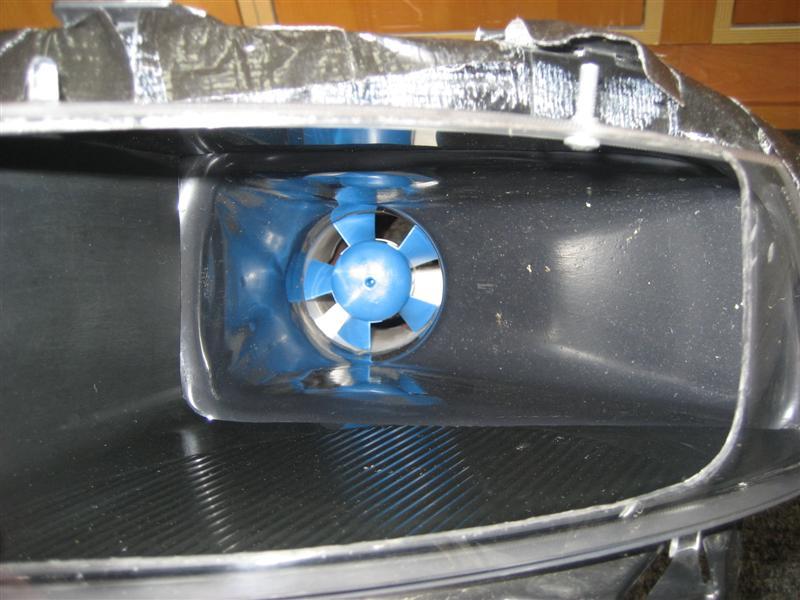
I installed these in-line cooling fans late last June, but never posted it up here o the forum. I ran it all season on track with ambient temps over 95. Pictures show it all.
I usually get 2-3 laps in to warm up my XR-2 pads on all 4 corners, then I reach over and turn my foglites on...bam! 145 CFM through a 3" hose for the entire track time regardless of speed.
They worked great. NEVER had ANY type of fade the rest of the season. I'm going to try and help out a vendor/member here on the forum get these integrated into his new mold foglite brake duct system as an upgrade!
Best part is, they come out and the foglites bolt right back in place and everything fits under the factory inner wheel well splash guards!
11-9-2010
There is a vendor here on the forum that will be releasing a completely moulded version of this duct system that is a direct fit, looks cleaner than my R&D set-up, and doesn't require cutting of fog lite assemblies.
I'll wait for him to anounce availability once he is happy with the final product.
I'm going to try and work with him to get the fan option in there for fellow hard core track guys!
This set-up WORKS!! I've run 95 dgree air temp in Colorado 45minutes all out at High Planes Raceway reaching top speeds of 155 on the front straight with no brake fade...which I could say the same about the tires..
It could, I never did the calculations to see how much CFM is moving through them at high speed. You could measure the foglite ( or stock)opening and calculate avg speed you would need to reach to find out how much CFM would travel through the system. then you could compare it to the fan output.
I run a dedicated MTI front splitter that I closed off underneath with carbon fiber sheeting, so that inlet was not an option for me, but MTI offers it as an upgrade to their system. Just too much $$$ for me.
The thing I like about the fans is I have a constant CFM going over them at all times, because I'm not going 150mph+ the entire track and we have several second gear turns after hard braking zones at HPR.
I had brake cooling issues with the stock inlet location and a dedicated spindle duct set-up from one of the vendors here on the forum. This was with running Coleman rotor/ Cobalt XR-2 pads from Performance AFX and Motul fluid from you Randy.
I fabricated the foglite ducts and switched to Castrol when I installed my AP claipers ( that take 20mm pads)...MUCH better, but I was able to turn the red paint on my AP CP5555 calipers to a nice burgandy color in one weekend with "slight" pedal fade at the end of longer sessions.
The extra pad thickness has helped from stock calipers but I think the foglite inlets have helped the most.
I now run 2 laps to get everything up to temp then hit the foglite switch to turn on the fans. The only thing that limits my track sessions time now is my concentration/bladder or tires.
For all those who PM's me. Daniel would be the Vendor I mentioned. I'm sure he will have a complete new post when everything is ready to ship.
I'll link to it on this one for him...
A product that is WAYYY overdue in my opinion.
11-22-2010
This summers aero mods included....
1) BPP rear (4 tip ) difusser
2) MTI front chin "spoiler" ( soon to be completed to full splitter for 2010-2011 seaon
3) removal of lower OEM piece
4) fog inlet brake duct system.
I can tell you that those mods made a HUGE difference in how the car felt at speed. 155 mph+ one hand down the back straight of HPR checking oil temps on the DIC as I pass vipers and GT3's.
I'm NOT a big fan of wings/rear "stick on" spoilers so I thought this package may fit my needs. After a "almost" a full season on it, I can't wait to hit PPIR turn one banking at 120+ the way the front of this car is settled down....most of which I think came from removing that lower OEM piece. It allows the air to travel freely under the car.
My original colemans and Cobalt pads put up a good fight, but with forced air cooling on them now I WILL run an entire season on one set of rotors ...and maybe pads too!
I taped mine off. ( they will be covered completely with a custom splitter extension in 2011) Combine this with the removal of the lower air dam and the air just flows right under the car. I have no wind tunel data to support it but with these mods and an MTI "chin spoiler" ( Not a splitter) the car was noticably more stable at speeds over 120mph. I could notice a change in the car starting at 60-70mph.
I added a BPP diffuser later in the year ( 4 tip version) and the car is almost perfect. I'll test these next year at PPIR with some high speed banking.
These cars are nice but you never know what you are missing until you try it out..
I did notice more stability with the above aero mods, I can't imagine the difference one of those crazy rear wings adds to the car.
Example: I used to brake before entering turn 1 at PPIR at 125-130mph...not anymore, I have more front downforce. As a result, high-speed turn initiation no longer has as big of a "pucker factor" in my car.
thats what I was talking about. at the very least the C6Z OEM UPPER assembly should be able to be retrofitted to base C6 cars. Jim dillion added fresh air pick-ups from the grill inlet to his system (although it is a C6Z) and said everything is working great with no cooling issues.
Here is another option for Base C6 guys...
http://forums.corvetteforum.com/c6-z...-new-look.html
7-7-2011
In the wide world of life, sometimes you have to take care of buisnes ( other than vettes) to allow you to play with your toys / toy projects.
In the meantime, My duct taped together ducts are working fine. When these finally become available, I'll retire my pieced together version.
5-6-2012
This kit is now for sale. The buyer of the had no interest in them. I also have a enough 3" silicone to install completely new hoses. I'll include that in the sale ( not pictured).
I'm going to list these for what Ihave into them. All you will need is some form of spindle duct. I'd recommend the Quantum kit as it does not require the removal of the spindle like my LG kit did.
"the kit" comes with everything pictured here PLUS enough new high temp 3" silicone hose to replace everything down the line as it wears. Once the inner wheel welll splash sheilds are in place, you'd never know it was there. Stainless screens included if thats the look you are going after.
since it looks like production of the finspeed kit is a ways off, this set-up will bolt right into place with no modificatiosn to the car and allow you to run 295's up front for $300 less.