You must be logged in to rate content!
3 minute read

95-99 AVENGER/SEBRING SHIFT BOOT INSTALLATION INSTRUCTIONS
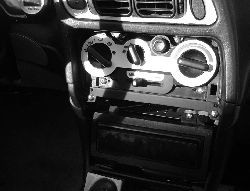
1. Begin by removing your shift knob by unscrewing it counterclockwise. Remove the trim piece that surrounds the HVAC and radio. It’s held on by 2 clips so a good tug will remove it.
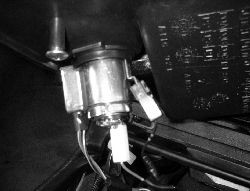
2. Now remove the center console. It too is held in by clips and can be removed by simply prying it up. There are 3 wires attached to the cigarette lighter, a positive wire, a negative wire and a light. Take note of how they attach so you know how they go back together. The power wires are held on by clips and the light just twists out .
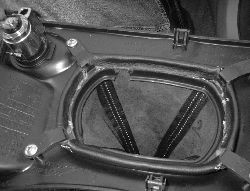
3. Now you can remove the center console. Turn it over, remove the 4 screws holding the shift boot in and take out your stock boot.
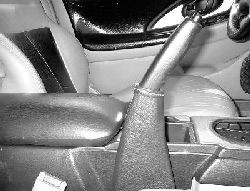
4. Remove your stock shift boot from the plastic bracket and install the new boot the same way the old one was positioned (you can use hot glue to hold it in place). Take the plastic ring off the top of the old boot and install it in the new one. You can use a zip tie for a good hold. Now just reverse the steps to reinstall the plastic bracket with the 4 screws, the cigarette lighter wires, the center console and finally the radio bezel. The parking brake boot simply slides over the stock plastic handle.
CONGRATULATIONS - YOU HAVE SUCCESSFULLY INSTALLED YOUR NEW LEATHER BOOTS!
Useful tip
You have installed a product made out of genuine leather. As you know, to maintain a leather product in good condition, you should take care of it. We suggest occasionally (every 4-6 week for example) applying some leather conditioner/UV protector to keep your leather from drying up in the sun and cracking.
Redline Automotive Accessories Corp. will not be held liable for any labor, incidental or consequential damages of any kind. Proceed at your own risk.
