You must be logged in to rate content!
7 minute read
SVT Fog Light Protection w/Lexan
Compliments of ..:: sleestak ::.. @ focusfanatics.com
9-4-2008
After replacing many fog lights to rock breakage and severe pitting, I decided I needed to come up with a good way to protect them. 20mil Laminex came to mind, but I have heard that the lenses can still break when hit by a decent sized rock and I knew there had to be a better, cheaper, and more durable than just a sheet of vinyl that adheres directly to the lens.
While talking with Mike @ Hillbish, he recommended rigging something up out of Lexan (thanks for that tip!). So, I stopped off at home depot on my way home.
I had no idea what I was in store for with this project. I expected to get home, pull the fogs and then come up with a plan and a list of addl supplies. But I was pleasantly surprised as things progress, at how simple and effective this really is.
Why Lexan?
Lexan is significantly stronger than glass, plastic, or vinyl. Some Uses of Lexan
It's UV coated and will resist yellowing for 10 years.
It is heat resistant and withstand the temps of your fogs
Easy to work with - just add dremmel
It's Cheap - and that's always nice
What You Will Need
Dremmel w/ a cutter bit and sander bit (see below)
1 sheet Lexan - 8" x 10" .093
7mm socket or wrench
Cost:
Lexan cost me $3.88 @ the HomeDepot
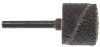
Dremmel Bits
Here are pics of the two bits I used w/ the Dremmel:
I used a cutter like this, my blades were straight though, not spiraled. Although this would probably work fine.

Just a basic sander bit.
Directions
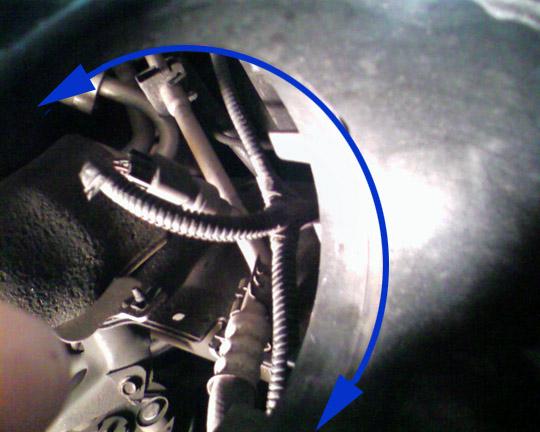
First thing is first, you may want a little extra wiggle room under the bumper, so you will want to slightly jack each side of the car to give you a little more room to work. Then grab a 7mm socket (pref on a screwdriver type handle if you can), or wrench and get under the bumper.
The fog lights are held to a bracket with some metal screws (7mm hex head). Skip these and go right for the bracket itself...it screws to the back of the bumper with 3 - 7mm screws as well. You will see two at the bottom of the bumper and the other is up top, you have to feel for it.
Unscrew these three screws and bring the whole assembly out - bracket and fog. Then take the fog light off the bracket. What you should have is something looking like this (minus the cute dog):
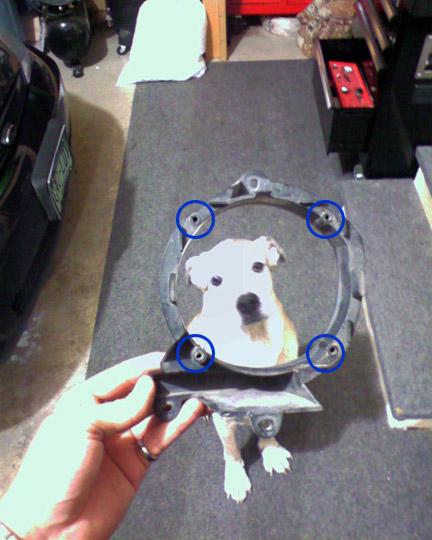
Now go back and sit in front of the bumper and hold the bracket back in place to get an idea of what you are doing.
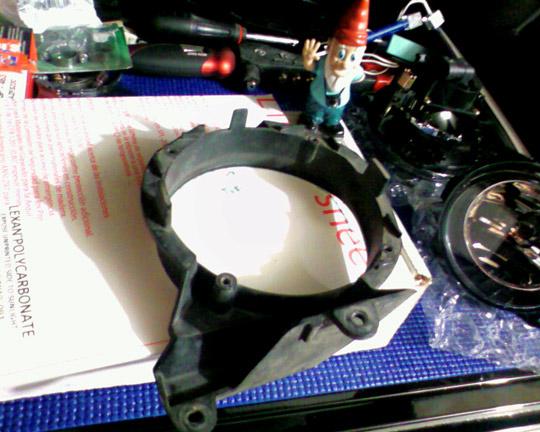
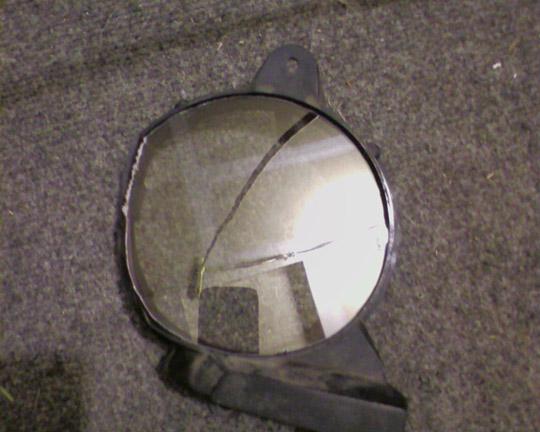
You will see that the diameter of the bracket is slightly larger than the opening in the bumper. This line shows the edge of the bumper opening.(Sorry for the crappy pic)
What you are going to do is just simply cut a piece of Lexan to sandwich in between the bracket and the bumper ... thats it!
So, place the bracket onto the sheet of lexan and trace the inside. Be sure to take note of the print on the lexan protective sheet. You want the NON-PRINTED SIDE FACING OUT. It has the UV protection. You might also want to mark the top.
Next (with the protetive plastic still on the Lexan) cut the Lexan with the cutter bit. Try to leave the line while cutting then clean up your edges with the sander drum and test fit. You want the Lexan to just fit into the opening of the bracket. The brackets opening is a tiny bit tapered, so you should only be able to push it back in there a little ways, so start big and shave it down a bit till it fits snug.
Here is mine with the protective film off and seated in the bracket. (no those aren't cracks, its a reflection)
Now that it fits good and snug, just pop your fog back into the back of the bracket and screw it in. The entire assembly should look like so:
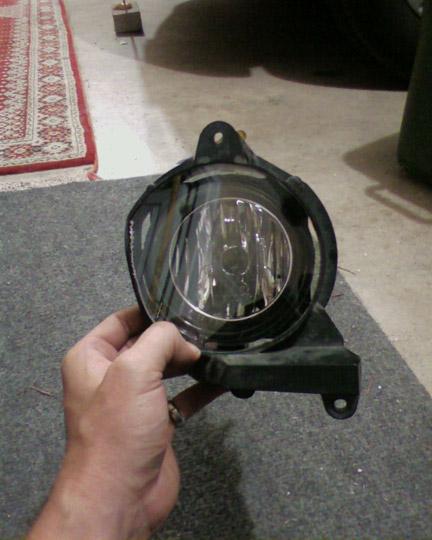
Now re-install the entire assembly. Be careful to keep the Lexan in place while popping it in. Don't worry about tacking it in place. Once you screw the bracket into the bumper, it will be held firmly in place and look like this:
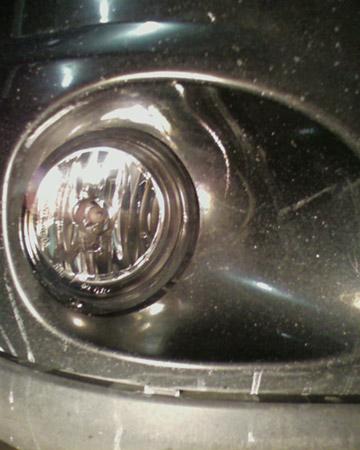
Note that you can't even see the Lexan in this pic (and yes my car is dirty). The finish is very clean and looks completely stock. You can hit the Lexan with your finger in the corners and see that it is held snugly in place between the bracket and the bumper. You should also have a good 1/4" of space between the Lexan and your fog! So even if that Lexan takes a good hit, the lens should not be effected at all.
Now just repeat the process for the other side and you are done.
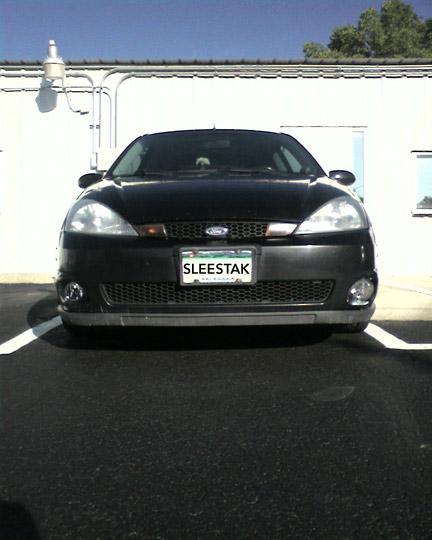
Here they are installed. Looks damn good, if I may say so myself. Now all I need are a new set of headlights!
*Note * I am sure that over time the Lexan will get chewed up by rocks and dirt that gets throw on the road here in the winter. But consider that this took me about 30min per light and cost me $3.88 I think I won't mind replacing these Lexan bits vs two new $50 fog lights.
Hope this helps you guys out there who are getting tired of shelling out money for these fogs.
 Cheers!