You must be logged in to rate content!
5 minute read
Wideband A/F Gauge Install With FSwerks Header
Compliments of matmatician @ focusfanatics.com
8-8-2012
If you're anything like me, and want to install your AEM Wideband UEGO A/F gauge, but need pictures to learn how to do anything, you're in luck. I'm going to show you how, in the fashion that I need things explained to me in (aka, like a 4 year old, with pictures, and big red crayon.) I searched forever before I started spending money and time, so hopefully I can help someone save some time with this write up. So off we go.
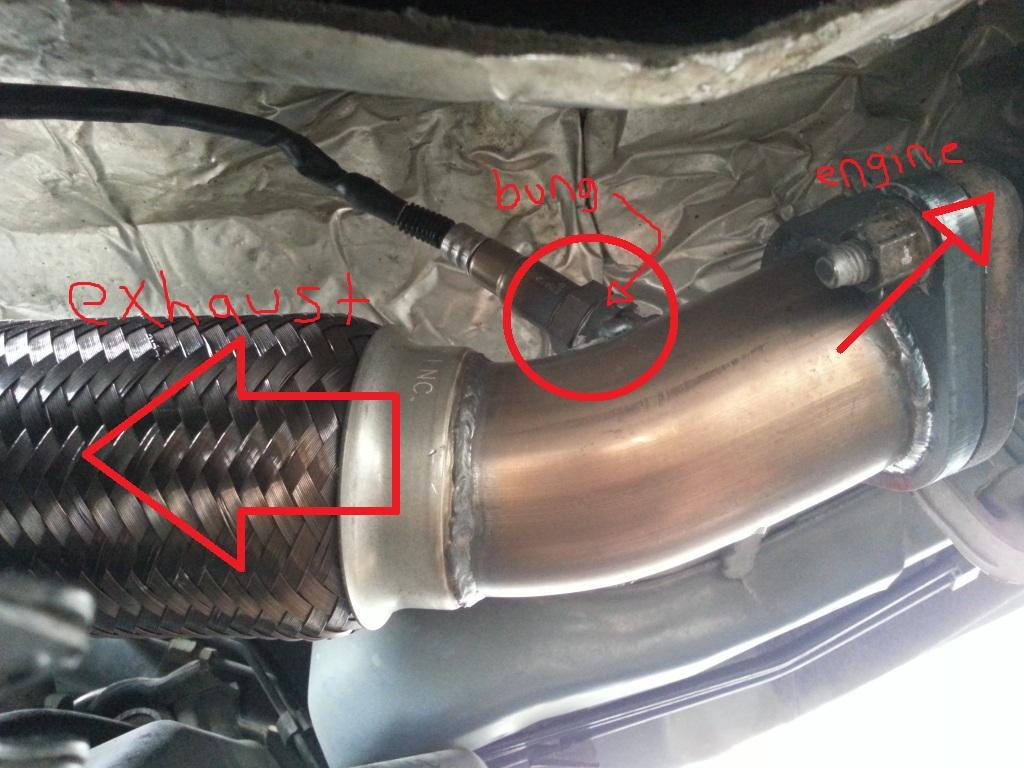
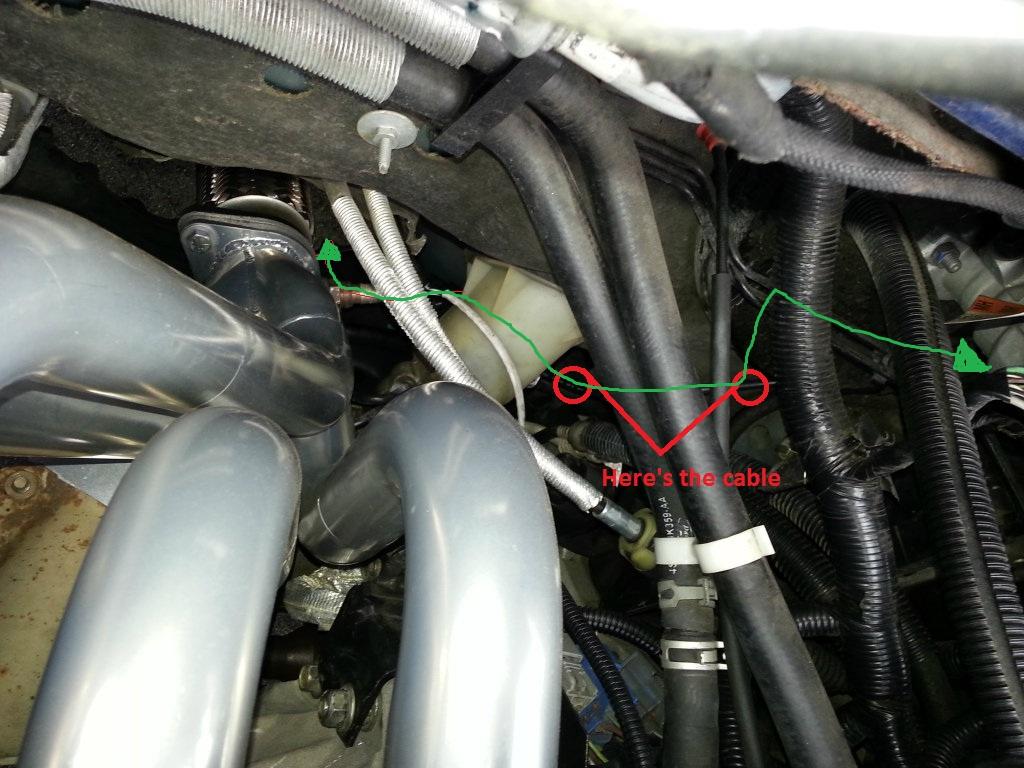
The first thing I would need is a hole welded into the exhaust with a bung for the new 02 sensor to plug into. Unfortunately, I didn't know where to put it. After calling AEM and talking to an exhaust specialist, I found out the answer is in the flex pipe, after the collector, and before the 2nd cat, illustrated here.
NOTE: I mislabeled the picture. The wire goes up towards the engine bay, of course.
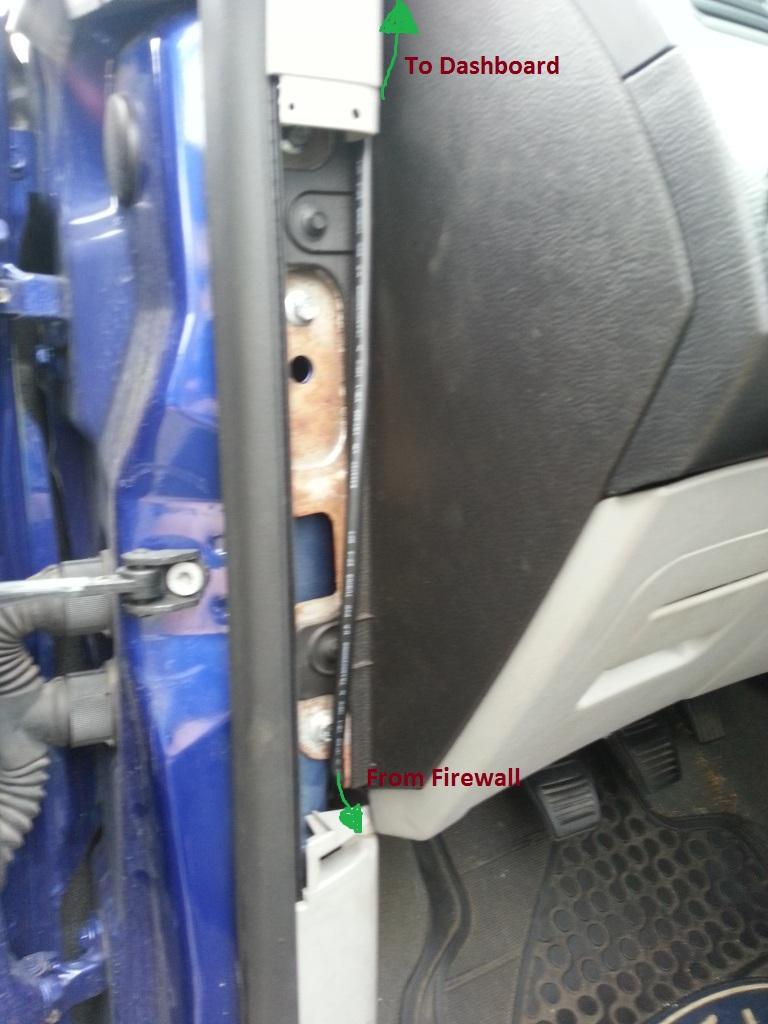
The next thing I did was drill a hole in the firewall to get the cable to the 02 sensor. There was probably a better place for this, and if you do drill here, make sure its RIGHT there, because if its not, or you get the angle wrong, you may hit something on the other side of the firewall. Measure twice, drill once.
This is just to the left of the clutch pedal if you have an MTX
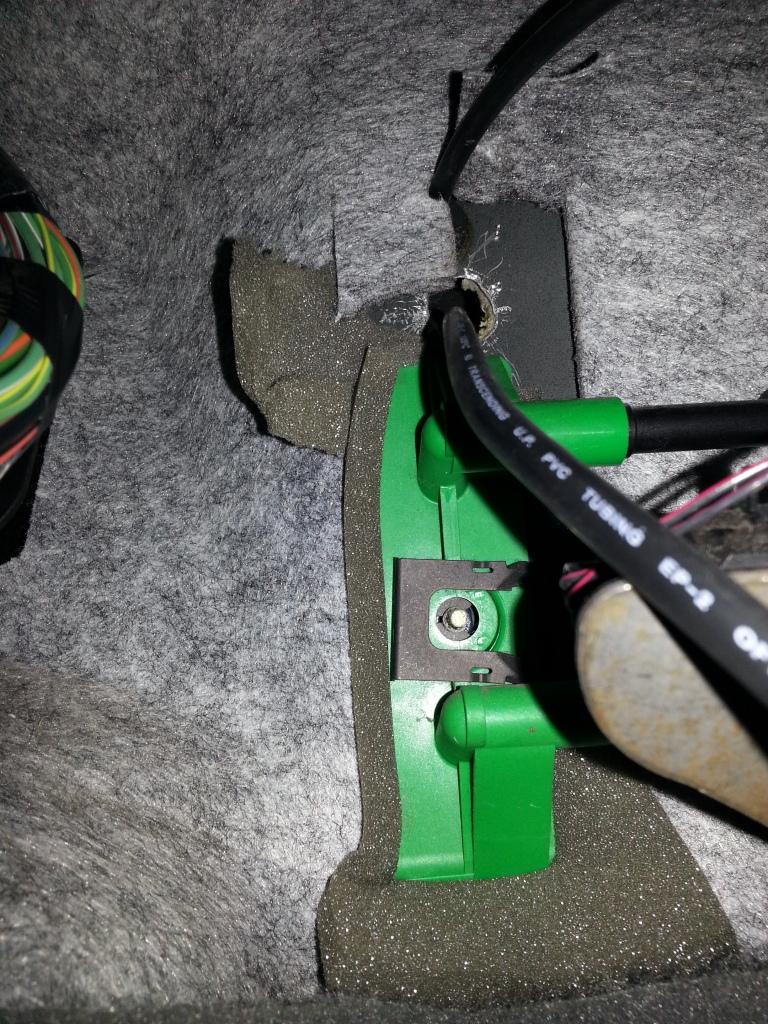
Another shot for clarity:
This is also how I secured the massively long cable after it was routed.
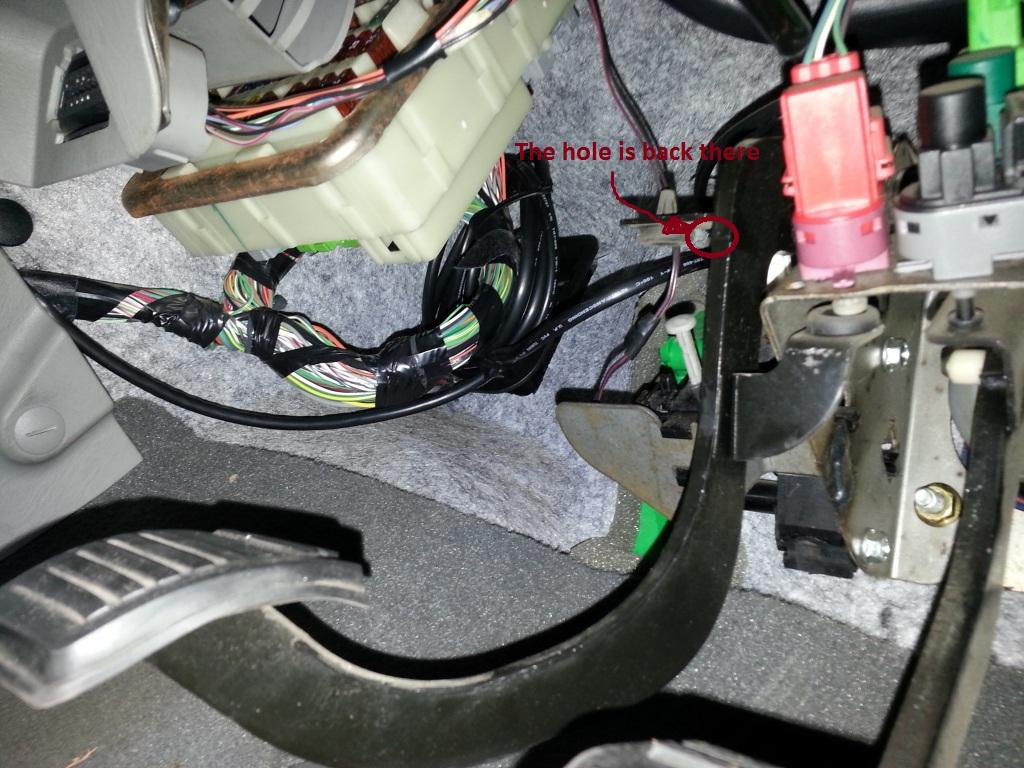
Next, I had to route the cable to the 02 sensor. Pretty easy stuff. Keep it away from heat so that it doesn't melt, and try to keep it in a place where it won't get too much exposure to water.
The green is the route i ended up following. Using zipties, I secured the cable to the black existing cables that go under the fusebox
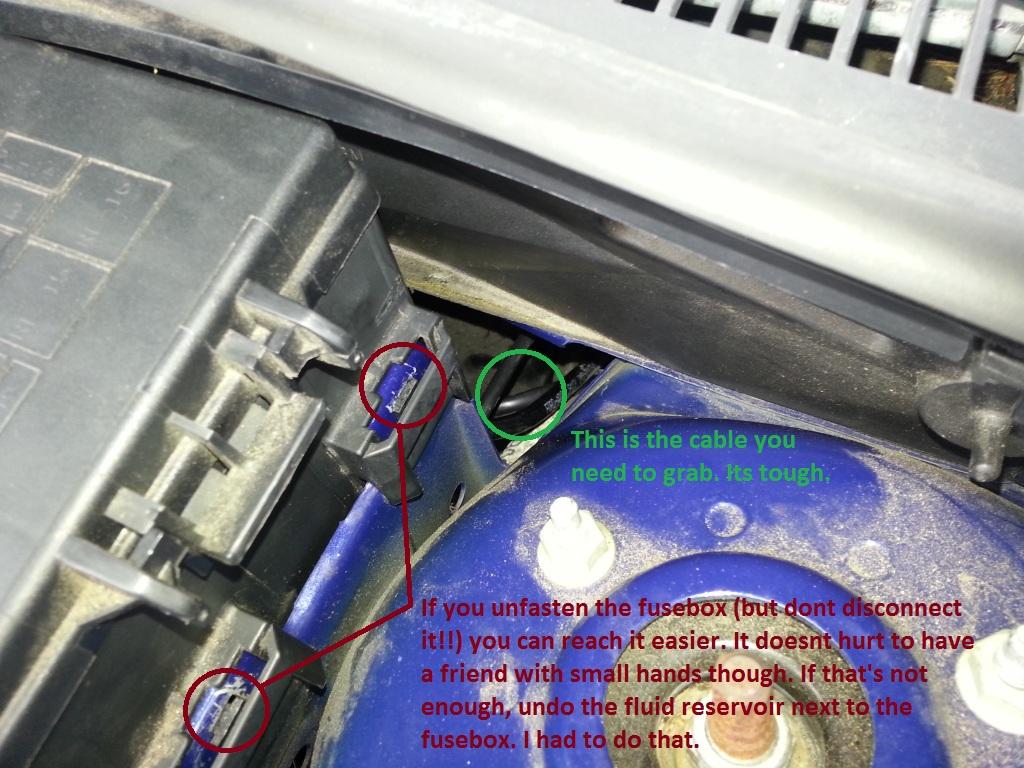
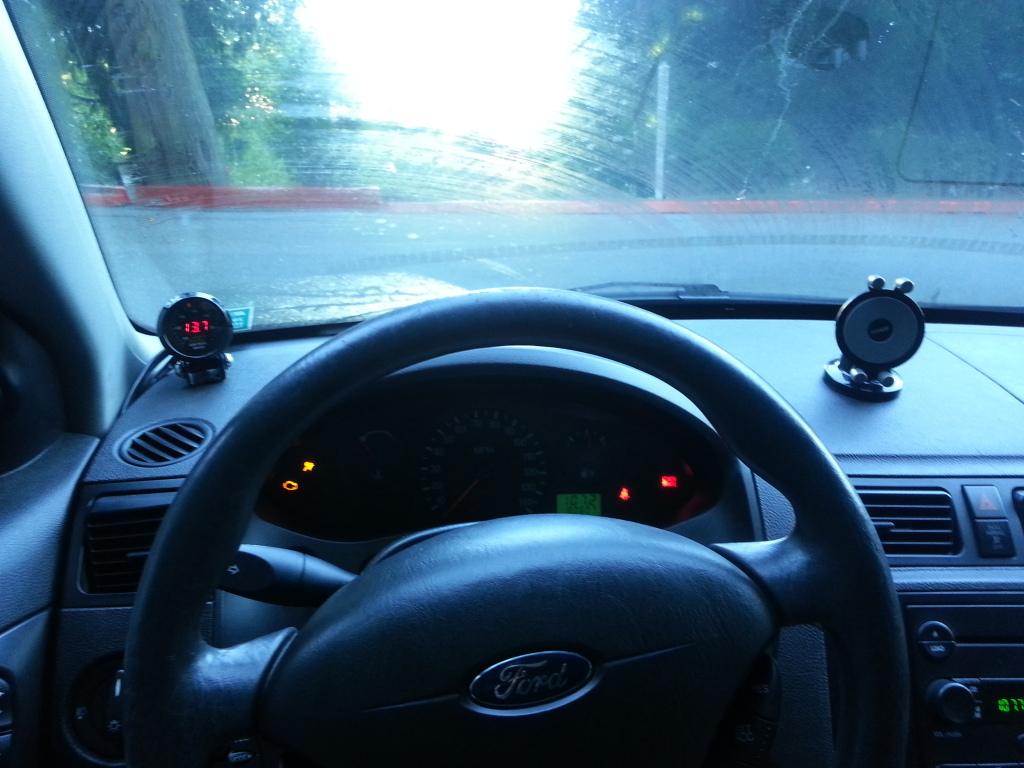
This is where I have the cable feeding up to the dash to plug into the gauge. If you're going to use a gauge pod, your route will probably vary a little bit. There is a small catch securing that part of the plastic to the frame. It pops off pretty easy.
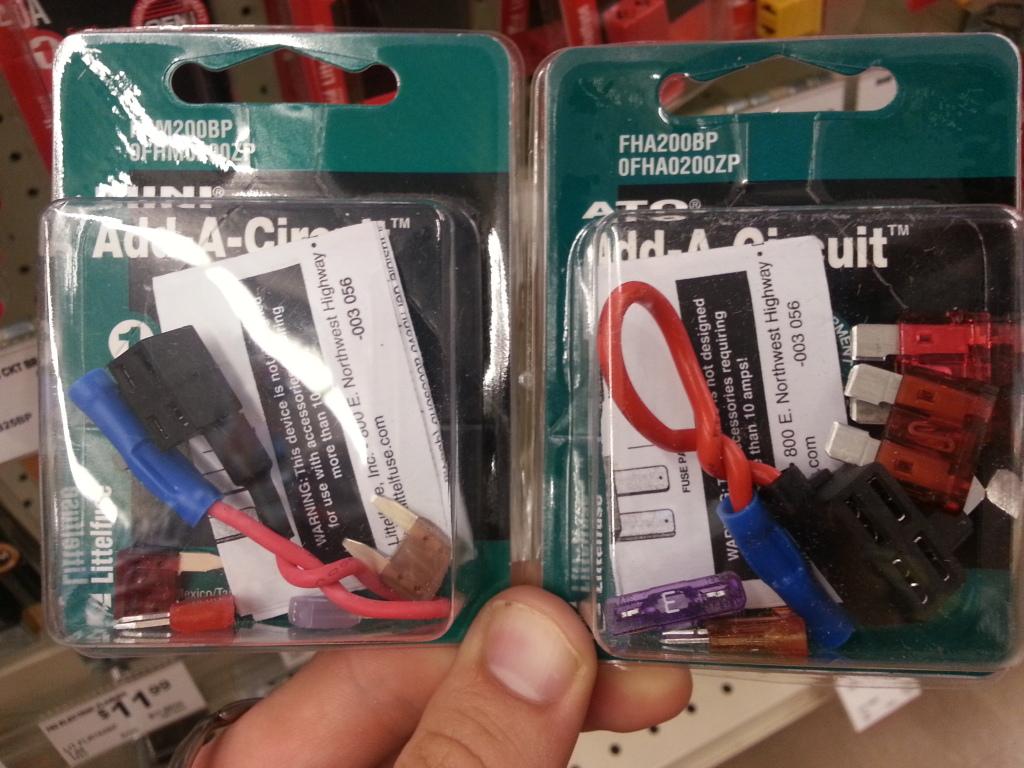
After the cables have been run, you'll need a way to get power to the gauge its self. Instead of splicing into a live wire (which I HATE doing, I'm weird, I know) I bought a littelfuse add-a-fuse kit from O'reily for 6 bucks. You'll only need 1, I got a second one for another project.
With that, wire the littelfuse to the red wire coming from the A/F gauge:
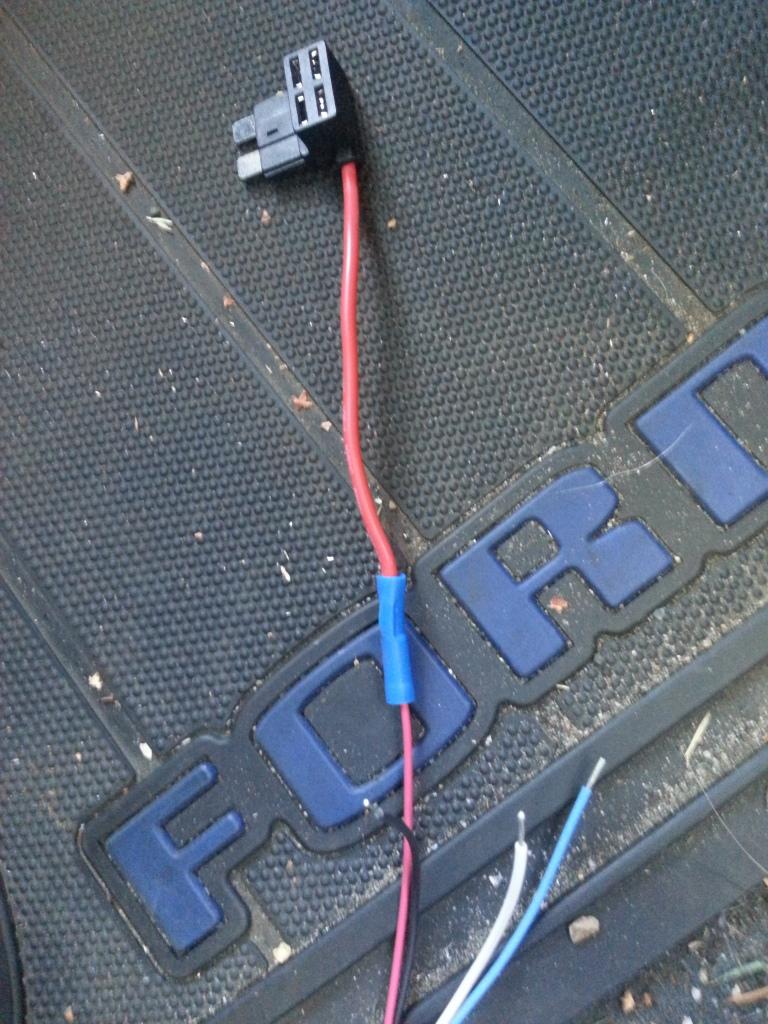
Then, wire it into the fuse shown below, I believe its fuse 48.
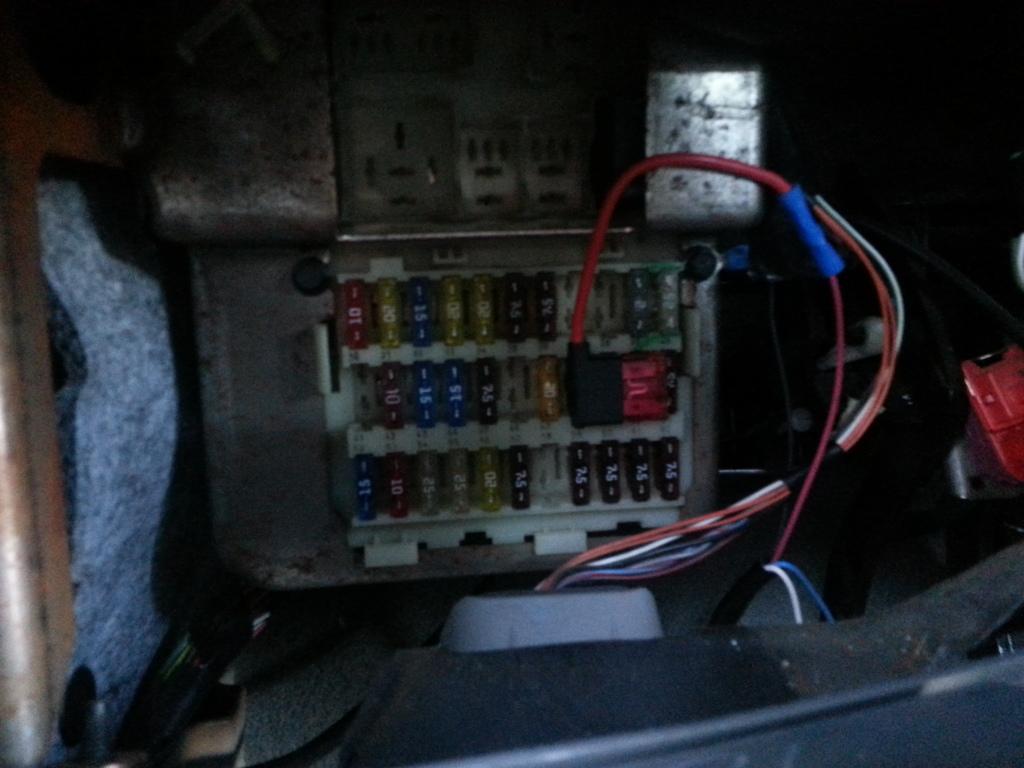
If you've done everything right, and hooked into the right fuse, your gauge should now work! If the gauge doesn't turn off when you power off the car, its hooked into the wrong fuse. Just make sure its a 10amp fuse (that's what the instructions say)
Soon, I'll add in a walkthrough on datalogging. I'm still trying to figure things out. I need to call SCT and get things hammered out first. More to come!! 
8-11-2012
I think that yours may be different on the 2010, but I did see (after I drilled, of course) that there is a pretty big grommet by the gas pedal. I didn't even look to see if the cable would fit through there though. May be worth someone checking into in the future.
And thanks!
Thank you, I'm going to try to get this as easy as possible for noobs like myself to do lol. I'm also going to try do some things that no one has done yet, like how to datalog with the new TSX for android app. And, I'm going to try to make the signal from the wideband gauge go through a USB 3.0 cable since no one has firewire anymore.