You must be logged in to rate content!
4 minute read
SC430 Alternator swap and Big 4 upgrade
Compliments of http://www.flawlessfitment.com
12-24-2015
Cranking up the car one morning, well it didn't, jumped the car with my handy jump starter battery pack and got on my merry way. Didn't really think twice on why, jut figured it was cause I hadn't driven it in weeks and and didn't have my trickle charger hooked up to it. Anyway, drove around and stopped for coffee and noticed when I was cranking the car there was a hesitation and when my compressor for my air ride came on there was a huge drop in voltage almost stalled the car. So I have an optima yellow top and is a deep cycle battery, from past experience I know that once a cell goes bad on it (jump starting an optima does that I feel) you just warranty it out. I had the alternator checked too, just to be on the safe side, no sense putting a new battery and then finding out the alternator is gone which can pretty much ruin the battery as well. The alternator failed the testing process and I wasn't really shocked, the SC is an 02 and it was the original alternator on it. It had a good run but time for a new one. I chose to go back with a Denso alternator before I replaced the battery and while I was doing that I wanted to do the Big 4 upgrade.
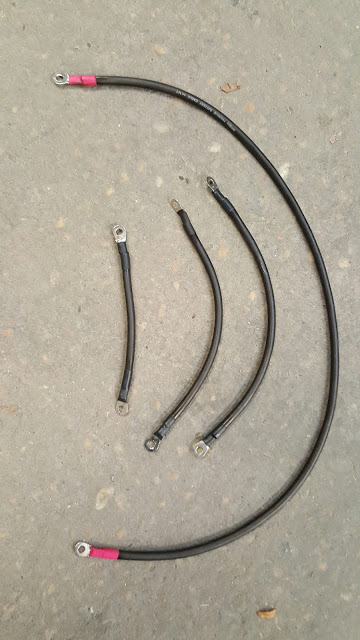
The Big 4 upgrade I wanted to do in preparation for my sound system. For those that don't know the Big 4 is adding wires to allowing more current to flow easier to all components. The Big 4 consists of 4 wires:1 - Battery positive to Alternator Positive2 - Ground alternator to chassis3 - Ground negative battery to chassis4 - Ground engine to negative battery or chassis
The alternator is fairly easy, I'm not doing a DIY on this because it is well documented, I didn't remove the bottom splash guard just the 4 bolts in front that hold it up and managed to get the alternator out that way.
The alternator off the mount and chilling on the splash guard.
Move the alternator more towards the right of the engine bay and it'll plop out from the bottom like the pic above. I did not have to put the car on jack stands etc, as I said this alternator was fairly easy.
My big 4 wires, I chose to do 4GA the longest one was from the alternator positive to battery positive. The shortest one was from alternator ground to chassis. The other two, one was the battery negative to chassis ground, and the other was from engine to chassis.
Changed the battery out the next day and it is as good as new, no voltage drops, no dimming, no hesitations starting. Awesome!