You must be logged in to rate content!
21 minute read
DDMTuning HID install
Compliments of GarnetMica @ forum.miata.net
9-16-2010
I’ve spent the last few weeks searching the forums and threads for photos of wiring and ballast installs. Kudos to Miatagohard, this was an excellent write up:
http://forum.miata.net/vb/showthread...ht=hid+install
Most installed based on convenience. I wanted an OEM install with as little visible wiring as possible. I pulled the trigger and bought the DDMTuning.com 35w, 5000k H7 slim ballast HID kit for $35 ($47 shipped to the east coast). The package shipped a day or so after the order and received it about a week after the order. I decided to get the 35w kit to avoid any wiring problems. Some say you need to buy the optional relay kit to avoid flicker. My Volvo S60R had OEM 4300k HIDs and they seemed to have a green hue as they aged. I wanted pure white so I opted for the 5000k kit. They offer only slightly less output from the 4300K and look more like factory Lexus and BMW bulbs.
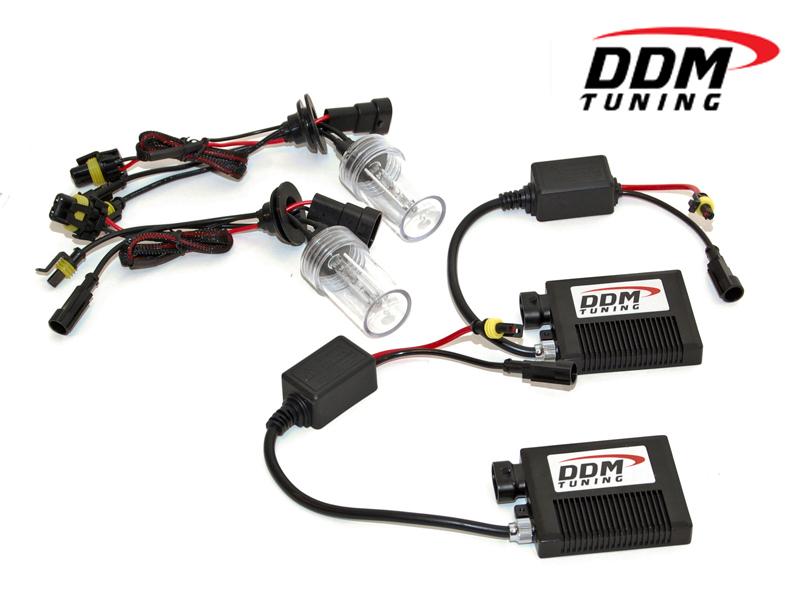
The kit comes with two H7 bulbs, two H7 bulb adapters, two slim ballasts, wires connectors, double sided foam tape and a couple plastic zip ties. I thru the foam tape and zip ties on the shelf and opted to use my 3M double sided trim adhesive tape and heavy duty black zip ties. The HID wiring harnesses have some rubber grommets around the wiring. The H7 adapters and the factory rubber headlight seal are sized perfectly so I elected to remove the grommet from the HID kit.
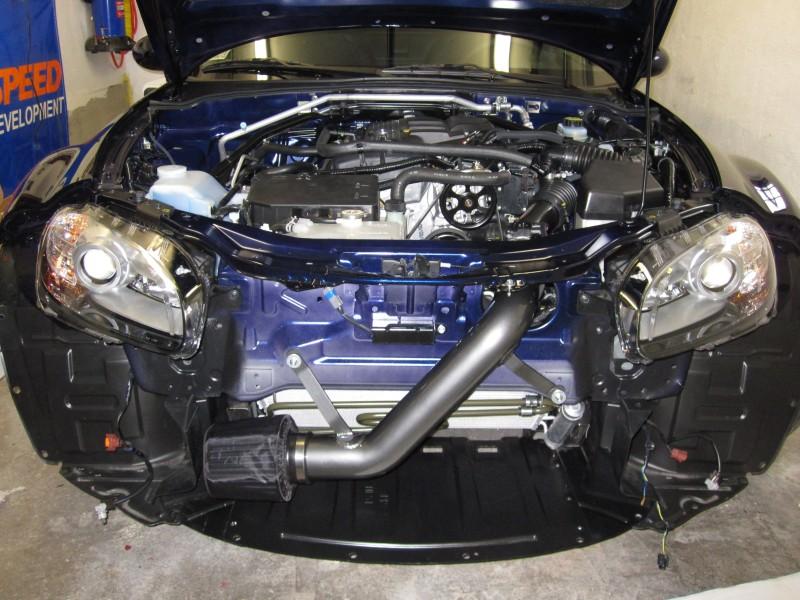
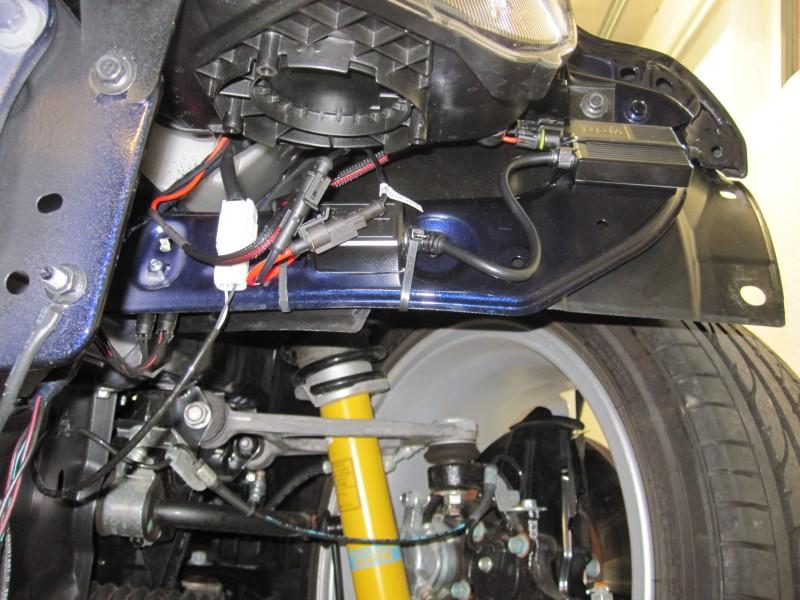
I wanted a clean install so I removed the bumper. I started by pulling the bolts from the top of the bumper. I pulled a couple handfuls of plastic clips from inside the wheel wells and lower splash shields. Two nuts and a bolt attach the bumper sides to the front fenders. There are a few more bolts under the chin, some more plastic clips and three screws on each side. Disconnect the parking lights and unclip the fog light wiring. Two more bolts hiding under two plastic panels in the front grill. I’ve had the bumper off twice now…the first time took about an hour, this time took about 15 minutes. I pulled the washer bottle apart on the passenger side and loosened the fuse box on the driver side.
Once the bumper was off I cleaned up the areas under the headlights with some rubbing alcohol. I also took the time to throw some 303 protectant on the plastic splash pans and wheel well housings.
I started on the passenger side. I mounted the large ballast with two pieces of double sided tape. A strip of 3M double sided tape along the top, one along the bottom and one large zip tie for good measure.
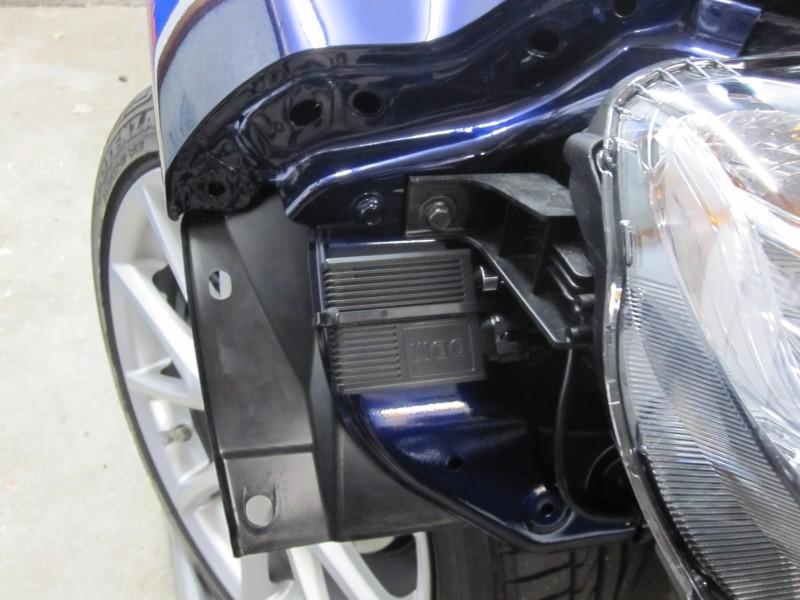
I then attached the second part of the ballast on the same panel just lower and below the headlamp housing. Two strips of 3M tape and a t tie on either side.
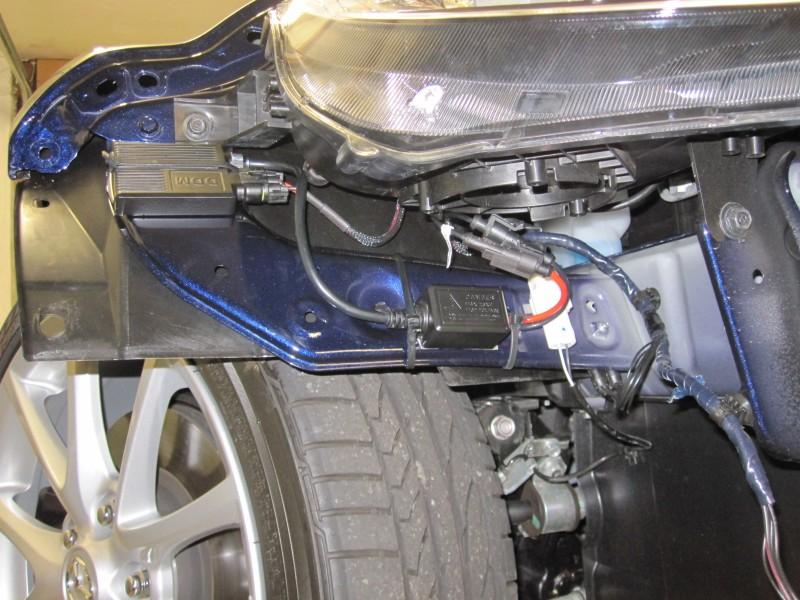
On the passenger side, the factory wiring harness has a brown/white where (positive) and a black/yellow wire (ground). I hooked up the red and black wires from the ballast and wrapped it all up in electrical tape for protection. Once the ballast had power I began prepping the bulbs.
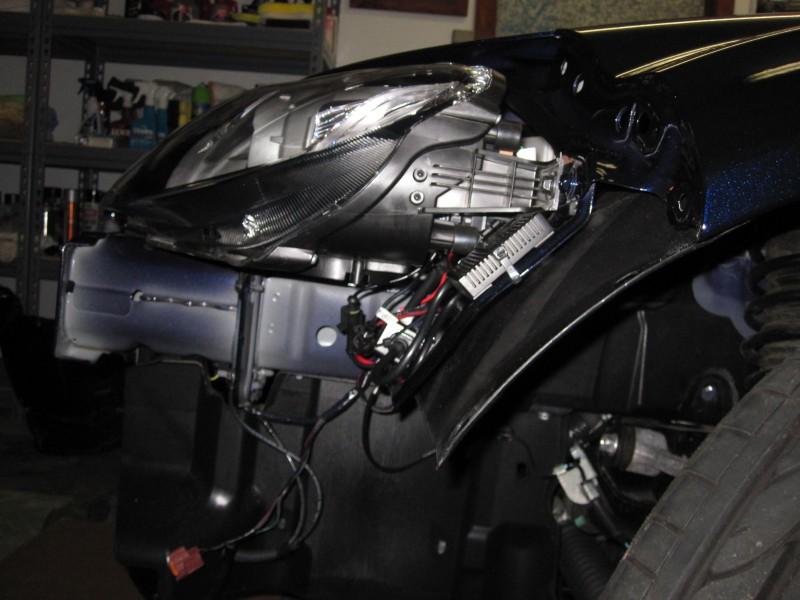
I removed the halogen bulb and prepped the HID bulb for install. You have to align the H7 HID bulb and adapter to the housing. Use the factory bulb and adapter for guidance. I installed the bulb and reinstalled the clip. The factory rubber boot fits snug over the H7 adapter and bulb. I then connected the bulbs to the harness for the ballast. Passenger side done.
The driver side went much the same way. The driver side bulb is powered by a purple wire (positive) and black/yellow wire (ground). I decided to remove the headlight too. I was hesitant to go bumping around with the sensitive HID bulb. I then put the housing back together.
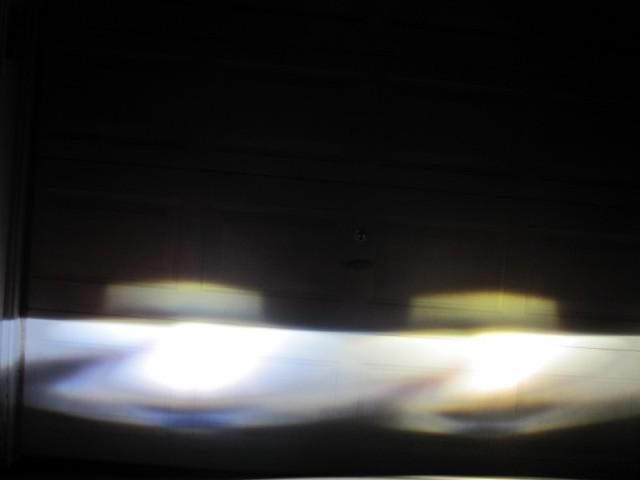
I fired the bulbs up, the light was the same on both sides. Then reassembled everything. I’ll get some light shots up in a day or so when the weather gets better. It’s tough to capture the light. I can say that they look very good. Bright and white. Very close to OEM. The ballasts do take a few seconds to warm the lights up but the effect is very cool.
Thanks guys! Still working on getting some night time pictures. Bazmx5, they do have H11s available. Their slim ballasts kits are $35, regular ballast kits are $25! I'm toying with the Hoens for my fogs and highs. Anyone here have Hoens in the fogs/highs?
9-20-2010
Thanks for the response Navy, thats what I was hoping to hear. My plans for other lighting upgrades might be on hold while I consider going back to stock (I had Silverstar Ultras in low and fogs). I think the focus of the bulbs inside the housing is slightly off causing a narrowing of the light field ahead of the car. The cutoff is nice and true but the light seems to be too focused in front of the car. I was able to compare it with Loansharks car last night and the OEM pattern was much wider. With the days getting shorter, I might leave the ballasts in place and go back to stock for a few days to compare.
9-30-2010
The sun produces light at the 5600-5800k range. Our eyes are more receptive to light at around 4300-4500k. The effectiveness of the light starts to drop between 4300-5000k. kelvin ratings lower than that have a yellowish hue...light above is on the blue side of the spectrum.
I went 5000k as there is a small drop in effective light but it is also completely white.
10-4-2010
If you are installing a 35w HID system to the fogs, simply order the specific bulb and it's plug and play from there. The kit will come with all wires, zip ties and adhesive foam tape you need to install. The only issue I could see is that the HID bulbs are slightly longer than OEM bulbs so you may need to pull a little metal shield out of the fog housing if your car has it. There have been a few threads on here about that.
In regards to power, the only time people need more power is when they upgrade to a 55w system.
10-9-2010
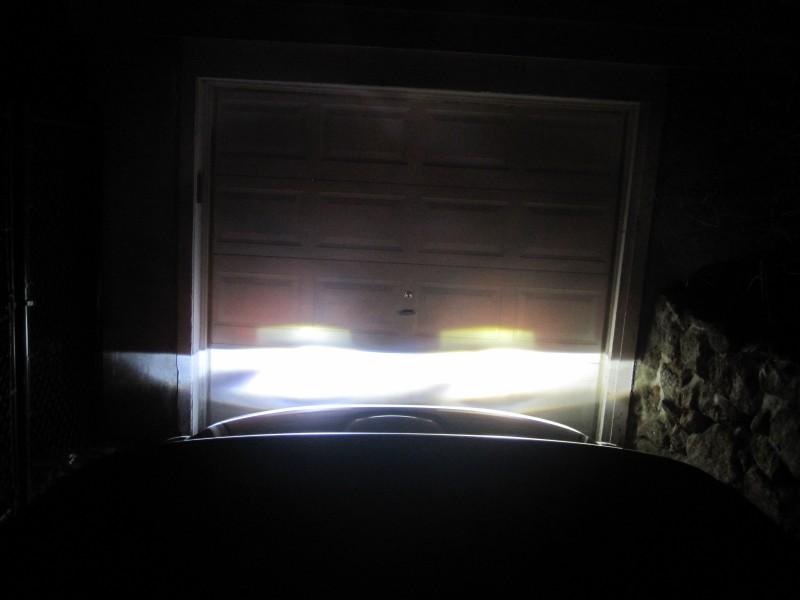
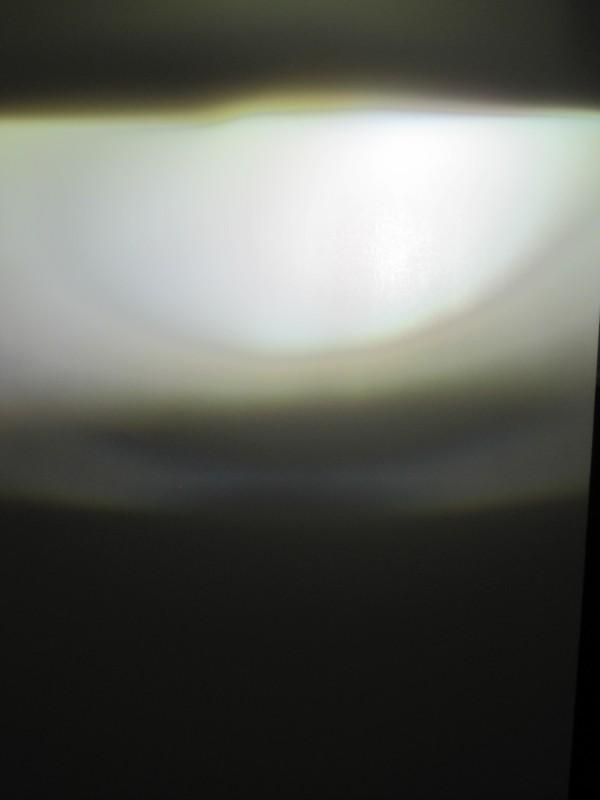
Cutoff pic. This is a blackberry pic so the color i slightly off, far less blue than the pic suggests:

11-30-2010
It's been about two months now since the puchase and I noticed a little shaking in the driverside headlamp. I removed the bumper, headlamp and removed th bulb. It turns out one of the insulators (on the metal rod extending to the bulb) cracked and is now in two pieces. I think it is leading to instability in the bulb/base. I've got an e-mail into DDMTuning.com about the warranty. We'll see that they say.
12-3-2010
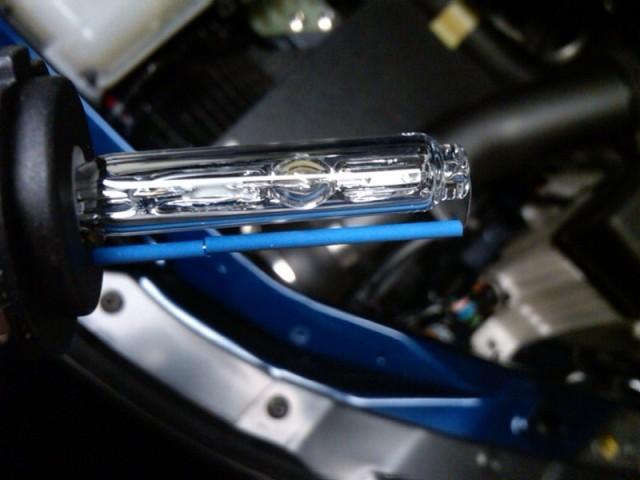
It's a ceramic tube that protects the wire running to the end of the bulb and it seems pretty fragile. All HIDs have this external wire, some may have better coatings. Despite my issue with the return policy, I ordered a new pair of bulbs from DDMTuning because they are simply the cheapest out there (aside from some of the ebay suppliers). The bulb above still works and they seem to think it is not a warranty issue. The new bulbs are 4500k, we"ll see how they look when the come in. The 5000k are very white but I'm thinking I want to go slightly more OEM so I'm not so obvious.
Get an HID kit, 35w, 4500k to 5000k and you'll be no brighter than anyone else out there, OEM or otherwise. Then align them down slightly. You shouldn't have any problems. This kit is cheap enough to throw way and replace if it stops working at some point.
The one I posted above can be had for less than $50 delivered and they sell one slight larger for less than $40 delivered. www.ddmtuning.com www.sharphid.com http://www.aandrmotorsport.com/store...&product_id=21
Ultimately, all of these kits share the same components and have similar reliability ratings. I would spend as little money as possible.
12-18-2010
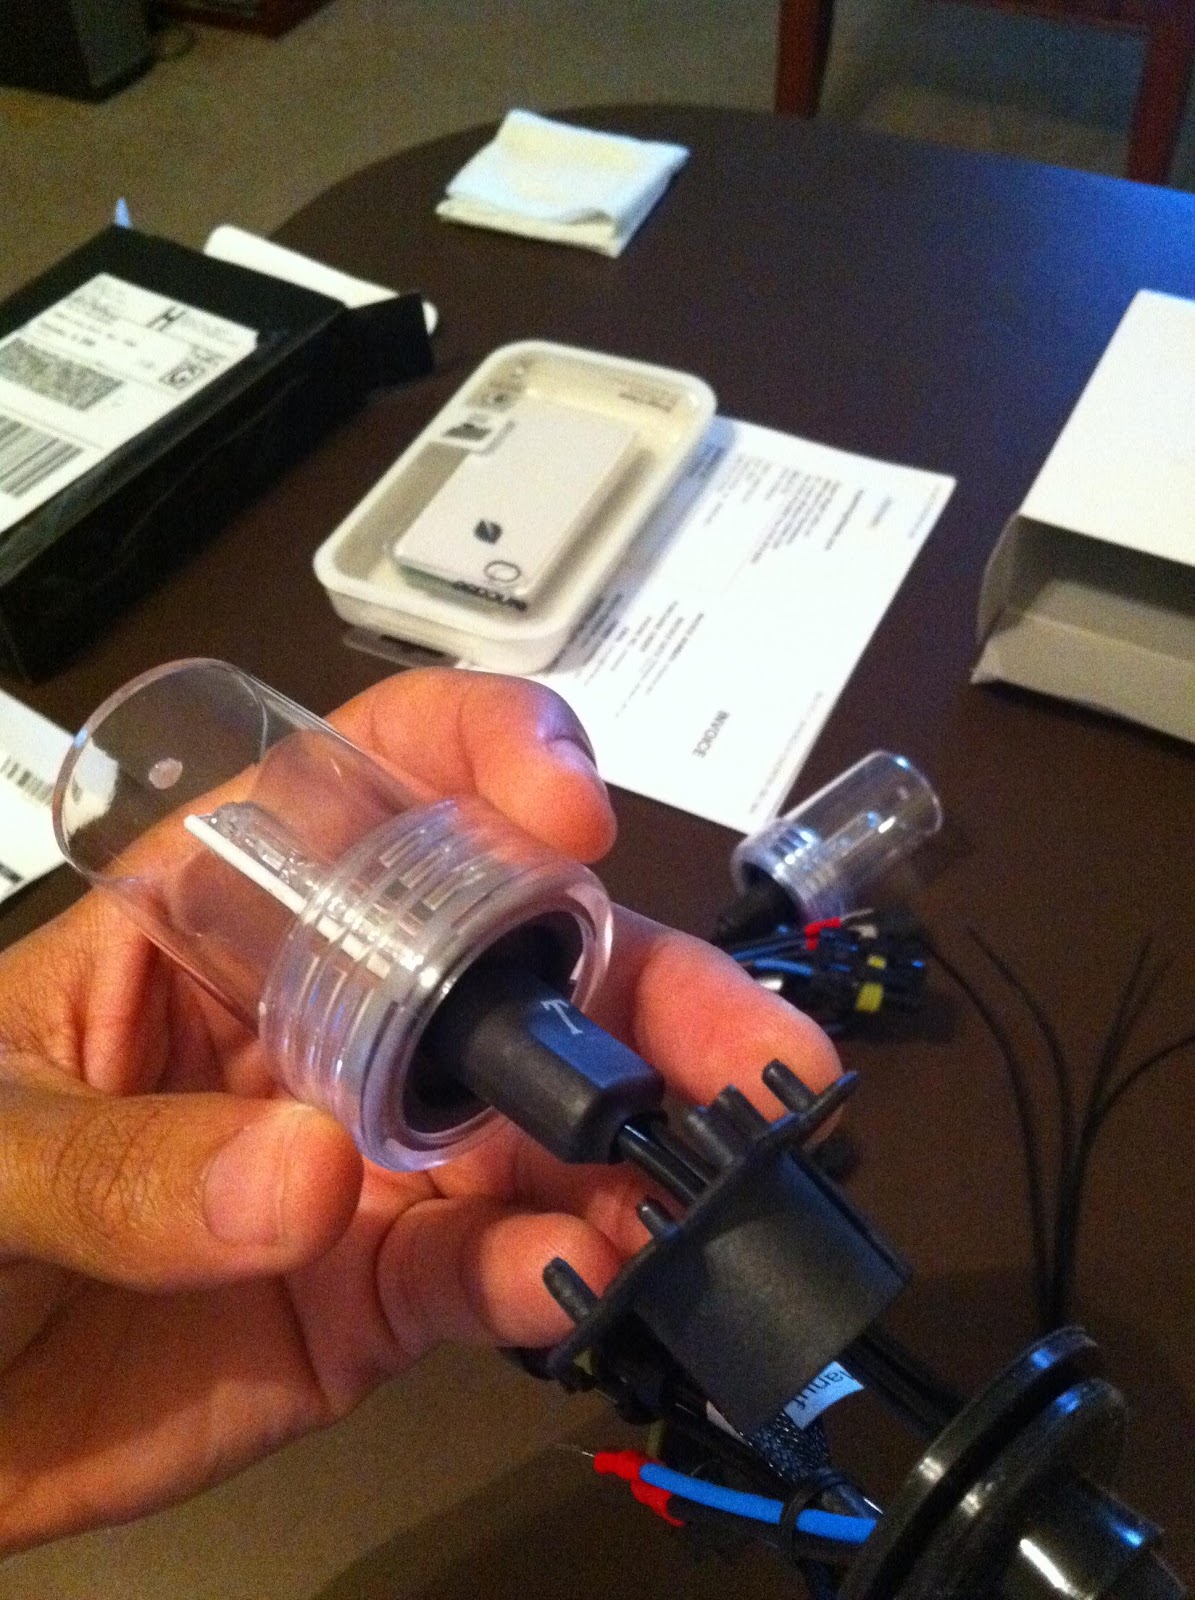
Ok, so after a week and a half, I finally hve some pics to show. I received a pair of 4500k bulbs on Tuesday from DDMTuning. When I openned the package, I could tell that there was something different right away. The 4500k H7 bulbs had a thinner oval base and the adapter was a different design, it had a slit that ran down the side and along the bottom of the adapter. After preparing for install, it became obvious that the new 4500k bulbs were longer than the adapters were deep. This prevented the adapter from fully seating on the bulb. Beyond that, there was no way to seal the bulb/housing from moisture in the engine bay. My MX5 never sees inclimate weather but I do occasionally wash and detail the engine bay.
The 5000k bulbs I originally ordered had a wide base with a rubber seal which fit snuggly into the adapters that came with them and the factory large grommet seals properly to the adapter making a nice water tight seal. Before I did anything else, I tried the open base adapters from the DDM 5000k bulbs on their 4500k bulbs to get an idea of the color difference. The bullbs worked but they were so loose in the adapter that the pattern was off just sitting in the housing (again keeping in mind that the system would be open to the elements). The color looked so OEM that it almost looked like a brighter halogen vs. HID.
I called DDMTuning to complain citing two points, the loose fitting adapter and the lack of moisture protection. After much discussion, they confirmed that in the busy seasons, they will ship bulbs from their two suppliers. The new 4500k thin base bulbs I received were from a different supplier. They recommended that I send the 4500k thin base bulbs back (at my expense) to swap for the 4500k bulbs from the same supplier as my original 5000k bulbs, or they were willing to talk me thru a process of shimming with washers and electrical tape to get the 4500ks they sent to work. It was at that point I asked to speak with a manager. After another 15-20min of explaining they agreed to ship me a new set of 4500k bulbs at their expense.
On Thursday I had yet to receive a response. I called in and spoke with their shipping dept to get a tracking number for the replacements. Turns out they did not ship them and instead were working up a solution that would allow me to use the bulbs they had sent in the first place. I was furious at this point and asked to speak with the manager again. The manager came on and made a few suggestions to get the 4500k to work and it was at this point I told him absolutely not, I want the bulbs he told me that he would be sending. He agreed to ship them that afternoon.
I received the new 4500k bulbs today and installed them. Their bases are identical to the 5000k I order in the first place. BUT, it would apppear that the color is the same as well....I honestly cannot tell a difference between the wide base 5000k H7 and the wide base 4500k H7. Please excuse the poor quality. The light is a bit blue as they were stil warming up in the near single digit temps outside (I'll let you guss which is the 4500k and the 5000k):

I then swapped the two new wide base 4500ks in and they both looked identical to the original wide base 5000ks. For giggles, I took the passenger side wide base 4500k out and installed the ill-fitting thin base 4500k in. Keep in mind that in person, it matches the Sylvania Silverstar fogs but is brighter:

Honestly, I'm happy with the color of the wide base 5000k and wide base 4500k...again, they look nearly identical. I would probably be happier with the color of the thin base 4500ks but I can't justify the lack of moisture protection or the lack of stability.
The lesson I guess from all of this is that you get what you pay for. At the end of the day, I'm going to run the 4500k wide bases and keep the 5000k wide bases on the shelf as a back up. I'll find a way to utilize the H& thin bases on something else. Hell, maybe the Snowblower culd use em...I will say this, I can't imagine paying more for any other kit on the market and I'm beginning to think here may be some truth to this flyer I found online:
12-19-2010
Well, there seems to be quite a bit of misbadging. My understanding is that Phillips is no longer making balasts for aftermarket kits and authentic bulbs are few and far between. As I have worked thru this process I have found that this may be one of thoe times where cheaper really is better.
Ballasts: They either work or they don't. You could spend $200-$300 for what you believe to be an authentic kit with a 2 year warranty only to later find out that it has the same internals as the $40 kit that I have that carries a lifetime warranty or can b thrown out and replaced with new bulbs for $40.
Bulbs: When it comes down to color range obviously light output from 4300-5000k is going to offer the most output, thats why manufacturers use them thus making them more OEM and natural looking. Light output below is good for fog. Light output above is mostl aesthetic unless you have boosted wattage to compnsate for the decreased output but even then anything more than 6000k can look out of place and distracting. There does not seem to be any continuity in the HID industry and would imagine most bulb ratings are based on a range more so than a specific k value...thats why it was not too surprising to see that my 4500k and 5000k wide base bulbs look the same yet the 4500k thin base made by another supplier appeared different. Instead when considering bulbs you need to think about your application, design of the bulb housing itself and moisture protection. I would havee been willing to pay more for a bulb with a metal base vs composite but at the end of the day, the wide plastic base with the the thin rubber cover fit into the adapters tightly which then fit snuggly in my unmodified OEM rubber headlamp boot providing a nice weather tight and stable rubber seal. I don't know that a premium bulb would have offered thes advantages. These bulbs however are $12 to replace versus 5x-10x more.
Wiring: Really not much to consider here as in all of my research the wiring is never a fault point.
Ultimately this $40 kit is 95% of what I was looking for a fraction of the expense of the other kits available. It offers a lifetime warranty on ballast and bulbs if you choose to utilize it but is cheap enough to disgard or replace at will. Despite some of the customer service issues I had, I would have a hard time not recommending this kit to others.
Thanks guys! There has been one more little issue I hav looking to resolve. From day one, there is a prominent shadow cone that appears from the lower left that narrows to the center of the beam pattern. This reduces the light cast on the ground to the left. Initially I thought this was perhaps due to some left hand drive beam pattern adjustment but after a little thinking, I've come to the understanding that the cone is from the shadow of the ceramic tube covering the wire running to the end of the bulb. This was confirmed when I noticed that the 4500k thin base had a narrower ceramic tube (pass side headlamp) than the 4500k wide base bulb comparo. This resulted in less shadow:
I found a thread on the 2011 Hyundai Sonata forum where people had complained about similar issues. It seems most aftermarket HIDs position the ceramic tube on the wrong side of the bulb causing the shadow on the emitting part of the reflector/lens. Someone got ambitious and dremeled the bulb to allow it to position the ceramic tube 180 degrees from the way it was designed and it worked making the light distribution nice and even. I decided to experiment and sure enough it worked:
Stock DDM H7 wide base 4500k bulb on left, Modified DDM H7 4500k bulb on right:
This was the result:
So, if you get aftermarket HIDs and you get a shadow cone, simply dremel the base and rotate to fit your needs! Now, with a little elbow grease I'm at about 95% of what I could expect out of an aftermarket HID for short money.
I just drove it down the street in the dark and now I am 100% happy!
11-27-2011
I've had some members ask why I pulled the HIDs, here are my thoughts:
I decided to pull them for a few reasons, most are pretty nit picky. Back story: I don't do much driving with the MX5 at night. The times I do, there is never any rain or snow. I love advanced lighting and I love the look of OEM HIDs. My goal for the exercise was to get the HID look and performance in a non-GT car. Ultimately I found a few short comings.
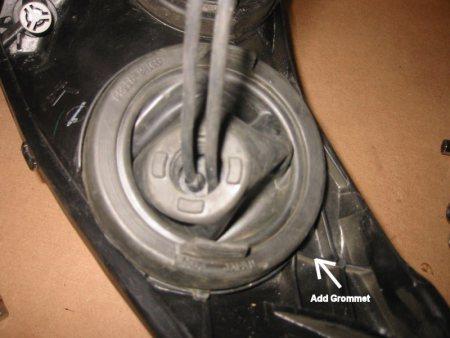
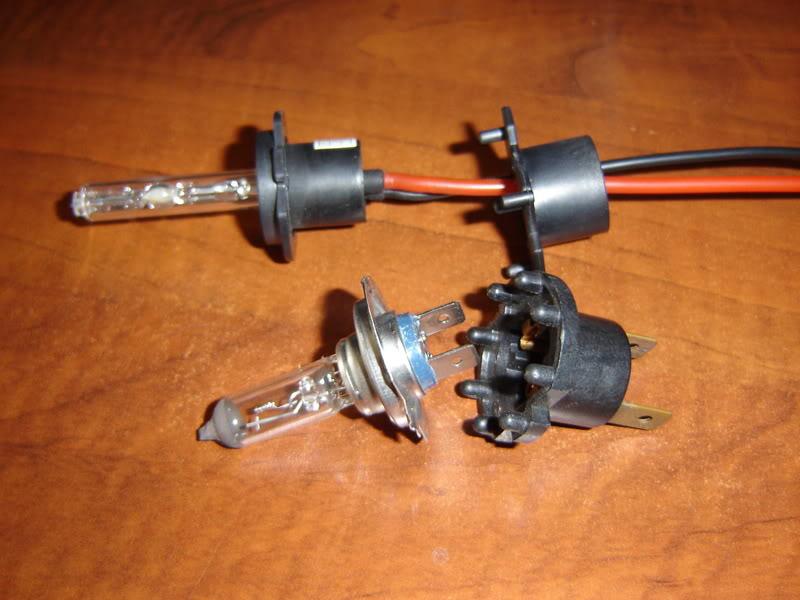
First, the bulbs bounce a little in the housings. How familiar are you with the H7 bulb and retainer clip? Almost all HID H7s are cheaply made plastic H7 bases with glass bulbs containing the salts. The bases vary greatly in size and shape. The problem I noticed immediately is that the OEM halogen bulbs have a plastic adapter that holds them into the housing. There are little metal clips that then secure the plastic base into the headlamp. Then a large rubber grommet seals around the headlamp and the base of the bulb. This prevents moisture from building in the lamp:
Rubber Grommet:
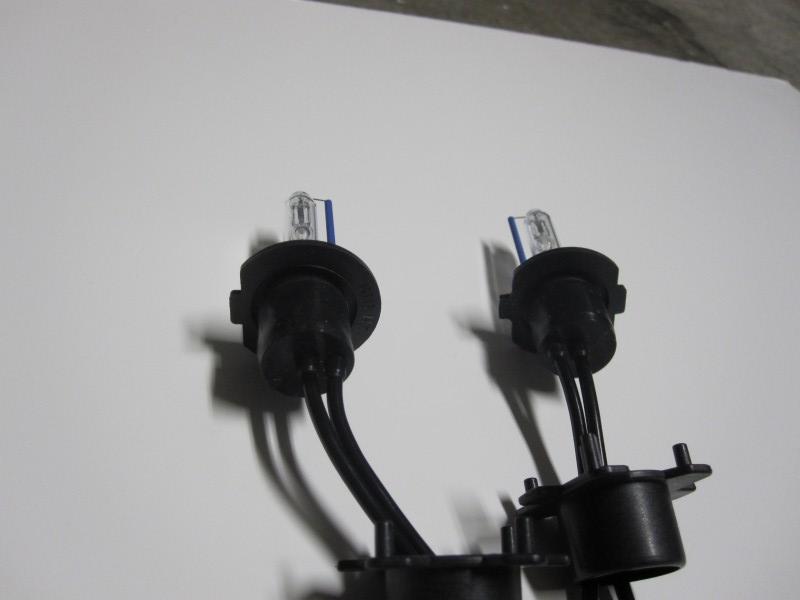
Example of OEM H7 halogen and adapter vs. HID wide base H7 and adapter:
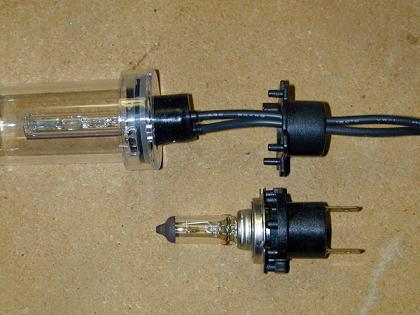
HID thin base and adapter:
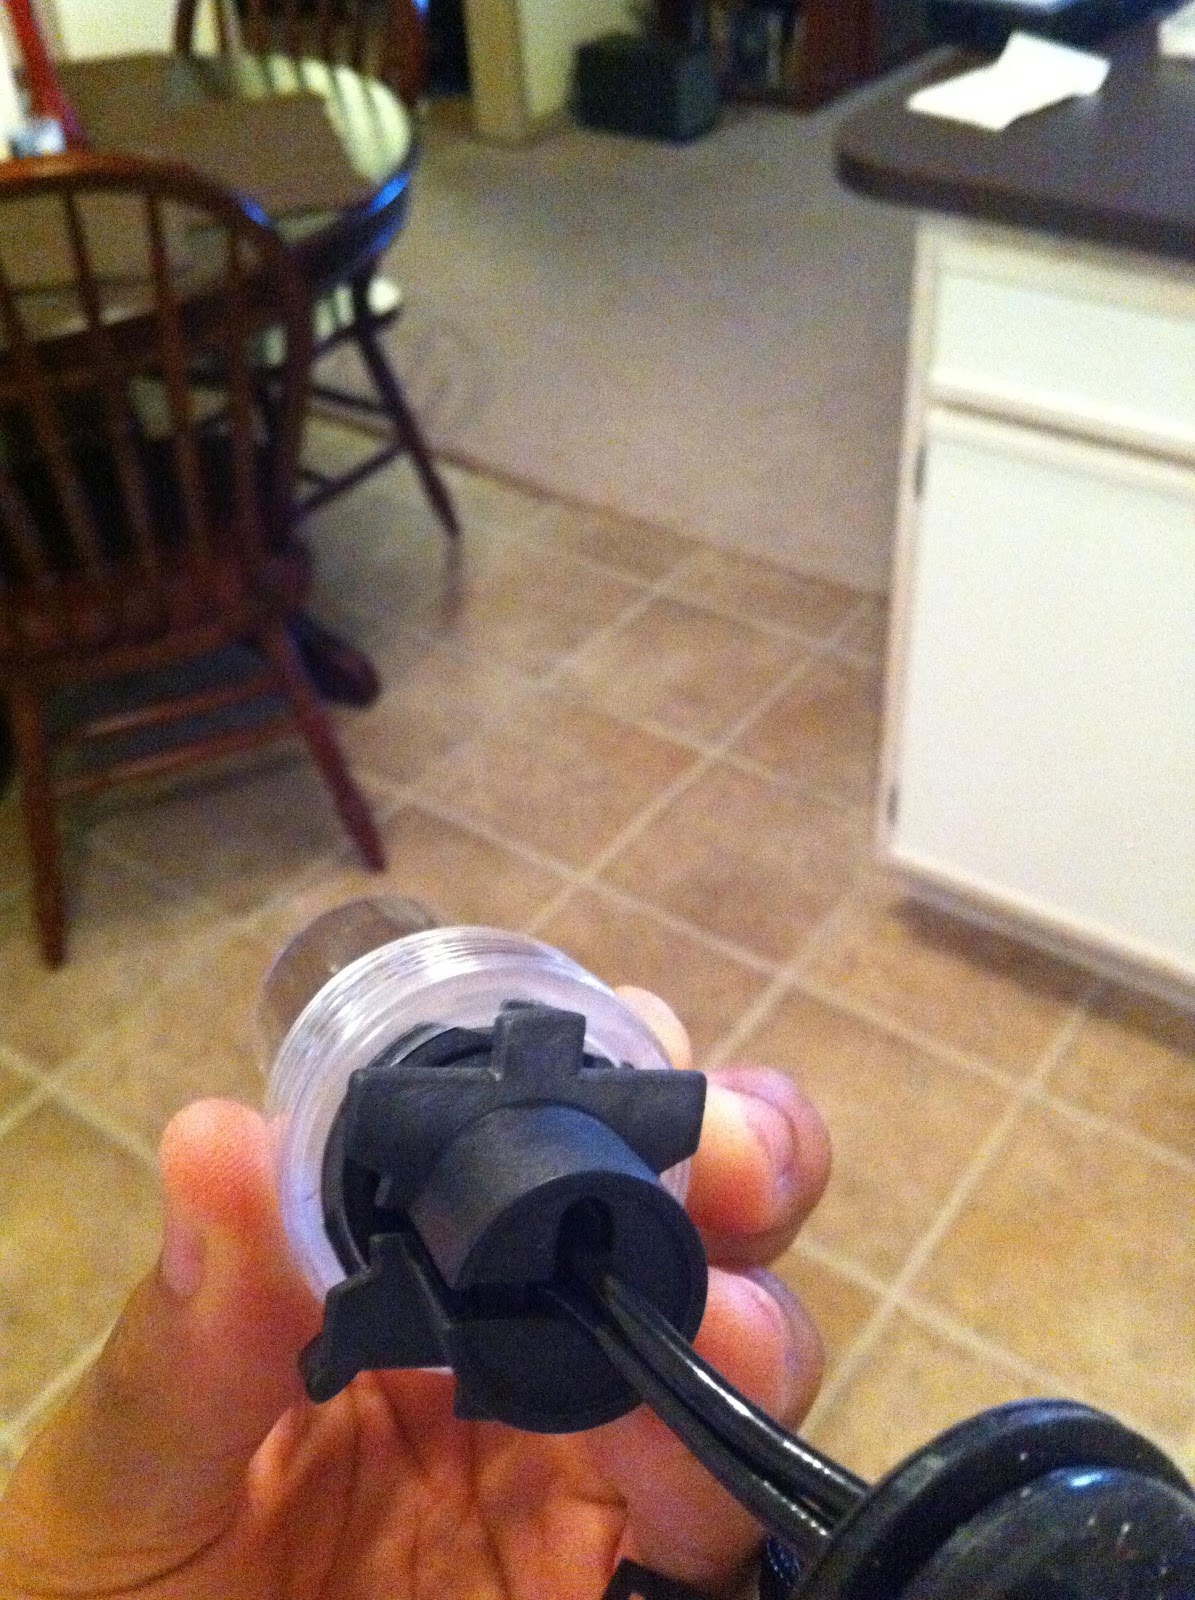
The trouble is that the base of the H7 HIDs tend to be shaped differently and dont seal well within the H7 HID adapter. The Mazda grommet seals well against the adapter but if moisture got in behind, it could be interoduced into the housings. Luckily, the bases in my kit were shaped nearly the same size as the inside of the HID adapter and a thin coating of rubber helped seal them. Of the three sets of H7 bulbs I have for this car, only one came with the wider bases that seal. Most are different. Once installed, there was still enough play to move the bases inisde the housing. With my RX8 yellow sways and the chassis braces, the result is bulbs bouncing in their housings over rough roads.
Second, the focus is still slightly off. The very slight difference in the position of the salts causes the light pattern to be more focused directly in front of the car. Much the way a flashlight beam is altered by moving the reflector in relation to the bulb. I know others have recommended using thin spacers to adjust. I wasn't that interested in sourcing the correctly sized or the proper material for the spacers.
Lastly, the bulbs listed in the OEM (4300-5000k) range were still a little too blue for my liking. The light color range varies greatly from manufacturer to manufacturer. Of the three sets I have, two identified as 4300k, one set identified as 5000k, two actually appear to be 5000k, one should be 4300k. Unfortunately the 4300k had the smaller non-sealing base. Using the 5000k, the light was white enough, but the cutoff was very blue. With the bulbs shifting over bumps, the cutoff would alter. This magnified the flashing effect that oncoming traffic experiances at the cutoff point except that the light looked blue. There were times that the light reflceted off signs and I thought a police car was behind me...but it was just the cutoffs catching the right angles.
Switching to the German spec Osram 65w H7s (H7 metal bases, H9 bulbs) offered better light output than stock, OEM color and no risk to burning the housings. Simple plug and play. They are about 15% brighter.
5-22-2012
Again, I've since reverted back to H7 Halogen but I have upgraded to the German Osram Rallye 65w light. I'm happy enough for now. The problem even with a good kit is that the bulb needs to be rotated 180 degrees to get rid of the shadow cone. Not too keen on trimming an expensive bulb.
12-22-2012
Ultimately I reverted back to halogen for the same reasons (plus I couldn't stand the bouncing when I hit rougher roads. I'm using the Osram 65w rallye bulbs and they are brighter from the driver seat than stock but dont look much different from any other perspective.