You must be logged in to rate content!
9 minute(s) of a 97 minute read
2-17-2014
Rotary Midget project
Compliments of Dutch 1960 @ mgexp.com
2-17-2014
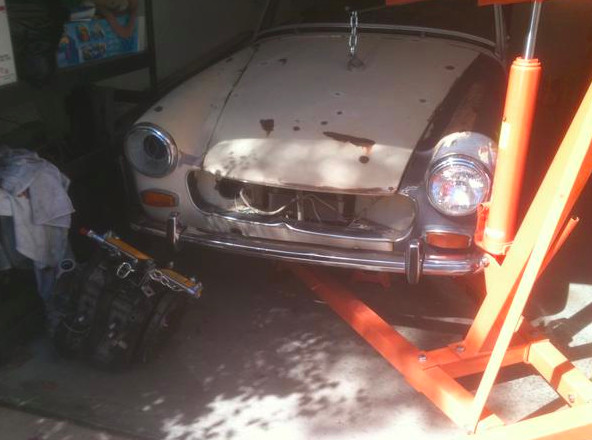
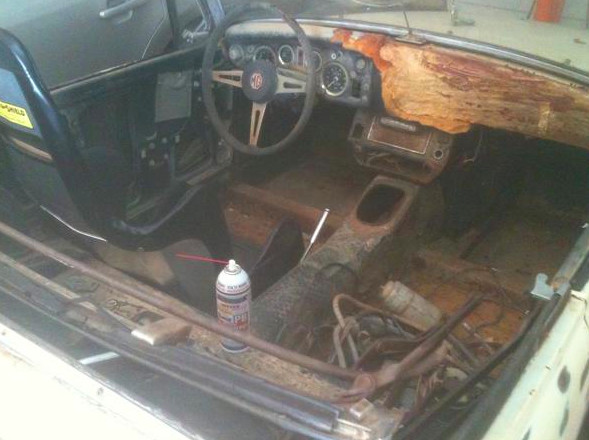
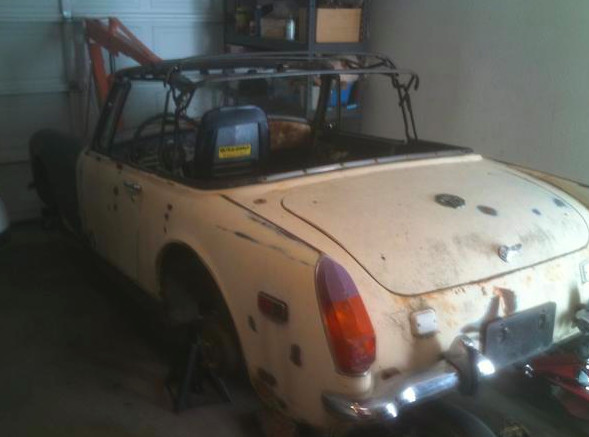
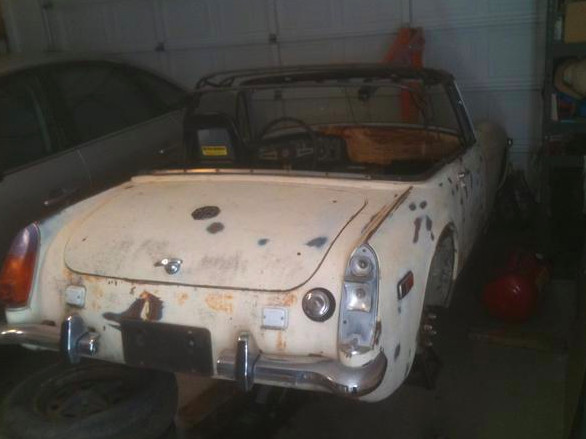
Starting my rotary Midget project. The idea is to work up a running car, and not worry about details and cosmetics. Starting with a 1973 Midget, and the mechanicals from a first generation 1981-82 Mazda RX7. The challenge is to cut up the Midget as little as possible, and to use the Midget and RX7 parts, unmodified, as much as possible.
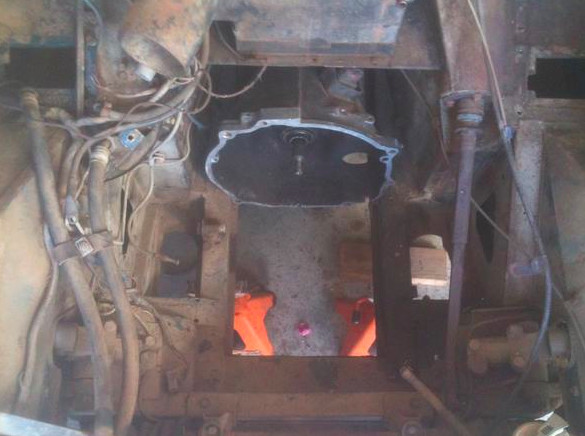
The car is a bit of a basket case, as you can see. We will start with a mock up engine, a scrap core block, so the fitting process is not done on a built up engine.
Gerard's Garage has a build page, and I am using it for ideas, but we are going to go for a real world build out, warts and all.
The engine, minus smog equipment, the transmission, the driveshaft (shortened), and the rear axle (narrowed), will come from the RX7. The rest will be Midget and some other spare parts laying around the shop.
The idea was to be able to fit either a 12A "small block" or a 13B "big block" rotary. Can the transmission be moved back far enough to accommodate, as the engine must drop in behind the steering rack mount? What about the oil pan clearance? If we fab up an oil pan, things can fit more easily, but let's try to use the stock oil pan, it's so much easier.
Generally, one must cut out the heater mount crossmember to make things fit. We were able to jam the transmission in there without cutting, but the clutch release on the top will hit when the clutch is disengaged. Also, there is no room to tilt the bellhousing upward to accept the engine.
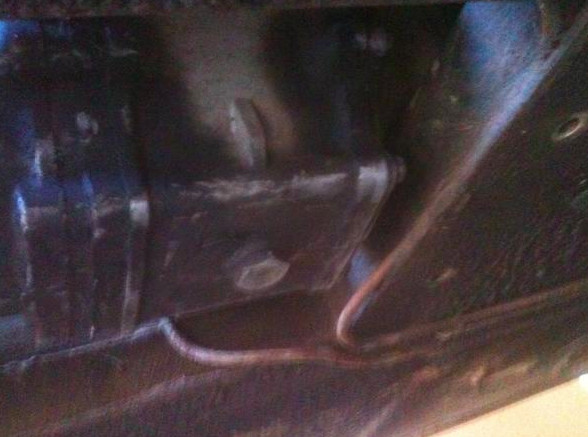
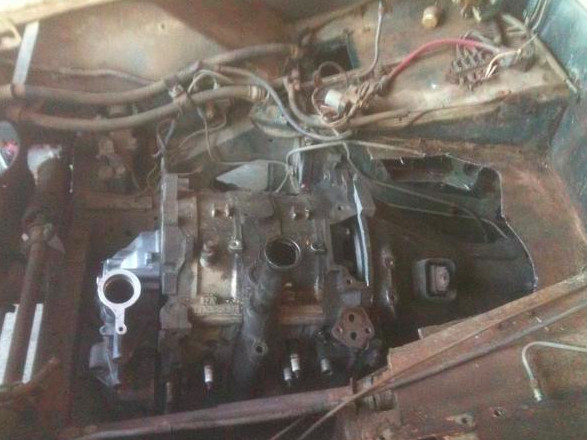
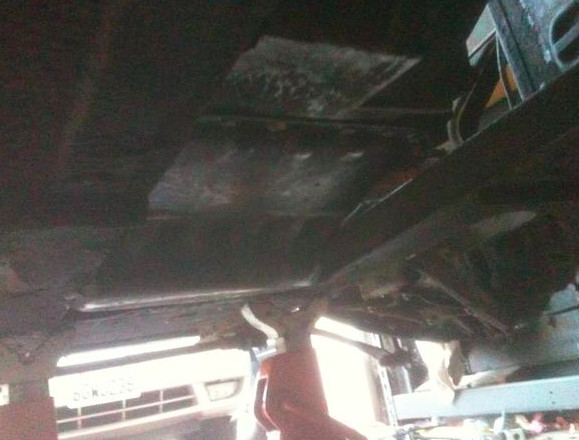
As you can see from underneath, the transmission case ends up butting up to the transmission mount crossmember in the car. So far, there is still a little room to move the transmission rearward, but the bellhousing against the heater mount is stopping us. Also, the fuel and rear brake lines will need to be rerouted, to protect against chafing from the transmission.
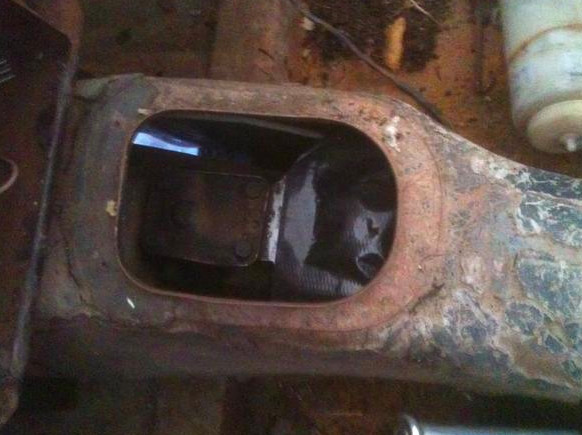
From up top, you can see that the transmission tunnel will need to be cut out a few inches for the shifter. The hole for the shifter mount is covered in black duct tape. Unlike the Gerard's Garage piece, we are doing no work at all on the transmission, to reorient or shorten anything. We want to leave things factory stock when possible.
Back to the first photo, you can see the shelf, which is the main front crossmember, just aft of the steering rack mount. The crossmember is three inches wide, and we really don't want to cut into that, if we can help it. As the bellhousing and transmission sit in this photo, we have 12 inches from the bellhousing to the shelf, then 3 more inches from the back of the shelf to the back of the steering rack mount, a total of 15 inches. The frame rails are 12 inches wide, going to 11 inches wide between the flanges at the lower edges of the frame rails.
The 12A engine has an oil pan that is 14 1/2 inches long fore to aft, with the front engine mounts mounted forward of the pan. The pan is 13 inches wide. At this point, we would need to move the transmission back 2 1/2 inches, or fabricate an oil pan. We have only another inch or so behind the transmission, before we cut into the mount. And what about the width? Our saving grace is that the pan has a lip, about an inch wide on all sides. So, below the lip, the pan is 11 inches wide, and goes forward 13 1/2 inches from the bellhousing. The forward side of the oil pan also slopes to the rear from lip down to the sump, so maybe we can cheat a little. We are at 12 inches fore to aft now, we aren't going to get another 1 1/2 inches, but maybe an inch.
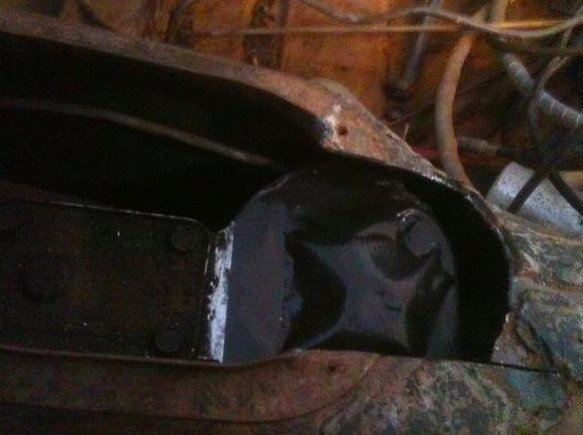
OK, time to get out the sawzall. Went a little crazy on the heater shelf, but the heater was fused to the shelf very well, so we just cut around the heater. The sawzall is not a jigsaw, so things came out a bit curvy, and we took more off of there than we needed to.
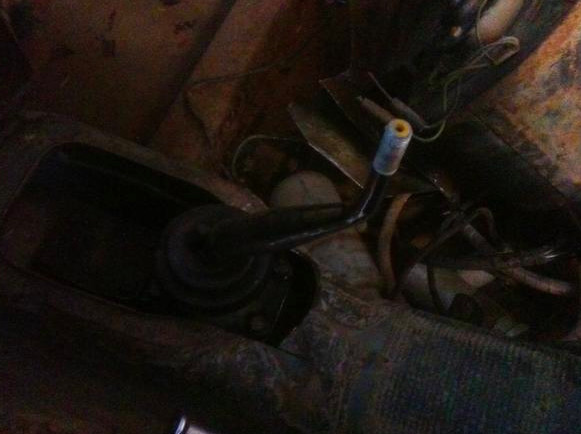
The hole for the shifter was easy.
Now the transmission and bellhousing sit another 3/4 inch or so farther back. And they can easily be tilted up at the fore end to accept the engine. That engine is not going to clear the front crossmember if the engine is not soundly mounted to the driveline, and we can't tilt the bellhousing up.
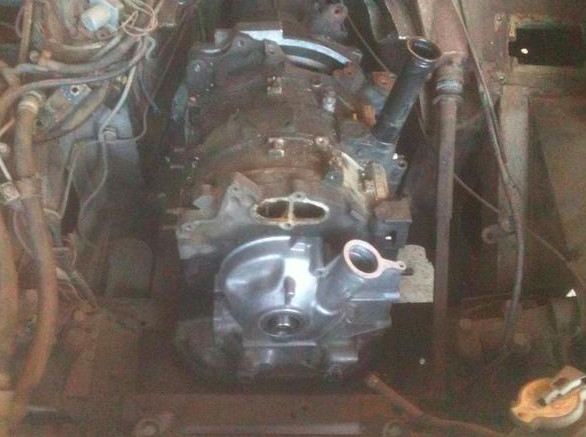
We are close, but still seem a bit short fore and aft. It is clear now that a (3/4 inch longer) 13B engine is not going to fit without a lot more work, so we are sticking strictly with the smaller 12A engine on this one. Lets drop the core engine in there and see what happens. Note that the clutch line mount has been sawzalled off of the right side frame rail.
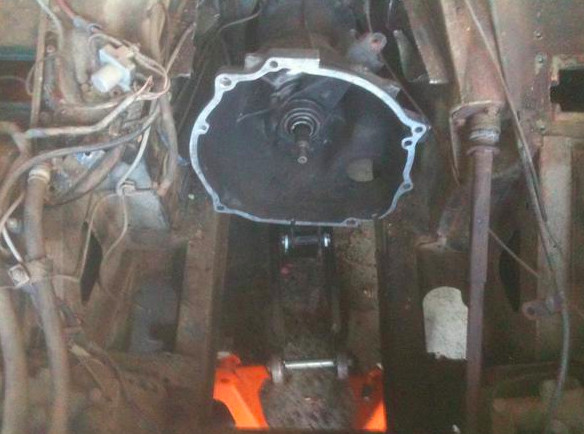

Well, that engine just dropped in like it was made for it! We are sitting with the crossmember on the front of the slope of the pan, just a bit, not up on the lip of the oil pan. We figured we were a fraction of an inch too long on the engine, and we are. But there is room above the crossmember and aft of the steering rack mount to do our front engine mount. We will raise up the front of the engine an inch or so, to get the front engine mount points above the crossmember shelf, and get the oil pan off of the shelf. Also, if you look underneath, the pan hangs just below the frame rails. That's just asking for trouble. Raise the nose of the engine an inch or so, and we are good all around. The clearance is oh-so-close, but we are OK. We will need to notch the right side frame rail, or at least the flange, to clear the oil drain plug. This one will need some rather solid engine mounts, so the engine does not twist into the frame. It is that close (a fraction of an inch all around). The bellhousing and transmission sit rather high, as the crank exits the center of the rear of the engine, not near the bottom as on a piston engine like the A series. Which means we can add a crossmember straight across between the frame rails, if we need to, under the bellhousing. We'll see about that later.
There is room to work on this engine and hang everything, without clearance problems. It looks like if we use the factory intake manifold and carburetor (cheaper, and the factory 4 barrel is a nice piece, once the smog stuff is cleared, like a baby Holley 4 barrel), the manifold just might clear the passenger side footwell without cutting it up. The manifold will need some pollution control passages ground off to clear the footwell, but it looks like it might work. Hood clearance should be OK, though the factory air cleaner may need to be jettisoned.
So that is it for tonight, time to sort out the engine mounts later, and get to work on the intake manifold and carburetor. The RX7 radiator and oil cooler will need to be evaluated for fit, as well.
Harry, yes, isn't that a beautiful build?
I think with careful mixing and matching of parts, a 13B engine would easily fit. The factory transmission I am using has a huge space between the front of the bell housing and the actual gearbox, more than is necessary. The idea here is to build a "sleeper" that is visually mostly stock MG from the outside, as simply and cheaply as possible, and to find out the absolute minimum real world effort that is required to complete a successful rotary MG Midget build.
Also, for a road car, the factory 12A Mazda rotary, without all the porting and fancy upgrades, should make for a delightful set up that maximizes the potential within the limits of the stock Midget, without wildly exceeding them.