You must be logged in to rate content!
17 minute read
Bose Touring Stereo (NON NAV) iPod Interface Upgrade: iSimple Media Gateway
Compliments of Spartan 1771 @ www.the370z.com
6-9-2010
iPod Interface Control Unit & HD Radio Adapter Installation Instructions
DISCLAIMER:
Should you decide to use this do it yourself guide, I WILL NOT BE HELD RESPONSIBLE if something goes wrong and you damage your stereo or vehicle in any way, or if you somehow manage to hurt yourself or someone else. If you decide to do this modification, do so at your own risk.
PLEASE NOTE: This upgrade is only available for the factory Bose stereo, which is included in the Touring Package (NON-Navigation Package). For reasons unknown to me, this modification WILL NOT WORK with the basic factory stereo.
Although I truly love my 370Z, I do on occasion have to wonder why the manufacturers cut corners on a few very small things. One of which being the Bose Stereo system. Although I do consider myself to be an audiophile, I personally have never been a fan of Bose products. I feel they are over priced and overrated. The Bose stereo in the 370Z is a great example of this. The subwoofer is somewhat underpowered, and I was very surprised to discover it did not come with an integrated iPod interface. The subwoofer I can live with as is, but the lack of an iPod interface is something that truly drives me nuts. I’m somewhat anal when it comes to having exposed wires running from the auxiliary port to the iPod, which I have to keep in the cup holder. So I set out to remedy this issue without replacing the entire head unit.
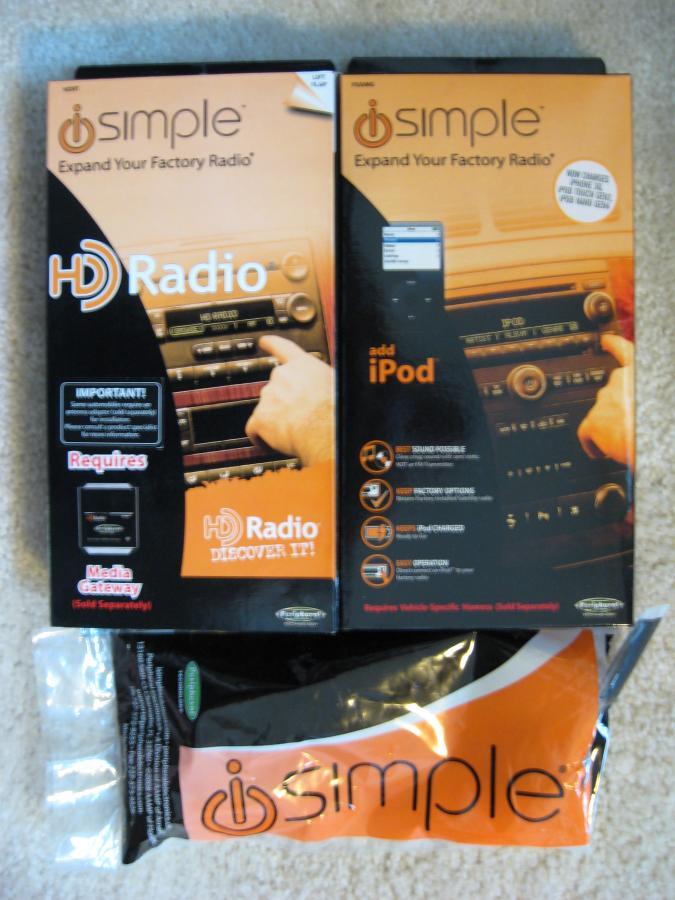
I found several manufacturers produce an interface unit which allow you to fully control the iPod from the face of the factory Bose stereo, allow you to use the steering wheel controls and charge the iPod while it’s docked. UPAC and Peripheral Technology seemed to be the most popular. Funny thing is, they are both the same company. I guess one was bought out by the other. I also found one on Crutchfield marketed by another manufacturer. While researching this product I quickly discovered you can also install an adaptor to integrate HD Radio. The HD Radio adaptor can not be installed alone. It requires the iPod interface unit. I saw no reason to do one and not the other, so I purchased both. The last thing you will need to do this installation is the proper wiring harness. From what I have seen you should be able to purchase this from the same store you purchase the iPod interface unit. If you decide to also install the HD Radio adapter, you will need an antenna adaptor. I personally decided to go with Peripheral Technology products. If you do the same, here are the model numbers: iPod adaptor iSimple PXAMG, HD Radio adaptor iSimple HDRT, wiring harness adapter iSimple PGHNI2-NISSAN, HD Radio antenna adapter: BAA3637.
If you have a 5th generation iPod, be sure the interface unit you purchase is capable of charging it while it’s docked. The distributor I purchased the interface unit from was very helpful and supplied the proper charging cable. This may also be an issue with an iPod Touch, iPhones and other newer generation iPod products. For this DIY I will be utilizing three different iPod Nanos: first generation, third generation and a brand new fifth generation. All of which worked properly after the installation.
Here are a few links to the iPod interface unit:
Peripheral Technology: Amazon.com: isimple pxamg nissan: Automotive
Although the links I provided are from Amazon.com and Crutchfield, I’m not promoting either site. I merely posted the links for reference purposes. If you decide to purchase from either of them, be sure you purchase the proper adapter for the 370Z.
Prices for these items seem to range a great deal. I’ve seen the iPod interface adapter for as low as $106.50 and as high as $180.00. The HD Radio adapter ranged from $60.00 to $125.00. The HD Radio antenna adaptor ranged from $15.00 to $28.00.
What you will need for this installation:
1. The Bose factory stereo, which is included with the Touring Package
2. An ipod
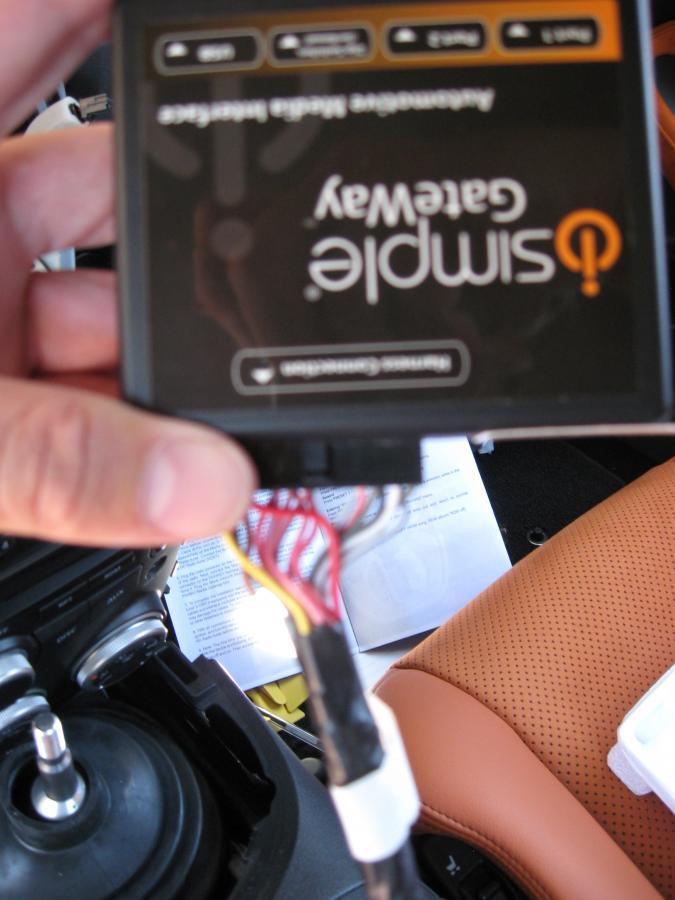
3. iPod interface unit (AKA: Media Gateway”)
4. Factory stereo wire harness adapter
5. HD Radio adapter (optional)
6. HD Radio antenna adapter (optional)
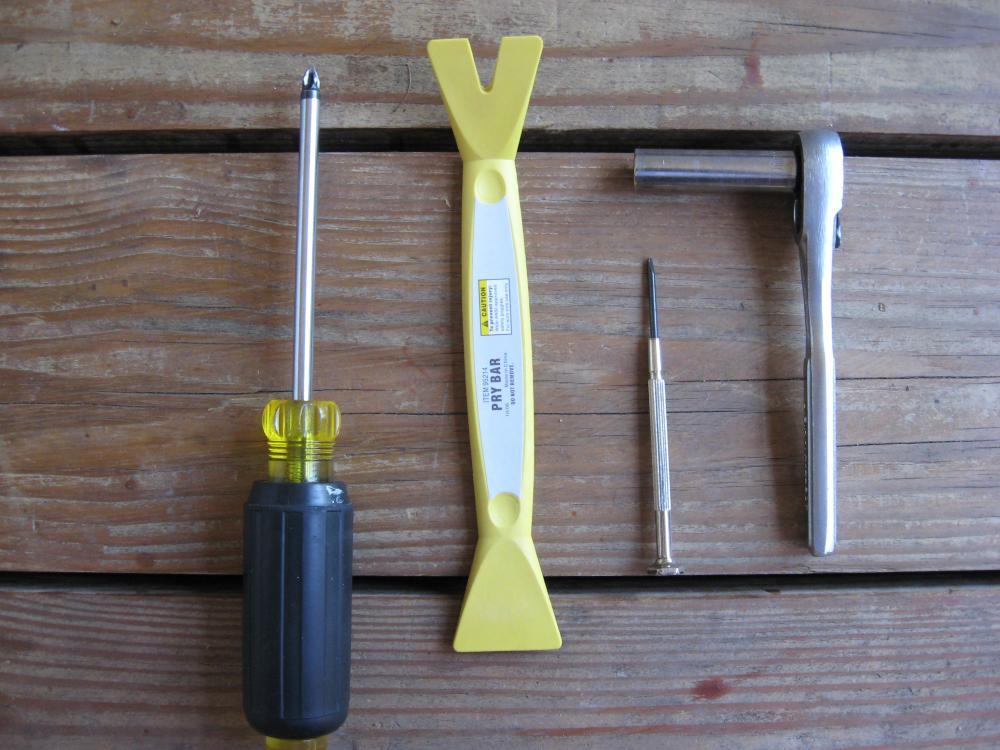
7. Philips head screw driver
8. 10mm Socket and ratchet
9. Dashboard pry bar (optional)
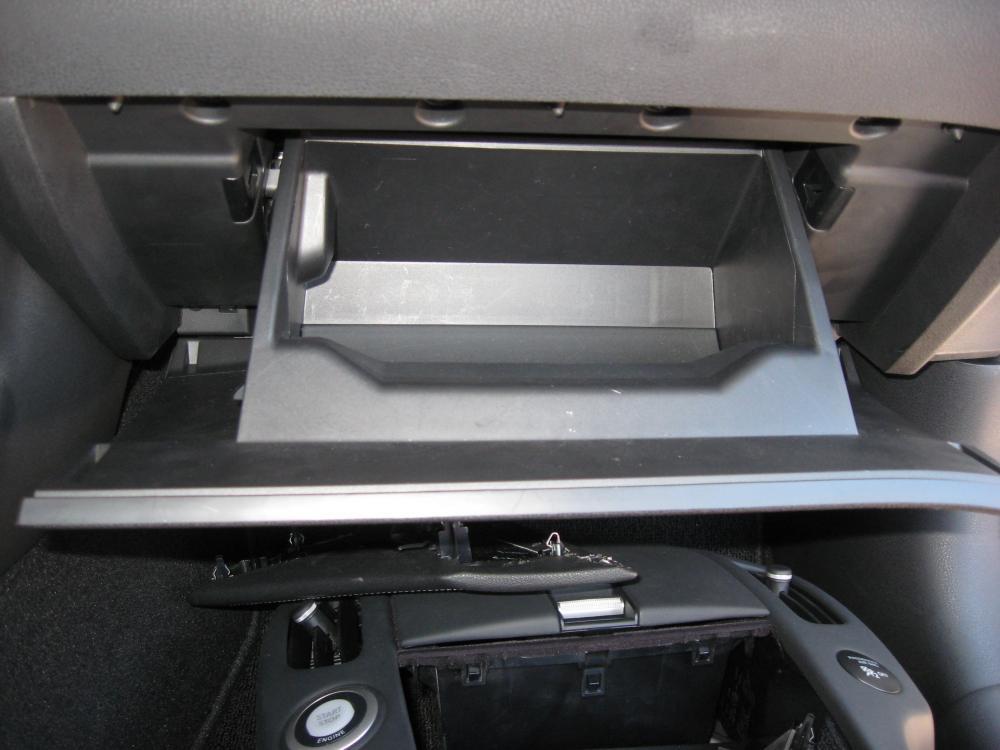
Prior to starting your install, you need to decide where you want to run the ipod docking cable to. The cable supplied with the iSimple PXAMG is 14 feet, so that gives you a lot of options. You can run it in to the glove box, the center console, the storage compartment behind the passenger seat, in to the driver’s side door panel storage tray or anywhere else you decide. For this install I decided to run it to the glove box.
Items to be installed:
Tools Needed:
Step 1: Using the 10mm socket and ratchet, disconnect the negative battery terminal on the car battery. Then be sure the parking brake is fully engaged.

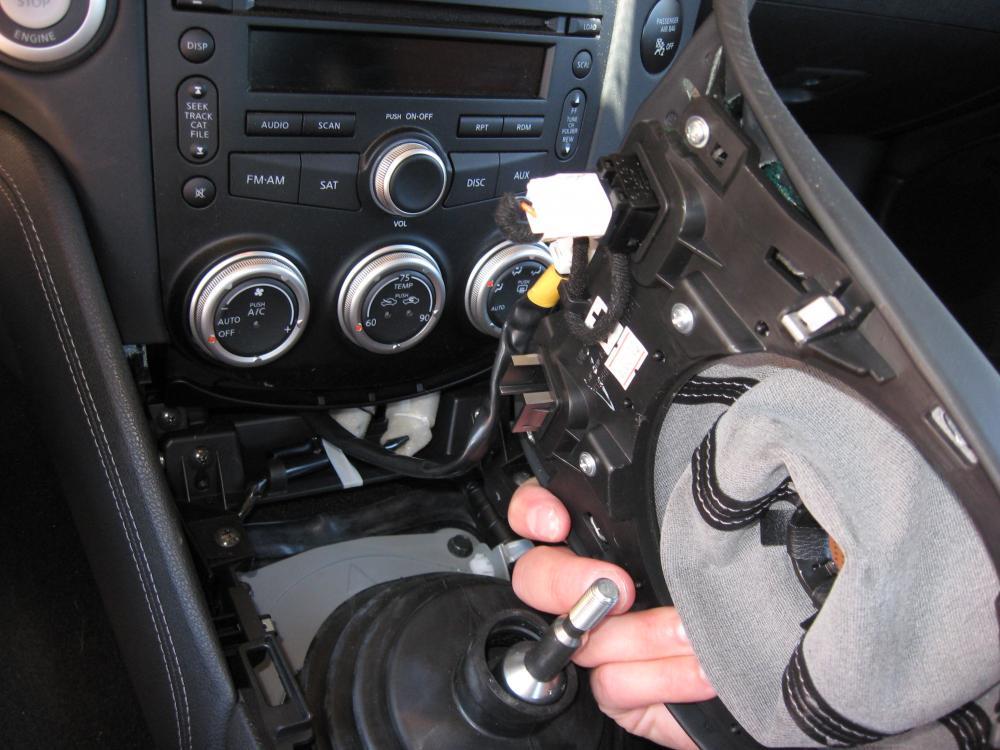
Step 2: Unscrew the shift knob. This will allow you to remove the trim ring and boot. If your not comfortable removing it, you can work around it. If you remove the surround completely, re-install the shift knob, or cover the bare shift handle with a cloth. This will prevent it from scratching the face of the stereo once it’s pulled forward.
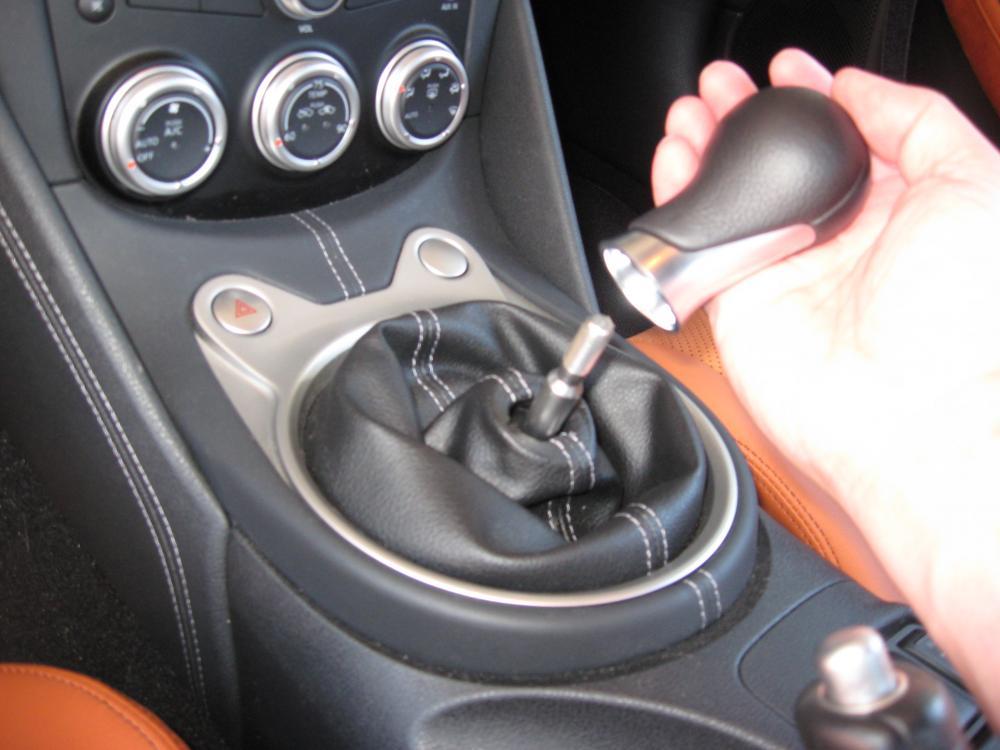
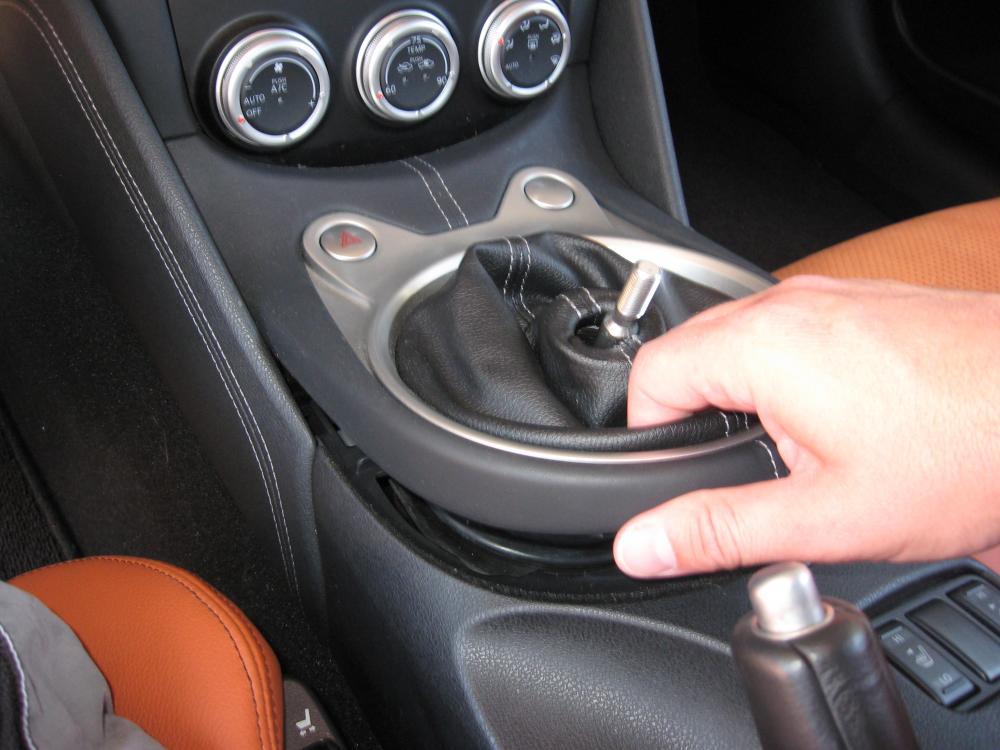
Step 3: Remove the trim ring around the shifter. Grab the back of the ring and pull upwards. It will snap out and you can the work the front of it lose.
Step 4: Disconnect the hazard lights switch and the SynchroRev-Match transmission switch (if equipped). Once the plugs have been disconnected, remove the ring and boot completely.
Step 5: You will now see four screws, unscrew the two upper screws (one on each side).
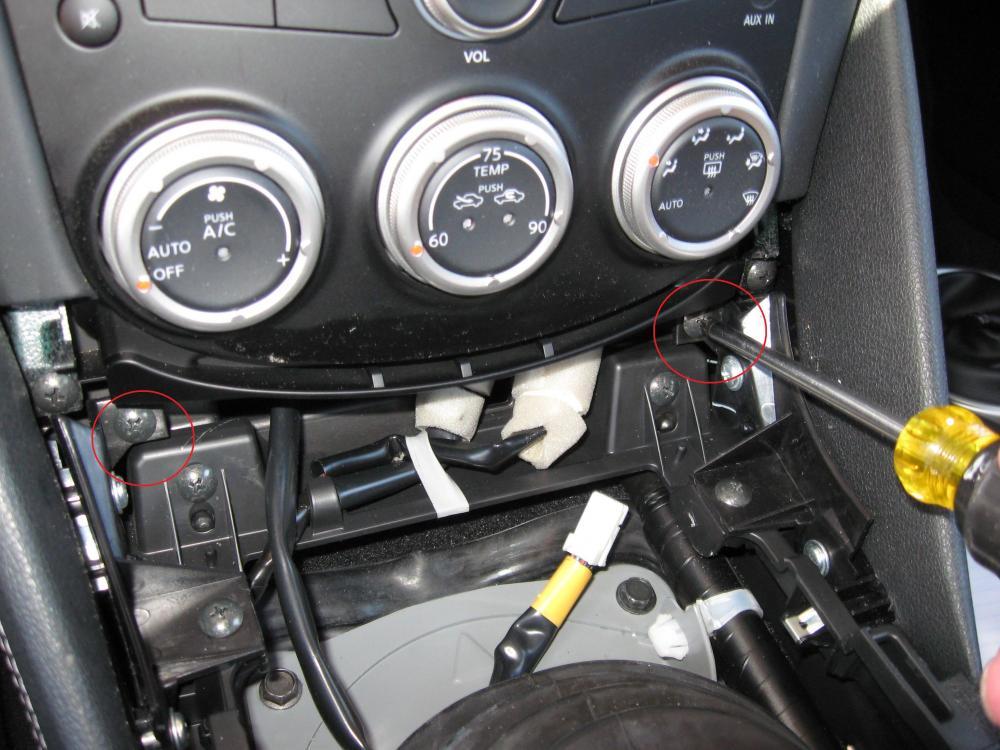
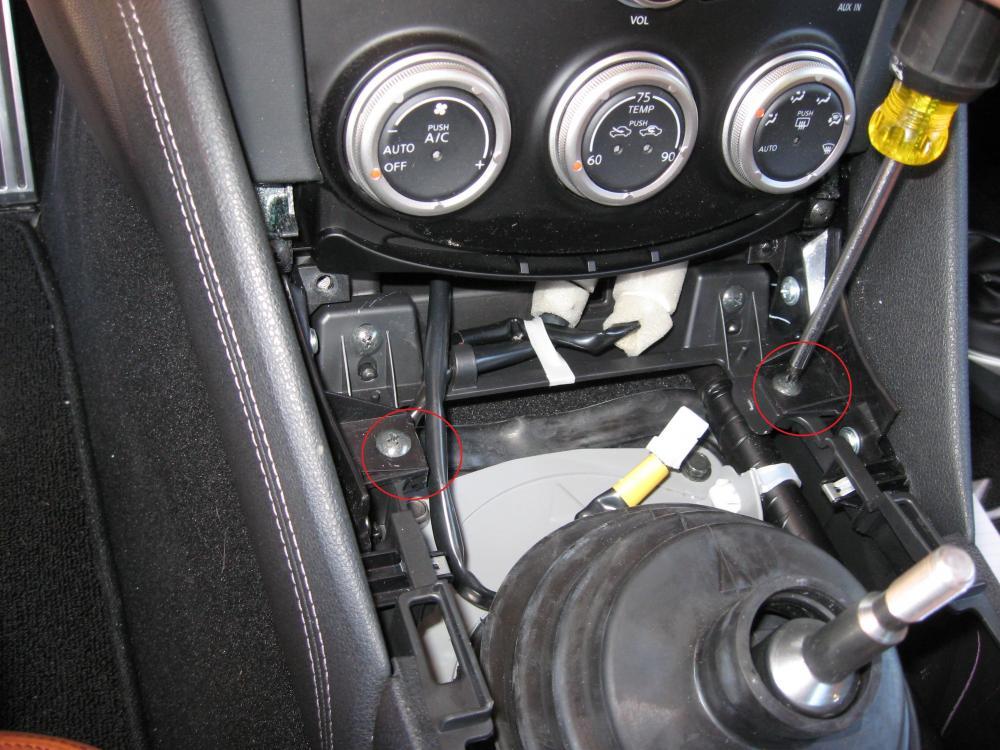
Step 6: Unscrew the two lower screws (one on each side).
Step 7: Remove both side panels. Pull outward from the top and it will pop lose. Once the top is free, pull outwards from the bottom and the bottom will pop lose, freeing the entire panel from the center console assembly.
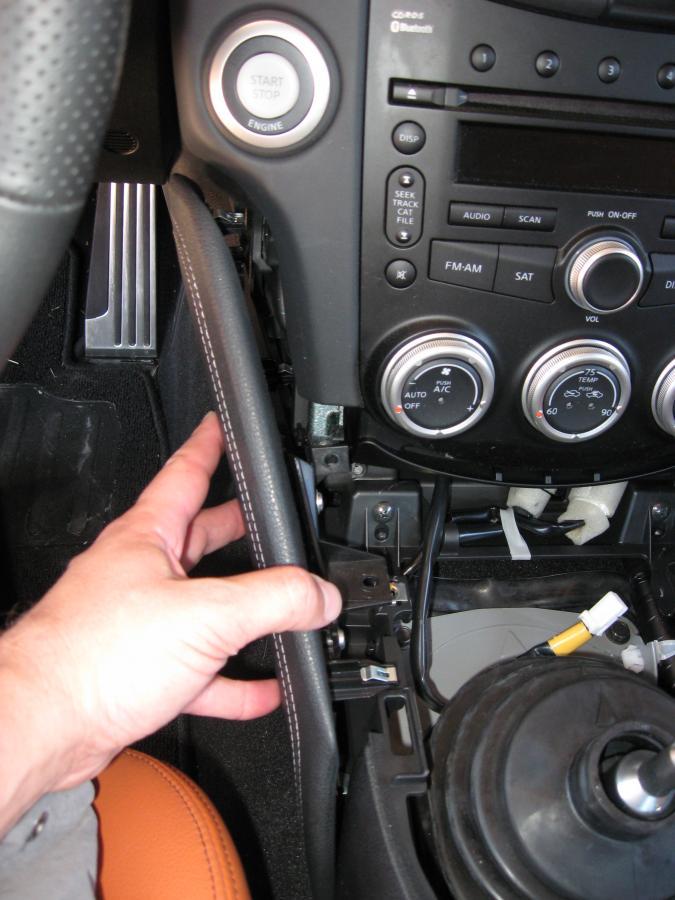
Step 8: You will see two black screws on the bottom: one on each side. These screws hold the leather surround and forward storage compartment in place. Unscrew both screws.
Step 9: Pull forward on each side of the stereo surround. It will pop lose at the bottom ends. Work your fingers or a plastic pry bar around, gently pulling the entire surround free from the dashboard and center console assembly.
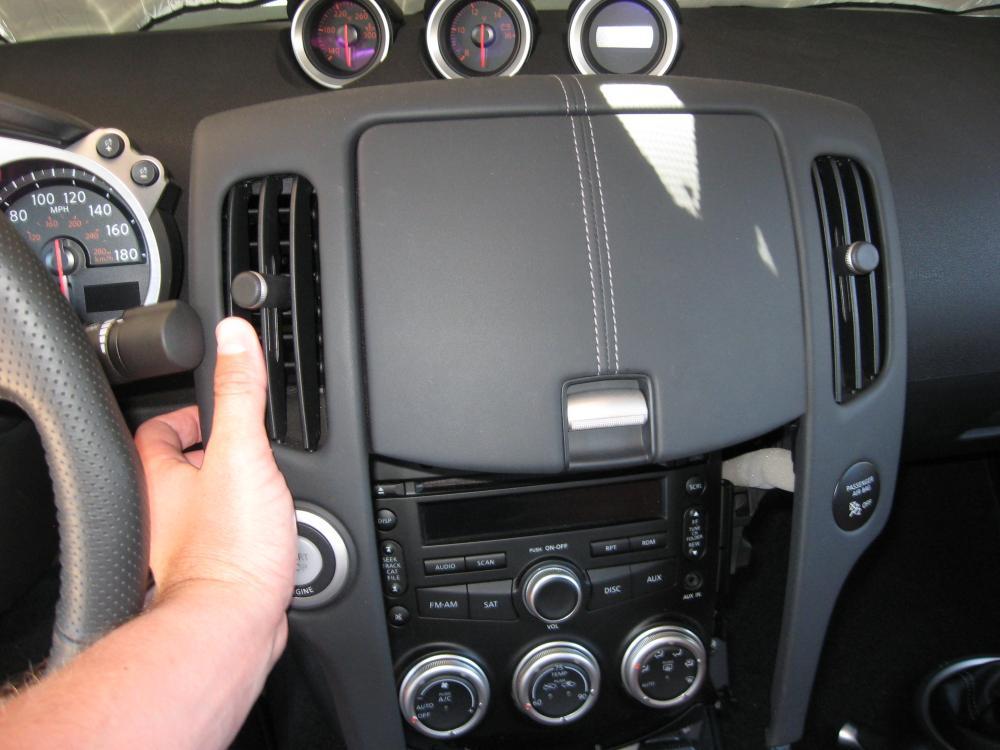
Step 10: Disconnect the passenger side airbag light connection and the ignition switch connection. Squeeze from the bottom and pull gently. If you have larger fingers, you may want to use a small screw driver to push the pin in while pulling gently on the plug.
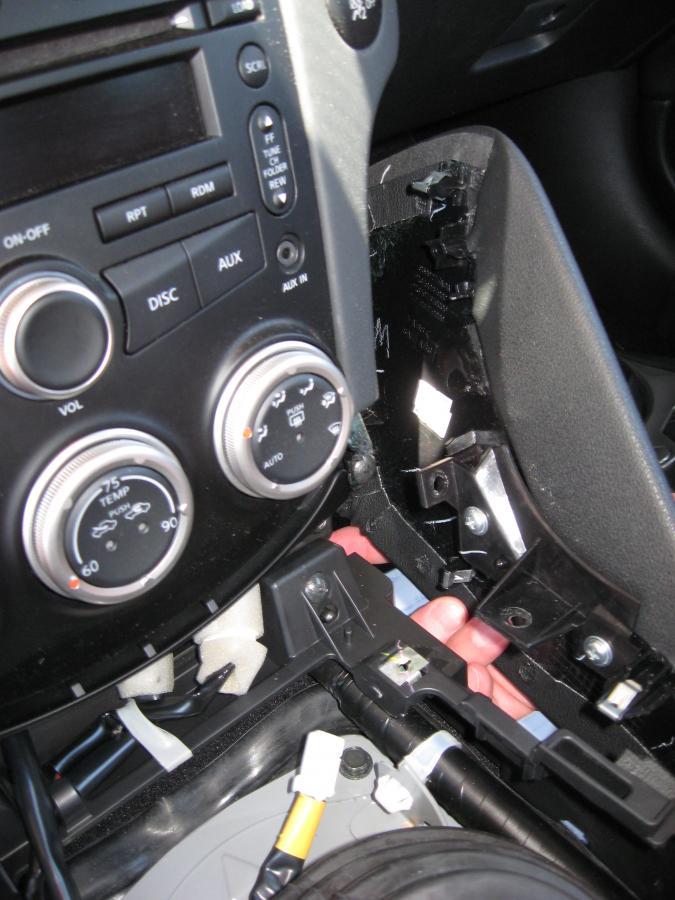
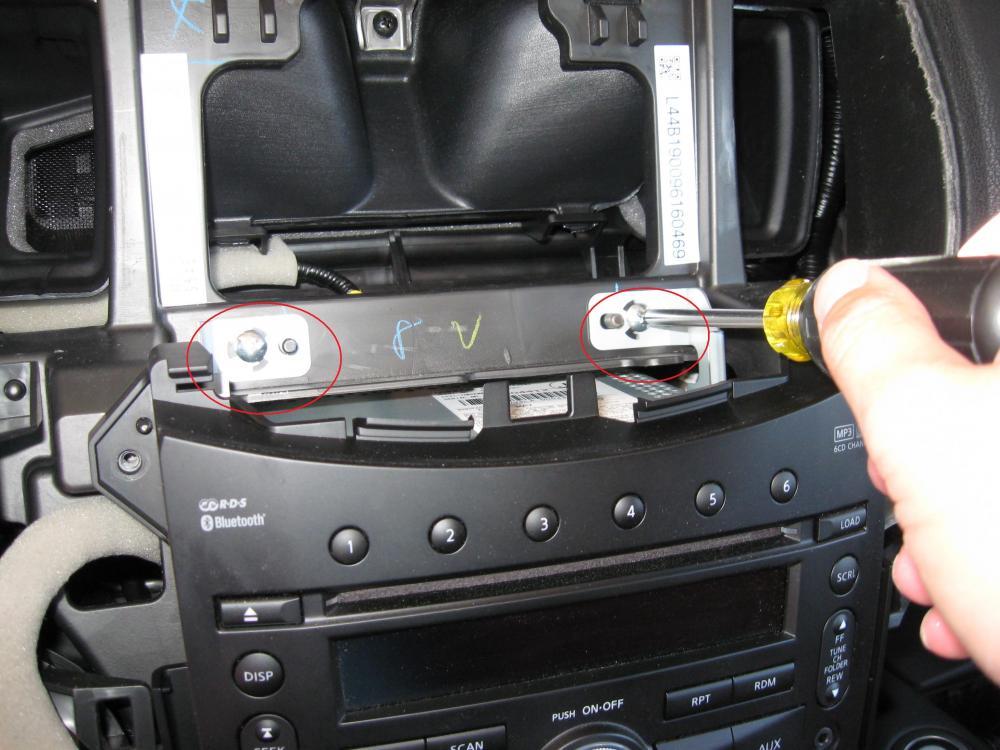
Step 11: Look around the perimeter of the stereo and you will see four black screws. Unscrew these.
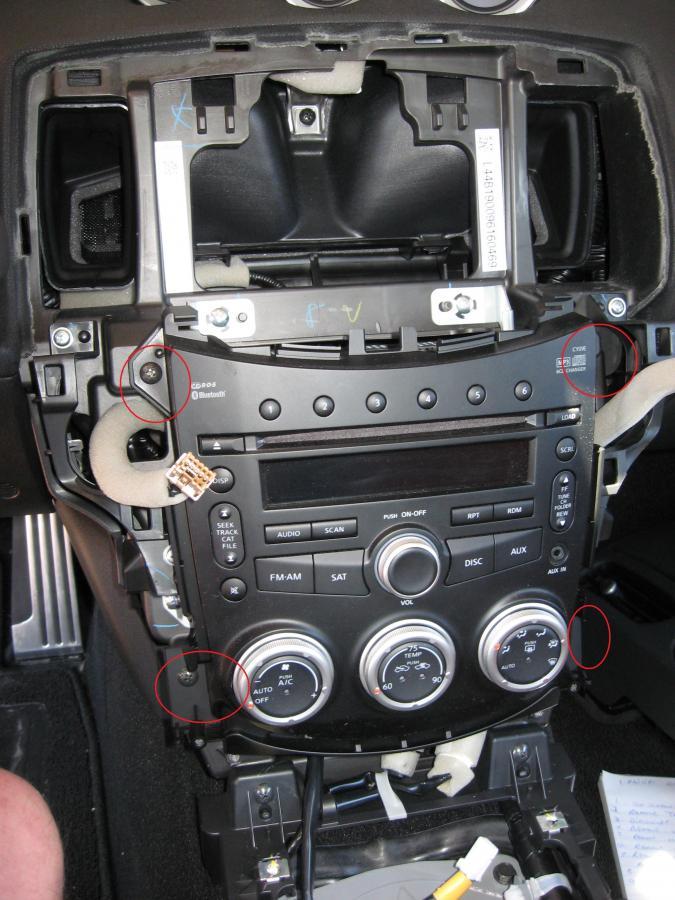

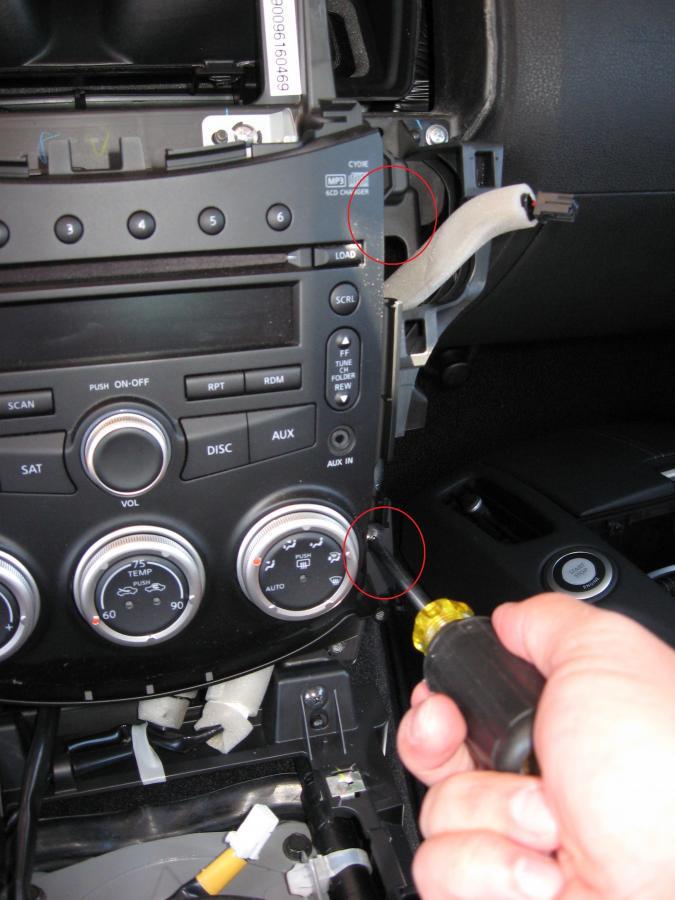
Step 12: Look around the perimeter of the stereo and you will see four silver screws: two on the top and one on each side. Unscrew these.
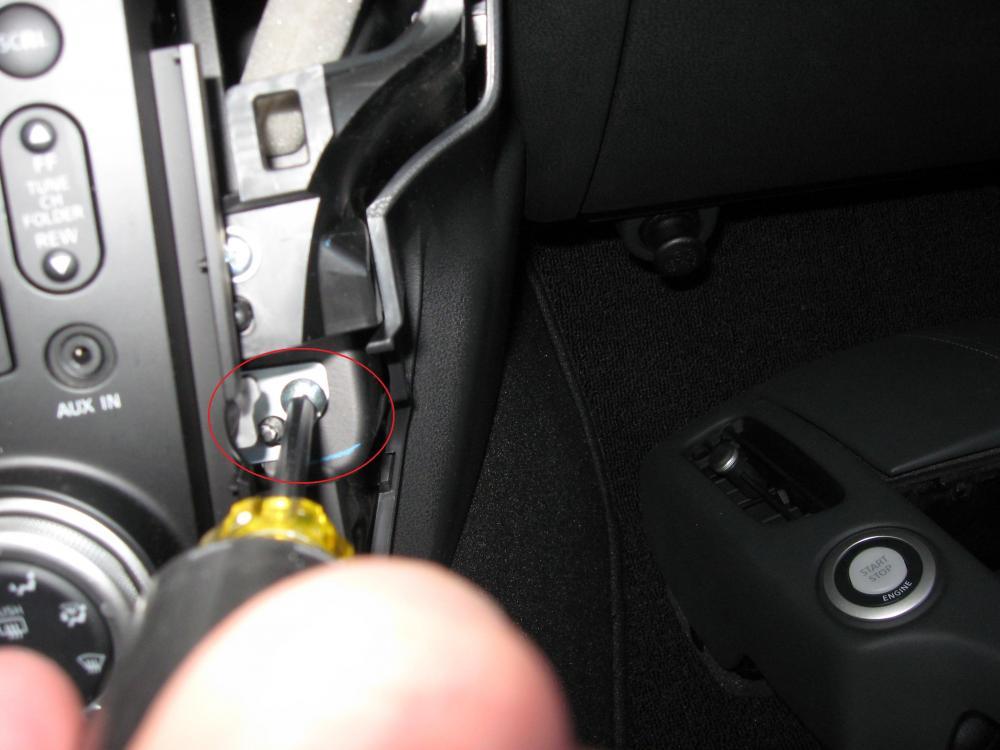
Step 13: Pull the entire stereo and HVAC unit forward out of the dashboard.

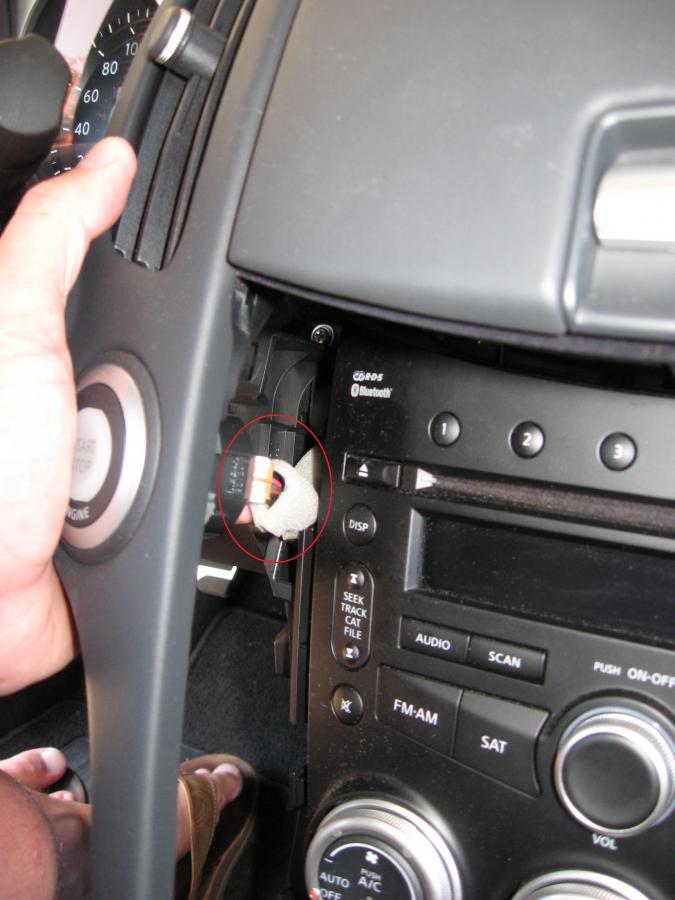
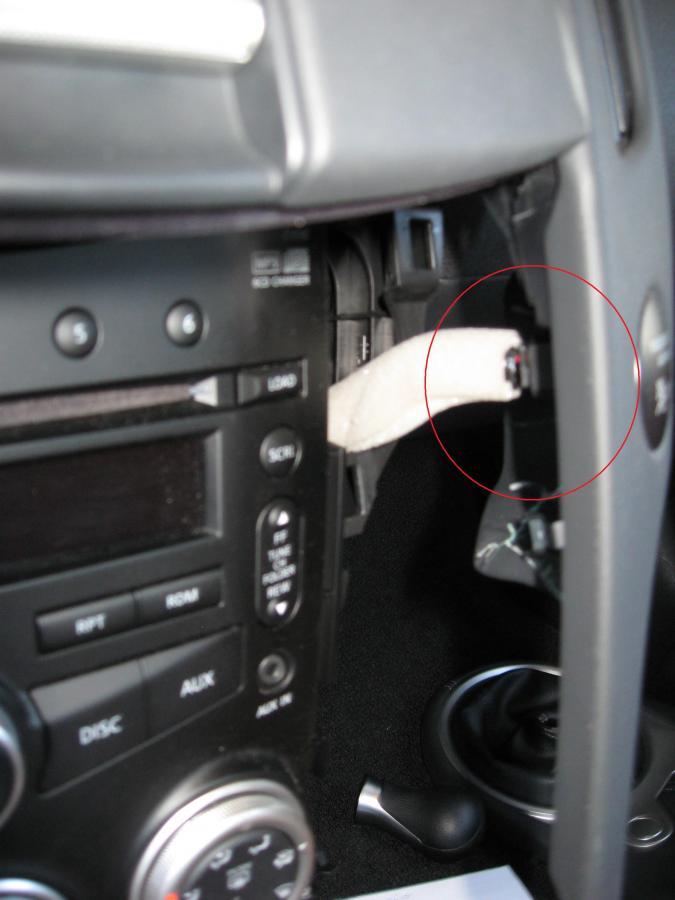
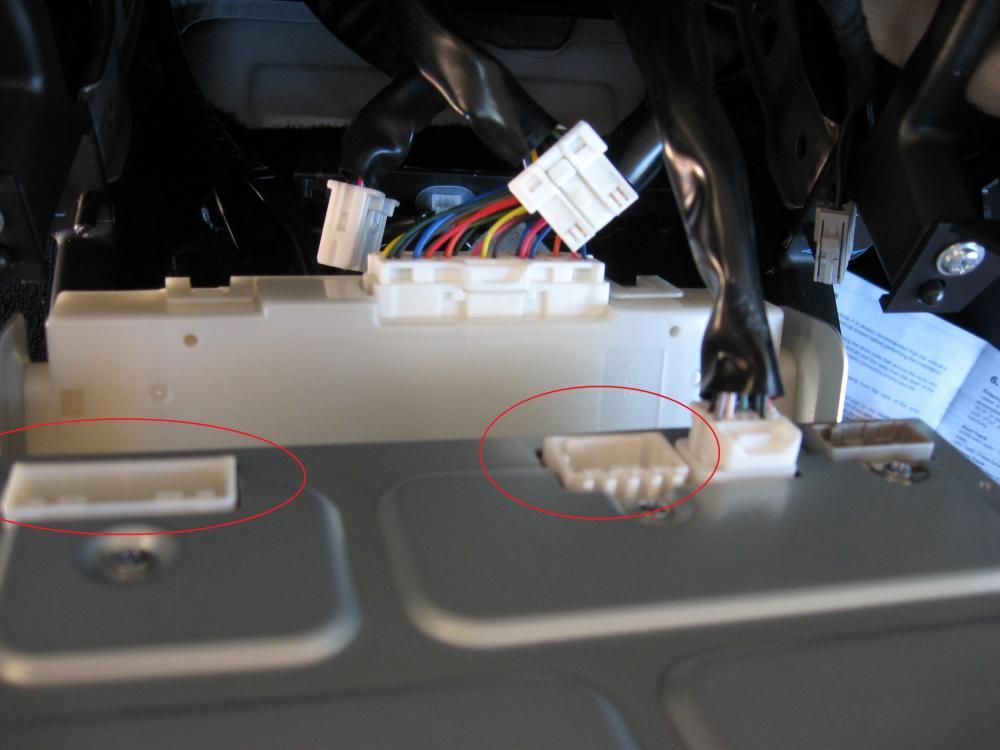
Step 14: Disconnect the 20-pin and 12-pin harness connections on the back of the stereo. If you are also installing the option HD radio adapter, also disconnect the antenna harness.
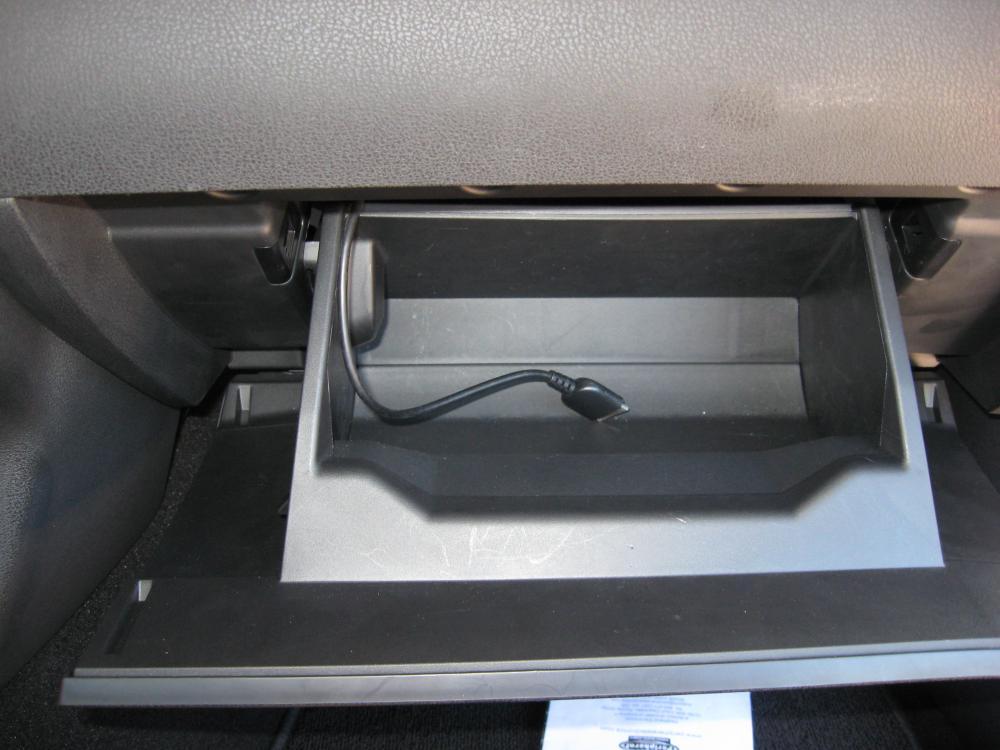
Step 15: If you are going to run the docking cable to the glove box, open the glove box and pull the bottom forward gently. This will free the glove box at the bottom and will allow you enough room to run the cable. I did not fully remove the glove box. I left the land yard cable attached and allowed the box to hang down. If you feel the need, then you can fully remove it from the dashboard.
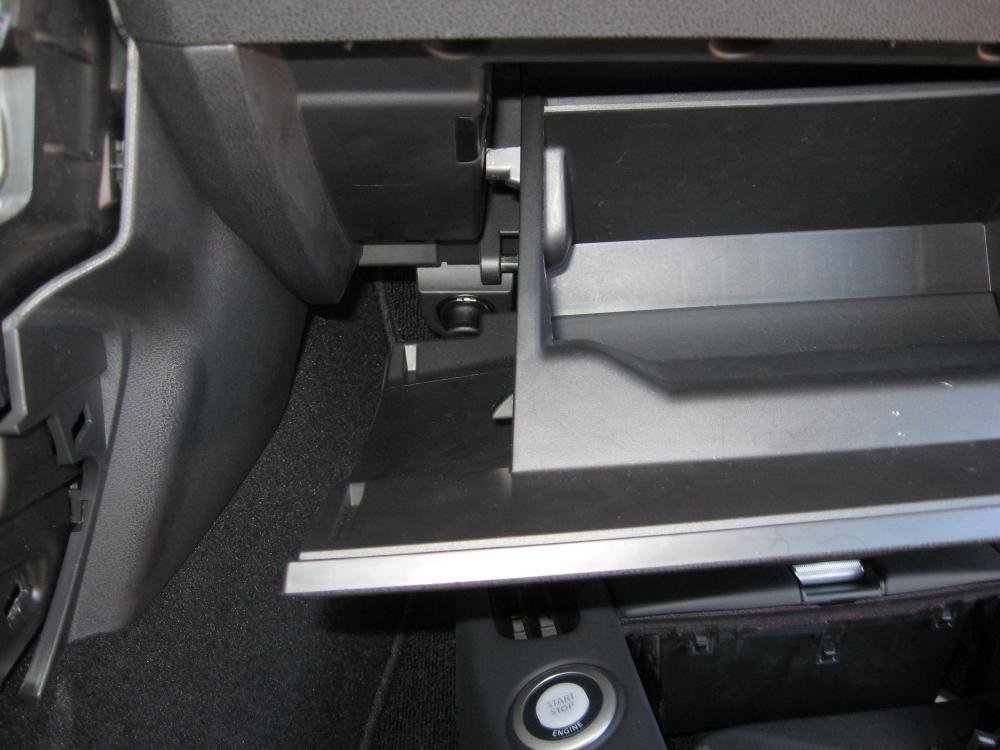
Step 16: Run your cable from the back of the stereo to the glove box. There is an opening that will allow you to run the cable without any problems.
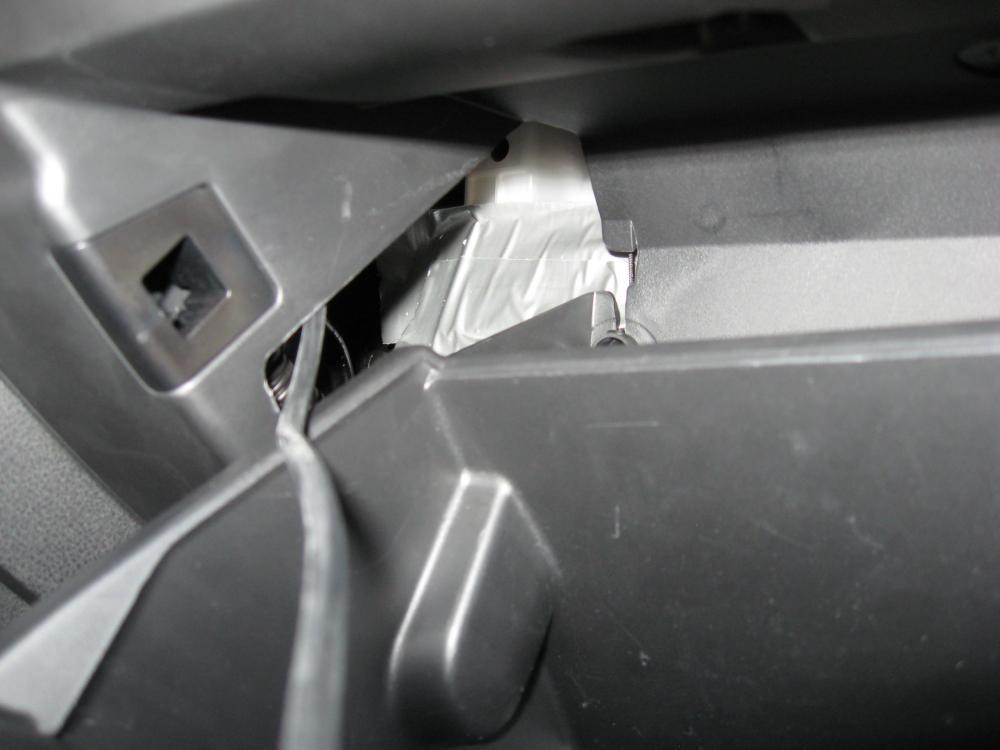
Step 17: Once the cable is run, leave enough slack in the line so you can close the glove box. Then roll up the unused length and secure it reusing the supplied wire twist tie.
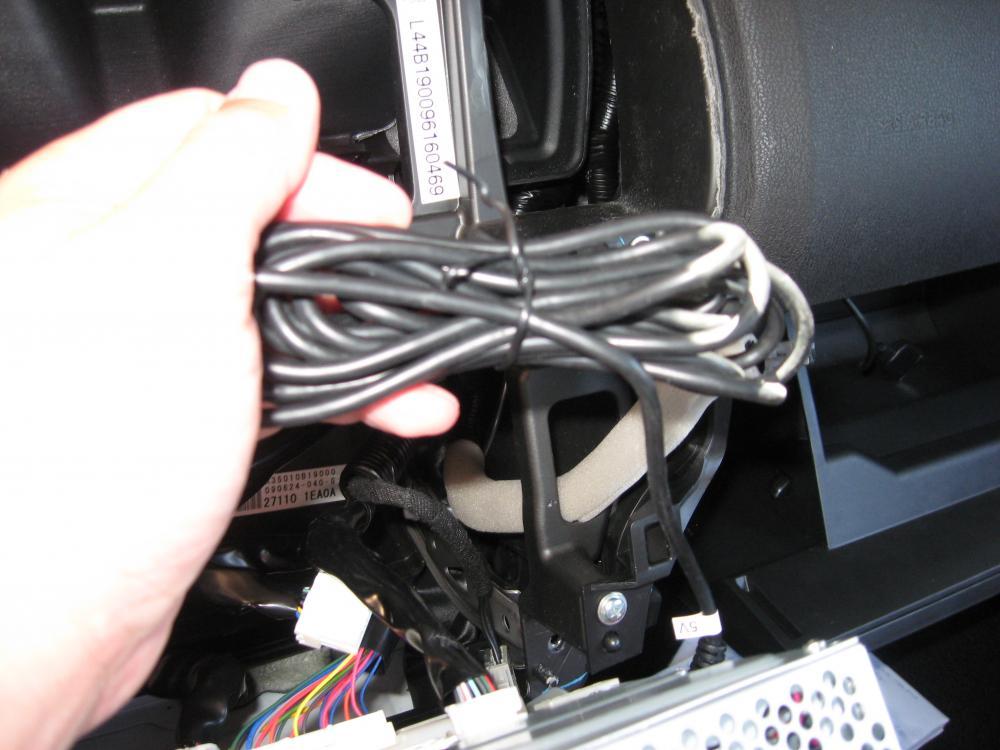
Step 18: Reassemble the glove box.
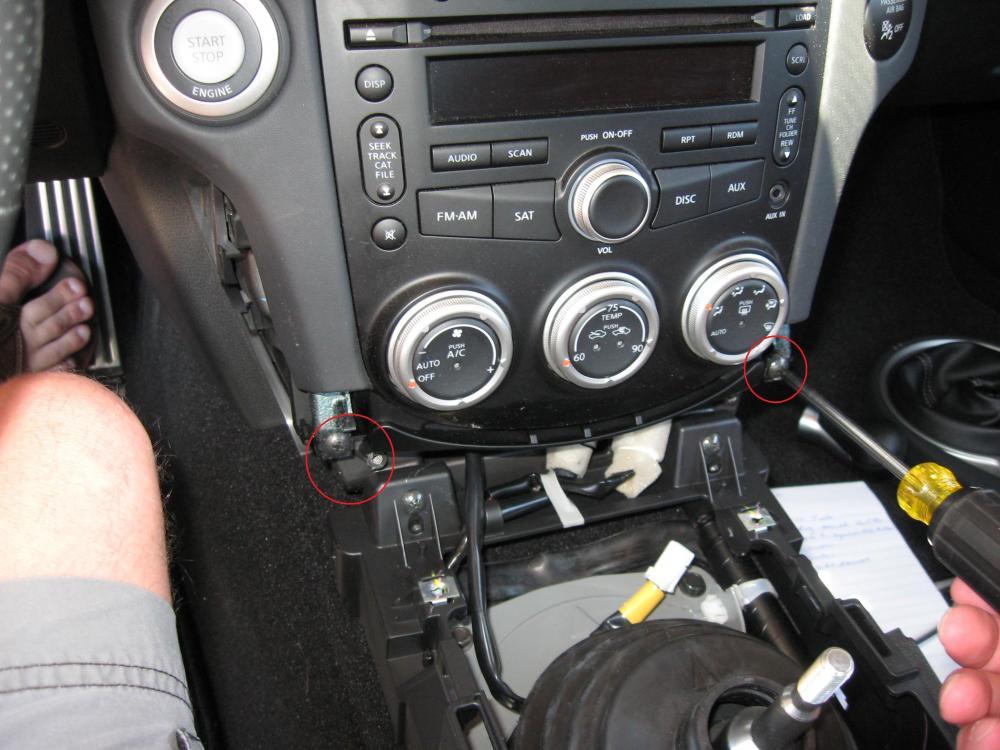
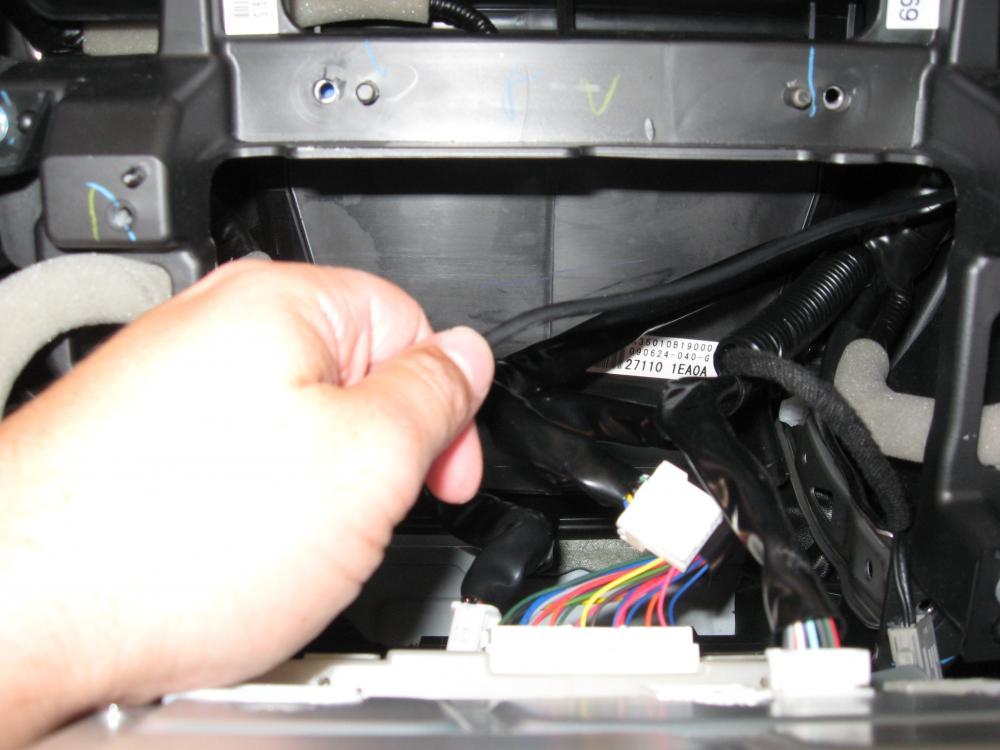
Step 19: Take the new wiring harness and connect the male leads coming out of the dashboard to the female leads on the new wiring harness (12pin and 20-pin connections).
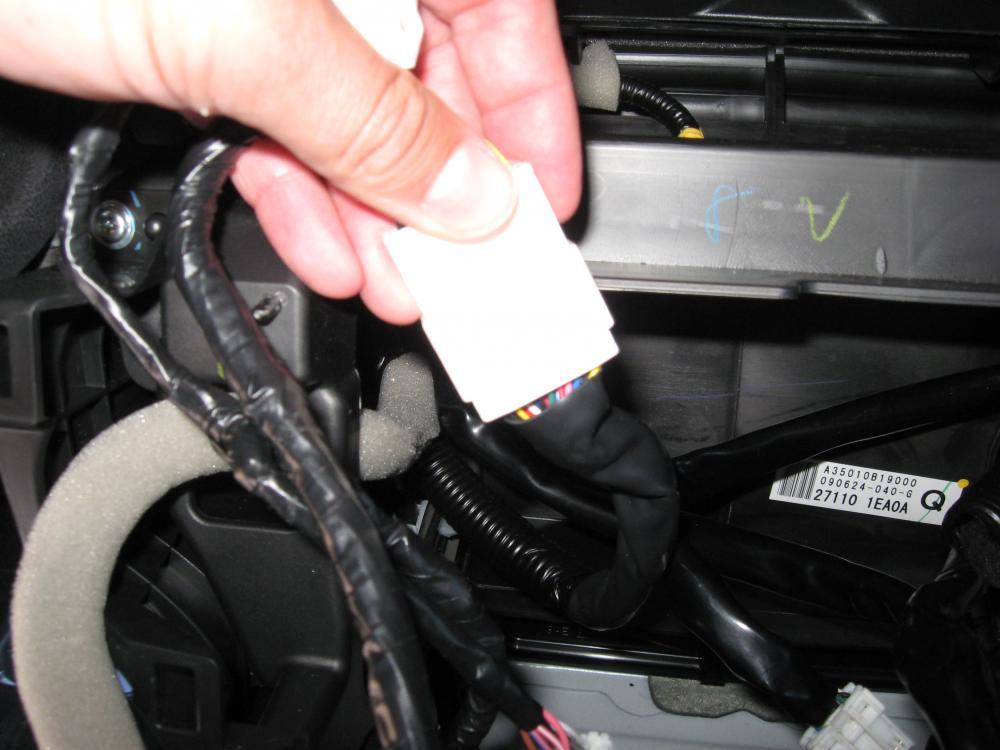
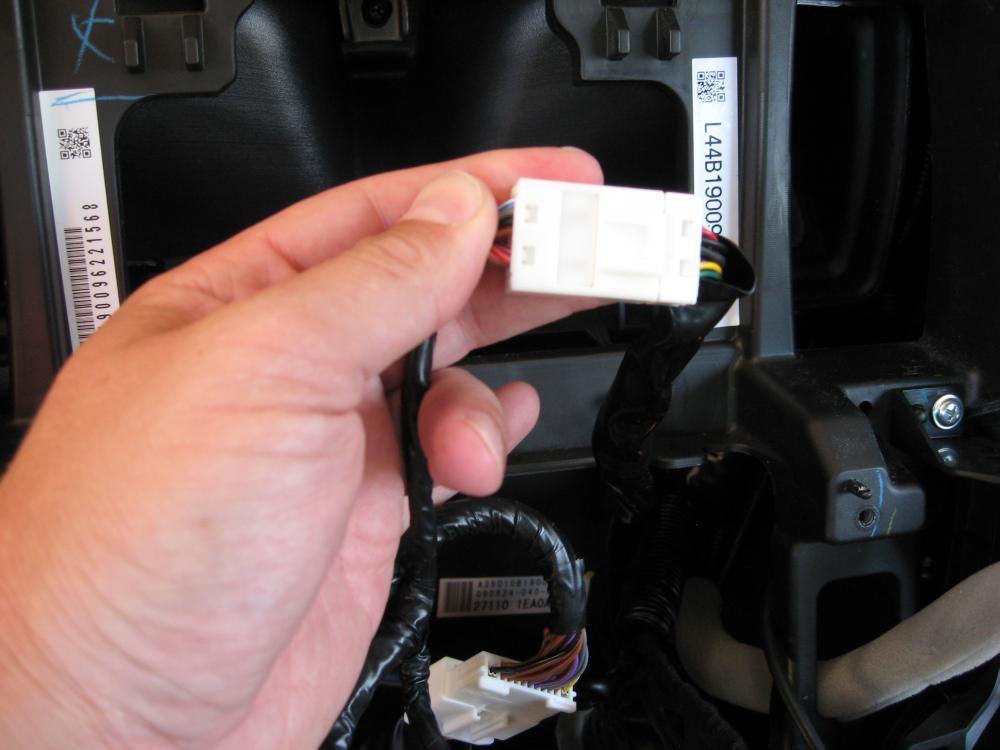
Step 20: Connect the new wiring harness male 12 and 20-pin plugs in to the back of the stereo.

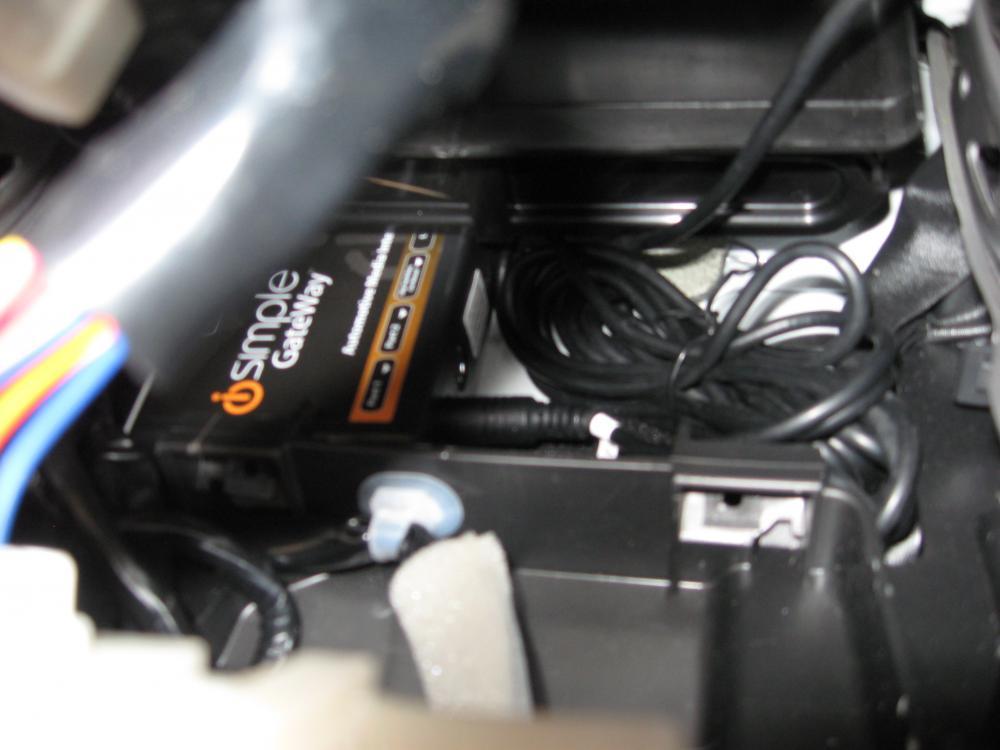
Step 21: Remove the protective decal over the dip switches on the media gateway and set dip switches 1, 2 and 4 to off and 3 to on. Then recover with the decal.
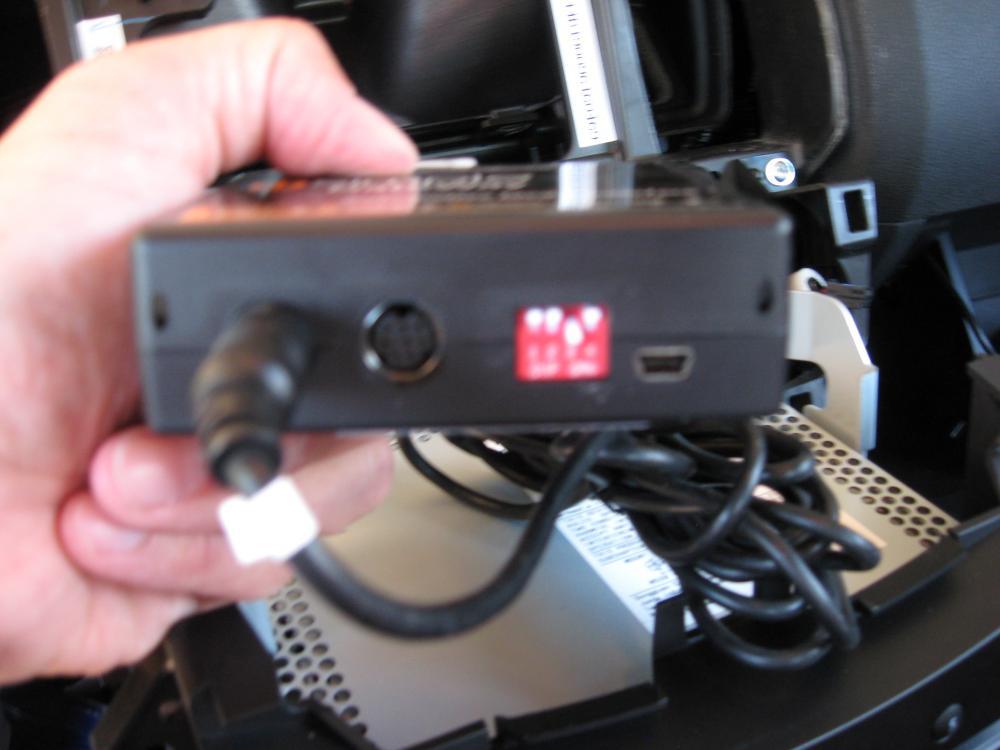
Step 22: Connect the iPod docking cable to Port 1 on the Media Gateway box (port one is the furthest one from the dip switches).
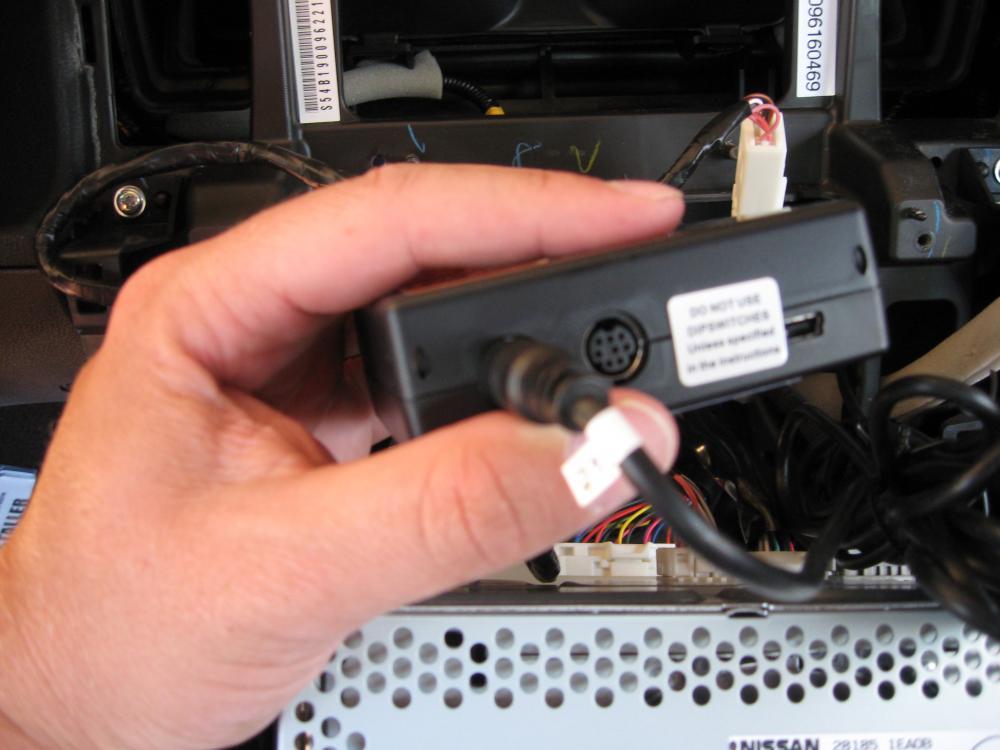
Step 23: Connect the black pin connector from the new wiring harness in to the media gateway. Be sure it is fully inserted.
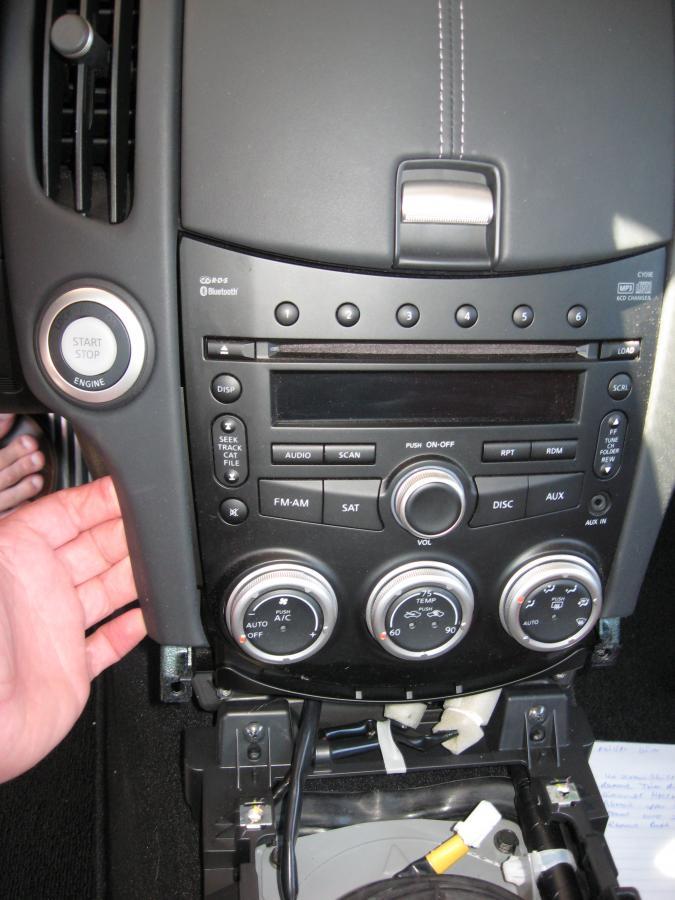
Step: 24: Reconnect the ignition switch, but do not fully install the surround, and leave the stereo pulled out.
Step 25: Reconnect the negative lead on the battery. And then hook up your iPod to the new docking cable.
Step 26: Turn the ignition switch to “On” and wait for one minute before turning on the stereo.
Step 27: Turn on the stereo. If the display says “INIT” or “DEV INIT”, wait one minute and then turn the ignition off and then back on again. If either of those were displayed, the device was just initializing.
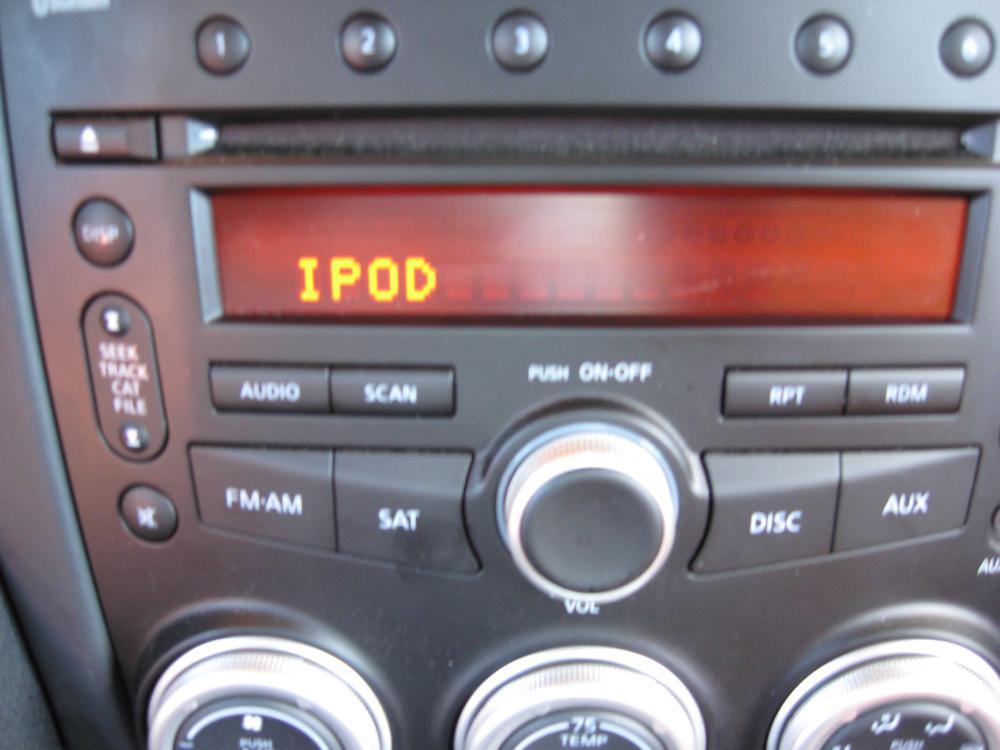
Step: 28: With the ignition on again, turn on the stereo and press “Am/Fm” and then “Sat”. Immediately after pressing “Sat” press the up “Seek Track” button and you will then be able to scroll through: Sat, Aux 1, Aux 2 and then iPod”. Stop on iPod and you will be able to use your iPod.
Step 29: If all goes well, turn off the ignition and store the Media Gateway and the extra docking cable in the cavity behind the stereo. There is room for both on the bottom.
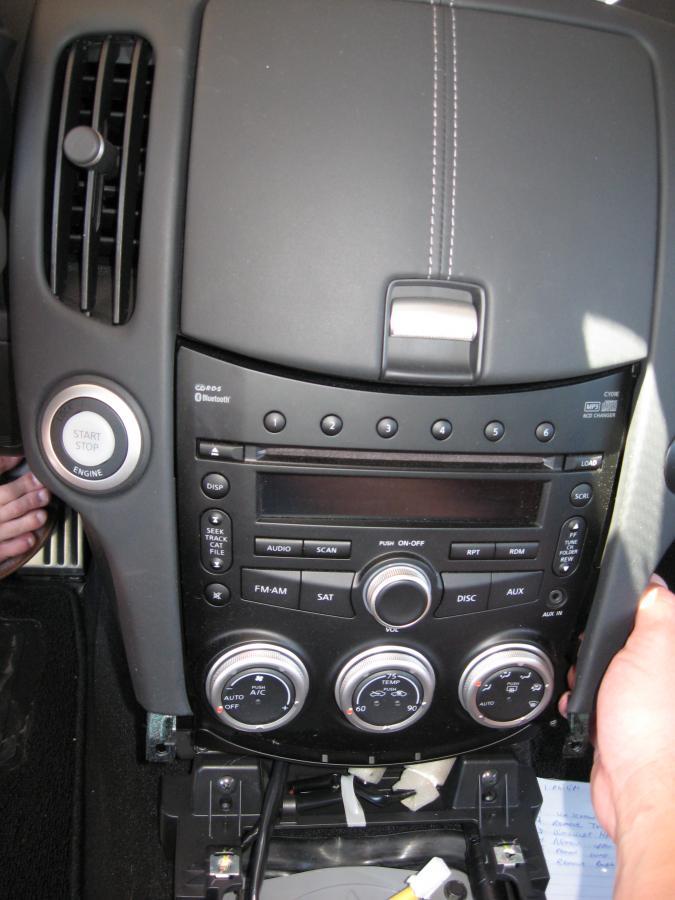
Step 30: Reinstall the stereo and reassemble the dash & center console.
Step: 31: Since you disconnected the battery, you will need to reprogram your passenger and driver’s side power windows. They will not function properly when you open and close the doors. Here is what you do: with the ignition off open the driver’s side door. Turn the ignition to the “On” position (do not start the car). Roll the window all the way down. Then roll the window all the way up and hold the switch in the up position for 5 seconds. After 5 seconds release the switch and test the auto up and down feature. If it works perfectly, redo the entire process with the passenger side door.
Step 32: Since you disconnected the airbag light on the right side of the stereo, you will have to reset it, or your airbag light will flash, which is REALLY annoying. Here is how to reset it:
1. Push the start button two times (Ignition on but engine not started).
2. Watch the airbag light closely. It will stay on for a few seconds. As soon as it blinks off (the start of the flashing), turn the key off QUICKLY.
3. Count to 5
4. Repeat steps 1-3 two more times until you have done the cycle three times.
5. Now turn the key on and watch the light. It will start blinking in a different, slower manner. This is diagnostic mode. You can let this run for a few seconds.
6. Now turn the key off again, Count to 5 again and turn back on. If the procedure worked, the airbag light will not be flashing.
If it does not work the first time, just repeat the steps again.
Now that your iPod is installed you won’t have to fumble with an auxiliary cable, clutter the interior of the car with hanging wires and won’t have to worry about hiding your iPod from lurking thieves every time you park. Your iPod will always be charged and ready to use.
Although I purchased the optional HD Radio adapter, I didn’t install it because I didn’t have the proper antenna adapter. I found that out the hard way and decided to install the iPod interface alone for now. I ordered the right adapter and will install it once I receive it in the mail. After doing so I will update this DIY to reflect the HD Radio install as well.
Here is the instruction manual for the iSimple Media Gateway (PXAMG PGHNI2):
http://www.pac-audio.com/PacProductD...ons_050610.pdf
If you have any questions, please feel free to ask, and rep points are very much appreciated.
7-20-2010
Sorry if I wasn't clear on this. If you have a 5th generation iPod nano, you will need to be sure the connection cable that comes with the media gateway is compatible. Older media gateway units came with a cable that wouldn't charge the 5th gen. nano while it was docked to the stereo. The newer units come with them. Just be sure you get an updated one. Talk to the retailer to be sure. Step 18 displays a picture of the docking/charging cable.
Yes, your satellite radio will still work. When you power on the stereo you will be able to scroll through and select your iPod, satellite radio, HD Radio (assuming you installed the HD tuner) and auxiliary input. This modification adds to your stereo. It doesn't take away any preexisting functions. I made sure of that prior to install because I didn't want to lose what I already had.
If you have any other questions, please feel free to ask.
8-23-2010
No worries Bro. It happens to all of us!
To shuffle through your playlists:
1. Turn on stereo
2. Toggle to iPod and allow it to start playing any song
3. Hit “Tune” down
4. Use “Seek” up to shuffle through your choices: play list, artists, etc. When “play lists” is displayed
5. Hit “Tune” down to select it
6. Now use “Seek” up or down to scroll through your play lists. Display the list you want to select
7. Hit “Tune” down twice to select it and start playing it.
Let me know if that works for you.