You must be logged in to rate content!
17 minute read
XV Level II Suspension installation
Compliments of jvike @ www.cuda-challenger.com
10-19-2010
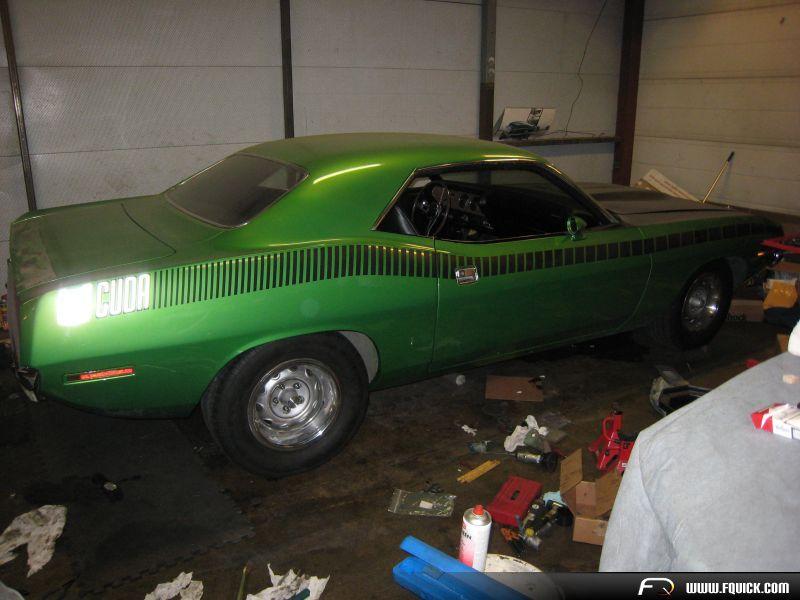
Tought I could share pictures of my installation of the XV Level II Suspension. The whole process took about a year. Mosty due to getting money for the extras, brakes, wheels etc..
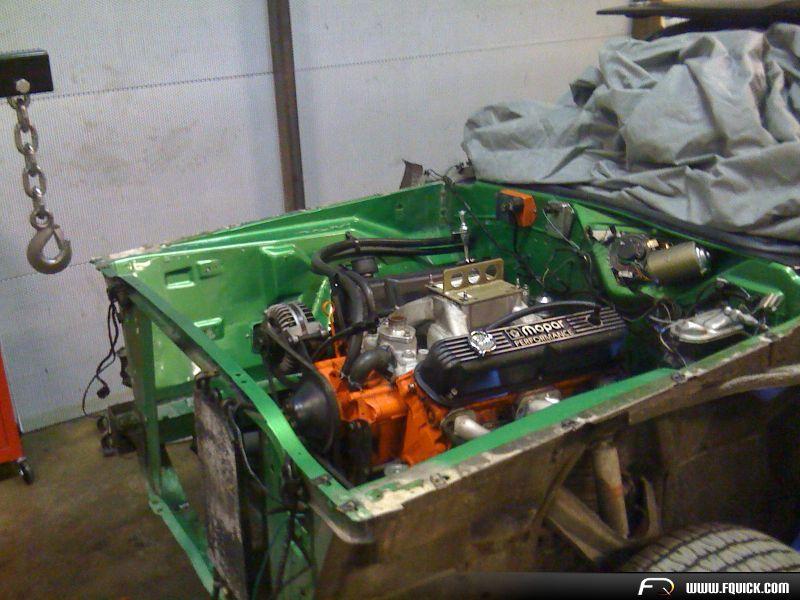
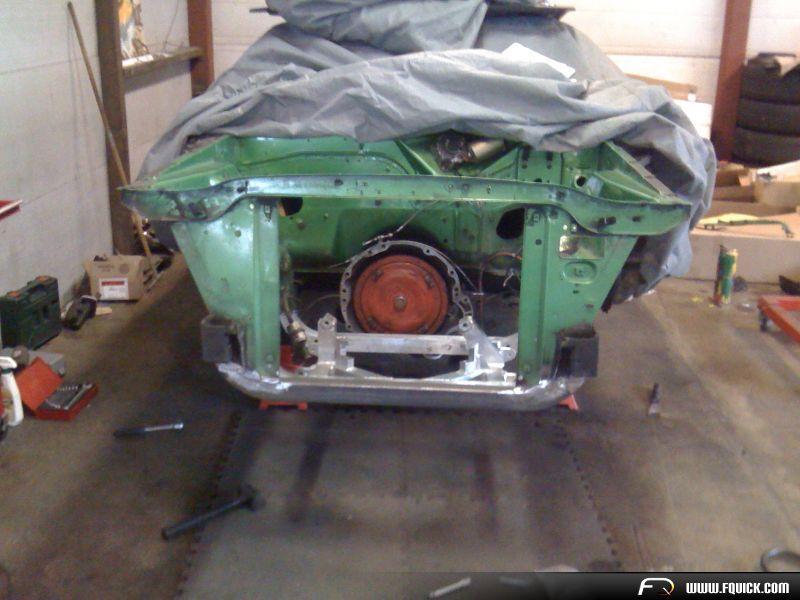
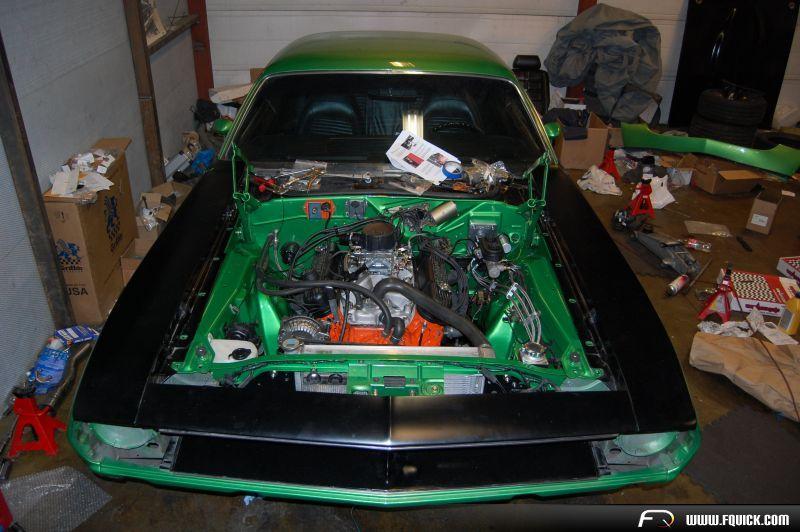
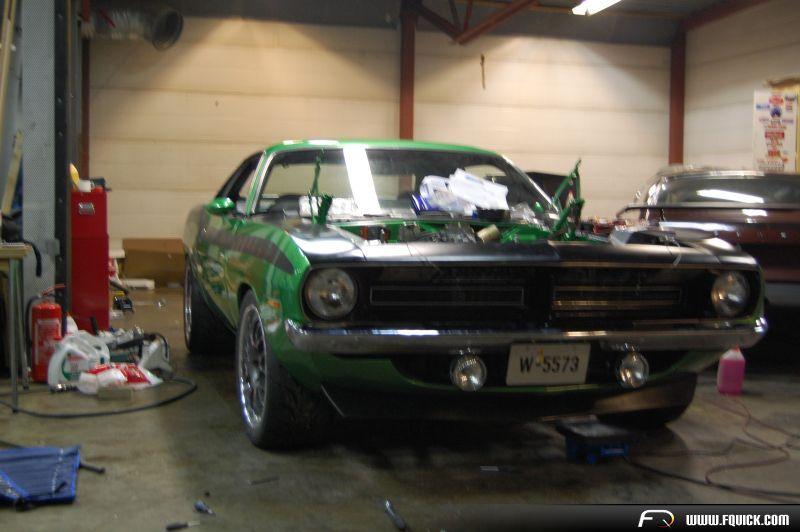
Okay, let's start. Get the engine out. 340, was told they have only sold two smallblock based units.
Old stuff, sold it the next day! ![]()
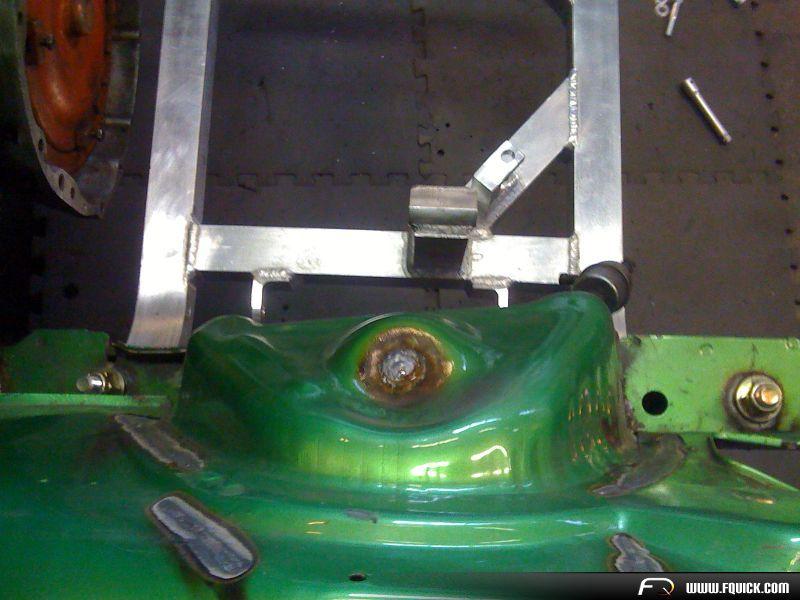
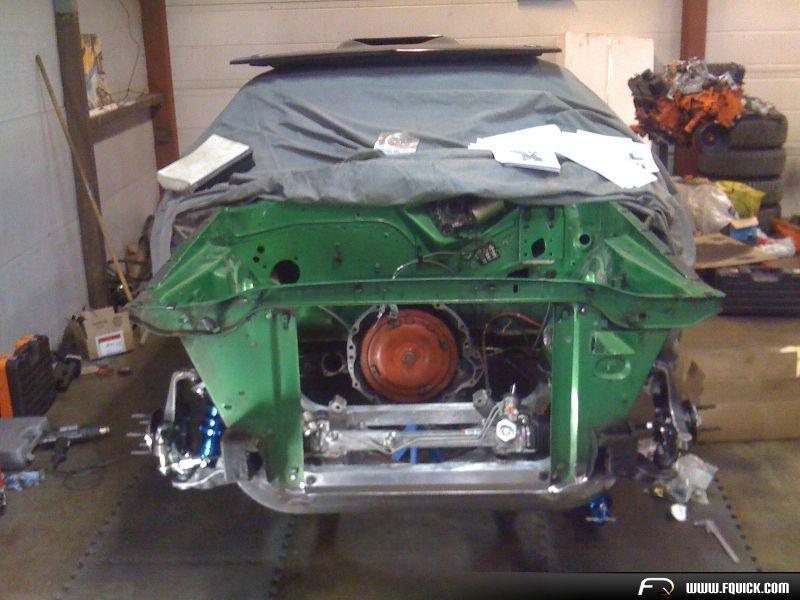
Testing the aluminium k-member.
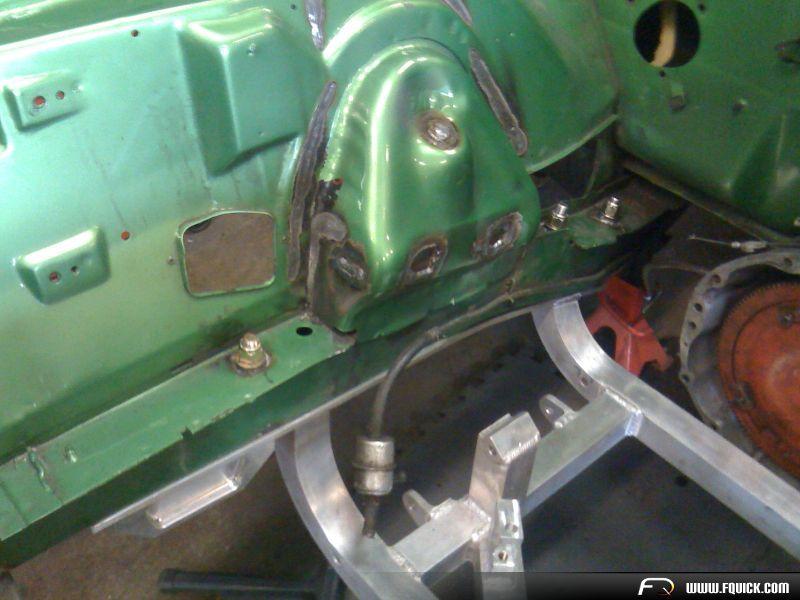
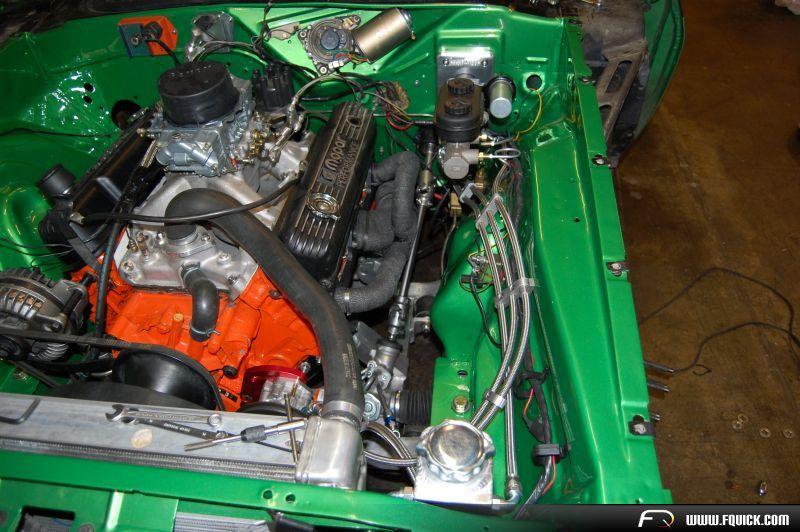
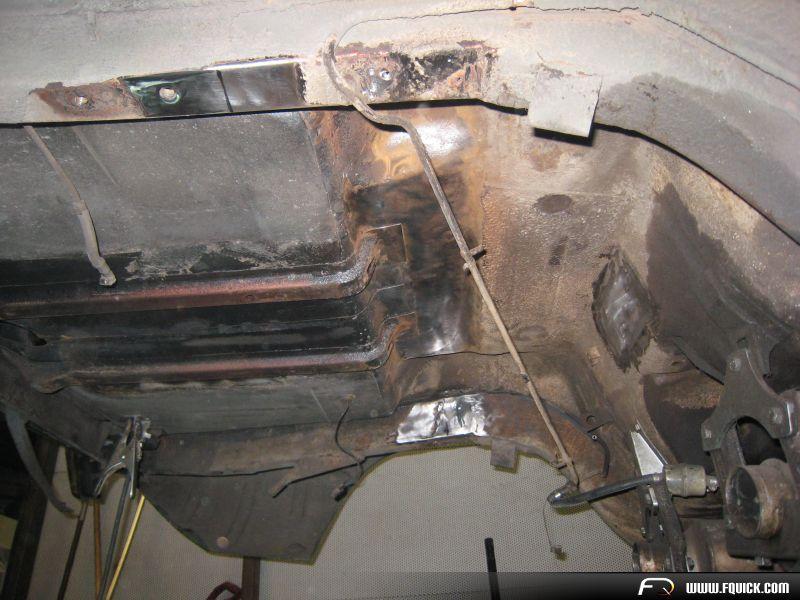
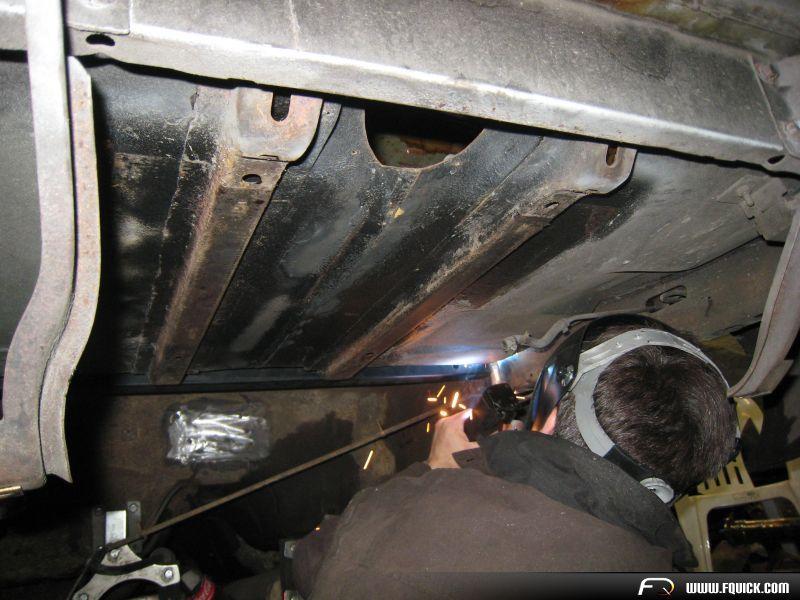
Had to repaint the enginecompartment, I stitchwelded the dampertowers.
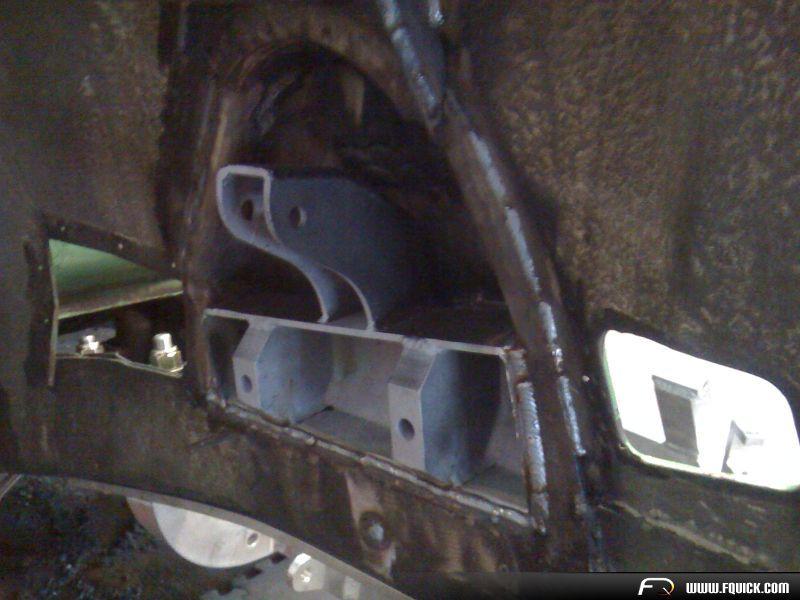
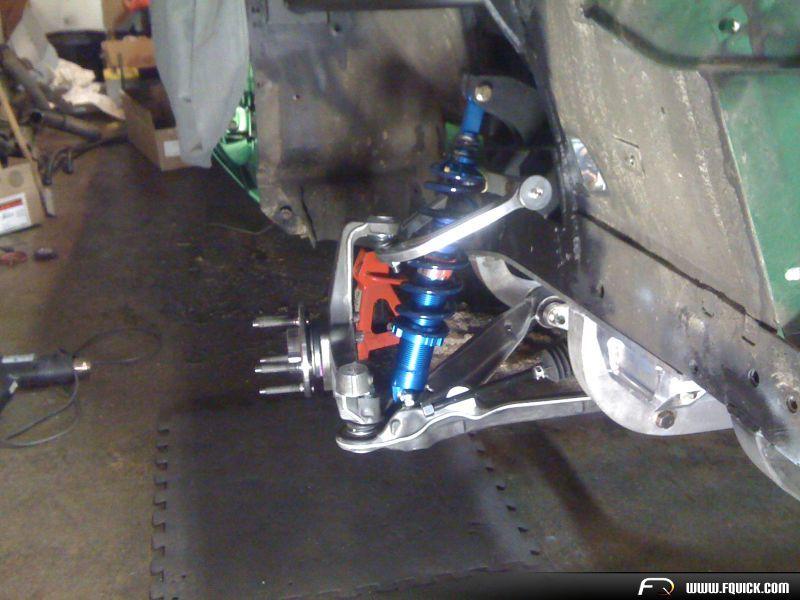
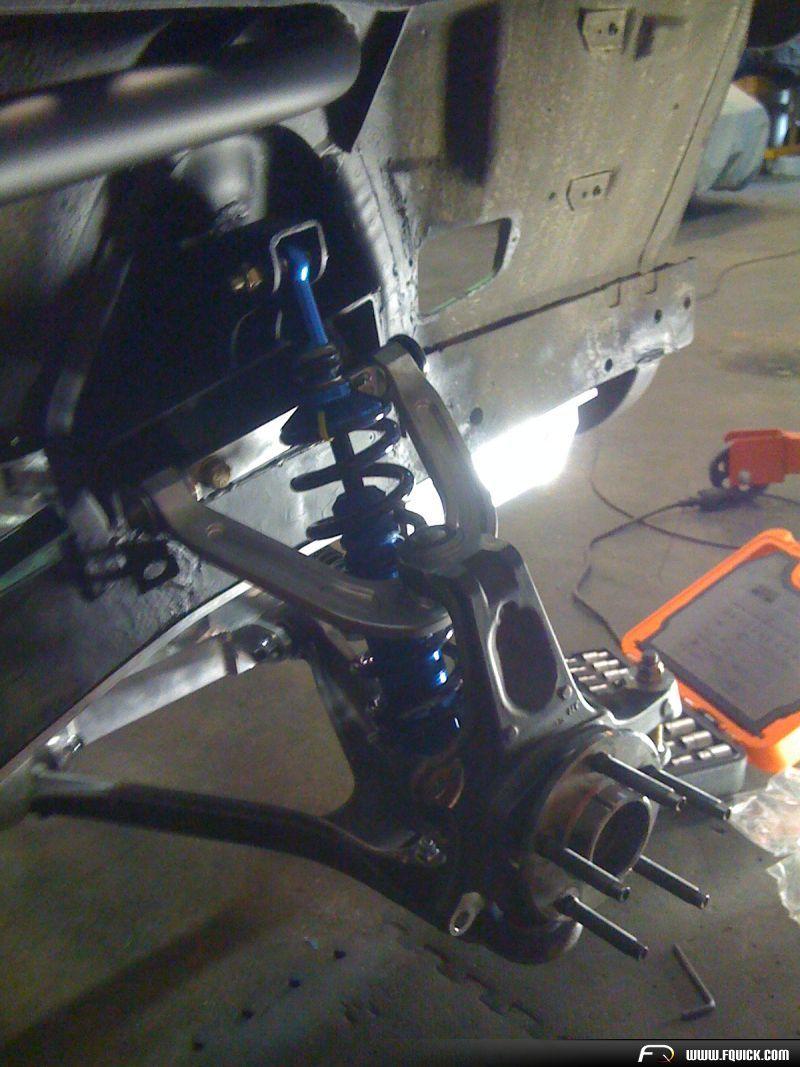
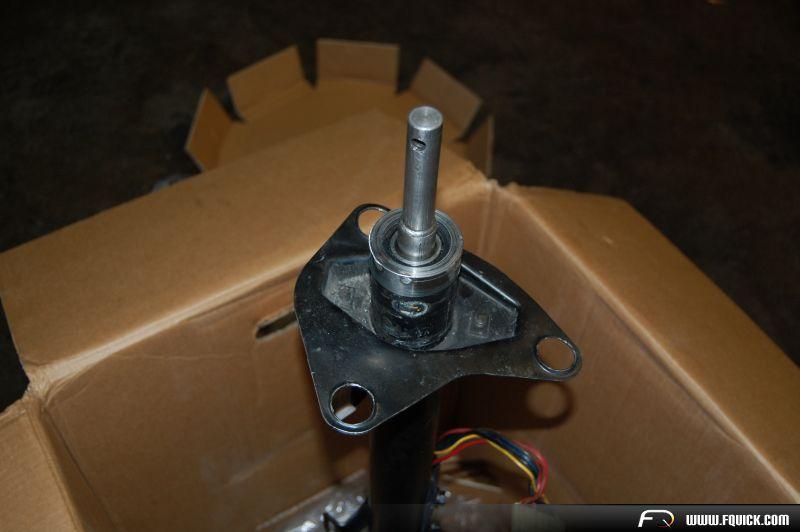
This is the cassette for the damper and UCA.
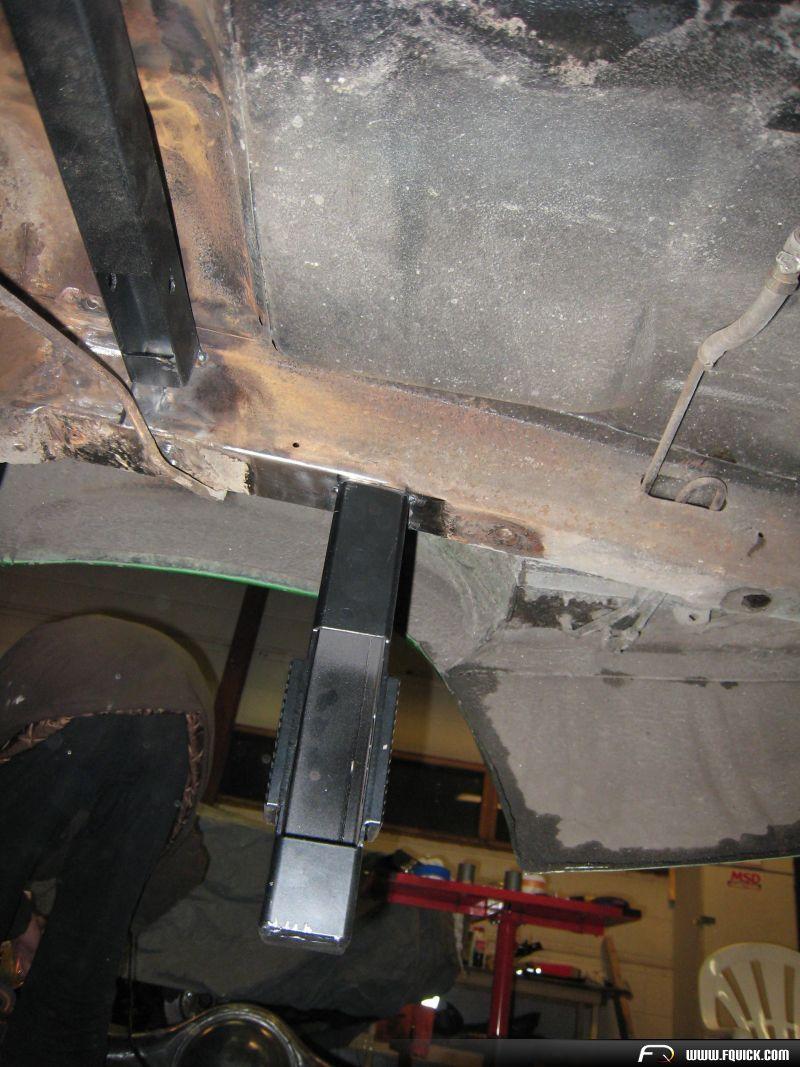
There are six extra point for bolting the K-member, there are tubes welded in the rails to support them.
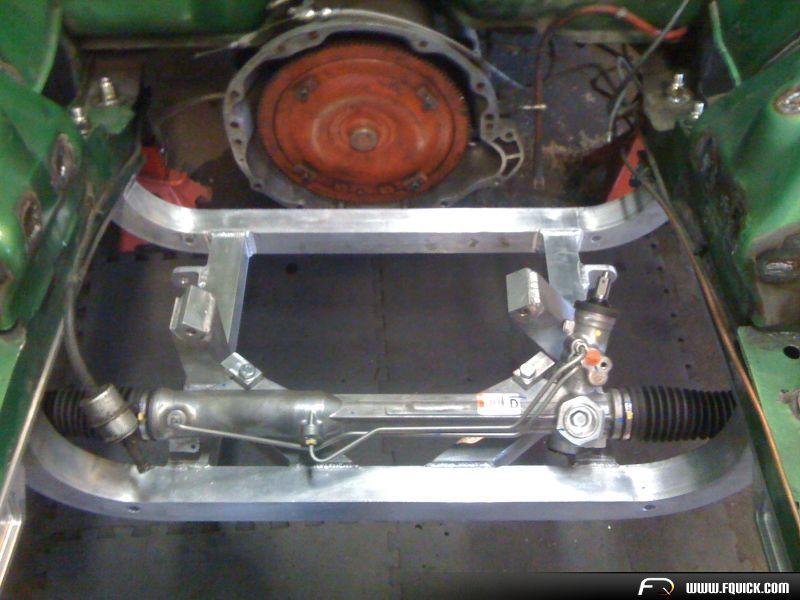
The rack, it's from an 05 Mustang.
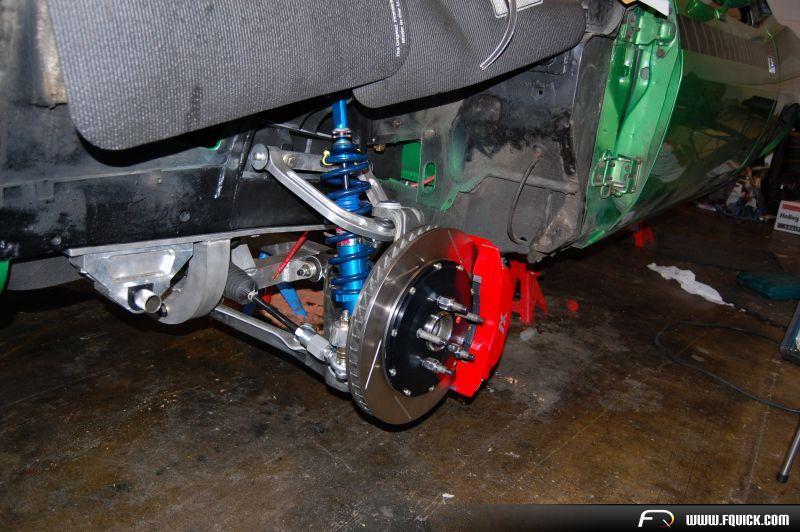
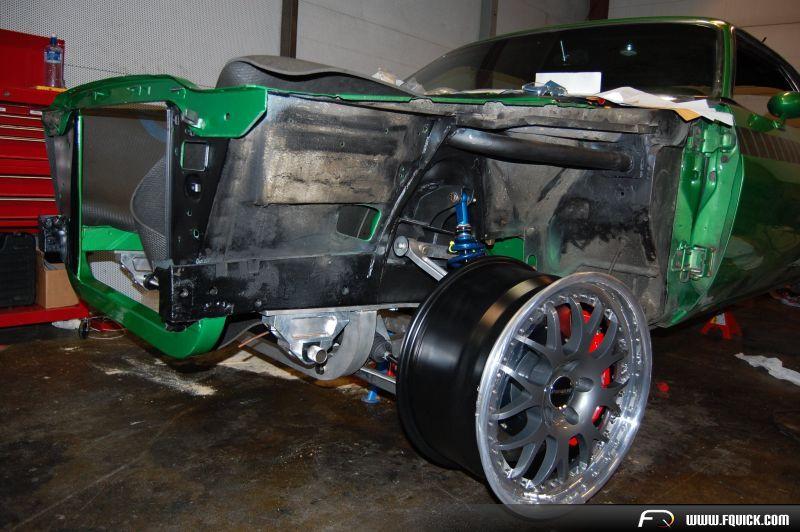
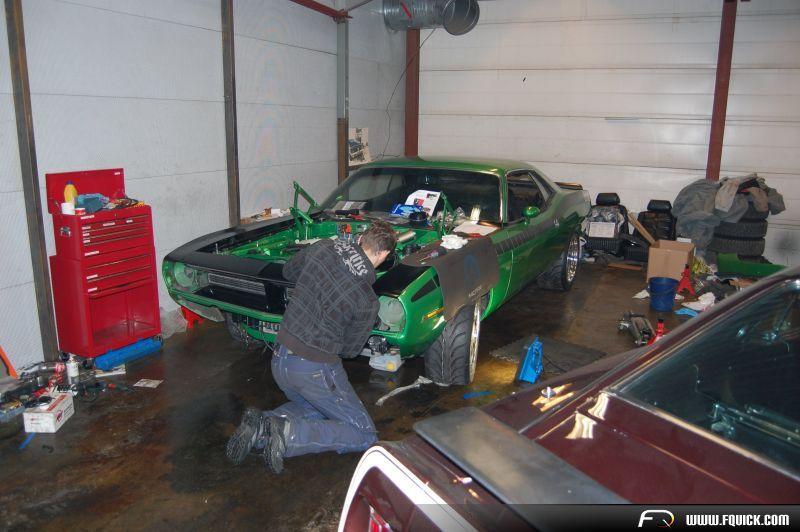
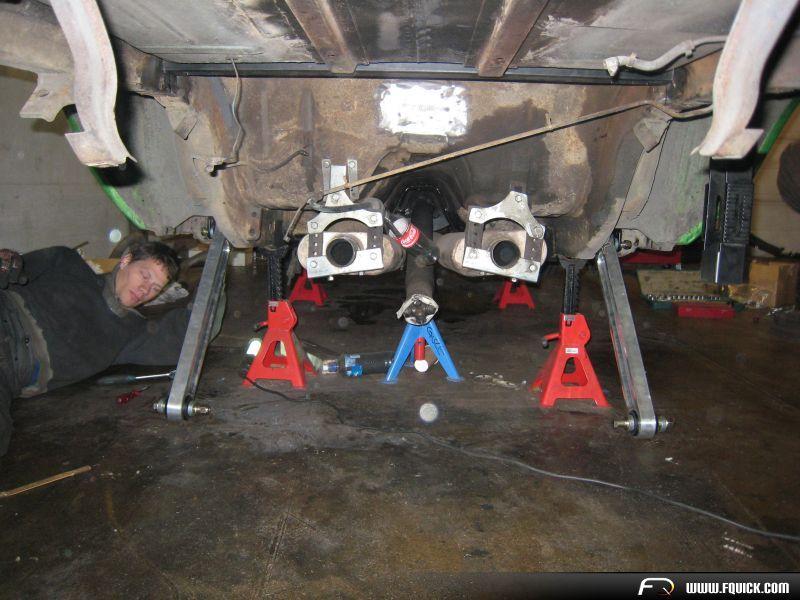
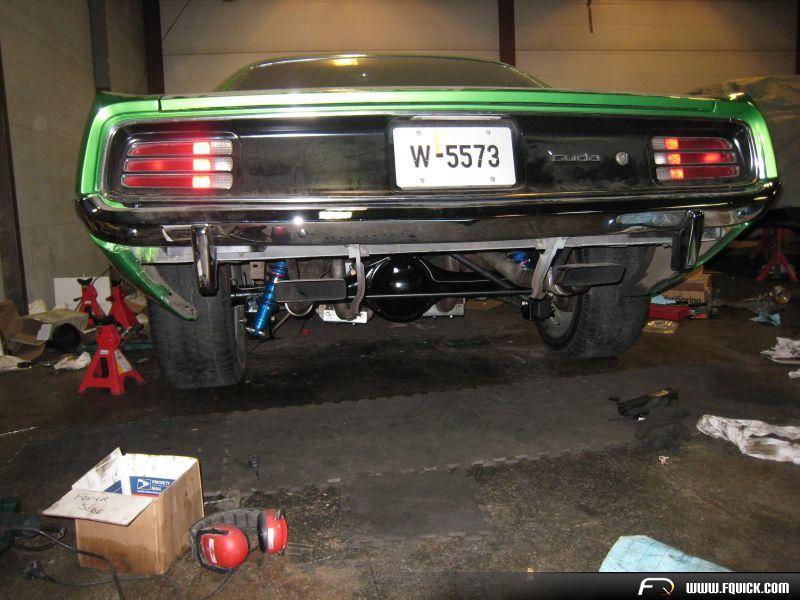
Suspension is on, no problems.
Should shave off some pounds! ![]()
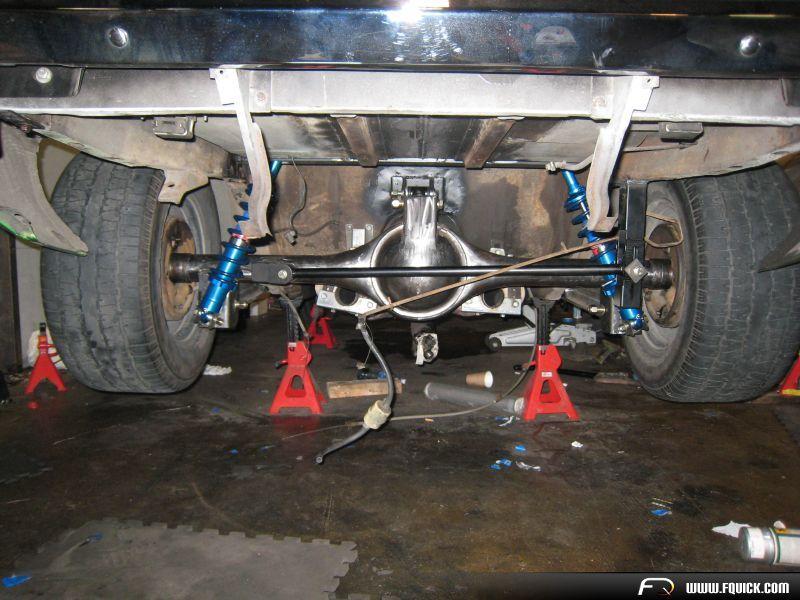
The track width is wider than stock.
Also got the whole thing approved road legal by the Norwegian Public Roads Administration
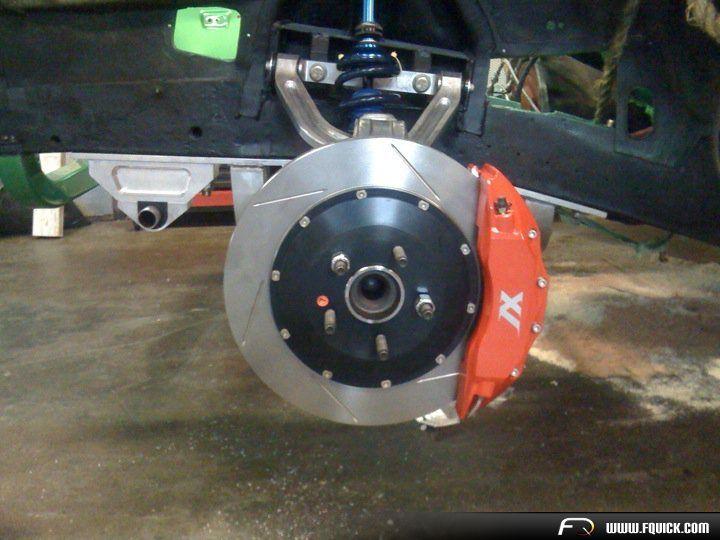
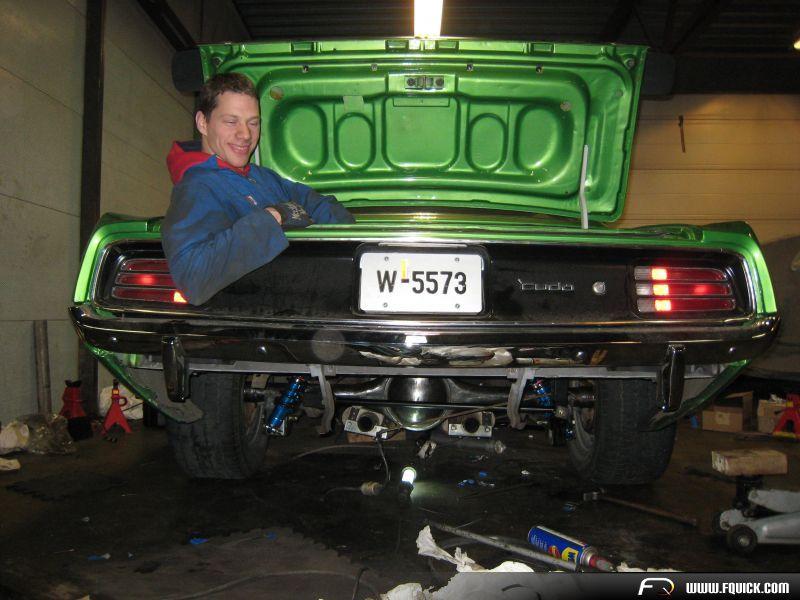
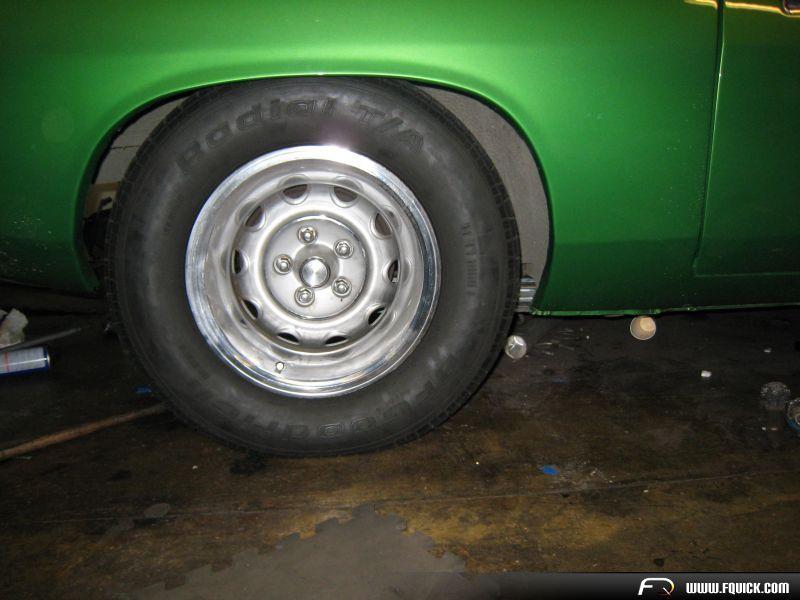
Got the XV Level II brakes, 14" discs, 6 piston calipers. Delivered to XV from StopTech.
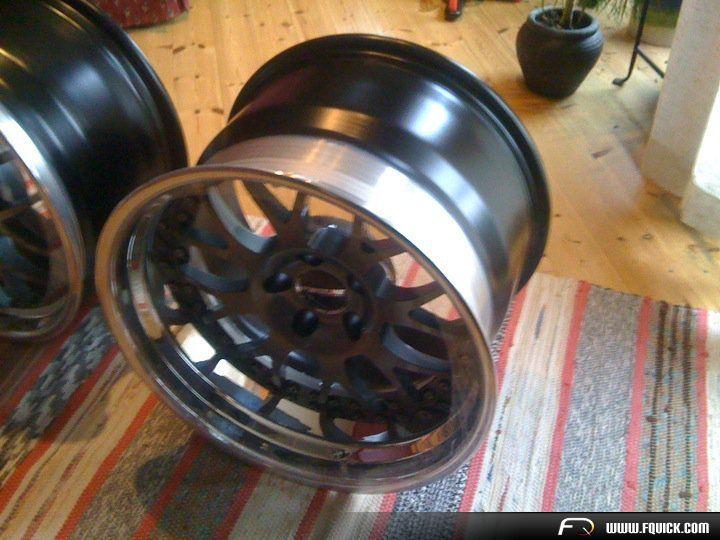
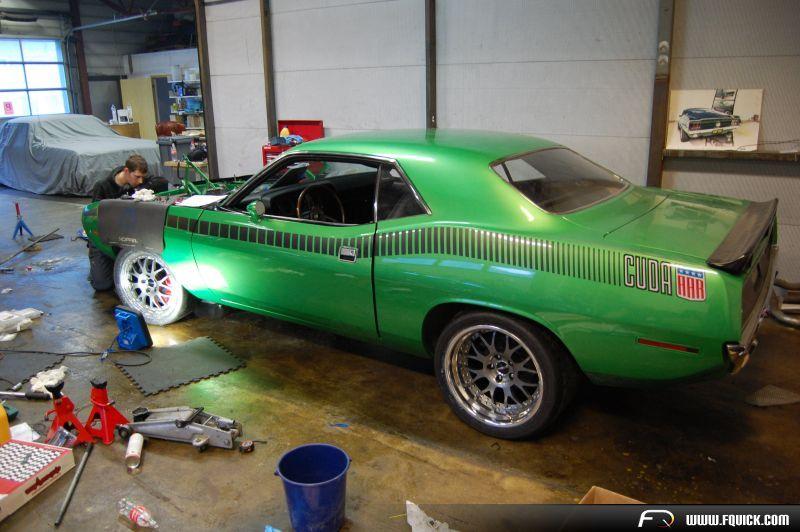
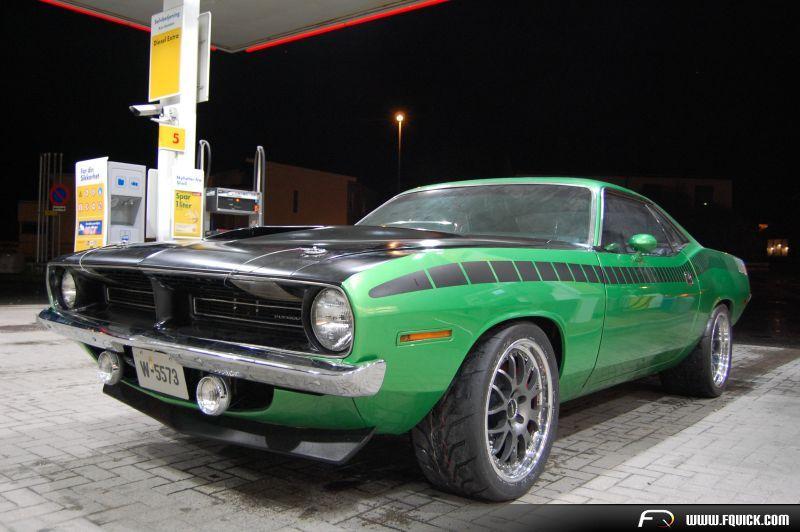
The rims are from Forgeline, they are WC3 in gunmetal center, satin black powdercoat inner hoops, and polished step-lip outer. They are screwed together with titanium hardware. 18x9.5" front 18x12"" rear.
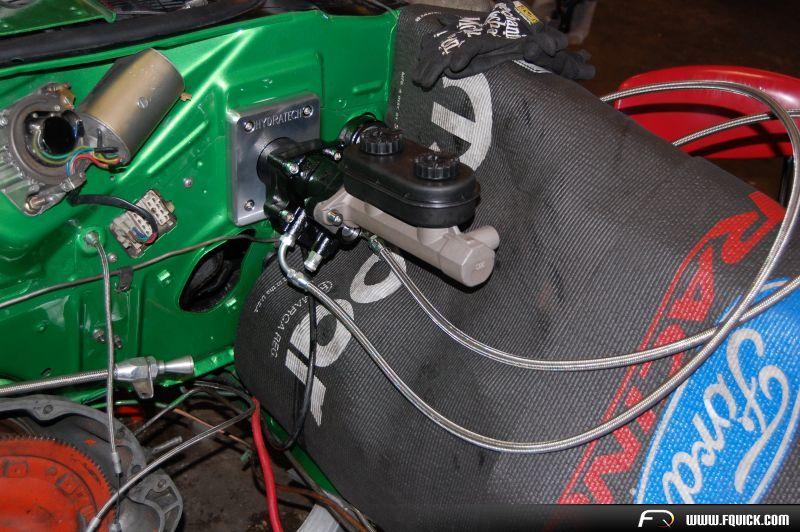
This is the Hydratech brake booster, I bought a pump from KRC.
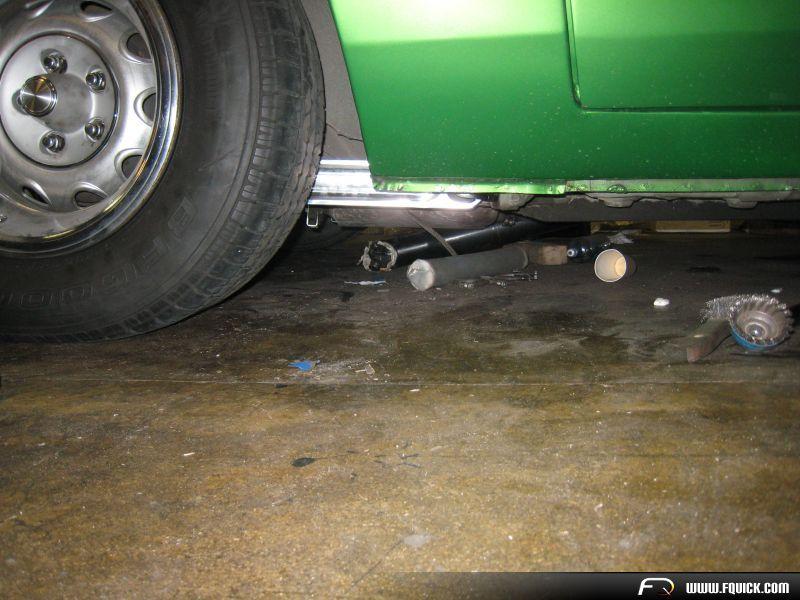
More pics of the brakes. The pads from Hawk and Earl's braided hoses are also in the kit.
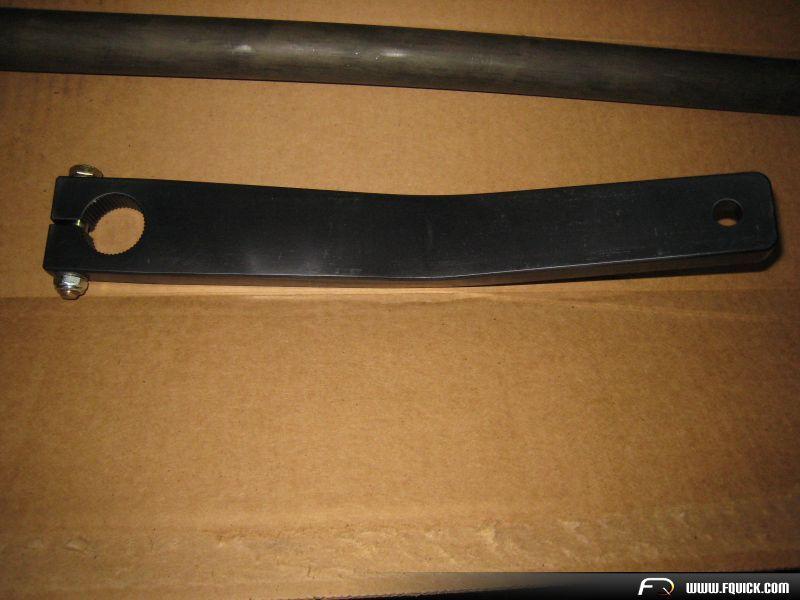
I put a needle roller bearing in the steeringcolumn. The orginal nylon brushing won't cut it.
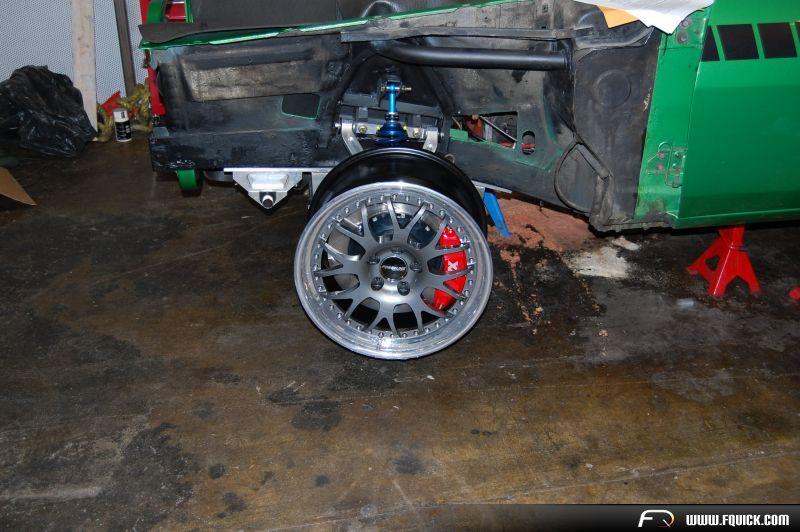
Testing the wheel, 6.5" BS. The rack has to be shimed for clerance when turning lock to lock.
New paint in the enginecompartment, choose to black out the front.
10-19-2010
Hydraulic hoses for hydroboost and rack.
Getting there!
Me, starting to get done with it. Tires are Toyo R888. 275/35-18.
Will get discbrakes in the rear this winter.
Got to have lights!
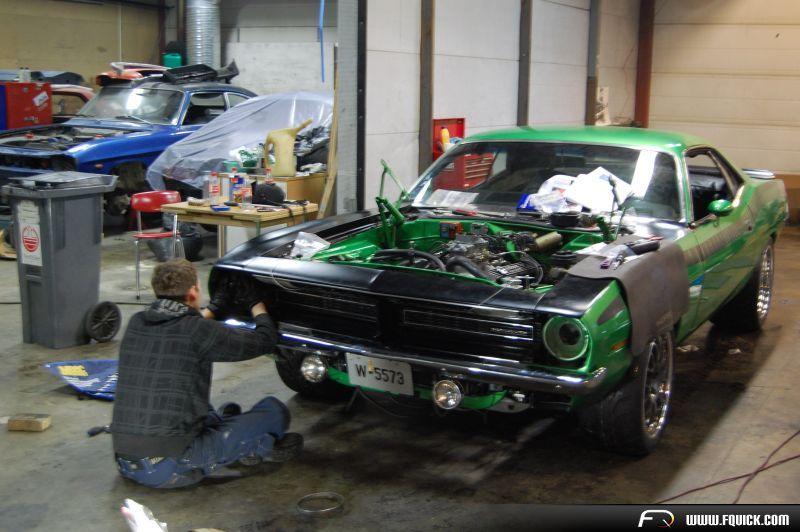
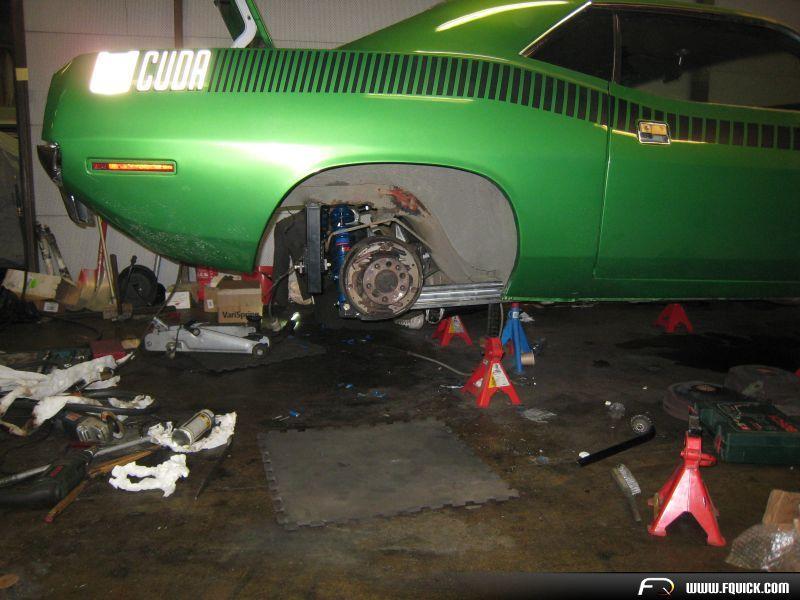
The front is on, I like how the MAS fiberglass spoiler hide the low and shiny aluminium K-member.
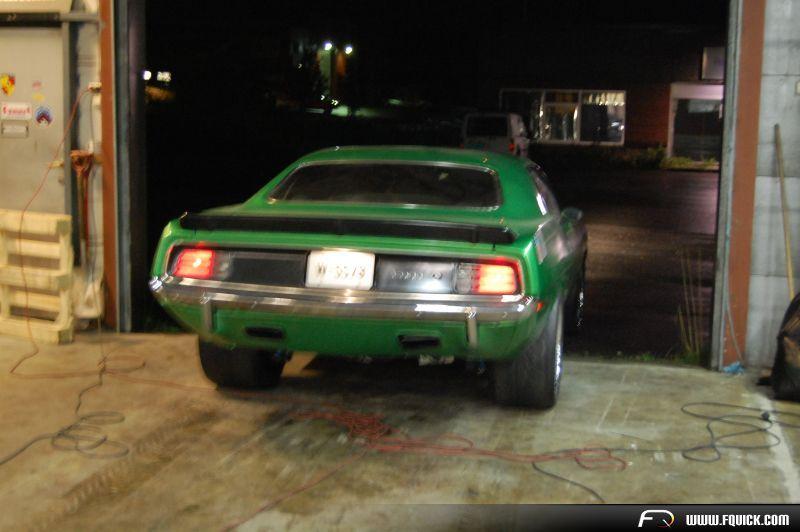
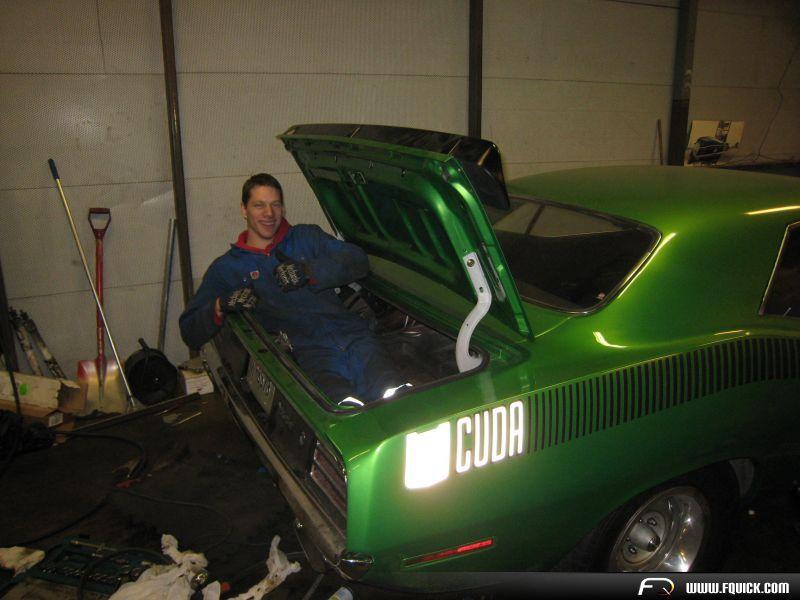
DONE! and on my way out!
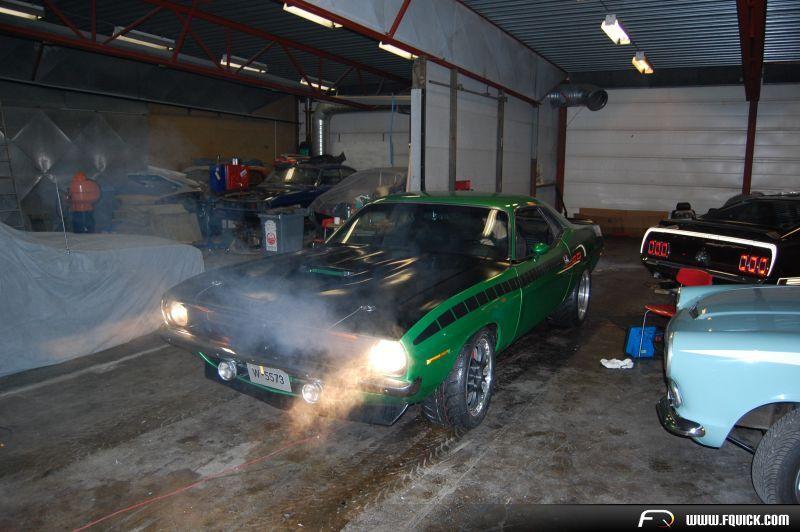
Ready to do a test trip, massive leakage form the automatic cooler. :oops:
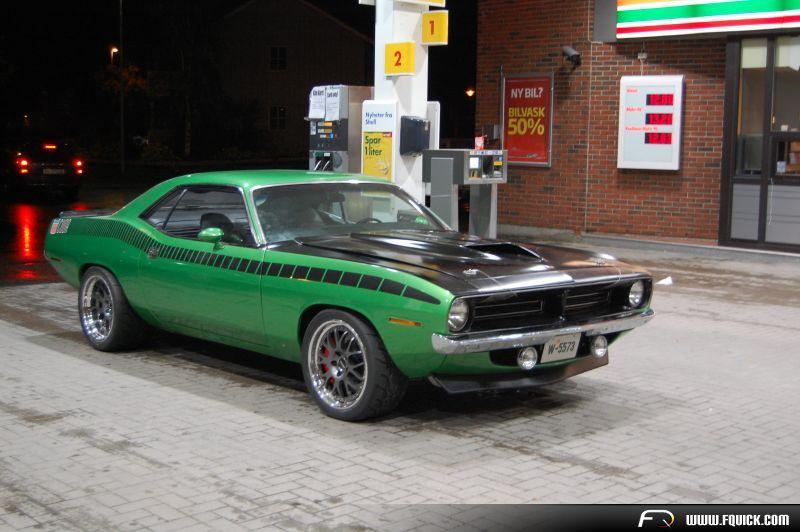
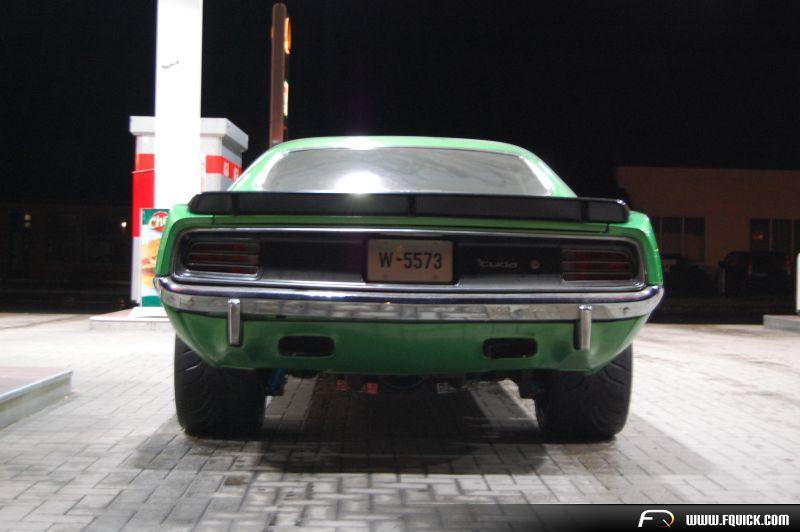
Straight to the petrolstation!
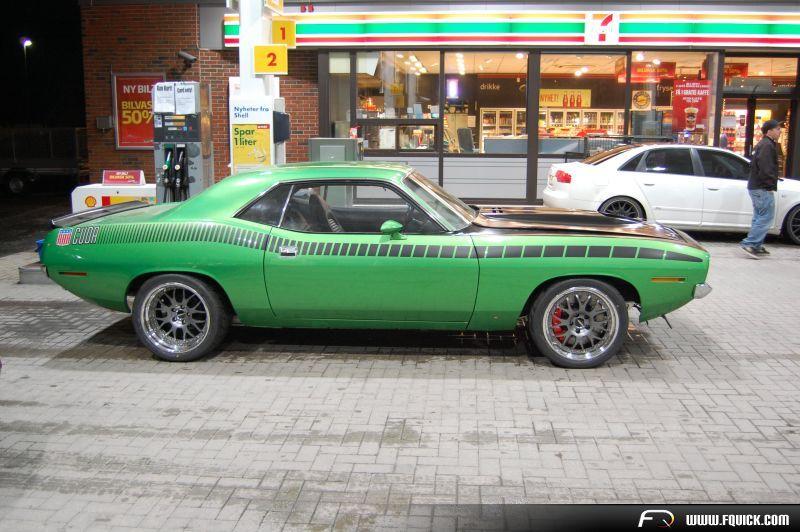
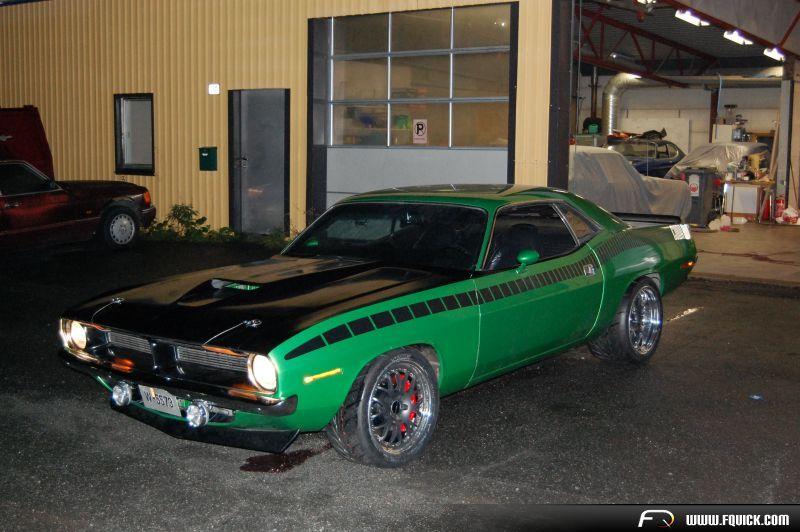
Think I'll need to lower it a bit.. ![]()
Managed to fit 335/30-18 on a 12" wide rims in orginal wheelwells! ![]()
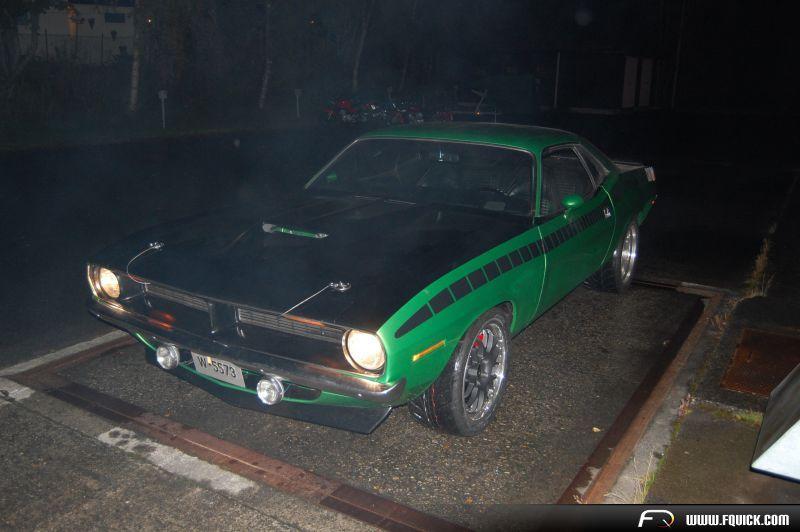
Very happy with the way the car looks! ![]()

My brother wich is a Steeler fan, started to call my car Mean Joe Greene! hehe, It sure looks the part.
The 335s looks just right under the car.
On the weight it showed 3373 lbs with aprox 5.2 gallons of fuels. Lighning the car some 60 pounds.
Then I could park my 'Cuda, the only one in Europe with XV suspension. Finally a Pro Touring car. Now the winter is just around the corner, so this was the only short trip I got to do this year!

With my brothers 69 Mustang, I had a leaking distribution block on the brakes, so I got a long pedal during the short drive, so I never tested it properly, but the car felt modern, the chassis is very rigid, no flexing. Now I'll use the winter to change the brake dist. block and put on disc brakes in the rear and probably change the axles while I'm a it!
I did the XV rear a couple years ago, can post pics if anyone wants them, any questions about the XV suspension , just ask!
10-21-2010
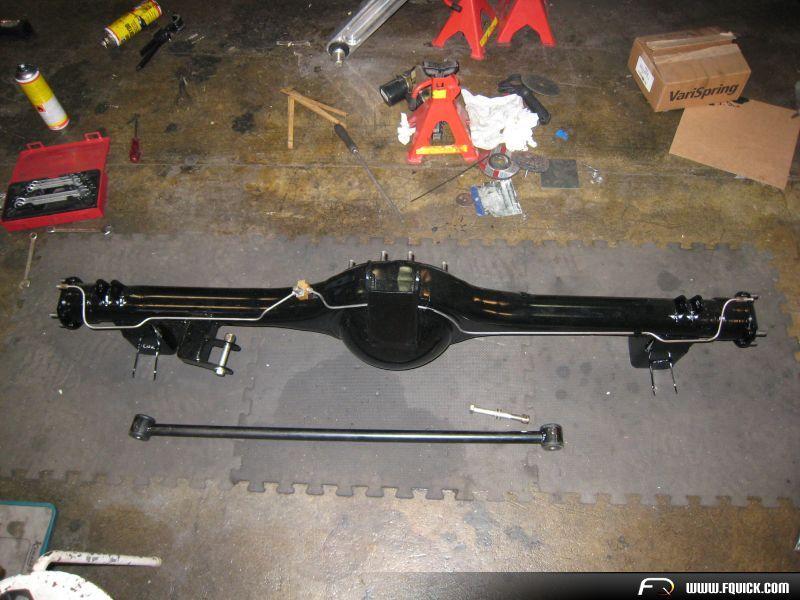
Here are the pictures for the rear suspension. Did this back in 2008.
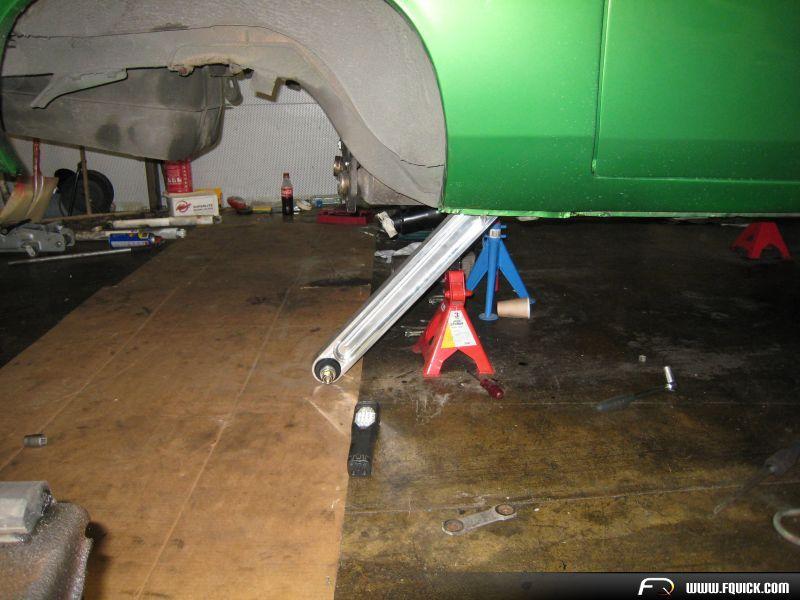
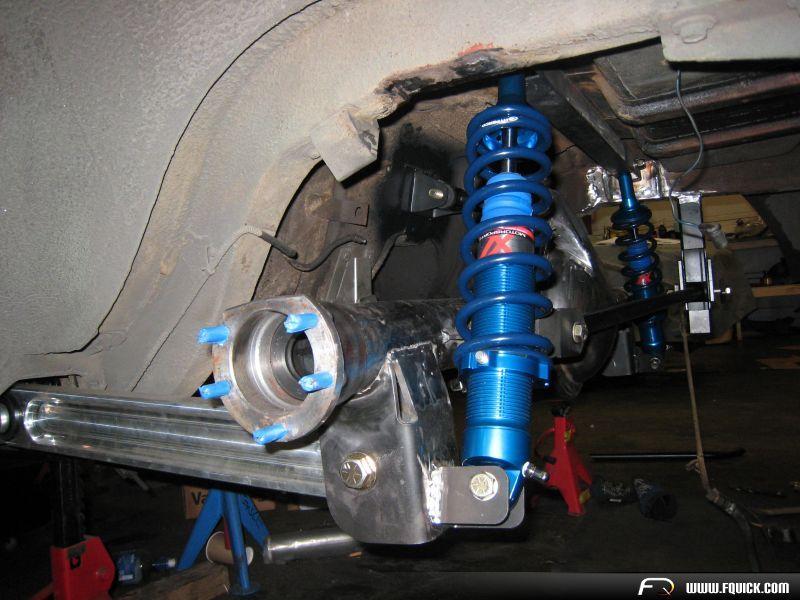
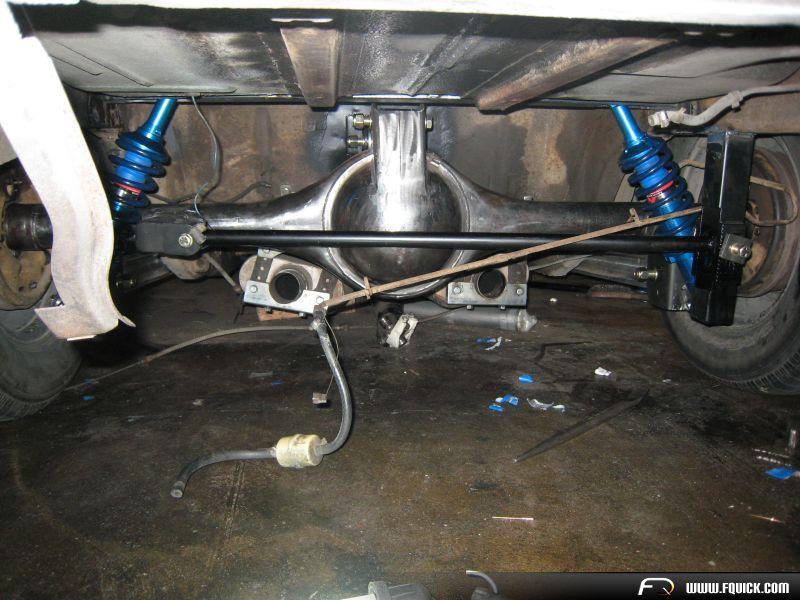
Billet aluminium LCAs, massiv stuff, low weight.
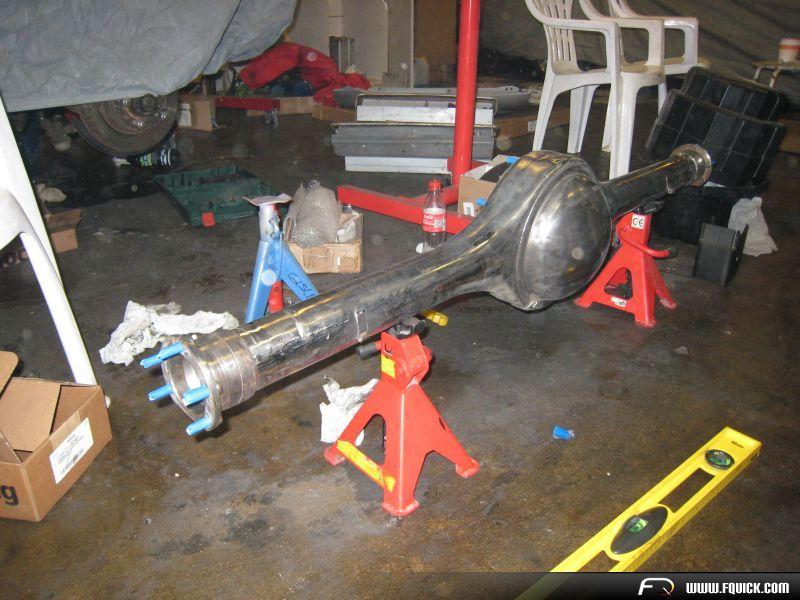
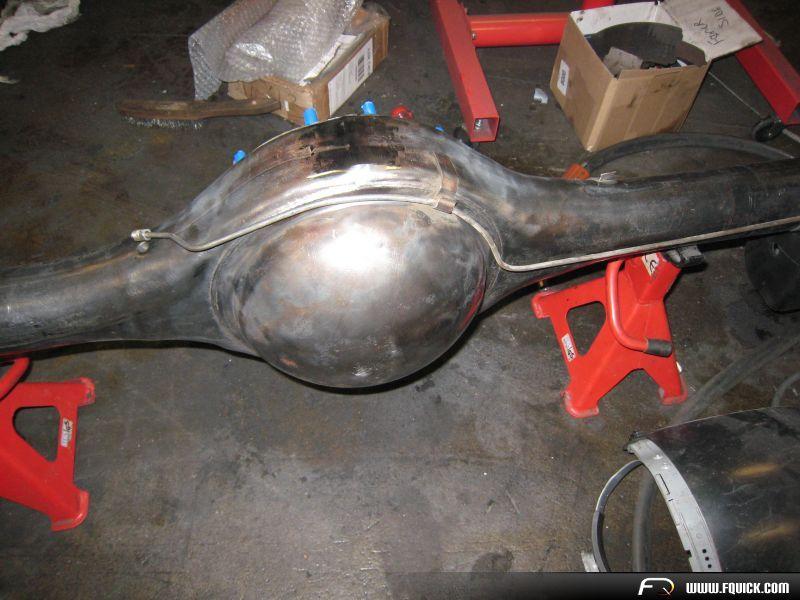
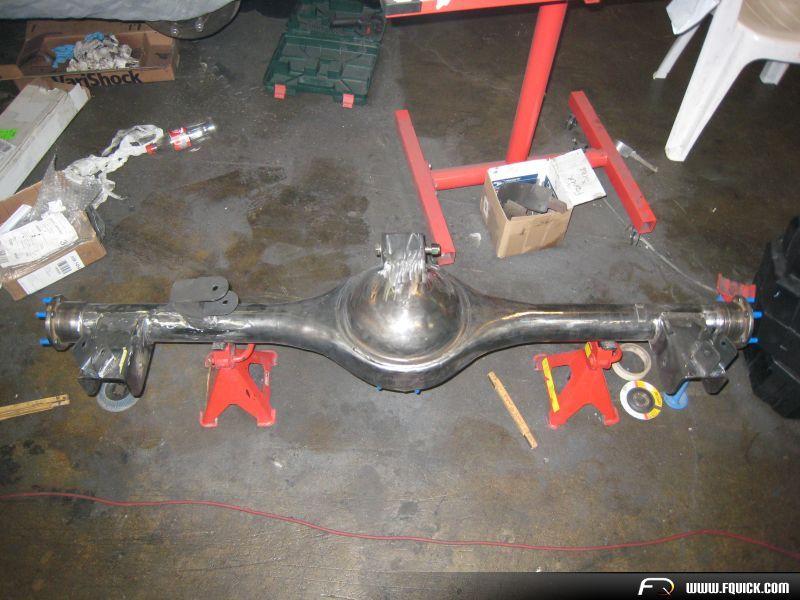
Removed all the brackets on the axle, I have the 1.5" narrower b-body axle.
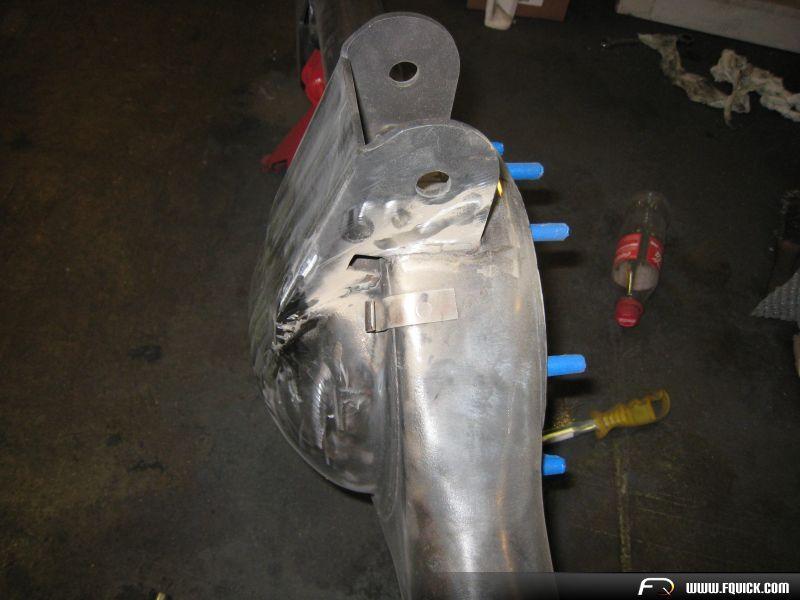
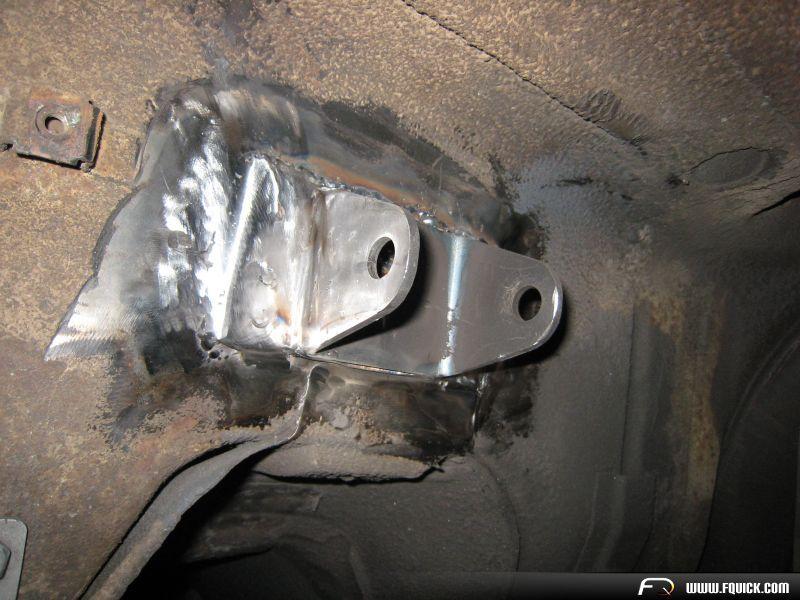
The original dampermount had to come out.
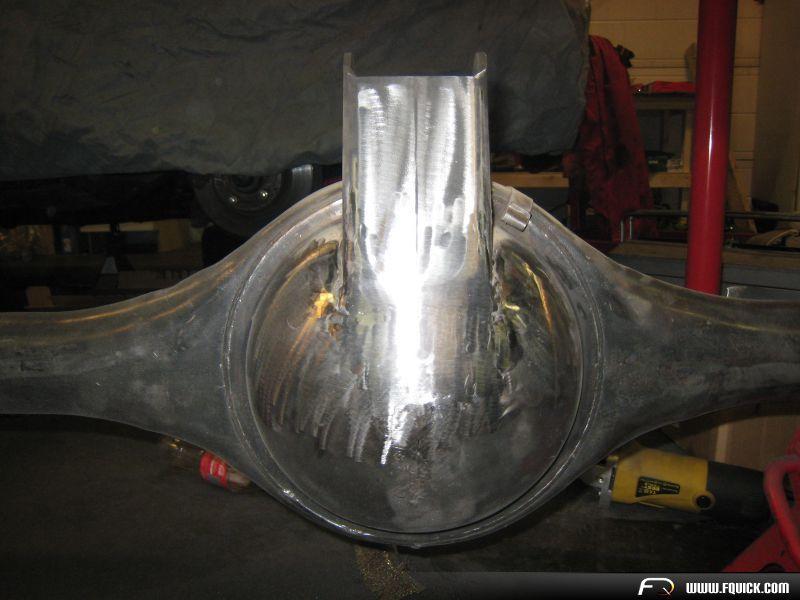
Here's the new coil-over mount being tacked in place.
New brackets for the control arms.
I moved the control arms 1" invards, My brother admireing the stuff.
Here is the panhard bar mount, it's adjustable for ride height.
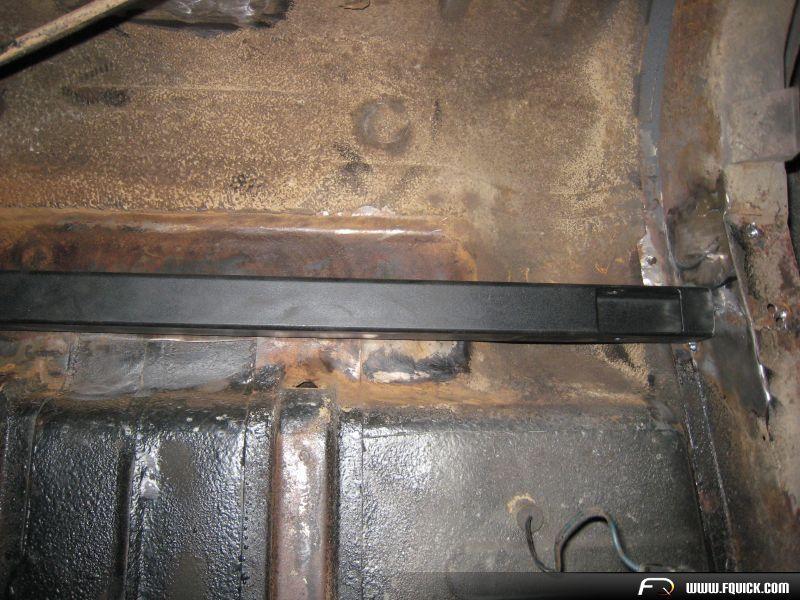
The coil-over mount, took it down again and reinforced the rails with some plates. There are also some plates on each side that weld on to the floorboard.
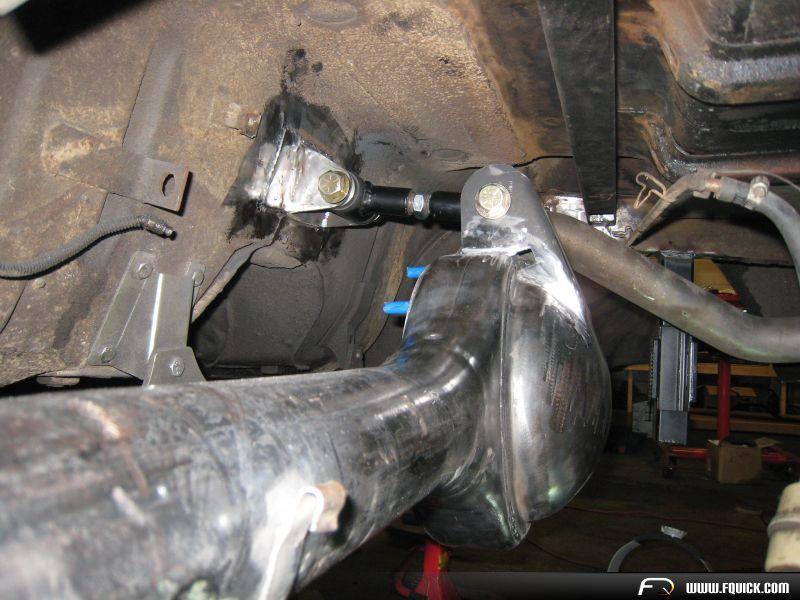
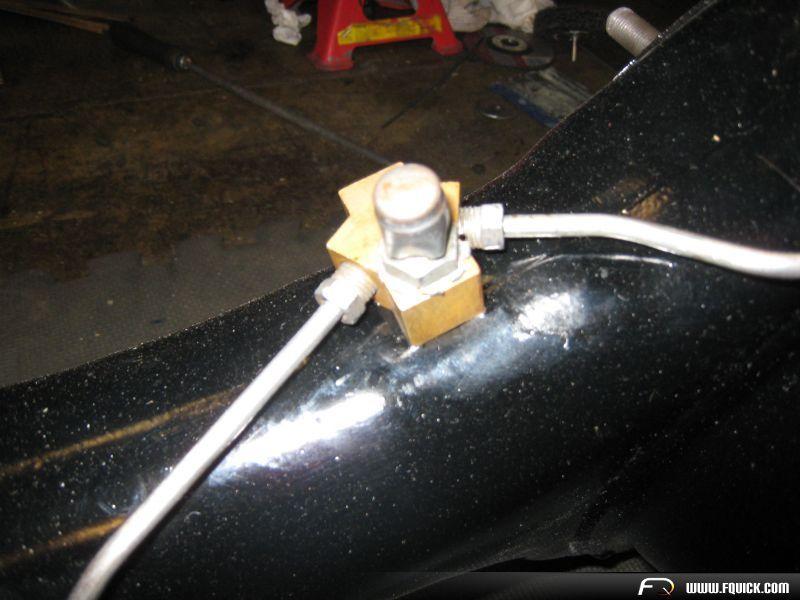
I wanted to use the original brakelines.
So I made a hole in the 3rd link for the it.
Welded it up to look smooth.
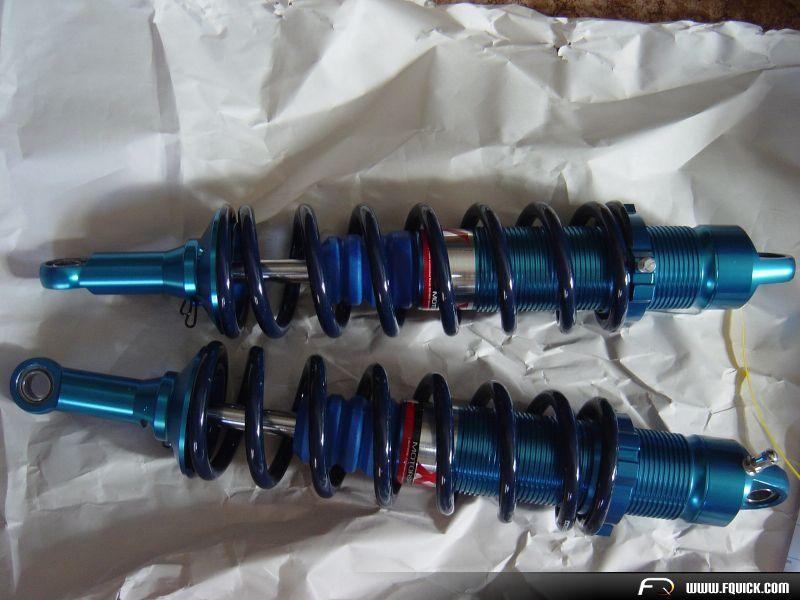
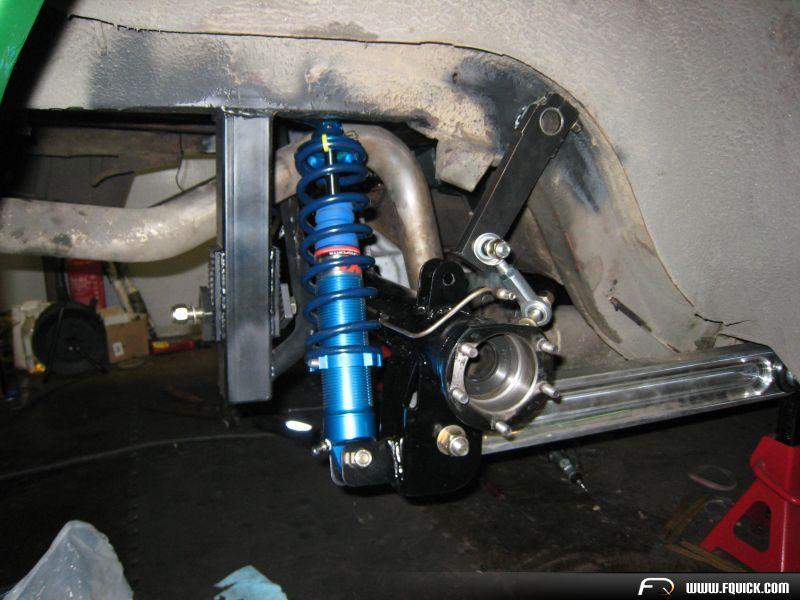
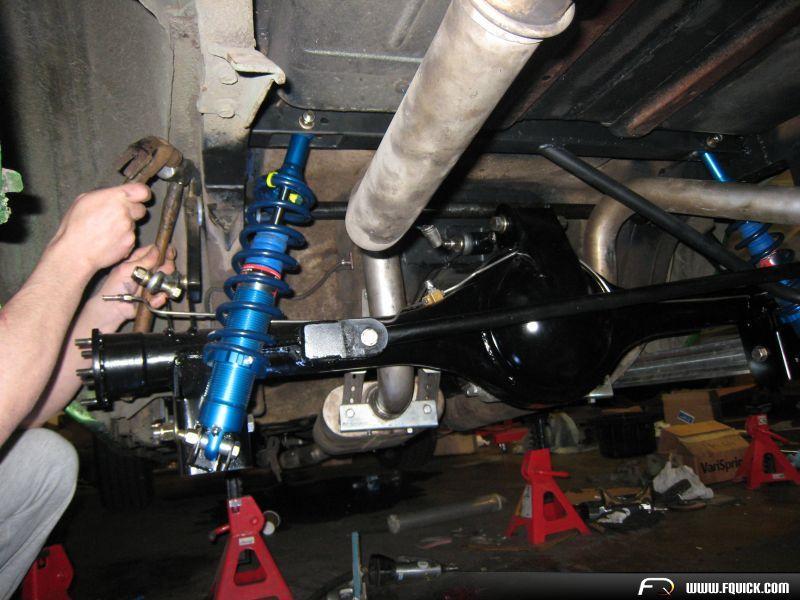
Coil overs, monotube gas dampers, delivered from Afco. Custom valved and dynotested. Springs are from Hypercoil.
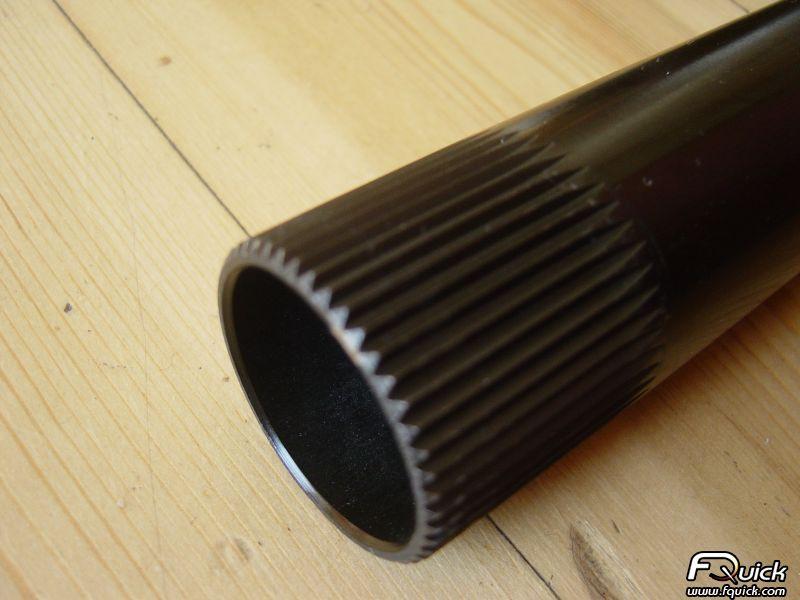
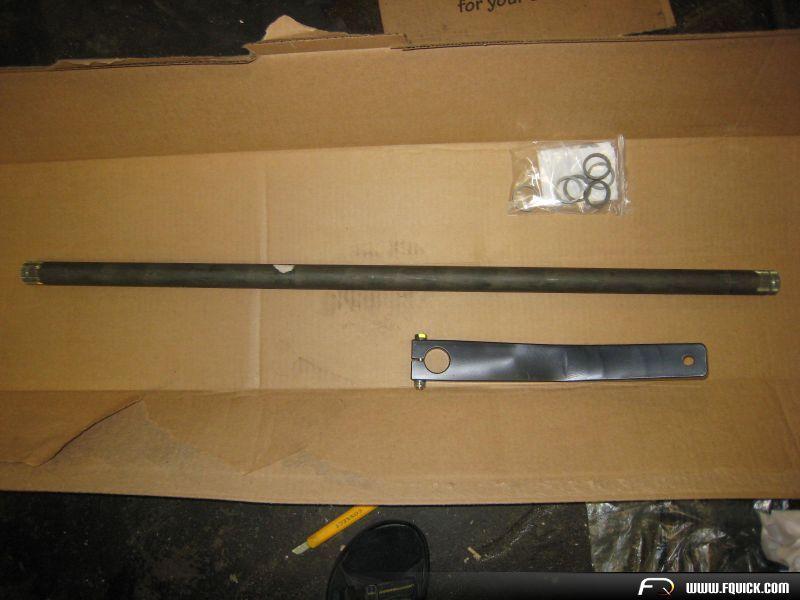
Splined swaybar, this billet links and goes trought the framerail, wich was a bit tricky.
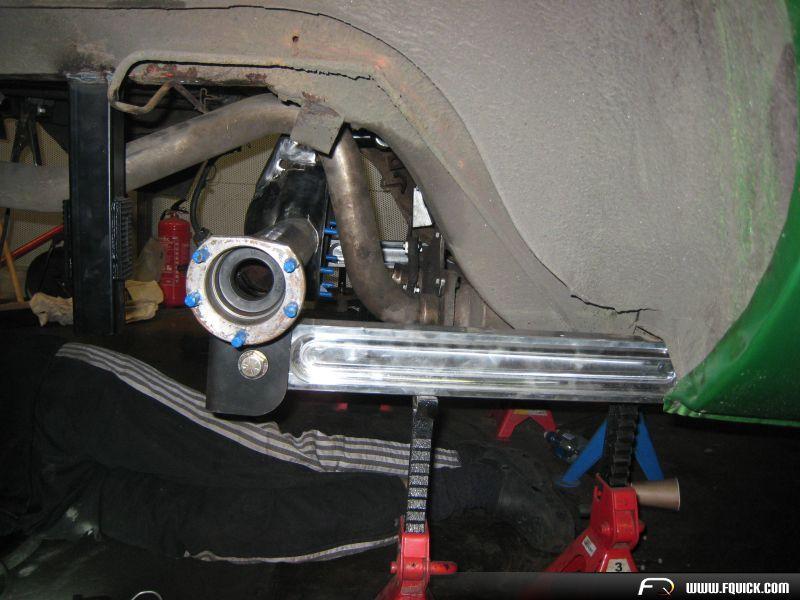
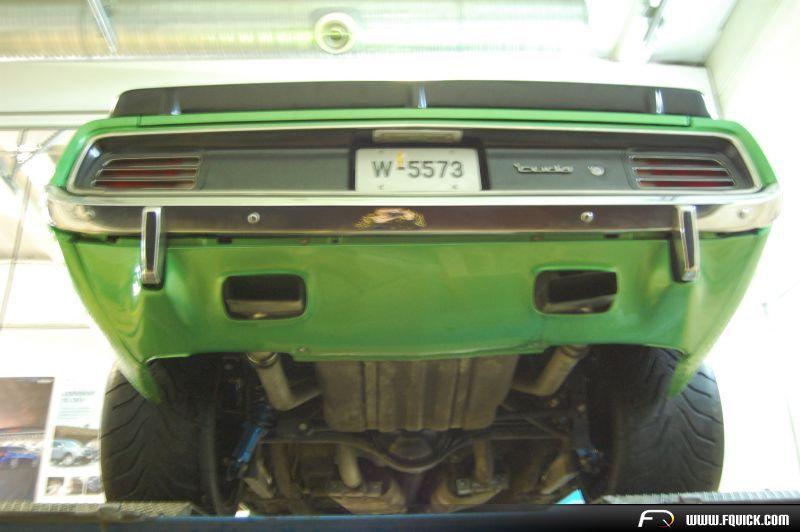
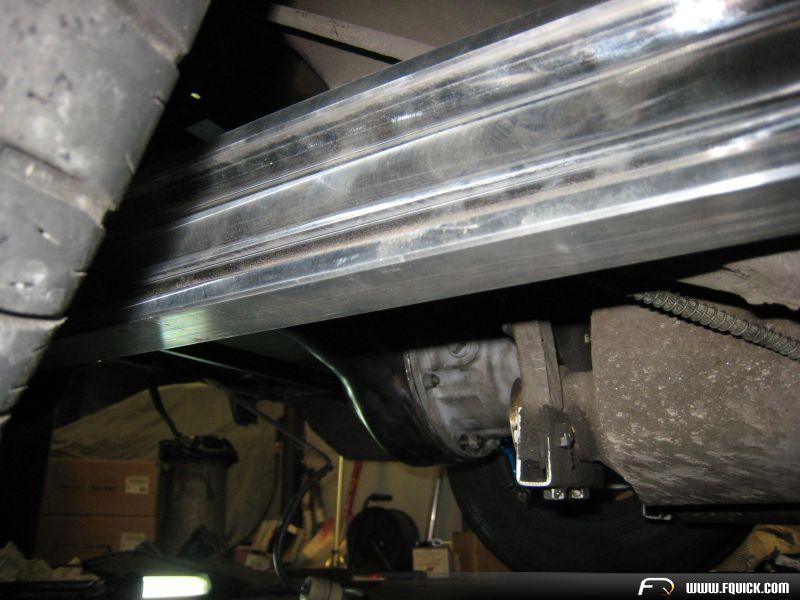
Checked the clarence to the exhaust, no problems with my 2.5" TTI exhaust!
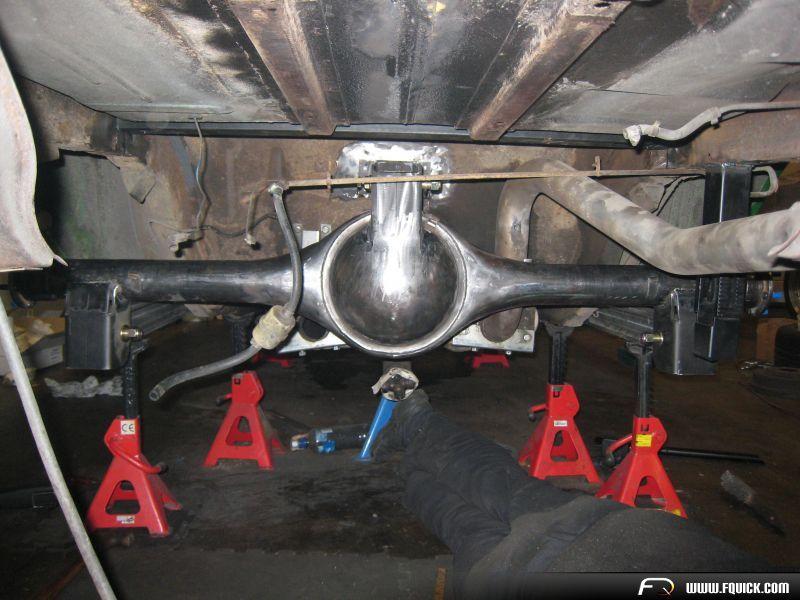
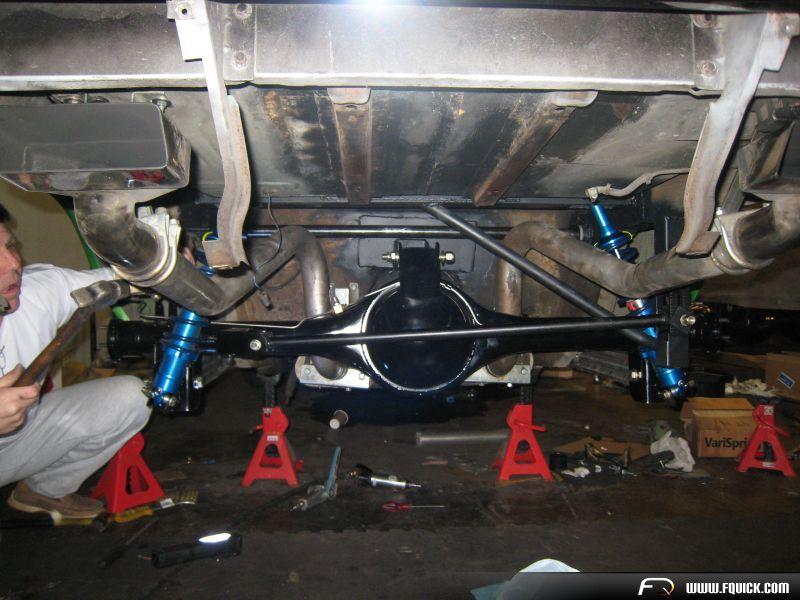
3 link is up!
Bracket for the 3rd link. I made a mistake here, had to take it off agian and mount it a bit lower becouse the swaybar crashed into it.
The link with it's adjusable pinion angle.
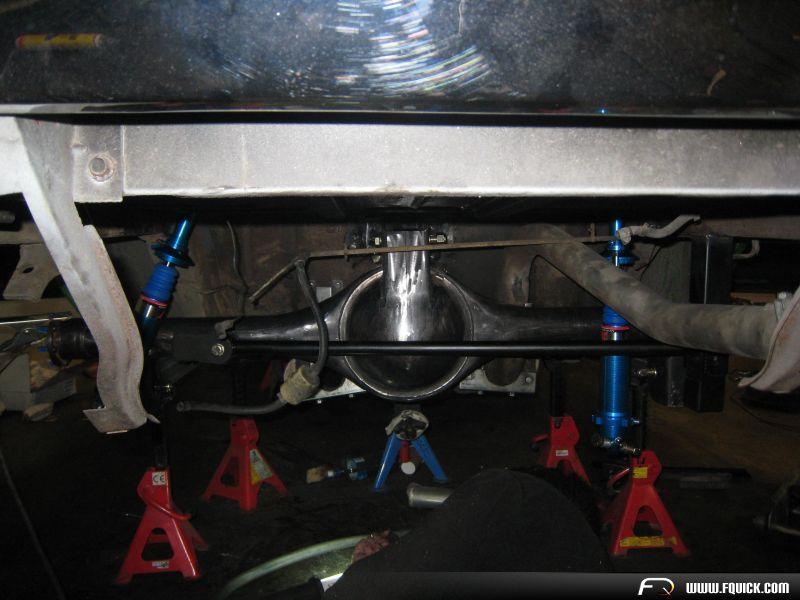
Mounted the panhard bar and started with the dampers.
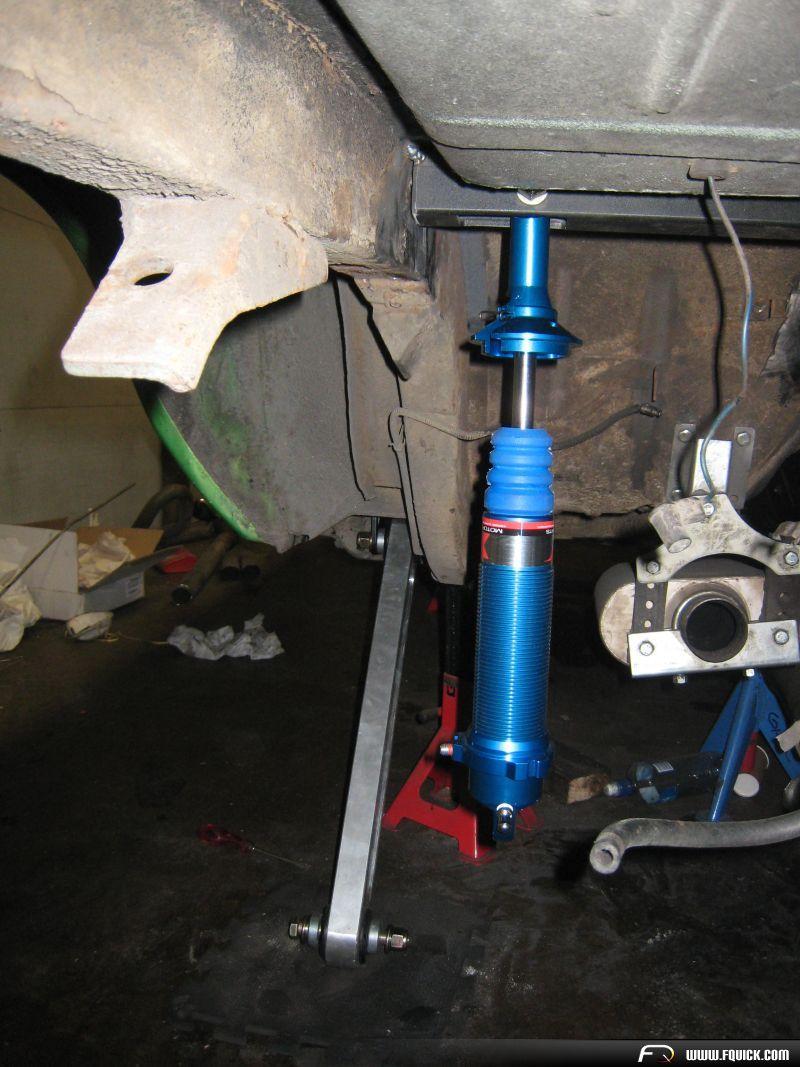
XV coil-over.
All the brackets minus the ones for the swaybar.
I drilled in new holes in the upper mount 1" narrower since the control arms was moved 1" inwards. But in the end I ended up using the original holes anyway I think.
Did some mockup to test the righthight before I drilled holes for the swaybar.
Wheels on!
Suspension tuning 101! My brother had to be gasoline and battery.
Mustang man! Has to ride in the trunk!
On the ground!
From the side..
LCA..
This pic should show tireclerance 275/60-15 on that pic.
Newly painted axle and panhard bar.
Cleaned the valve and tubes.
Here everything is in place, the swaybar was a tight fit!
Had to make a new longer J-bar. The one in the kit hit my exhaust.
As said, the swaybar was tight, some adjustments in the end.
On the ground, some 4 months later!
Had to rise the ridehight a bit with those huge tires. Spoiler was being repainted since someone had scrached it.

At this point only the alignment (shims at the leafsping/LCA shoes) and pinion angle needed to be done.
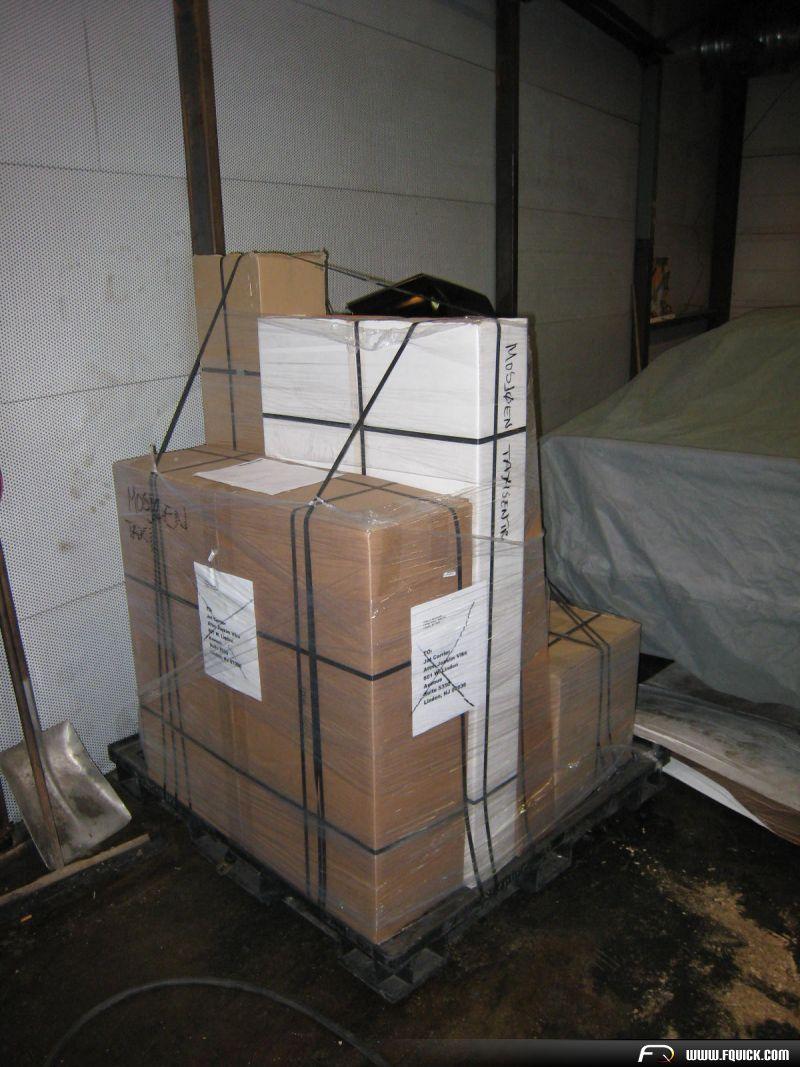
Here are pics of the Front suspension parts that I got in July 2009.
Early christmas!
Swaybar and endlink. Here are the mentioned shims for the rack and pinion!
Endlink, splined.

Damper, noticable stiffer than the ones I got in the rear.
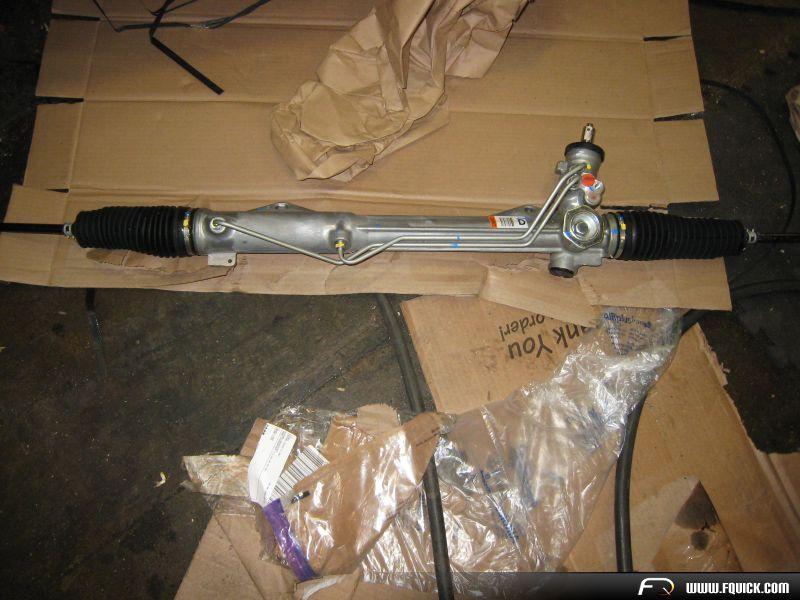
The rack, from a 05 Mustang. Came in a Ford box out of Dearborn.
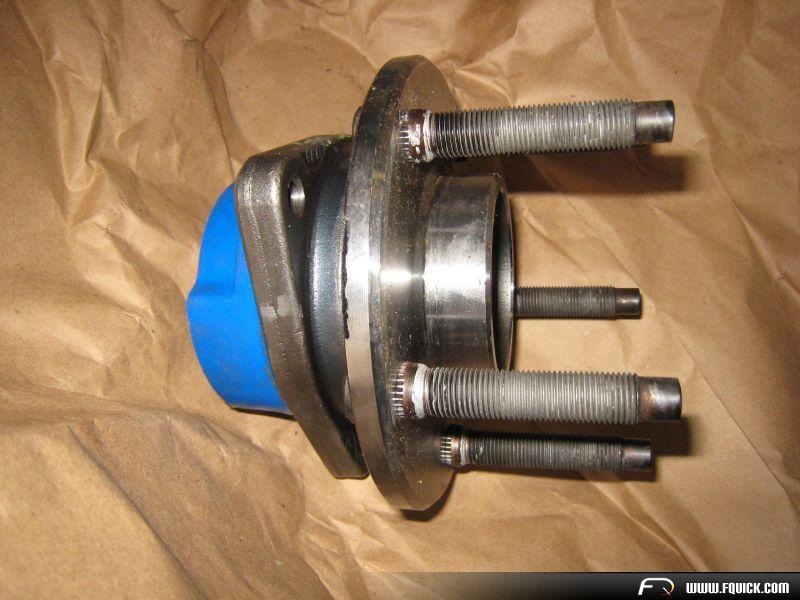
Spindle, Mopar bolt circle.
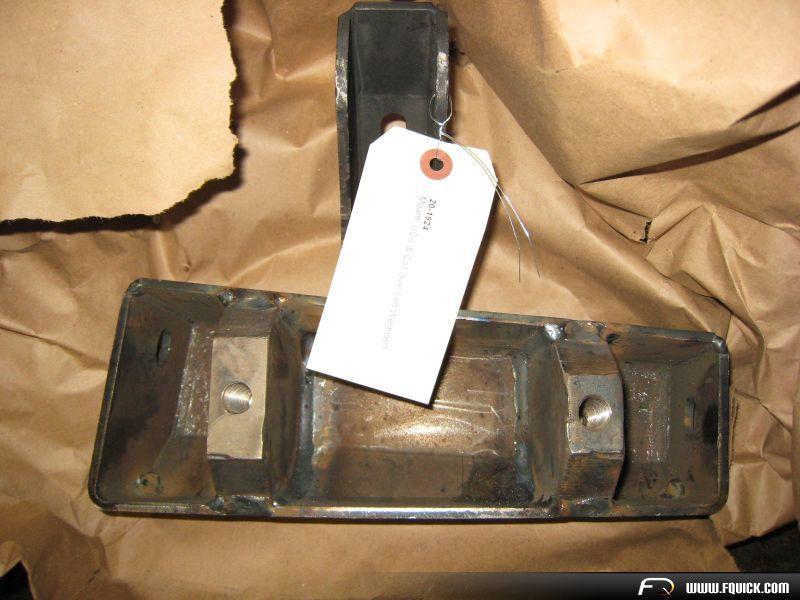
These are prewelded mount for UCA and coil-over.
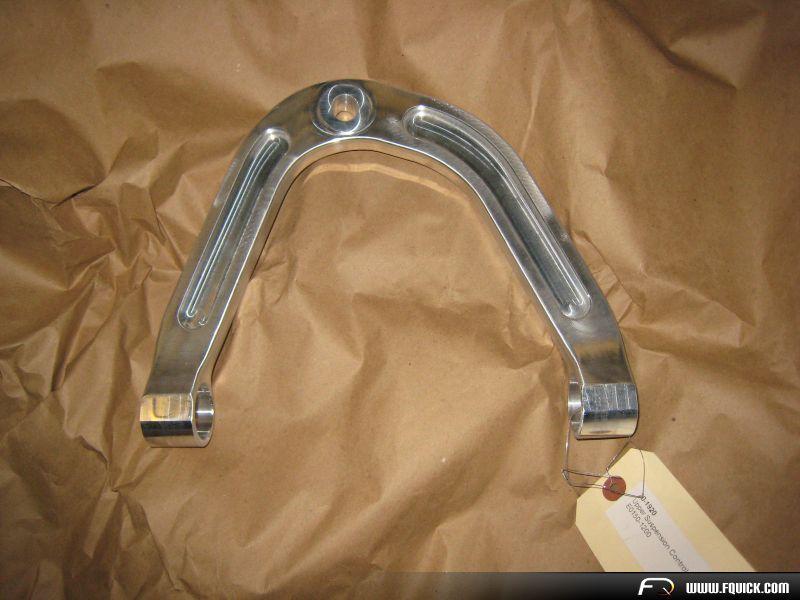
Here's a real goodie, billet aluminium upper contol arm. These weigh nothing! ![]()

Springs from Hypercoils.
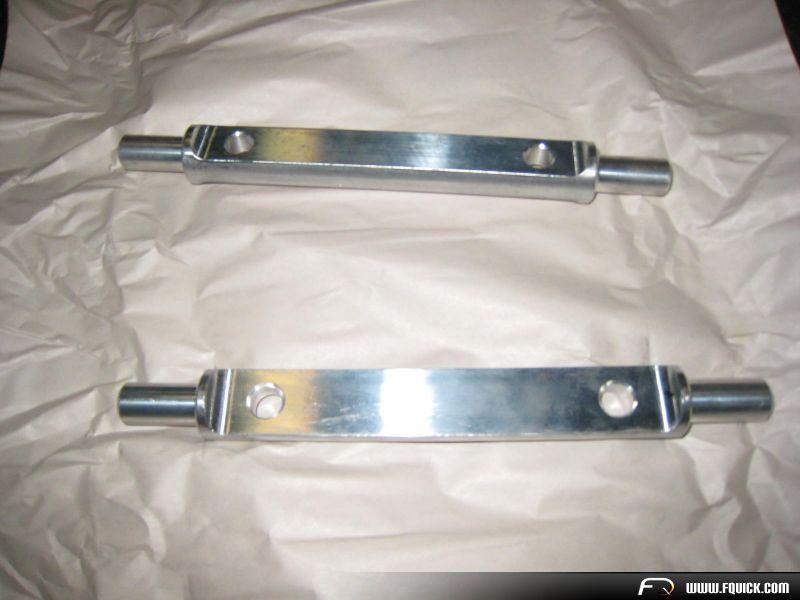
UCA dogbone. You slide brushings on to theese.
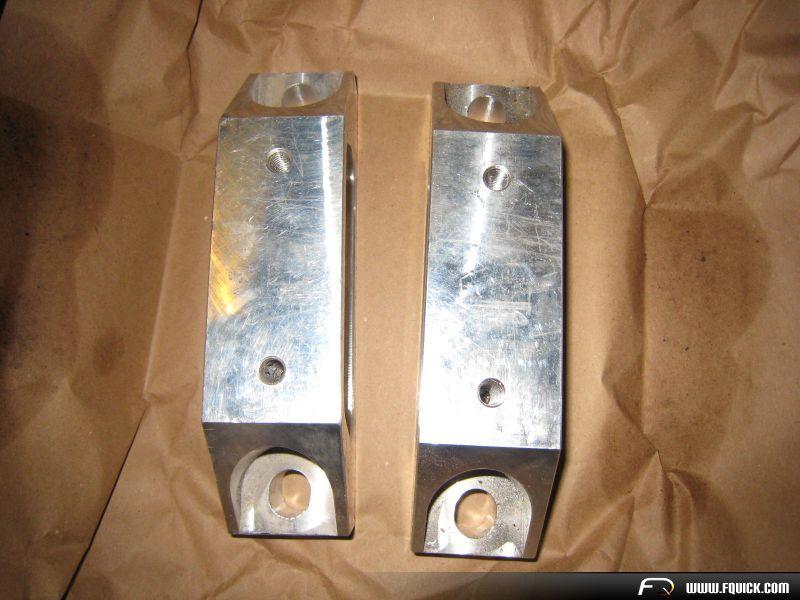
Blocks that fit between the K-Member and Swaybar.
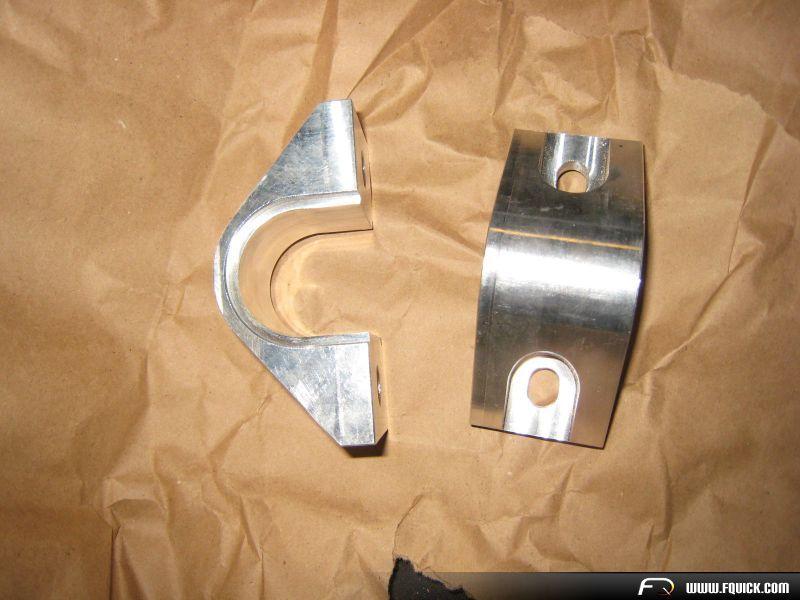
Mounts for the swaybar.
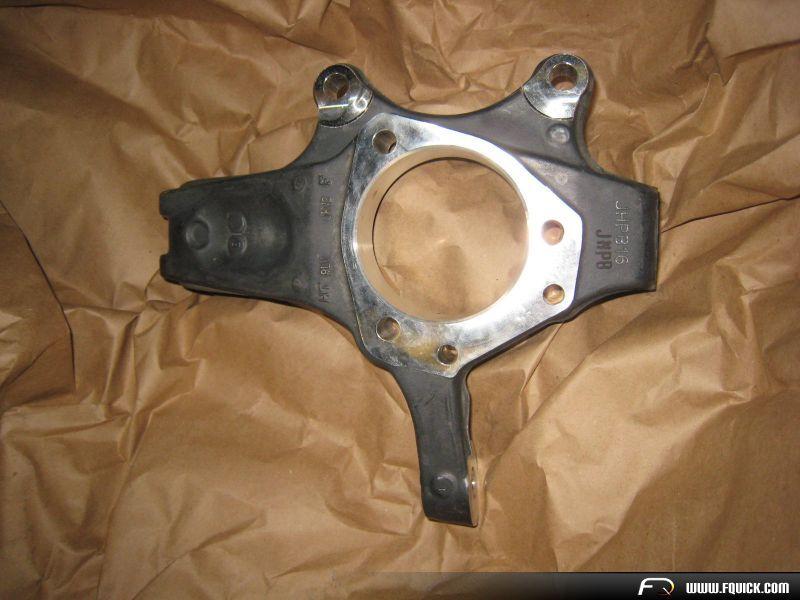
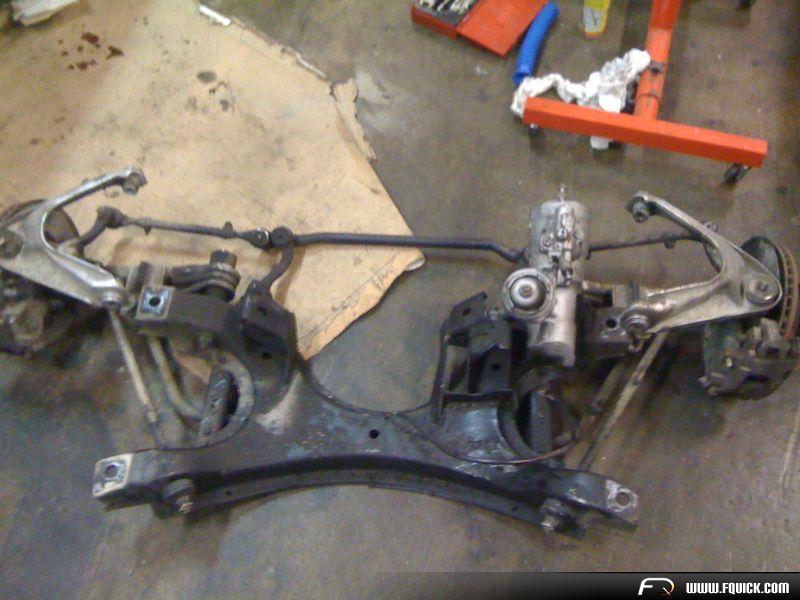
Uprights. Corvette C5/C6 stuff.
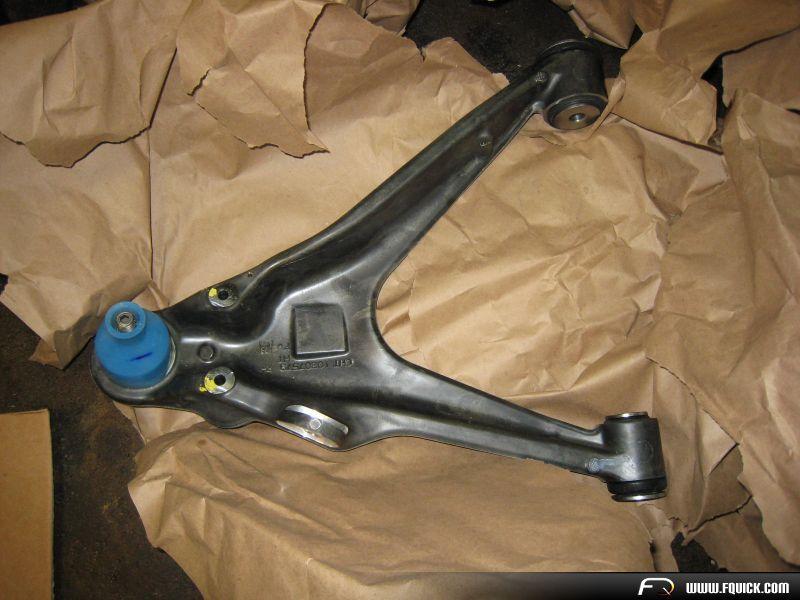
LCA, also from Corvette C5/C6.
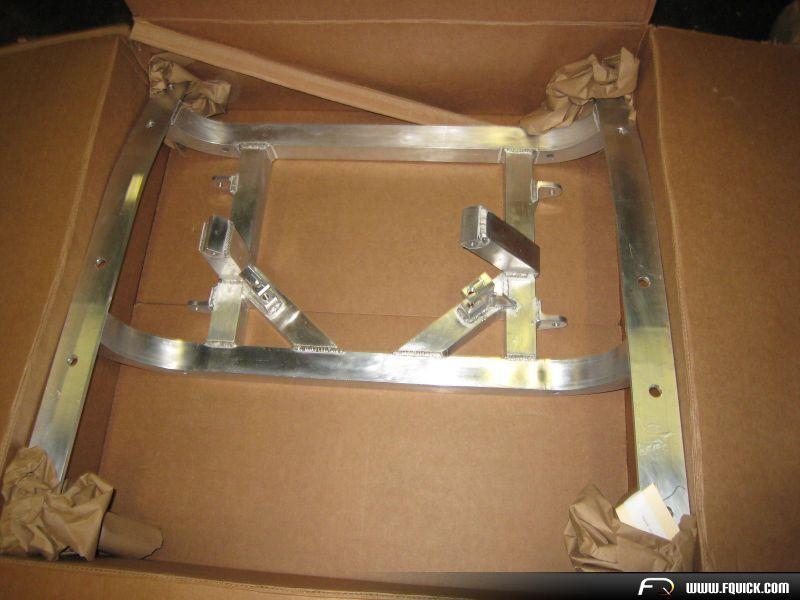
K-Member, aluminium, not much weight here either!
4-25-2012
Hi guys, just wanted to tell you I got the car on the road today! I drove around town to get a feel with it. I'm not gonna put it to the test before I've had it trough an 4-wheel alignment. Have the dampers at max soft at the moment, felt comfortable on speedbumps, will stiffen it up. It did track a bit on the poor roads we have around here, but that was expected with those fat tires. It cornered flat, and the rack was very responsive and gave great feedback. Then it started to rain.. I'll also lower it a bit in the front to get the right stance. So far I'm very satisfied with the setup ![]() Will report back when I get to really push it trough the bends!
Will report back when I get to really push it trough the bends!
5-14-2012
Yeah, It worked flawlessly. I'm very happy with it! After the car was at the alignment shop I needed to roll the front fenders a bit more. The handling is amazing, you won't belive how much grip it has! Did not find a car that could shake me on the road. It takes the corners, bumps and crests so effortlessly. Point and shoot deal. It just changes direction so fast! the rack gives good feedback, the ride is firm yet comfortable. No problem to go on longer trips, can drive it all day (I did). Didn't take it to the roadrace track last year, but I plan to within a month and a half. I will lower the car a litle bit more in the rear to get the right stance. The brakes are amazing, the best I have ever experienced. It's just so fun to drive! ![]()