You must be logged in to rate content!
6 minute read

09+ TOYOTA MATRIX/PONTIAC VIBE SHIFT BOOT/ARMREST INSTALLATION INSTRUCTIONS
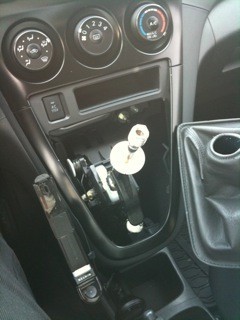
1. Remove the shift knob simply by unscrewing it.
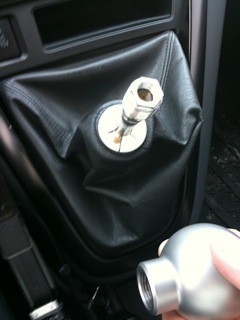
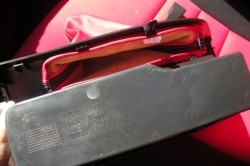
2. Pinch the top portion of the shift boot and remove it from it's plastic holder.
3. Push down either one of the top corners of the shift boot to dislodge it from it's mounting points.
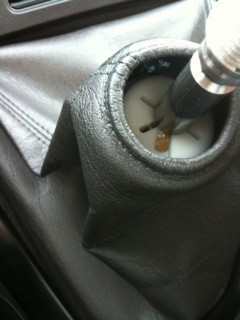
4. This is the shift boot released from the mounting points, all you need to do is then pull it out.
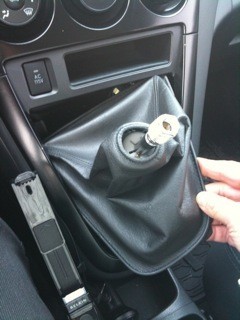
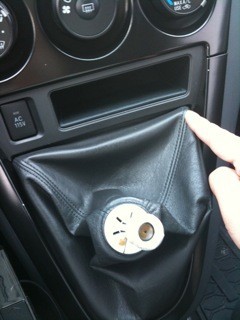
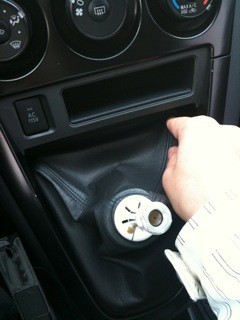
5. Replace the boot with the RedlineGoods one.
6. Installation is essentially a reverse of removal.
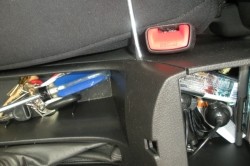
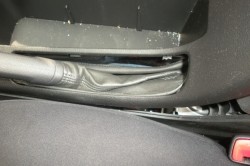
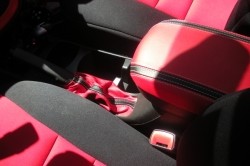
7. Start by lifting both sections of the center console armrest to expose the center console seam for the section containing the E-Brake.
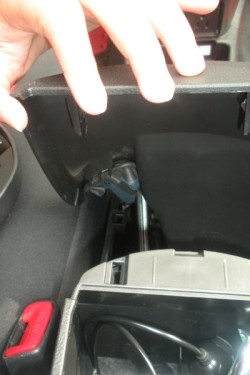
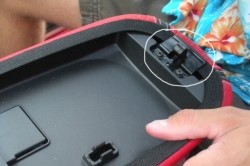
Gently slide a small flat head screwdriver into the seam and slide it downwards until you come to a plastic retaining clip.
Back the screwdriver out and place behind the retaining clip.
8. Apply gentle pressure to the clip while carefully lifting up on the console section.
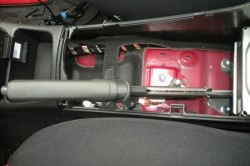
Repeat until all clips are loose and the console section pulls up freely.
Note: The retaining clips on this section are permanently molded to the console, so be very careful not to break any of them during the removal process as they cannot be replaced.
9. Start by lifting both sections of the center console armrest to expose the center console seam for the section containing the E-Brake.
10. With the console section loose, locate the leather E-Brake boot attached to the E-Brake handle. At the bottom of the boot are several metal retaining clips. Pull the boot free from the retaining clips and completely remove the console section.
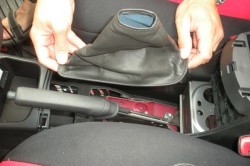
11. With the E-Brake boot completely free of the console section, lift up and over the E-Brake handle, it is held in place by friction and will pull free easily.
12. With the E-Brake boot completely removed from the E-Brake handle, remove the forming wire from the bottom of the boot using either a pair of scissors, flat-bladed knife, or a seam ripper. This piece is not included in the replacement boot and will be needed to reattach to the console section. The wire faces back and points upward when installed. The longer end of the shift boot goes towards the dashboard.
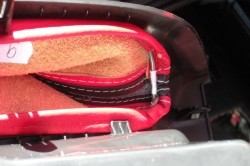
13. Place both the replacement boot and forming wire through the slot in the console where the E-Brake handle is placed. Place the wire to the inside of the boot leather.
Wrap the leather around the wire, encasing it entirely, then place both inside of the metal retaining clips.
14. Carefully slide both the console and replacement boot over the top of the E-Brake handle. Pull the E-Brake handle through the hole of the replacement boot until snug.
Re-secure the plastic retaining clips of the console section to the rest of the center console.
15. Optional Items: Philips head screwdriver, (2) 3/8” nickel washers
Slip leather armrest cover over the top of the existing armrest from back to front with the elastic facing downward.
Optional: As this is held in place by an elastic band, the job is complete, however, the new material may make it difficult to latch the top of the armrest closed.
If desired, lift the top of the armrest to expose the latch and screws holding the latch in place. Using the Philips screwdriver, remove both screws securing the latch to the armrest. Place (1) 3/8” nickel or plastic washer between each screw and the armrest. This will adjust for the extra material between armrest and the latch, and enable the latch to close.
ENJOY YOUR NEW LEATHER BOOTS!
Useful tip
You have installed a product made out of genuine leather. As you know, to maintain a leather product in good condition, you should take care of it. We suggest occasionally (every 4-6 week for example) applying some leather conditioner/UV protector to keep your leather from drying up in the sun and cracking.
Redline Automotive Accessories Corp. will not be held liable for any labor, incidental or consequential damages of any kind. Proceed at your own risk.
Good detail
Posted by Diggymart on 7/30/20 @ 11:49:43 AM