You must be logged in to rate content!
7 minute read
Front Caliper Studs for 981 S
Compliments of Mr_Brown @ www.planet-9.com
1-29-2014
I tried to post an article for this but I must have been doing something wrong because it would not load. So instead, I'm posting a thread here...
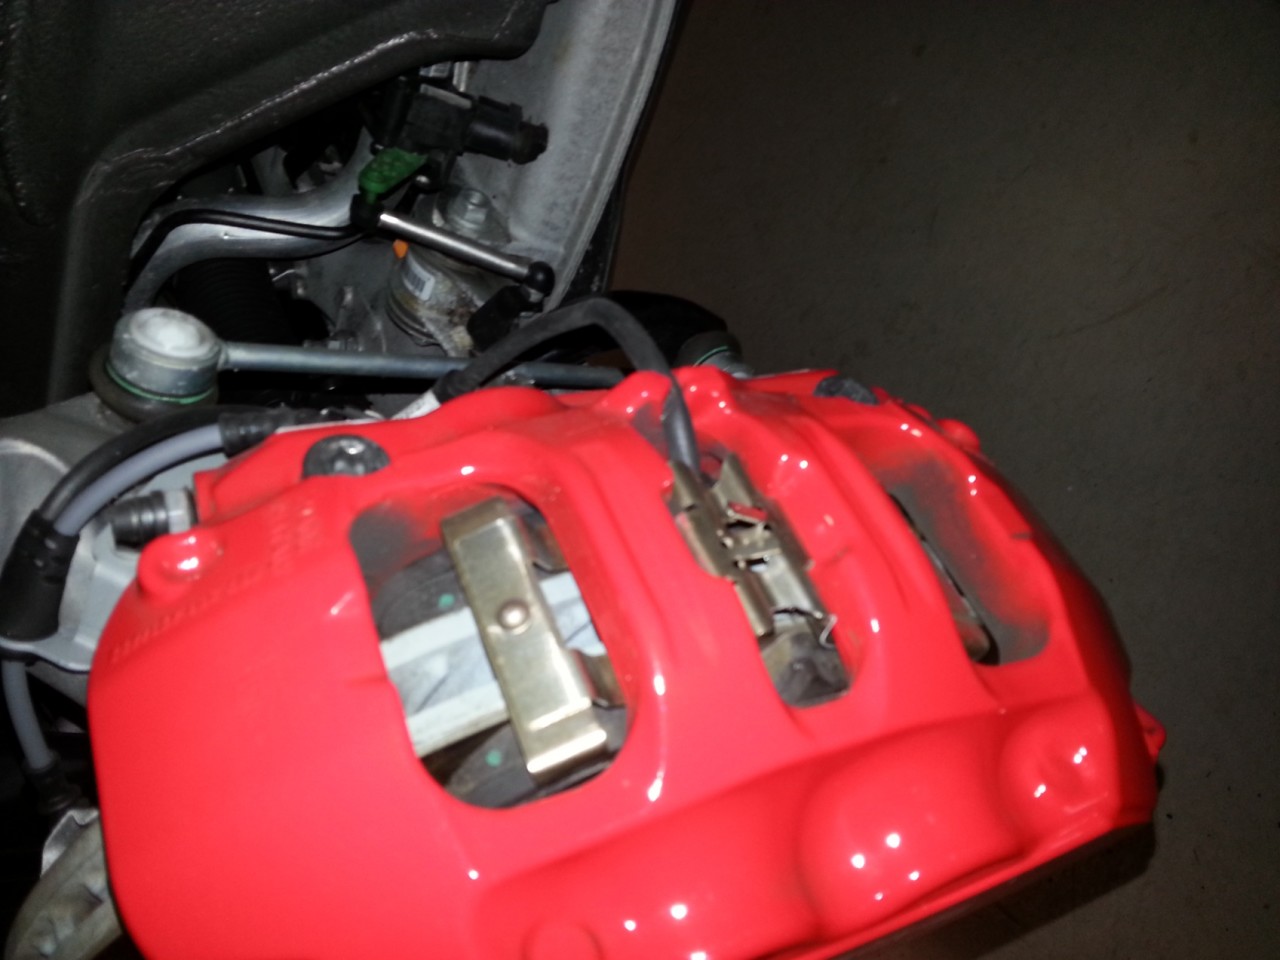
Many 981 owners have noticed that the front brakes on the new 981 S have a solid bridge between the two sides of the caliper that prohibits easy pad changes for track days. To swap pads in a 981, the caliper must be removed and pads inserted from the bottom. Porsche specifies caliper bolts as a one-time use item and there is a risk of cross-threading the aluminum wheel carrier each time the caliper is re-installed.
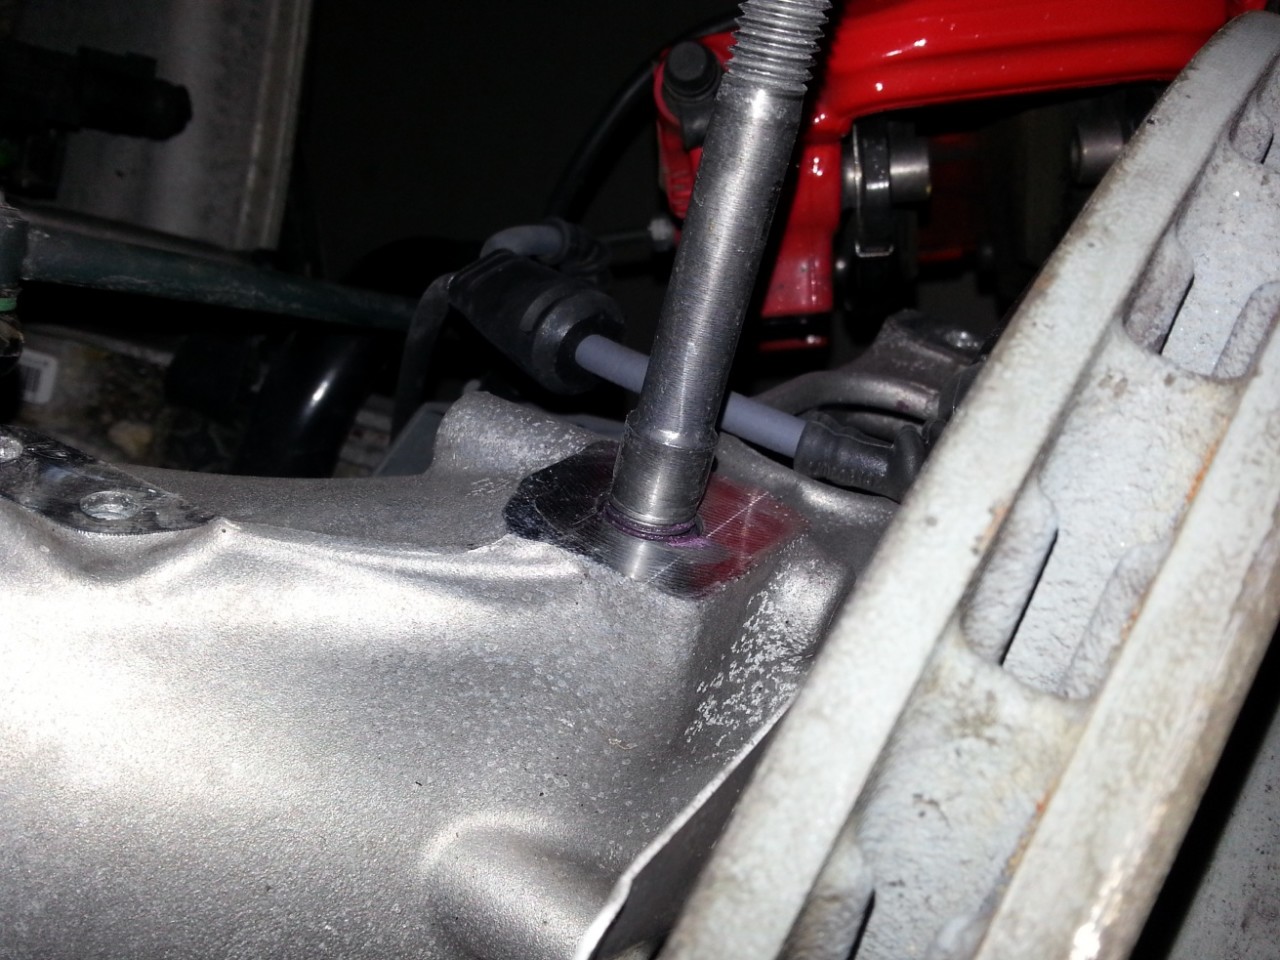
GT3 owners have been dealing with this issue for a few years and many have installed caliper studs from Porsche Motorsports. I read about this on another forum and decided to try it on my 981 CS. Mercifully, the rear calipers use a drop-in design like previous 986 and 987. The first picture is 981 S front caliper with no modifications.
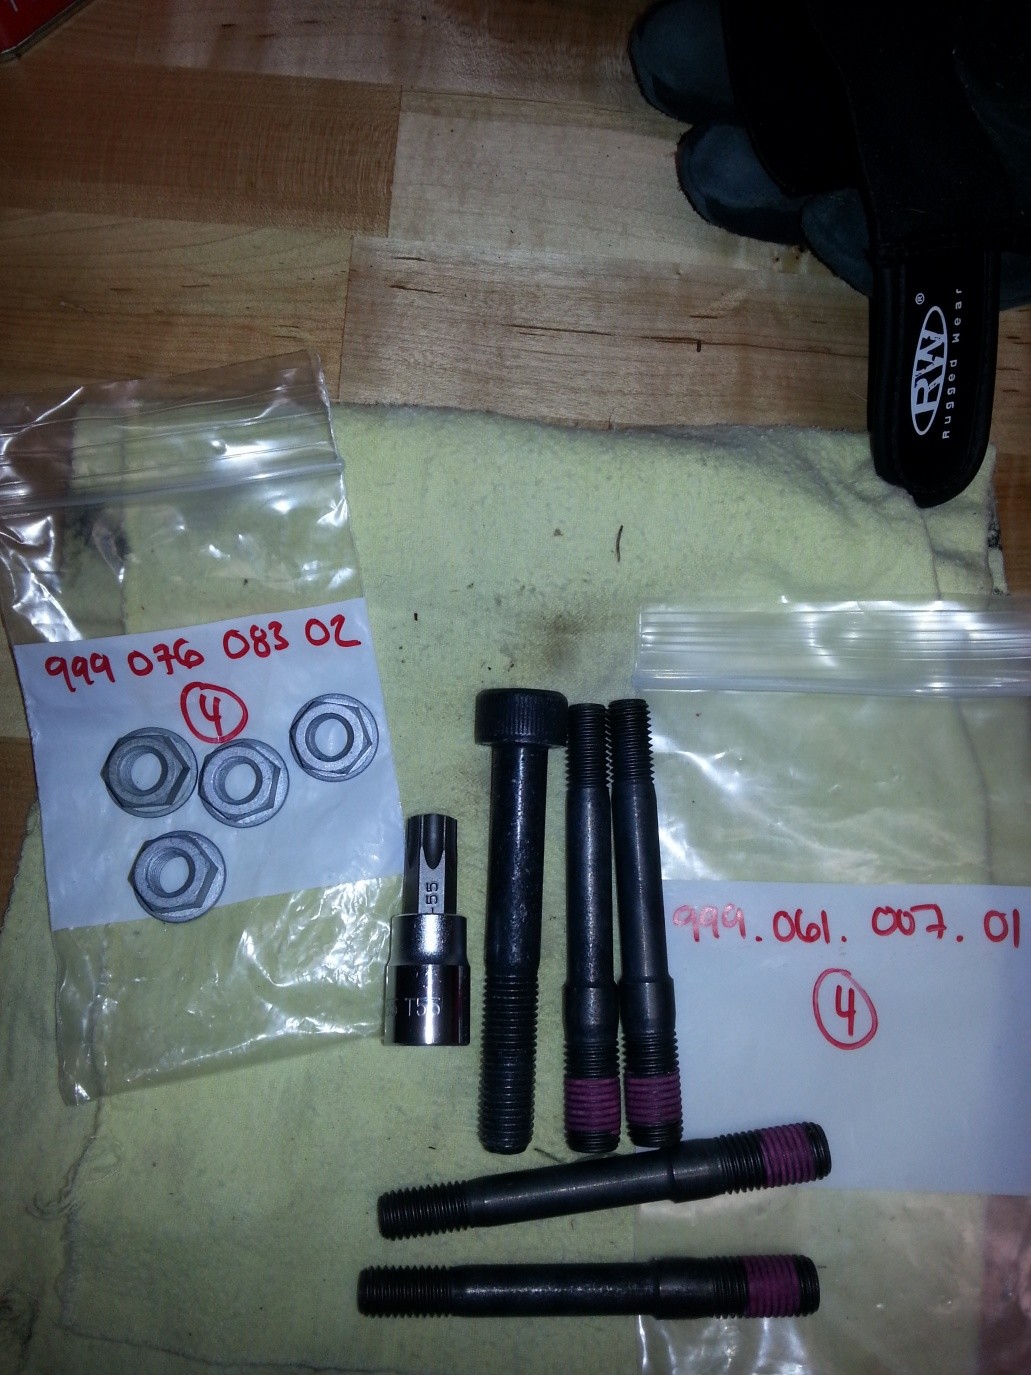
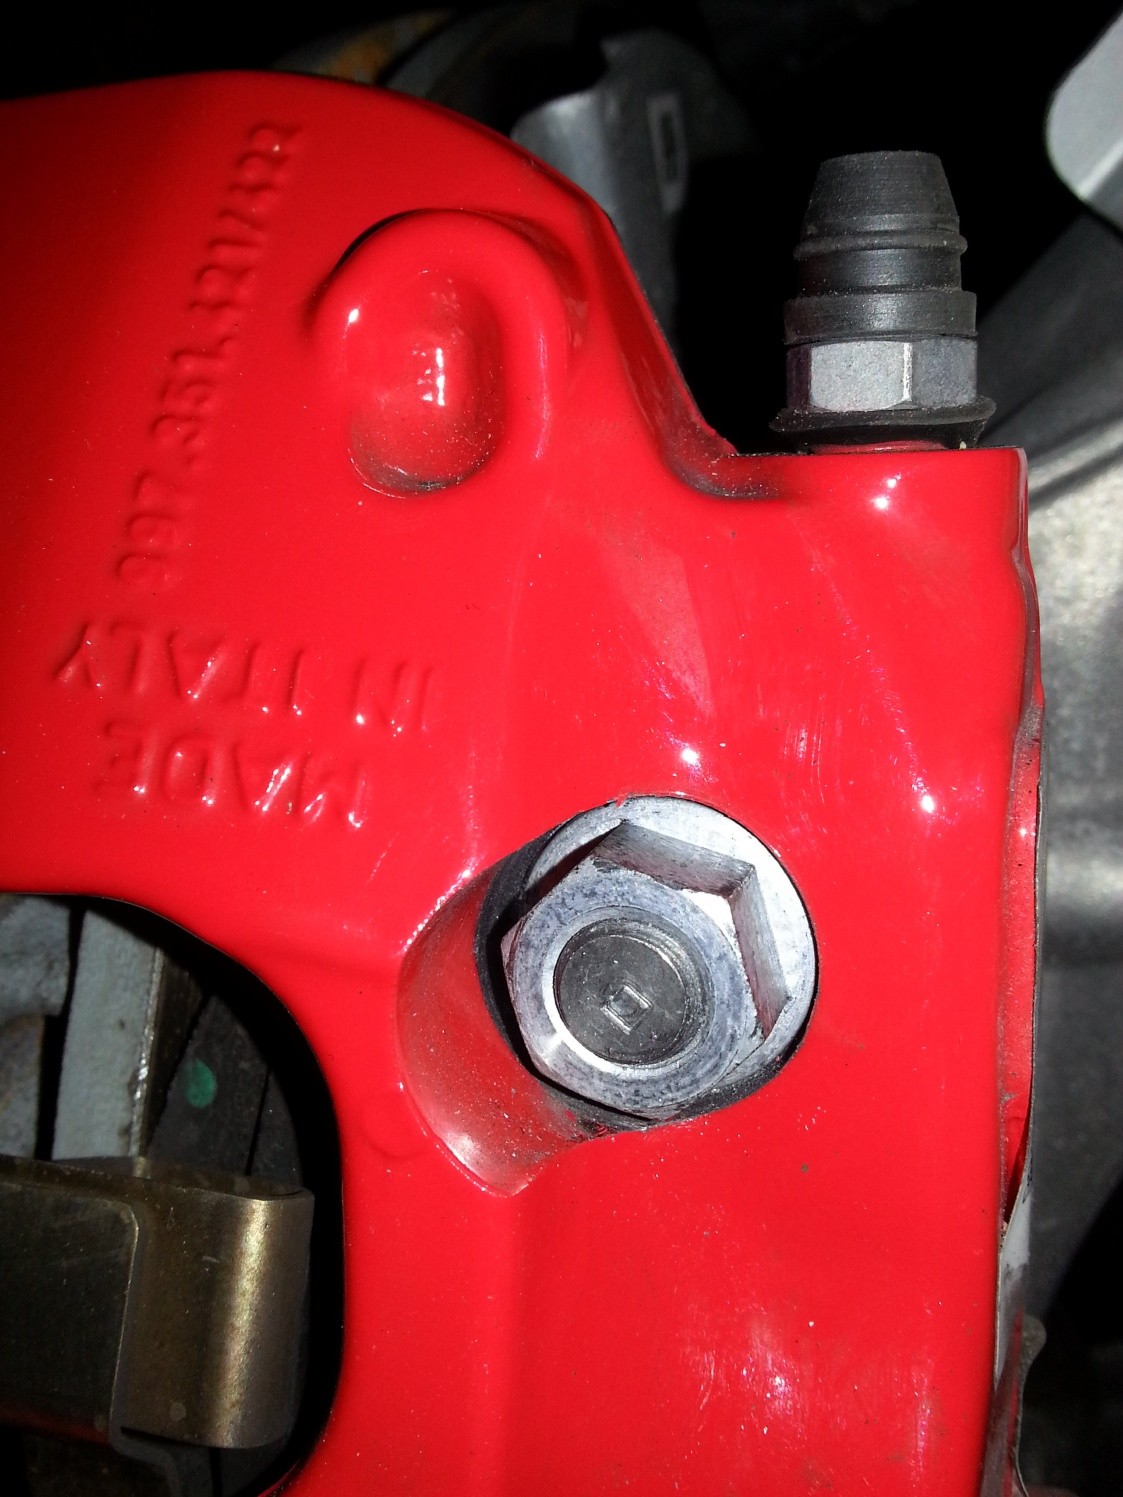
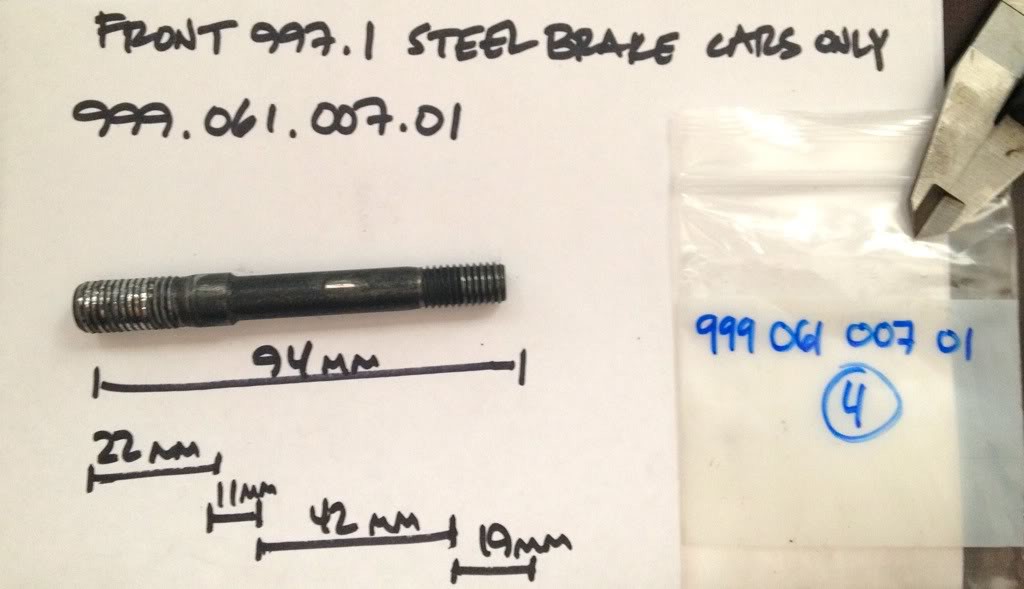
The first set of studs I ordered were too short so I re-measured and tried again. I found that PMNA part #’s 999.061.007.01 (studs) and 999.076.083.002 (nuts) fit the 981 CS front calipers. The studs are ~$14 each and the nuts are ~$11. This may seem expensive, but they’re made of Porsche unobtainium and it’s not so bad when you consider the cost of recurring bolt replacement. Suncoast and Rennstore both sell these parts. See the picture of caliper hardware.
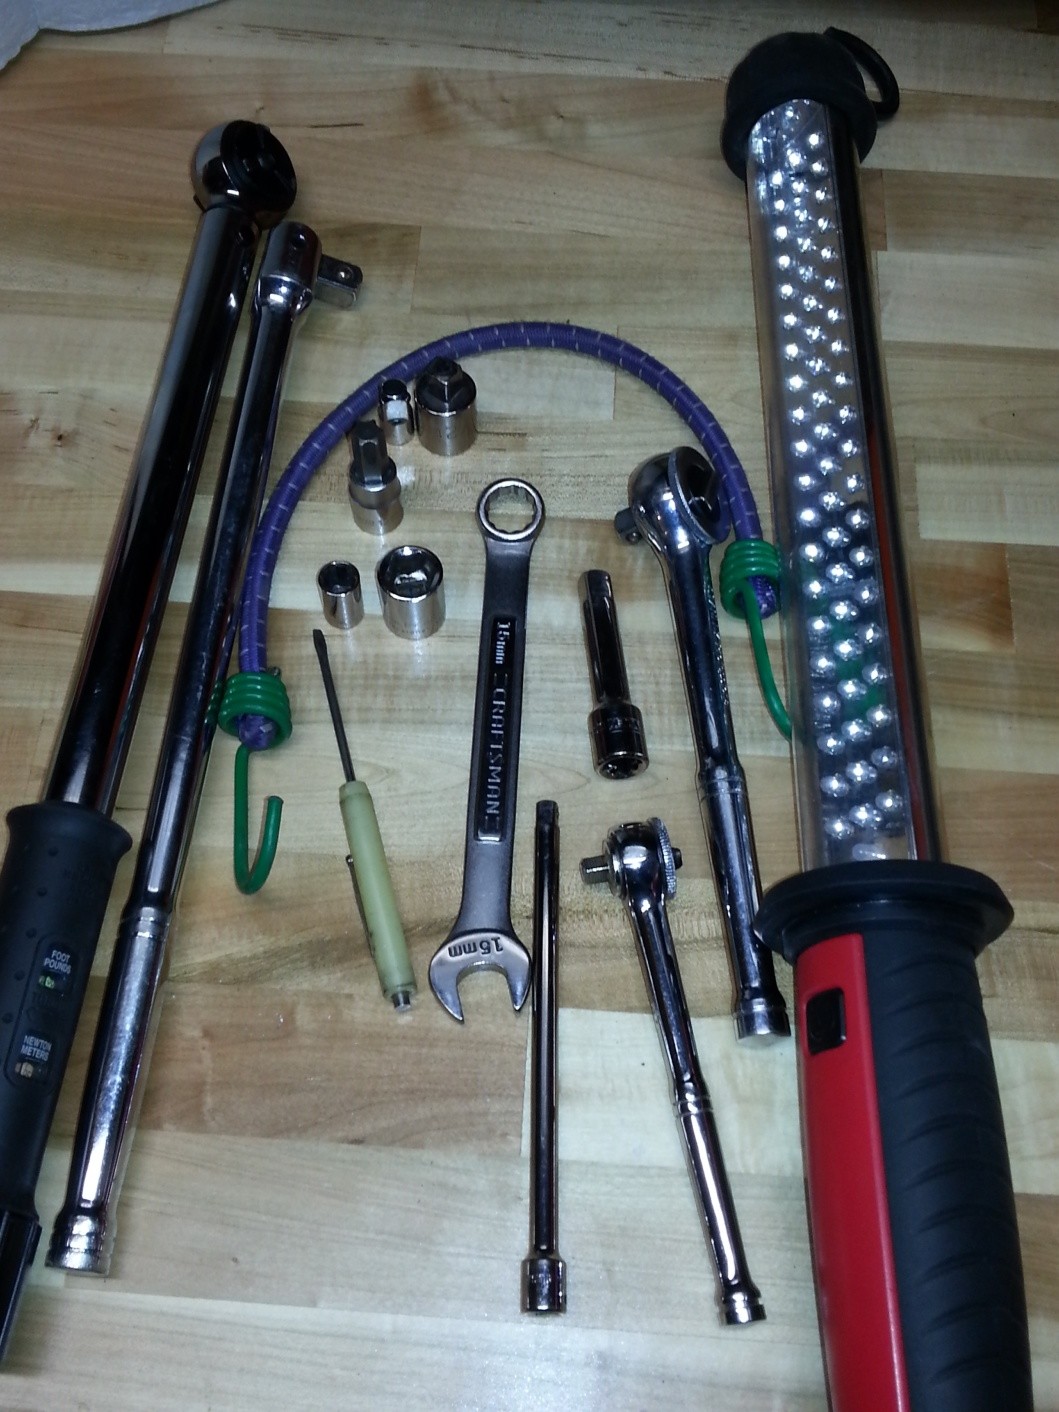
Tools needed to accomplish this modification are all very basic except a T-55 bit is needed for the original caliper bolt. T-55 caliper bolts were common in previous generations so dig thru your toolbox and maybe you’ll get lucky and find one that you had forgotten about like I did. See the tools pic.
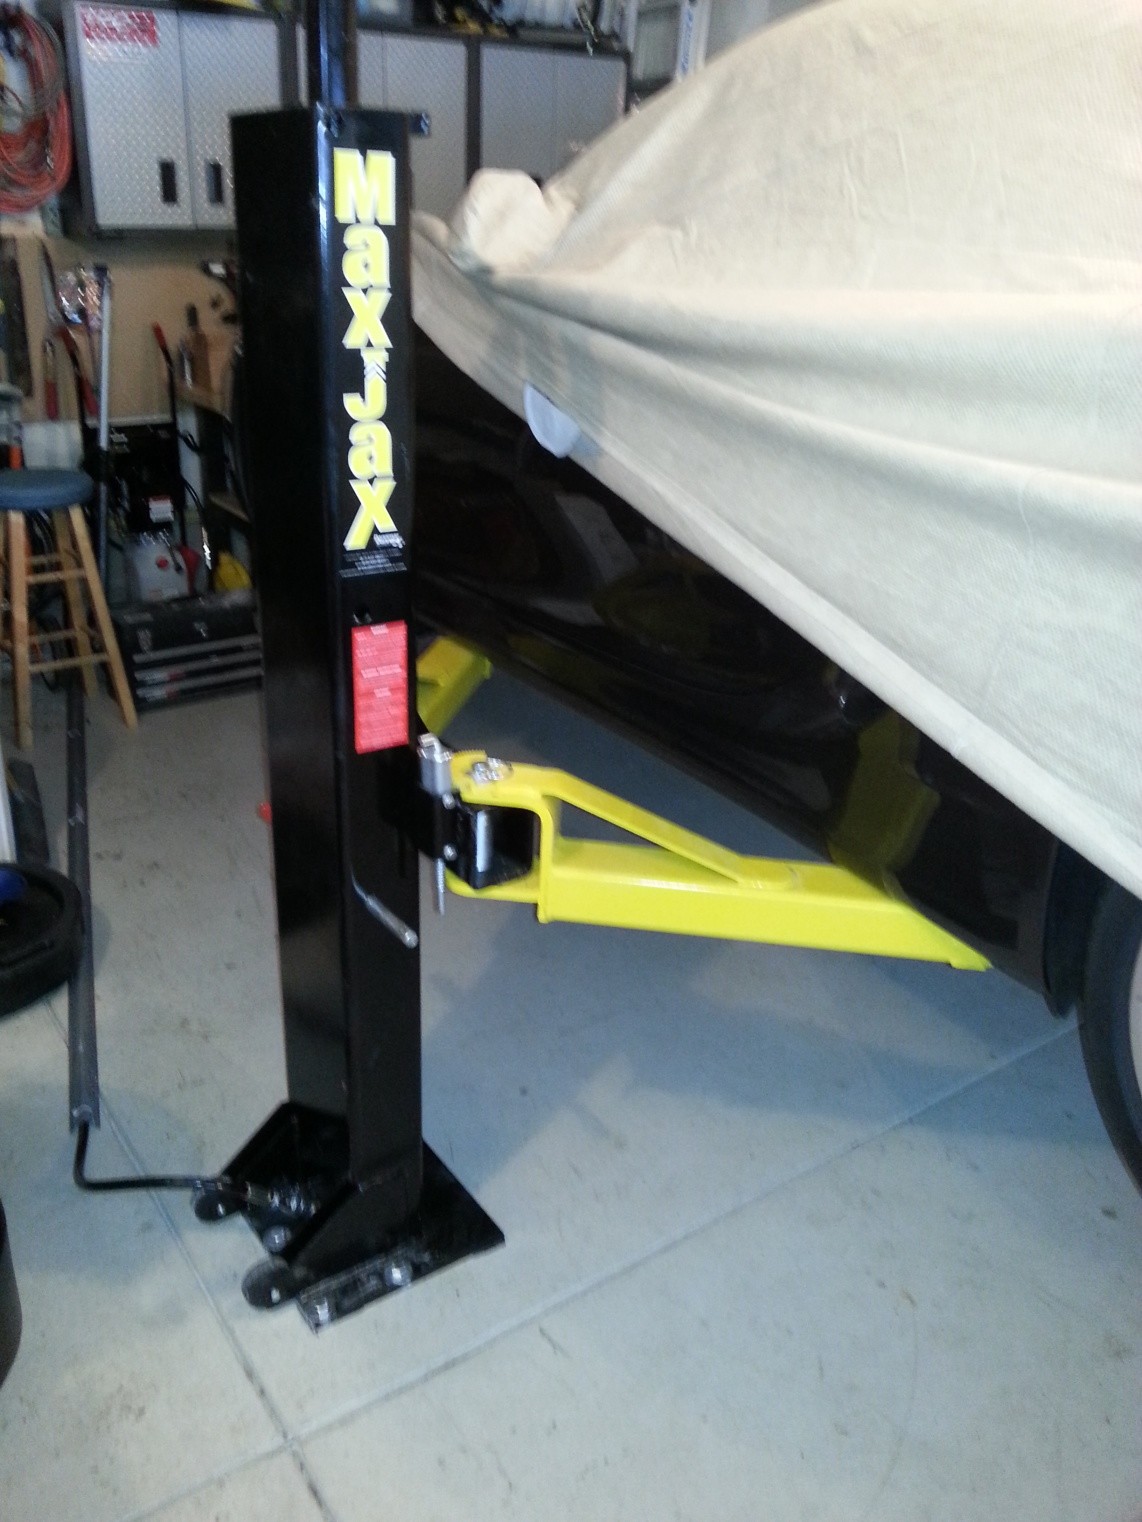
The first thing you need to do is pretty obvious – get your car elevated and get the wheels off. I included a gratuitous pic of my new lift that I bought myself for Christmas.
Now the fun part:
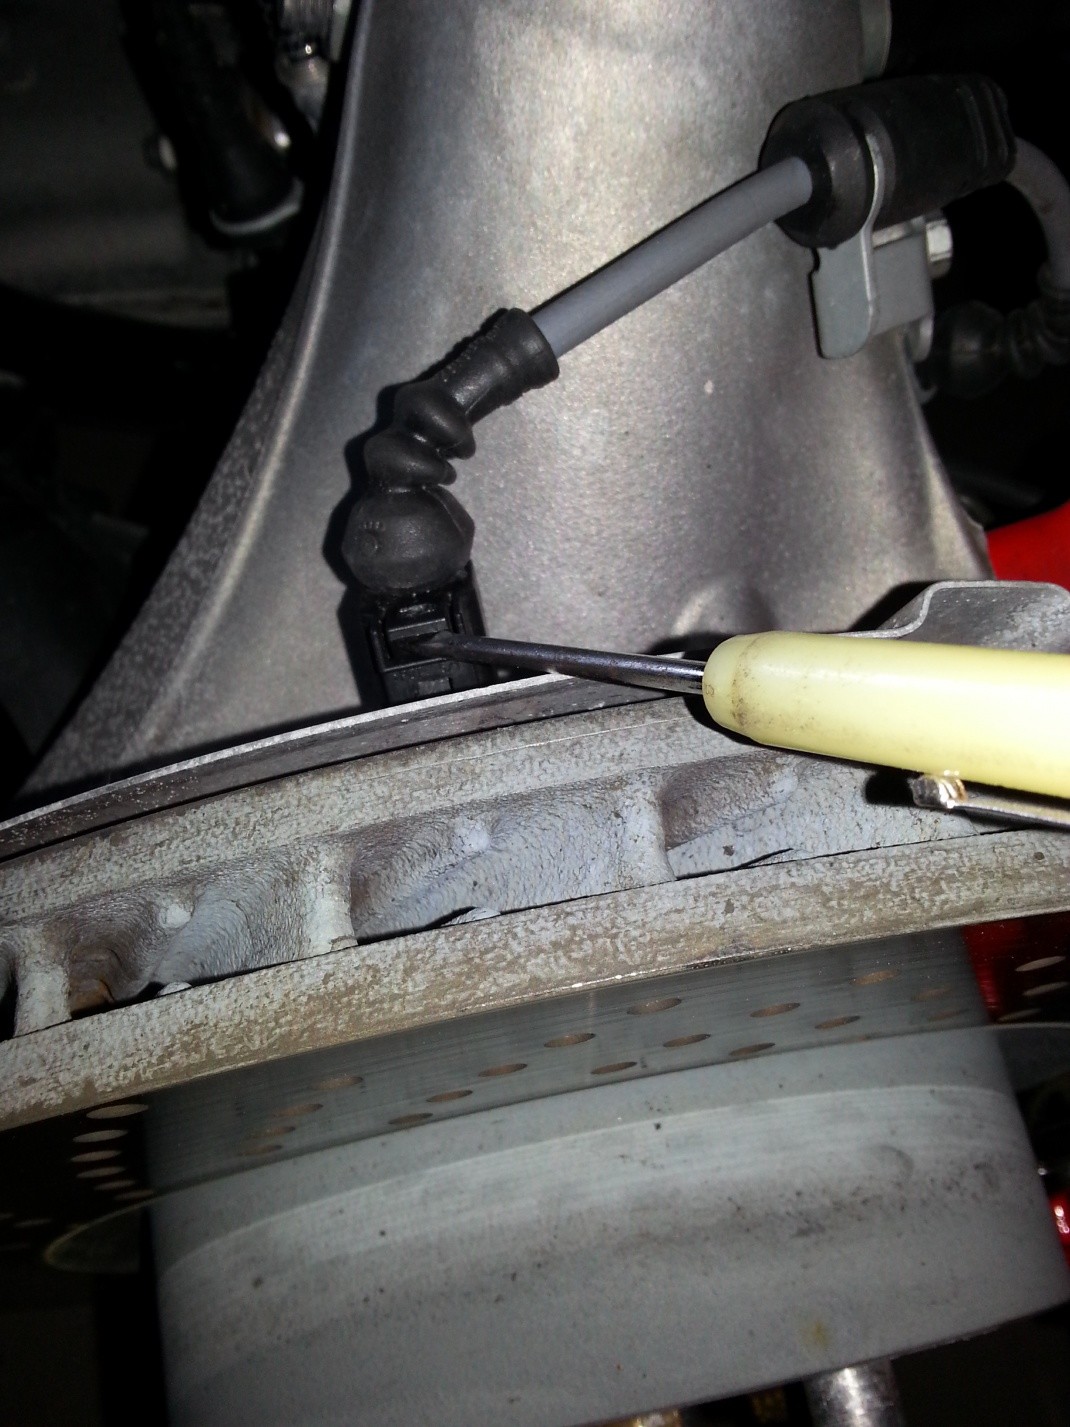
1. Release the connector on the ABS sensor. I had to fiddle with this for a while and fortunately figured it out before I broke anything. Insert a small screwdriver under the tab at the top of the connector, lift and jiggle. The fixed inner plastic tube of the sensor has a little nub on it and by lifting the tab, you’re lifting the connector off the nub. Be gentle.
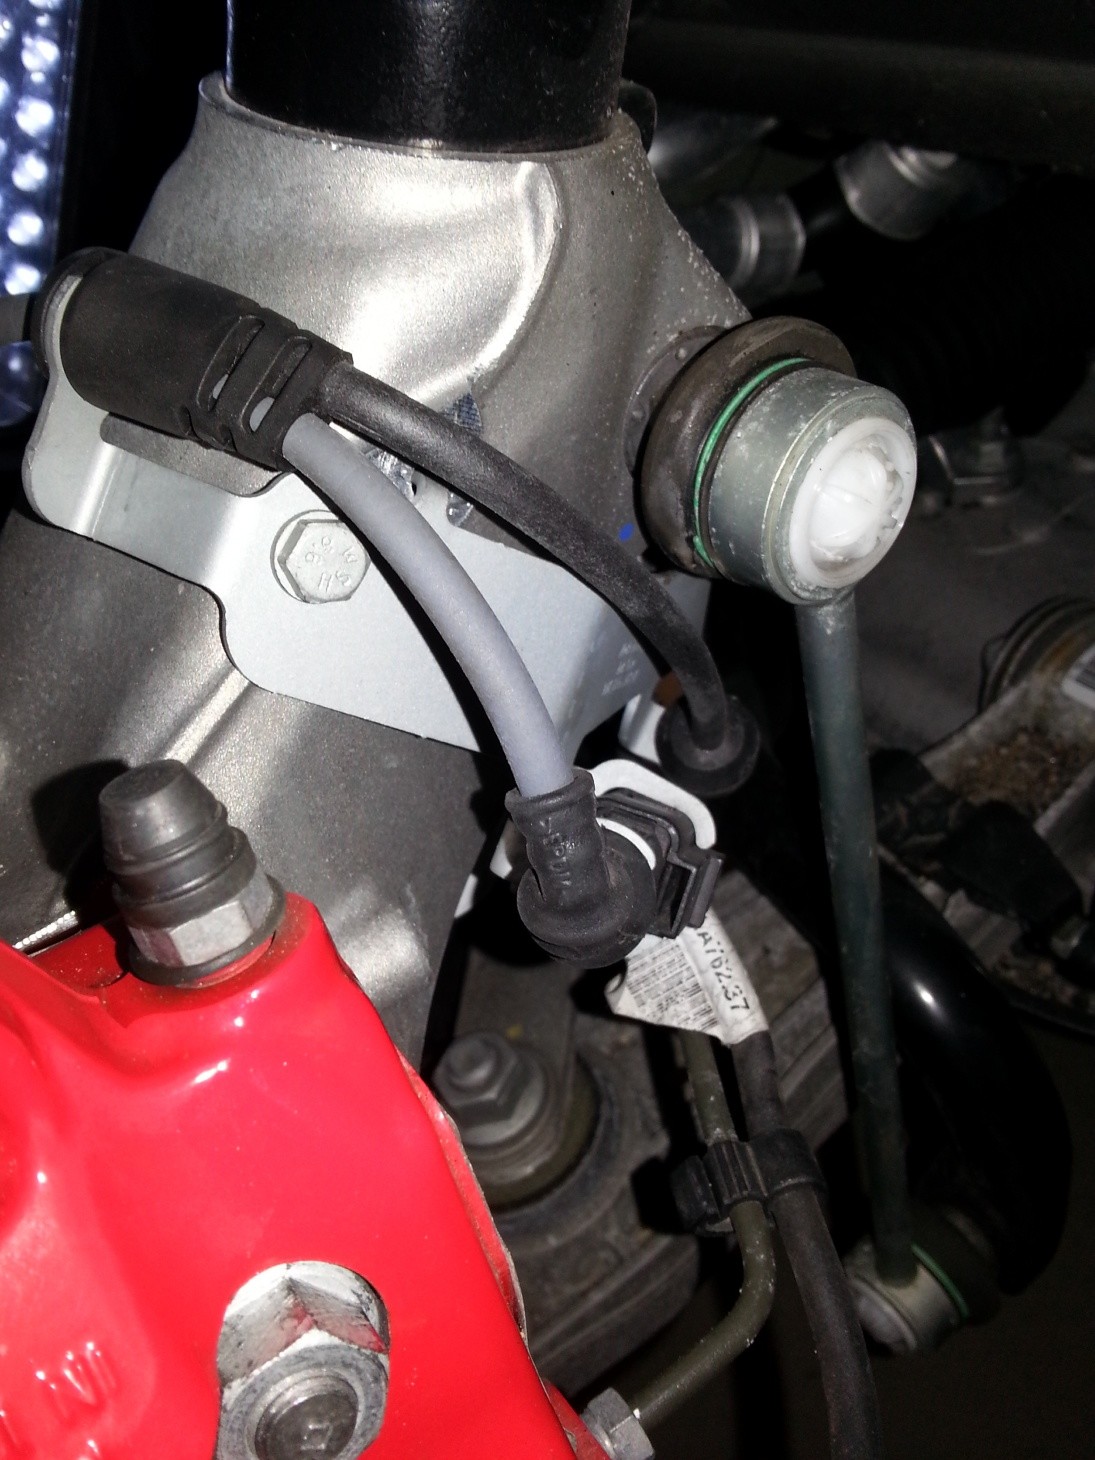
2. Remove the small bolt that holds the bracket containing all of the wires and brake lines. There is only one bolt holding the bracket, 10mm, IIRC. The bracket has a locating tab to aid in re-assembly. See the bolt behind the gray wire in the middle of the 6th pic.
continued in next post...
continued...
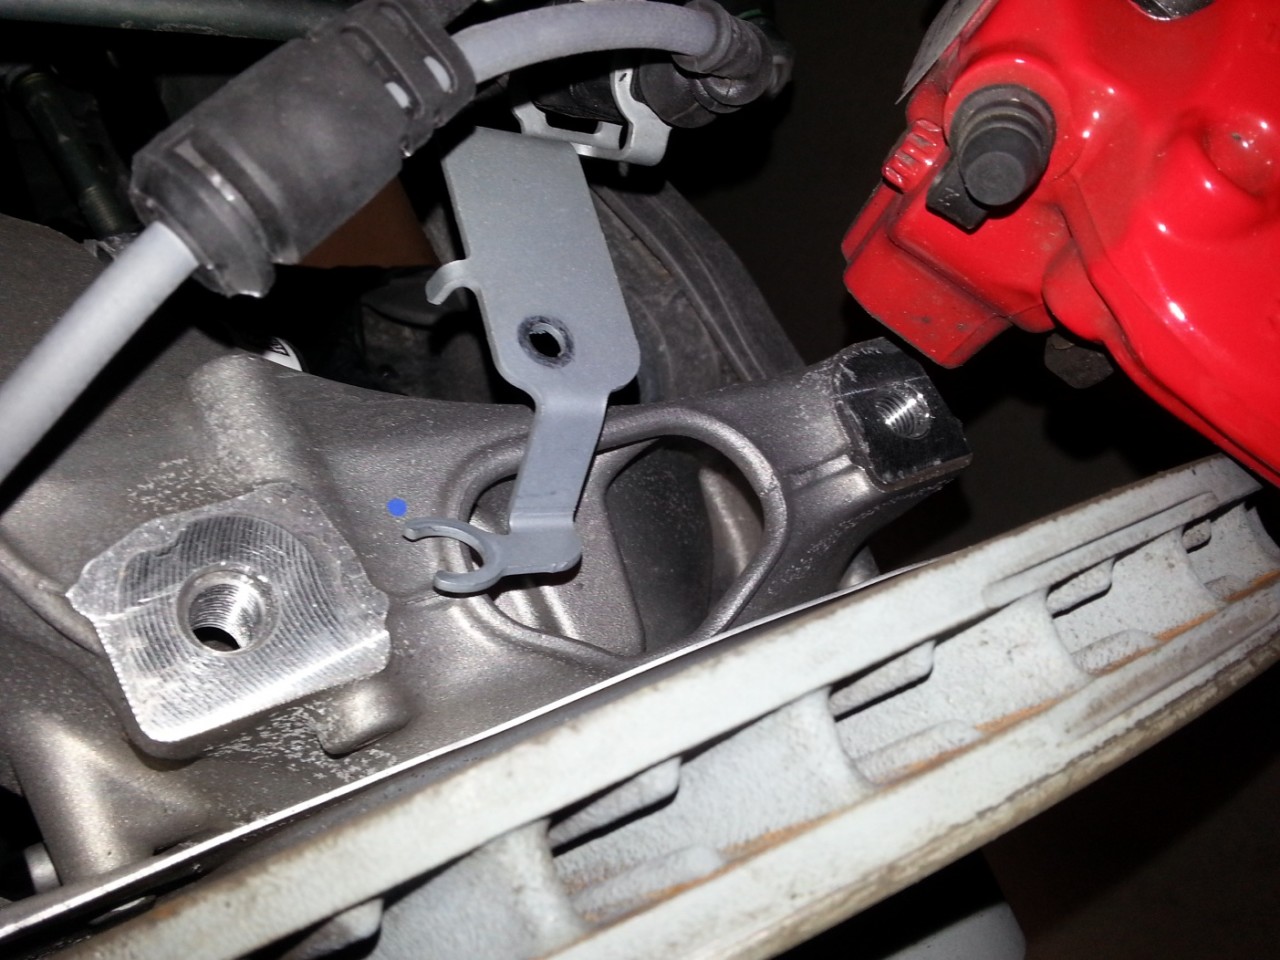
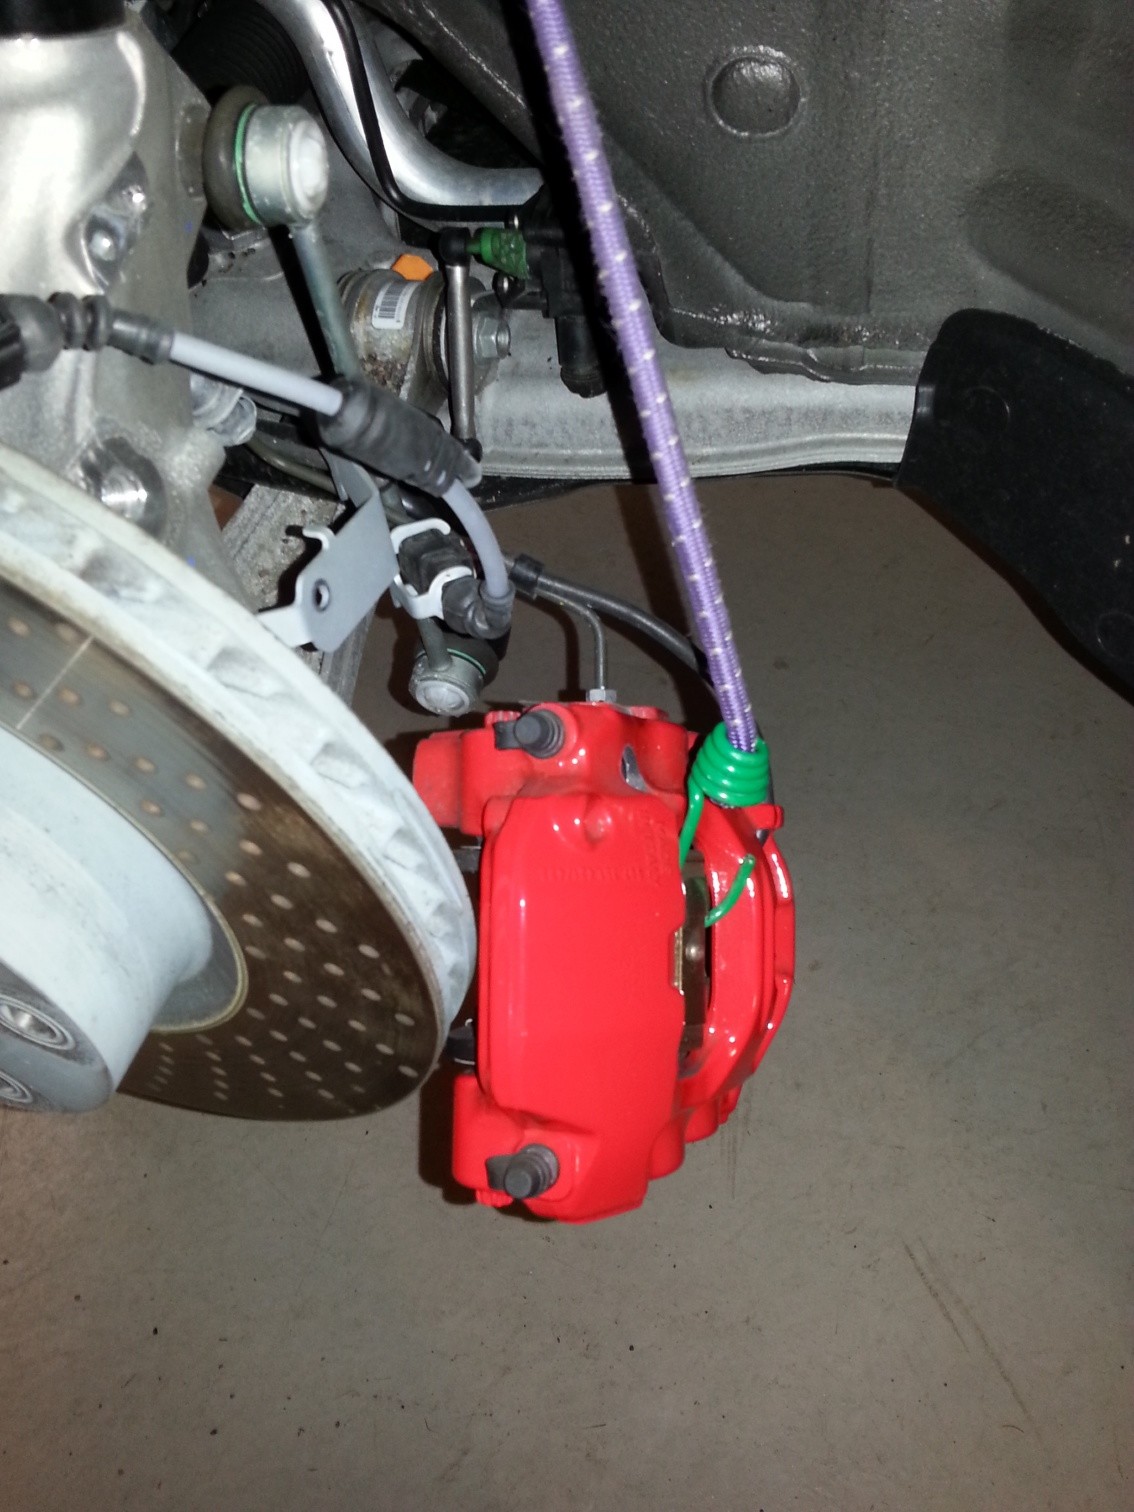
3. Remove the caliper bolts using a T-55 bit. Slide the caliper off the rotor. Don’t allow the caliper to dangle freely and try not to twist the brake lines. I used a bungee cord to hang the caliper from the suspension coil while working on the studs.
4. Get the studs started by hand and then lock two nuts together at the top of the stud to assist in turning it into the wheel carrier. Stop turning when you can still see one thread peeking out above the wheel carrier. If you drive the stud down as far as possible, the smooth part will go halfway down into the wheel carrier and you will not have enough threads left at the top to fully seat the nut. Once the red thread locker sets, the stud will be more than secure; it will take a torch and a couple hours of hard labor to remove it.
5. Once you have both studs installed, carefully lift the caliper into position and slide it over the studs. Tighten nuts to 63 ft-lbs (same as caliper bolts). Re-install bracket bolt, connect ABS sensor and you’re done. Be careful not to over-tighten the bracket bolt because that one is still threaded into the aluminum wheel carrier and you’ll be removing it anytime you need to swap pads.

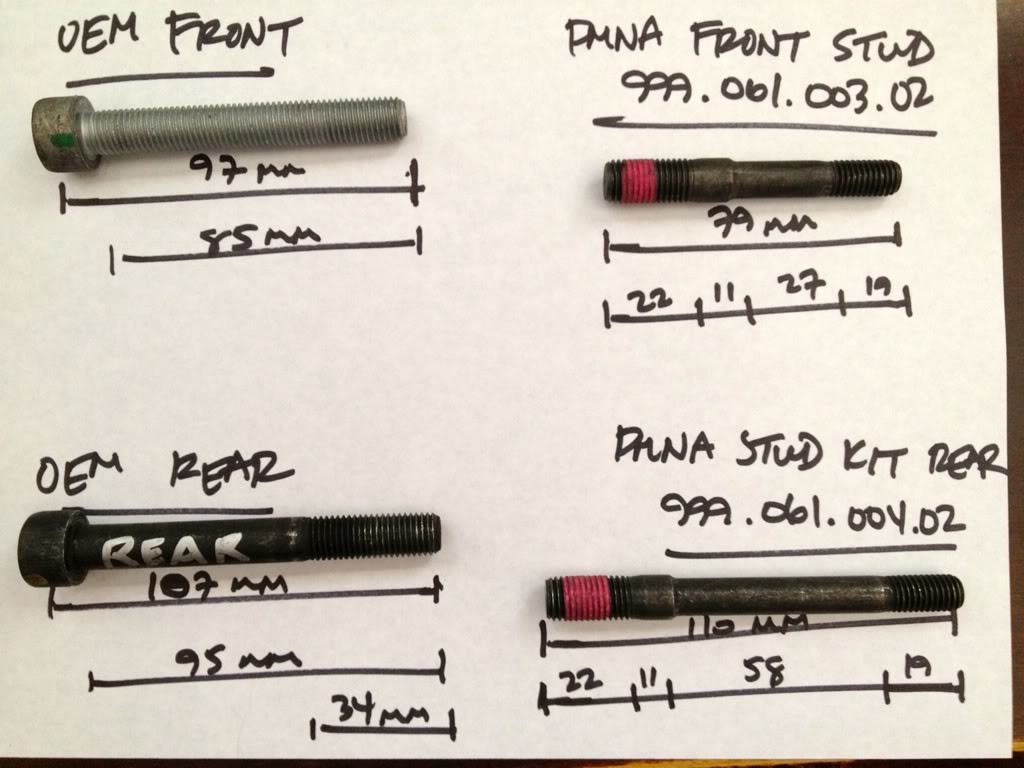
I haven't looked at the rears yet but there are a few different sized studs available from PMNA. Below are a couple of "borrowed" pictures that may help in determining if there is a stud that will fit the rears. Pull one of the existing rear bolts and measure the whole length including the head. If one of the studs pictured is of similar length, it will probably fit. I'll probably tackle this with the first rear rotor change.
New calipers are pretty spendy for guys like me doing a few weekends a year. Although the front pad changes will take a few minutes longer, I don't see it as a huge issue worthy of spending on new calipers. One plus of the new 981 front brake design is we should be able to leave the anti-squeal shims installed on our street pads.
I had a 987 before this 981 and I removed the pads the first time by shoving a putty knife down in between the pad and the anti-squeal shims. I never removed a caliper until the first rotor change. Just my experience.
