You must be logged in to rate content!
10 minute read
How to clear 06 headlights & paint.
Compliments of Silver_04_WRX_SC @ nasioc.com
3-9-2006
I hope this helps some, I sent it to a few 06 people and they said it was ok. So I am going to post it up. For some reason I put steps in the photos, so my write up & pics don't correspond to each other  I was told that most people will find the 1st part the most helpful. Please PM me with any suggestions that I can change to make the write up better... here it goes!
Tools needed:Permatex black silicone, small/skinny flat head screw driver, philips screw driver, Black silicone, 10mm socket/ wrench and long flat head screw driver. I also used goo gone to remove any silicone that got on the front lens of the head light. Mechanix auto work gloves, helped keep my hands clean, and from being burnt! As for bulbs, I bought some clear white bulbs from AutoZone that morning. But since then have ordered the chrome/orange bulbs.
The small skinny screw driver is for the plastic tabs, the skinnier the better. The Philips screw driver is for the screws on the back of head light, and one inside holding the orange reflector on. The long flat head screw driver came in handy to remove the front “nose” of the grill, the lower tabs are very hard to see and my hands were to big to fit down inside by the hood latch. The black silicone can be bought at any hardware store/ auto store; it is pretty much the same stuff Subaru used to seal the head lights. 10mm is the size of the bolts that are holding the head lights in place. Since I did this by myself, I got some silicon on the front glass of the light, sprayed some goo gone on it, waited about 30 seconds and it came right off. Make sure you Windex afterwards though.
Step 1:
See picture for more details.
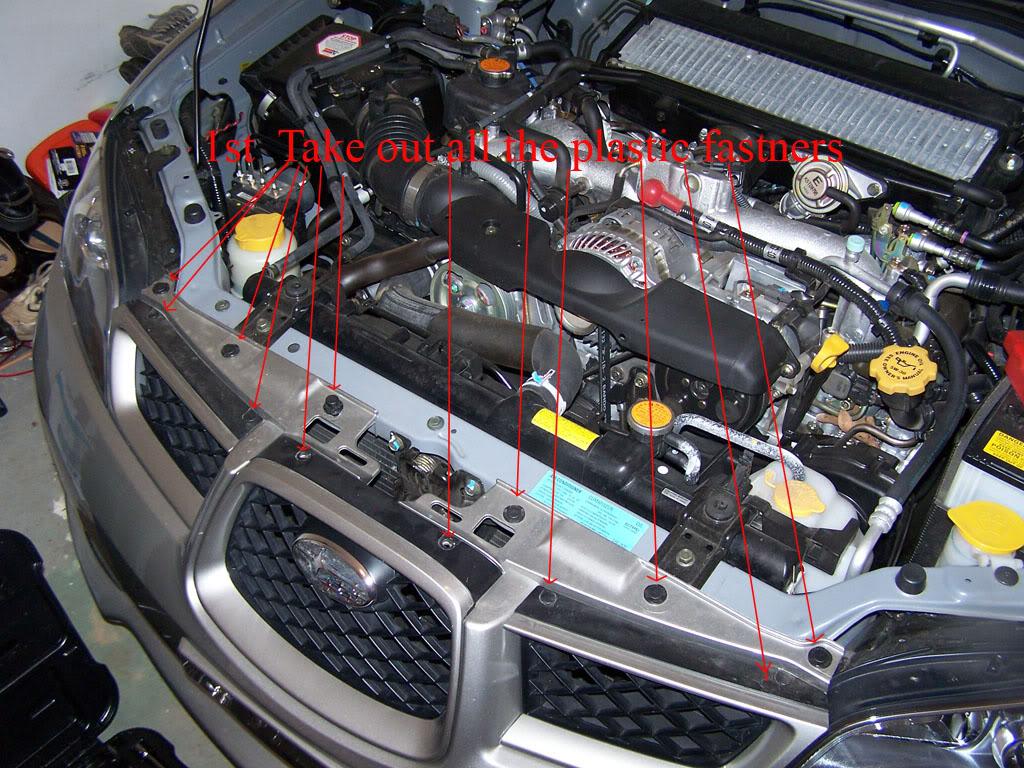
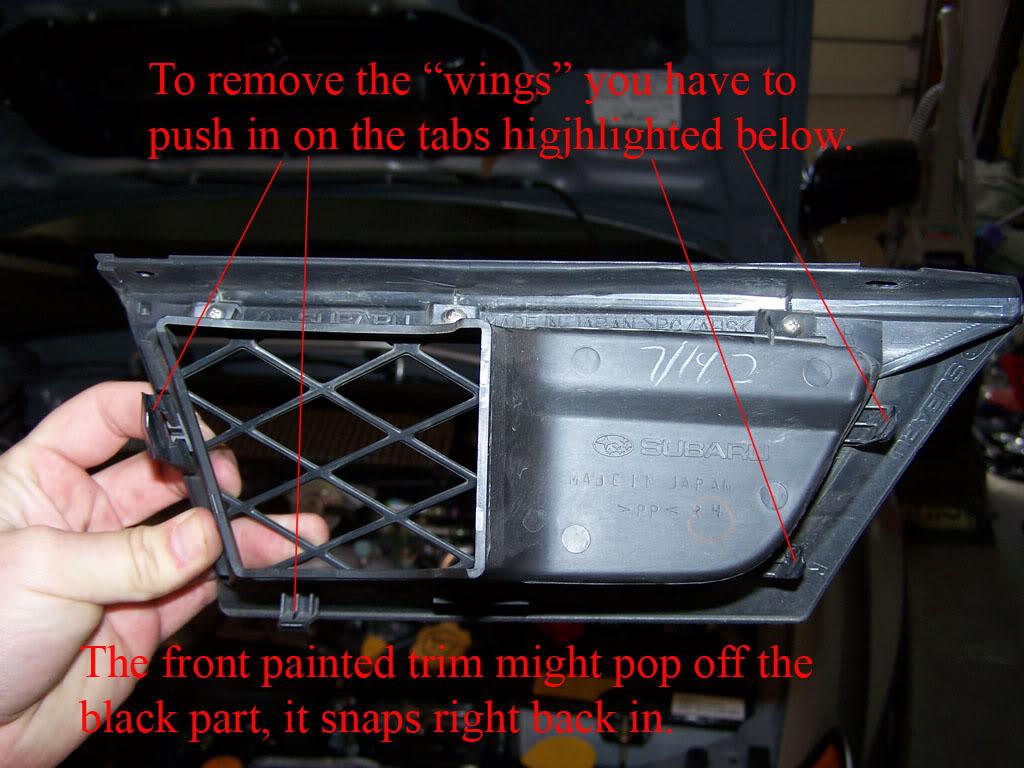
You want to remove all the plastic fasteners across the top of the grill, and then proceed to remove the grill. The center part has 4 tabs holding it in place, using some good lighting, and the long screw driver, you have to reach in between the grill and the hood latch, and pull in on the 4 tabs. The top 2 can be done by hand and the bottom with the screw driver, or some force. To remove the “wings”, they are held in with 4 tabs also, the tabs closest to the middle are easy to get with your hands, the lower tab is kind of tough, but either using a screw driver, or fingers it can be gotten to. The 2 on the far side, closest to the light, are very hard to get at, by reaching my hand all the way down to where they were located, I was able to get the top one, and then by pulling the “wing” out at an angle the bottom popped off.
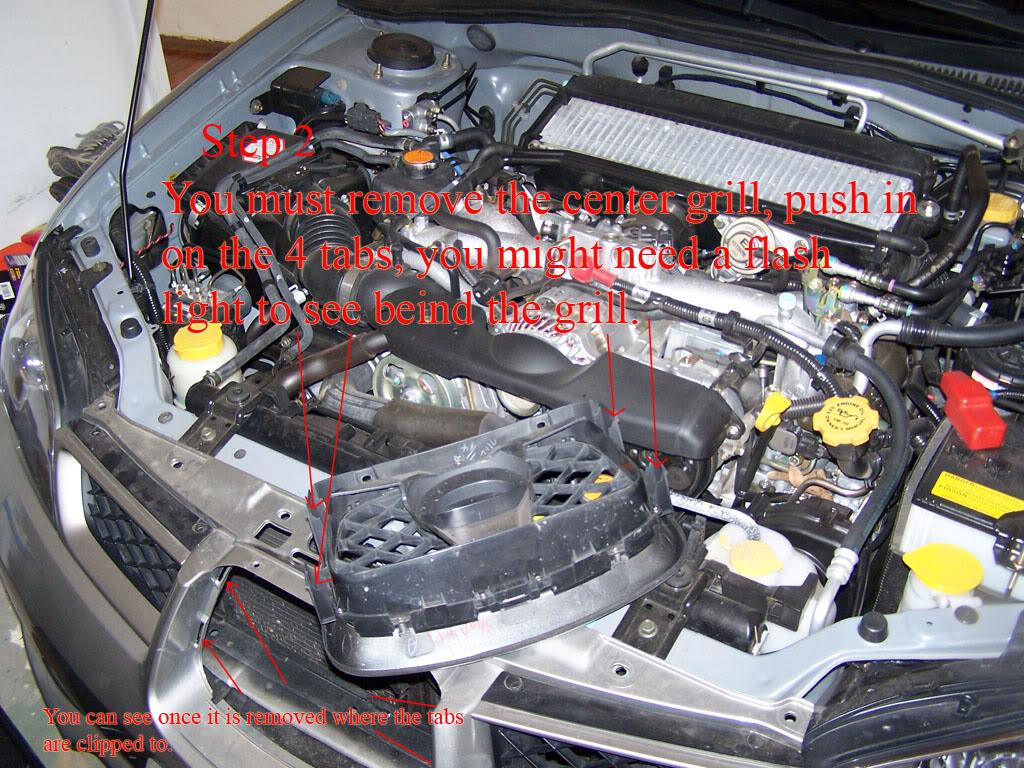
Step 2:
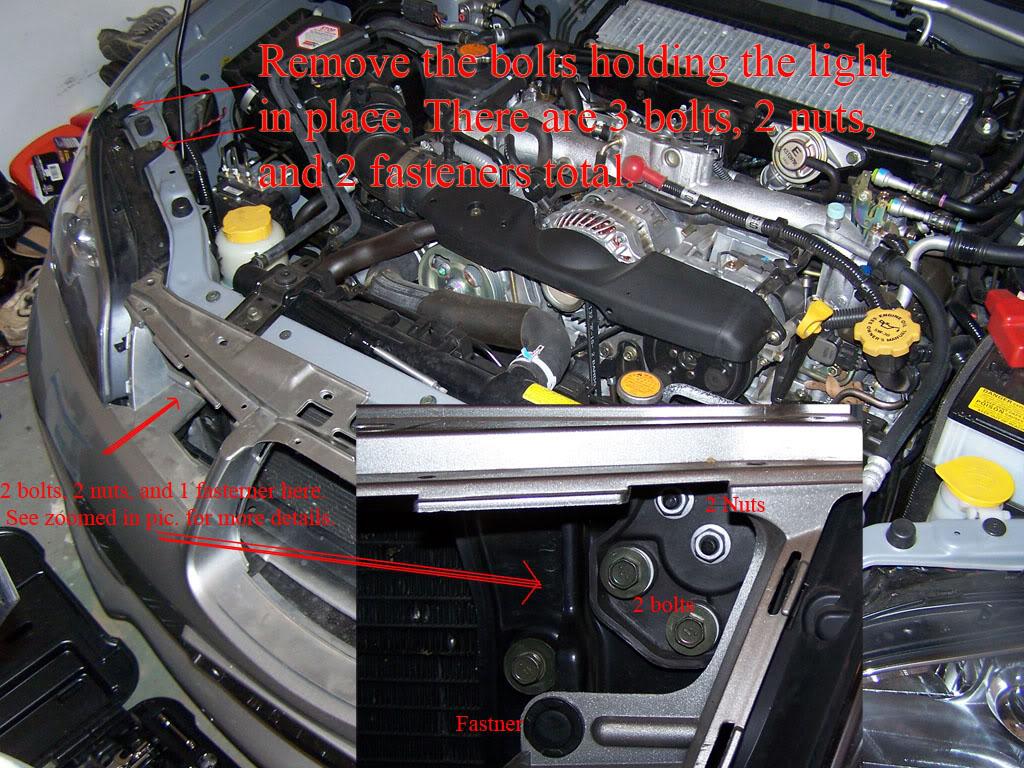
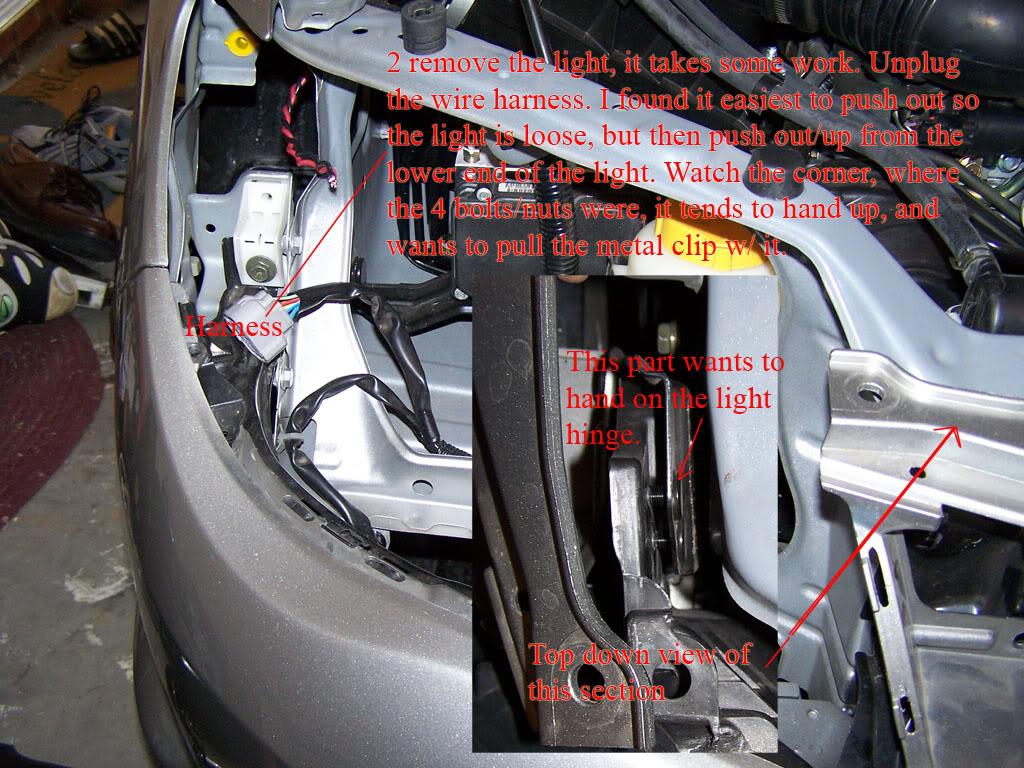
Light removal, see pictures for more detail.
Remove the 4 bolts/nuts that were located behind the “wing”, and then remove the 1 bolt at the top of the light, along with the plastic fastener. To get the light out, it is kind of tricky. You have to push out from behind, so it pops out about a ½ inch, then from the back lower side of the light, you must push up at an angle, while wiggling the light. Eventually it will pop out, and then remove the main plug from the wire harness on the back of the light.
Step 3:
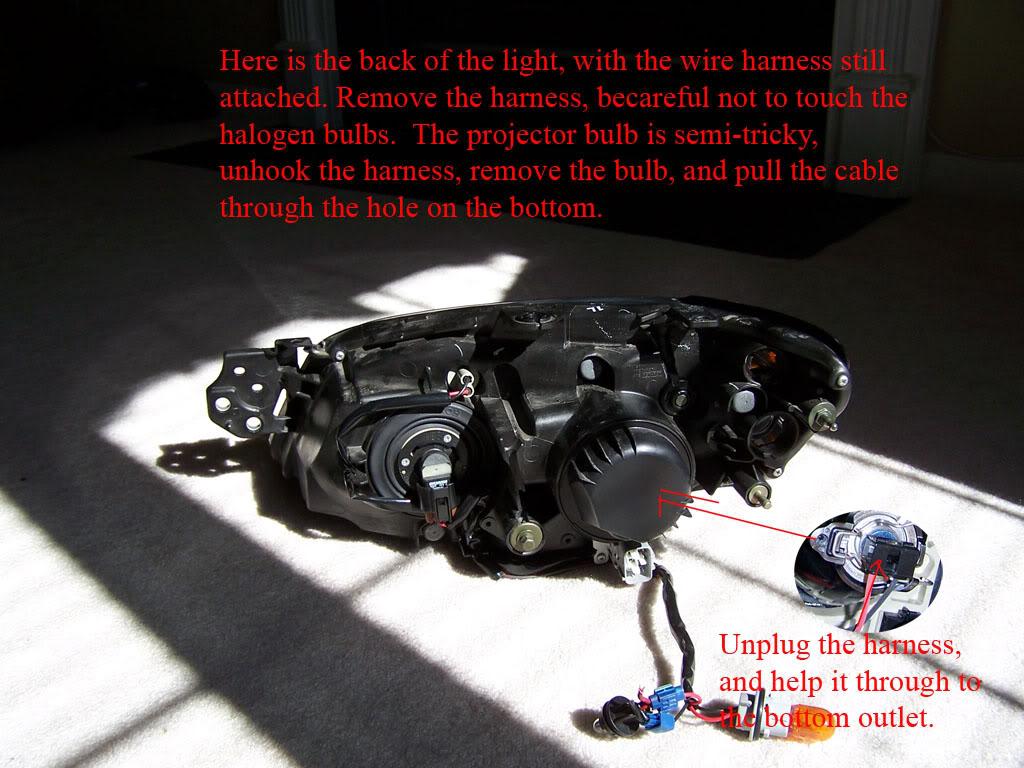
Light prep, make sure your oven is turned on @ 220 F degrees. Remove the back circular cover for the projector bulb. Then remove all the screws on the back of the light and place the screws in the cover. (makes for a easy storage item) **Now you might be able to cook the light with the harness and bulbs left installed, but I didn’t and won’t make that call** You must remove the wire harness from back of the light. Remove each bulb and un-hinge each wire from the back of the light. You will notice that on the bottom of the light, there is a rubber seal with wires going into it. This is the wire going to the projector bulb. Un-hook the wire from the bulb, and pull it through the hole. (Yes it is a PITA, to get it back through) Now the light is screw less and free of bulbs and wires.
Step 4:
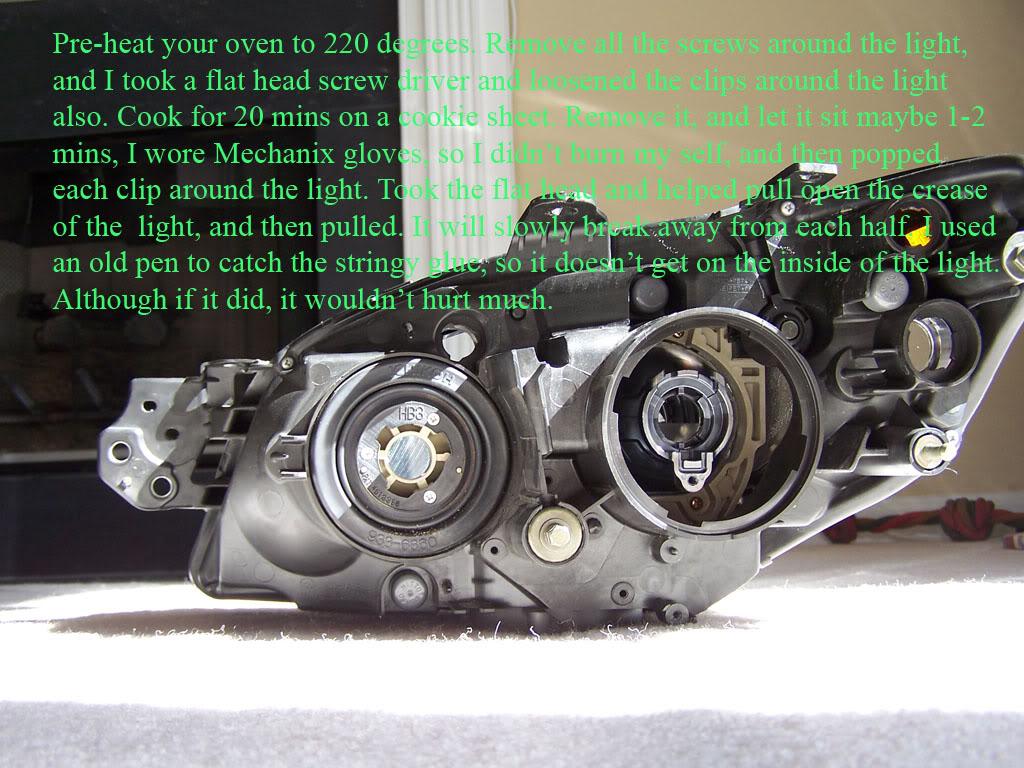
I didn’t take any pictures of cooking or opening the light, since I was by myself. Before placing it in the oven, I used a flat head screw driver and popped up the plastic tabs that are around the 2 parts of the light. It is pretty straight forward, put the light on a cookie sheet, and cook for 20 minutes. Remove it after 20 minutes; let it sit for about 1 minute. It will still be fairly hot, so be careful. I wore the Mechanix gloves to protect my hands. I used the screw driver again to pull the clips off the base of the light, then took the flat head and put it in the crease of the 2 parts, and turned it sideways. This kind of started to break the light away from the 2 halves. Then start pulling, I put the light between my legs and started on one side and broke each half apart, as it breaks apart, the silicone will become stringy and will make like a “spider web” effect on the 2 parts of the light. I used a old knife to catch the silicone before it tore completely off and landed on the light. Once the light is pulled apart, leave the side with the projector alone. The part with the chrome housing and front glass is all you need.
Step 5:
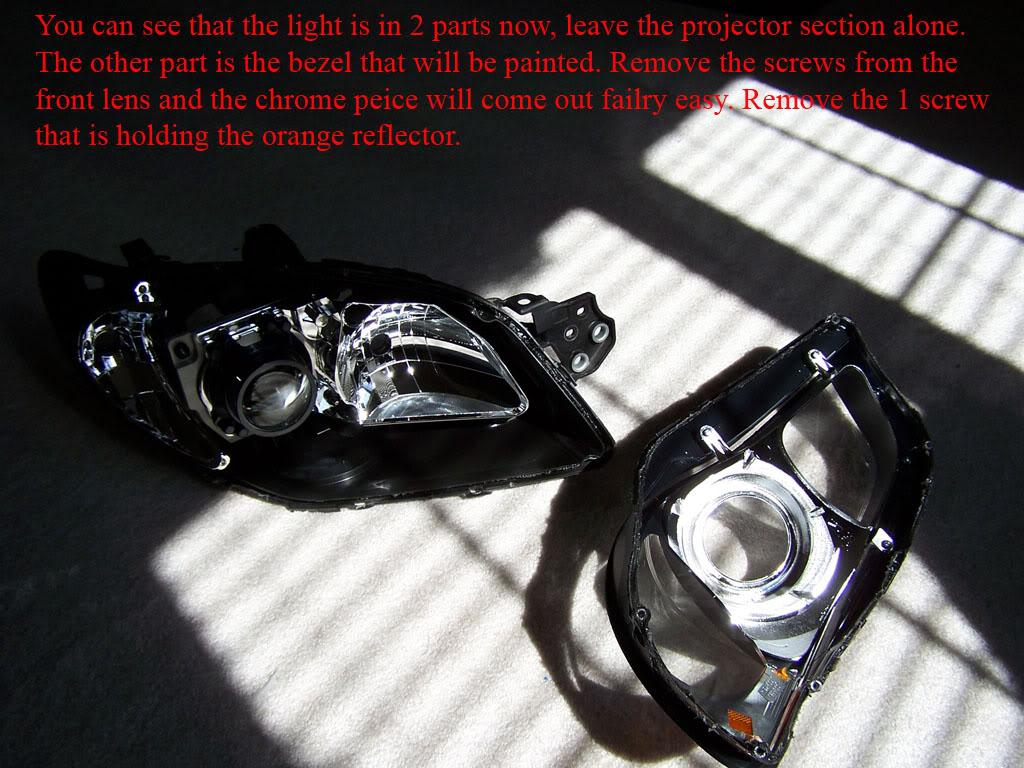
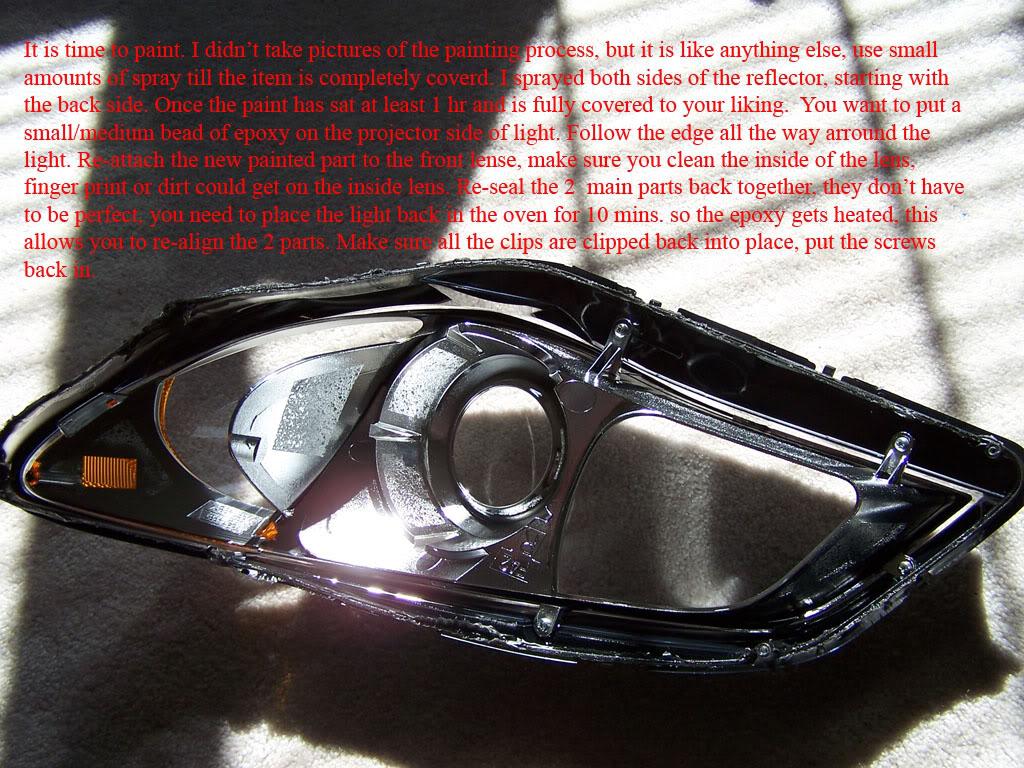
I also didn’t take pictures of painting, but it also is relatively easy. Remove the chrome portion from the front glass, it is held on by a few screws. Once removed, take the orange reflector off. It is held on by 1 screw. Set up your painting area, and do light coats on the chrome housing and orange reflector. Wait 10 minutes between coats, and make sure you get all angles and crevasses. I painted the orange reflector from the back side 1st, flip it over and paint the outside part last. I gave the Dupli-color at least 1 hr to dry. That is up to you though.
Step 6:
Assemble the housing, and place it back into the front glass. Make sure it is nice and tight. Take the black silicone and place a bead on the projector side of the light, follow the lines that are already there, use a pretty good amount. Take the glass side and place it back onto the projector side, I had to slide the glass side up with some force to get it lined up. Once lined up, I re-heated the light for 10 minutes, this softened the silicone back up, which allowed me to line it up even better, and close all the gaps and plastic tabs. Make sure there are no gaps, and you can wipe any excess silicone off. But it won’t hurt anything. When putting the screws back in, I noticed it tightened the seal even more, I tightened the screws pretty good too.
Step 7:
You have to put the bulbs and harness back in, I found it easiest if I took the projector bulb connection, wrapped a small piece or wire around the connector, and pulled it through using the wire. Hook back up all the bulbs and put the wires back in their grooves.
Step 8:
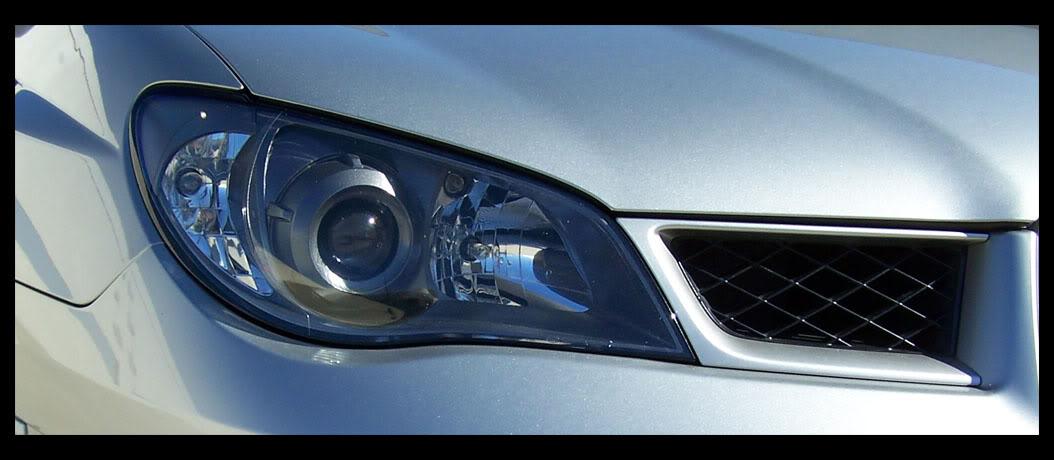
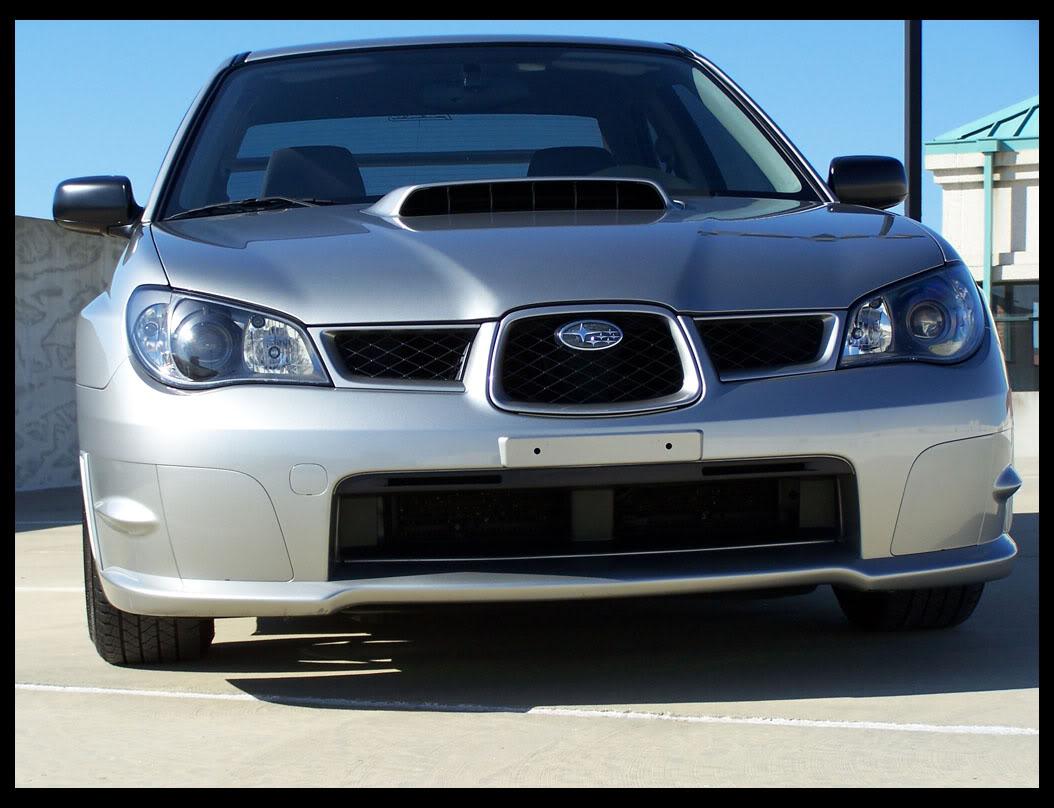
Time to put it back in the car! It is kind of tricky; you really have to work at it. But coming in at an angle helped. Once you get the light back in, make sure you hook up the main plug to the wire harness. Put the bolts and fastener back into the light; make sure it is all lined up. And then check to make sure all your blinkers and lights work. Put the “wings” and center piece back onto the car. You’re done!
Hope this helps!
Sorry about that, I have a thread under the members gallery ---> here. But here are a few.
3-11-2006
Here is the word document w/pics. It might make it easier to print up while doing the process. I would click the link & save the document, rather than run it off my crappy charter webspace  Thanks all for the comments!
P.S. Anyone else that does this process, take some pics of the opening right outta the oven, painting, and re-sealing process that will make the write up complete. Plus post your pics once it is done, I would like to see some other colors!

Good DIY!
Posted by Diggymart on 3/4/20 @ 6:36:41 PM