You must be logged in to rate content!
21 minute read
SP 4L80E auto tranny install (updated as install progresses)
Compliments of XCELR8 @ www.supraforums.com
7-4-2008
This thread will show the progress over time on the Sound Performance 4L80E auto tranny install in my red supra. I don't know if anybody but SP has done installs for this kit yet. We may be the first and there will probably be a few hiccups e..g. we are still waiting on some missing parts that SP is shipping out so the install is going to take a little longer than anticipated.
Old stock tranny without bellhousing and converter:
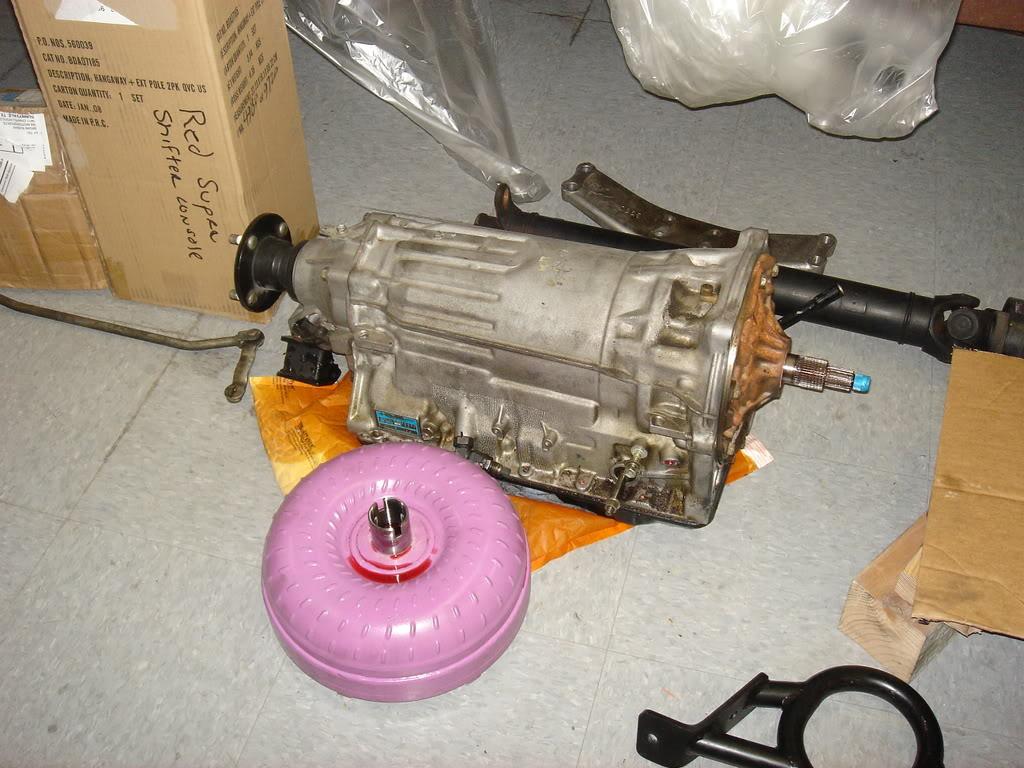
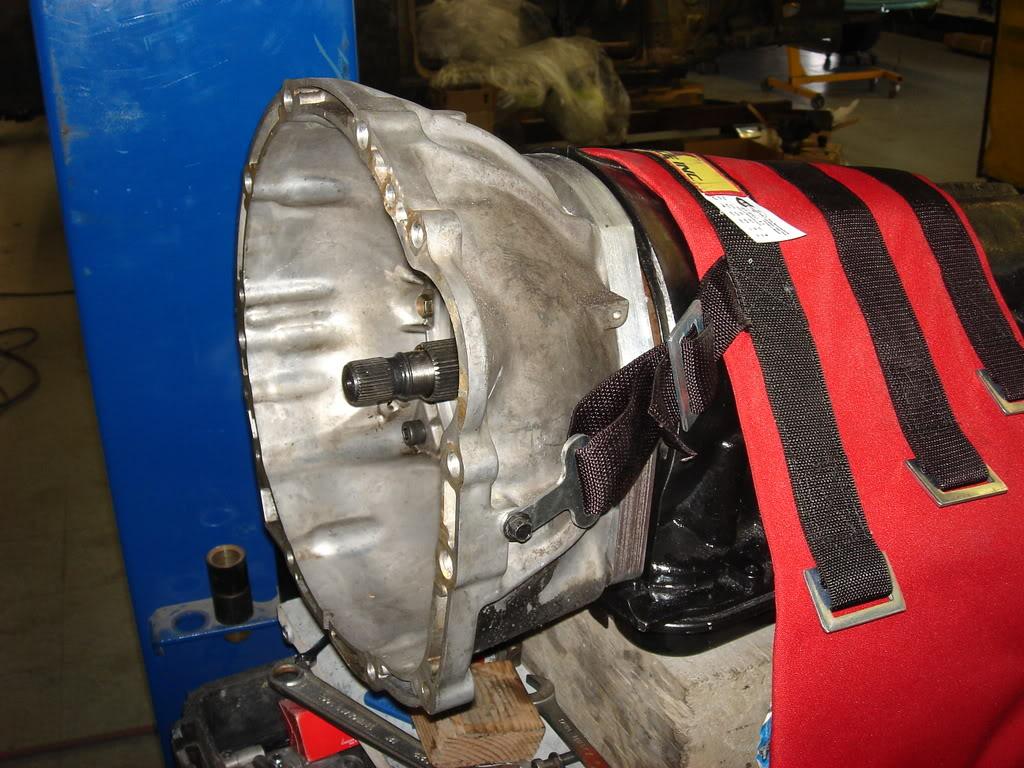
4L80E tranny with stock bellhousing:
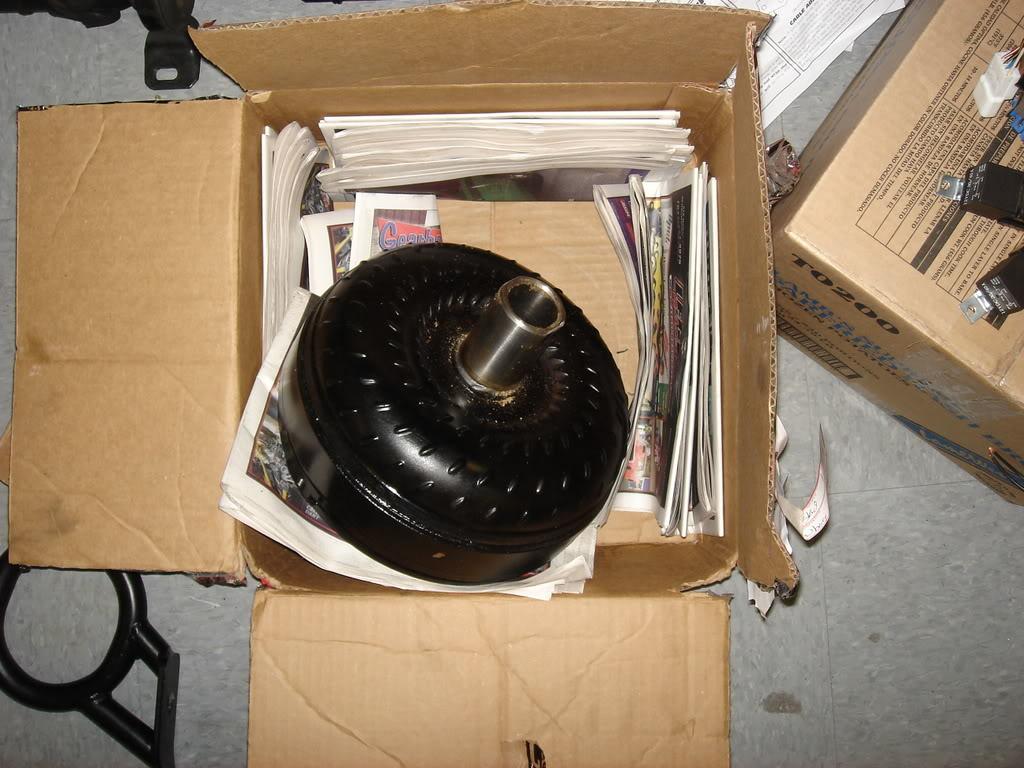
Converter for 4L80E:
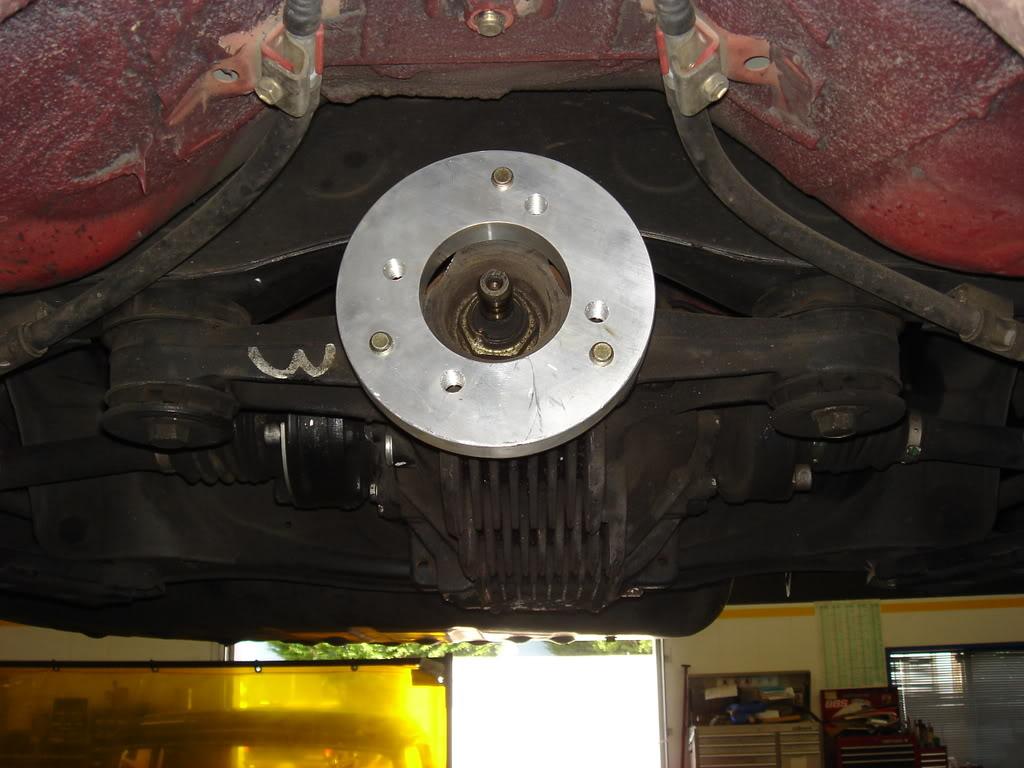
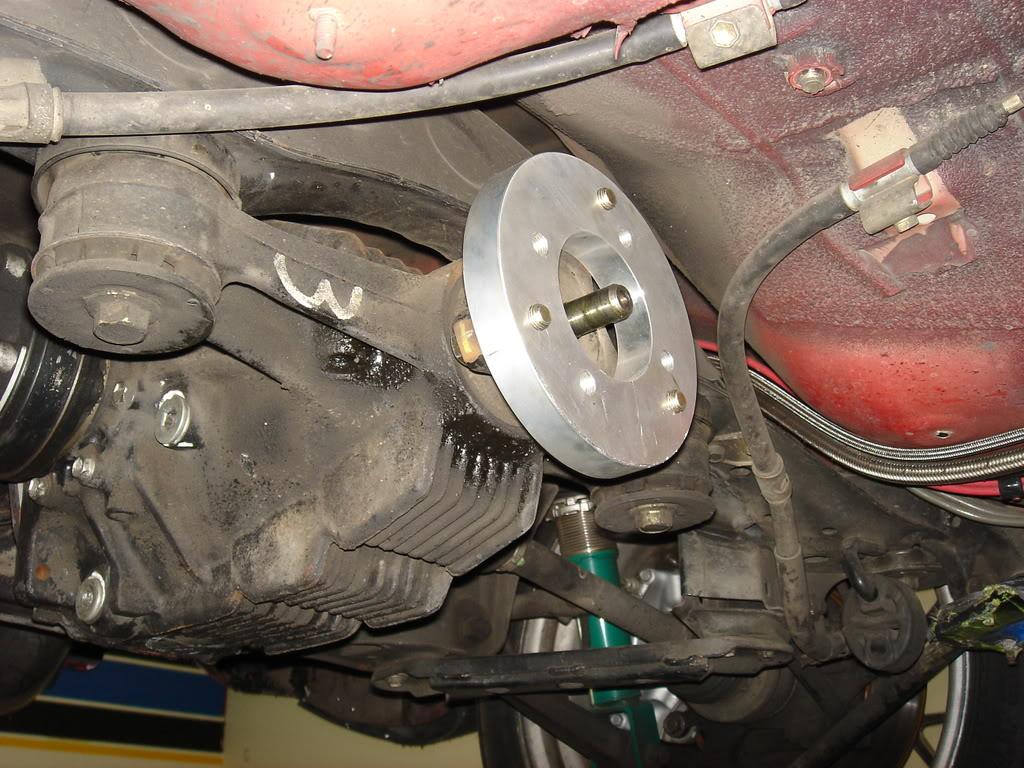
CNC flange to adapt driveshaft to rear diff:
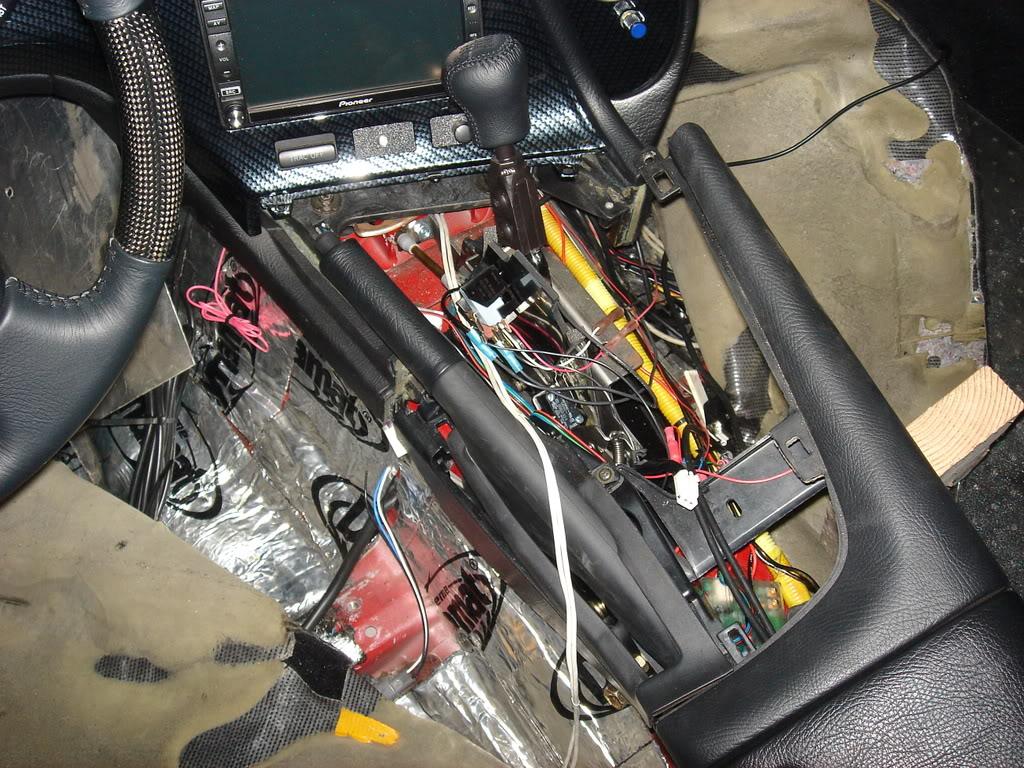
After massaging tunnel on left side (look at sprayed area) and also the cutout to allow clearance for electronic control module on the tranny. After we're all done, that cutout will look like it came stock on the car.
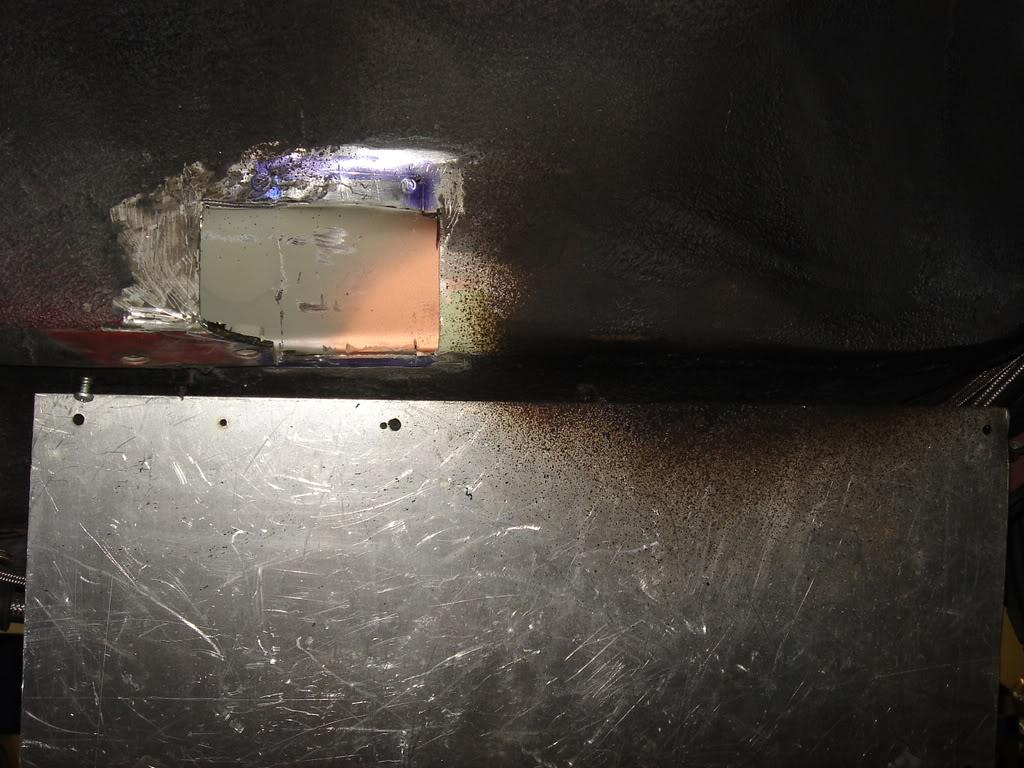
After massaging tunnel on right side. Orange cable goes up to the ratchet shifter inside the car.
7-8-2008
We're still waiting on some key parts that prevent us from mounting the tranny and wiring it up, but here's a short update. I think the gear selector sensor mod described and shown below is pretty sweet. I weighed the stock tranny and the 4L80E and here are the results:
Stock tranny, no bellhousing, partial fluid still inside: 125 pounds
4L80E, stock bellhousing on, dry: 192 pounds
We figure the stock bellhousing is only about 5 pounds, so we're talking about around 60-70 pounds difference between the stock tranny and the 4L80E.
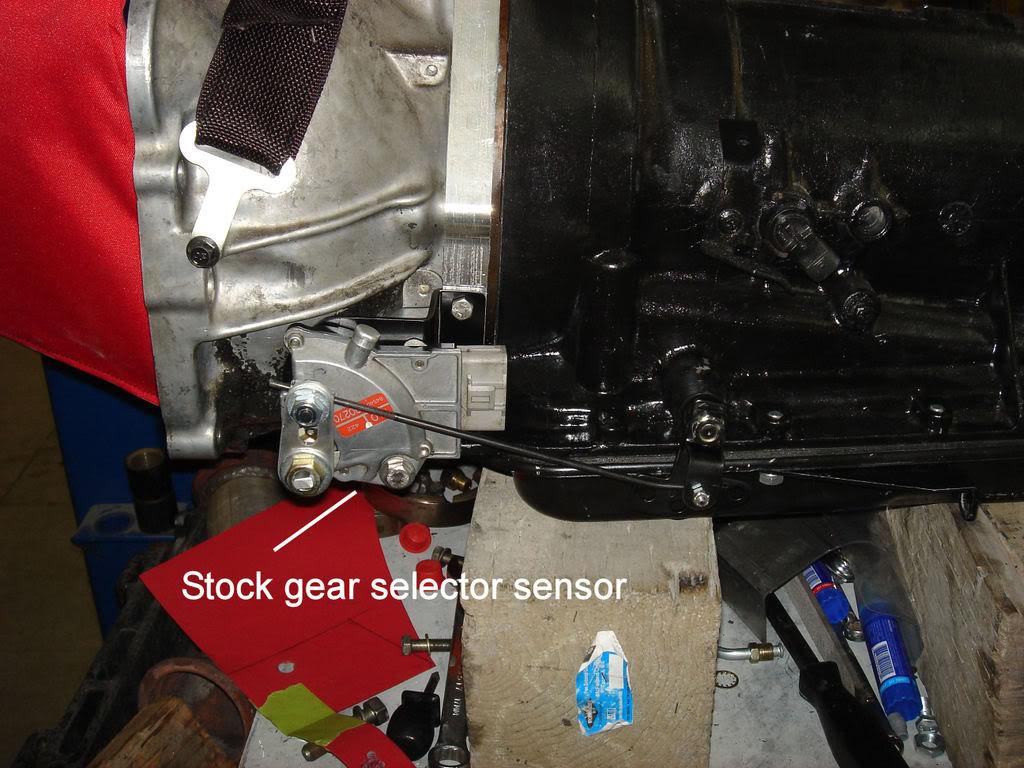
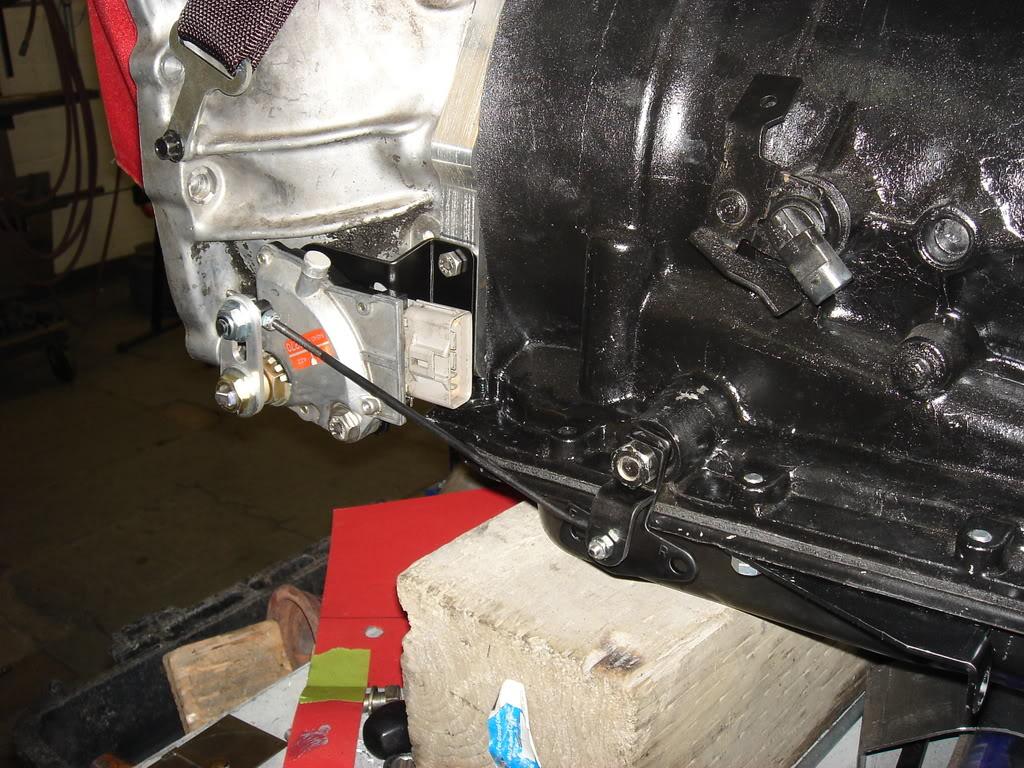
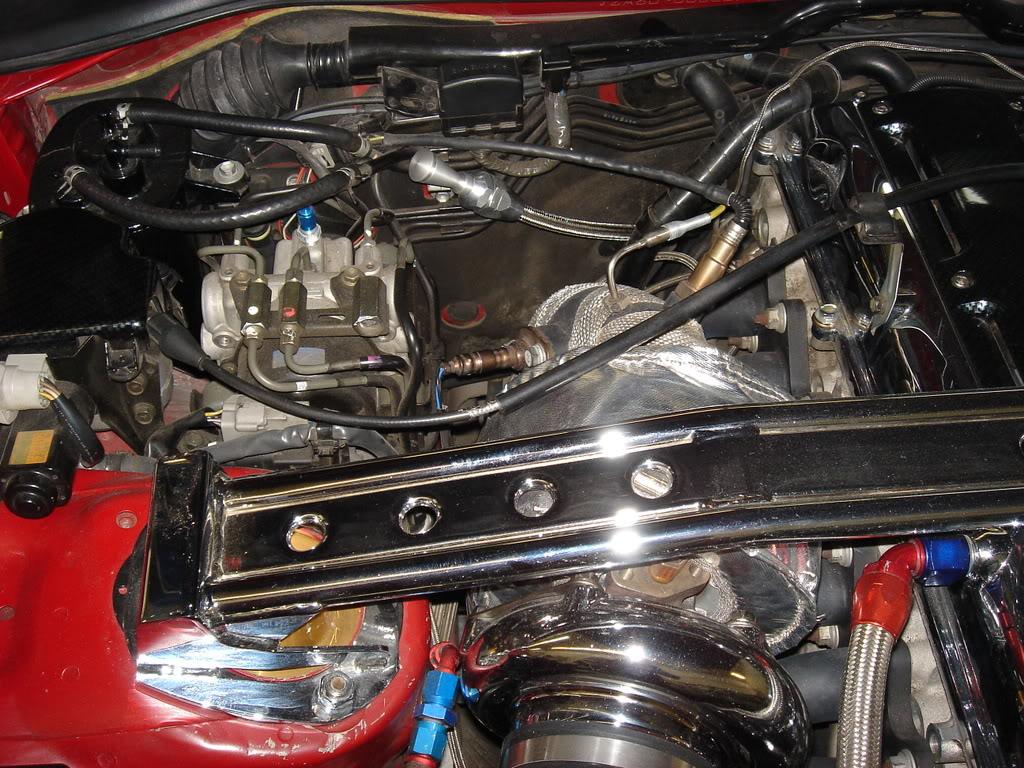
Here is the gear selector sensor from the stock tranny that has been mounted on the 4L80E and a rod setup so it can work correctly. With this mod we'll be able to read out on the instrument panel whether the 4L80E is in R, P, N, D, etc. It actually will map gears 1 and 2 on the 4L80E to the L indicator and gear 3 on the 4L80E to to the 2 indicator, but that's ok. Basically, if the D indicator is lit up, the AEM can shift it through gears 1-3, and OD. If the 2 indicator is lit up, the AEM can shift it through gears 1-3, with no OD.
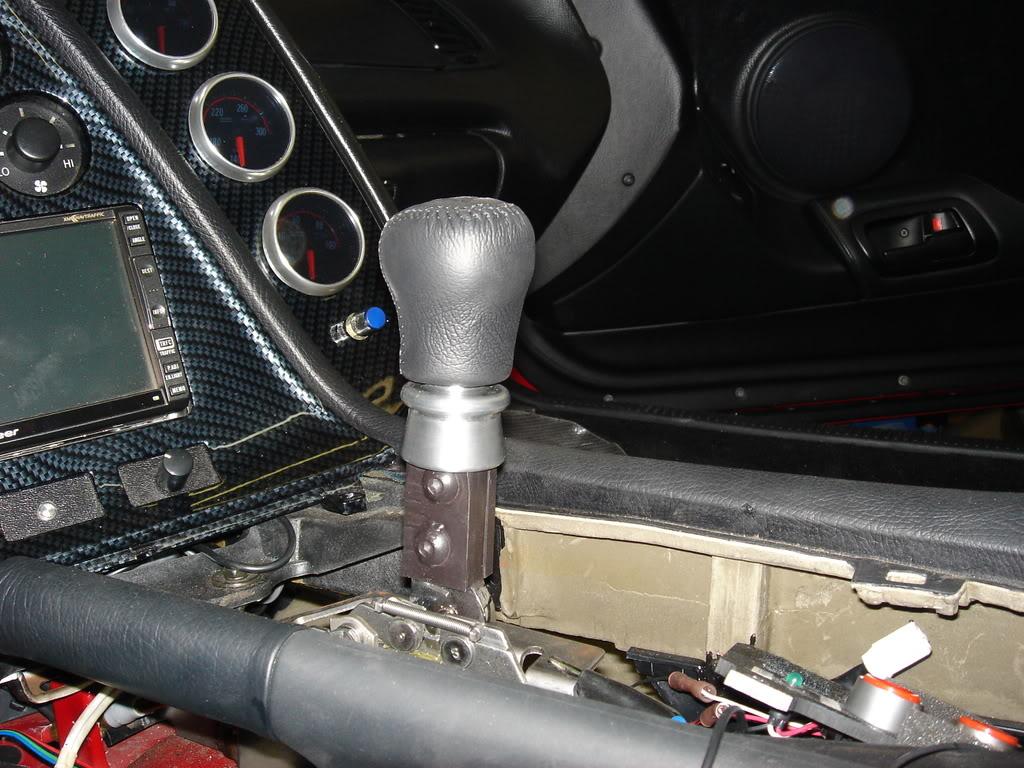
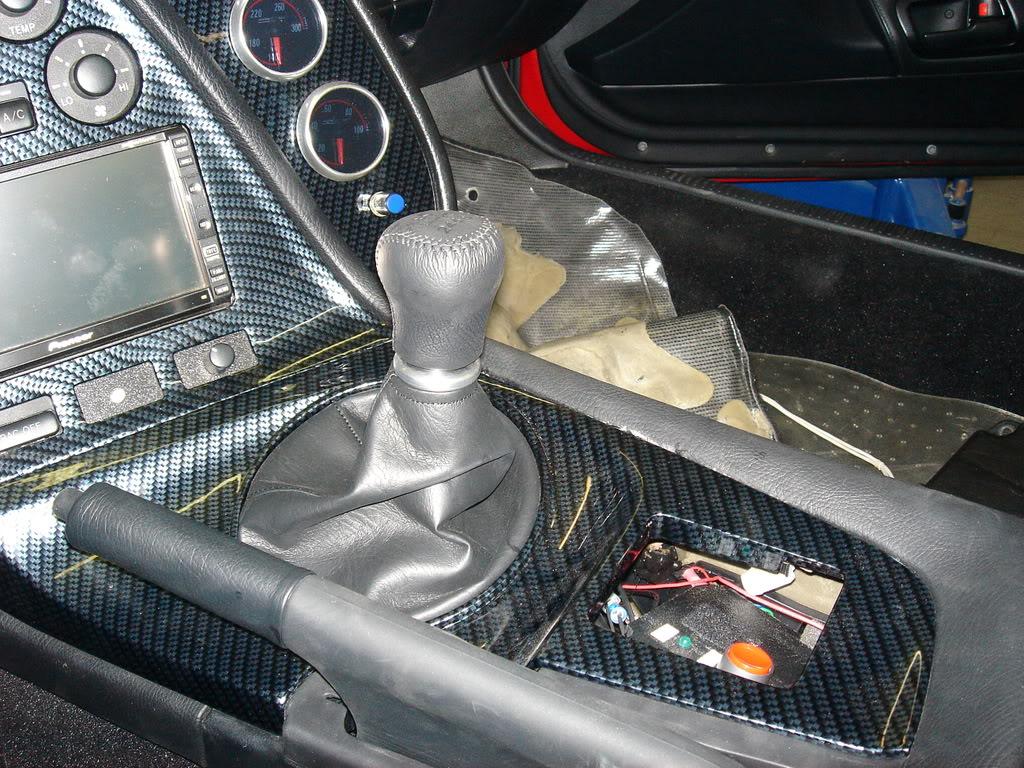
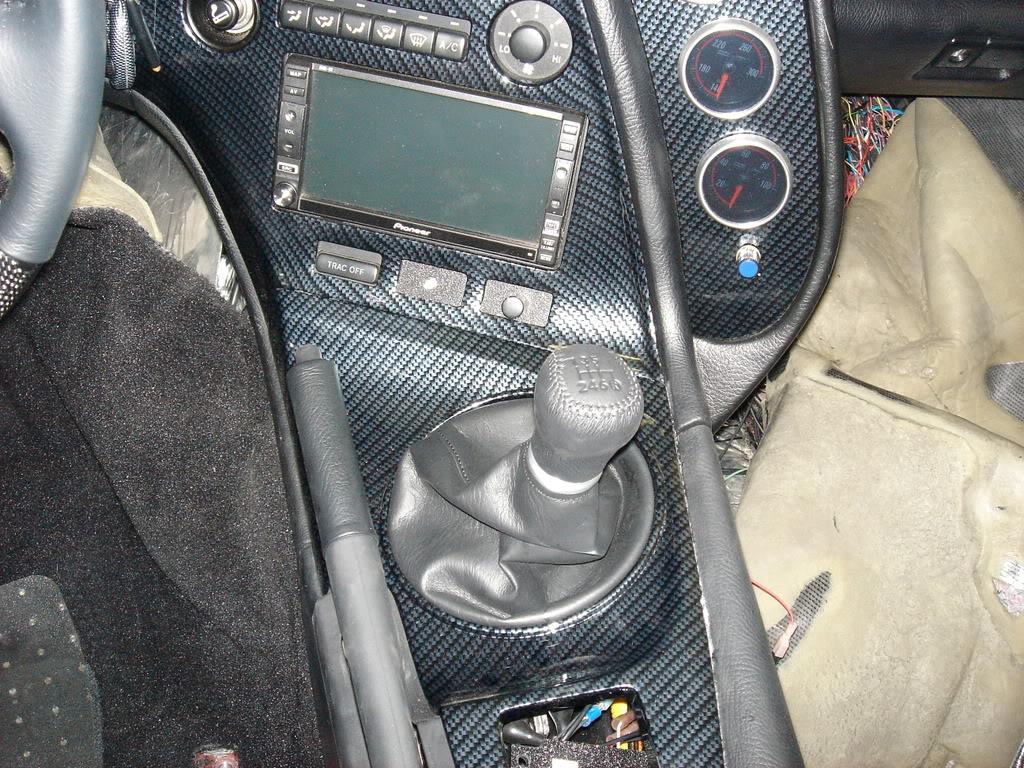
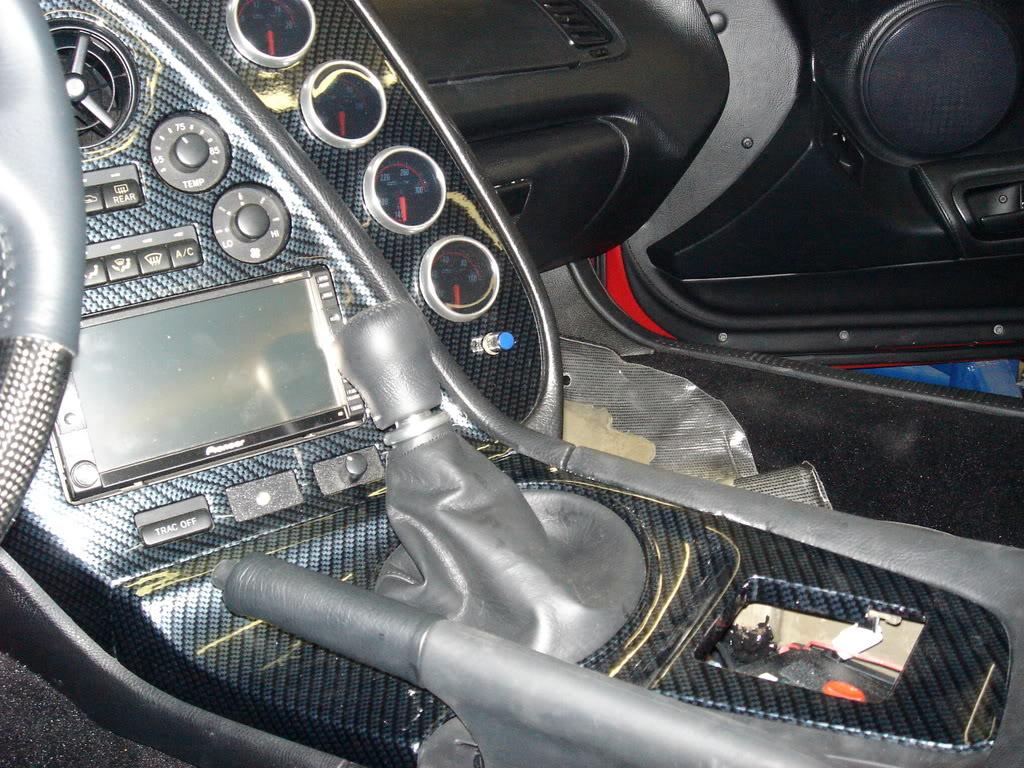
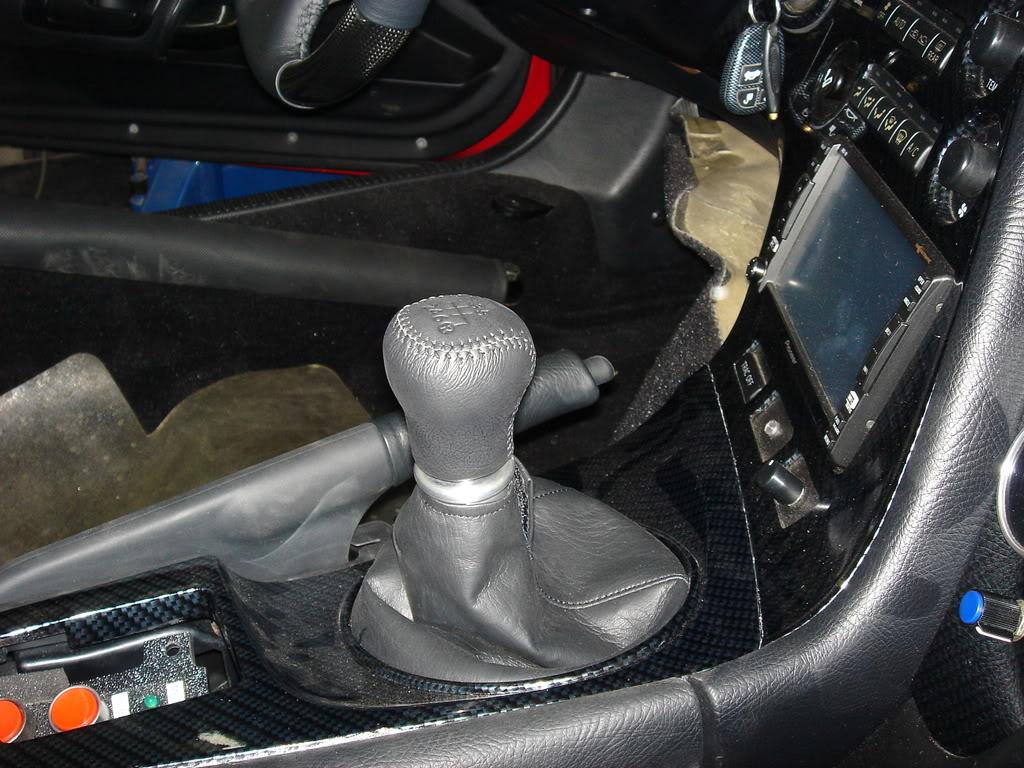
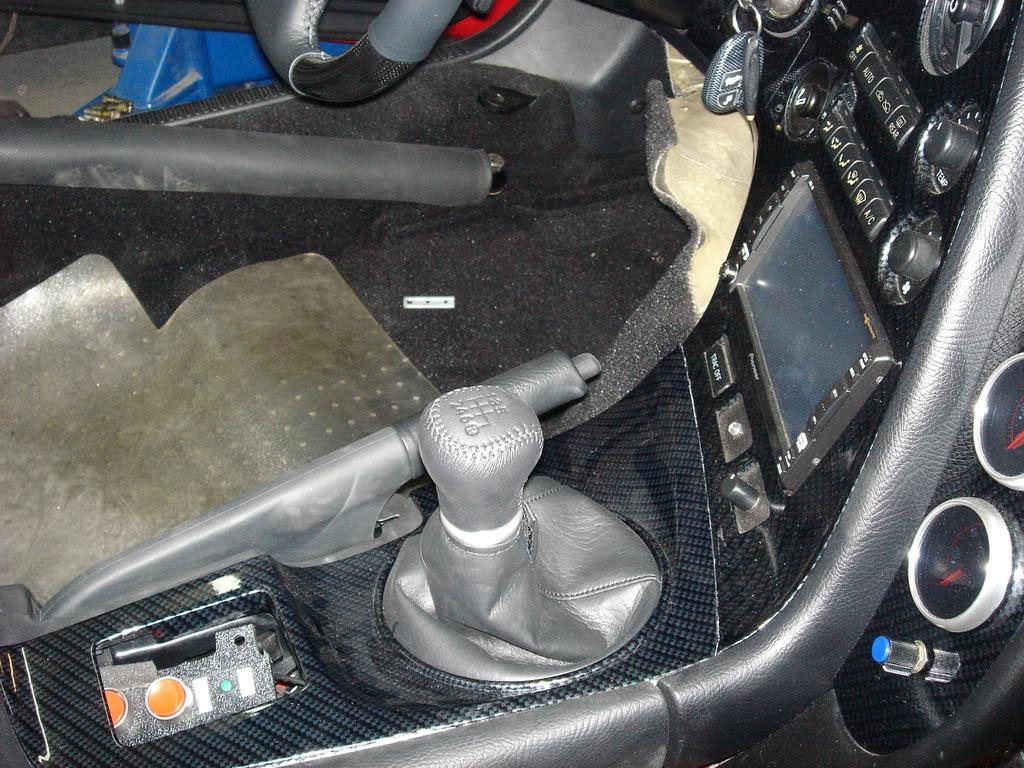
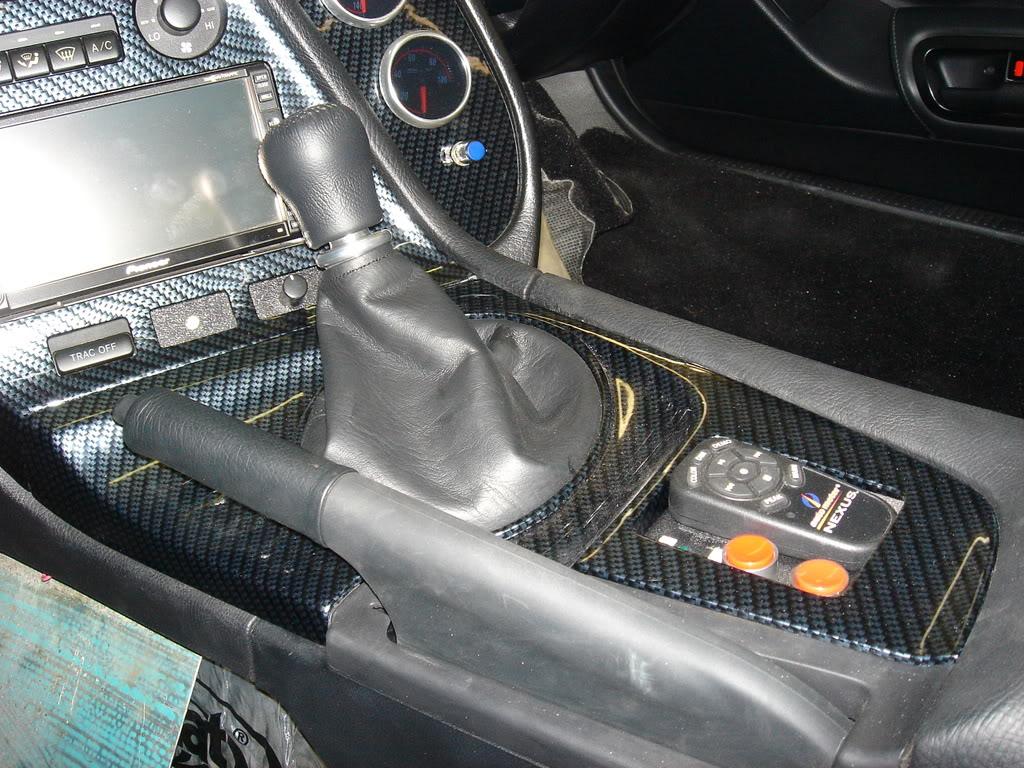
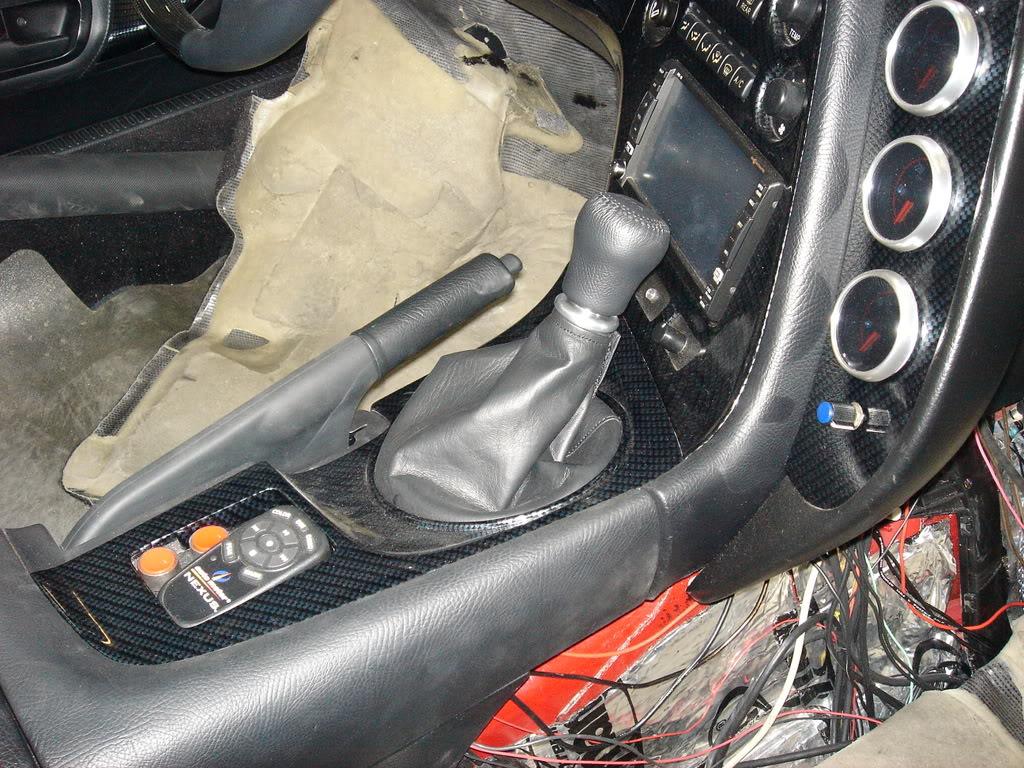
Here is the B&M quicksilver ratchet shifter with the 6 speed knob mod. After the 6 speed console is put back on no one will be able to tell there's a big auto tranny under the hood (except for the missing clutch pedal). We were missing the 6 speed knob in the kit we got from SP (it's on the way), so here I robbed one out of the BG supra.

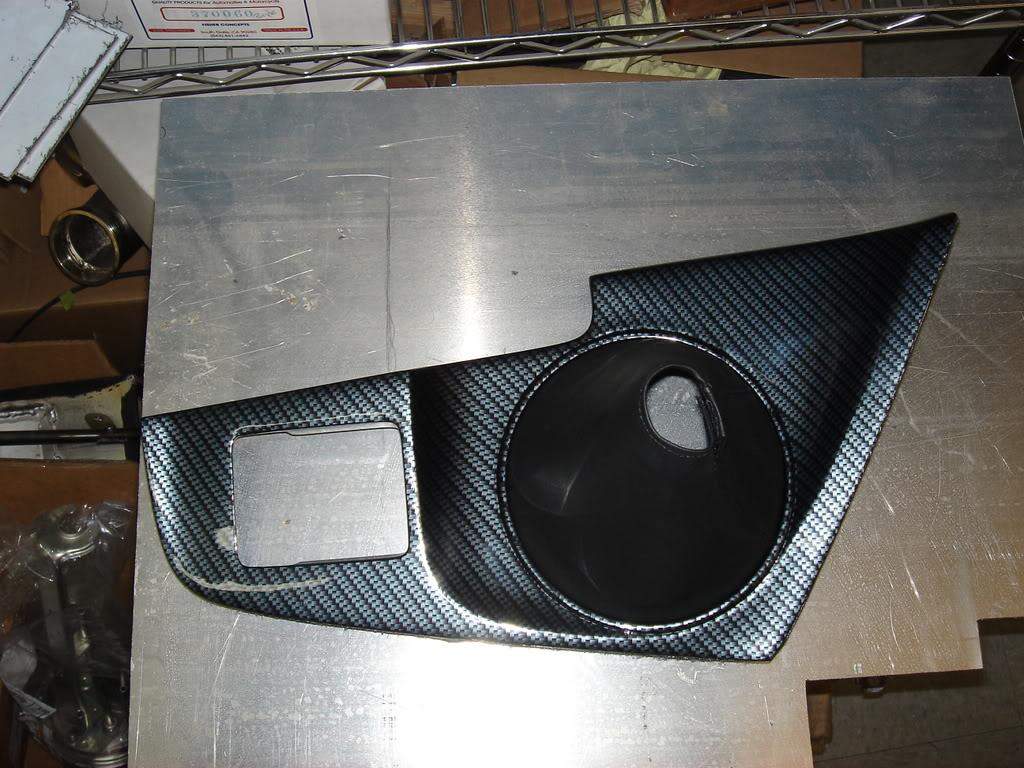
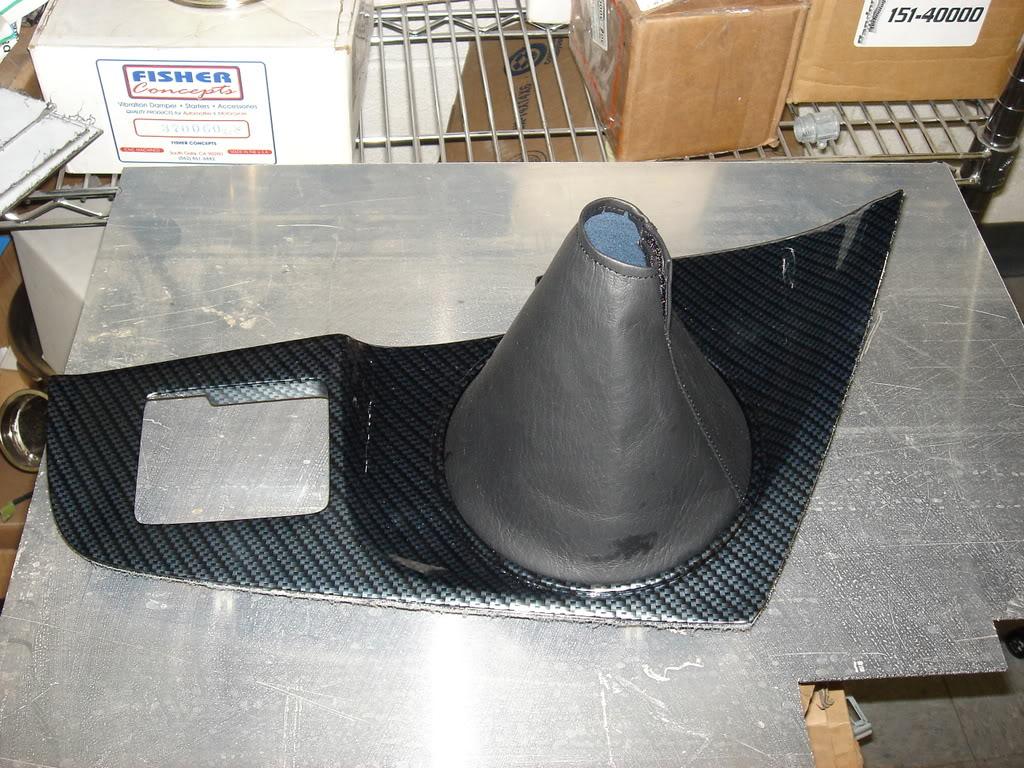
Here is the 6 speed console done up to match the finish on the other panels in the cockpit.
7-10-2008
Still waiting on some parts from SP and the driveshaft had to be modded a bit and is due back tomorrow. This update shows an aluminum collar that sits below the 6 speed shift knob on the shift lever that was made on the lathe. This was custom made for my car and is not in the SP kit. It is similar in shape to the reverse lockout collar on the 6 speed, which not only is used to put the car in reverse by lifting up on it, but also serves the aesthetic function of keeping the shift boot sitting up close to the knob as you go through the gears. The latter function is why we made it. These pics show the collar and various positions of the shift lever, so you can see the boot stays up close to knob. Of course, the stock collar is actually black so it is less conspicuous.
7-19-2008
We finally got the missing parts (Lokar dipstick, Dakota digital adapter for speedometer, shift knob, etc). It won't be long now. The tranny is basically installed sans the electronic hookup which should be done on this coming Monday.
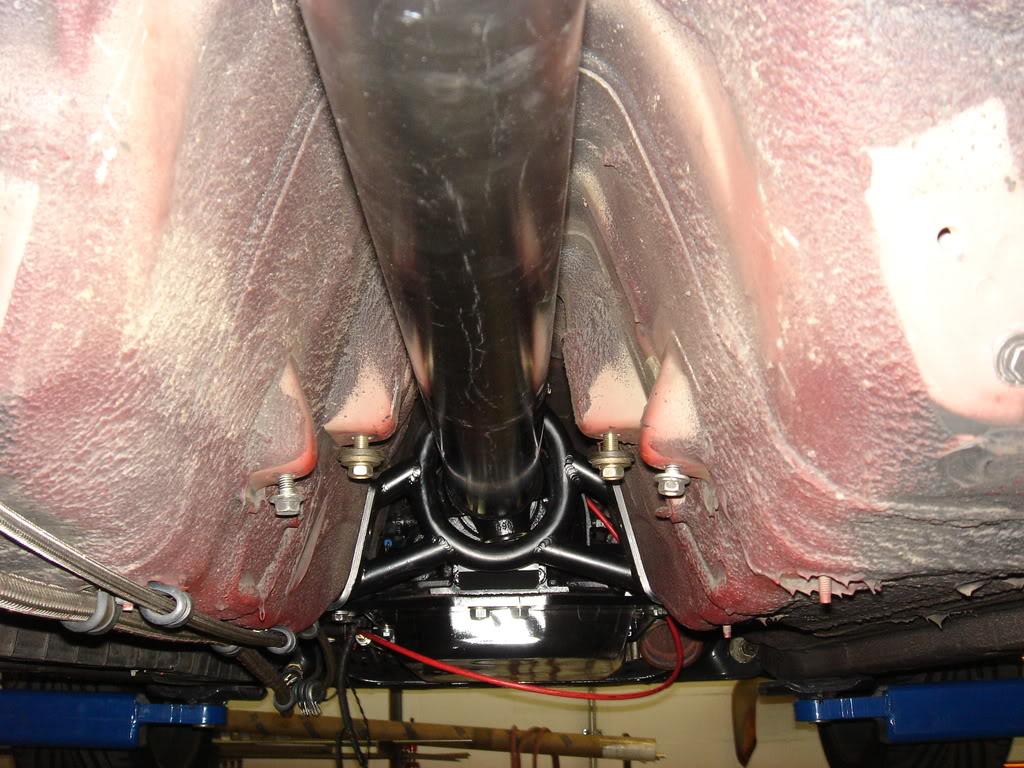
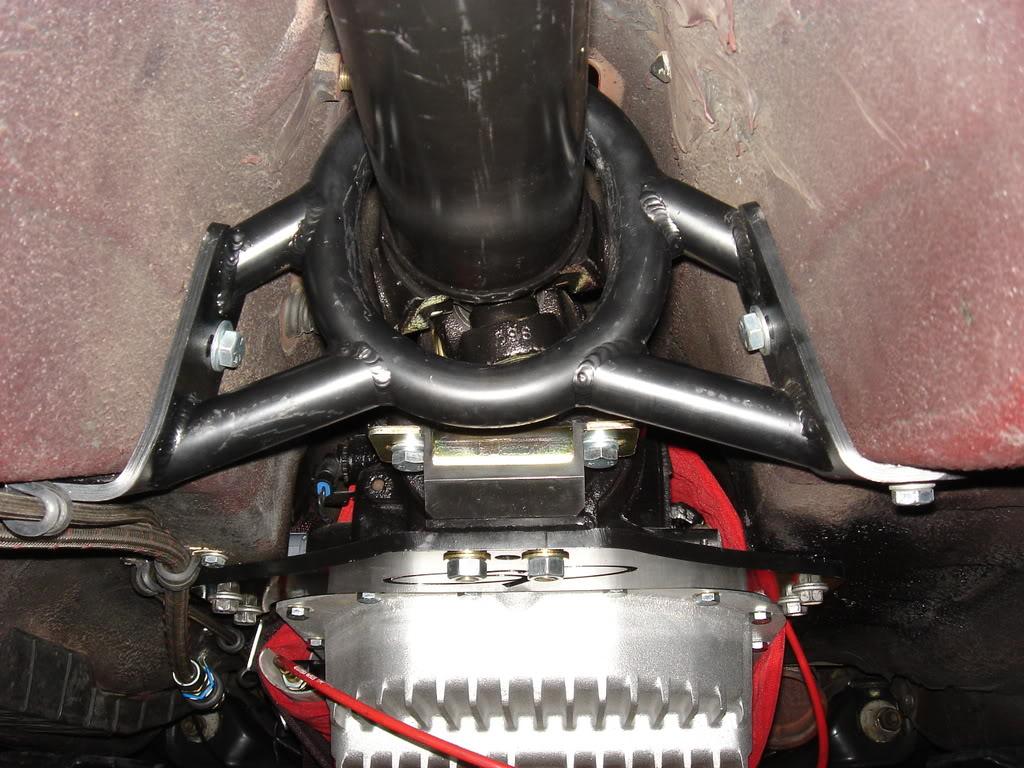
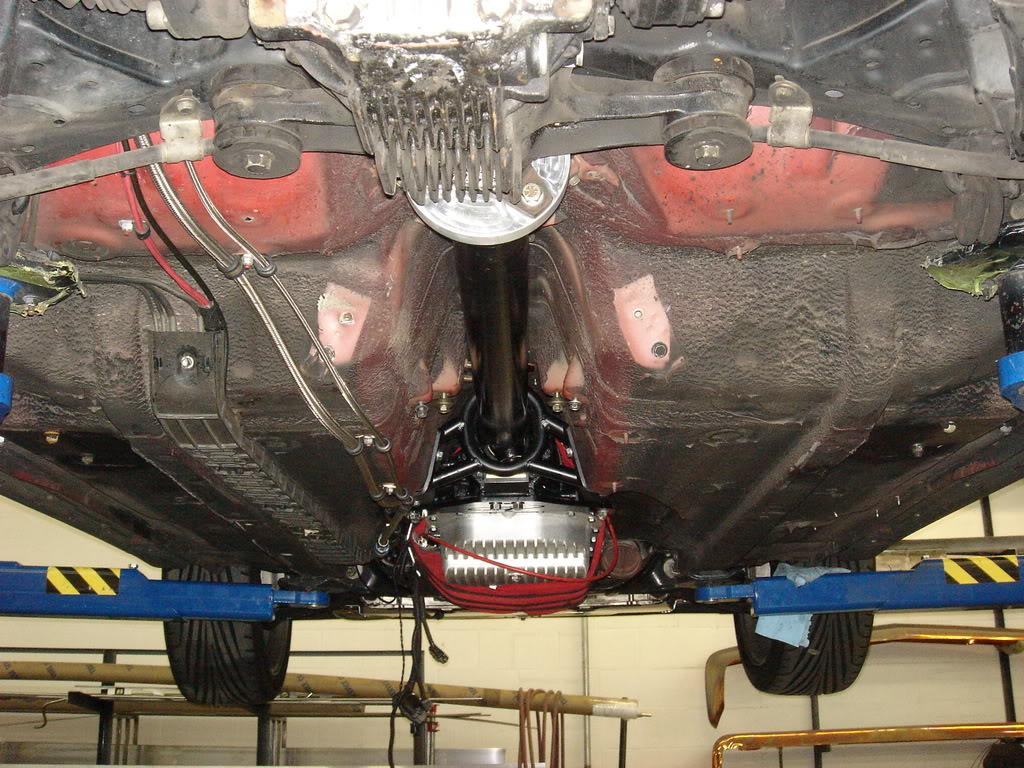
Here's various pictures of the driveshaft and driveshaft loop that was custom fabbed for my car. The driveshaft loop was originally done for the stock tranny setup, so we had to move it back a couple inches since the 4L80E is longer than the stock tranny.
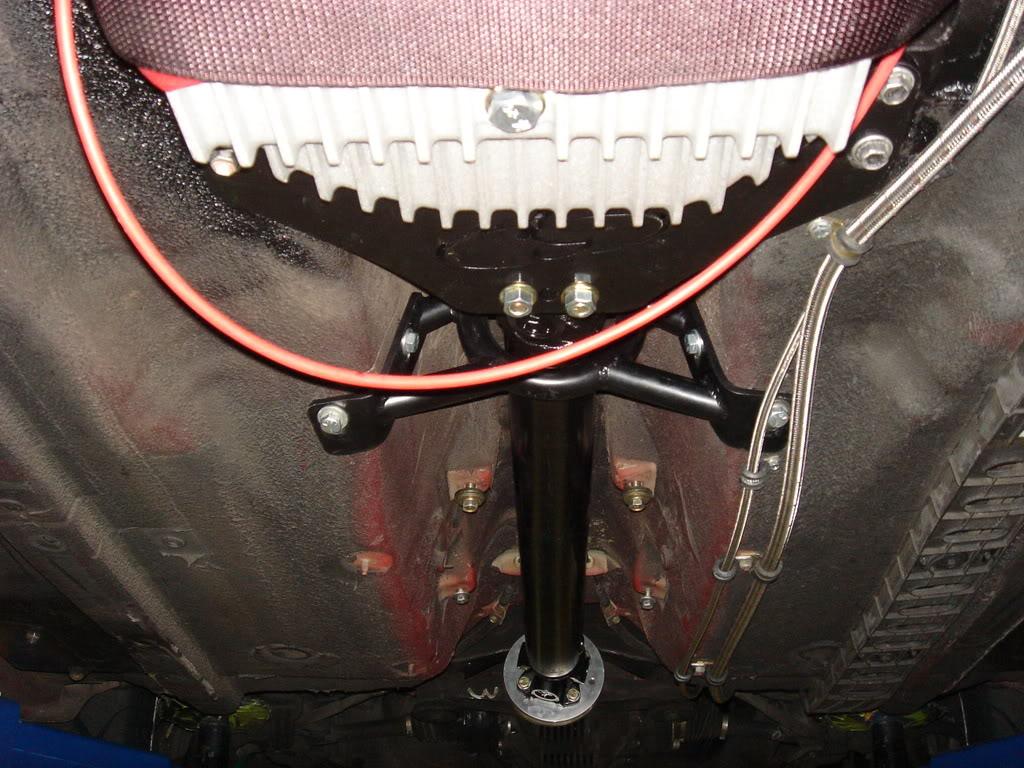
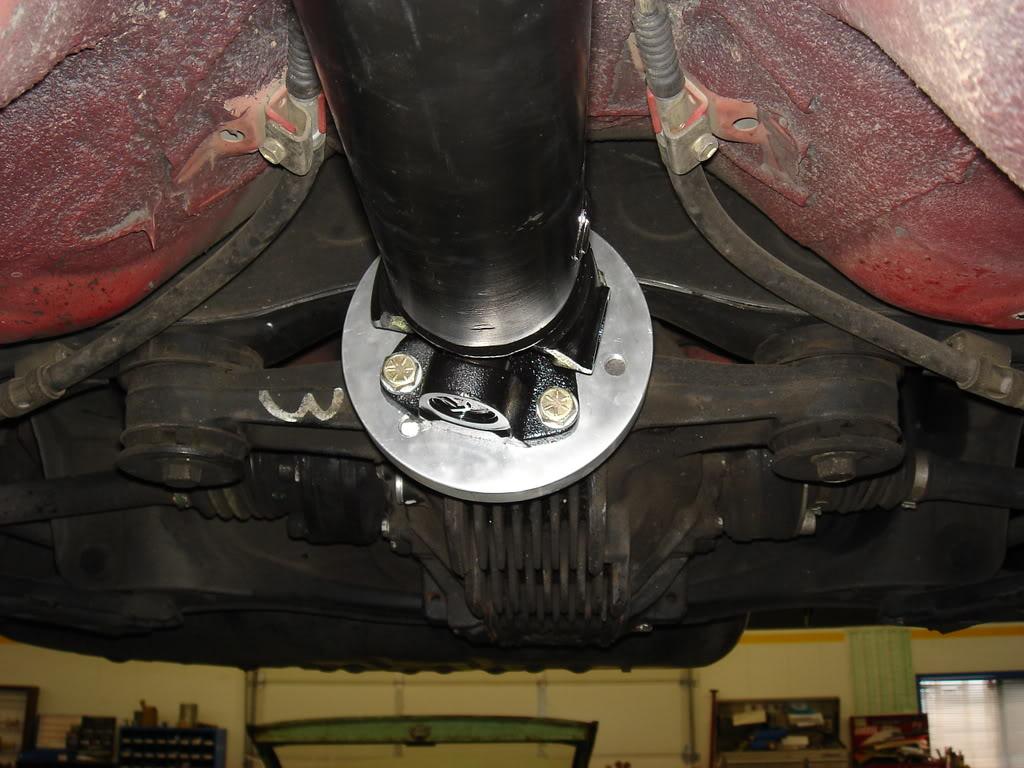
Here's pictures of the driveshaft to the rear diff.

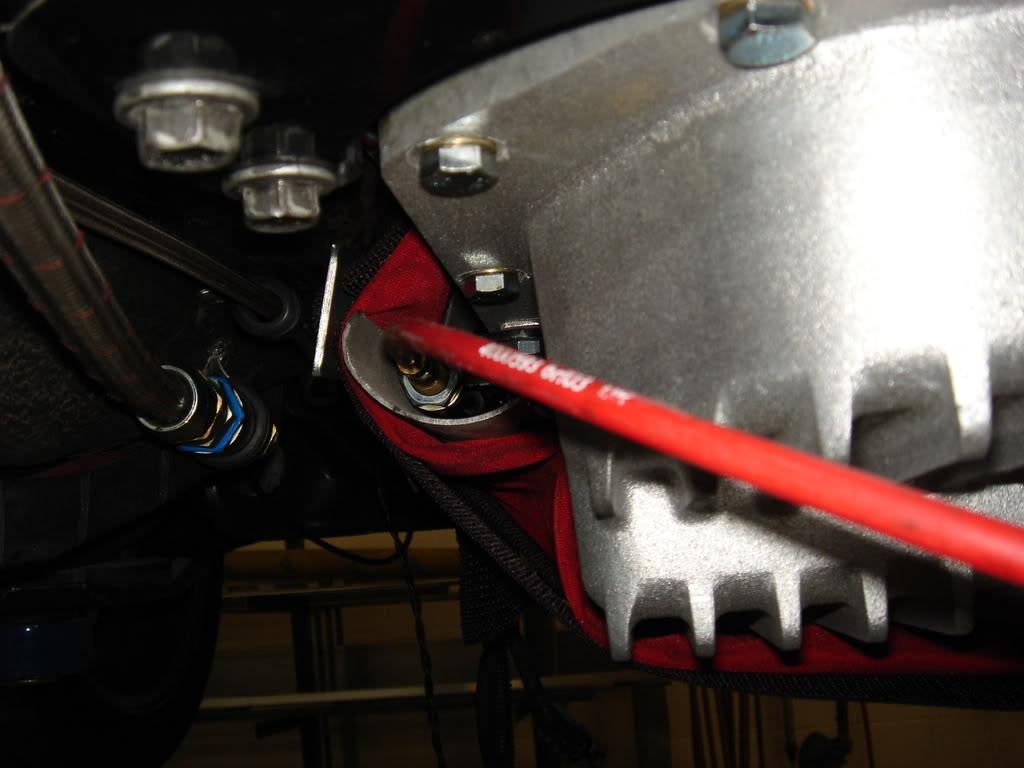
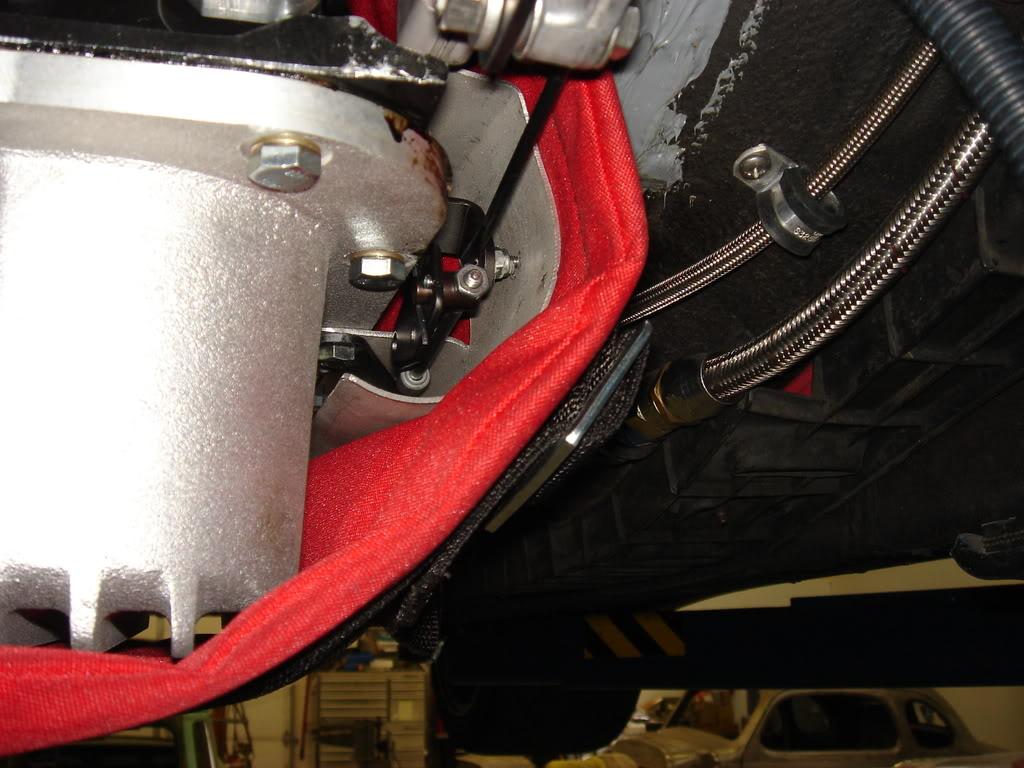
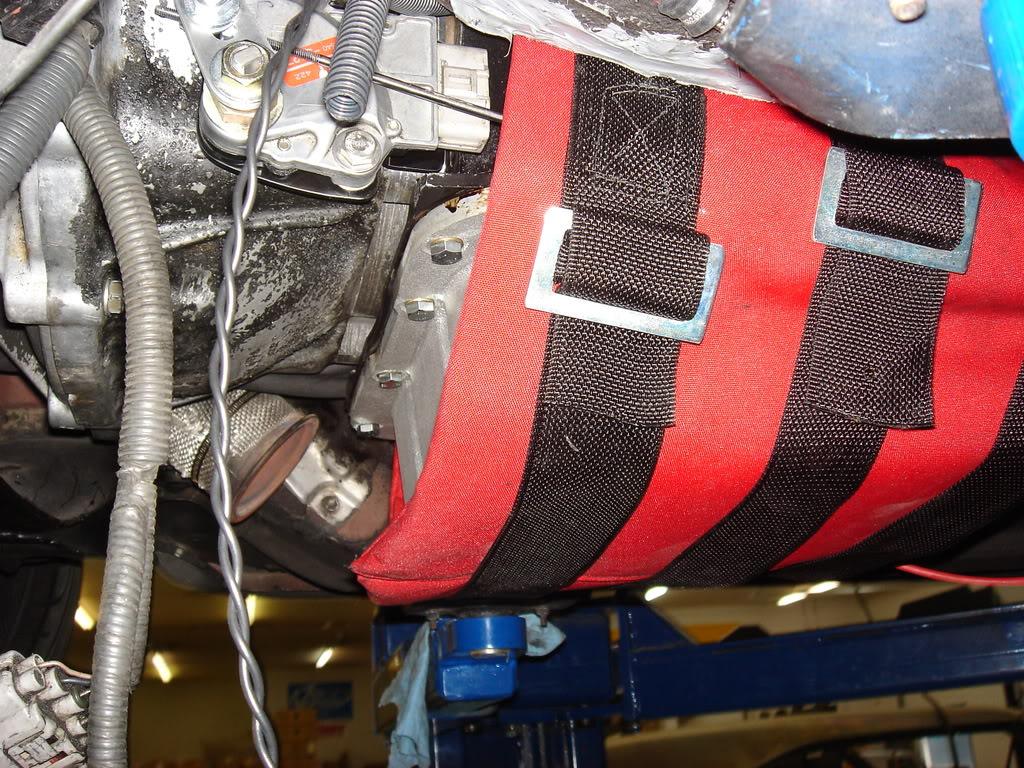
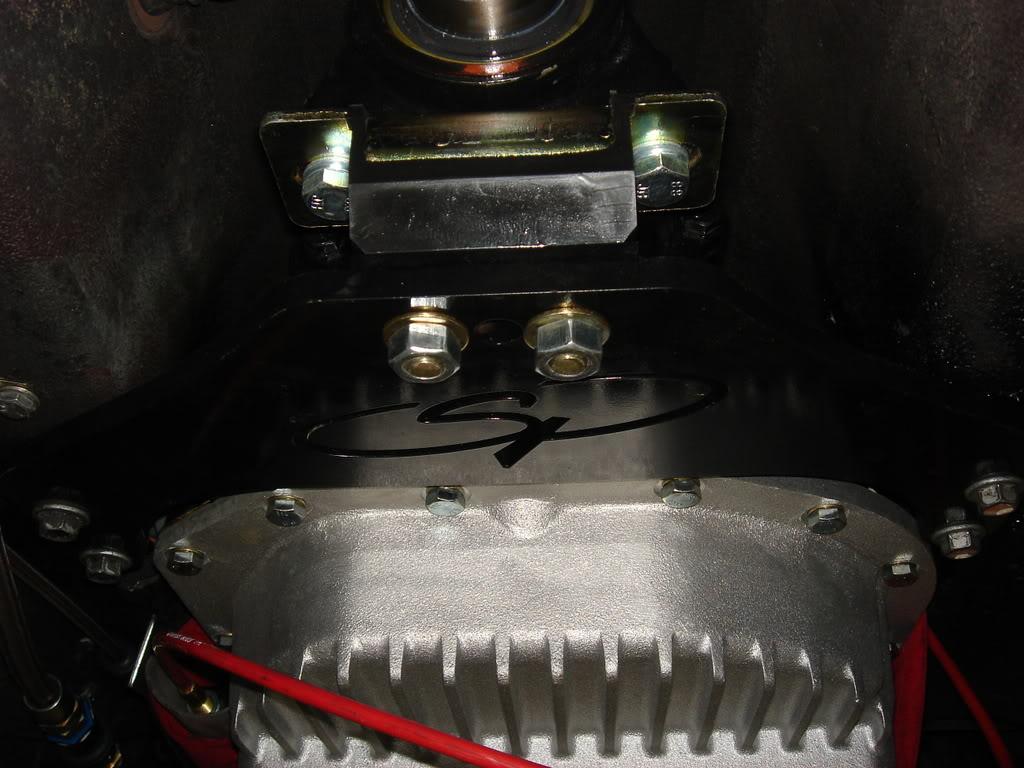
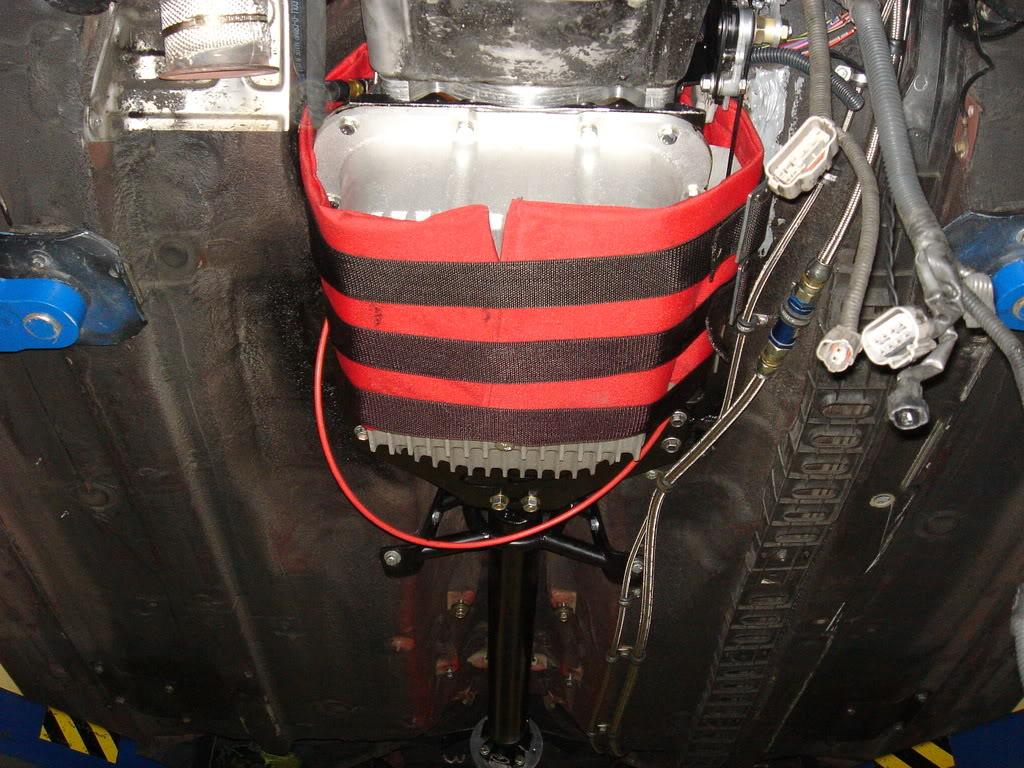
Here are pictures of a metal cover we built around the shift linkage so that it is not squeezed by the tranny safety blanket. In the 2nd picture you can see a bolt that is just binding against this cover, preventing me from getting into drive - we'll have to grind that down a bit.
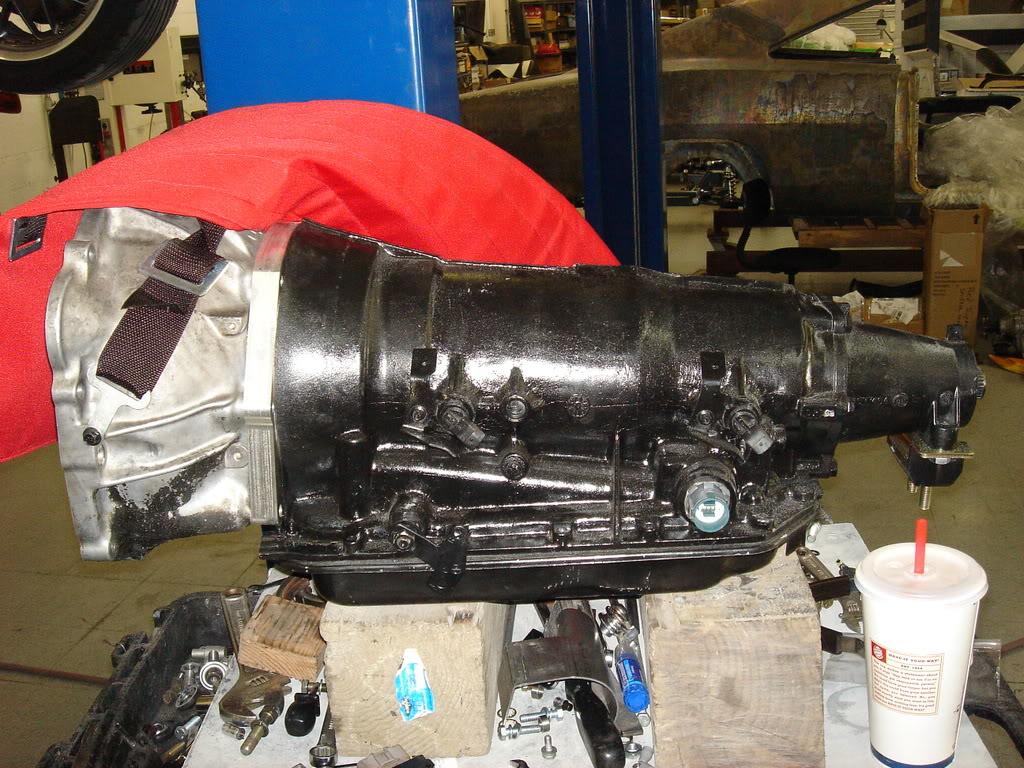
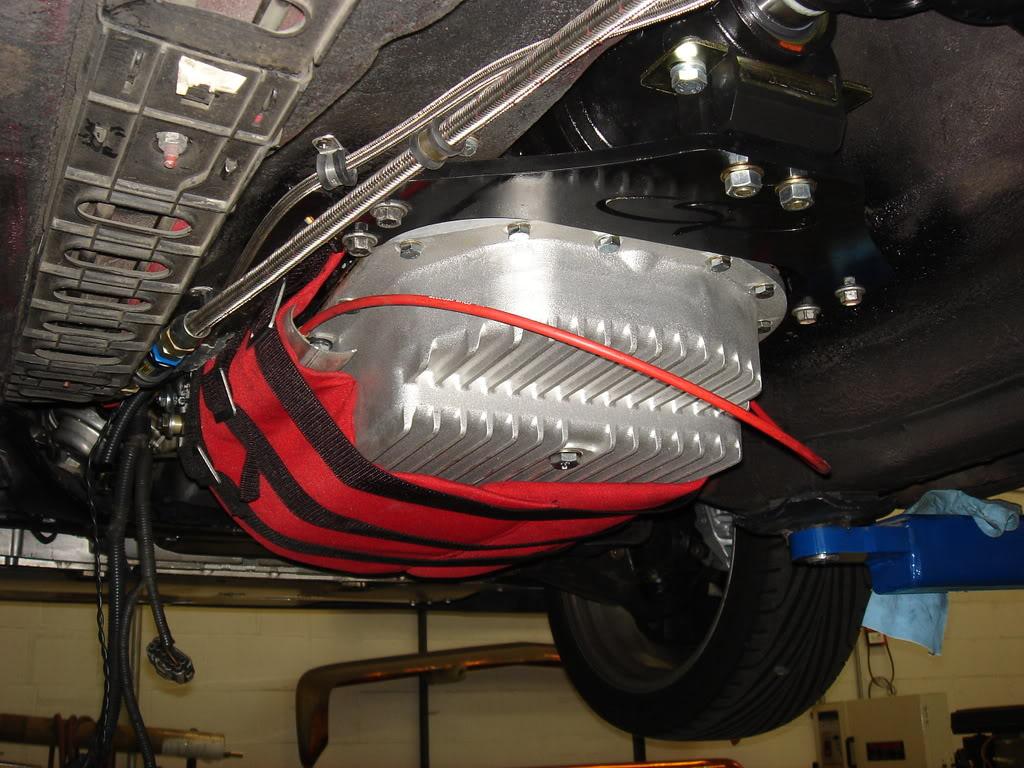
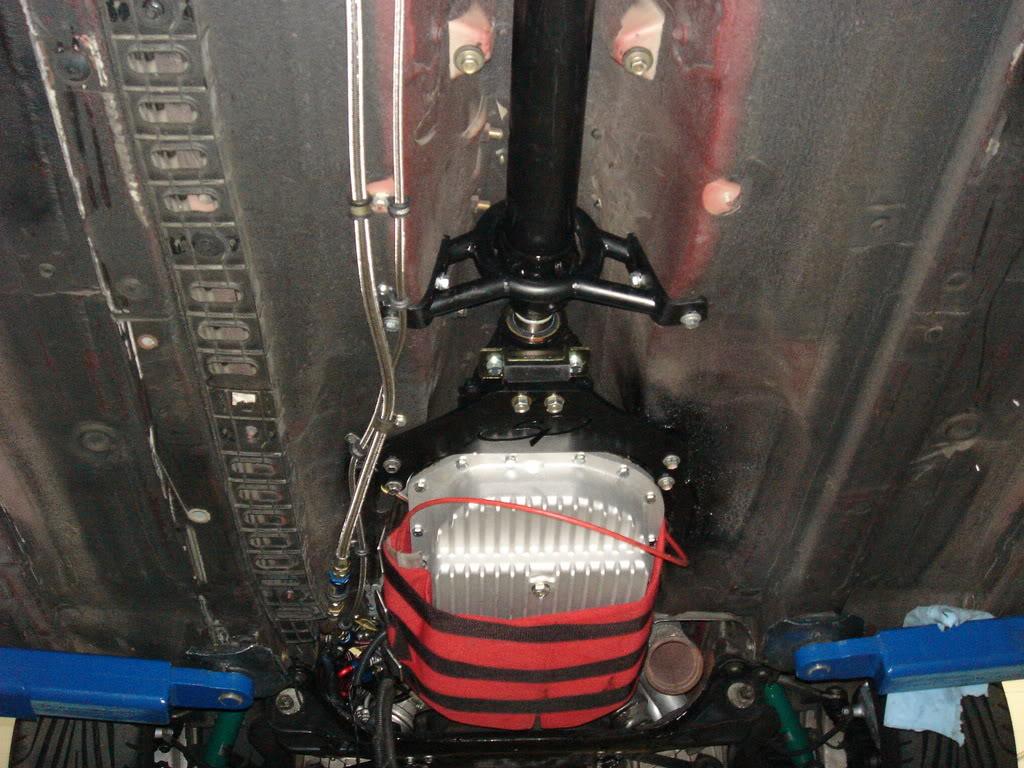
Various pictures of the tranny, pan, mounts, and safety blanket. We replaced the oil pan that came from SP with a cast B&M pan that has 3 quarts more oil capacity. The shift cable is still hanging down, but we'll secure it up before the job is done.
The Lokar oil dipstick is on the passenger side near the firewall.
The 6 speed shifter setup with the panels back in place. The shifter is all the way forward in Park.
7-28-2008
Ok, so we took care of the converter bolting issue and John Reed was finally able to make it out today to finalize the wiring, setup the AEM, and do some test driving. The car was functional enough for me to pick up and drive home. John still needs to calibrate the dakota digital speedometer adapter on the dyno (plus we want to see what the power loss is over the stock auto), address an issue on making the ratchet shifter actually work for manual shifting with the AEM, and we need to go out and do some fine tuning on the shift points under different conditions. As far as driveability on shifting and lockup, it doesn't seem much different than my stock auto setup. But, I think using the external AEM injector driver box is the way to go on the shift solenoids. John took the car out for about a 10 mile shakeout run to ensure I would encounter no issues on the way home. I still had about 1/16th of a tank of race gas in the car. Unfortunately after running it around a bit, he did 2 full pulls on the car and blew the hose coupling off the turbo compressor outlet. He didn't know that but I found out later when I picked the car up. My first thought was that the tranny was pretty noisy - but wrong, it was the compressor starting to spool. Well, then I saw the car could barely go above 4000 rpm under half throttle. Finally, I saw the car was running under vacuum all the time from my boost meter. Then the lightbulb went off to stop and check the hoses. So, I have 20 miles of driving completely under vacuum when I really wanted to see the turbo spool up and how the tranny worked on the trip home. John will be back on Wednesday to pick the car up for the various issues above and hopefully I'll be cruising again on the road this weekend after a long couple months of waiting.
BTW, the tranny with my B&M extra capacity oil pan took over 12 quarts of oil to fill!
8-20-2008
You can buy the transtar repair harness shown below at a GM dealer parts counter. It plugs into the connector on the side of the 4L80 and it has the wires on the other end which you can connect to your stock auto harness to get the signals up into the cockpit area. On my supra, like I said earlier, we adapted the stock gear shift selector sensor to work with the 4L80E, but as described earlier the 4 forward positions on the 4L80E are mechanically mapped to the 3 forward positions on the stock sensor; we did this so I could get a readout of the position on my instrument panel but of course the 1st and 2nd gear indicators really mean the 4L80E is in either the 1st or 2nd gear position when the 1st gear indicator is on, and in 3rd when the 2nd gear indicator is on. When the "D" indicator is on, it means the 4L80E is in the OD gear position (that doesn't mean you are locked into OD, it just means the tranny will automatically shift between the 4 forward gears under AEM control). We are presently also using these same signals into the AEM, but before we could only use the AEM to automatically shift between all 4 forward gears using the normal shift map. What John Reed was able to do is get the manual shifting to work for 1st to 3rd only. I think we can eventually get everything to work exactly like the stock tranny shifter (i.e. an OD off button, a manu mode buttton). Right now I can only do one of these 2 functions at a time using my trac control button hooked up to a relay.
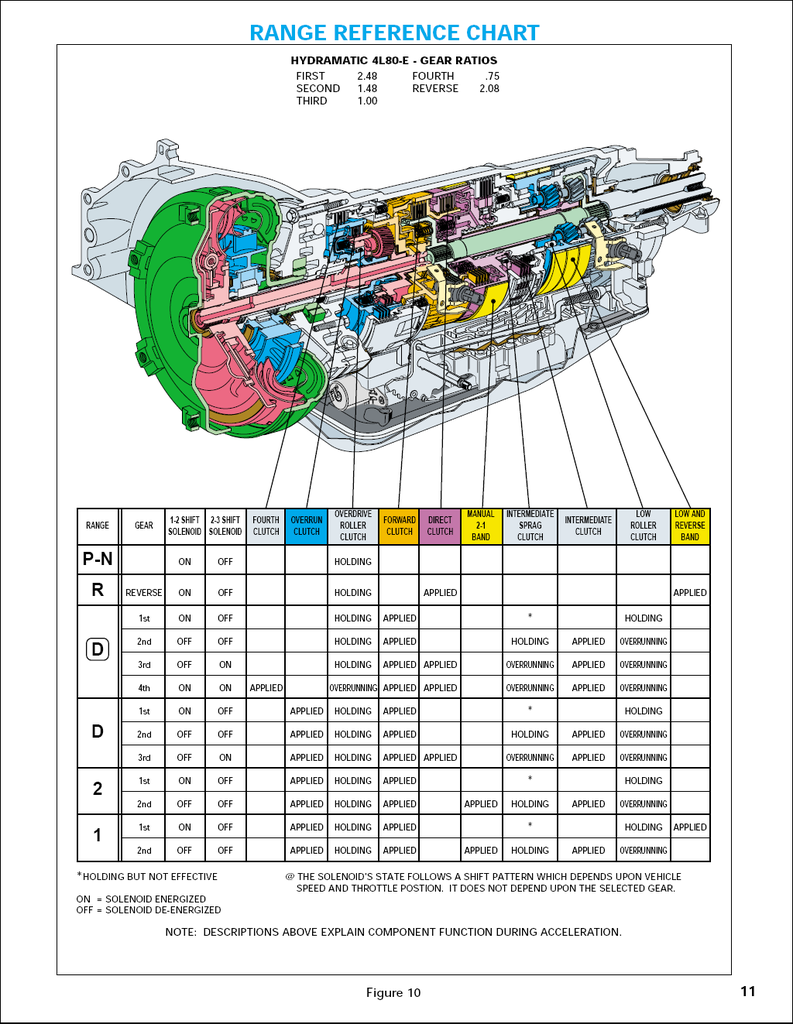
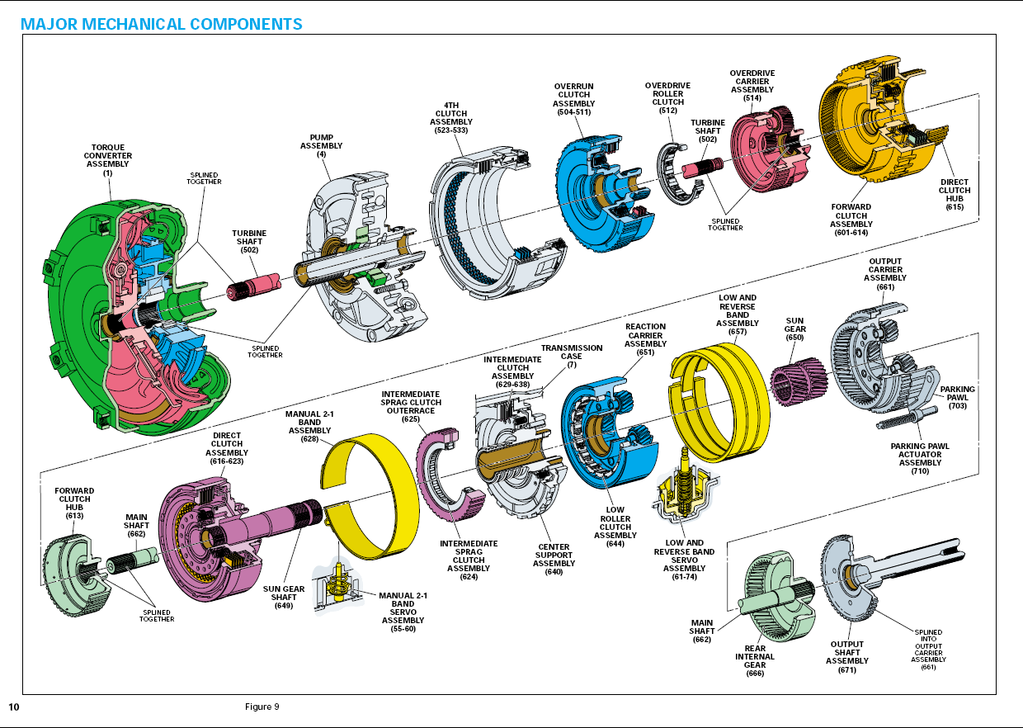
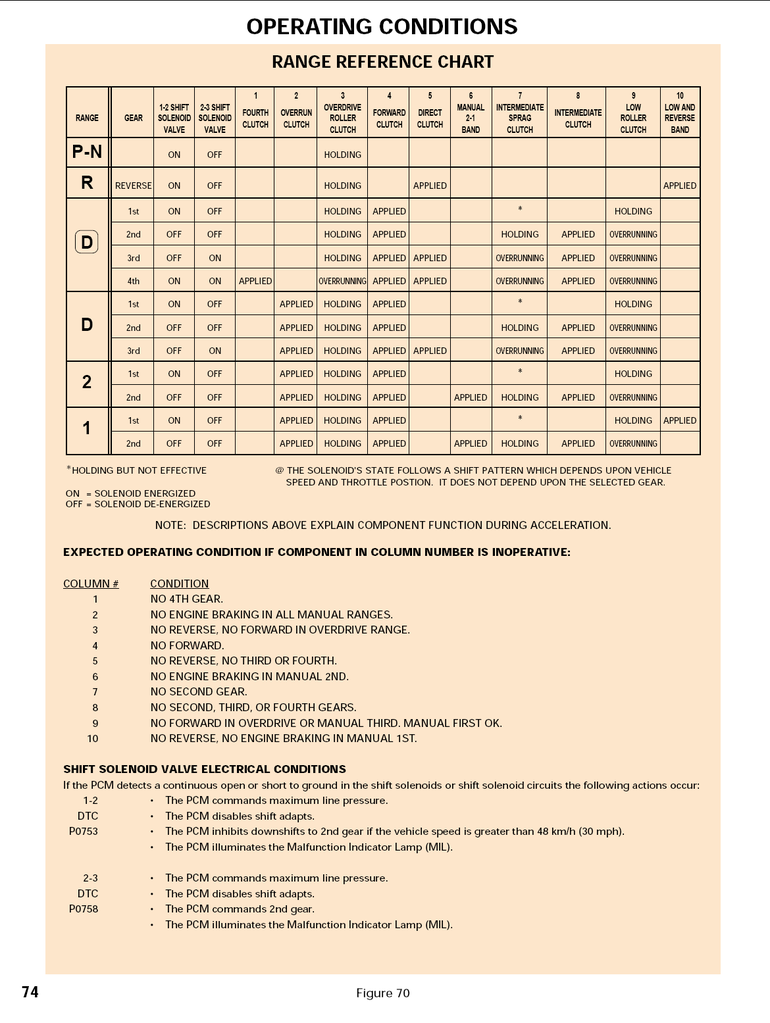
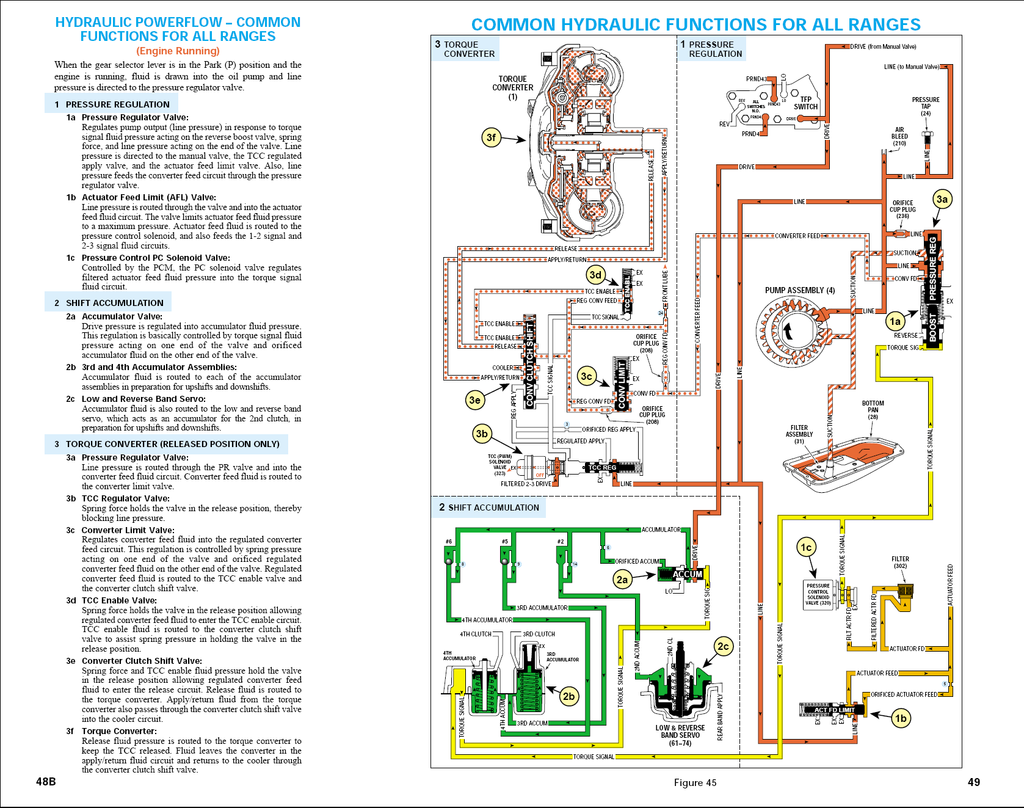
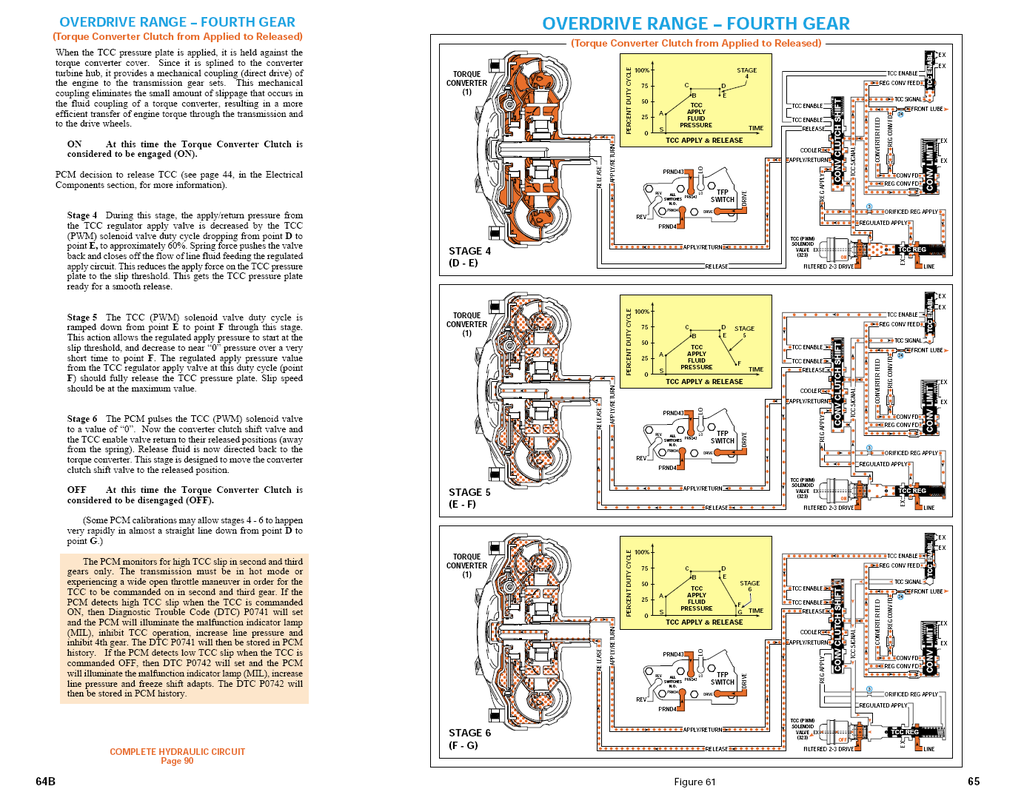
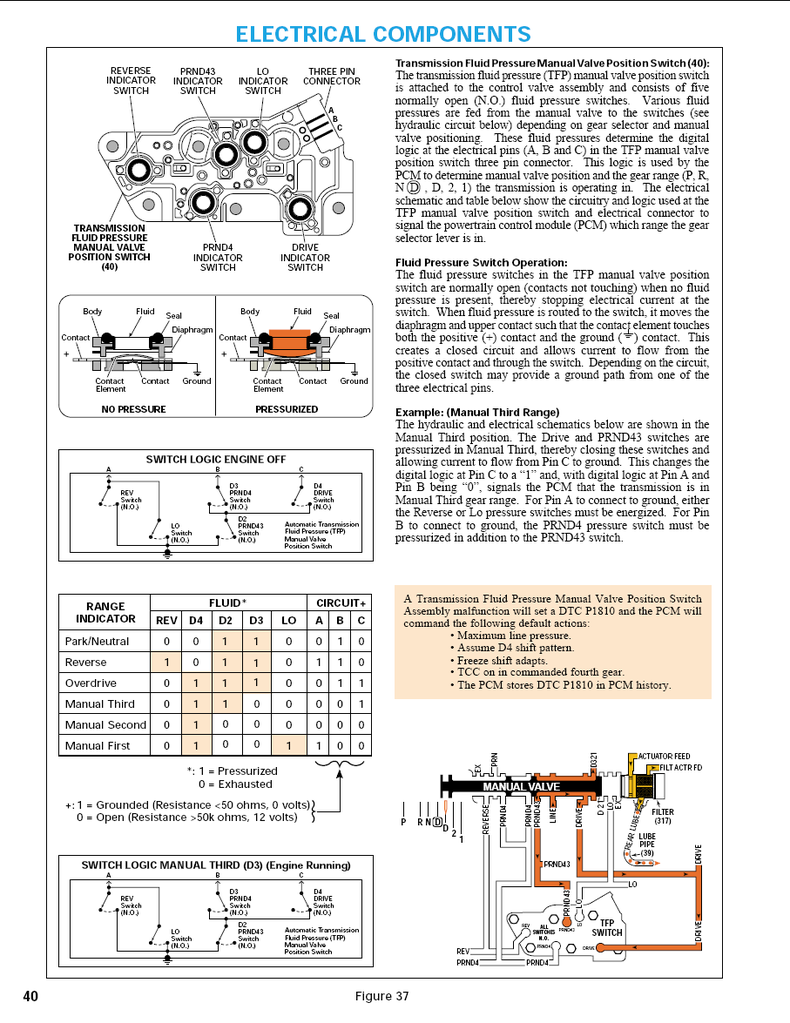
BTW, here are some really nice pics of the 4L80E internals and operation.

10-20-2008
Finally, an update on drag racing. Since I last drag raced in June'08 before breaking my stock toyota tranny, my changes were this 4L80E tranny upgrade, upping the stall from 3200 to 3600, and upping my nitrous from a 75 to 100 hp shot (only used to launch). I went to SILV'08 with new M&H slicks/skinnies but had no time to test and tune the launch setup for all these changes. So, given that and the fact that they ran a pro light, I ended up red lighting out in eliminations. Oh well, it was still fun. Anyways, finally got back to the track in Portland in October to run again. Within 3 runs the car was again running in the 10.8s that I did back in June this year. That's pretty good considering the car gained quite a bit of weight with this 4L80E tranny and is also down in HP due to the losses from the tranny and the higher stall I'm running over the same # I ran back in June. We're pretty sure we can get it down to the 10.5's and I'll be out again this wednesday to try. Also, I weighed the car with me in it after the drags and it's between 4000 and 4025 lbs. As many of you know, dyno #'s for a high stall auto are only good for comparison purposes against your baseline. I did dyno 525 rwhp a month or so back, but the weight, trap speed, and ET indicate the rwhp is somewhere between 585 and 614.
11-30-2008
Last update on drag racing for this year since our local tracks all shut down at end of October. My last outing was on 10/22. The weather was great here and very few cars showed up. You could literally hot lap if you wanted to, but I let the car cool down on each run and left early after only 3 passes. I started out with a base setup for the nitrous on launching that I ran a 10.88 with earlier and then moved the nitrous to run a bit longer on each run after that. Base run shut nitrous off at 50 mph. Second run I increased that to 85 mph. Third run I let it go to 100 mph which is about the 1/8th mile. Each run data is shown below.
Run 1: nitrous to 50 mph
R/T: 0.187 sec
60 ft: ??? (timeslip had bad data)
1/8: 6.981 sec, 99.97 mph
1/4: 10.932 sec, 126.83 mph
Run 2: nitrous to 85 mph
R/T: 0.223 sec
60 ft: 1.583 sec
1/8: 6.897 sec , 102.76 mph
1/4: 10.819 sec, 124.44 mph
Run 3: nitrous to 100 mph
R/T: 0.179
60 ft: 1.587
1/8: 6.863 sec, 101.06 mph
1/4: 10.775, 125.00 mph
Video of run 3 below. Never mind what the video says on that 60 foot, it was a 1.587 according to the timeslip (they were having problems with the time display all night). The launch is dialed in with consistent 1.58's on every launch. At this point I either run nitrous beyond the 1/8th mile for only a little more gain in ET or go to a bigger turbo for a bigger jump in ET and trap speed. Moving 4000 lbs takes more horsepower.
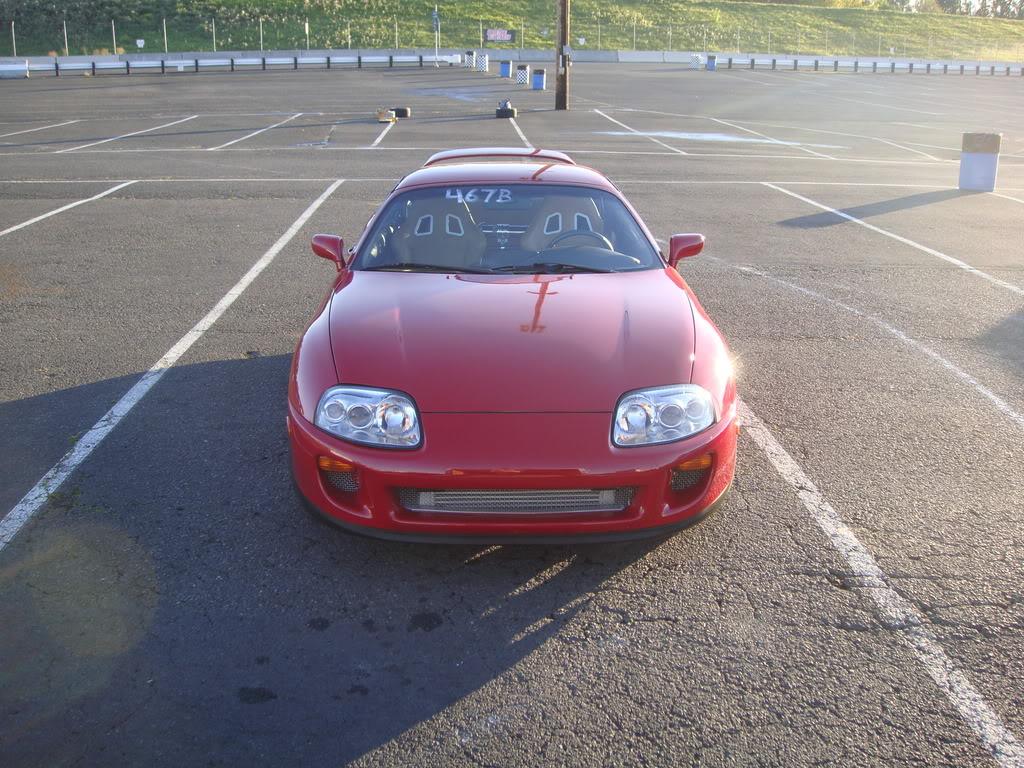
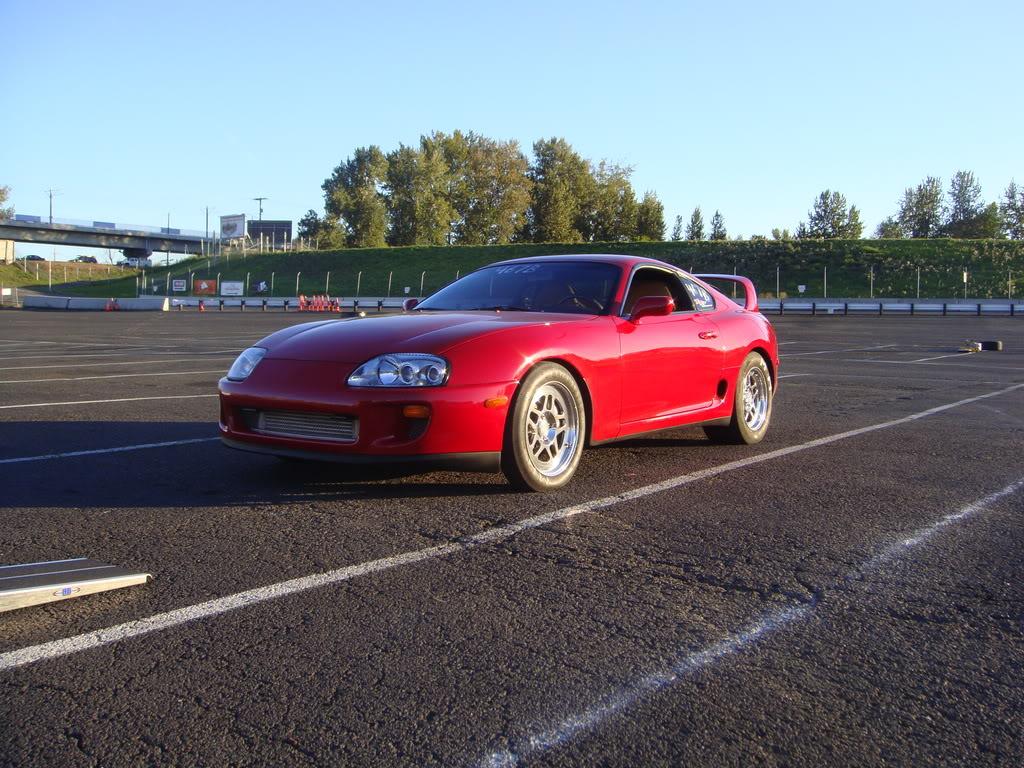
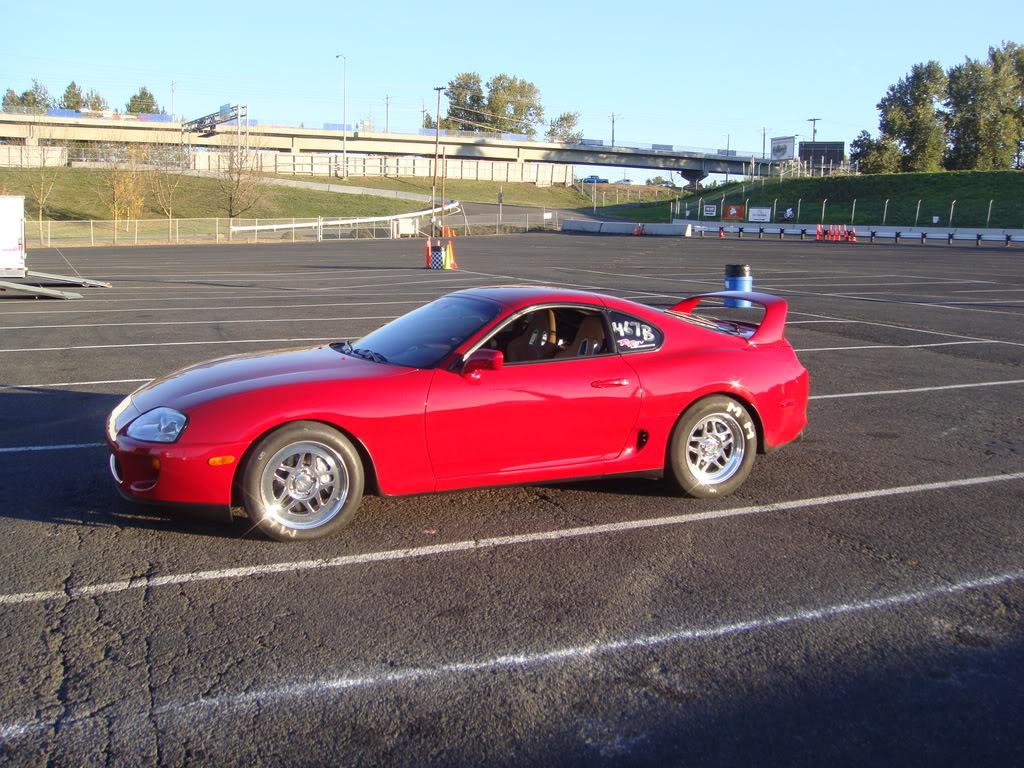
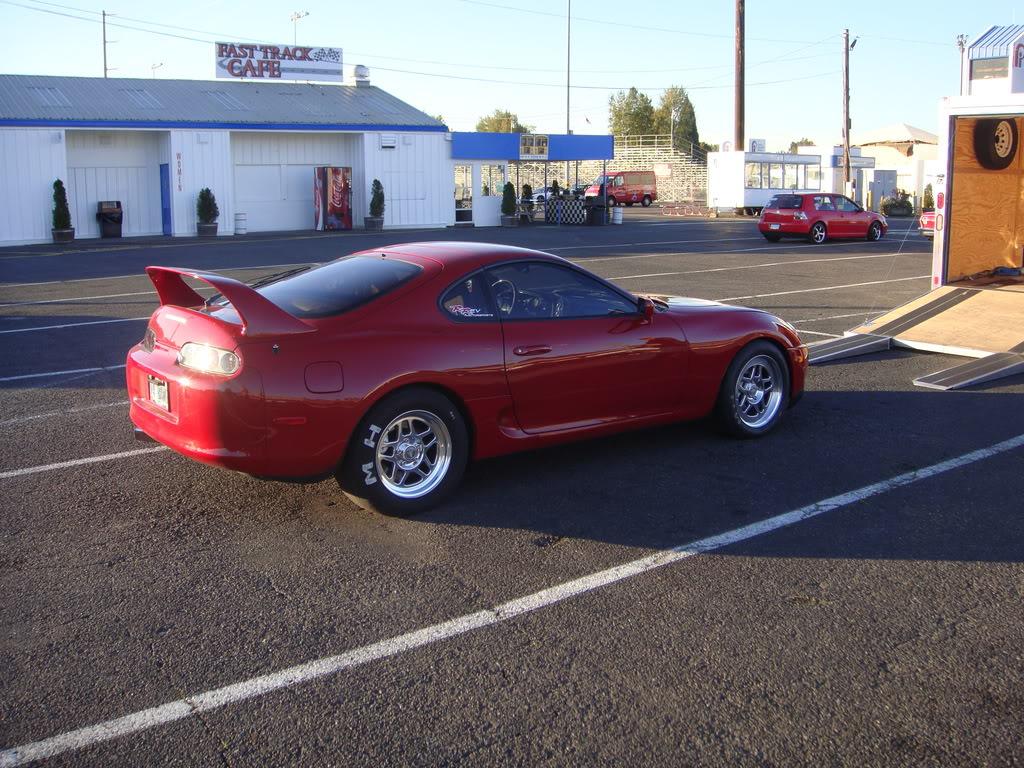
Pics of the car at the track.
1-18-2009
Time for another update. When I attended SILV'07 I had a real problem keeping the tranny oil temperatures down while driving around in Las Vegas in stop and go traffic. This was when I had a built toyo tranny in the car, a 3800 stall PI converter, and only a setrab oil cooler with dual electric fans mounted inside the air intake duct on the passenger side. When I upgraded to the 4L80E tranny last year before SILV'08, I added a large passive tranny oil cooler just behind the FMIC and in front of the stock radiator. It worked great...in fact so well that it was difficult to get up to 180 F even when driving up long hills. I had a minor problem with coolant overlfowing in my town one day when the temperatures soared to near 100 F but that was it. At SILV'08, my cooling problems reversed from that of SILV'07. My tranny ran at low temps all the time, but in stop and go traffic I had problems keeping the water temperature from soaring. Everything was okay when I cruised along at 20 mph and there was adequate airflow into the nose of the car but when in town and waiting at all those 2+ minute lights, the water temps would rise and sometimes I would have to turn off and shut the car down to let it cool down. The setup in my car then was to have the hot side of tranny oil flow into the setrab cooler followed in series by the large passive cooler in the nose. This path was open all the time and nothing regulated when this extra cooling was invoked nor ensured the tranny oil ever came up to a decent operating temperature of 180 F in cooler weather. In addition, the under hood temps were very hot as I could tell just by observing and feel. We had tried an oil thermostat earlier provided with the passive cooler but it didn't work very well and was too small. I have a Mocal oil thermostat with AN-10 input/output ports that I use for my external engiine oil cooler on the driver side air duct. It works very well. When the engine oil temp is below 180 it still allows about 10% flow into the external cooler to avoid thermal shock when the thermostat fully opens. I decided to use that on my tranny cooling side before my setrab and passive coolers. In addition, I had a fan controller for the dual electric fans in my setrab oil cooler and it was erratic because the probe for measuring oil temperatures was a clip on that you insert into the cooling fins. I decided to change that over to a hayden fan controller with an actual probe that measures oil temperature directly. Here are pictures of the new setup being installed. which I think will bring the tranny oil up to operating termperature more quickly, address the underhood termperatures, be more reliable on turning the setrab dual electric fans on during high temps, and reduce heating effects in the radiator and into the engine bay since the nose passive cooler will be invoked with full oil flow less frequently than before. We are also going to duct some cooler air flow from under my custom sheet metal engine undercover toward the air intake and I hope that will both give more cool air flow to the intake and push out hot air in the engine bay. Sometime this year I may add a beefier aftermarket radiator and a TRD water thermostat if needed.
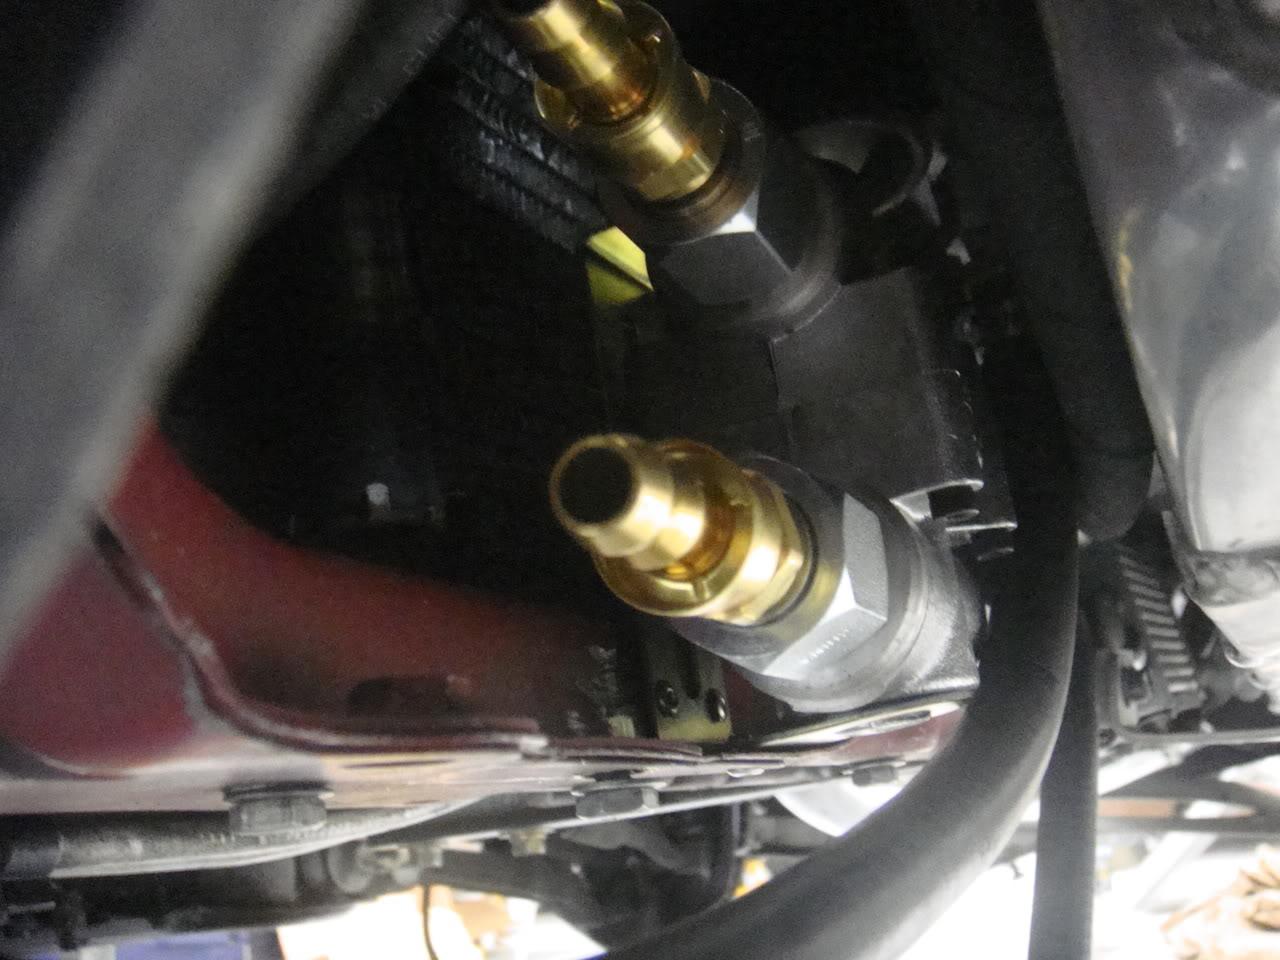
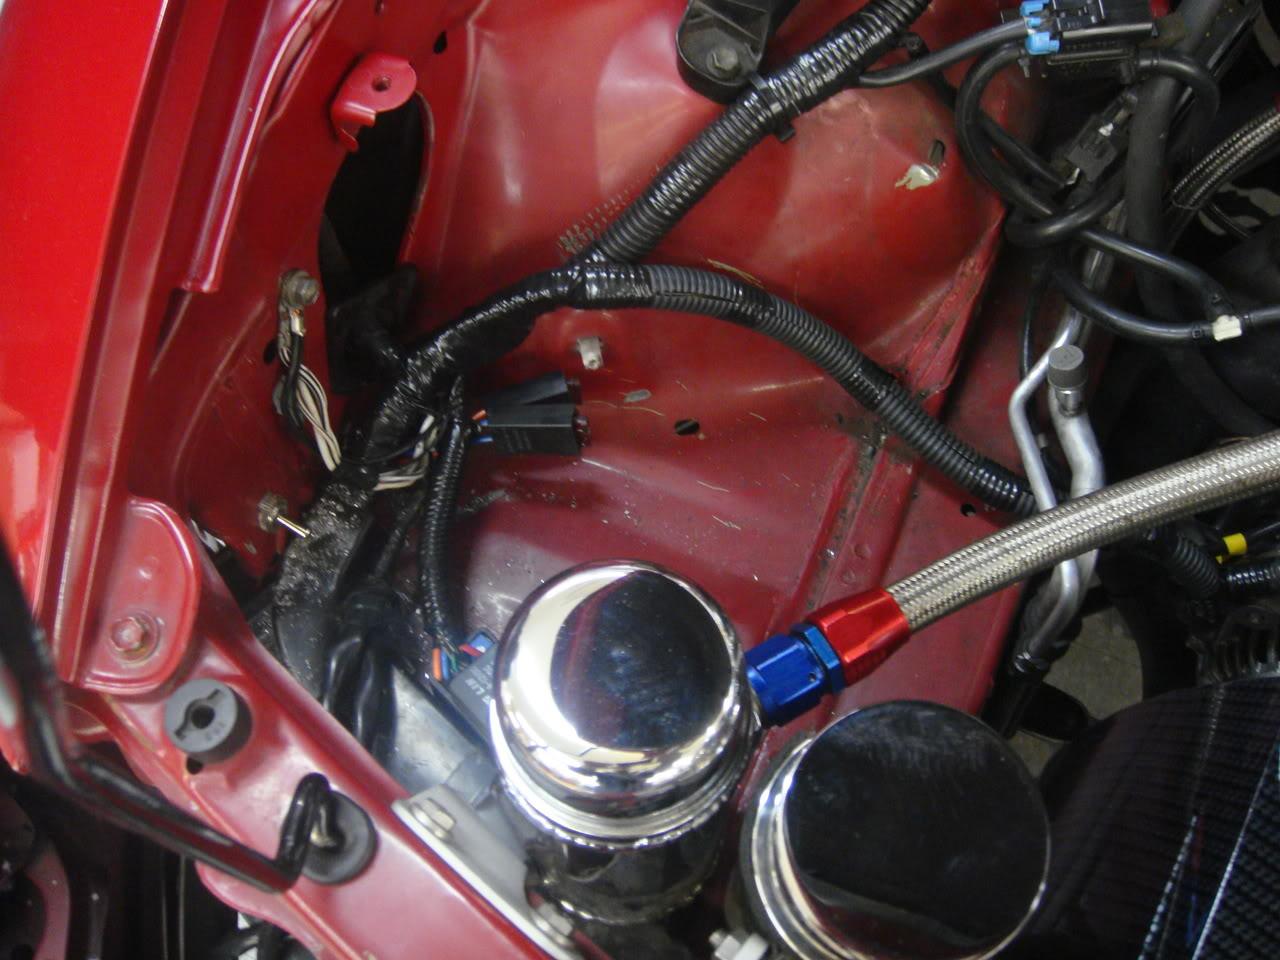
Here's the block used to connect the probes for my tranny oil temperature gauge and the new hayden fan controller.
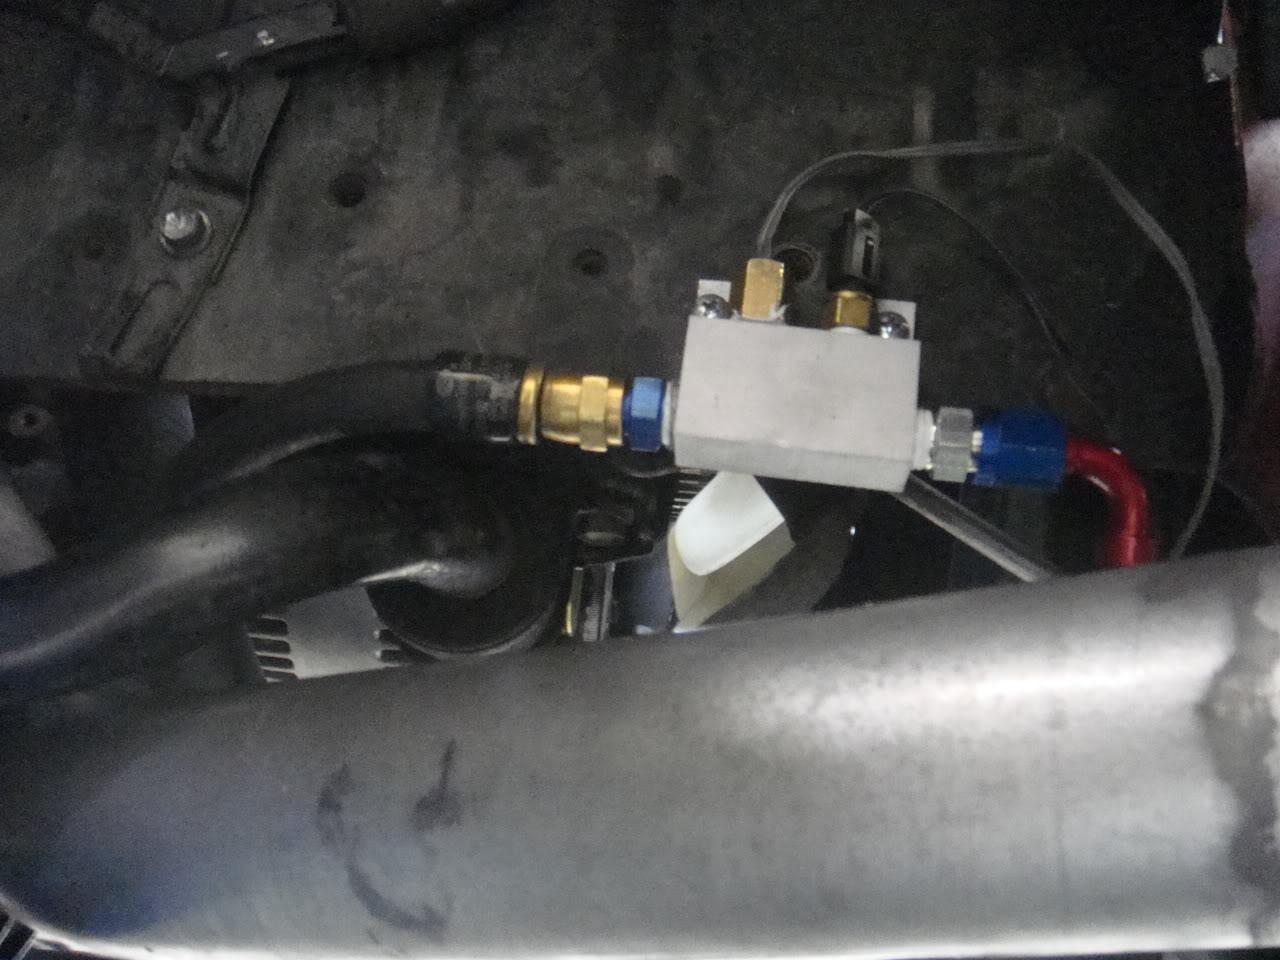
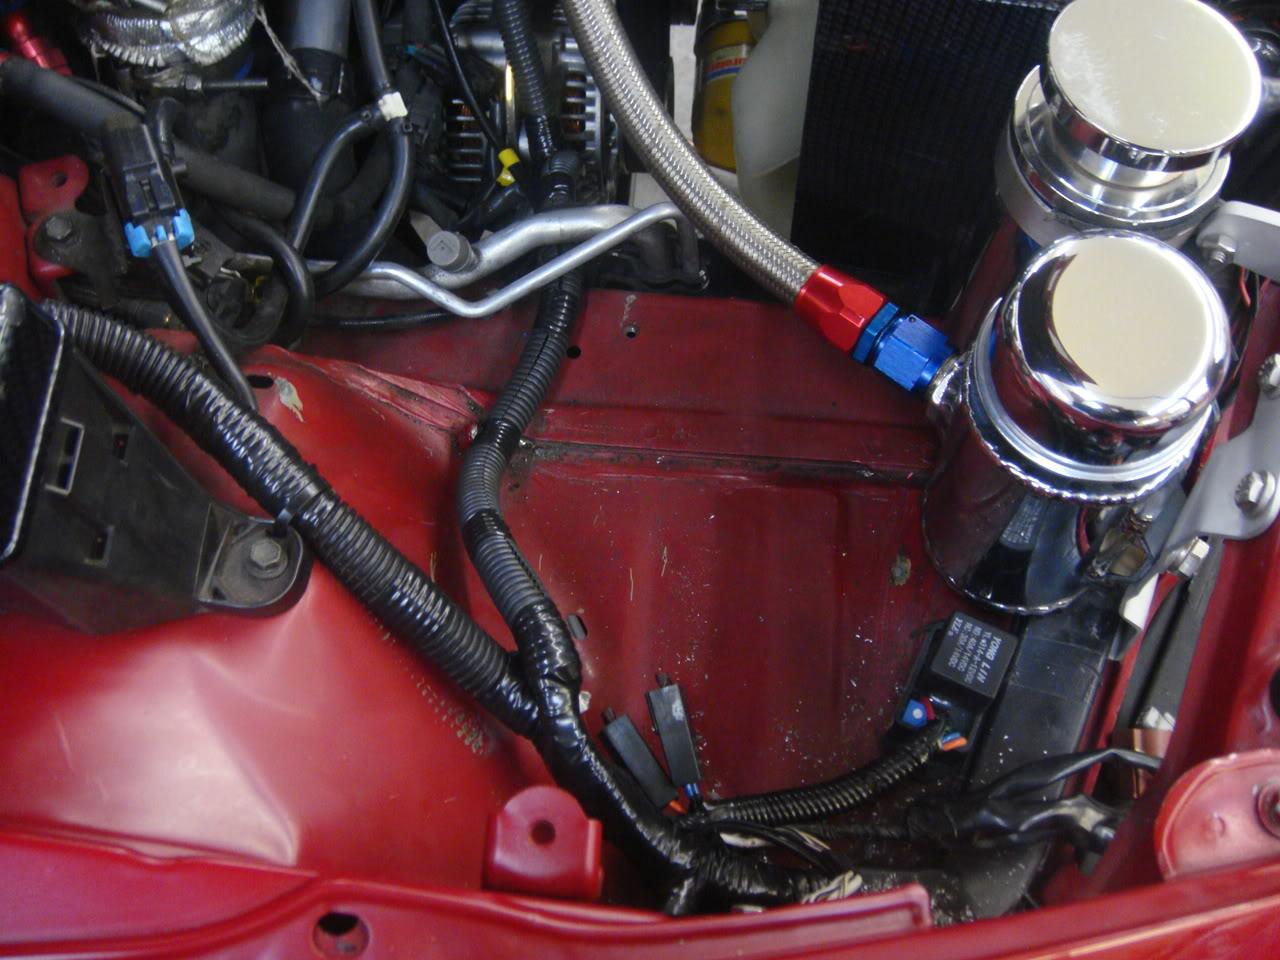
Heres the Mocal oil thermostat after the probe block but before my setrab and passive oil coolers. The ports on the input/output side of this are AN-10, quite a bit bigger than the actual tranny oil lines I use so it should not be an impediment for oil flow. I also use this same Mocal product for my engine oil cooler that is located in the driver side intake duct.
The first picture shows a switch I can use on the inner passenger side fender to turn the setrab dual fans on manually which I may use during drag racing. The second picture shows the hayden fan controller and it's relay to the electric fans.
Here's the setrab dual electric fan cooler angled slightly backward in the passenger side duct. It just barely fit in here.
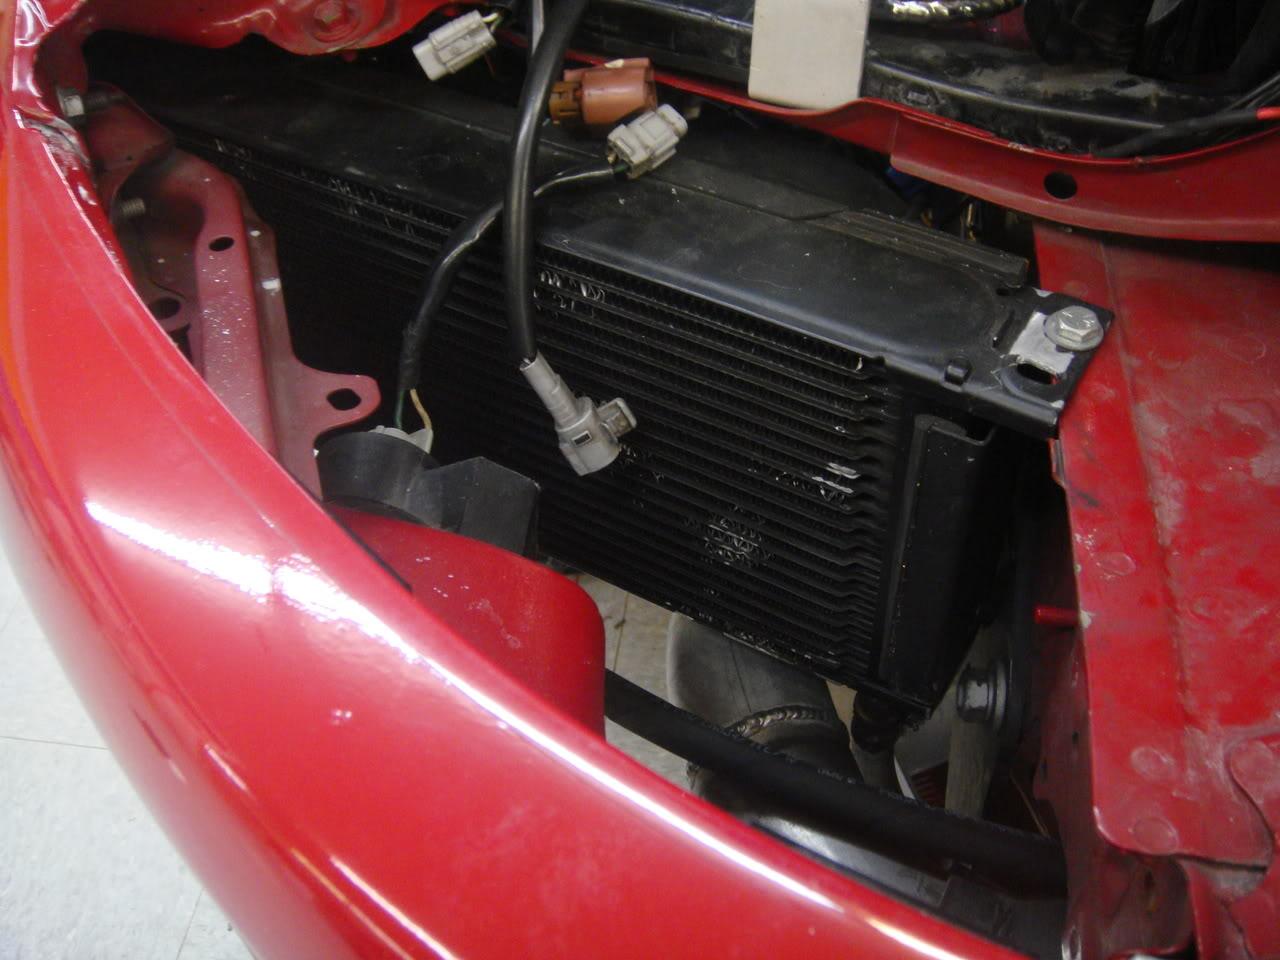
Near the passenger side in this pic we'll add an air scoop under the sheet metal engine uncover and a duct up to the air intake to bring more cool air to the air filter and into the engine bay.