You must be logged in to rate content!
5 minute read
DIY Washable Cabin Air Filter
Compliments of 05Moose @ www.tacomaworld.com
5-1-2010
Since this keeps coming up with 05 Taco owners asking about the cabin air filter (which won't be there for them because it wasn't installed from the factory until the 06 came out)...and because so many of you probably don't like seeing links to other forums where I have this posted, I decided just to add the thread here too.
Here's what I did last summer:
With all the driving on dirt roads (off-roading, cutting firewood, etc), I was getting tired of having to replace my cabin air filter once a month. I was making one from a cheap home filter and the last one went from being white when new to dark brown when I replaced it.
So I got to thinking, why not make one that lasts forever and can be washed? We use one of the washable filters inside our home that never needs to be replaced. So I purchased another one this weekend (The Web Plus washable electrostatic air filter for $19.97 plus tax) and modified it to fit snugly inside the slot for the cabin air filter. Make sure it's the adjustable filter.
BEGIN EDIT:
So many still have questions, so I'll try to answer them right here.
Q: Where did you find this filter?
A: I found mine at Home Depot.
Q: What other parts do I need? (plastic clips, c-channel plastic, etc)
A: Assuming you buy the Adjustable filter like I did, all the parts come in the package. Other than the tools, EVERYTHING you need is in the filter package. The filter is an adjustable 20 x 25 x 1 Electrostatic Furnace Filter. Here's a link to the filter at Home Depot:
http://www.homedepot.com/h_d1/N-5yc...splay?langId=-1&storeId=10051&catalogId=10053
Sandman614 (in post #90) found one at Lowes. Here's the Lowe's link:
http://www.lowes.com/ProductDisplay...gId=10051&cmRelshp=rel&rel=nofollow&cId=PDIO1
END EDIT
Instructions:
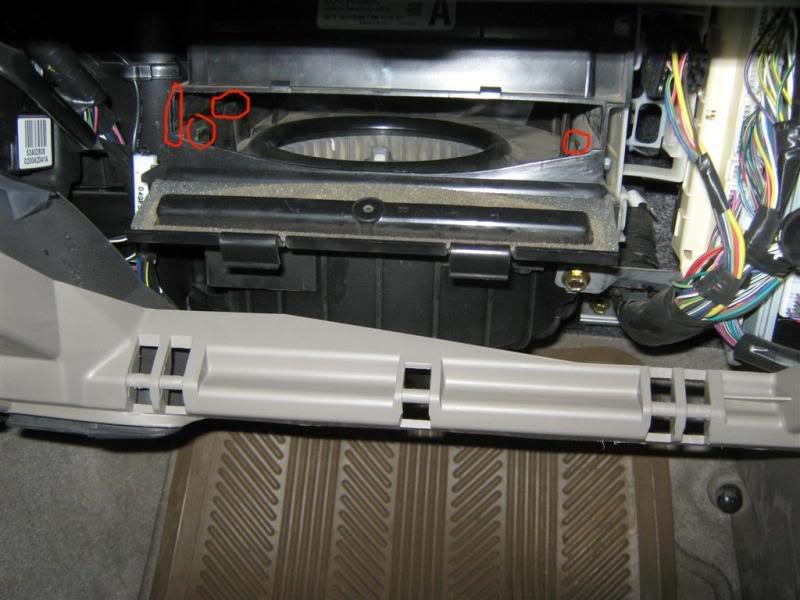
Remove the glovebox, open the filter door, and remove any old filters.
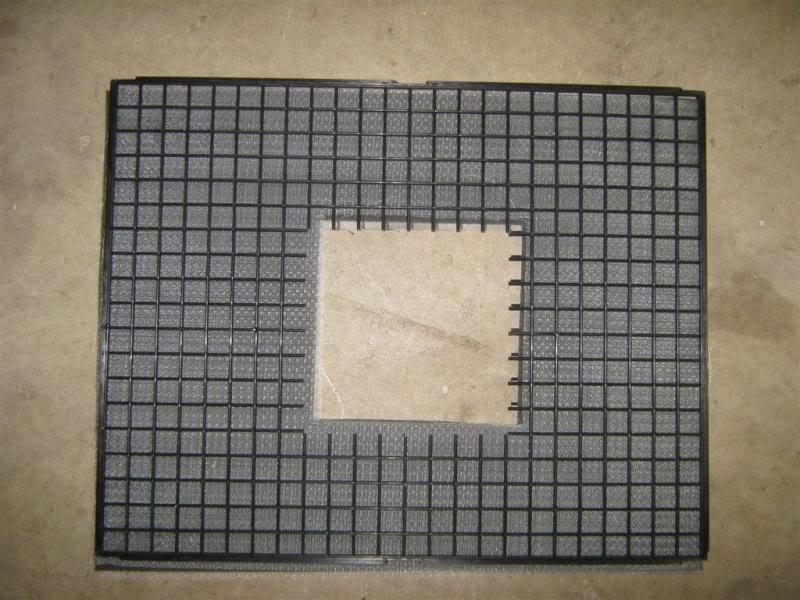
Cut out an 8" x 8" section from the middle of the filter (Use the middle because the center filter material is attached there with a plastic rivet. The squares are each 1" to make it easy.)
NOTE: You may want to measure the inside dimensions of your air box first because some have found that they had to trim this a little more so the finished filter was 8 x 8. My finished filter fits snugly at 8 1/8 x 8 1/8 inches!
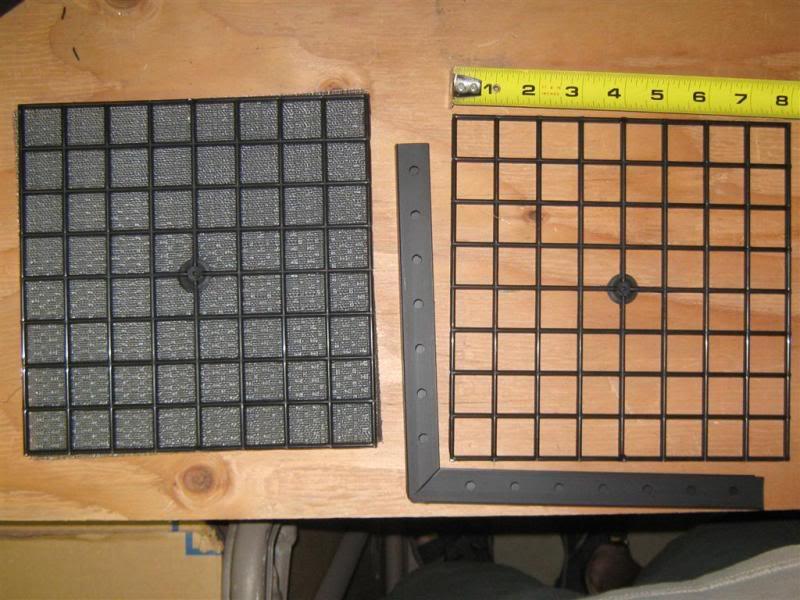
Trim up the sides until they fit around the new 8" x 8" center piece. (NOTE: You must use the smaller sides because the height of the larger sides will not fit...the smaller sides are a perfect fit)
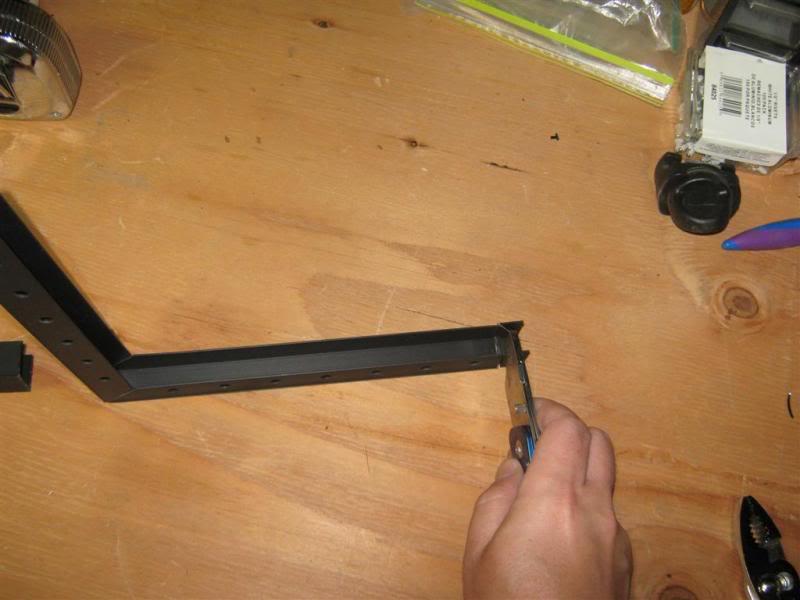
To cut the sides, I used a box cutter. Just apply a little forward pressure to slide the blade while putting a lot of pressure downward.
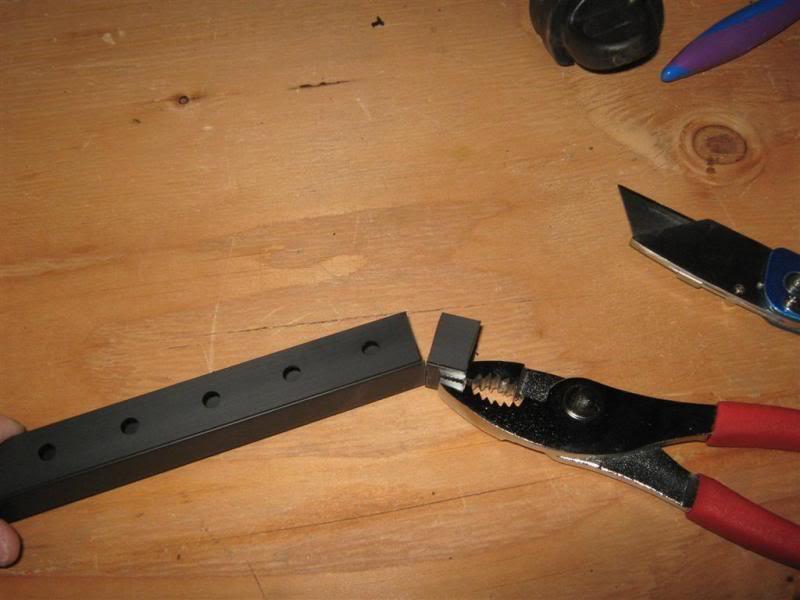
Once both side are trimmed down, use pliers to bend the piece back and then easily cut it with the box cutter.
The areas circled in red are what prevent you from using the larger filter sides.
Put the pieces together tucking in the corners so they overlap. Then try it out to make sure your filter fits.
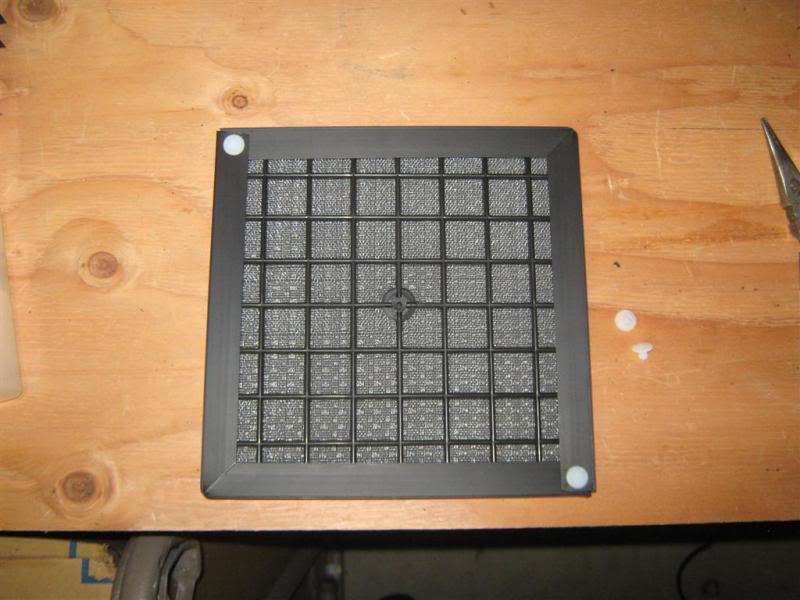
Next, drill holes in the two unconnected corners to the same size as those already in the filter sides. Use two of the four white plastic rivets to connect it. The finished filter should look like this:
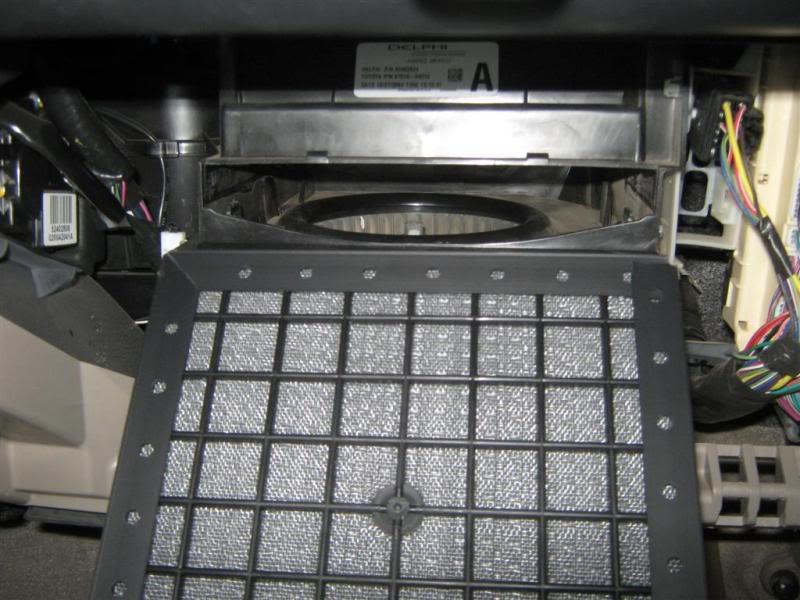
Now just slide it into the slot! You'll want to slide it in with the white rivets on the downward side (toward the floor and fan) because that leaves a very flat side upward which helps complete the seal above.
That's it! When it's dirty, hit it with the hose or just wash it in the sink then let it air dry.