You must be logged in to rate content!
14 minute read
OEM Heated Mirrors DIY mod
Compliments of Benson X @ www.tacomaworld.com
12-18-2011

This is a guide to install Toyota Sienna heated side mirrors and a Toyota Highlander switch. I wanted an almost 100% OEM solution for heated mirrors that was safe, relatively easy, and efficient. I will list all necessary parts and tools as well as prices and links below.
Note: This is the install I put together after much research on TW and helpful input from other members. Thanks to tsilliker, shawnd2, CtryBoyInMT, 84Hilux, bgreenley, and OldEric11 for the innovative ideas, answers, suggestions, and assistance.
The whole project took me about 9 hours, but it could probably be done in 5-6 hours if I were to do it again.
I am not going to waste my time posting pics and instructions on how to take your doors and dash apart. There are numerous posts, pics, videos on here for guides, like this one that explains how to take the door panels off. Here is another link from shawnd2 that is great step-by-step for removing the door panels and the mirror housing http://www.muthco.com/epapers/21001150.pdf (sorry there are no bikini-clad women, just some guy's man-hands)
This is a long thread with lots of detail and pictures. I do not in any way consider myself to be an electrical expert, and I accept no responsibility for any harm, damage, or injury that comes from anyone attempting this mod. If you have any suggestions or improvements, please feel free to leave civilized comments, or PM me.
PARTS NEEDED: Most of this stuff can be found at your local auto store and Toyota dealer. I like to support true local businesses, but you can save some money by ordering on line if you prefer.
*UPDATE* The 2012 Highlander Heated Mirror Glass works as a Direct Replacement for the '05-'13 Tacoma (thus eliminating the need to transfer/modify the plastic backplate if using the Sienna mirrors - thanks to File IFR for the info. ![]() )
)
*UPDATE* For the guys without "switch-blanks" near the steering wheel (TRD-OR models), SCROLL TO THE BOTTOM. Member @bgreenley did a great write-up on how to add an OEM switch under the HVAC control with a timer-relay, and super clean install instructions. THANKS BRANDON!!!
Toyota Highlander Mirror Left Part No. 87961-0E070 = $50
Toyota Highlander Mirror Right Part No. 87931-0E080 = $50
*(see above) Toyota Sienna Heated Mirror Left Part No. 87961-AE020 = $50
*(see above) Toyota Sienna Heated Mirror Right Part No. 87931-AE020 = $50
Toyota Highlander Mirror Switch Part No. 84871-48030 = $60
Toyota Amber Bulb (optional) Part No. 90011-01058 = $4
Toyota Highlander Mirror Switch plugPart No. 90980-10789 = $5
Toyota Terminal Leads (x5) Part No. 82998-12340 = $5/ea. ($30)
-OR- Sumitomo Terminal Plugs (x5) = $0.29/ea. (some extra charges, $7 shipped)
10 Amp ATM Fuse Tap = $7
 SPST or SPDT Relay = $3

14-16 gauge QuickSplices (x3) = $3
14-16 gauge butt connectors (x4) = $1 +/-
14-16 gauge 1/4" Ring Terminals (x3) = $1 +/-
.110" 16 gauge Female Spade Terminals (x4) = $1 +/-
.187" 16-22 gauge Male/Female Terminals (x2) = $1 +/-
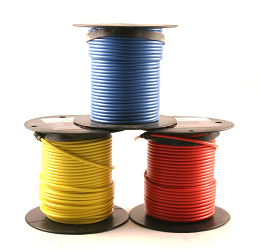
30' 16 AWG Primary Wire (various colors) = $6
HeatShrink Tubing (various sizes) = $4
TOTAL $204 (give or take a few bucks)
TOOLS NEEDED:
Wire Cutters
Wire Crimpers
Wire Strippers
Needle Nose Pliers
Large Philips head screwdriver
Various Flathead screwdrivers (from Micro to Large)
Soldering Iron (optional)
Panel Removal Tool (wrapped in electrical tape)
Various Zipties
Electrical Tape
Corrugated Conduit/Loom (optional)
Coathanger or Wirepuller
Scissors and/or Utility Knife
Torx Bit driver or Wrench
Dremel type hand-tool
Vise-Grips
10mm Socket
LIGHT!!!
APPROX. WIRE LENGTHS
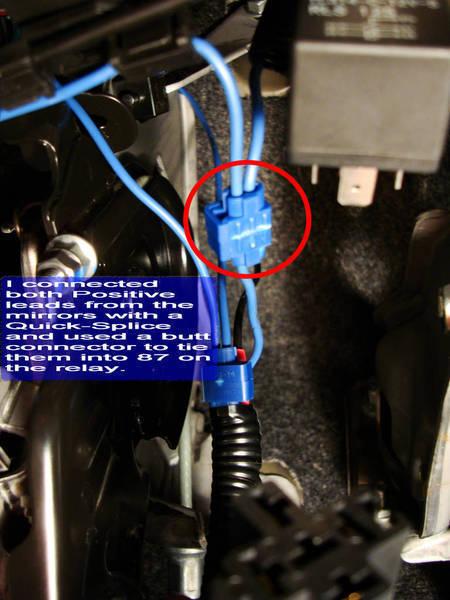
Driver's +12v Mirror Lead (.110" Female spade to Quick-Splice to Relay 87) = 60"
Passenger +12v Mirror Lead (.110" Female spade to Quick-Splice) = 140"
Mirror Ground Leads x2 (.110" Female spade to 1/4" ring terminal) = 30"/each
Fuse-Tap (Quick-Splice from Switch #5 Lead to Fuse-Taps butt connector) = 8"
(5) Switch +12v Lead (Sumitomo to butt connector to Relay 30) = 24"
(4) Switch (Sumitomo to butt connector to Relay 85) = 24"
(3) Switch Ground (Sumitomo to 1/4" ring terminal) = 13"
(2) Switch (Sumitomo to .187" female spade) = 5"
(1) Switch (Sumitomo to .187" female spade) = 5"
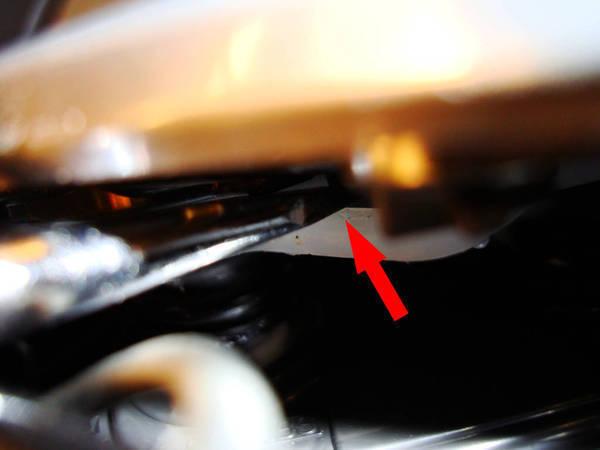
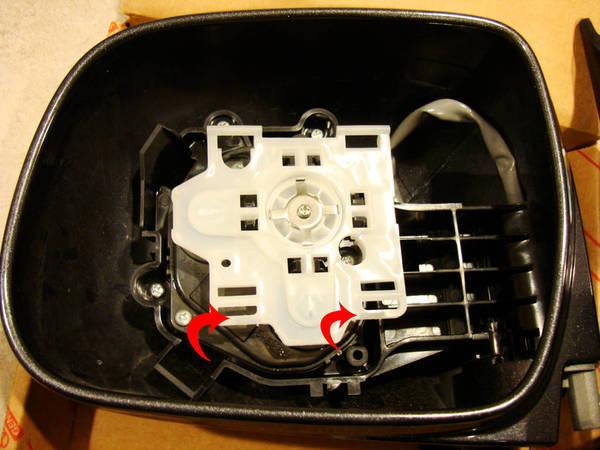
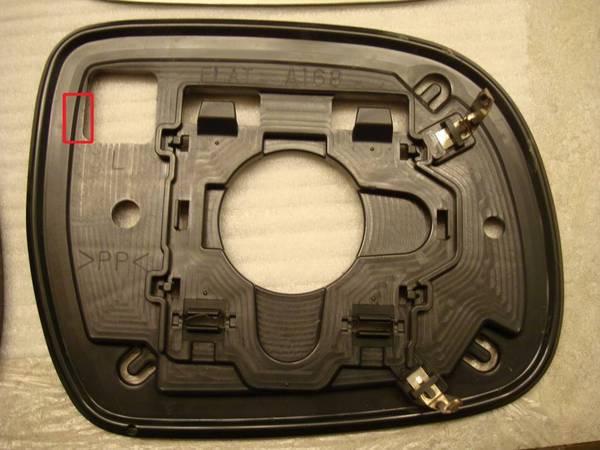
STEP 1: Unplug the battery then Remove Mirror Glass
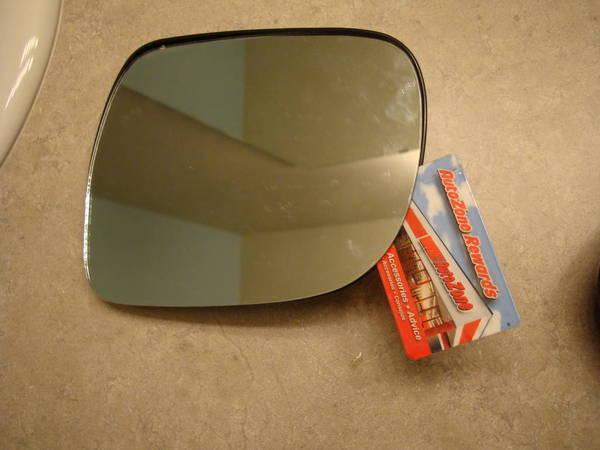
Gently press on the top of your mirror glass to create a gap on the bottom. You can slide a flat-head in the gap and into the small recessed areas of the white mount plate. "Pop" the glass out from the mount plate and pull down and out to remove.
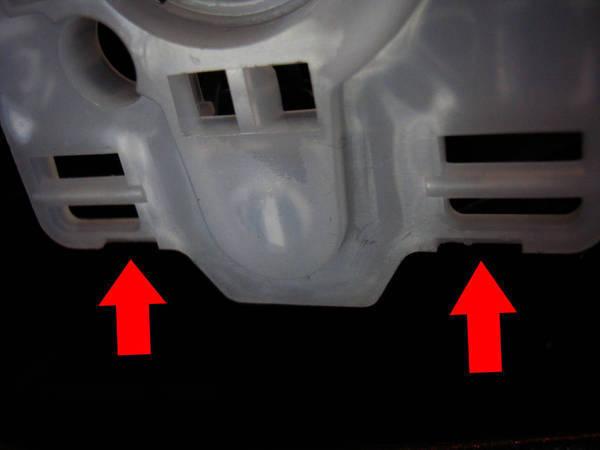
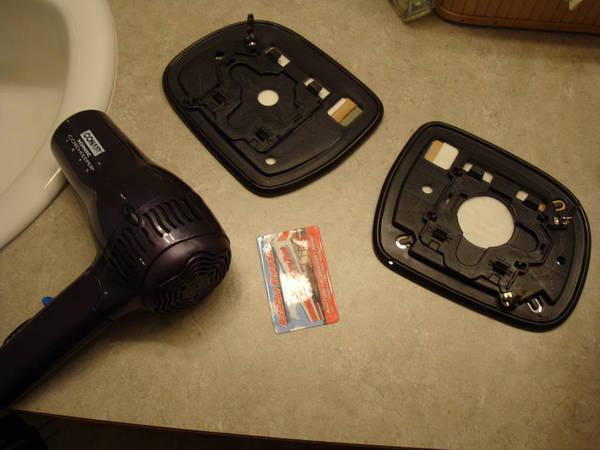
STEP 2: Remove the Backplates from all mirrors (2x Tacoma, 2x Sienna)
*UPDATE* The 2012 Highlander Heated Mirror Glass works as a Direct-Replacement for the Tacoma (thus eliminating the need to transfer/modify the plastic backplate if using the Sienna mirrors - thanks to @File IFR for the info. ![]()
Toyota Highlander Mirror Left Part No. 87961-0E070 = $50
Toyota Highlander Mirror Right Part No. 87931-0E080 = $50
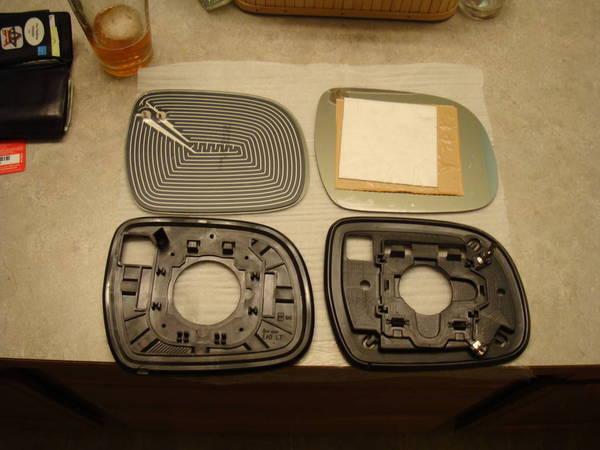
I recommend heating the black plastic with a hairdryer to make it more pliable. Then use an expendable credit card to separate the glass from the backplate. The Tacoma glass has a foam pad behind it that is slightly adhesive. The Sienna glass has a "sticky-tack" type of putty in various areas behind it.
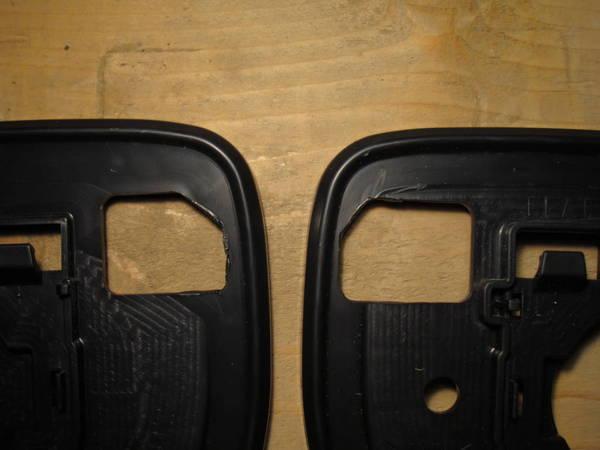
SIENNA MIRROR ON THE LEFT---------------------------TACOMA MIRROR ON THE RIGHT
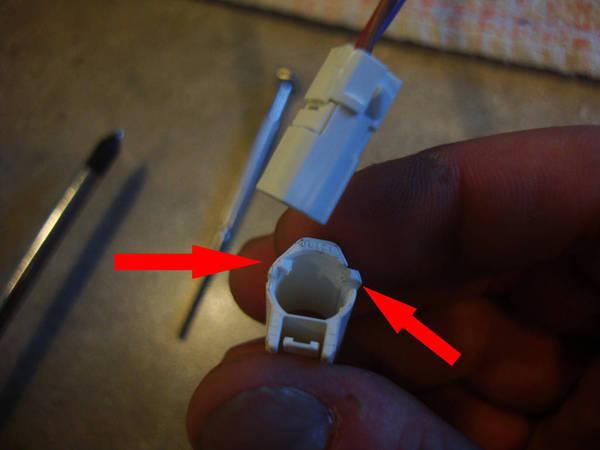
STEP 3: WIDEN THE HOLE!!!
The hole on the Tacoma backplate is too small to accommodate the terminal leads on the Sienna mirror and will need to be widened with a Dremel or file.

When putting the Sienna mirrors in the Tacoma backplate, I left the white putty on the Passenger Side to give it a more convex view. I didn't need any foam or putty on the driver's side, but you can add some at your discretion.
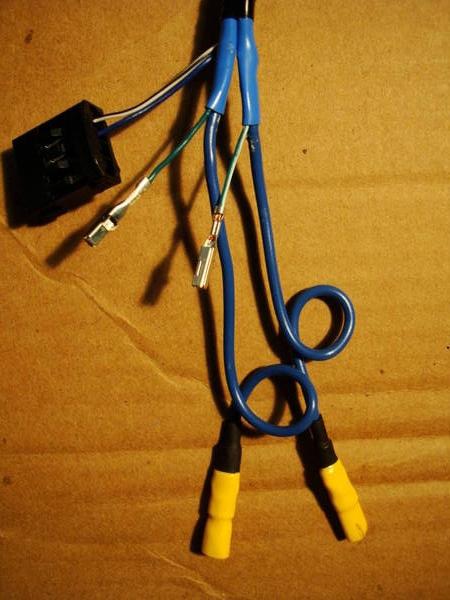
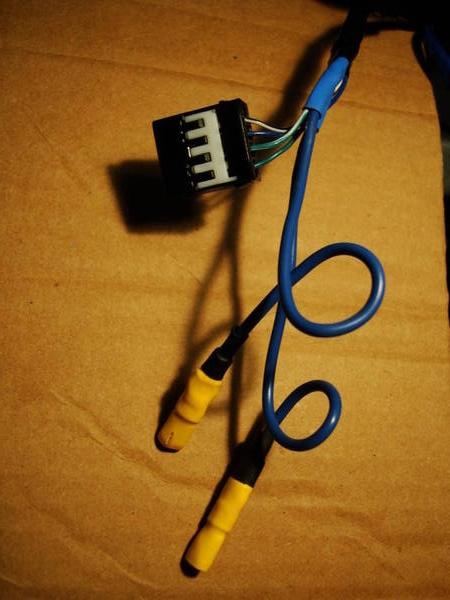
STEP 4: ASSEMBLE YOUR CIRCUIT
I followed these directions from @CtryBoyInMT and they worked fine. He updated his diagram to explain in more detail the correct relay setup. Thanks for the clarification! ![]()

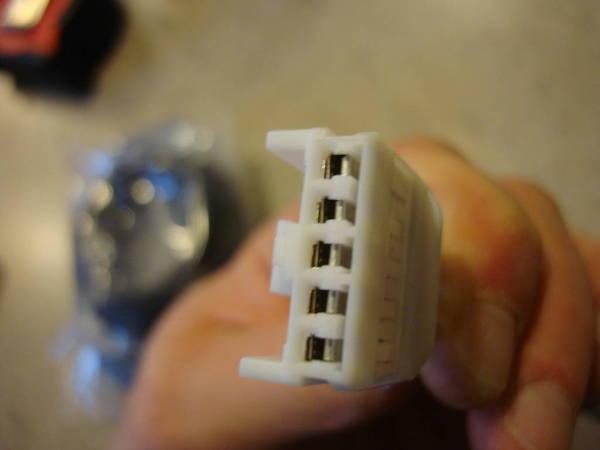
The Sumitomo Terminals fit perfectly. The 16ga. wire was very snug, and I would not recommend going any bigger than that.
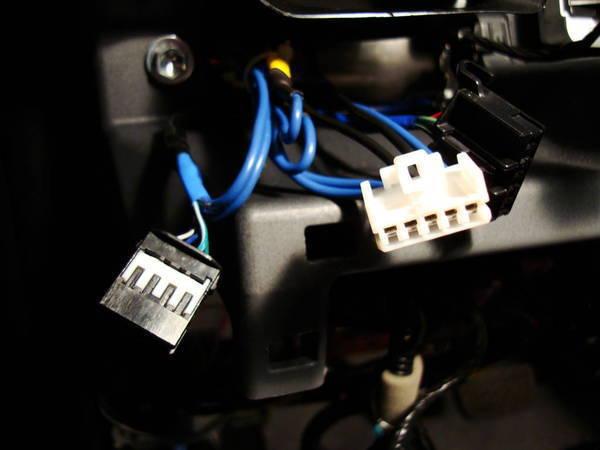
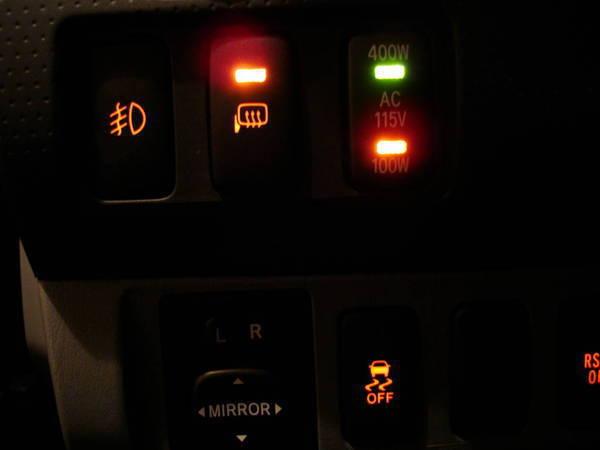
I had to splice into the Illumination Dimmer wires from the Fog Light switch in order to connect the #1 & #2 Switch Plugs. I followed the wire layout on the Fog Light switch and used SOLID GREEN for Plug #1, and GREEN w/WHITE for Plug #2.
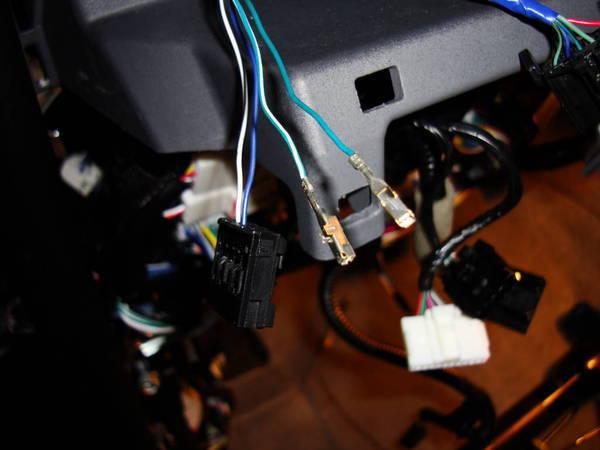
I soldered the splices and used .187" Male/Female quick-connect terminals and heat shrinked everything.
STEP 5: RUN THE MIRROR LEADS
Disassemble the door panels, kick panels, dash, and glove box, and unplug all necessary connectors. Remove the speaker from each door. Unplug the mirror plugs.
There are numerous posts, pics, videos on here to refer to for this. This one explains how to take the door panels off. Here is another link from @shawnd2 that is great step-by-step for removing the door panels and the mirror housing http://www.muthco.com/epapers/21001150.pdf (sorry there are no bikini-clad women, just some guy's man-hands)
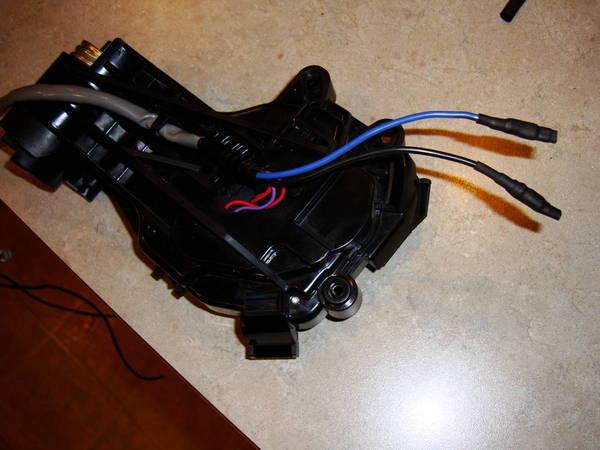
Remove the mirror assembly from each door and disassemble.
The plug-cover will need to be removed in order to fit it through the openings.
Take note the orientation of the plastic protective sheath around the wires. it will be easier to re-assemble the mirror housing if it's not all kinked up. I chose to run the wires inside the plastic shielded sheath with the rest of the wires, but most people will probably just run them along the sheath.
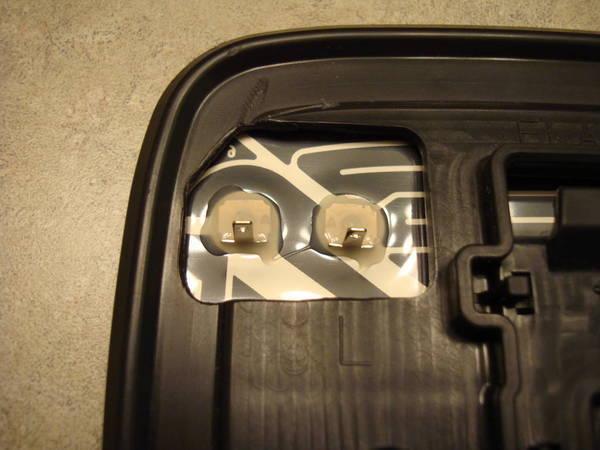
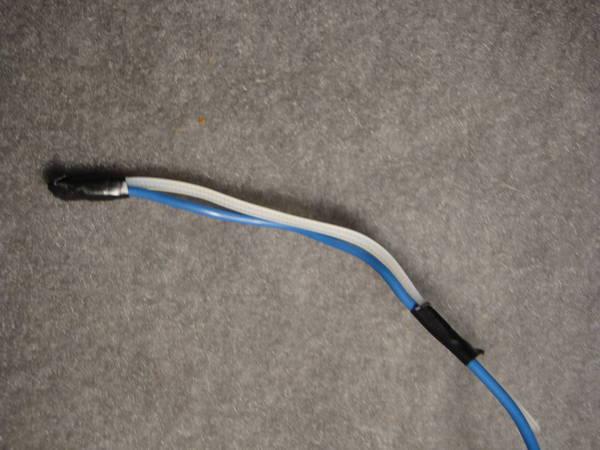
I used .110" Female Spade terminals to plug connect to the Sienna mirror tab terminals. I fed both leads through the shield, and heat shrinked the sh*t out of them since they will be the most exposed component.
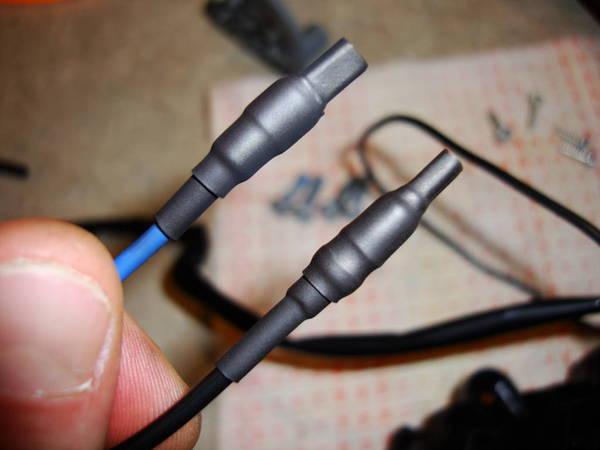
After weaseling the leads through the mirror assembly, and putting it back together, make sure you have at least 7 1/2" hanging out for mirror plug in the door (don't forget to slip the clip back on the plug either).
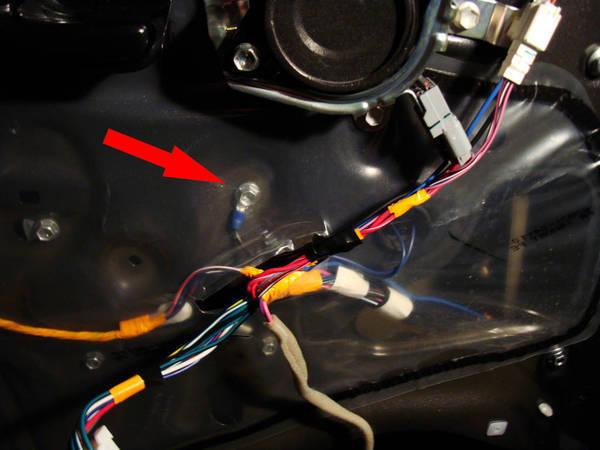
I crimped a 1/4" Ring Terminal on each 30" mirror Ground lead. I then grounded each mirror to this bolt inside the door.
Next, feed the +12v mirror lead through the door and into the cab. After about 15 minutes of struggling with a taped-up hangar, I found it was much easier to "unplug" both sides of the boot. I taped some extra length of Zip-Tie to my wire, fed it through, and plugged the boot back in....easy
Note: For the passenger side, I wrapped the lead in 3/8" black plastic conduit, and ran it along the silver frame tube behind the dash, and used some Zip-Ties along the way.
STEP 6: INSTALL YOUR CIRCUIT
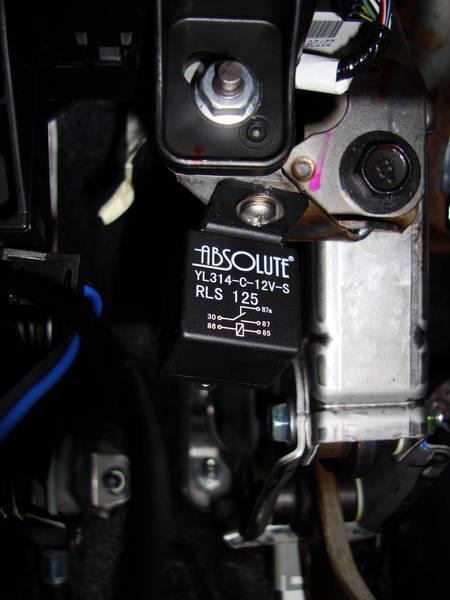
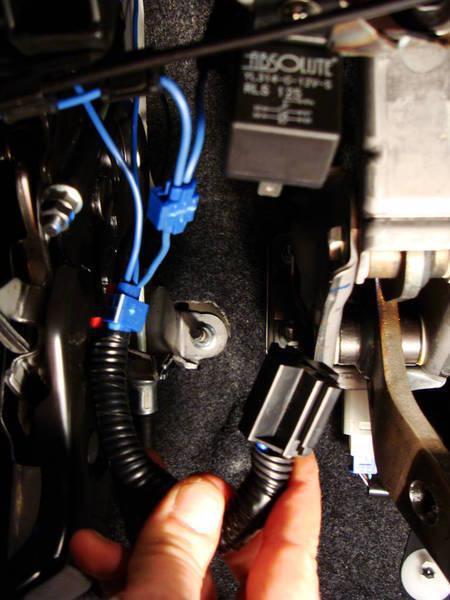
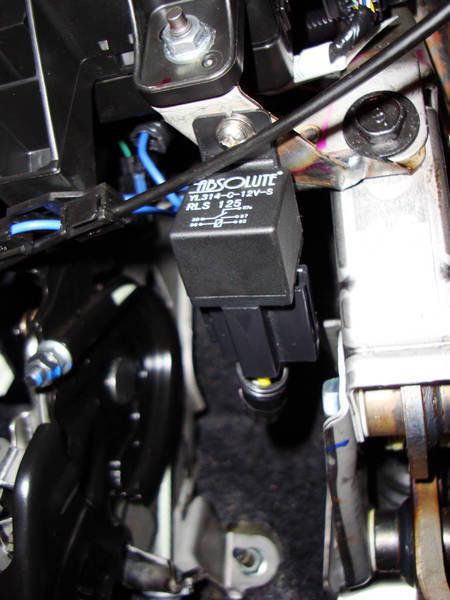
I mounted my relay here (there's an open hole on a metal mount up and to the left of the brake pedal). I had an 5-Pin SPDT Relay, so I disconnected terminal 87a (RED) since it was not needed, and used 87 (YELLOW) only.
I borrowed one of the plastic retainers from the hood release cable, and put my driver's side +12v lead in it.
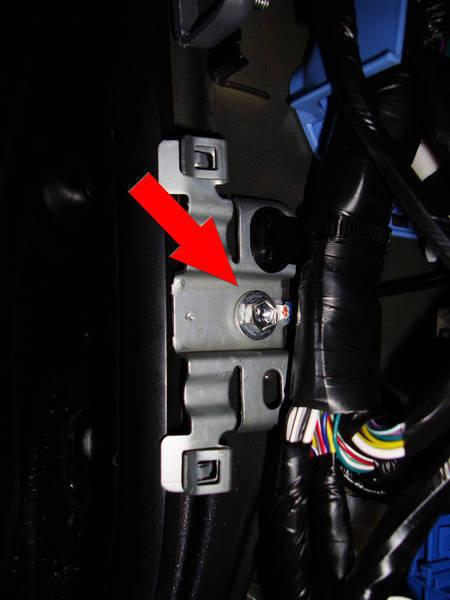
Here is where I mounted the Ground for the Switch (#3 Plug)
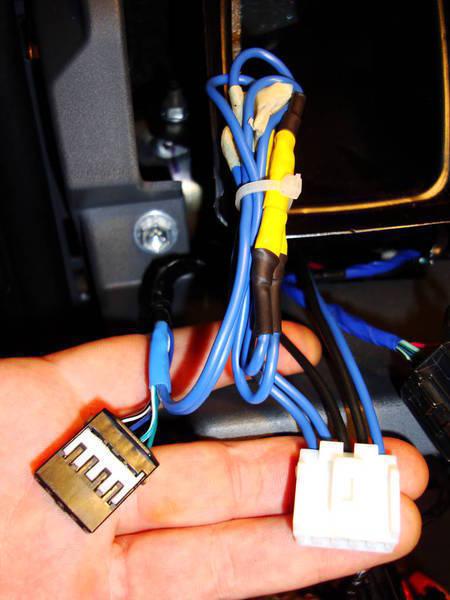
The Switch is ready to be plugged in
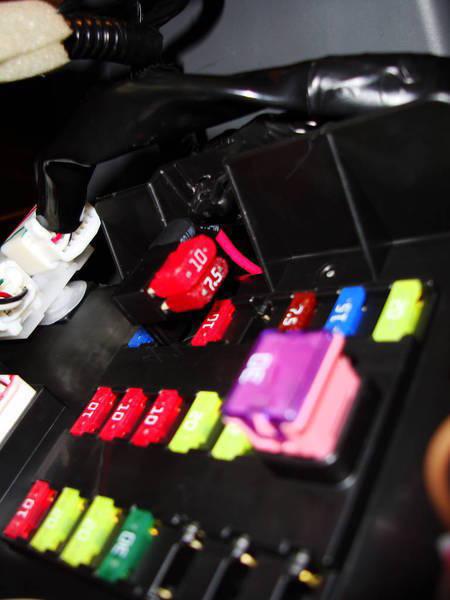
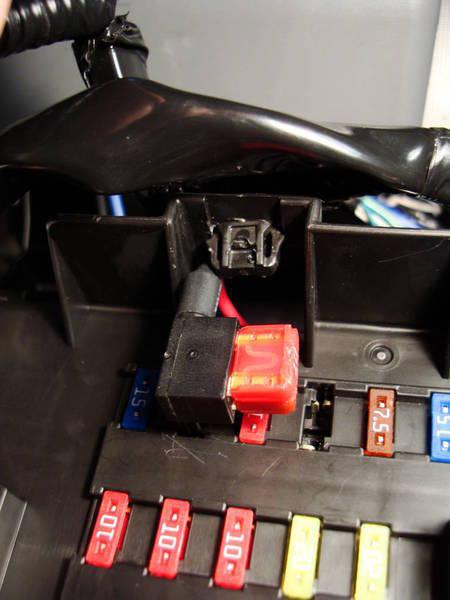
Here is the Fuse Tap. I tapped into the "Gauges" fuse and had to make sure I had room, since the orientation of the Fuse Tap is important. I added a 10A fuse (might be overkill), and had to install a 7.5A fuse for the "Gauges" Circuit. This is an ignition controlled circuit, and my heated mirrors will only work when the ignition is turned ON. The switch itself has a 15 minute timer, so it will turn off after 15 minutes, or if you press the button again or turn the ignition off. BE AWARE - The standard fuses are Low-Profile ATM fuses, whereas the Fuse Tap takes standard ATM fuses. (the diagrams I had on here were deleted, sorry)
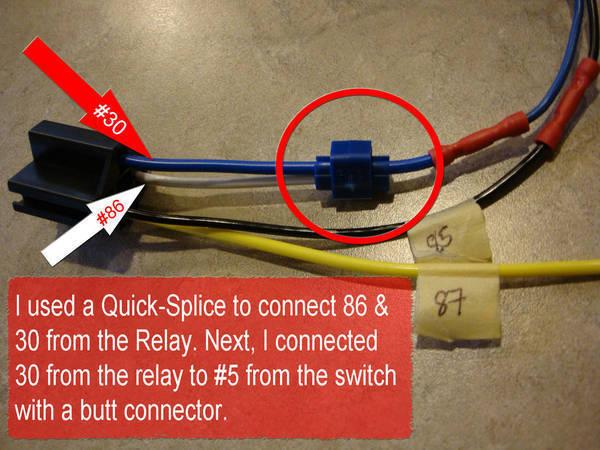
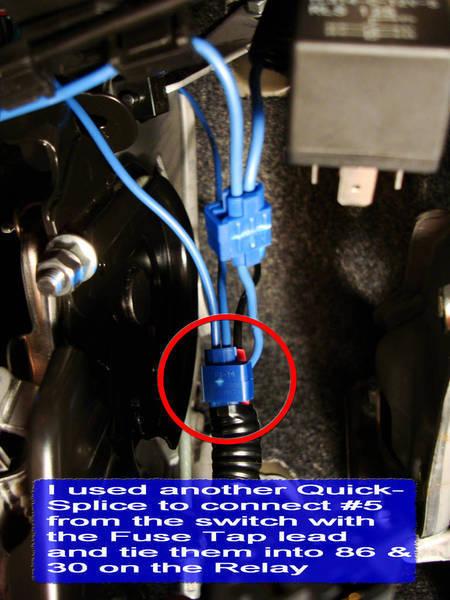
I connected an 8" Lead from the Fuse-Tap butt connector to the Quick-Splice from the #5 Switch Lead (which also ties into Relay 86 & 30).
Give all wires a good once over. Tape, Zip-Tie, use conduit as much as desired, make sure everything looks safe and secure. Plug everything in, re-assemble the dash, instrument panel, doors, kick panels etc. Re-Connect your battery, turn on the ignition.
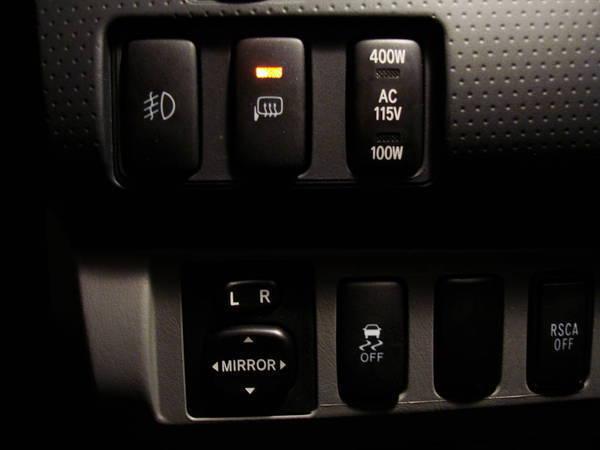
CRACK OPEN A COLD ONE AND ENJOY YOUR TOASTY MIRRORS!!!!
>>>*UPDATE* FOR THE THOSE WITH TRD-OR TACOS (with no switch blanks) <<<
@bgreenley (Brandon) contacted me regarding my inquiry to find a solution for TRD OR trucks that don't have switch blank by the steering wheel. We went back and forth bouncing ideas off each-other, trying to piece together a method that would work. He put together this awesome write-up as a supplemental addition to the OEM Heated Mirror Mod! Original Thread located HERE (http://www.tacomaworld.com/forum/2n...em-heated-mirror-option-off-road-package.html)
Mad props to @bgreenley for putting this together, and making it work. Make sure to give him some rep, and welcome him as a new TW Member!!! ![]()

Good one ?
Posted by Diggymart on 5/25/20 @ 7:54:50 PM