You must be logged in to rate content!
8 minute read
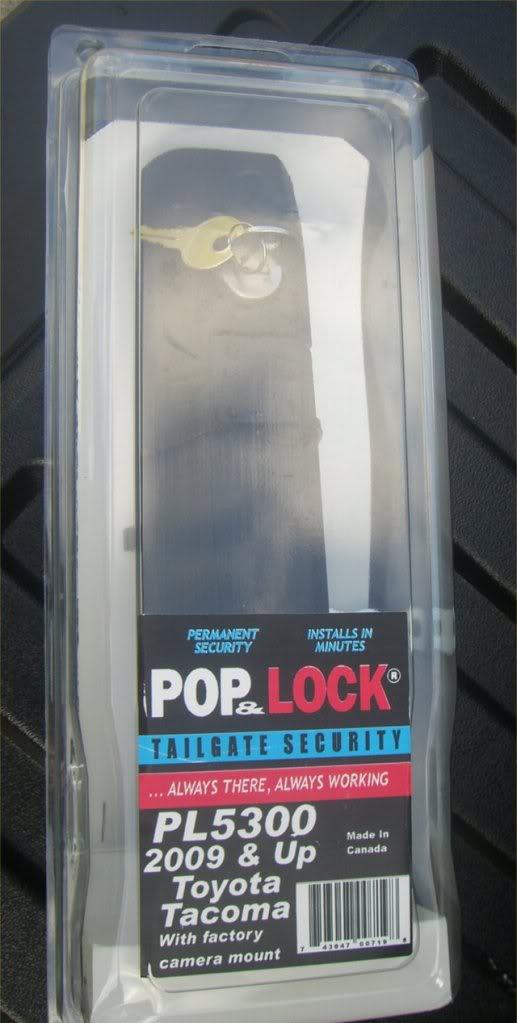
Poplock (PL5300) 2009 Tacoma with Cam -Install Tutorial
Compliments of Tacoma-09 @ www.tacomaworld.com
10-23-2009
Hi all,
After waiting many many months for Pop & Lock to develop and release the PL5300 for my 2009 Tacoma with backup Cam It finally arrived at my front door thanks to the group buy here at Tacomaworld.
Tools Needed for installation.
Small flat screwdriver
Box cutter
10 mm Socket set
Time take to install
Took me around 30 mins - Considering that I was taking pictures and really just taking my time this really should not take longer than 15 to 20 mins to install. There are one or two tricky steps but honestly this is a basic install.
Here is the PL5300 still in the packaging.
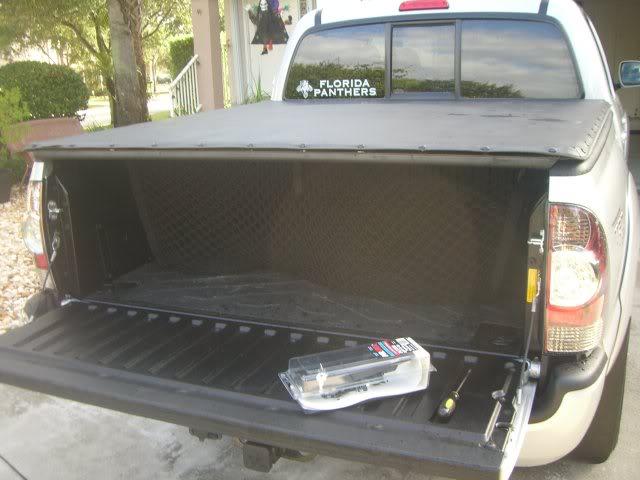
Even though it is late October sunny weather in Florida time to get cracking with the installation
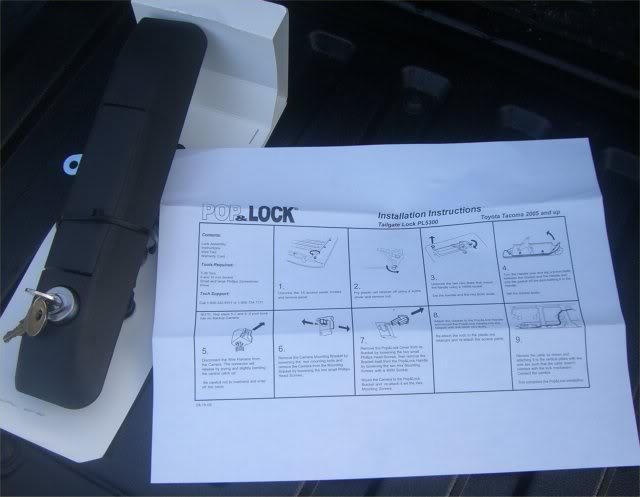
The instructions for the PL5300 come inside the package, although I found them useful there was two things they never told me.
1: How to detach the camera from it's harness and
2: A easy way of rerouting the cable (I will explain later on it is fairly straight forward.) This has to be done as the cam is now on the left hand side of the pop lock the factory fitted opener has the cam on the right hand side.
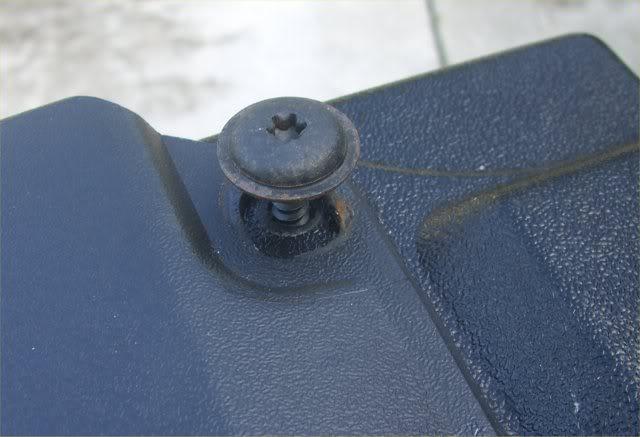
First things first - lower your tailgate and remove the 15 screws highlightd in the following picture.
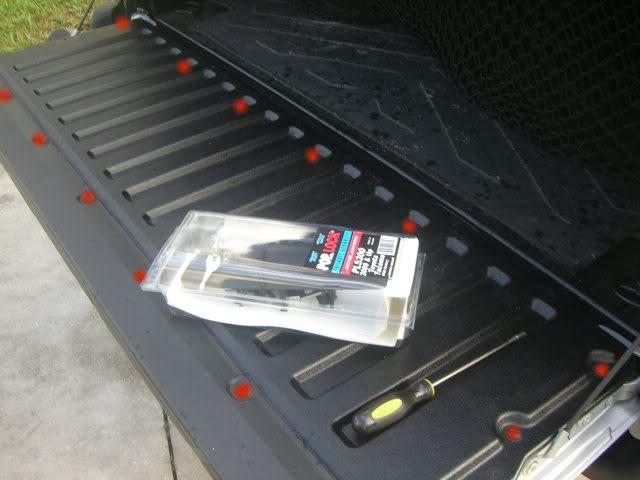
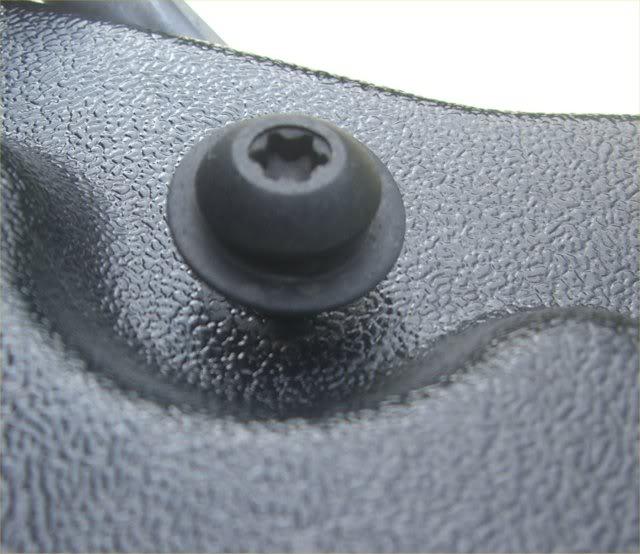
There are two sizes of screws to remove from the tail gate
These are the large ones (at the top of the tail gate)
I did not have the special type of screw driver to remove them so I used a flat screw driver of the same diameter and was able to unscrew them no problem.
These are the small ones. In total remove 15 of them
Once you get all the screws undone simply pop off the tail gate lining. The top stays on as pictured here
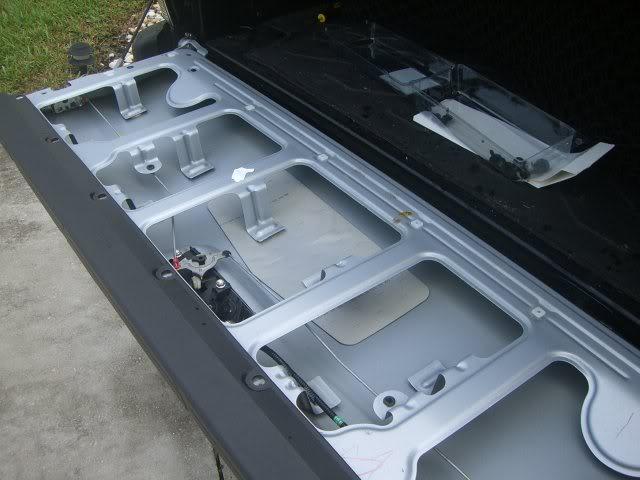
This is what the factory fit looks like. See the Red and black rod holders there is a trick to removing them without snapping them I will show you in the next picture.
The best way to remove these rod holders is as follows
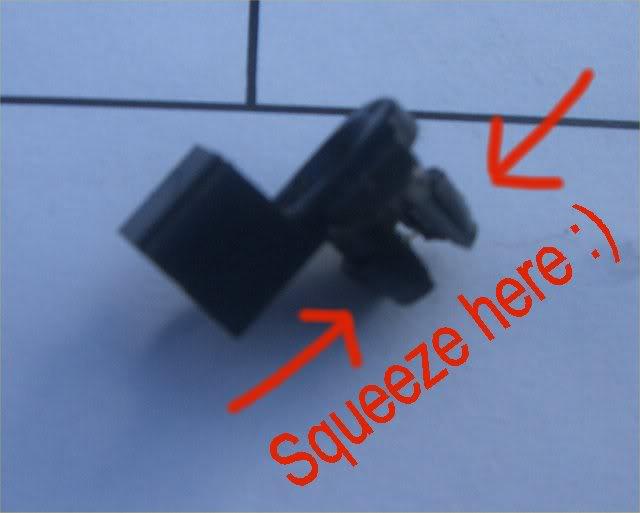
Number 3 points to a GAP in the rod holder the rod is marked 1 - slip the rod out of the GAP marked three. Once you have the rod out of the rod holder, leave the rod holders in place. You will be able to remove them once you have the factory handle removed by simply squeezing them from the bottom. If you try to force them out while the handle is still installed you will break them.

Here is a close up of the rod holder once I had mine removed.
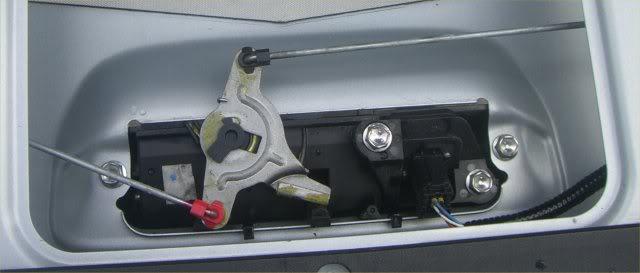
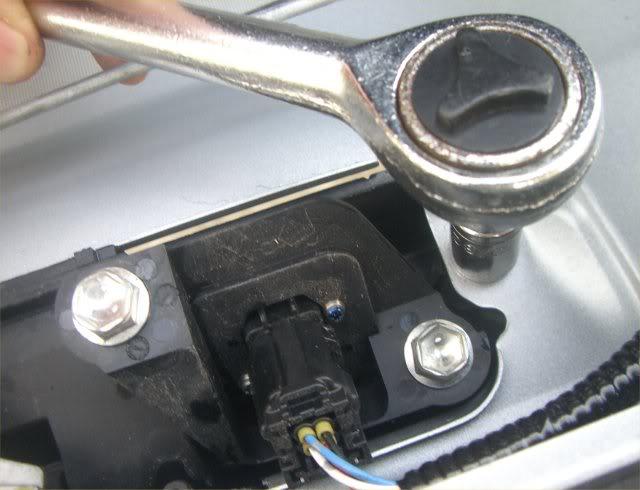
Next up is to remove the factory handle.
Use a 10mm socket and undo both bolts. Pretty straight forward here.
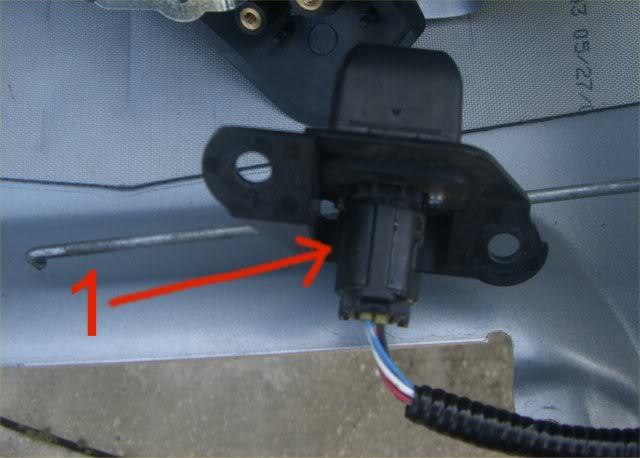
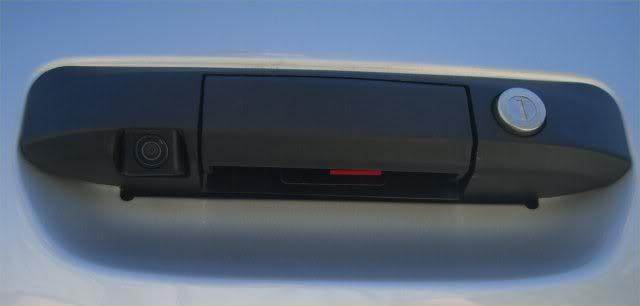
I found it was real easy to remove the cam once I had removed the factory handle off the Tacoma.
Simply squeeze the tab pointed out here as #1 once you squeeze the tab you can unplug the cam harness quite easily.
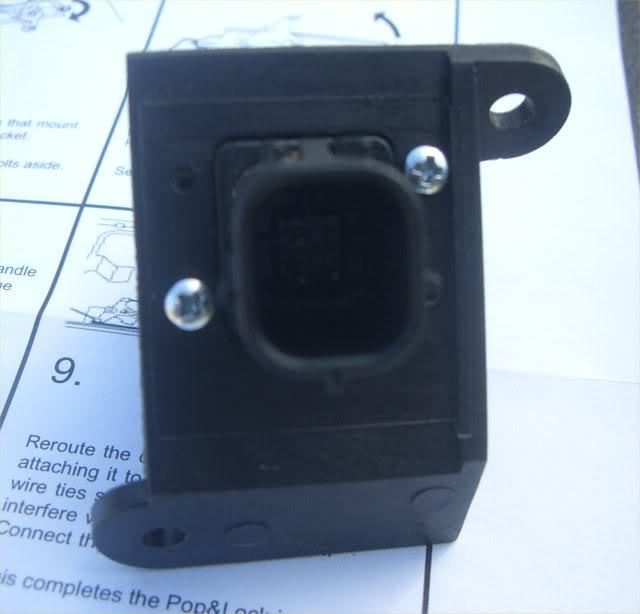
The next thing was to get the cam mounted into the PL5300.
Simply undo the two small screws from the PL5300 and the blank cover comes off. Once you have done this your PL5300 will look like this.

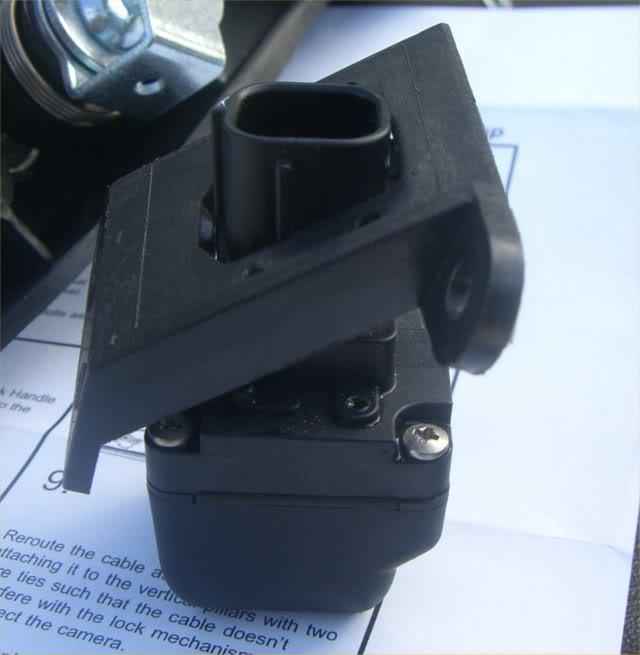
Fitting the cam into the PL5300
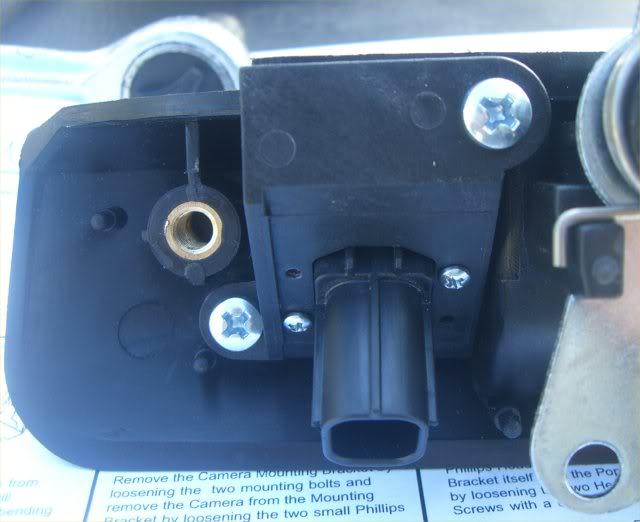
this was a little tricky. The cam will only go into the 5300 one way! - do not try and force it any other way. There are two small screws (supplied by Pop & lock) that screw the cam into place as well as the screws there are two plastic inserts that match up with two holes once you have the two screws and the inserts matched up simply screw it down before actually fitting the cam into the PL5300
Prior to screwing the cam in
Once the cam has been screwed into the PL5300 Holder it will look like this
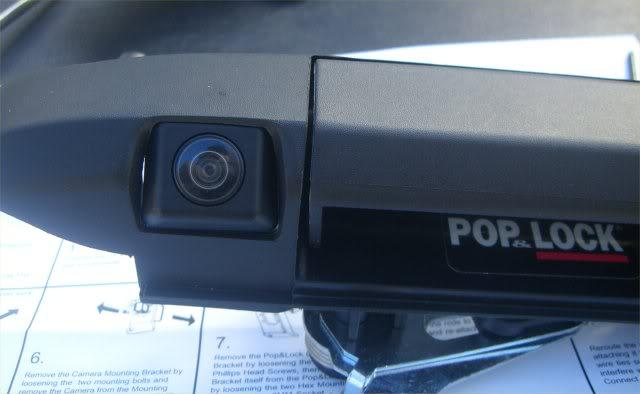
Now you are able to fit the cam into the PL5300 it sits nice and snug into the cam hole as follows.
Here is another view of the cam in the PL5300
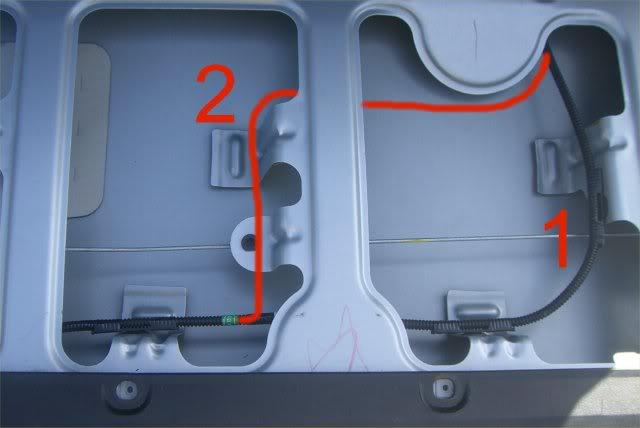
Routing the cam harness cable
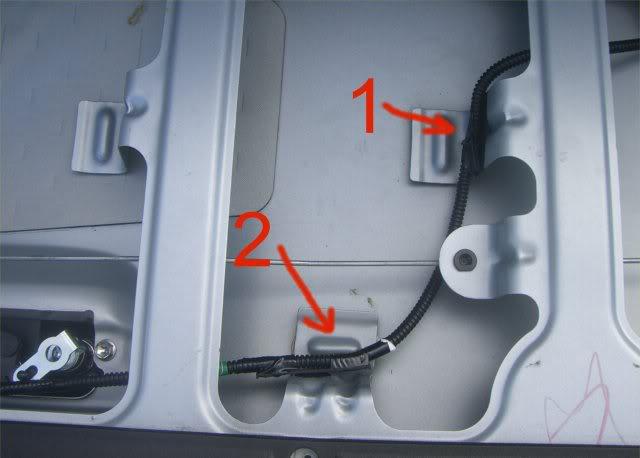
Here is a before and after shot. The cable as you can see in black is where it is run by the factory, highlighted in orange is how to run the cable in order to facilitate the cam on the other side of the handle.
Once I re routed the cable I used insulation tape to hold it down right at #2 on the picture
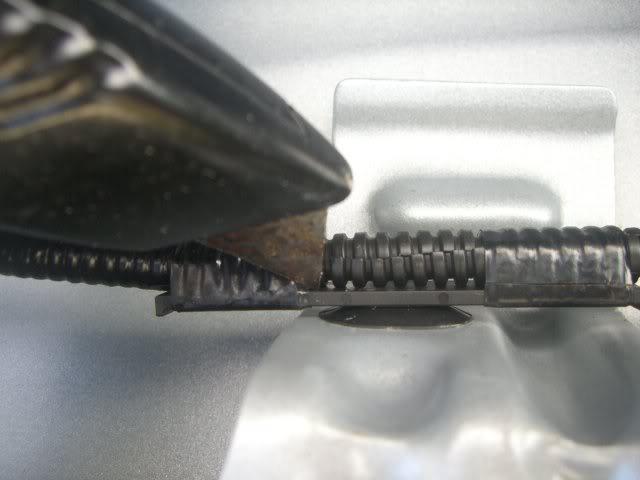
I found the best way to dislodge the cable from the holders is to use a box cutter and slice away the factory tape as shown here.
Once I re routed the cable I used insulation tape to hold it back in place
again.
Pictured here is where I used insulation tape to hold the re routed cable in place (#1 and #2)
Thats it. Once I rerouted the cable I screwed in the PL5300 using the original factory bolts and the 10mm socket.
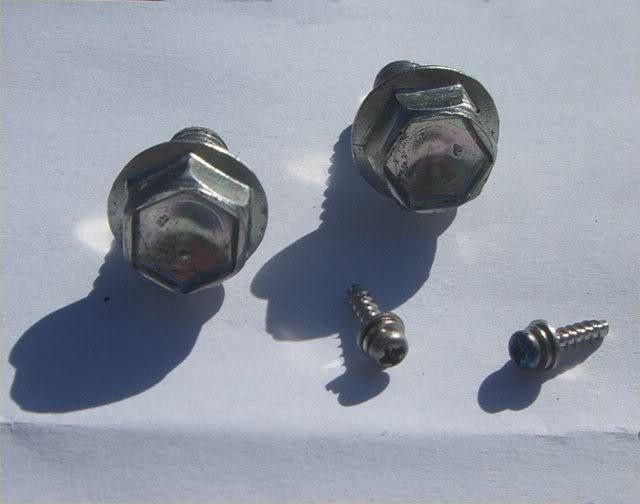
If all goes to plan you should be left over with the following "spare" bolts and screws.
Any more and..... you must have left something out ![]()
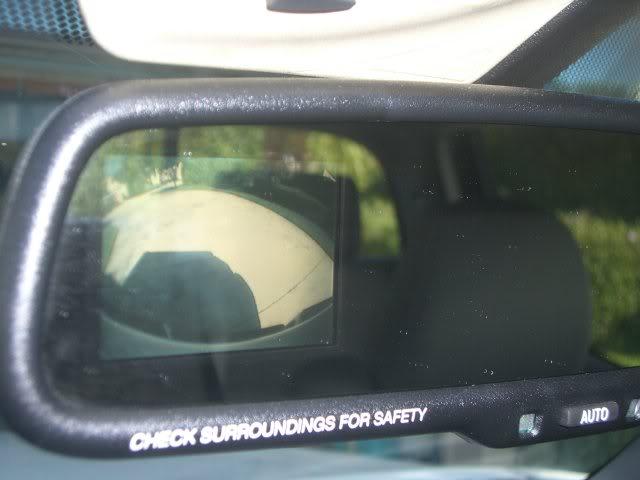
The last thing left to do was to test to make sure that the cam was still working.....
Thats it. Total time for install was around 30 mins. I certainly hope that this little install tutorial helps someone.