You must be logged in to rate content!
5 minute read
04.5 T5 center console removal write up (Pic Intensive)
Compliments of bloodrain46290 @ swedespeed.com
3-21-2011
I was looking through the What did you do to your car today thread and it inspired me to take apart my center console and make a write up out of it for you guys. I know I haven't posted much on here, but I read through most of the threads.
Task Condition:
Car off
Keys removed
Tools:
T20 Torx Screwdriver
Flat Tip Screwdriver
Time:
15-30 Min to take it out
10-20 Min to put it back in
First thing you need to do is pull off the panel behind the waterfall console. Its as simple as getting your fingers under a corner and pulling gently and the hidden clips will pop out of their brackets.
After you pull out that panel, disconnect the green wire connection from the back of the waterfall console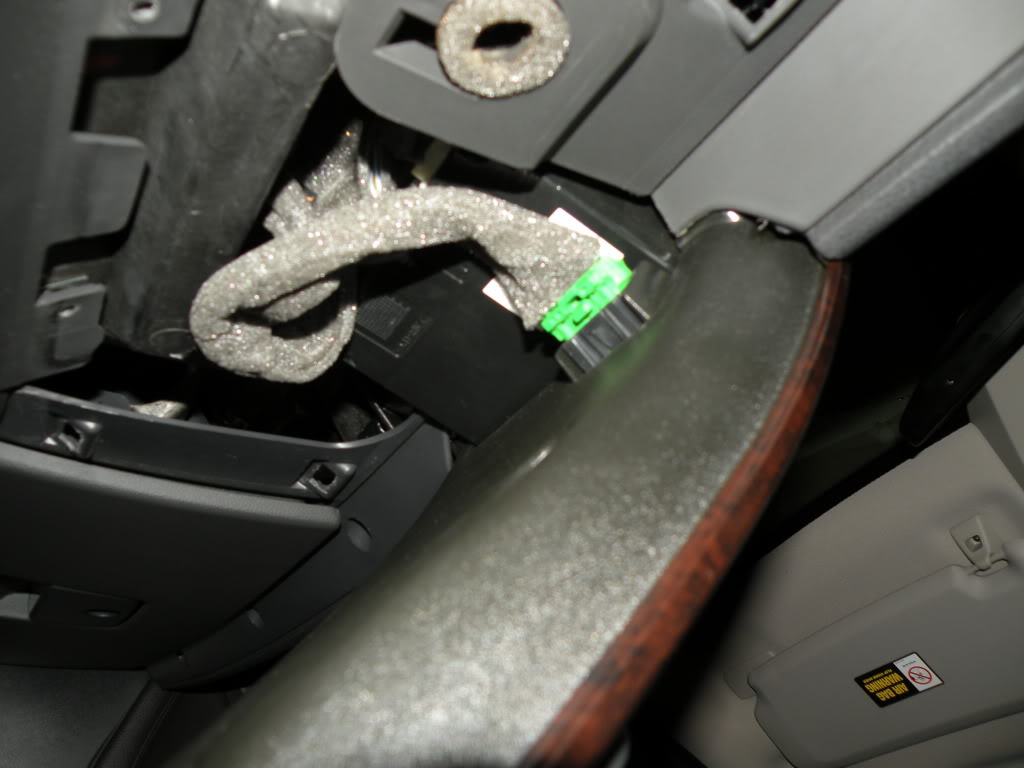
Next will be removing you 12V/STC button panel. Either your hands on on edge and gently pull up, or use your flat tip to pry up on one edge and then the other. Once that is up you will have 2 connections under there, a whiter connection for your 12v adapter that slides right off and a green connection for your STC button. Here you will see 2 T20 screws the left one is high and the right one is low. Remove them.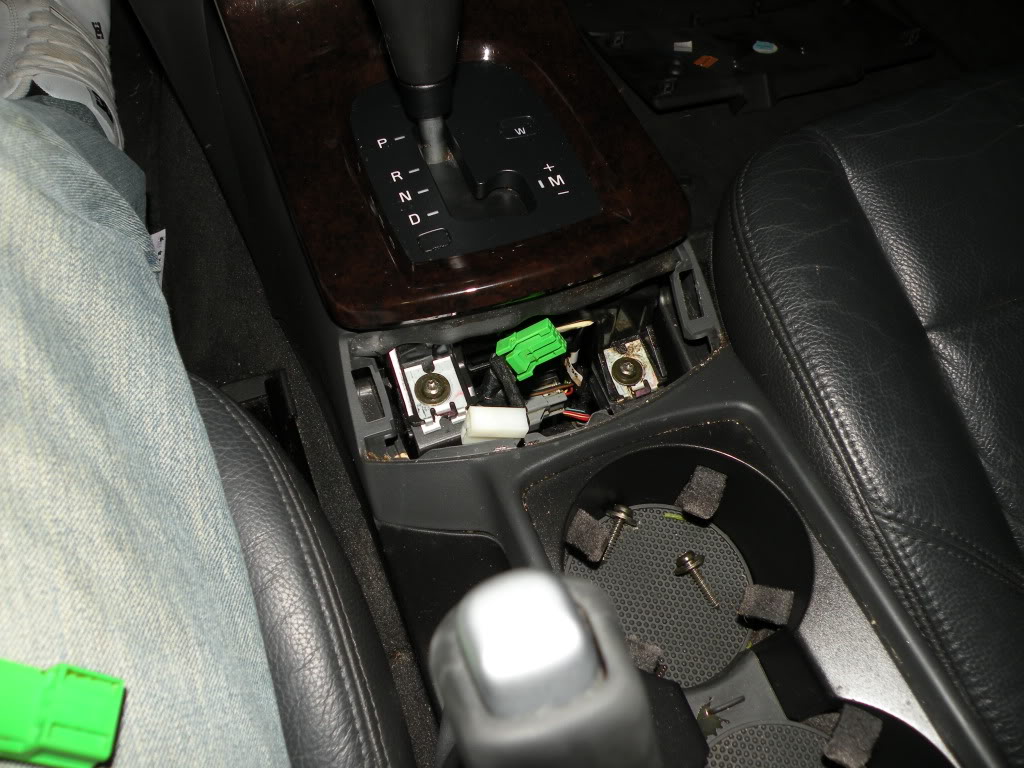
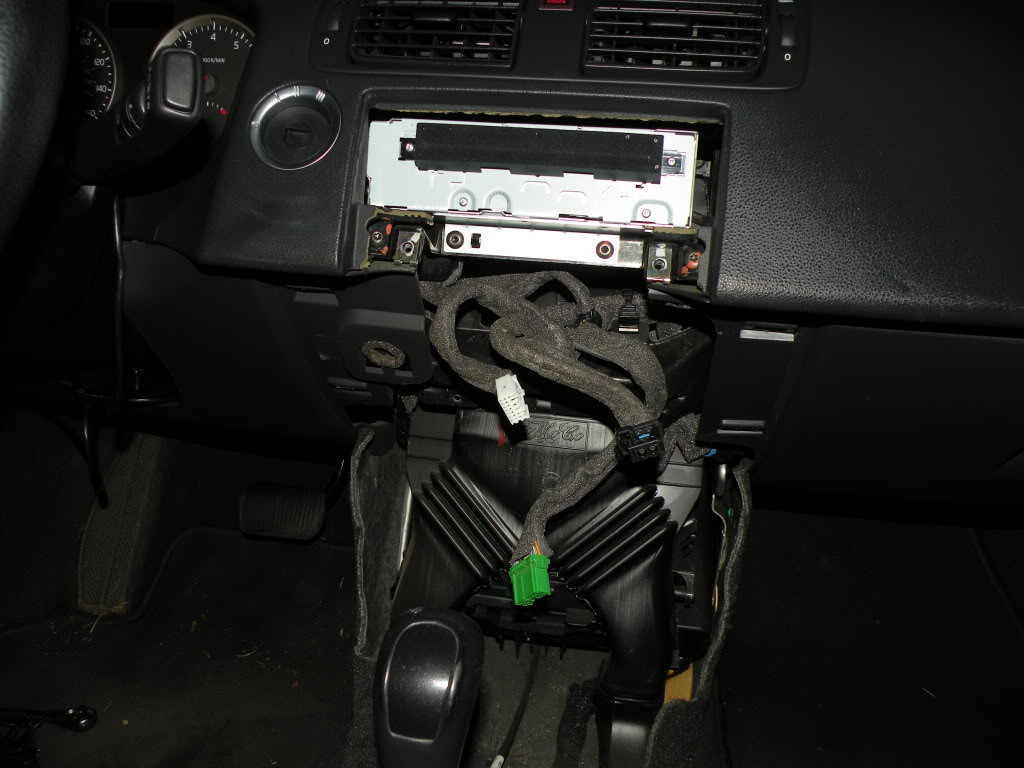
The plastic piece that goes around the stereo screen will come off next. Take your flat tip and gently ease it under the upper left corner and gently pry outward then repeat on the right side. the piece should just lift right out now.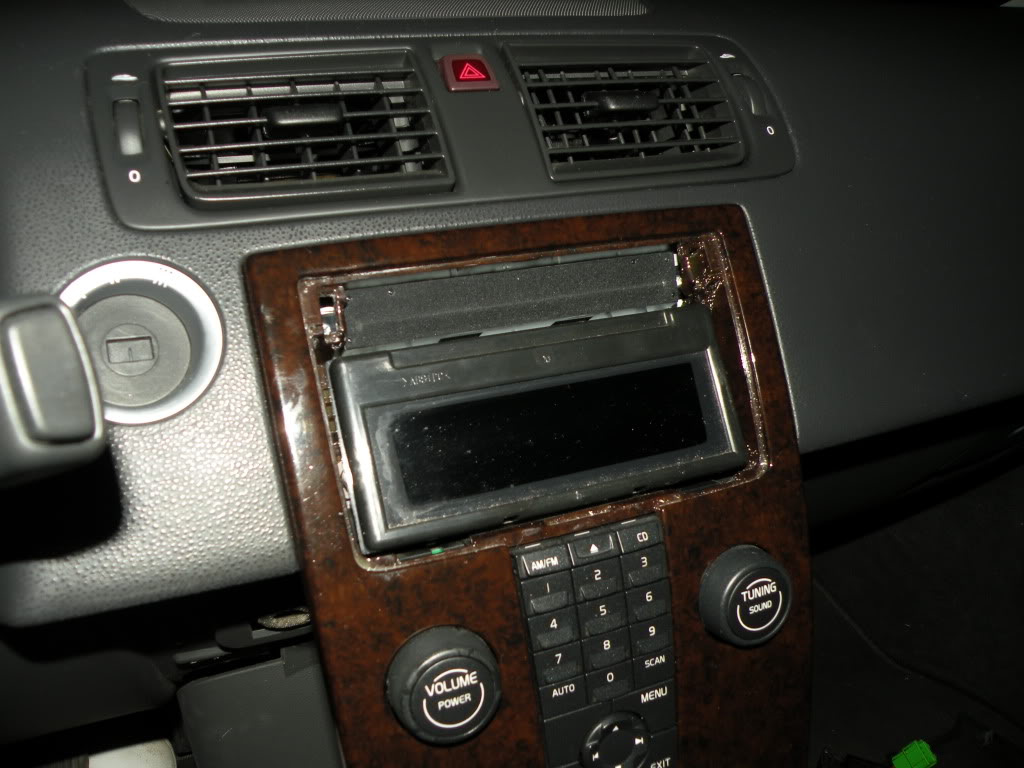
Gently pull the screen forward until you can access the black and white plugs on the back of the screen. Disconnect them. After removing the screen, on both sides there will be T20 screws. Remove them both.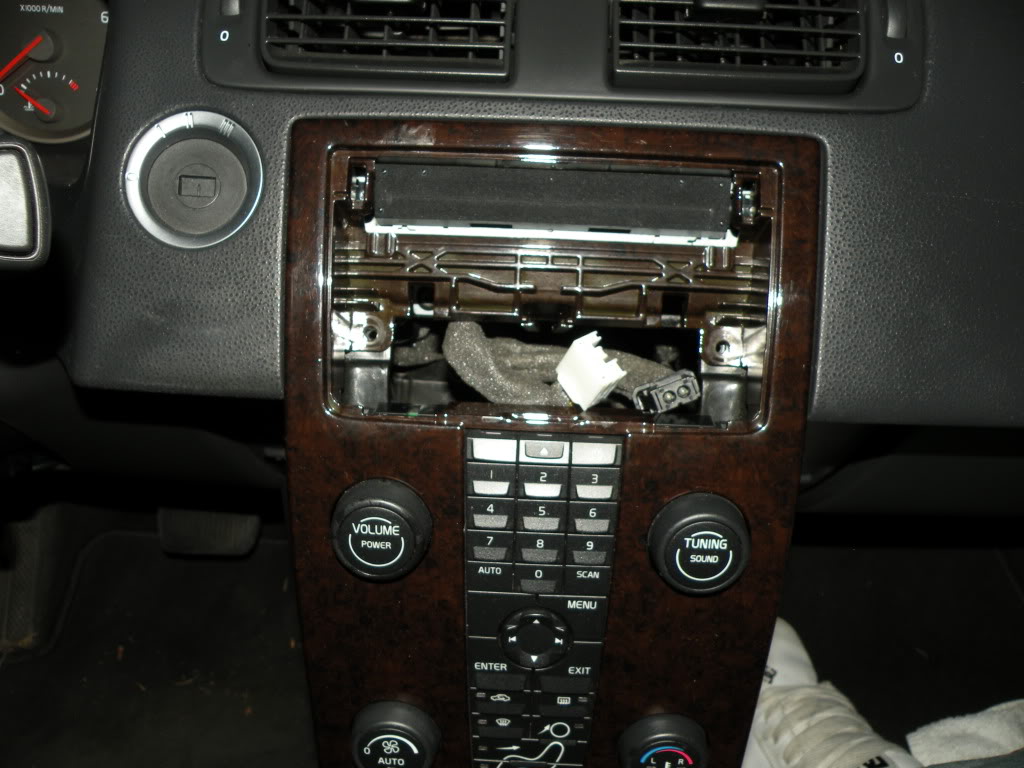
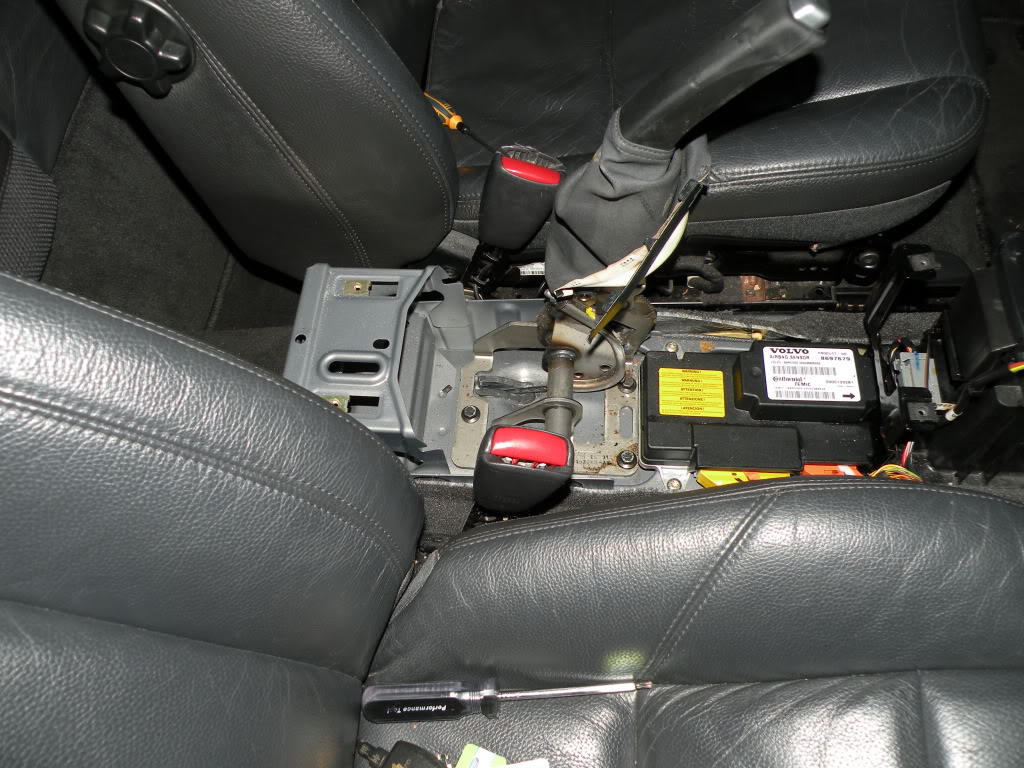
Remove the waterfall console by gently lifting it from where it sits.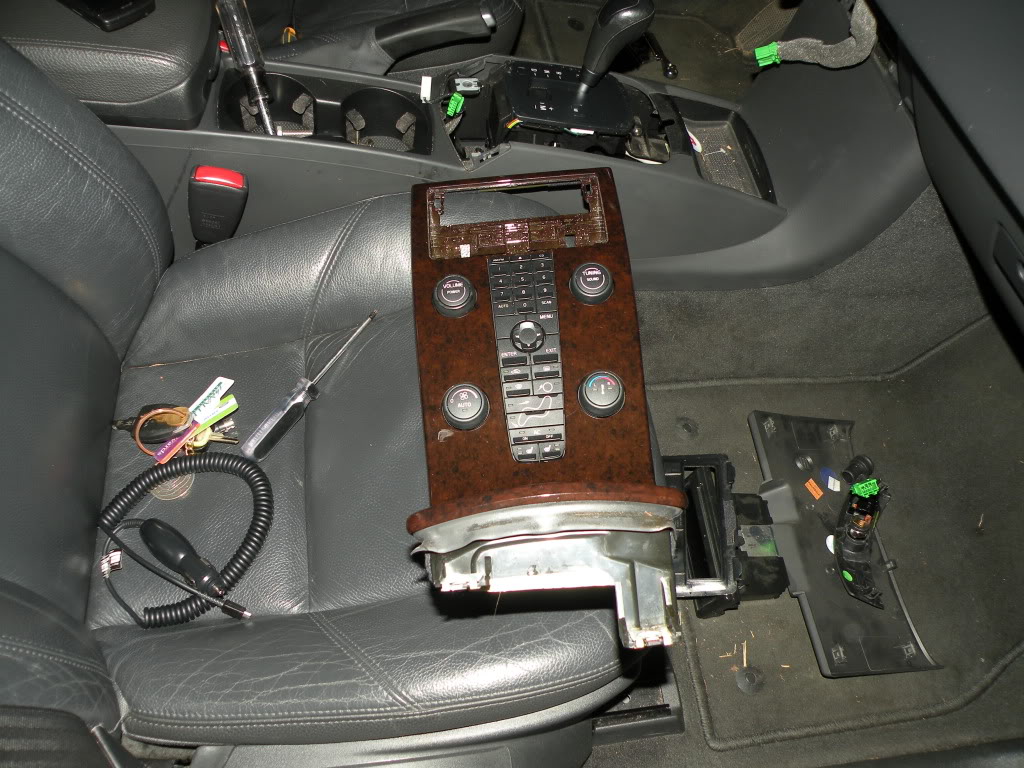
Next step is to remove the center console. I pulled off my parking brake boot. You at least have to disconnect one side of the boot to get it off.
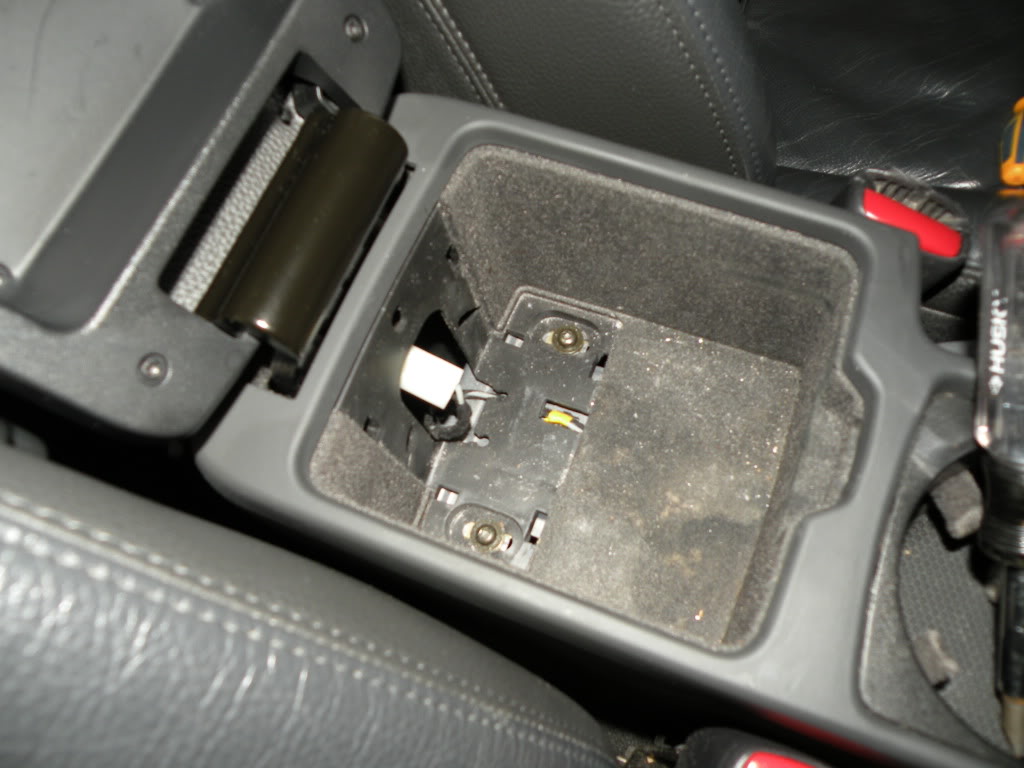
There are 4 T20 screws that hold the console in place. The first two are found behind where the first panel you removed is. (See pic 1) The second two are located on the storage compartment of the center console(See pic 2). To access these two screws you need to open the compartment and put your flat tip between the felt and the plastic next to the hinge and pry outward then remove the piece.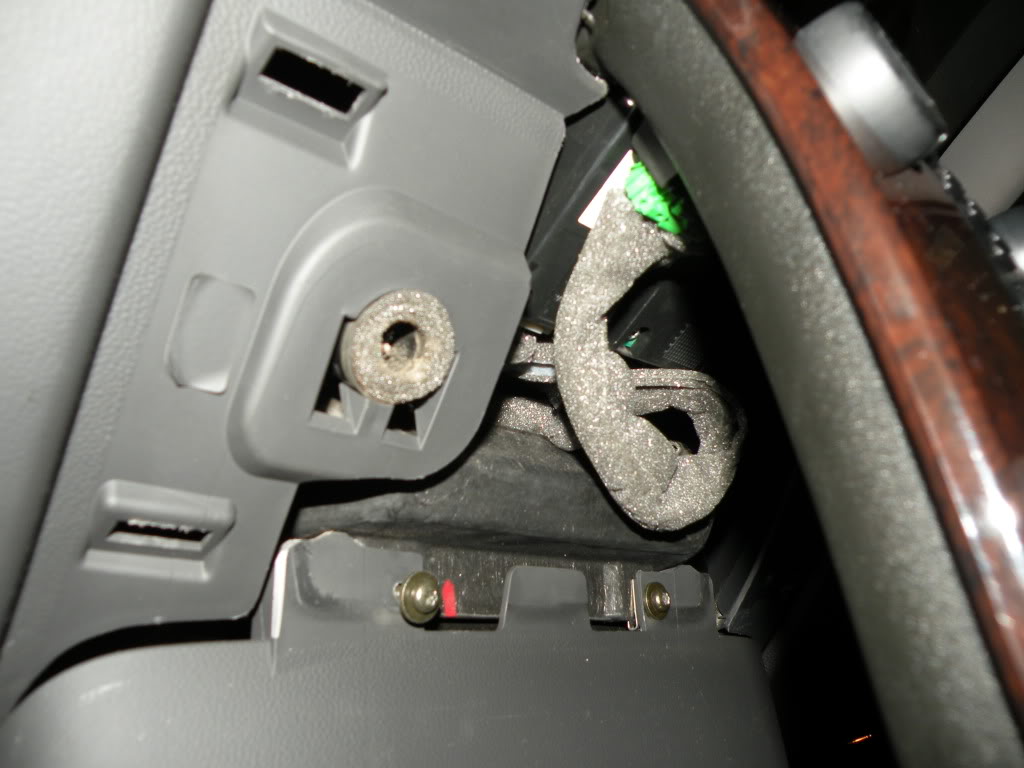
The last step is the removal of the entire console. There is one more connector you have to disconnect first. it is a grey connector located next to the shifter under the console.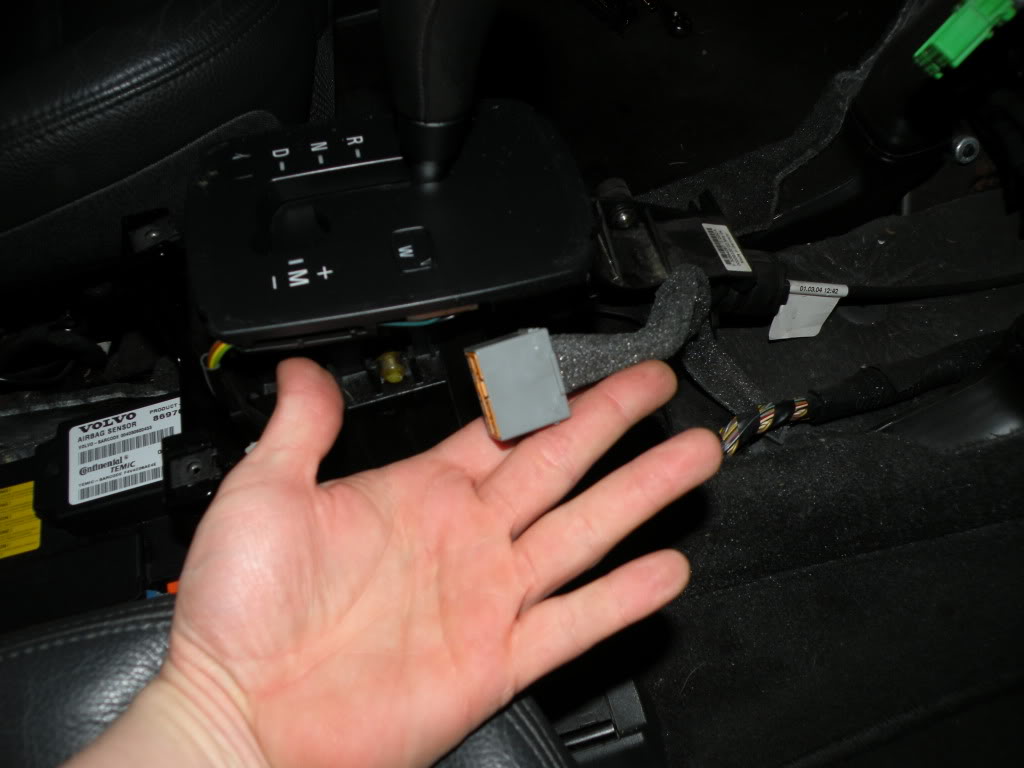
Its tricky to remove, I reclined both the seats as far as I could to give me maximum space to do it in. You need to slide it forward first then lift it then pull it upward and back.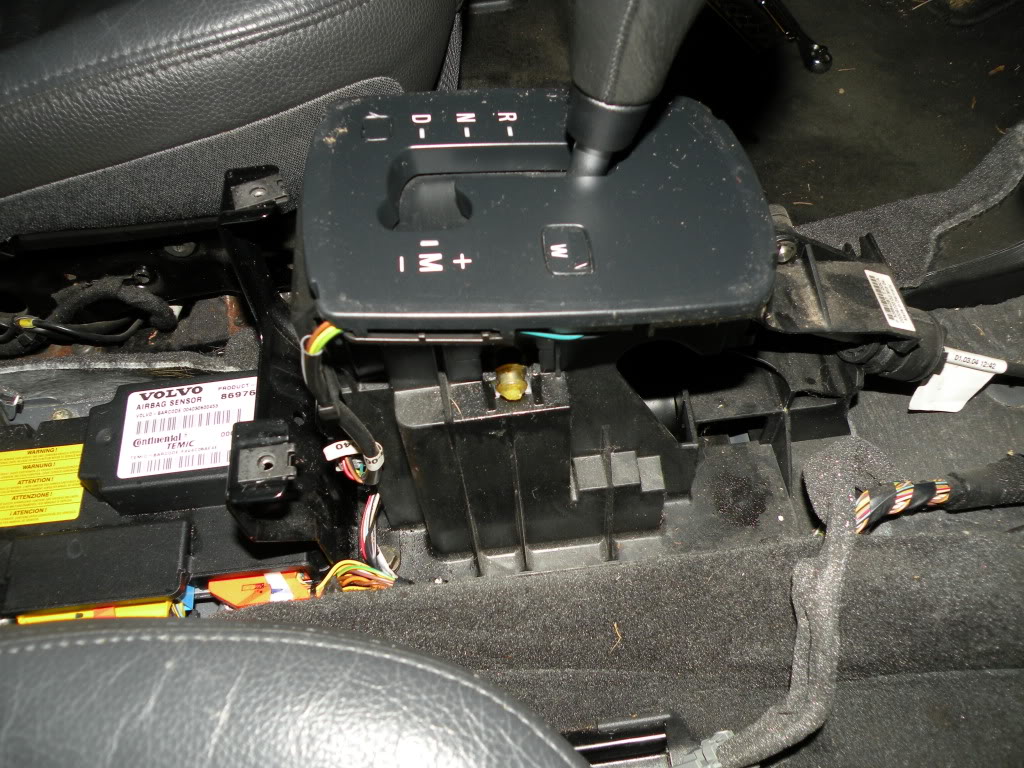

Put it back together is easy just do the same steps in reverse order. There are 6 connections to reconnect. Make sure you get them all back together.
Any questions or any more pics just ask and i'll see what I can do.
As a visual person, the pics are ?!
Posted by Diggymart on 1/2/20 @ 3:11:16 AM