You must be logged in to rate content!
6 minute(s) of a 22 minute read
4-11-2009
You are correct about the tape. I had no idea how thick the coat of zinc was. They offered to paint the spindle surfaces but I declined, thinking that that would have been as big a mess as what I had to deal with.
I definitely gave some thought to the springs but decided to coat them anyway as the leaves will have very little movement as the boat only weighs 2700# on 6000# springs.
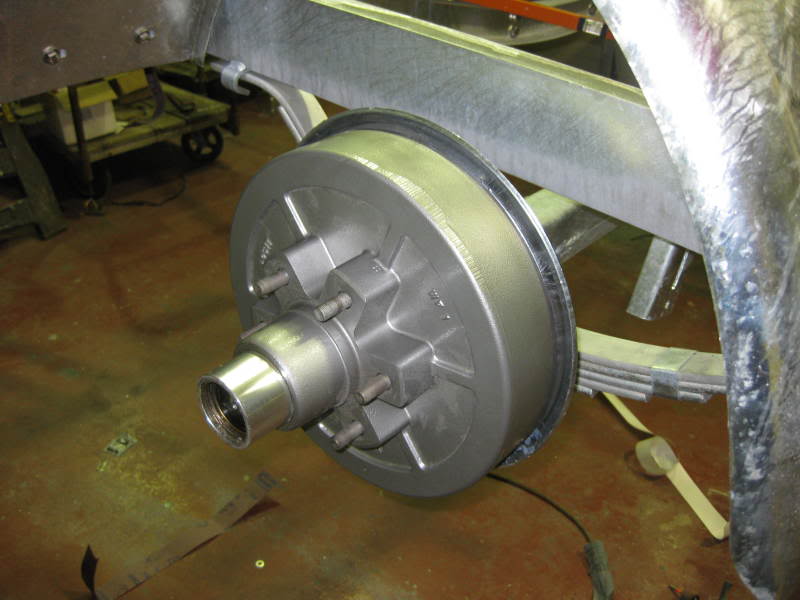
Got a freebie powdercoat on the brake drums. Had new races installed. Paid particular attention to bearing grease packing.
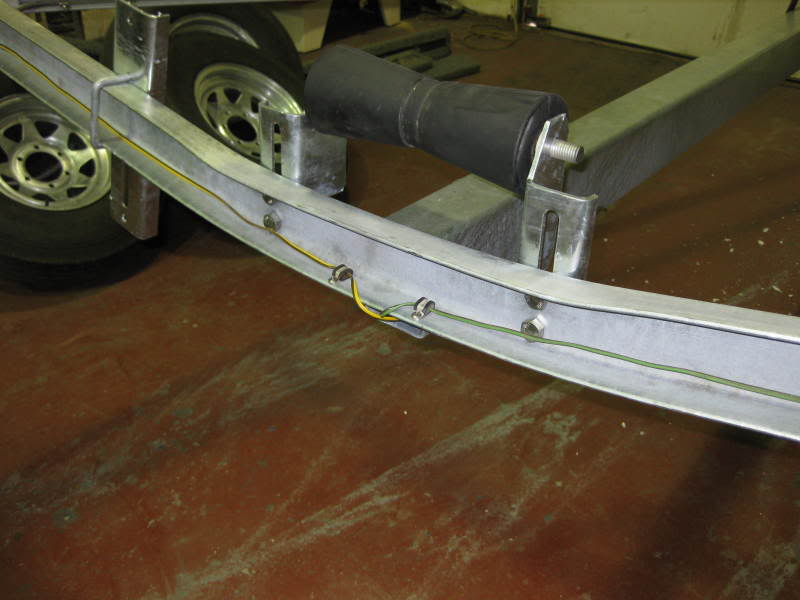
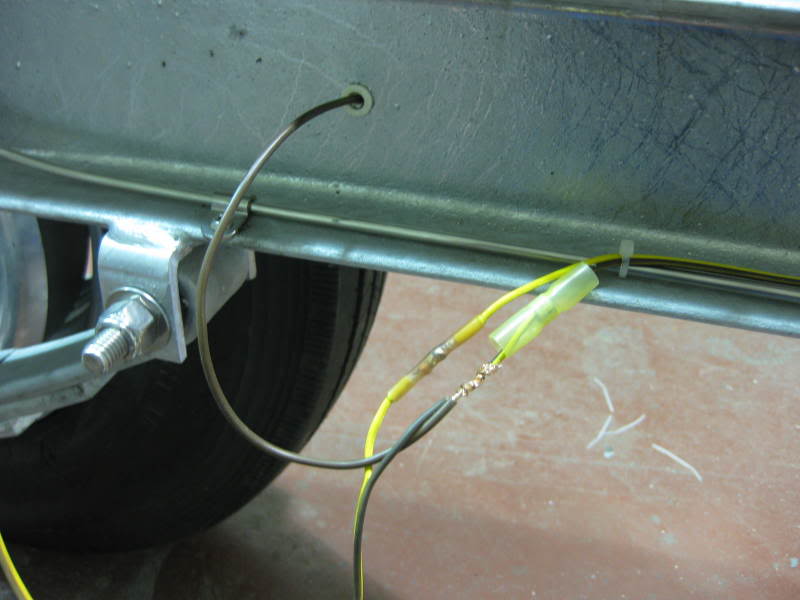
Installed a new wiring harness, careful to keep the wires out of harm's way.
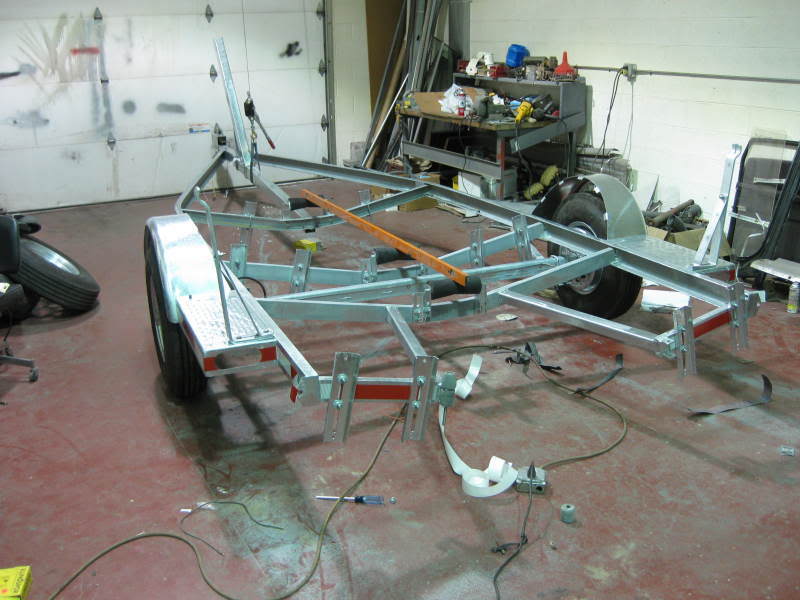
Back on the ground.
4-12-2009
Good question, Bill. The boat is sitting on blocks on the floor of my storage building. I lifted the stern with an engine hoist and the bow with my hi-lo and pulled the trailer out from under it.
No, I don't believe we're going to Keels and Wheels this year. They wanted the Mark II back but the shipping is a killer. They want $3,400 round trip for the car. The whole trip would be over $6,000, a princely sum in hard economic times. Being in business in the Detroit area is a little rough on the pocketbook these days.
However, if you want to see a Mark II convertible, one of the two clones made by Alan Taylor in the '90s will be auctioned off by Worldwide. The owner had been asking $295,000 for it. I hope he gets it.
On with the project:
I took great care to prevent the the wiring from shorting on the chassis. Wherever the wires passed through the cross-braces I sleeved them with heat shrink tubing and secured the wire on both sides to prevent chafing.
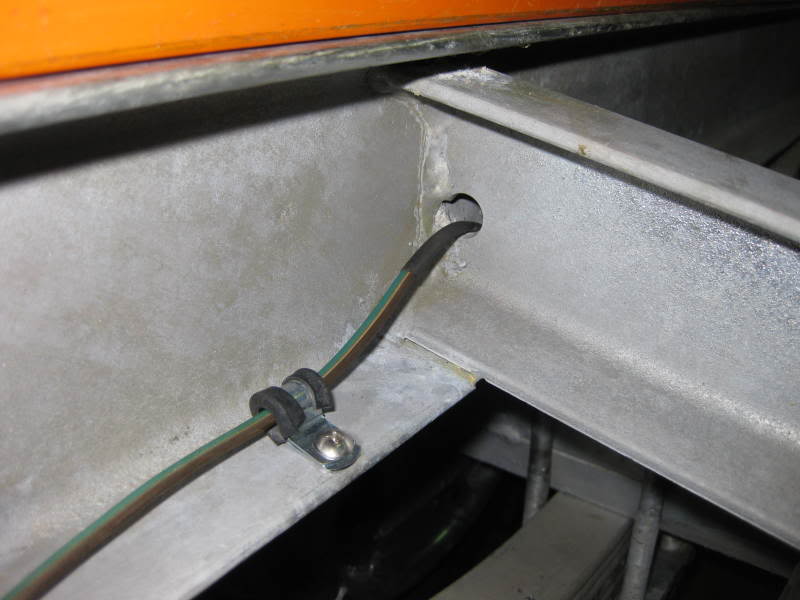
All of my spices were done in a 3M product specifically designed for weathertight automotive applications. What kind of looks like a crimp connector is not. It's a ring of low temperature solder inside a heat shrink tubing with a waxy inner surface.
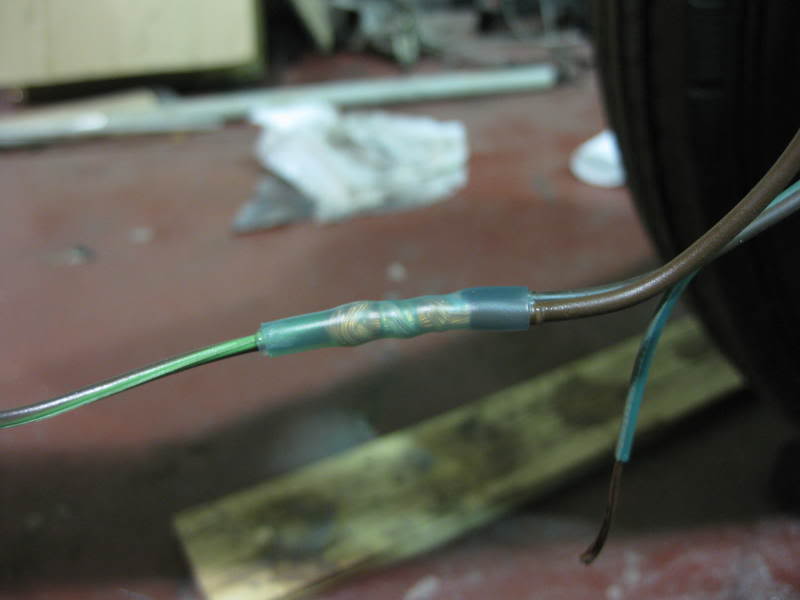
You simply make a mechanical connection by wrapping the wires around each other. Then you slide the tube over the splice, centering the solder ring over the center of the splice. Using a heat gun, play the heat all around the tube. It will shrink and hold the wires. When it gets hot enough the solder tube will collapse and melt into the splice making it very strong and totally waterproof.
You can see the melted solder in this picture.
Thanks Dean. I think I enjoy sharing as much as I enjoy doing the projects. I've learned a lot from the responses to my posts.
I just learned that my springs will rust and I learned that I should have covered the important areas with tape before galvanizing.
I need to replace the rotting and cracked hull support boards. I remembered that I had stashed some clear cedar 2 x 12s in the shed. There were supposed to be used as stair treads for a deck staircase I never built. They've been there for 15 years and I've never used them. Unfortunately, the longest boards were 9 feet and I needed one board to be 11 feet long. They must have come from a huge tree as there's not a knot in sight.
I decided that the purpose of the boards is to distibute the weight over 10 points on the bottom of the hull and spread that weight along the length of the planks. Therefore, I could make a splice in the boards, creating one long enough for my purposes.
I squared up the ancient Craftsman radial arm saw and squared up the ends of the planks. I cut the pieces so that they would end up the required 11 feet long. I fitted the radial arm saw with a dado head and set it for its widest path. I cut half-way through each plank 12 inches from the end, creating a one square foot lap joint. That created a lot of sawdust.
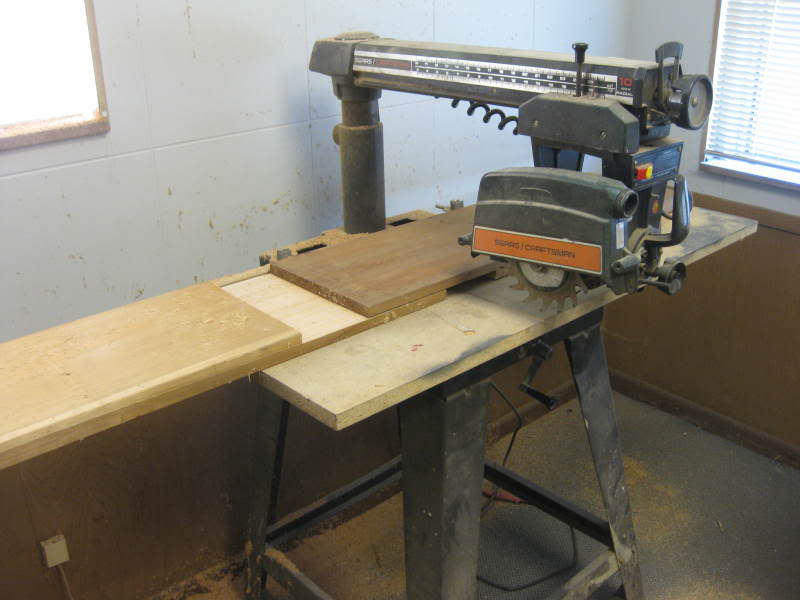
I then cut the boards to 5" wide, making them much easier to handle.
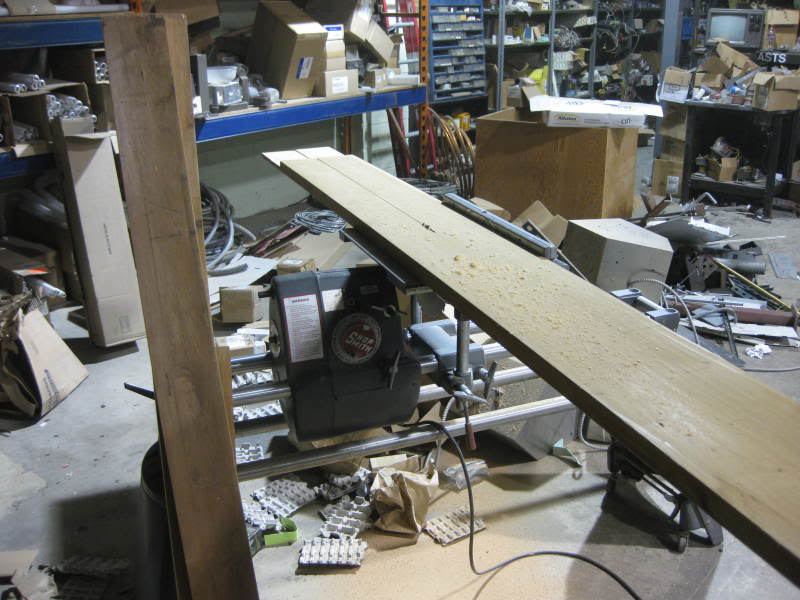
After test fitting I sprayed the mating surfaces of the joint liberally with water. Water is the catalyst for the Gorilla Glue. It expands and fills any joint creating an attachment that's stronger than the surrounding wood.
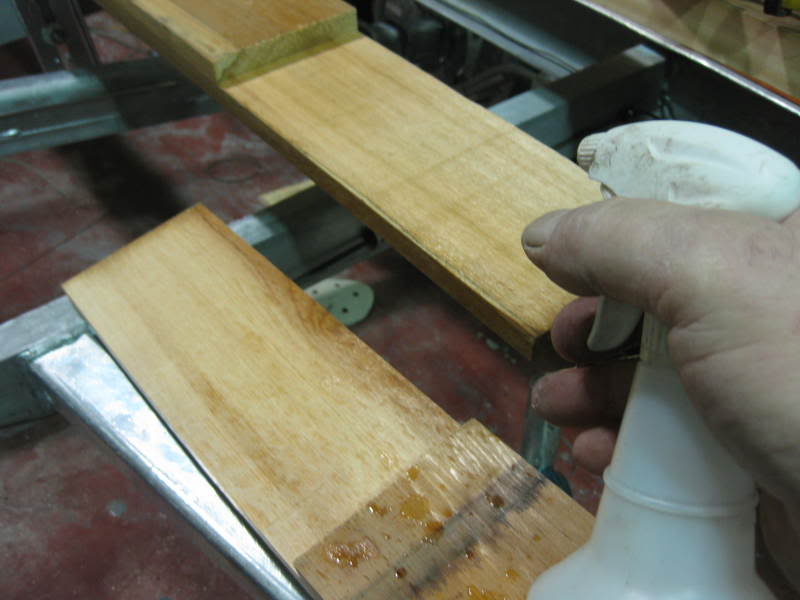
I clamped up the joints and left them to cure ovenight.


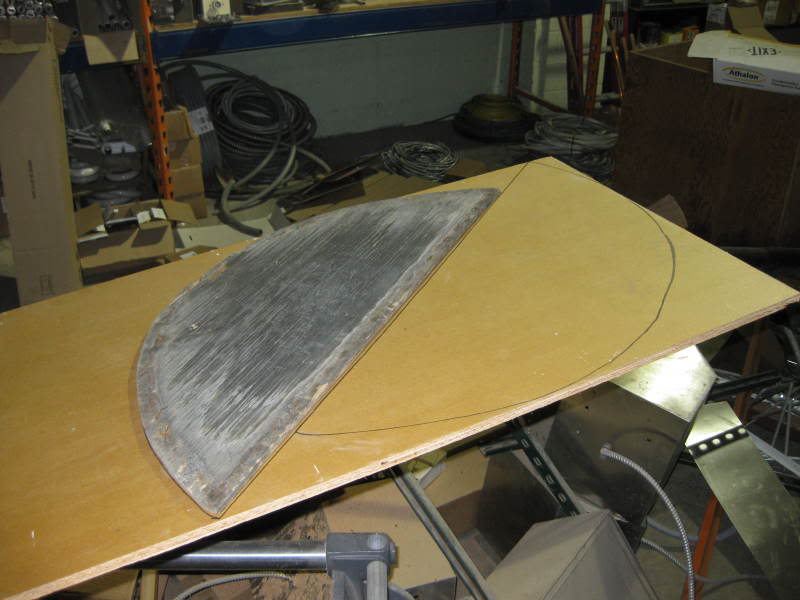
I needed to make some plywood fender well covers, like the originals. This material has a weatherproof face bonded to marine plywood. It's used for sign board so it can take paint and hold it. The plywood side will be carpeted with the same material as the hull supports.

Lots of details.