- T20 Torx screwdriver
- Small flathead screwdriver(possibly)
- Spray adhesive
- Small heavy fabric stapler
- Staples
You must be logged in to rate content!
5 minute read

09+ MAZDA6 SHIFT BOOT/ARMREST INSTALLATION INSTRUCTIONS
1. Remove insert from cupholder by pulling straight up, nothing is holding this in place.
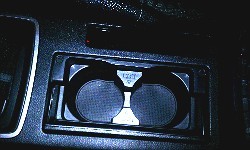
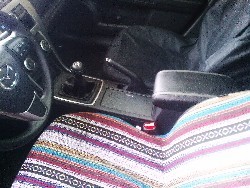
2. Gently lift cupholder/e-brake console piece up and over e-brake handle, latch tabs hold in place, comes up easily if you lift from under e-brake handle as shown in picture.
3. Now you have access to the shift boot assembly. Remove shift knob by rotating off stick counterclockwise. Next, pop the assembly up by applying pressure from underneath, these tabs are smaller and the stock boot and assembly will come up very easily. (I had already sent my stock boot to Redline so they could make a pattern, hence the redline boot in picture, disassembly and reassembly will be the same.)

4. Two plastic pieces sandwich the stock boot, separate them by removing 4 Torx 20 screws(you will need a screwdriver with a T20 Torx bit). Set these aside as you will reassemble with same screws.
5. Remove stock boot from tabs, and put Redline boot on in the same fashion(mine fit perfectly, start with a tab and work your way around sliding the leather over the tabs.)
6. Reassemble in reverse order. Enjoy your new Redline leather shift boot!
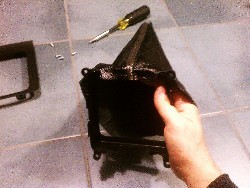
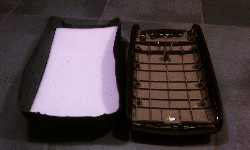
7. Your armrest cover for your center console separates into two halves, from one side of the top half lift out and up to release the latch tabs on that side. Once you feel that side release, do the same for the back side, then the other side will release easily. Pull the top piece off, this will be the piece you will apply your new armrest cover to.
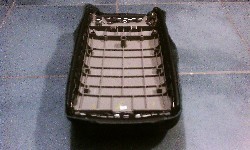
8. This is just a closer picture of the two pieces separated, notice the male tabs on the top half, and the female tabs on the bottom half. There are 10, 4 per side and 2 on back side.
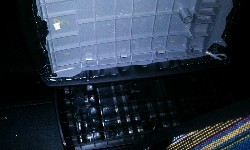
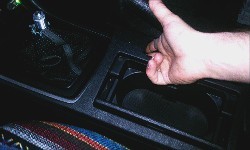
9. Place your stock piece next to your new cover. At this point you need to decide if you want to remove the original cover, if so you take a small flathead screwdriver and remove all the staples. I left mine on and had no problems(plus extra cushion!)
10. Place stock cover inside new armrest cover, make sure your orientation is correct by test-fitting, it helps to practice folding and stretching of the new cover for the next step
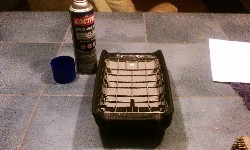
11. Decide whether to use staples like the stock cover, or a type of adhesive to apply the new cover. I chose a heavy duty spray adhesive, and it worked very well. Whichever way you use, start on one of the four sides and stretch the leather appropriately tight over the lip of that side. If using adhesive, be careful not to get glue on the topside or "seen" leather(I had a few spots, but they washed off with light pressure, warm water and dish soap.). Hold leather in place until glue bonds, then work your way around. Staples or double-sided tape would probably had been easier and less messy, but I made due with what I had!
12. After cover is ready(let glue bond,I let mine set overnight to make sure nothing popped up), simply put top piece back into place by light downward pressure to pop tabs back in, you will feel them pop in as you press down.).
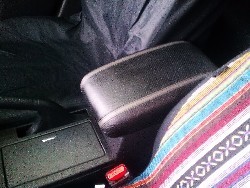
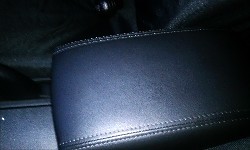
13. Enjoy your new Redline armrest cover!
Useful tip
You have installed a product made out of genuine leather. As you know, to maintain a leather product in good condition, you should take care of it. We suggest occasionally (every 4-6 week for example) applying some leather conditioner/UV protector to keep your leather from drying up in the sun and cracking.
Redline Automotive Accessories Corp. will not be held liable for any labor, incidental or consequential damages of any kind. Proceed at your own risk.